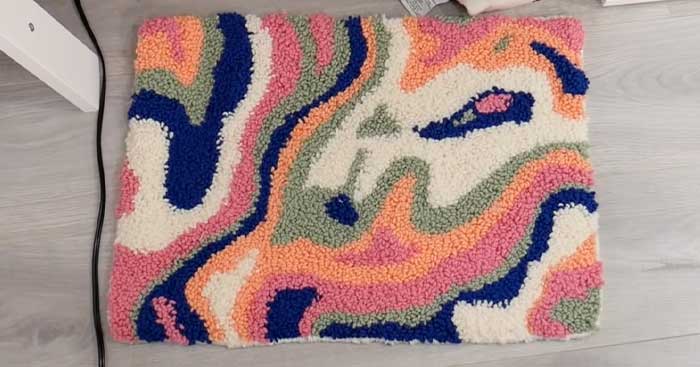
This punch needle rug tutorial by Jenna Phipps creates the coolest most groovy rug you’ve ever seen. I have made them in different colors for each of the bathrooms in my house and they look amazing! You can use any color of yarn you would like and really get creative with your patterns.
Ingredients Needed For This Recipe:
- Wood Frame
- Monks Cloth
- Staple Gun
- Marker
- Yarn
- Yarn Needle
Directions:
Step One
Start by stapling your monk cloth to your wood frame. Make sure you pull the fabric tightly.
Step Two
Draw out your design and label it by color. You can use as many colors of yarn as you want for this. Draw it out first on an iPad and then on a piece of paper. Finally, trace it onto your fabric.

Image by. Jenna Phipps via YouTube video.
Step Three
Thread your yarn into the punch needle. Use a piece of wire to thread this.
Step Four
Starting with one color, begin punching the needle through the fabric. Start punch needling the outline of the shapes you drew out in step two. Continue punch needling with different colors until you have finished all the steps.
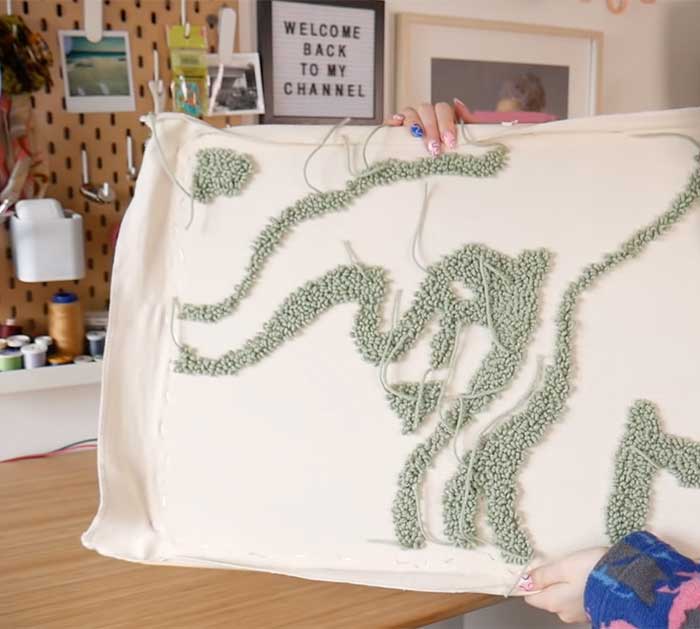
Image by. Jenna Phipps via YouTube video.
[social_warfare]
Step Five
Finally, remove the rug from the canvas and let’s fix up the edges. Trim up the extra fabric around the edges, you can leave about a half-inch around the outside.
Step Six
Take out your yarn needle and thread it with one of your yarn colors, then begin wrapping it in and out around the sides of the rug to seal the edges off. Once you are done with that, you can glue the backdown, or leave it to just stay in place on its own. Gluing it will allow the rug to hold up for longer.
Groovy Punch Needle Rug


