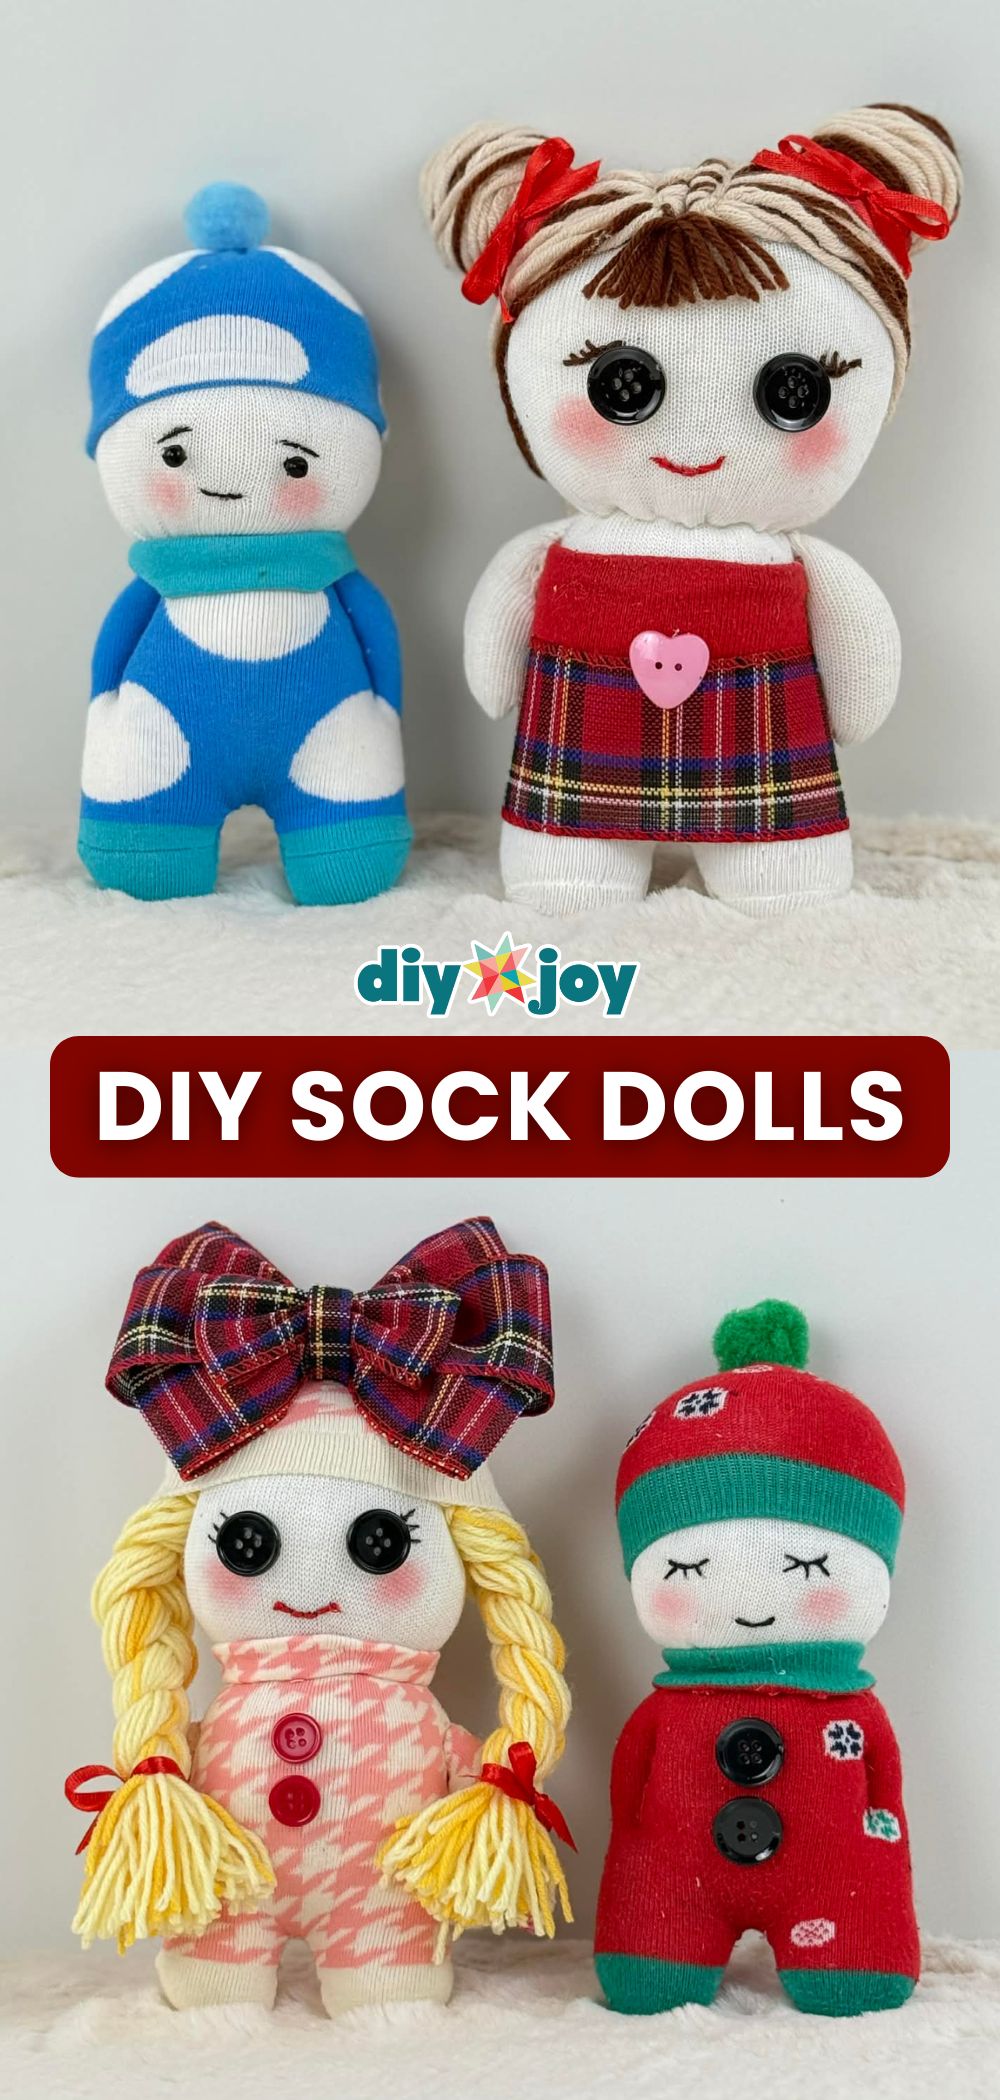
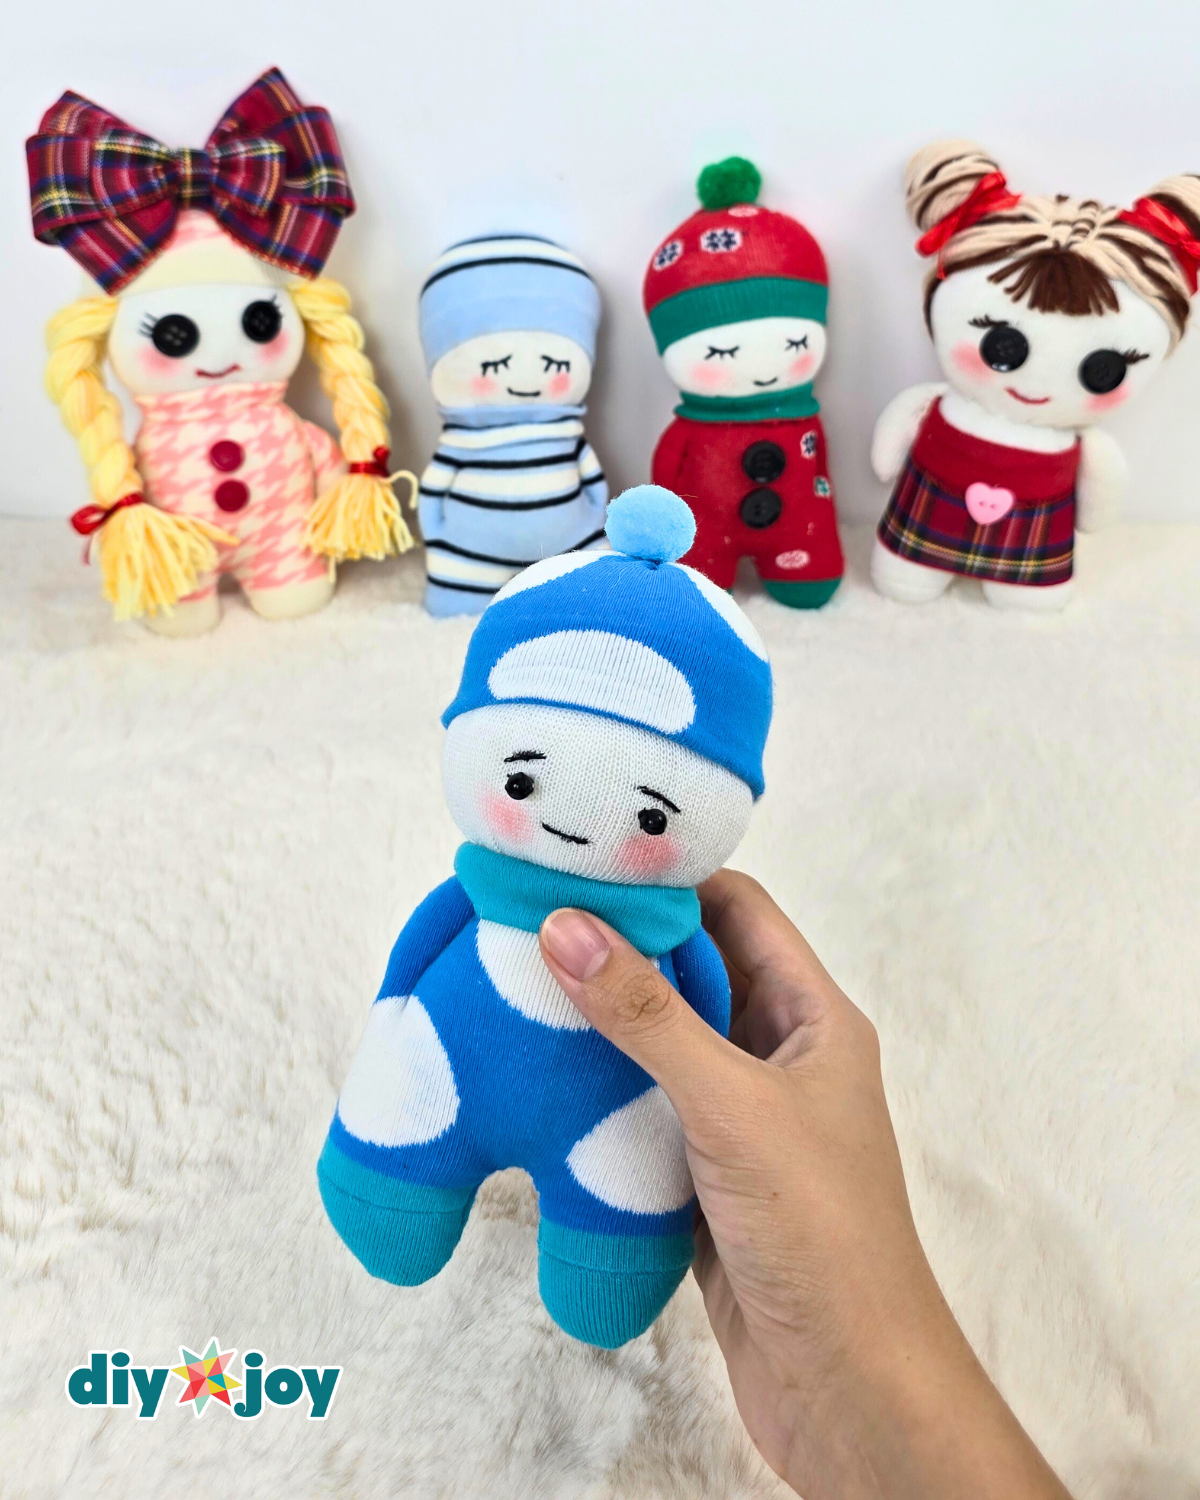
I’ve made a lot of crafts before, but I’ve never had as much fun as I did making these dolls! These handmade dolls made from socks are a little challenging at first—they take time and patience on your first try—but the results are absolutely worth it. Once you get the hang of it, you’ll probably breeze through the process, just like I did.
I started with the simplest pattern, but once I mastered the basics, I took my creativity to the next level by adding hair, experimenting with clothes, and finding fun ways to give each doll a cute, unique face.
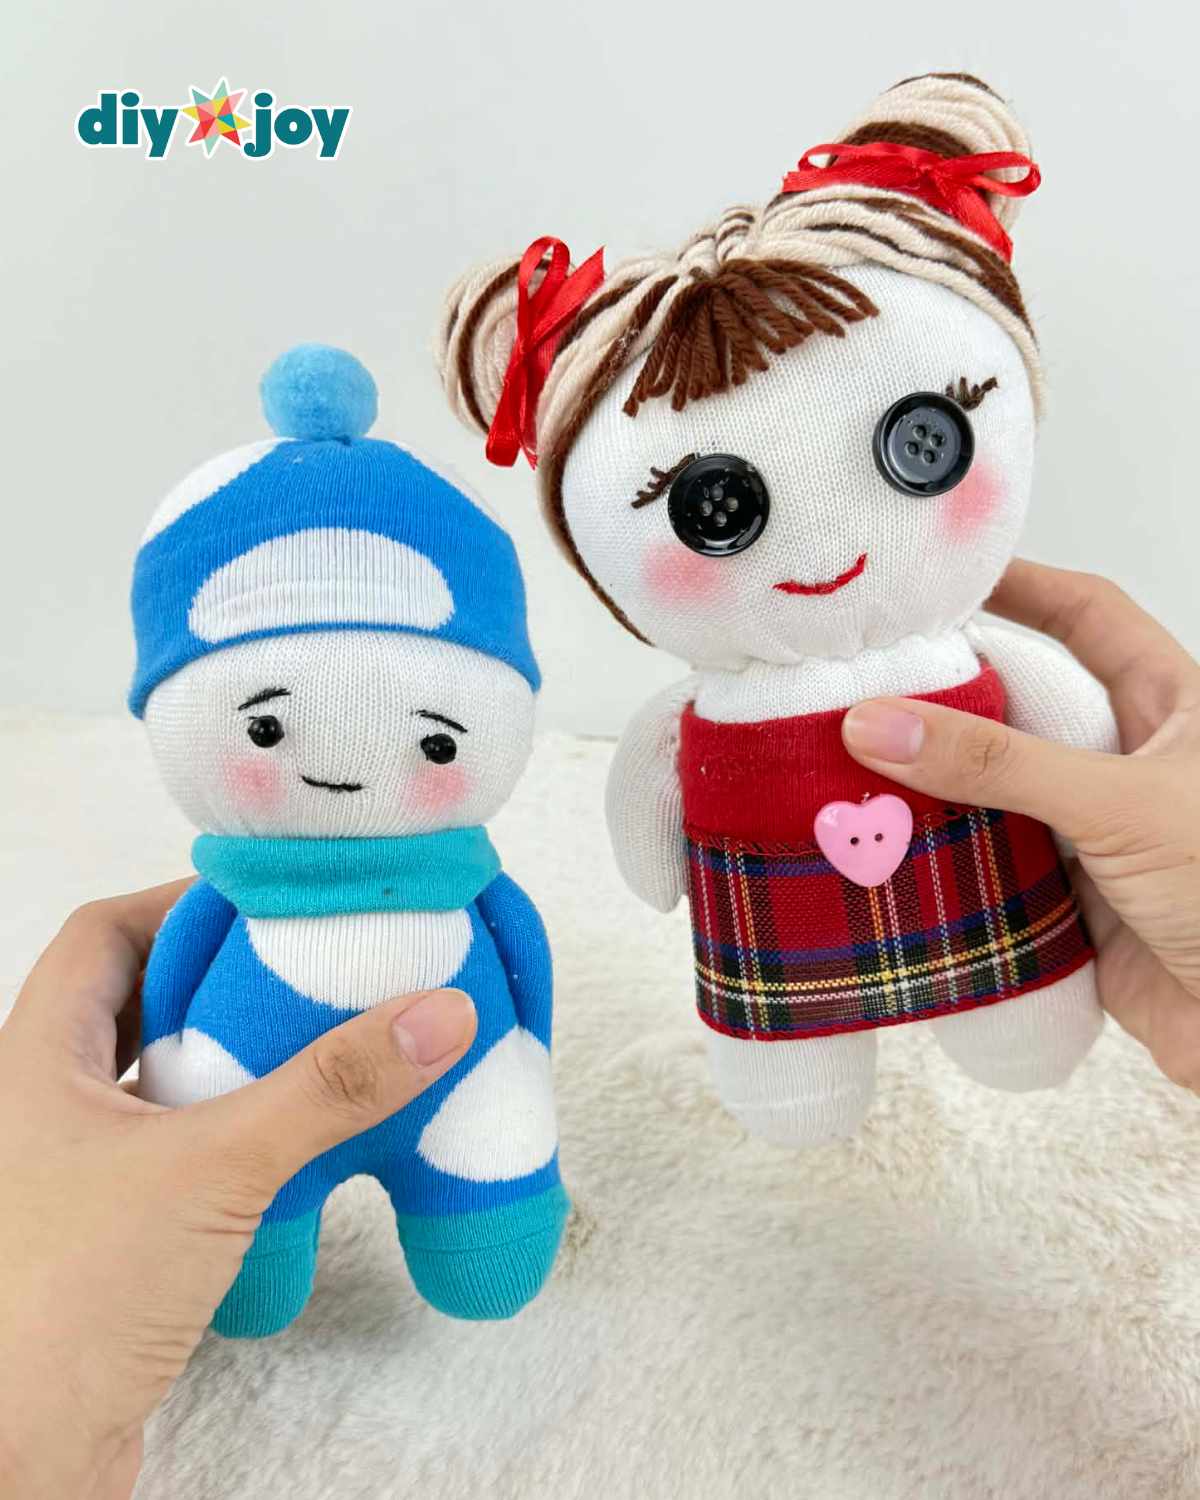
As mentioned—and as you can see in the title—these dolls are entirely handmade using just socks. The result is so adorable that no one would guess they were made from socks unless you tell them! They make thoughtful, adorable gifts for loved ones, and kids especially will fall in love with them.
You might also like: Easy No-Sew DIY Denim Owl

If you want to get a little more creative, you can even make the dolls larger or smaller—perfect for using as keychains, bag charms, or other cute decorations. Imagine these little cuties beside your bed or displayed on a shelf—you’ll melt with pure joy!
You can learn how to make your own handmade sock dolls by following the written instructions below, and don’t forget to check out the video tutorial for detailed step-by-step guidance.
How to Make Sock Dolls
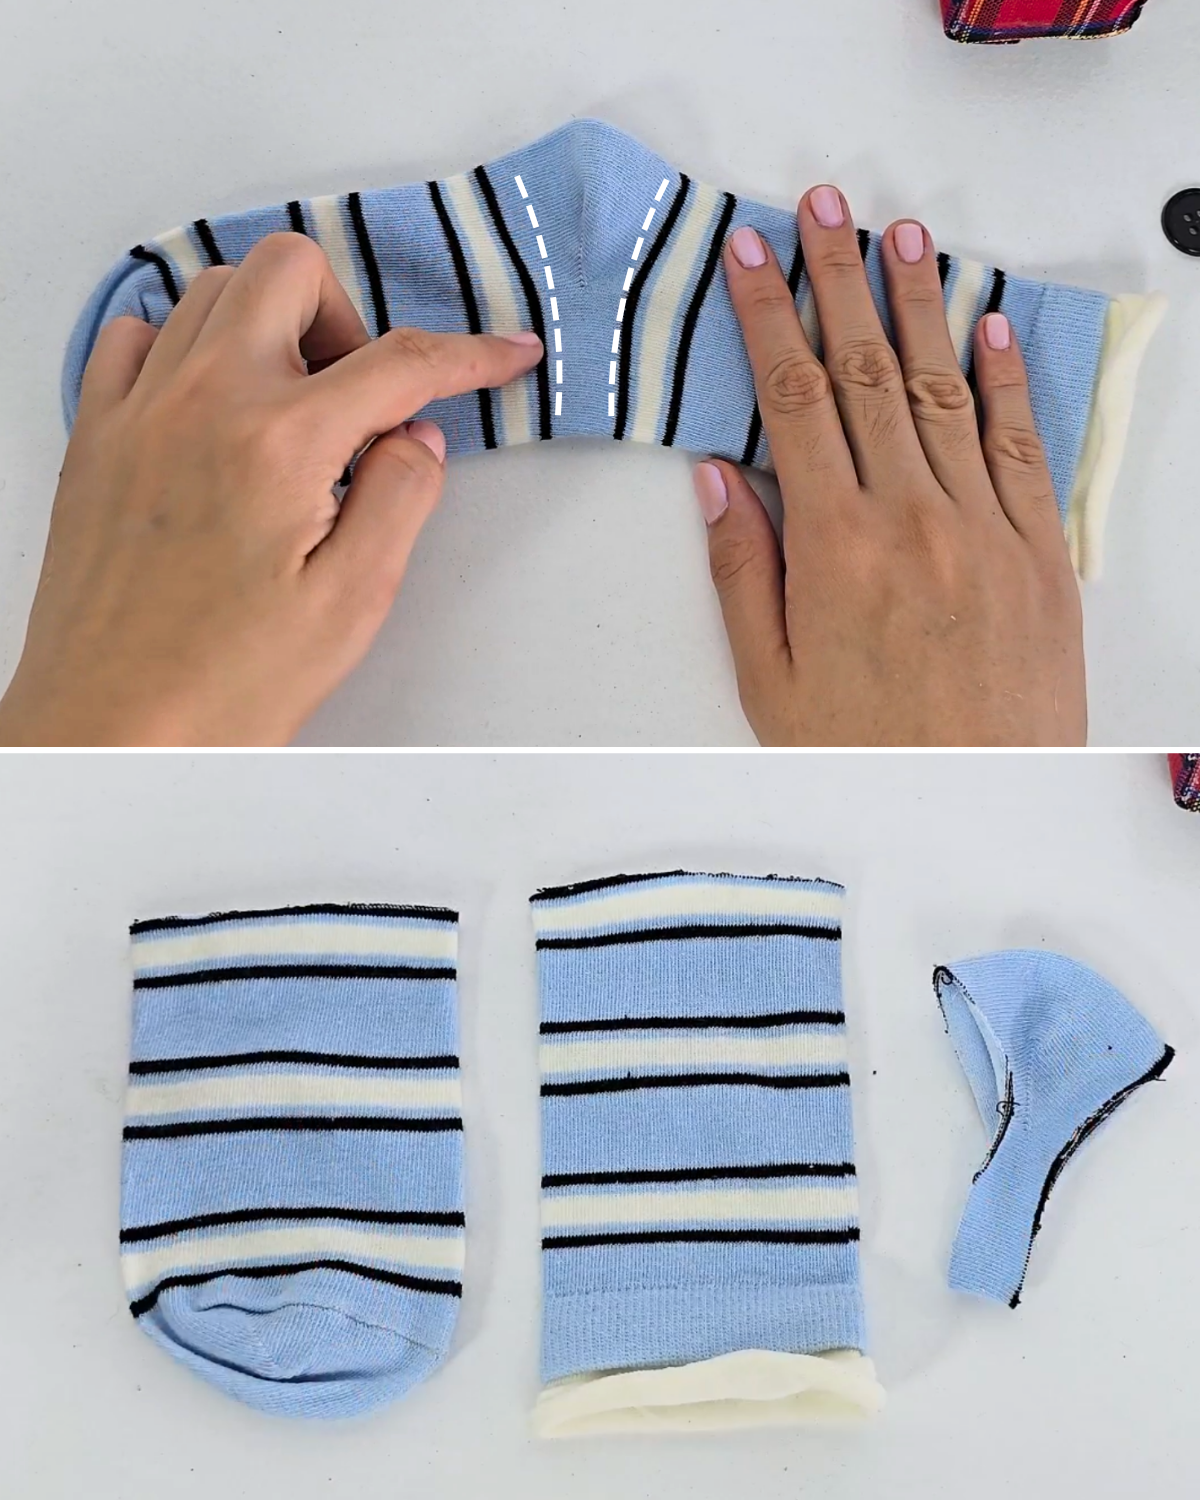
Step 1: Cut the Sock

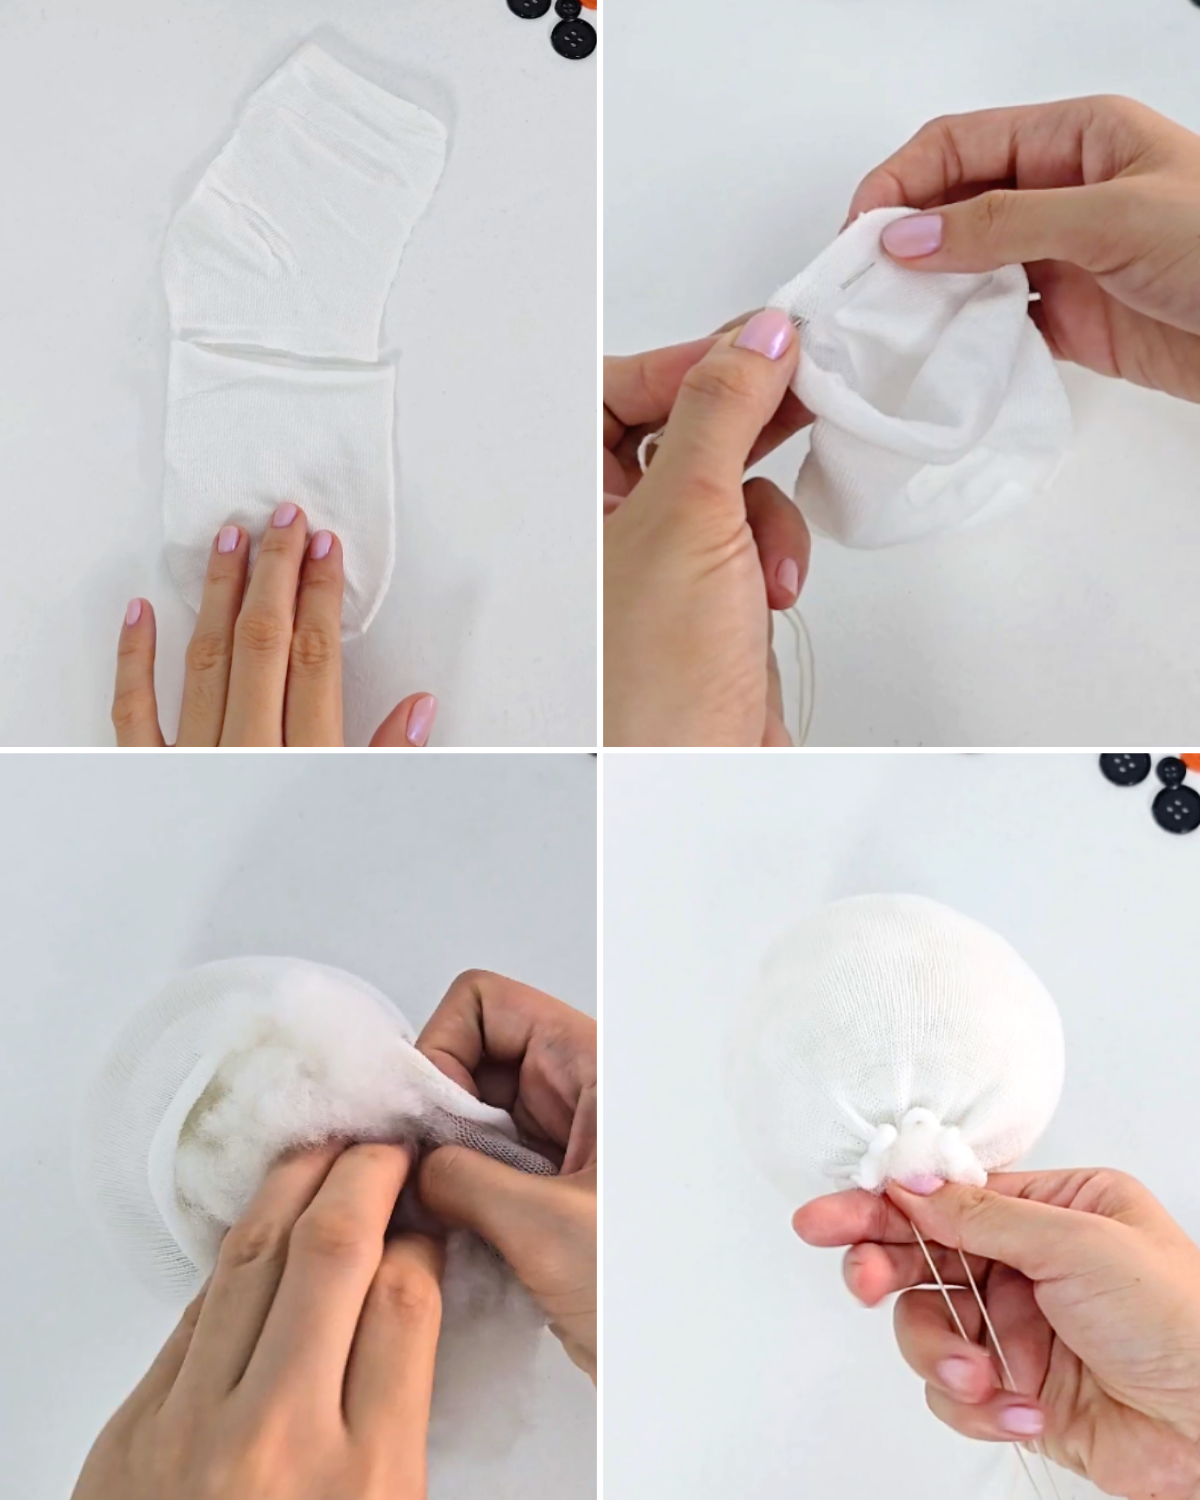
Cut the sock into three sections, as shown in the photo.Step 2: Make the Head
Cut the white sock in half, sew around the top edge using a running stitch, fill it with fiberfill, then gently pull the thread to close — this will be the head of the sock doll.Step 3: Shape and Stuff the Body
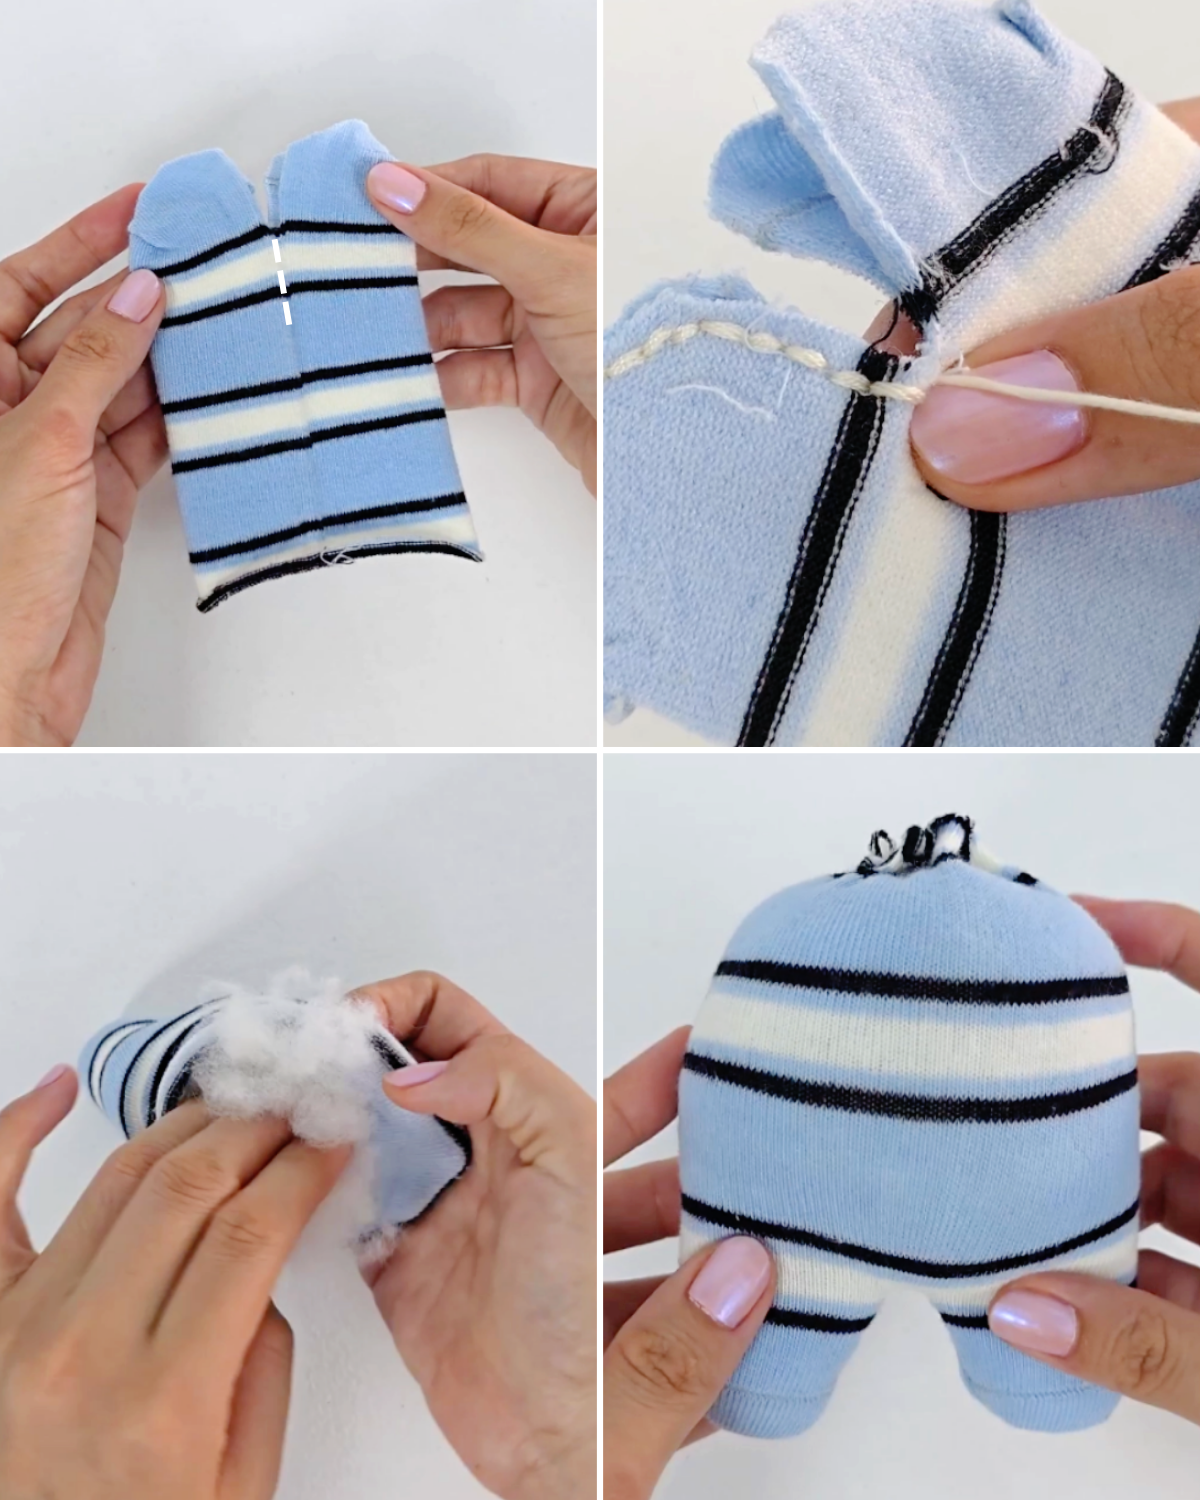
Cut a slit in the foot part of the patterned sock, curve the shape, and sew it using a backstitch. Turn it inside out, add fiberfill, and stuff it until it reaches the desired body sizeStep 5: Attach Head to Body
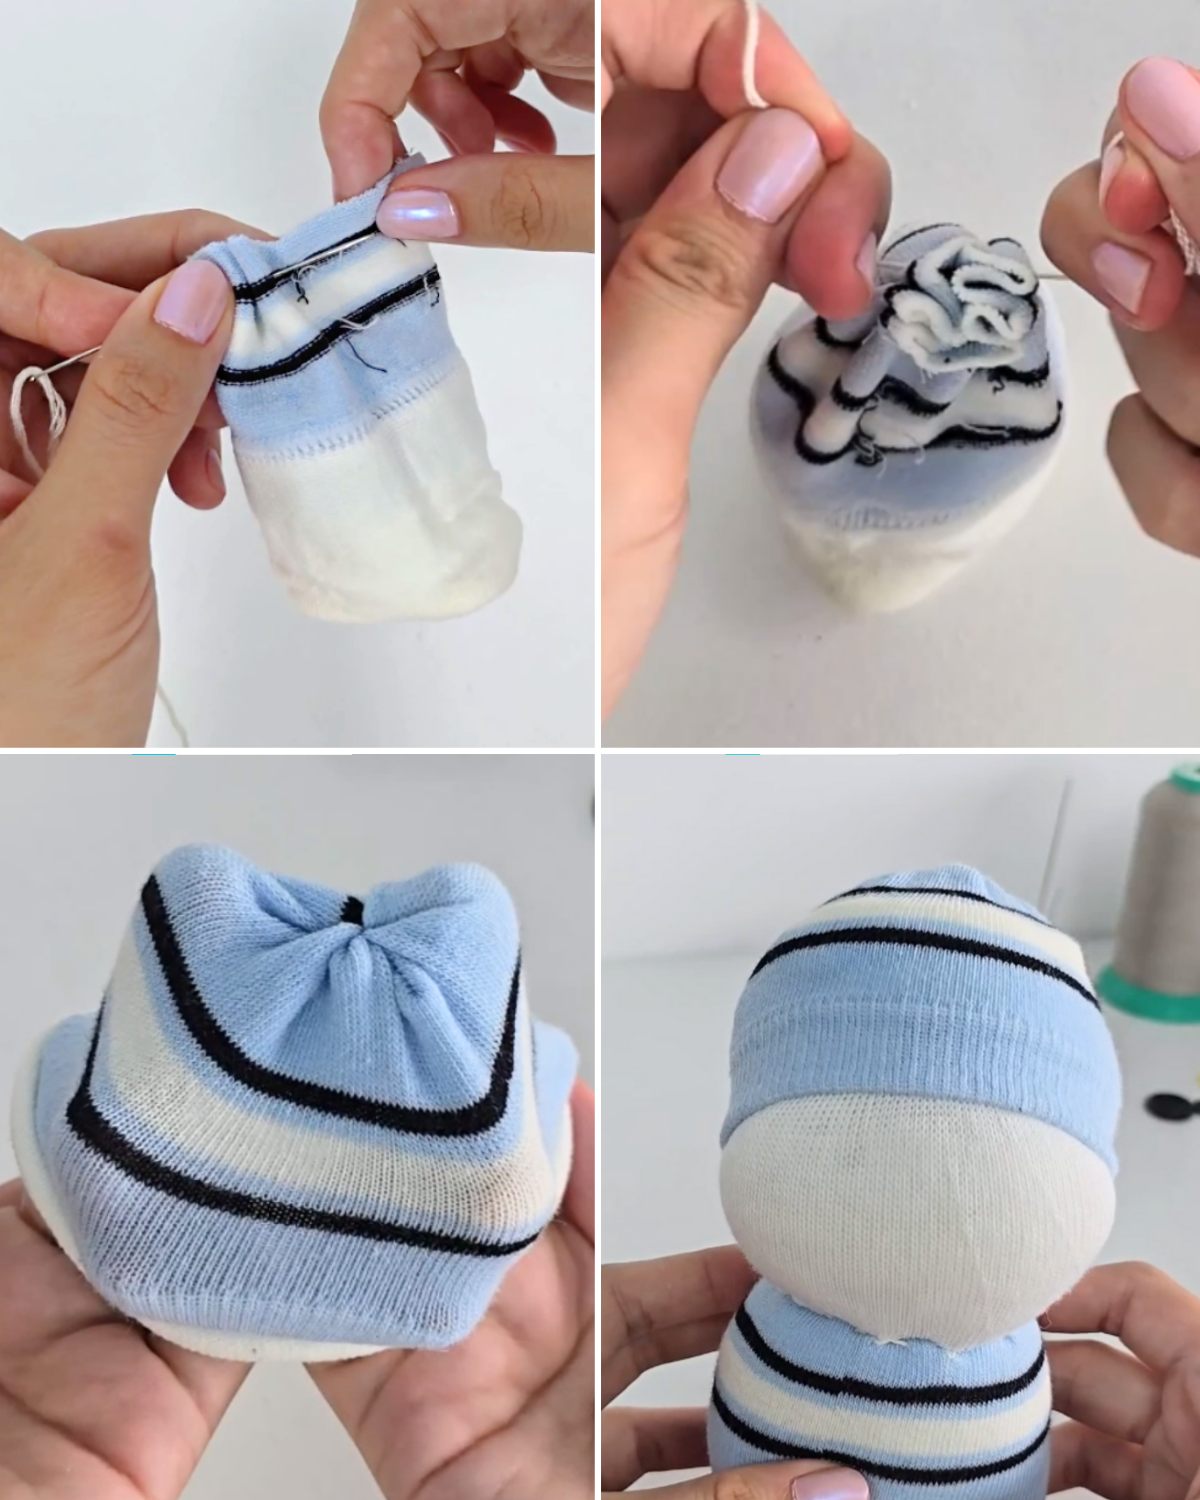
Gather the head and body of the sock doll and sew them together in the middle.Step 6: Make the Hat
Take the top part of the patterned sock, then cut it to size, and gather the cut edges. Make sure to pull the thread tightly and then tie a knot. Place it on the head of the doll as a hat.Step 7: Finish Hands, Scarf, and Face
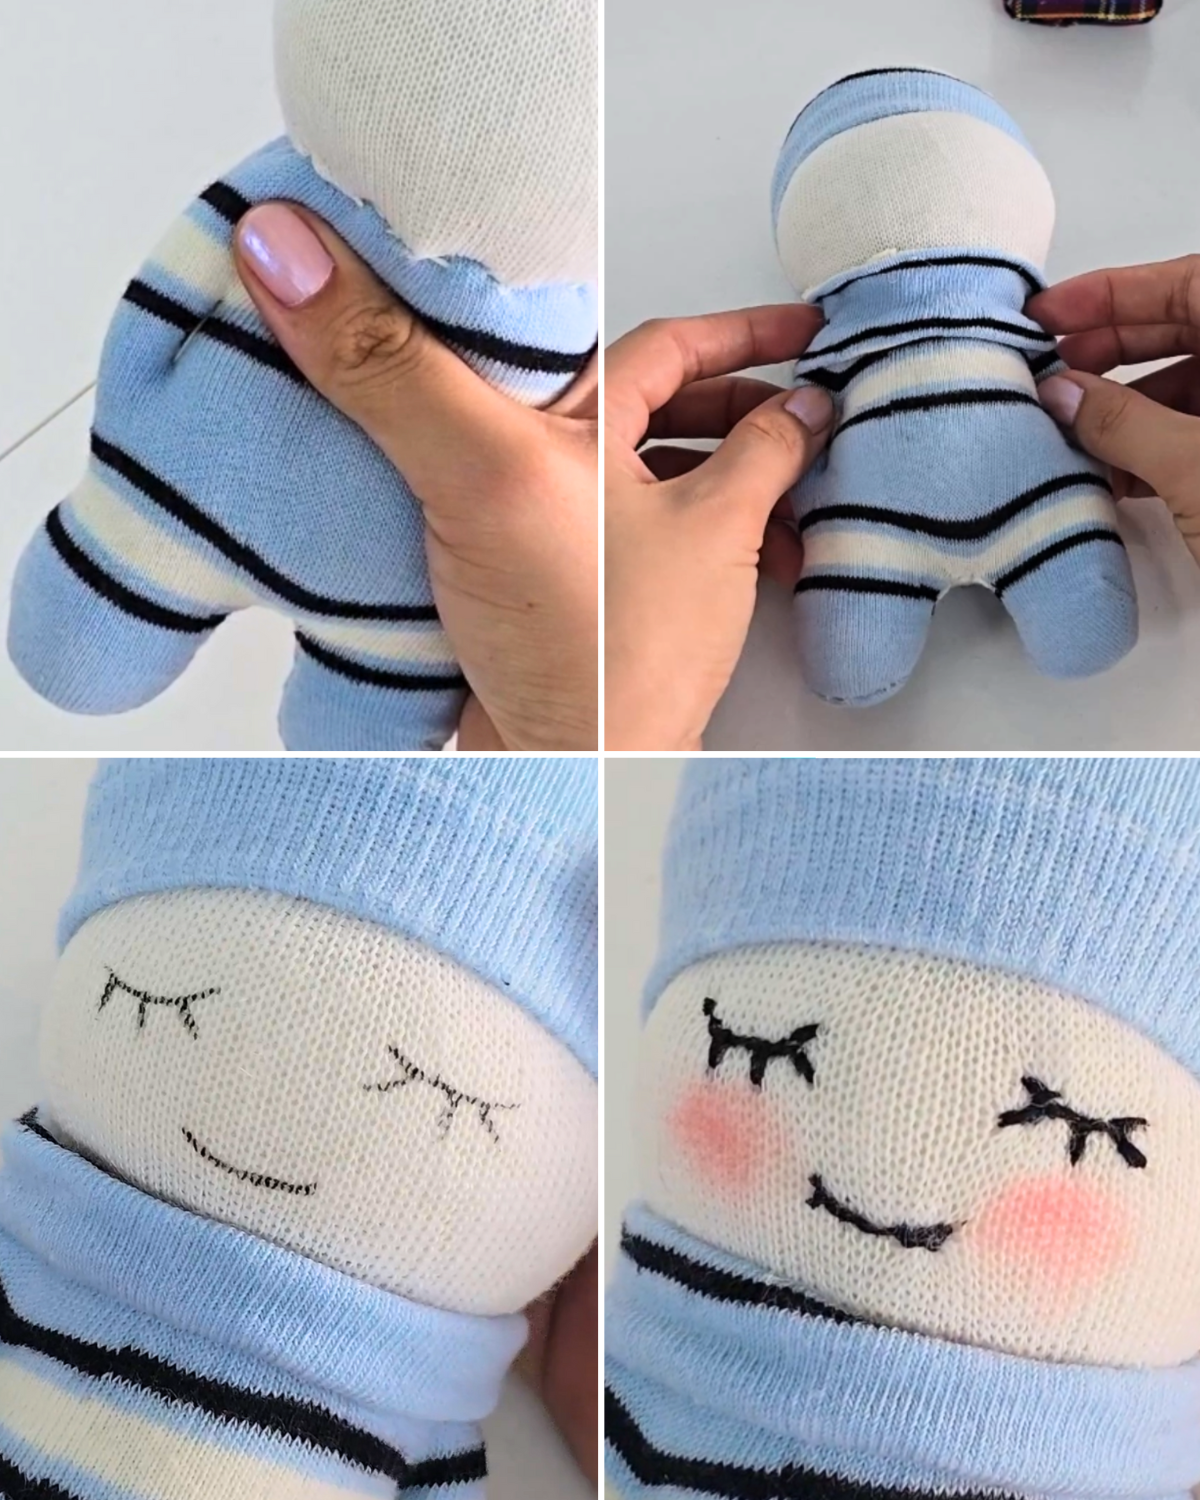
Sew on each side of the doll’s body to add the arms as shown in the photo, then use the excess sock piece to make a scarf and place it around the doll’s neck to hide the stitches. Stitch the mouth and eyes of the doll and add some color to the cheeks.

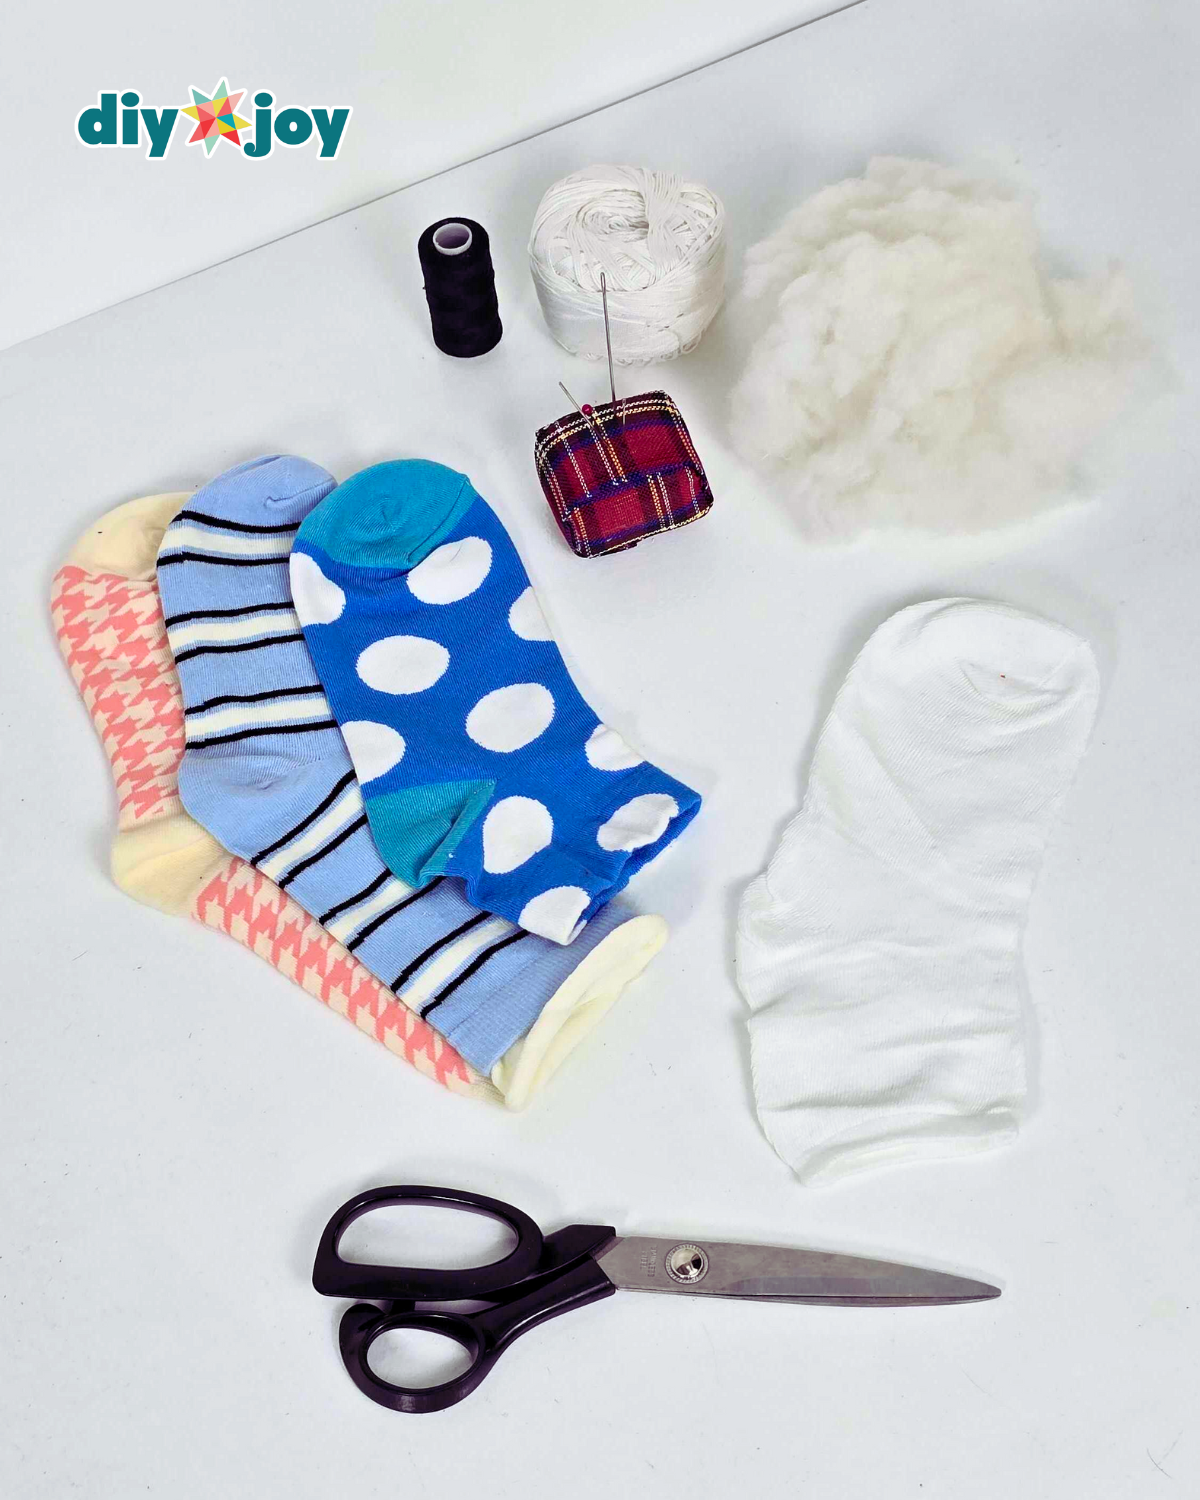
Materials
- Socks, plain white and patterned
- Scissors
- Fiberfill
- Needle
- Thread

![]()
Pro Tips
- Instead of stitching the eyes of the doll, you can use buttons or beads and attach them with hot glue.
- The fuller you fill the head and body, the better it’s shape holds.
What’s Popular Now

Crafts

Paper Flowers

Crafts

Paper Flowers
*If you love this craft, then visit our official website, follow our Facebook page, and subscribe to our YouTube channel for more!
Easy Handmade Sock Dolls