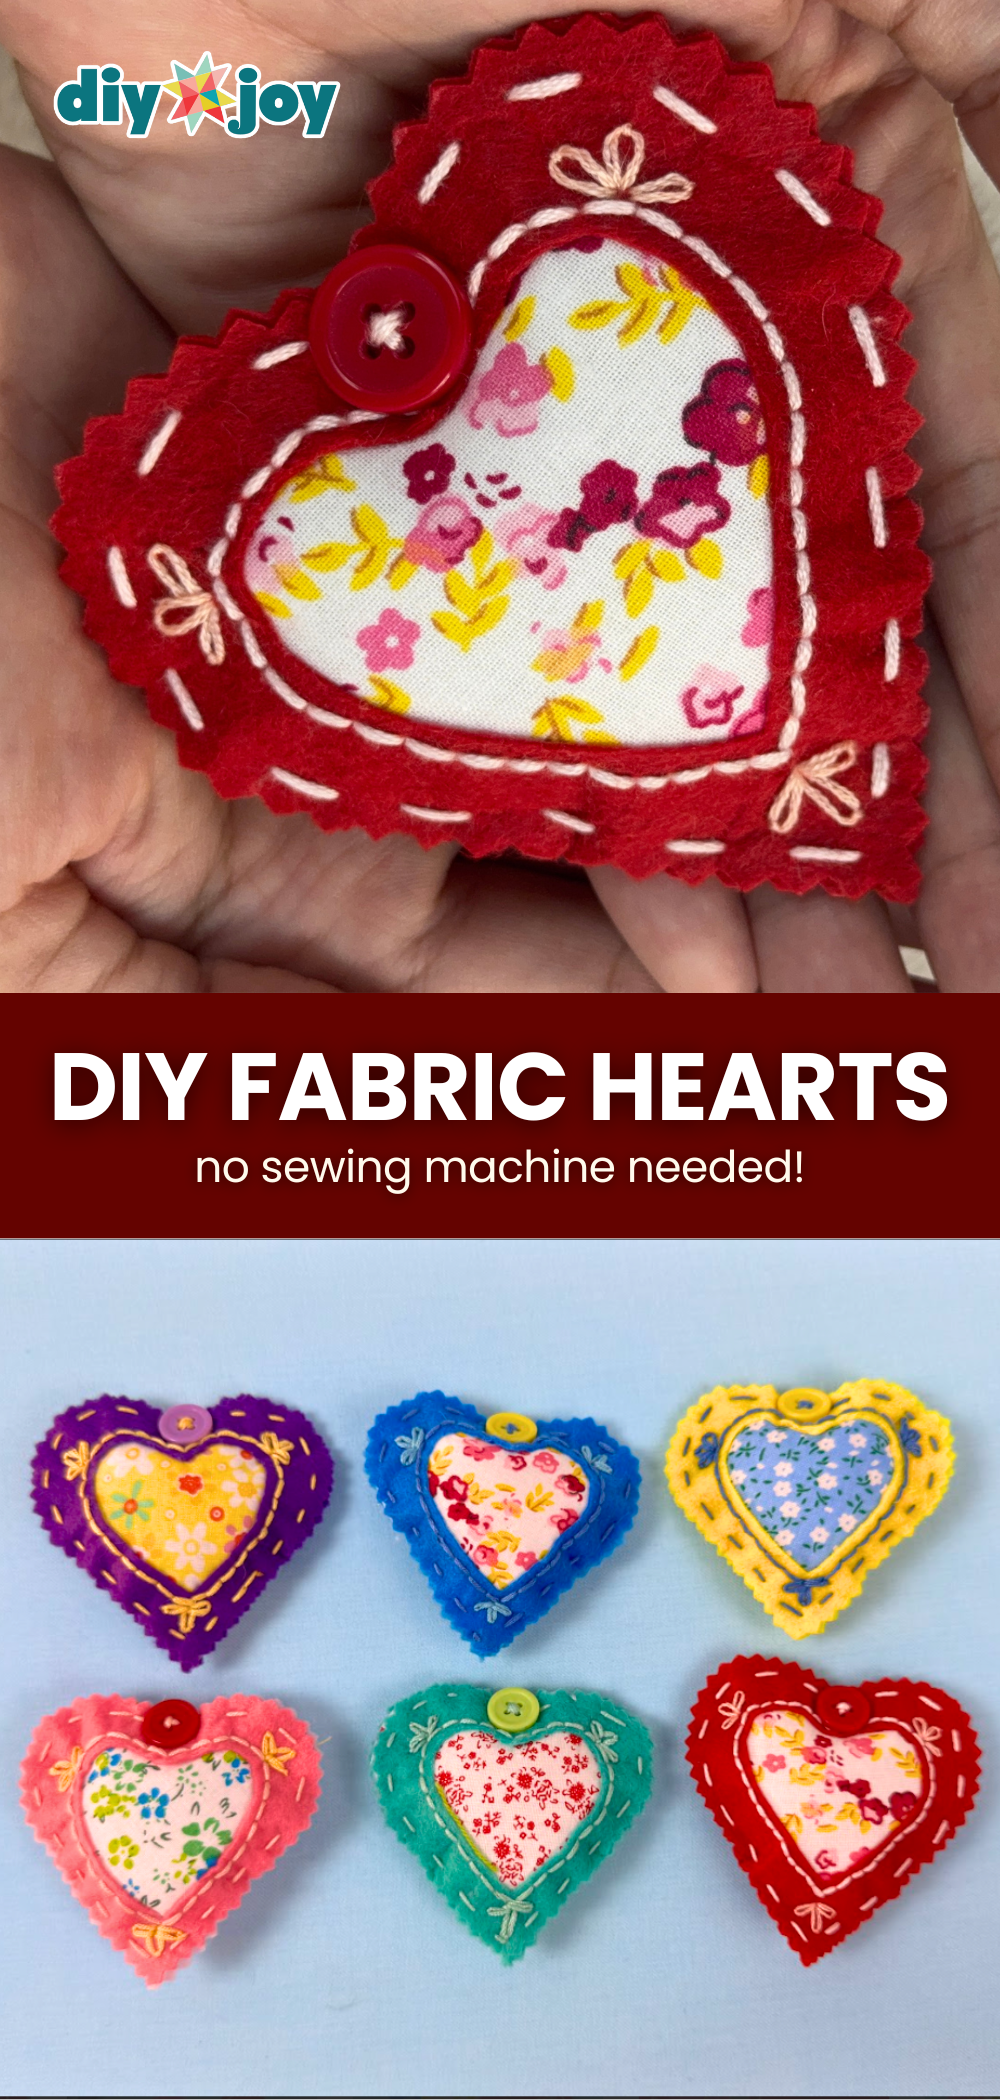
Sewing is a hobby and skill that I truly enjoy. It is a relaxing and therapeutic activity that helps clear the mind while allowing you to create something meaningful at the same time. When I first started sewing, I felt intimidated and even had a few mishaps along the way, including a couple of needle pokes. Despite that, I kept practicing and discovered how fun and rewarding it can be. Over the past few months, I have made many projects, and one of my favorites is this simple DIY fabric heart.

This easy sewing craft is perfect for beginners and does not require a sewing machine. You can complete this hand-sewing project using basic stitches, and there is no need to worry about perfection because the finished piece looks adorable either way. You can experiment with different fabric colors, patterns, and even practice simple embroidery stitches to make each heart unique.
RELATED: 15 Basic Embroidery Stitches for Beginners
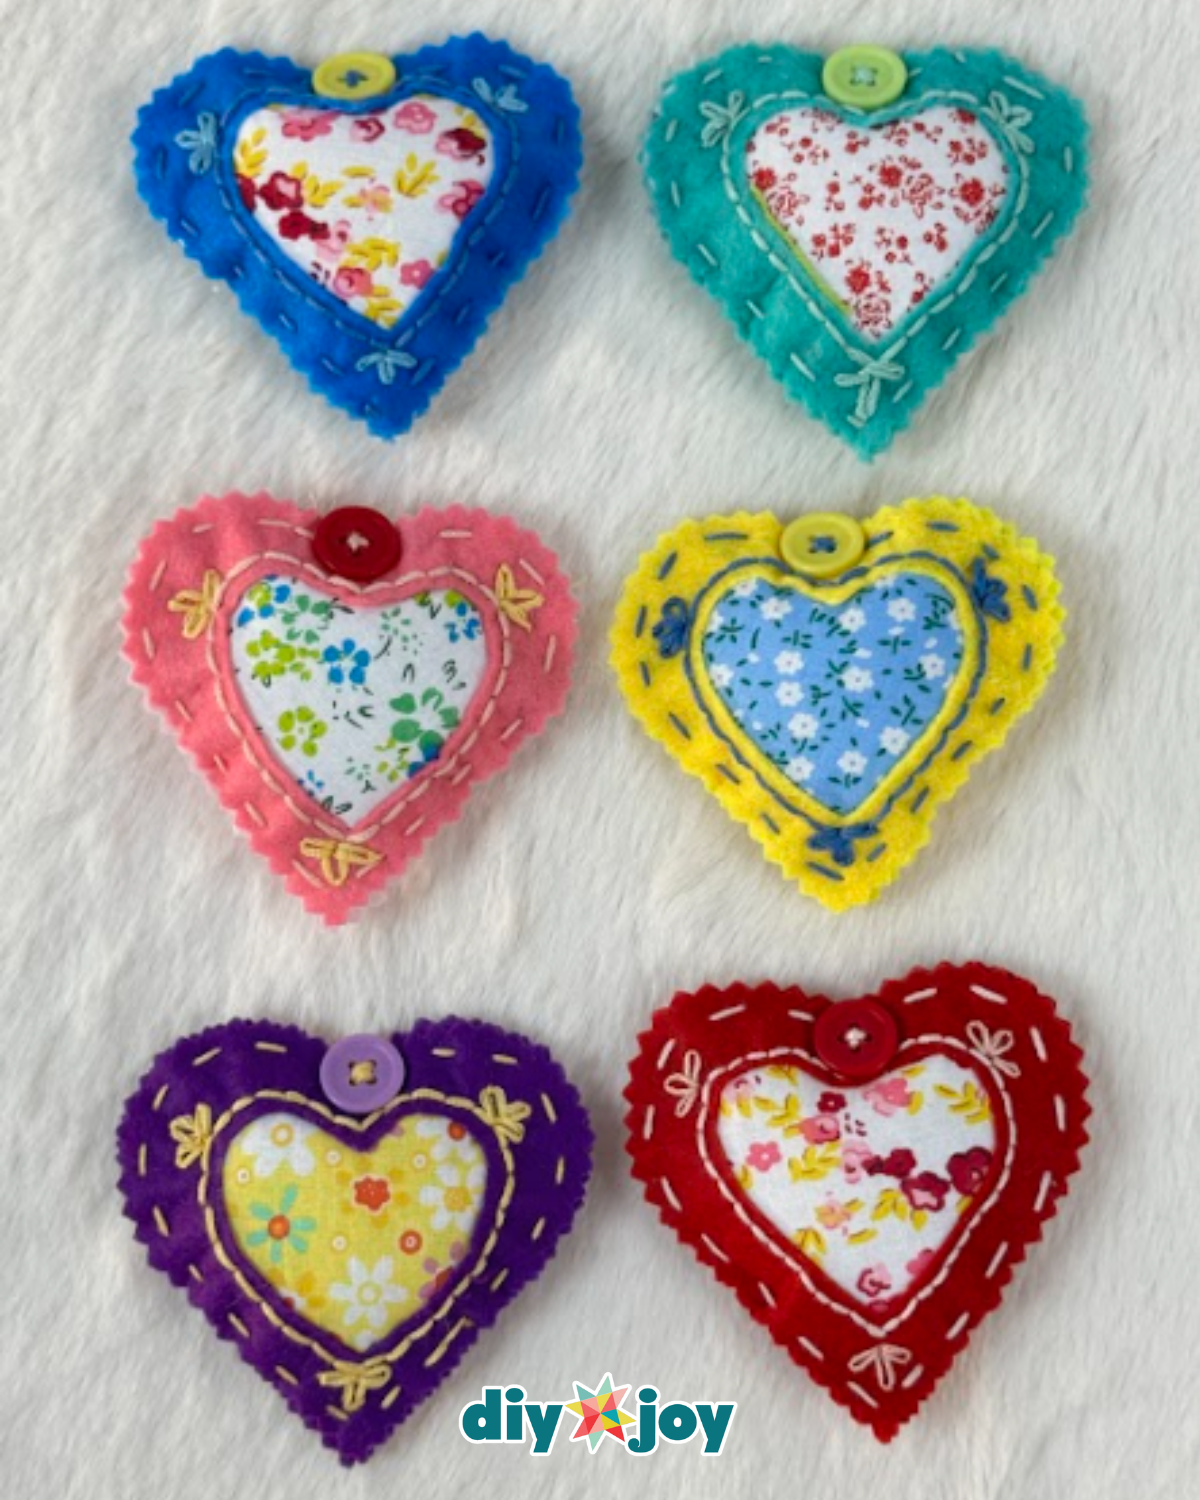
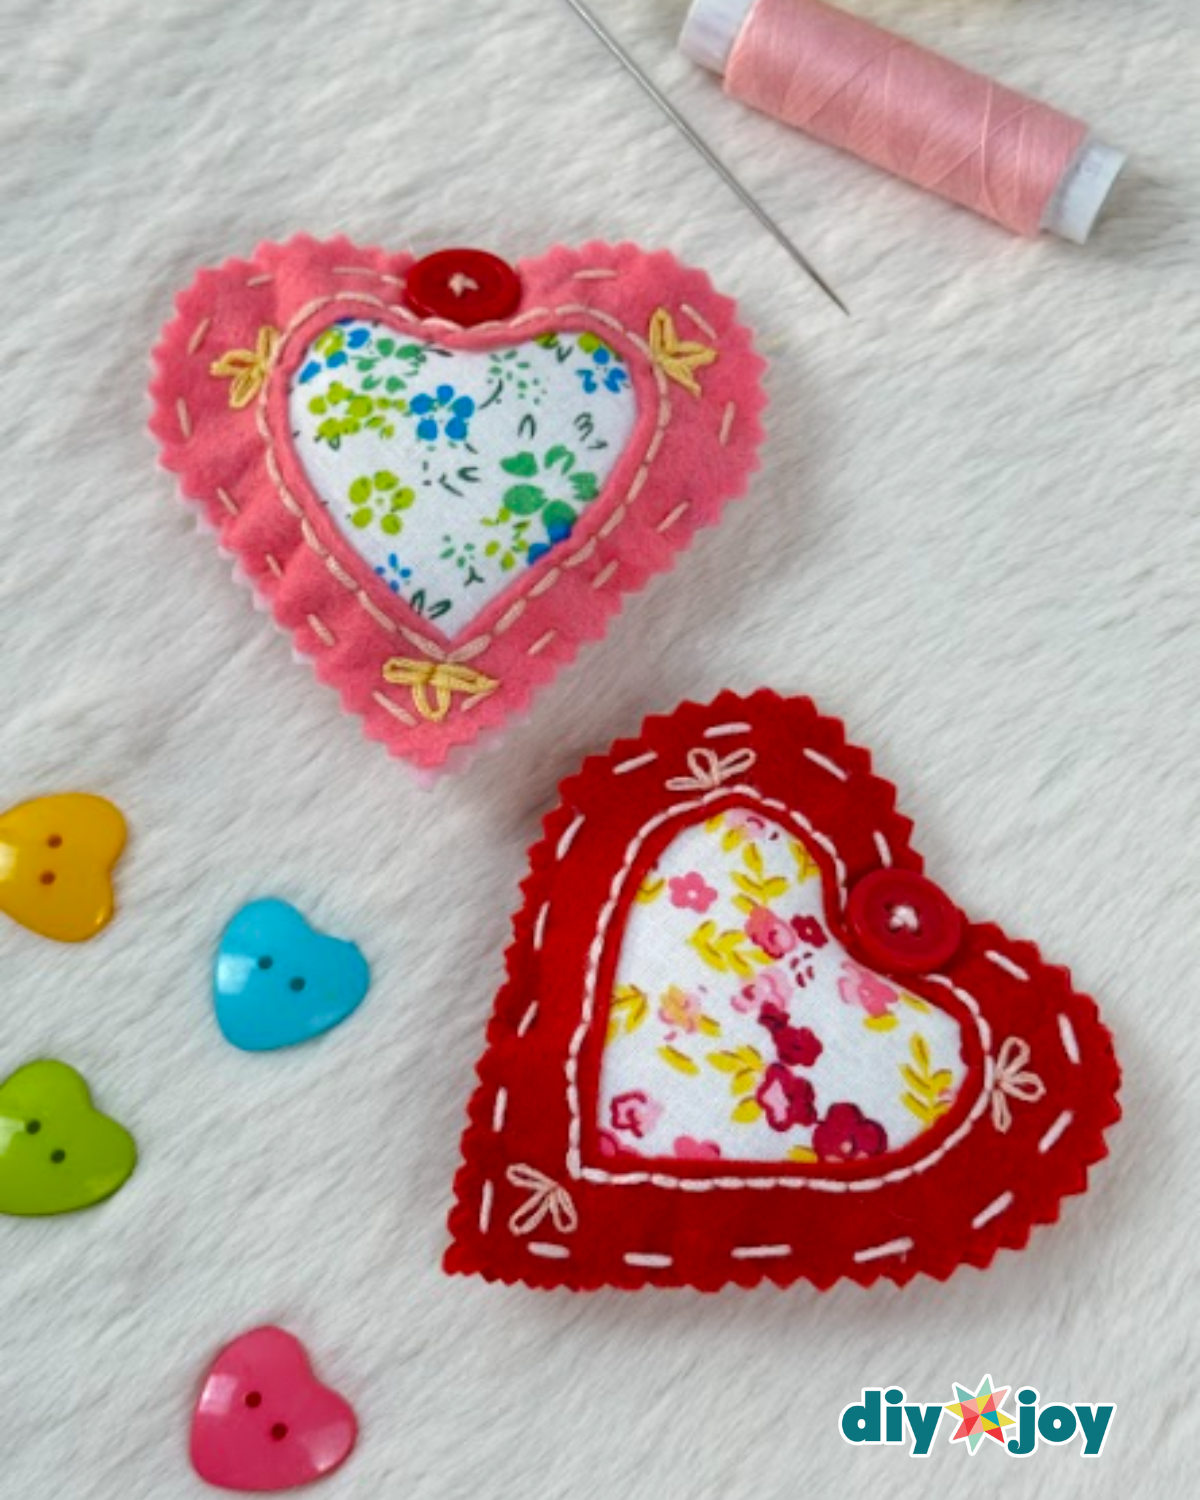
What makes this DIY fabric heart even more special is how versatile it is. It can be a sweet handmade gift idea, a keepsake, or a decorative ornament to hang anywhere. You can also fill it with dried lavender or other fragrant materials for a scented touch. If you want an extra challenge, try making smaller versions to use as bag charms or keychains. Whether you are new to sewing or already experienced, this project is a fun and creative craft to try. Follow the steps below and start making your own fabric heart today.
How to Sew a Fabric Heart
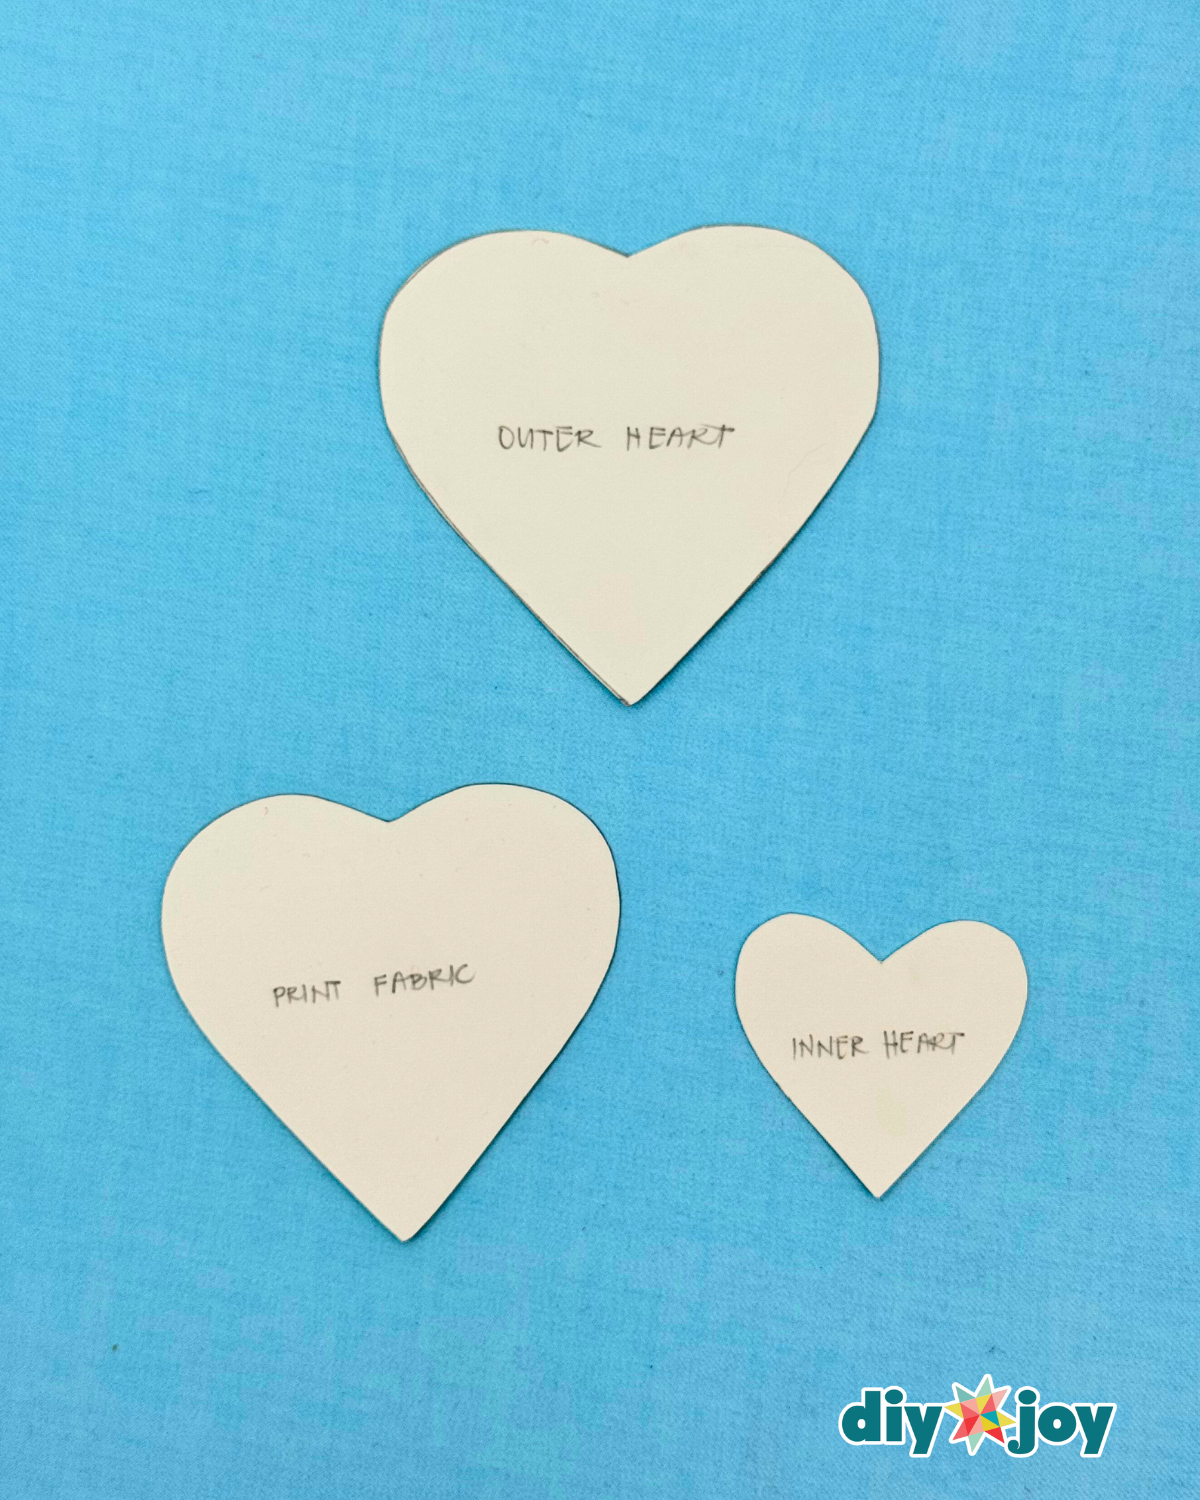
Step 1: Make the Heart Templates

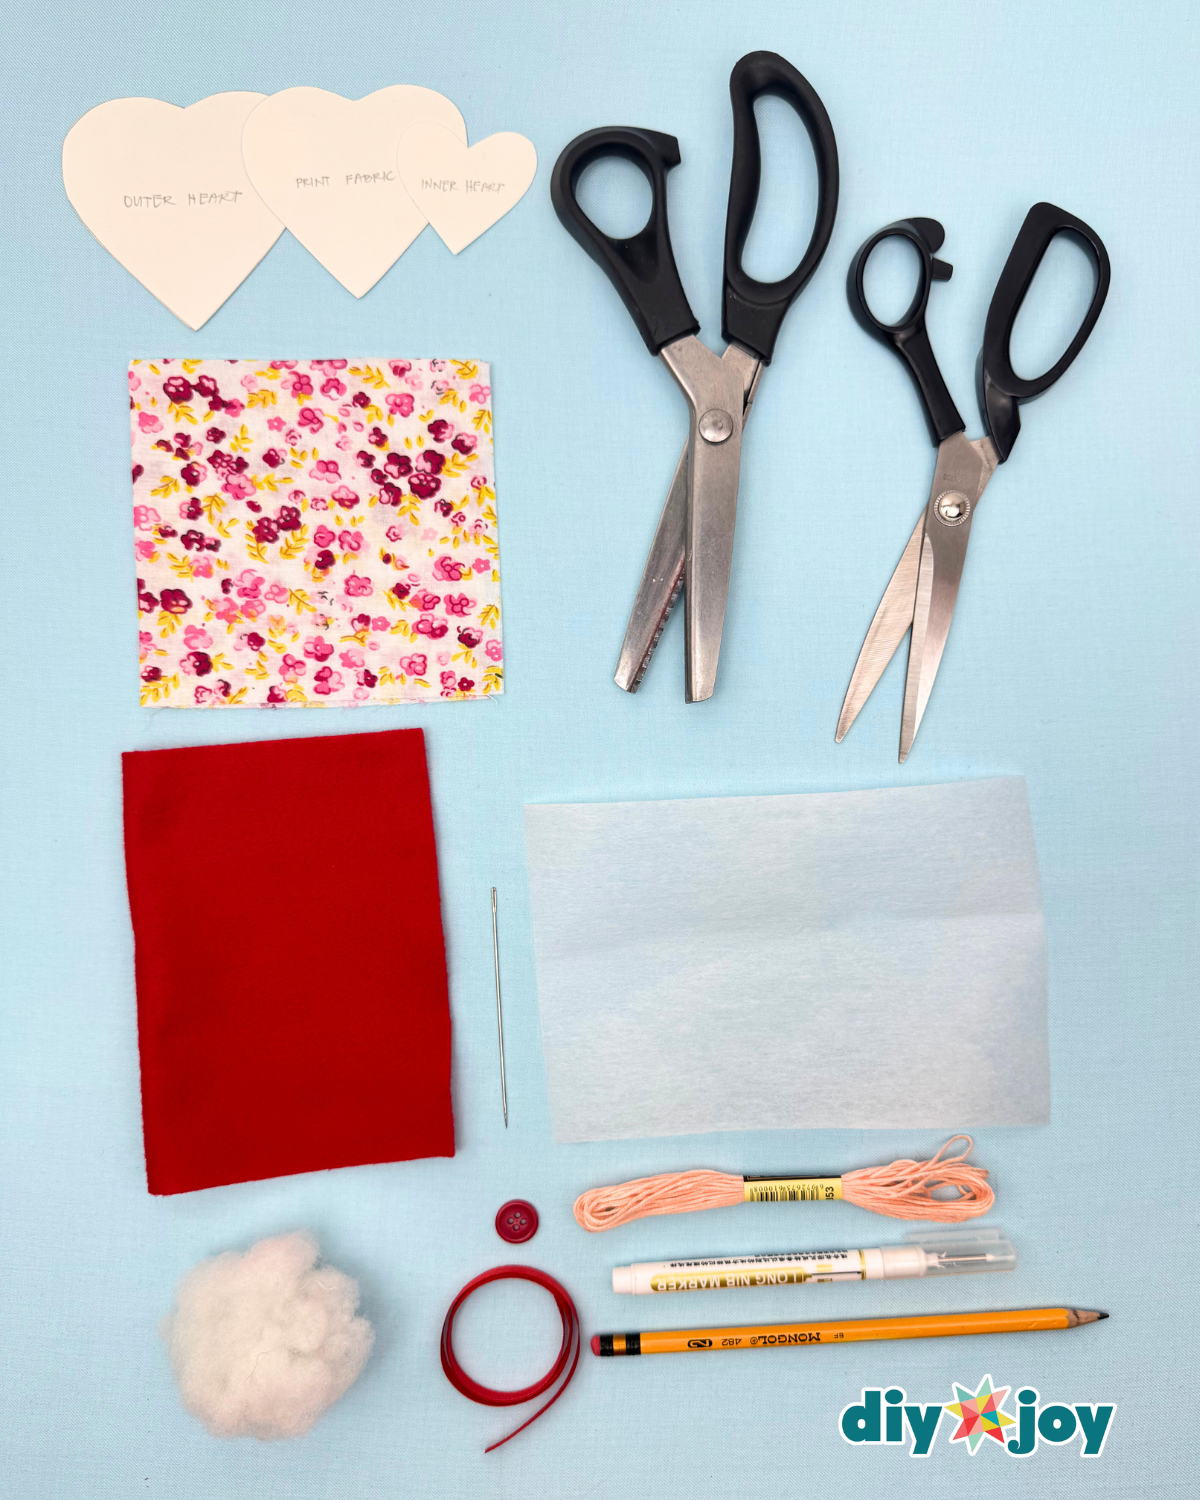
Get a piece of cardstock or paper. Create and label the following templates:
Outer Heart: Draw and cut a heart measuring 3.5 inches
Print Heart: Draw and cut a 3×3-inch heart
Inner Heart: Draw and cut a heart measuring 2×1.5 inchesStep 2: Cut the Felt Fabric
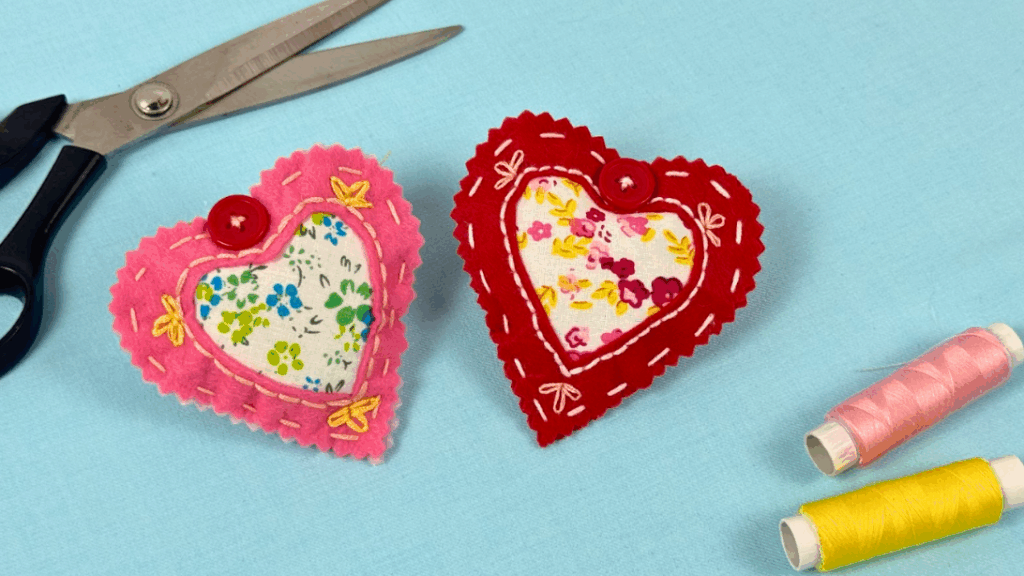
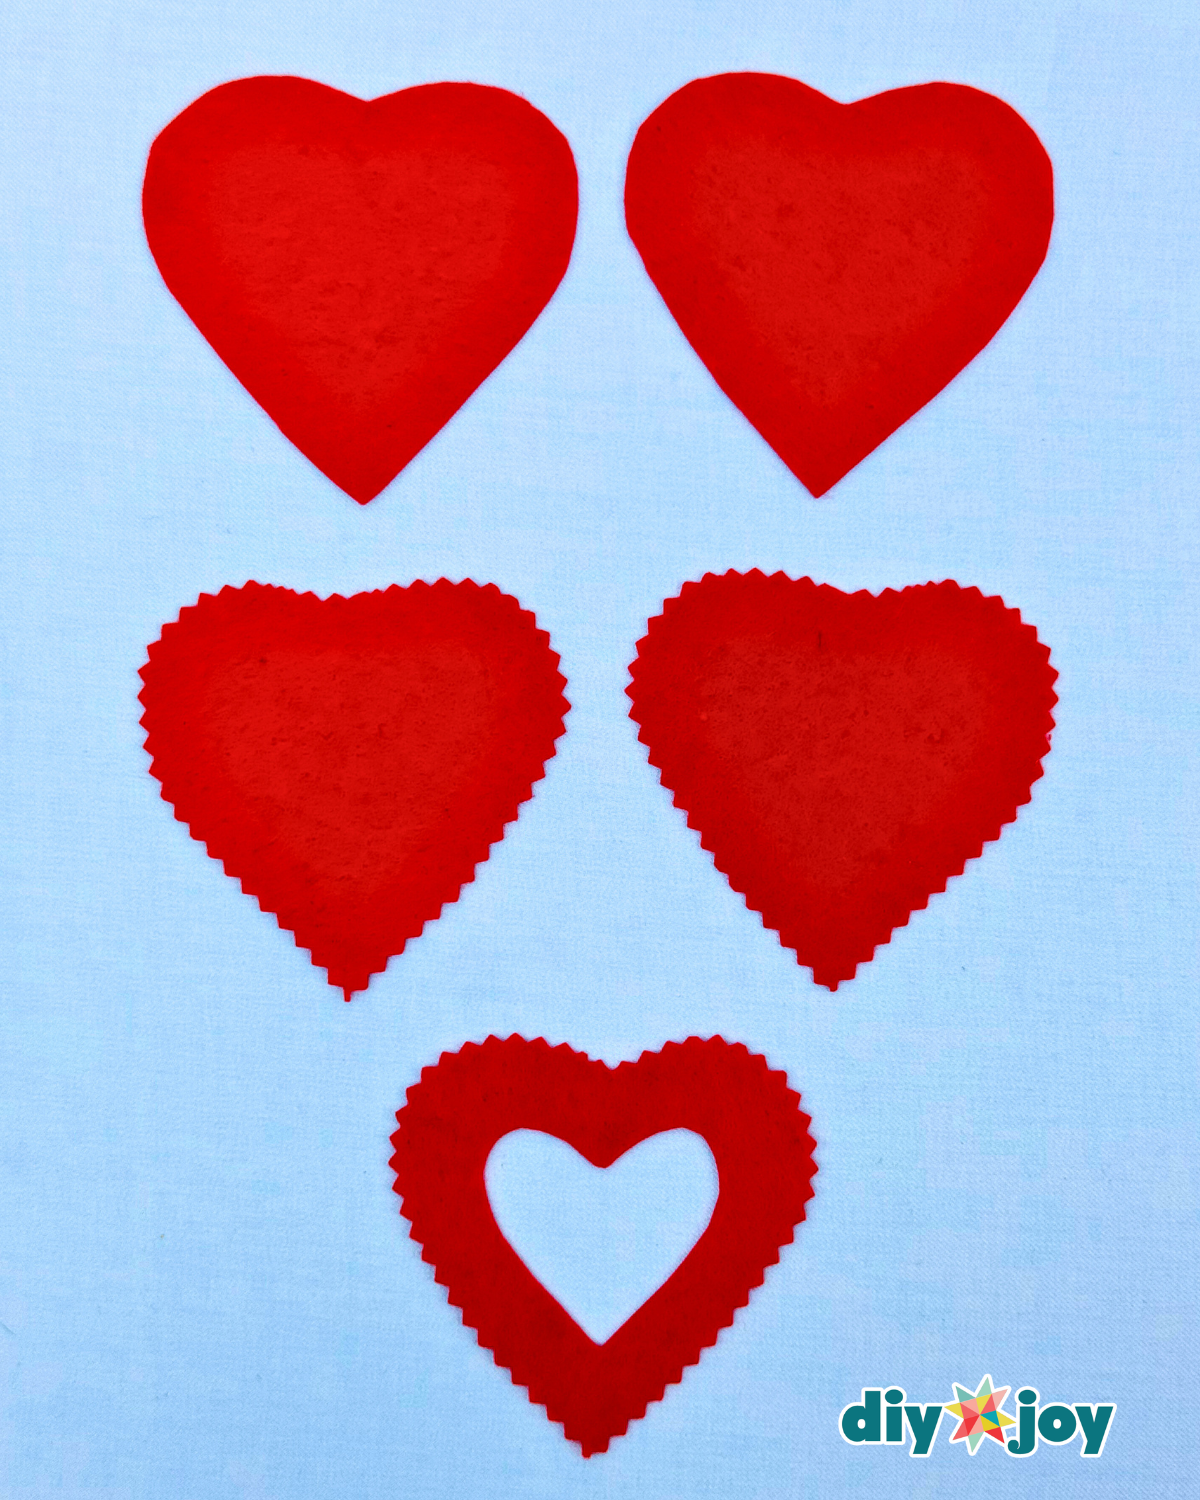
Trace the outer heart template onto felt, then cut out two pieces and trim the edges with pinking shears. Take one of the felt hearts and use the inner heart template to cut out the center.Step 3: Cut the Print Fabric
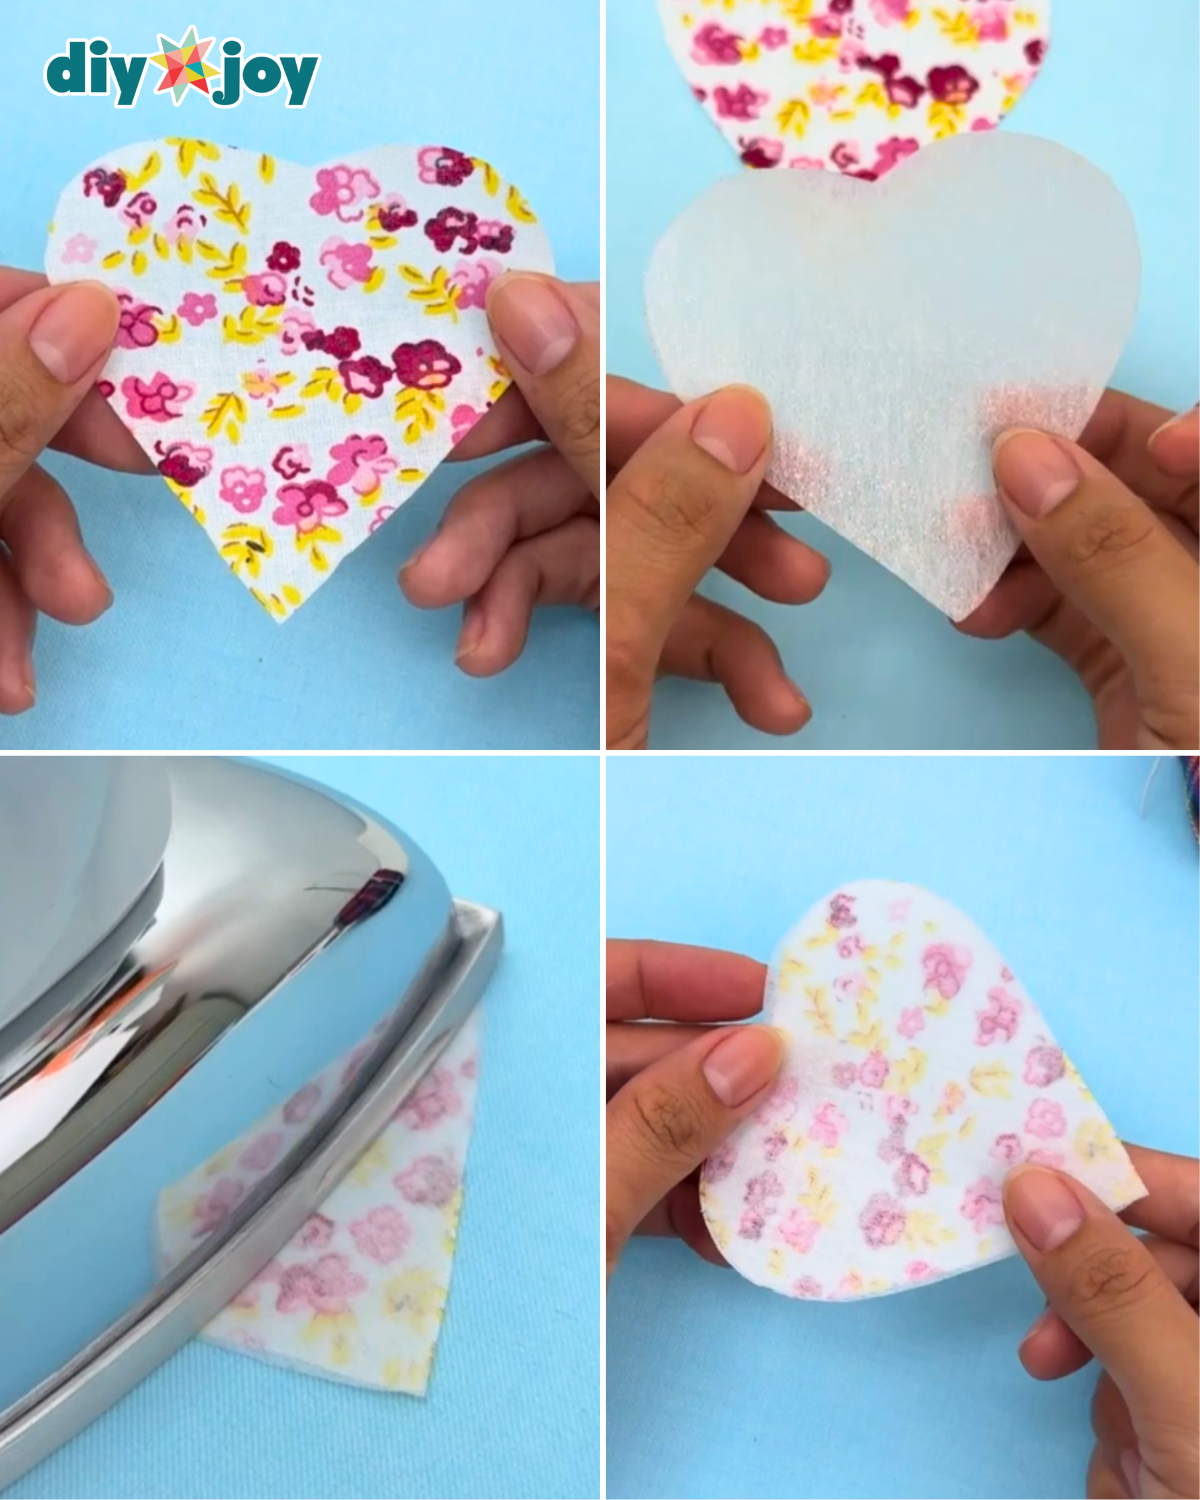
Using the print heart template, cut the printed fabric and fabric stabilizer. Place the printed fabric wrong side up, then position the stabilizer on top with the glue side facing the back of the fabric. Iron them together until fully fused.Step 4: Sew the Hearts
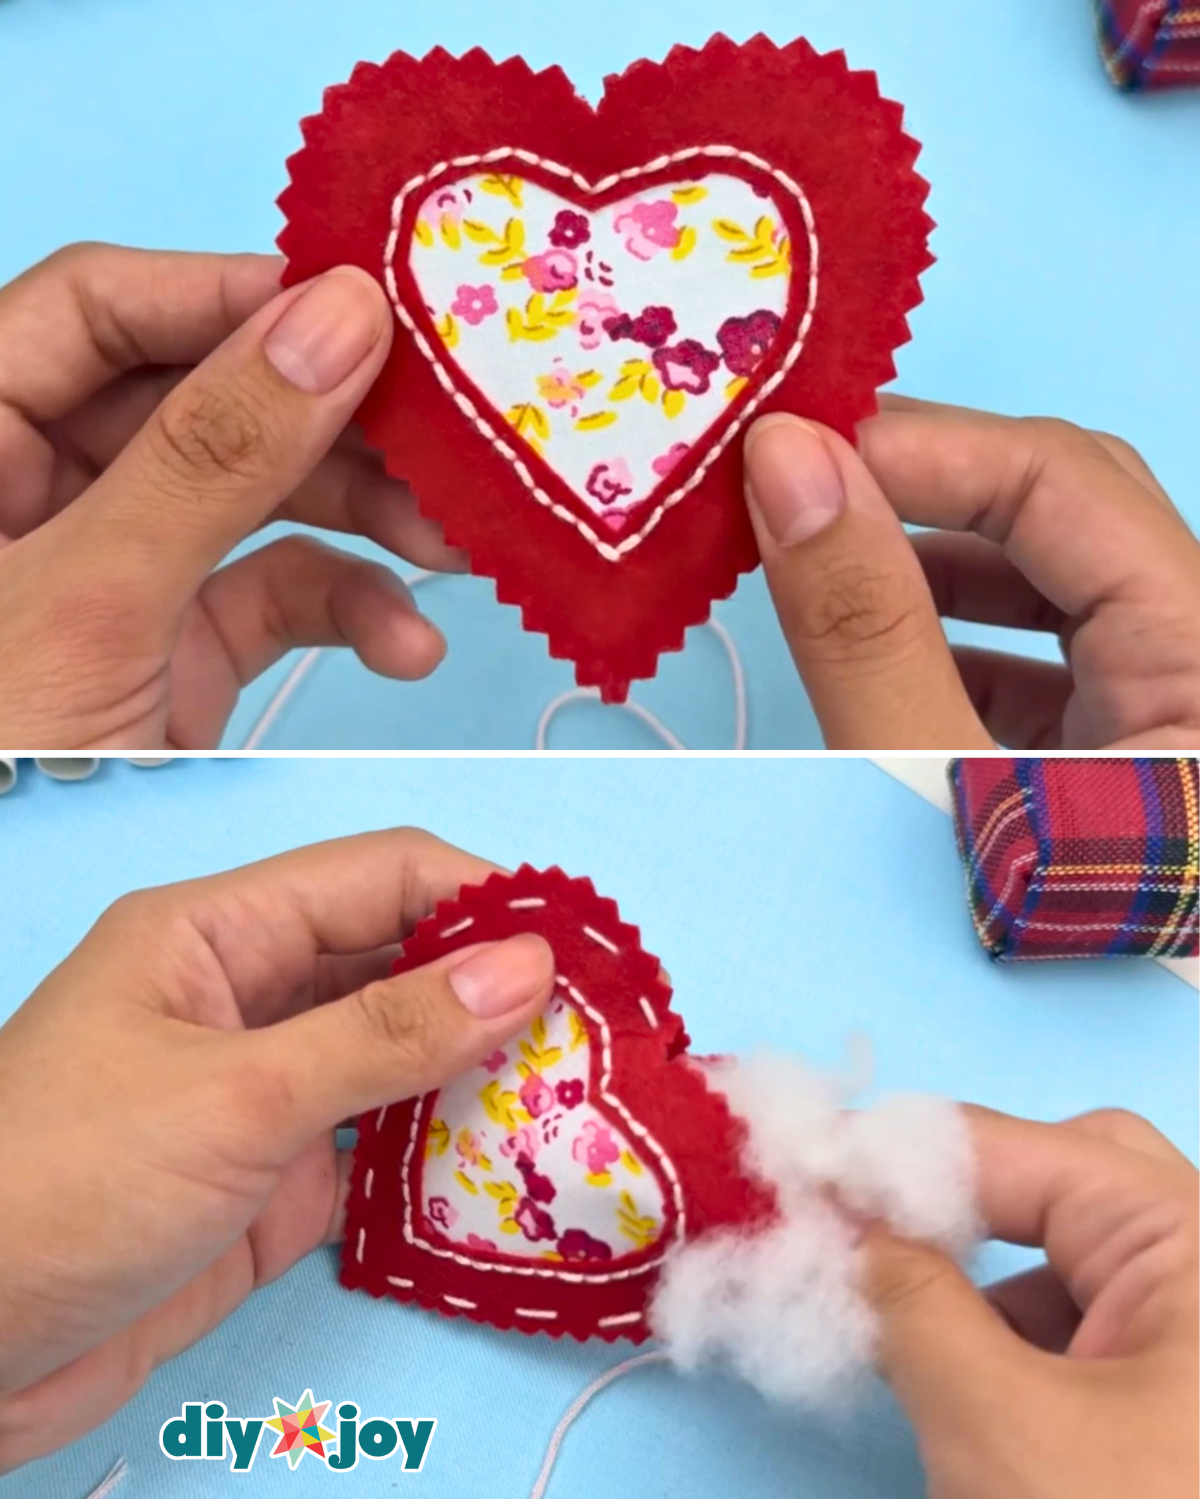
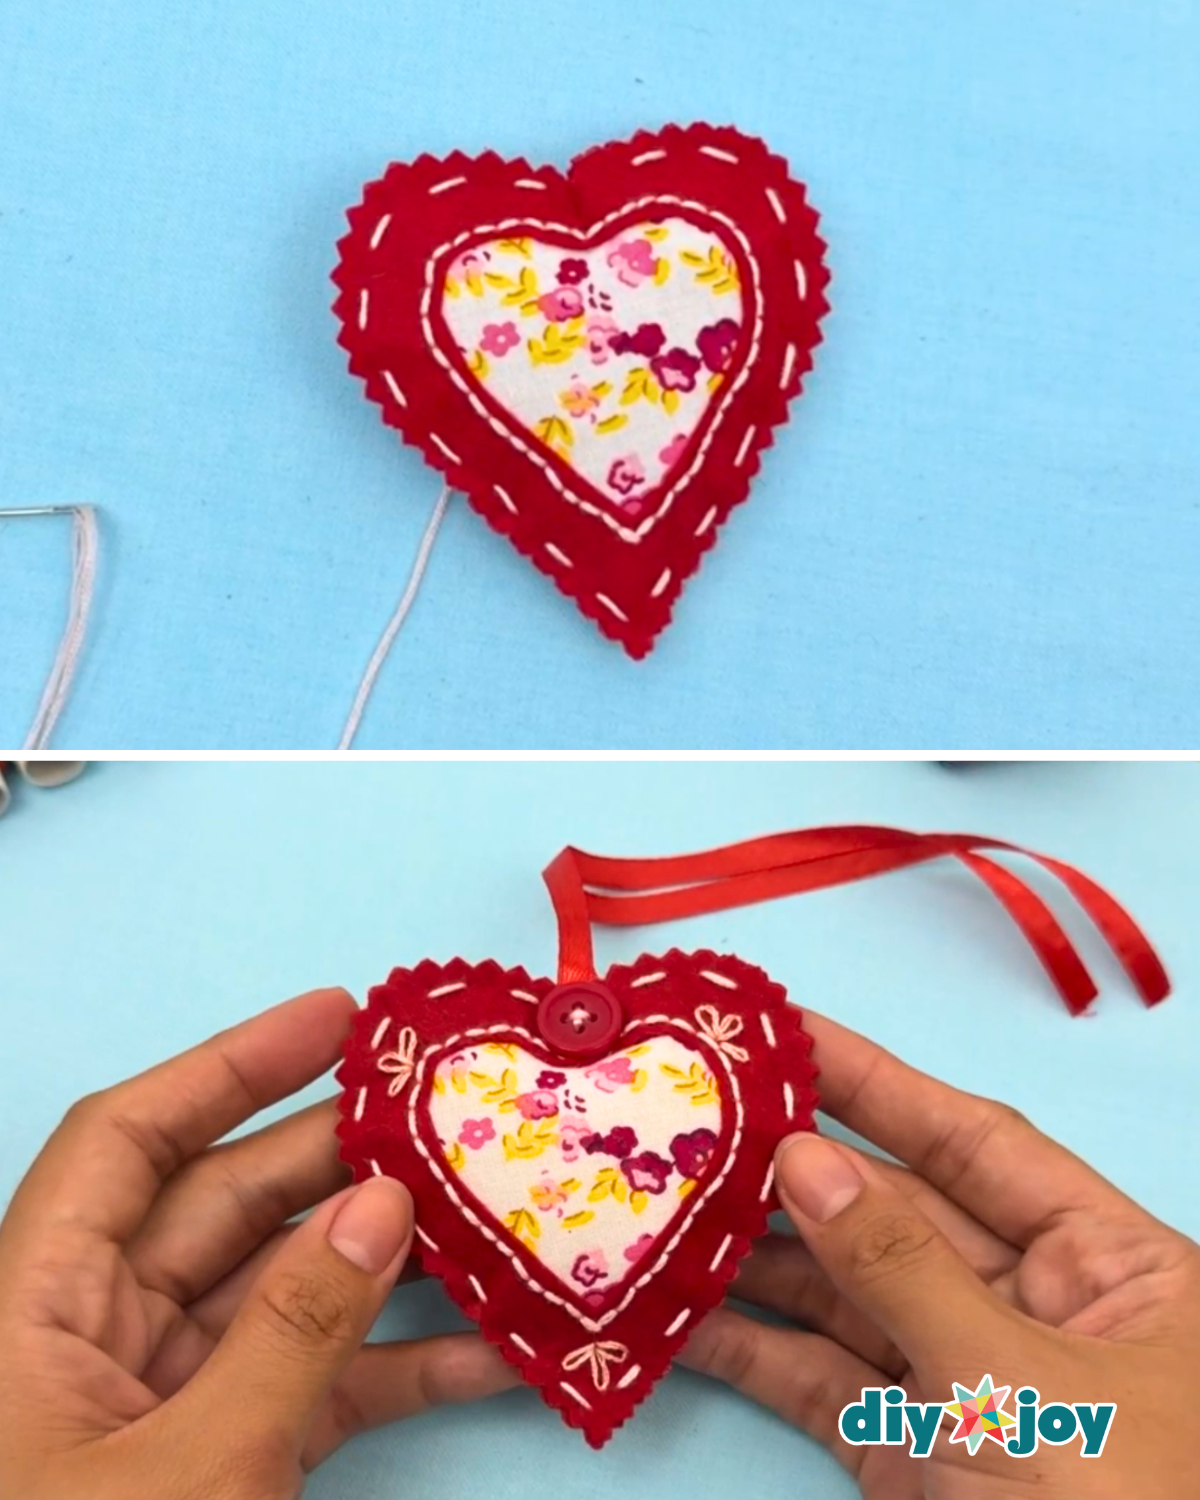
Take the felt heart with the center cut out and place the printed heart underneath it. Sew around the inner heart opening using a backstitch. Next, place the solid felt heart at the back, aligning all edges. Sew around the outer edges using a running stitch, leaving a small gap at the top. Stuff the heart with polyester fiberfill.Step 5: Finish the Fabric Heart
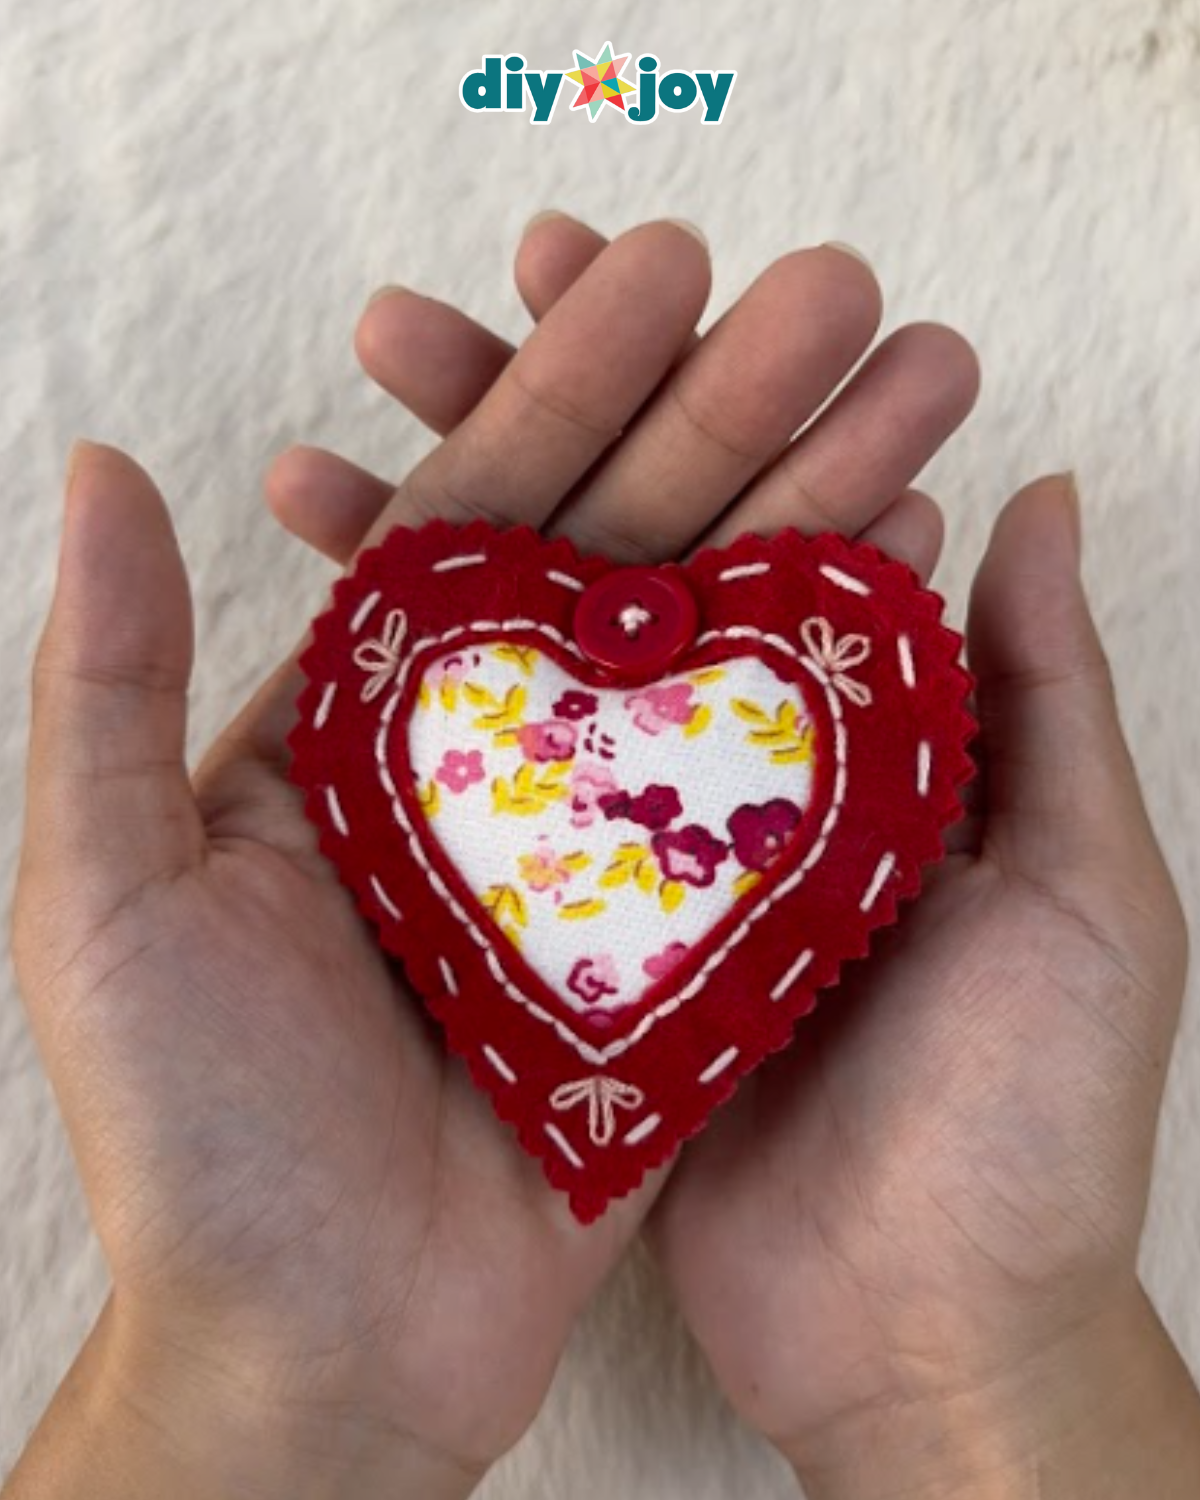
Before fully sewing the heart closed, insert a folded piece of ribbon inside the top center of the heart to create a hanger. Sew the opening closed, securing the ribbon in place. Attach a button to the top center of the heart. To finish, add decorative details by embroidering half lazy daisy stitches.
How to Do a Lazy Daisy Stitch:
Insert the needle at the starting point, then insert it back into the same spot without pulling the thread all the way through to form a loop. Bring the needle up from the back at the tip of the loop, then make a small stitch over the loop to lock it in place.
Materials
- Heart Template
- Pinking Shears
- Scissors
- Fat Quarter
- Felt Fabric
- Fabric Stabilizer
- Pen or Pencil
- Embroidery Thread and Needle
- Ribbon
- Button
- Polyester Fiberfill
![]()
Pro Tip
To make your fabric hearts more unique, try adding extra embroidery details or experimenting with different stitches. You can also place a small amount of dried lavender inside the heart to give it a soft, pleasant fragrance.
Must-Try DIYJoy Crafts!

Crafts

Paper Flowers

Crafts

Paper Flowers
*If you love this craft, then visit our official website, follow our Facebook page, and subscribe to our YouTube channel for more!
How to Sew Fabric Hearts Without a Machine