
You can make pretty decor without spending a lot of money, you just need the right inspiration and an easy-to-follow video tutorial such as this one by NataliDoma DIY on YouTube. This adorable hat gnome can be used as an ornament to your tree or just hang it wherever you please. This is a great and simple project idea that you can finish in just one sitting, it’s that easy to make
RELATED: How to Upcycle an Old Pill Bottle Into a DIY Gnome
Learn how to make this yarn hat gnome today and try making a couple of this in different colors if you want. Once you’ve learned the basics of making this gnome, you can try to create ones in different sizes, and experiment with it by adding more embellishments that you prefer. Proceed to read the step-by-step instructions down below now and while you’re at it watch the video tutorial as well.
Materials Needed for Yarn Hat Gnome:
- White yarn
- Dark-colored yarn
- Scissors
- A book
- Scissors
- A wooden bead
How to Make a Yarn Hat Gnome:
Step 1
Wrap the white yarn around the book’s length 3 times, then cut the excess, and set it aside. Wrap the white yarn around the book’s width 16 times, then cut the excess, and cut through each looped end. Group them into 4 strands each, then tie a group of strands in the center of the loop yarn loop you made earlier as shown in the video.
[social_warfare]
Step 2
Keep adding, looping, and tying the remaining group of strands on the long looped yarn, then loop a long piece of yarn around the center tying it securely, and insert the wooden bead down that long yarn piece. Gather the ends of the looped yarn toward and upward the center, then tie them together securely, and ensure the long strand is still centered.

Step 3
Trim and shape the strands at the bottom, then comb them out and trim as needed. Repeat the wrapping steps you did with the white yarn to the dark yarn, then once you’ve looped every 4 strands to the looped yarn, braid the strands alternately.
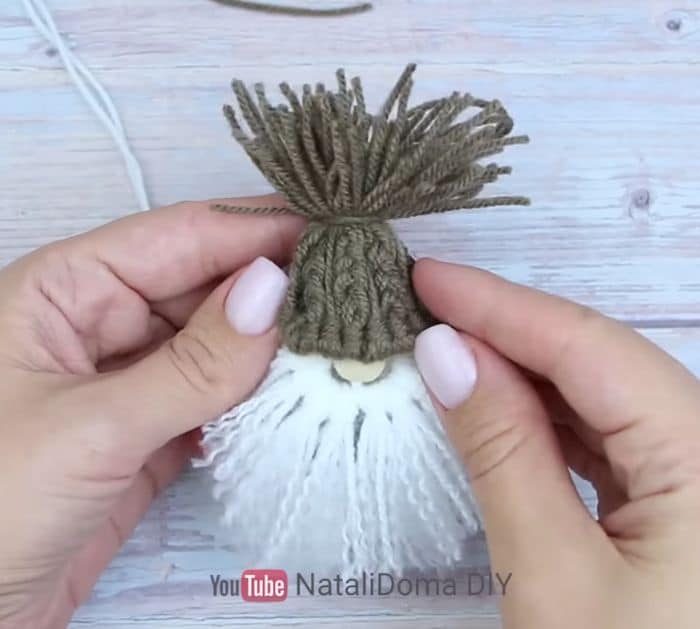
Step 4
Place it on top of the white yarn just above the wooden bead, then tie it in place, and tie it at the back as well. Gather the ends at the top with the long white yarn still at the center, then tie them together tightly and securely just about 1 inch above the bottom edges. Trim and shape the hat nicely and you’re done!
*All image credit belongs to NataliDoma DIY via YouTube. Follow and subscribe to her channel for more!
How to Make DIY Yarn Hat Gnome


