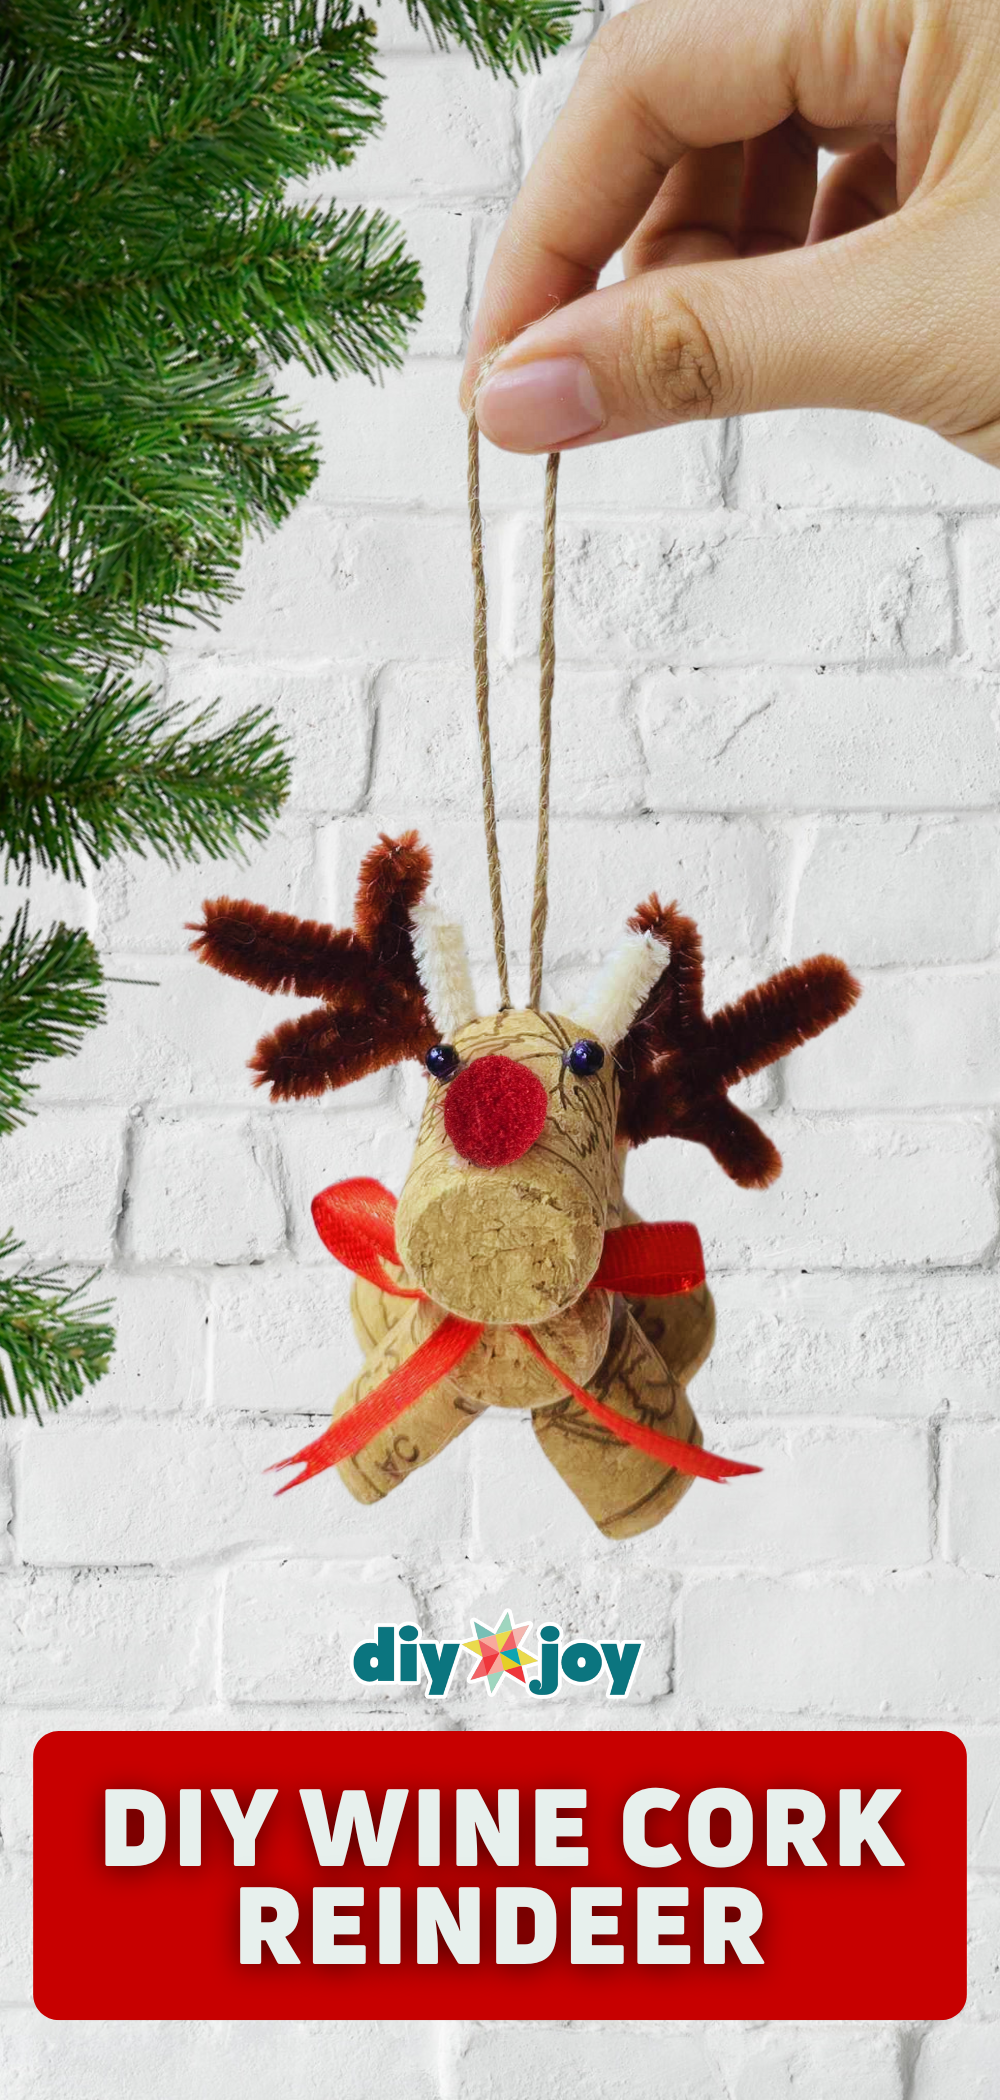
It all started one afternoon when I noticed a small stash of wine corks piling up in a kitchen drawer. I’d been saving them for something crafty, but never quite knew what—until I saw a photo of the cutest little reindeer made from corks, pipe cleaners, and some black beads. That was it! I pulled out the glue gun, found some red pom-poms, and got to work. What began as a random idea turned into one of my favorite holiday projects ever—easy, fun, and surprisingly adorable.
A DIY wine cork reindeer is not only a great way to recycle, but it’s also perfect for a quick and budget-friendly holiday crafting. You only need a few supplies—most of which you probably already have at home—and there’s no sewing or special skills required. Kids love making them, and even adults will find it hard not to smile as they bring each little reindeer to life with its own personality and twisty pipe cleaner antlers.
This DIY reindeer is a creative, eco-friendly craft that’s perfect for those who have Christmas as their favorite holiday. It doesn’t even matter if it’s still too early for Christmas projects, and it doesn’t hurt to make them in advance!

RELATED: Easy DIY Wine Cork Christmas Tree
One of the best parts about making a wine cork reindeer is how easy and customizable they are. Whether you want a classic Rudolph with a shiny red nose or a whole herd of unique reindeer with different antler shapes and scarf colors, the options are endless.
Beyond being a cute holiday project, this cork reindeer also makes a thoughtful handmade gift, a cute place card holder, or even a whimsical tree ornament. They’re a great way to recycle corks and get into the festive spirit without spending a lot. So gather your supplies, turn on some holiday music, and enjoy a cozy afternoon crafting your own little reindeer crew!
How to Make Wine Cork Reindeer
Step 1: Cutting the Wine Cork

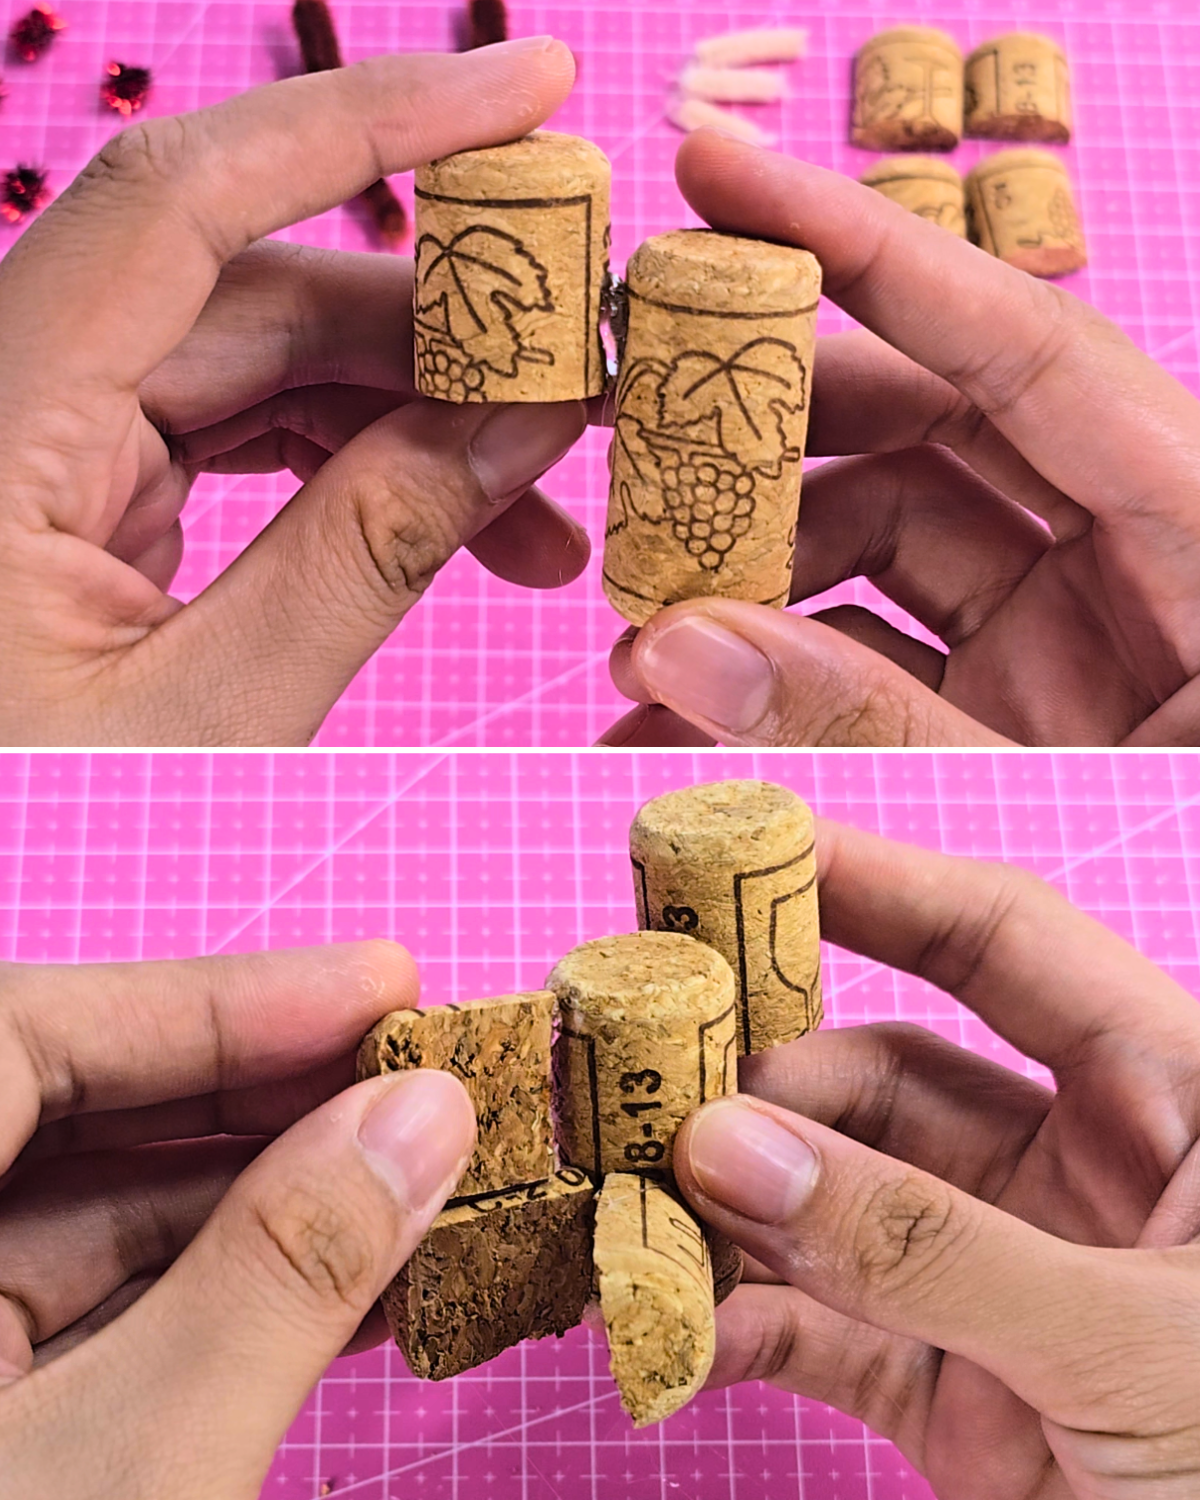
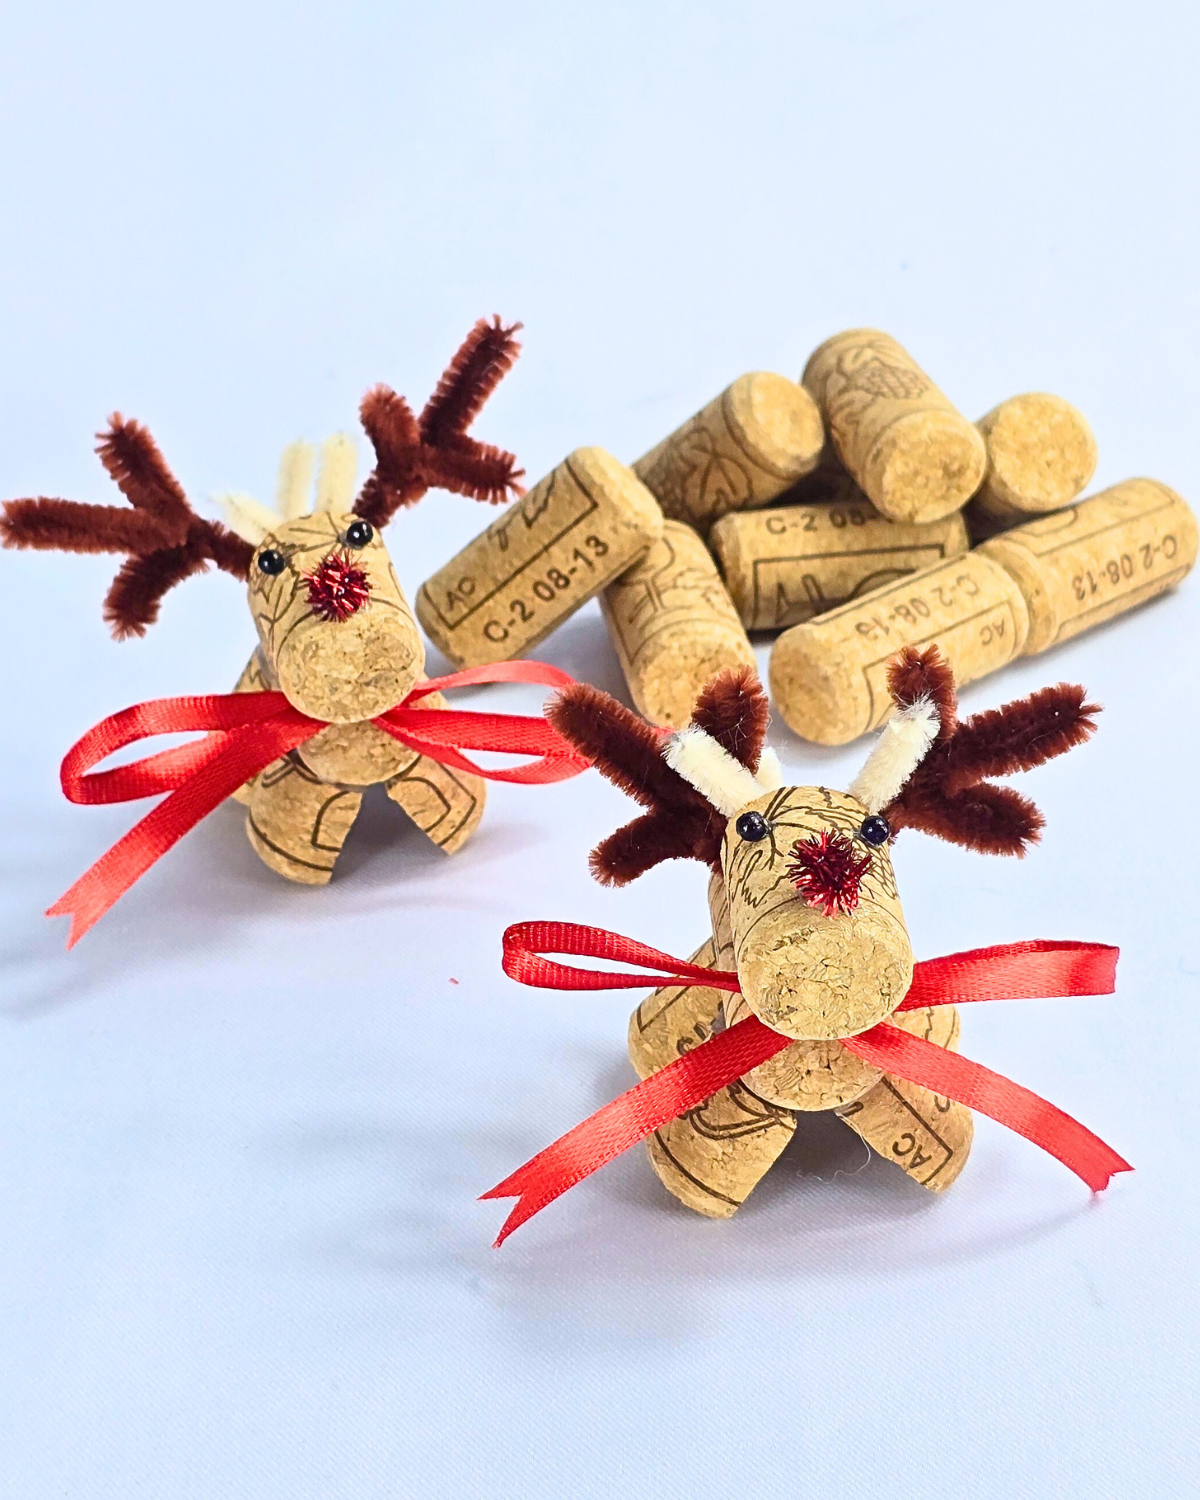
Cut a wine cork in half lengthwise, then slice each half in half again to create four equal pieces.Step 2: Forming the Body of the Reindeer
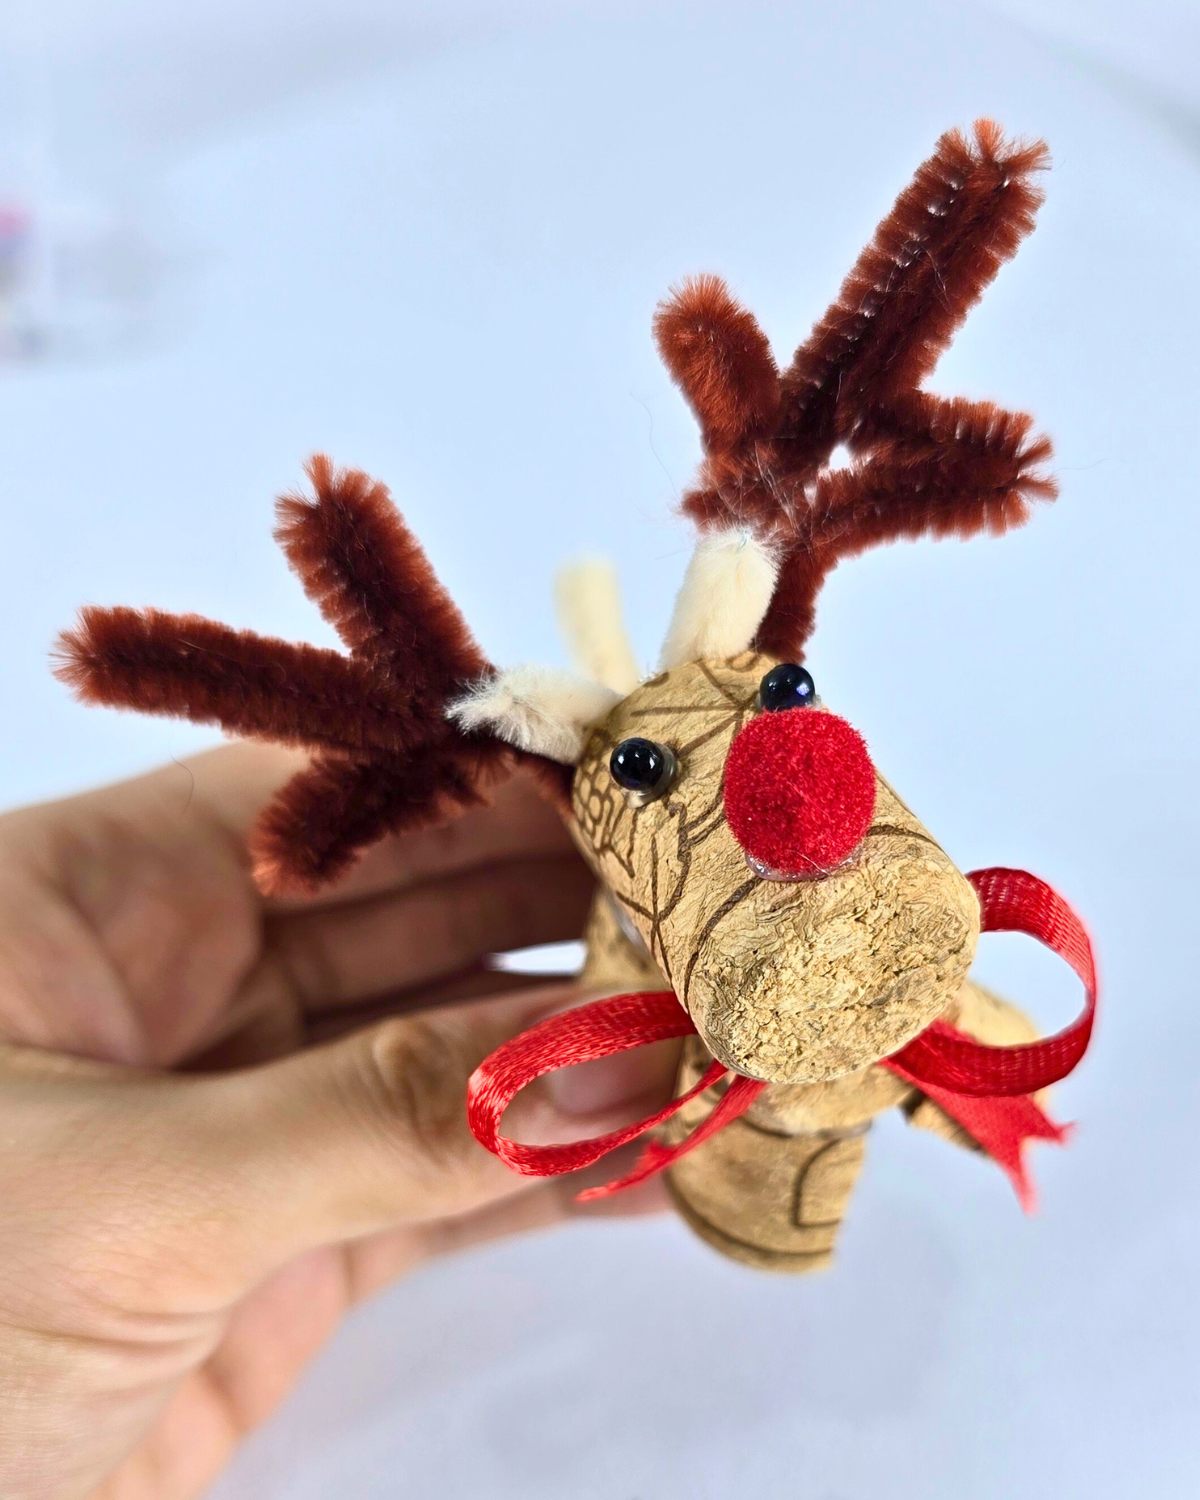
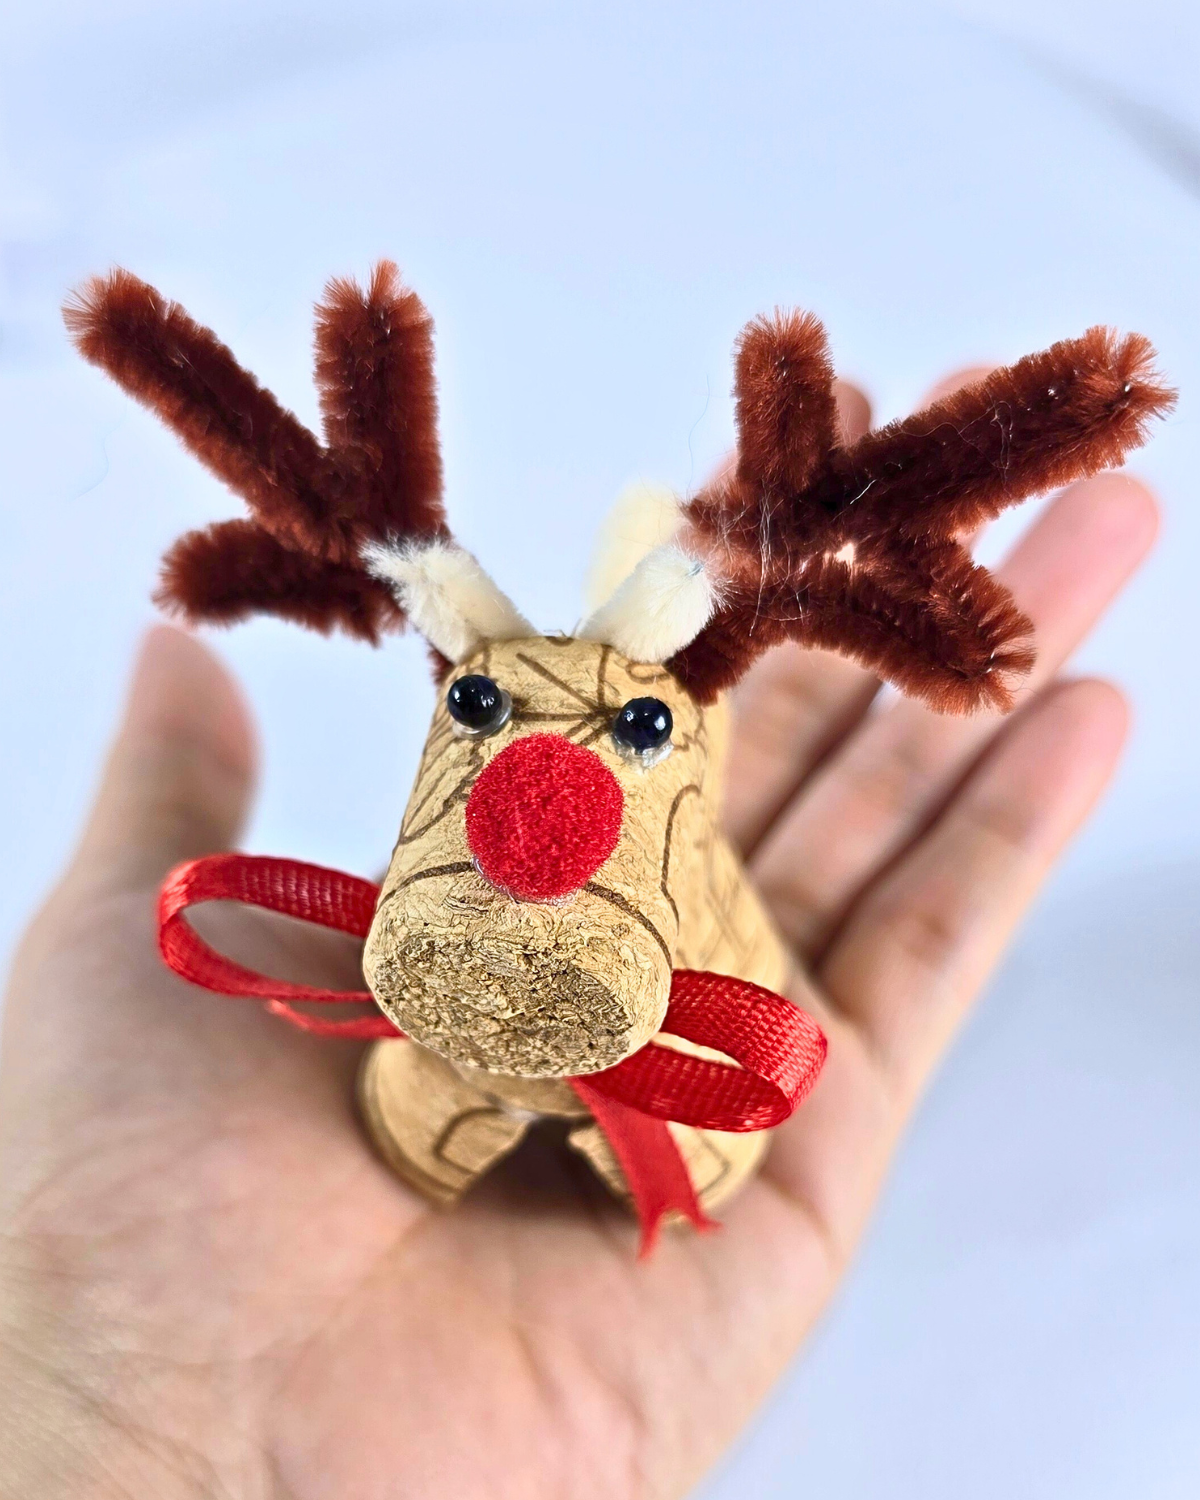
Cut a small piece off one end of a wine cork—this will be the reindeer’s head. Use a whole cork for the body. Hot glue the head onto the body, then attach the quarter cork pieces to the bottom of the body as legs.Step 3: Preparing the Antlers
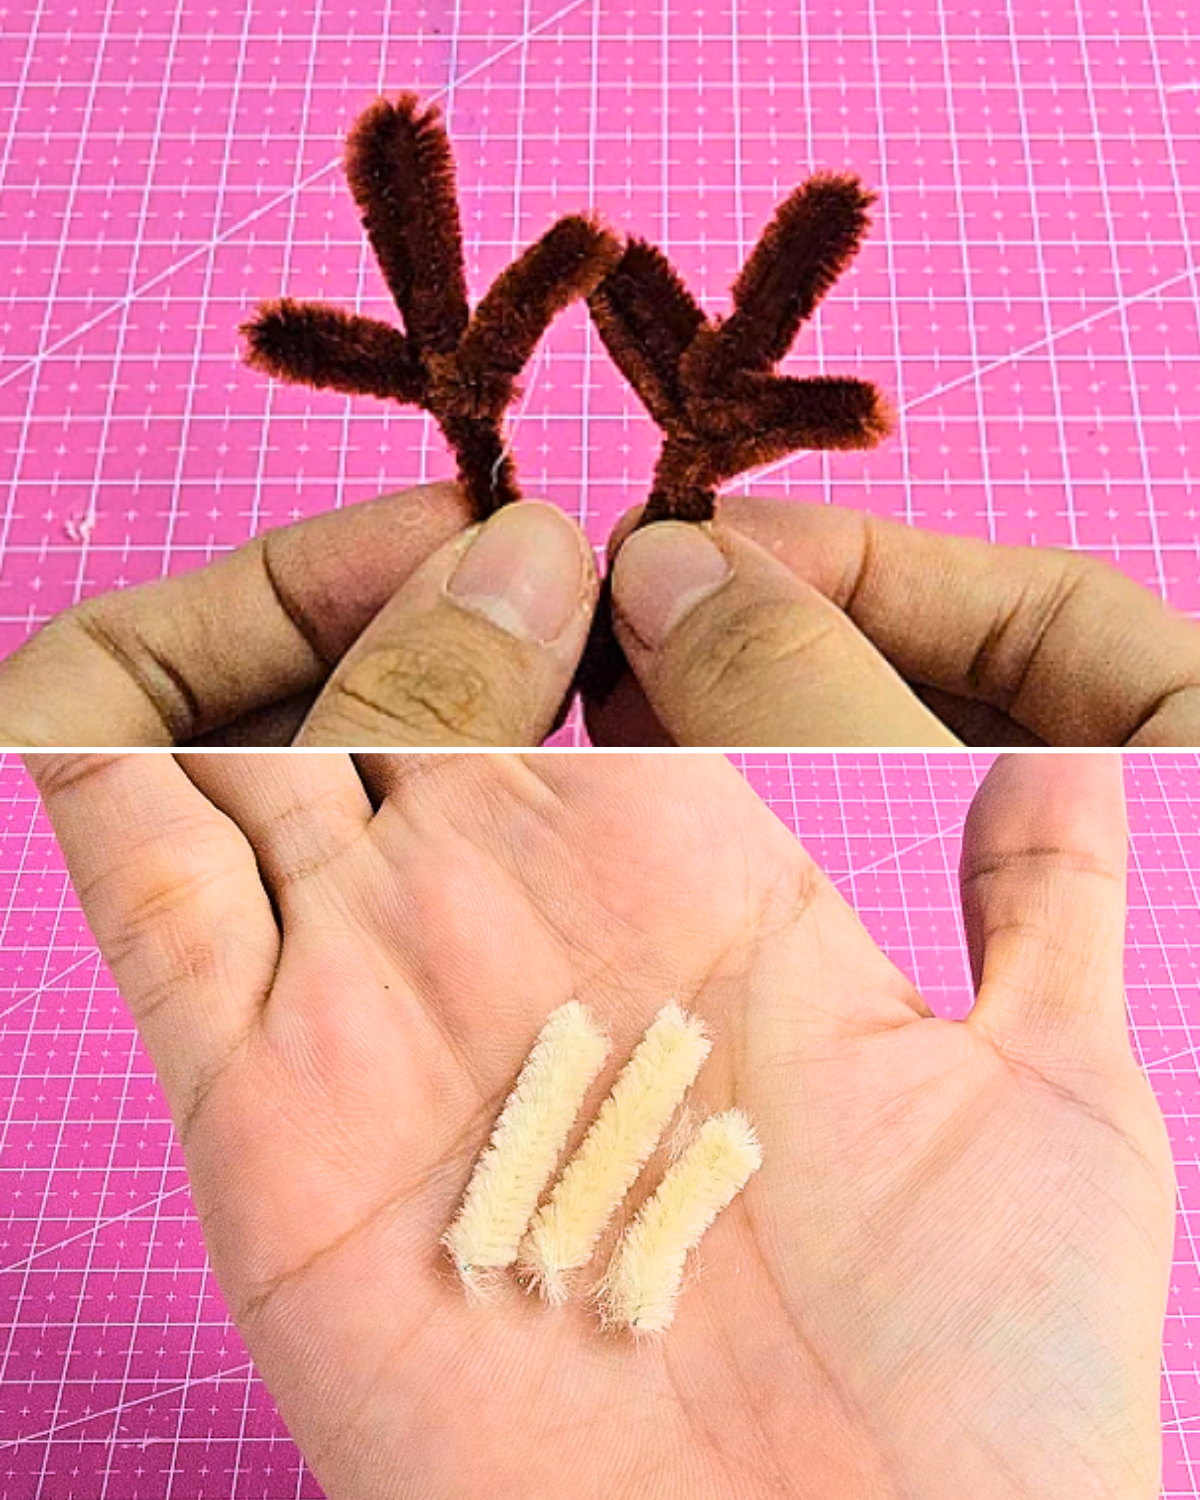
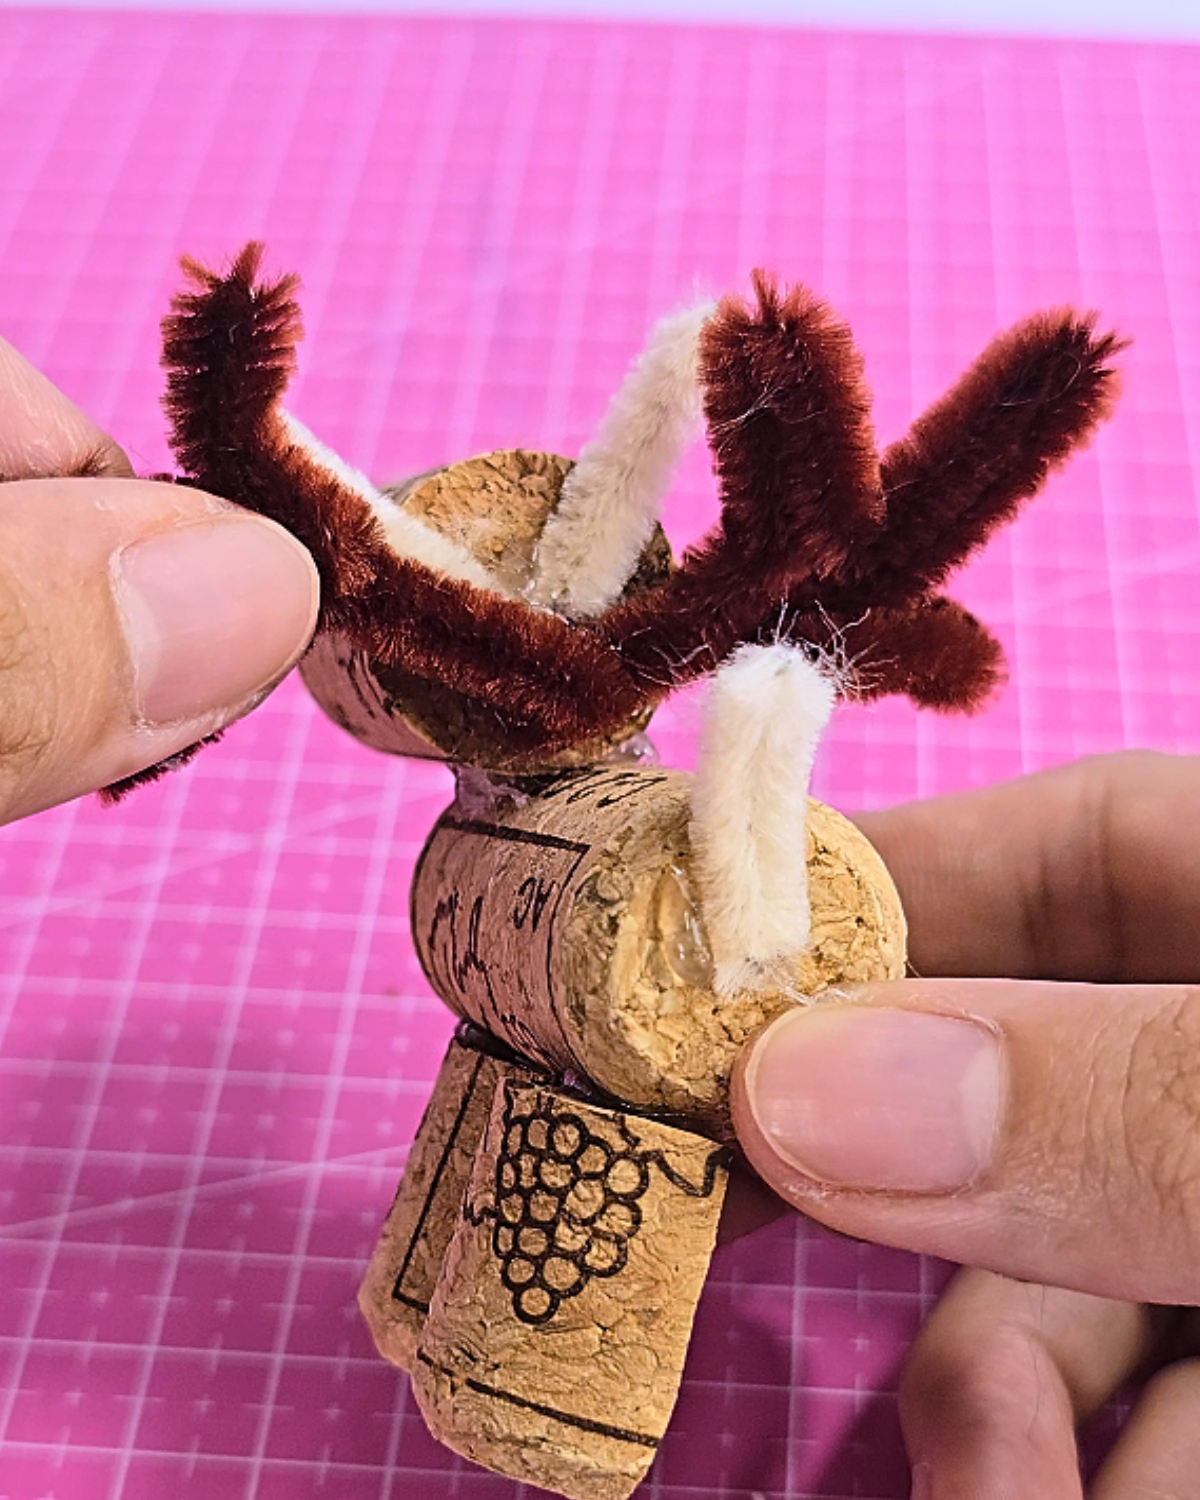
Cut a light brown pipe cleaner into three small pieces and set them aside. Take a dark brown pipe cleaner and shape it into an antler. Repeat to make a second one.Step 4: Attaching the Tail and Antlers
Hot glue the two small light brown pipe cleaner pieces to the back of the reindeer’s head. Attach the third piece to the back of the body for the tail. Then, glue the antlers just behind the light brown pieces on the head.Step 5: Finishing the Reindeer
For the nose, use a red pom-pom or shape a red glittery pipe cleaner into a small circle. Finish by tying a piece of ribbon around the reindeer’s neck like a scarf.


Materials
- Wine Cork
- X-Acto Knife
- Hot Glue Gun and Glue Sticks
- Scissors
- Ribbon
- Small Red Pom Pom
- Black Beads
- Pipe Cleaners, Light Brown and Dark Brown
![]()
Pro Tips 💡
- Secure corks with a toothpick for extra hold. You can insert a toothpick between the head and body before gluing to make the connection more stable.
- Add personality! Tiny buttons, bells, or mini wreaths make great accessories if you want to take your reindeer to the next level.
- Want your reindeer to stand? Make sure the legs are cut evenly and glued at the same height. You can lightly sand the bottom of the leg pieces for balance.
Must-Try Projects

Crafts

Paper Flowers

Crafts

Paper Flowers
*If you love this craft, then visit our official website, follow our Facebook page, and subscribe to our YouTube channel for more!
Easy DIY Wine Cork Reindeer