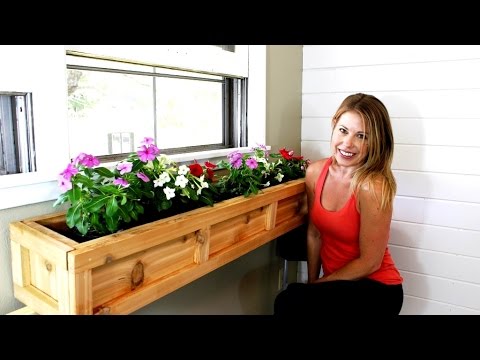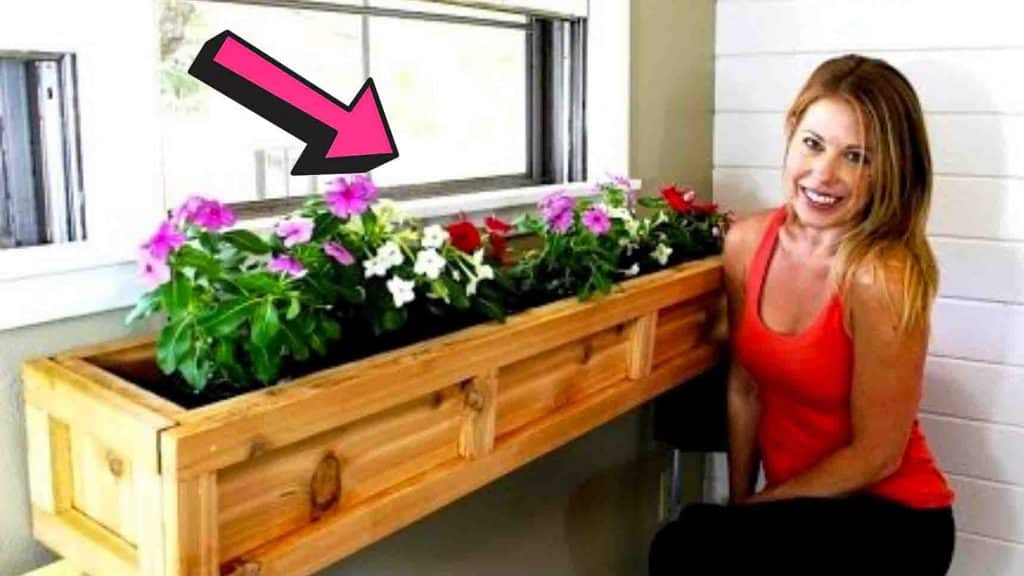
Are you looking for a way to elevate your greenhouse? How about adding this DIY planter box from The Rehab Life on Youtube? This planter box is not just easy to make but also inexpensive at just $20. You can also place this at your windows; it’s all up to you. Watch the video tutorial below to learn how.
Materials:
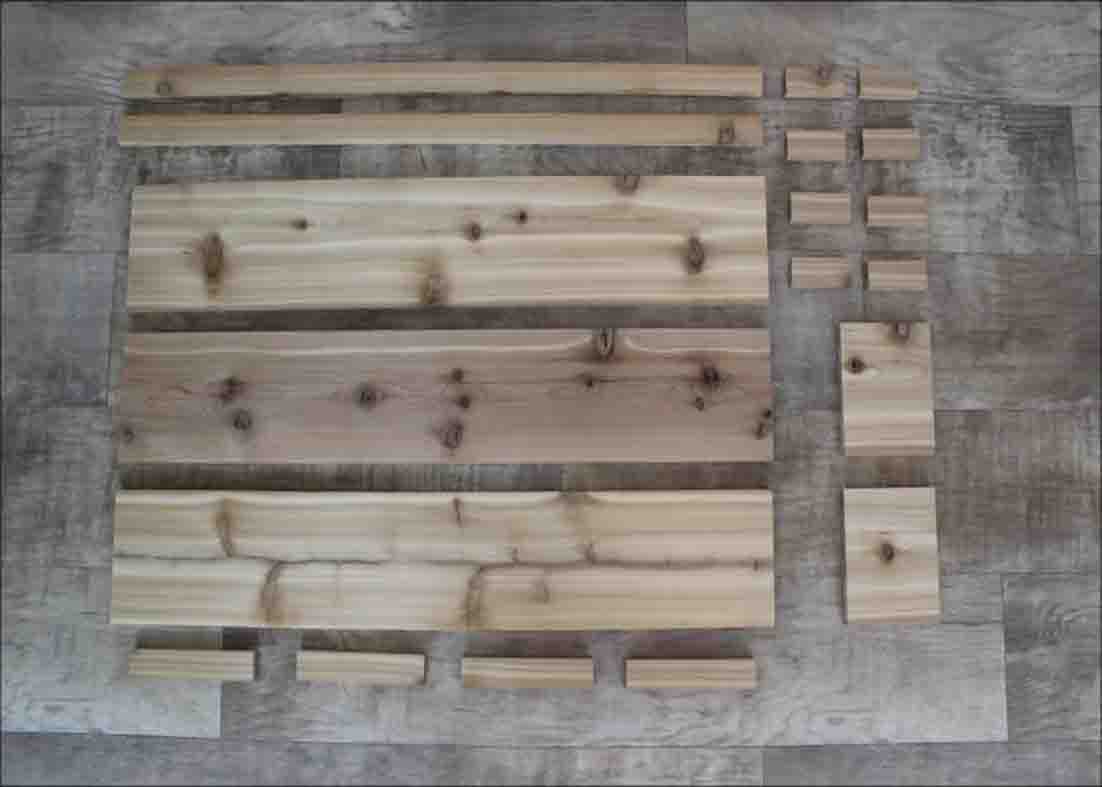
Lumber:
- 2 pcs. 1″ x 2″ x 8ft
- 2 pcs. 1″ x 8″ x 4ft
- 1 pc. 1″ x 8″ x 6ft
Other:
- 1 & 1/4″ trim screws
- wood filler
- sanding block
- exterior wood stain
Directions:
Step 1
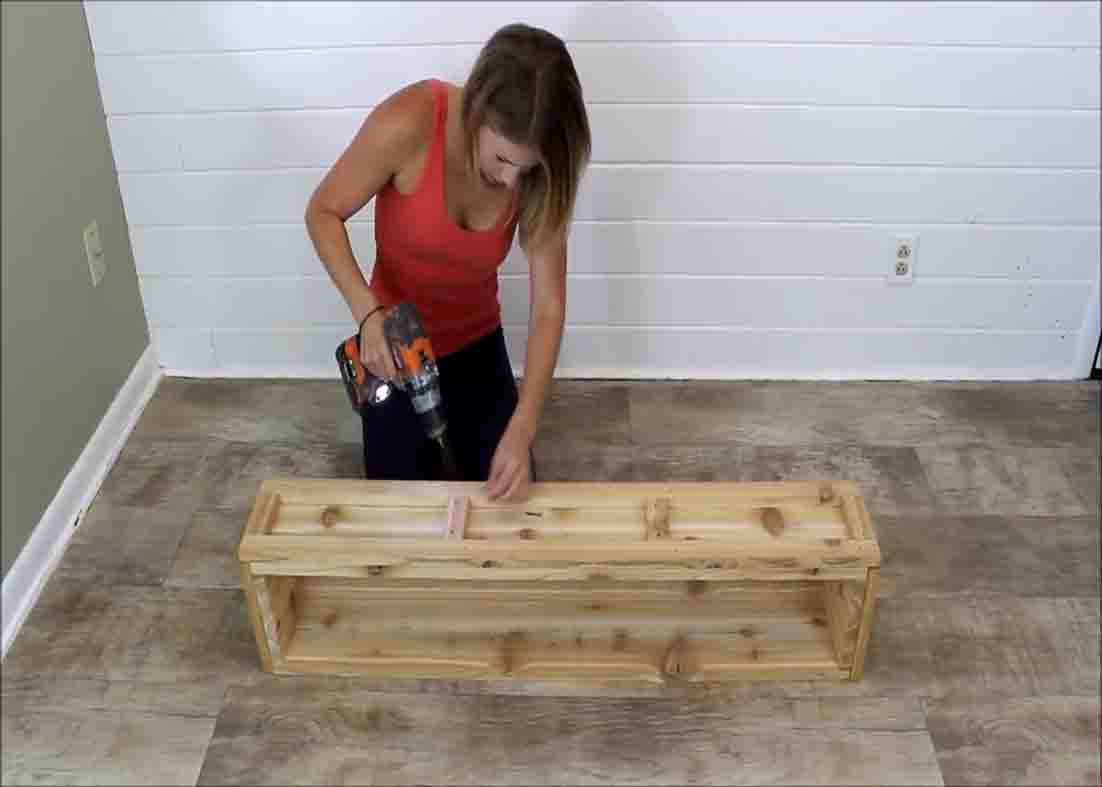
Get your lumber, then measure and cut the following pieces. For the 1″ x 2″ x 8ft lumber, you’ll need two pcs. 48″ long, eight pcs. 4 & 1/4″ long, and four pcs. 8 & 3/4″ long. For the 1″ x 8″ x 4ft, you’ll need three pcs. 46 & 1/2″ long and two pcs. 6 & 1/2″ long. Next, take three pcs. of 1″ x 8″ x 46 & 1/2″ boards and lay them out. Flip two of the boards up and place them flush against the other board, then secure them in place using trim screws. (Predrilling the holes can make the process easier.) Now, take two pcs. of 1″ x 8″ x 6 & 1/2″ pieces and slide them into place on both ends. Secure these as well using the screws. After this, flip the box on its side to make it easier to attach the trim.
[social_warfare]
Step 2
Take two of the 8 & 3/4″ pieces and attach them flush down the side. Make sure to keep 4 & 1/4″ of space in between the pieces. Repeat this on the other side. Now, take the two 48″ pieces, place them across the top, and secure using the screws. After this, all you have left are the small pieces. Place two on each end, sliding them, and secure with screws. Repeat this step on the other side. Place your last four pieces evenly across the top of your planter box, then secure with screws. Next, flip your box upside-down and drill some holes across the bottom to allow for decent drainage. After this, take your wood filler and cover all your screw holes. Once the filler had dried, sand the box down, and stain. Let it dry.
Easy $20 Window Planter Box Tutorial