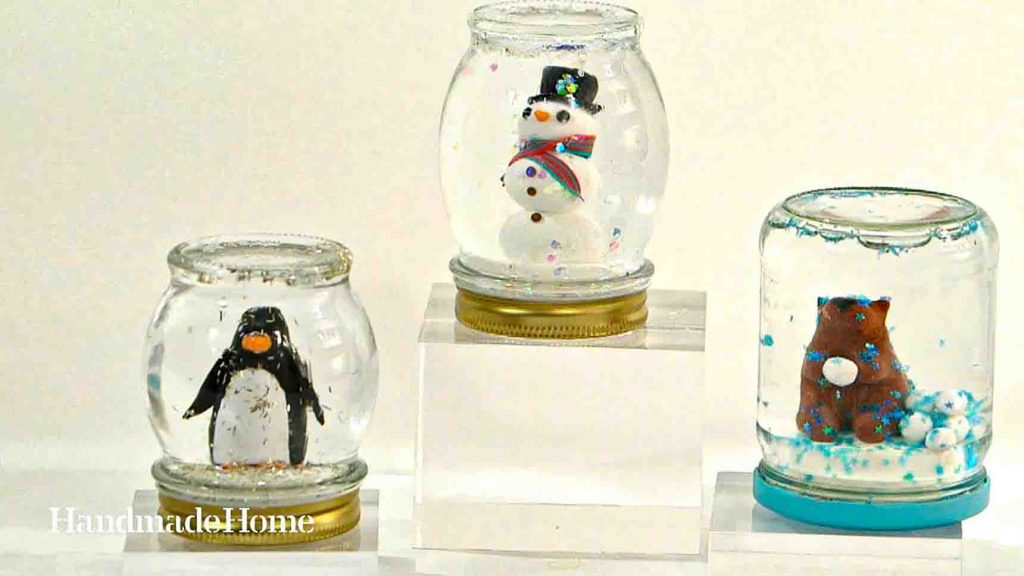
Growing up, snow globes are my absolute favorite during the holiday season. I mean, who doesn’t like playing with those floating glitters? Luckily, I never had to buy one this year because I found this DIY snow globe from Martha Stewart on Youtube! This Homemade snow globe is easy to assemble, and you can personalize the snowman to your liking. Watch the video tutorial below to learn the full instructions.
Materials:
- glass jar with a lid
- polymer clay
- rolling pin
- tin foil
- scissors
- clear nail polish
- glycerin
- distilled water
- glitter
- silicone sealant
Directions:
Step 1
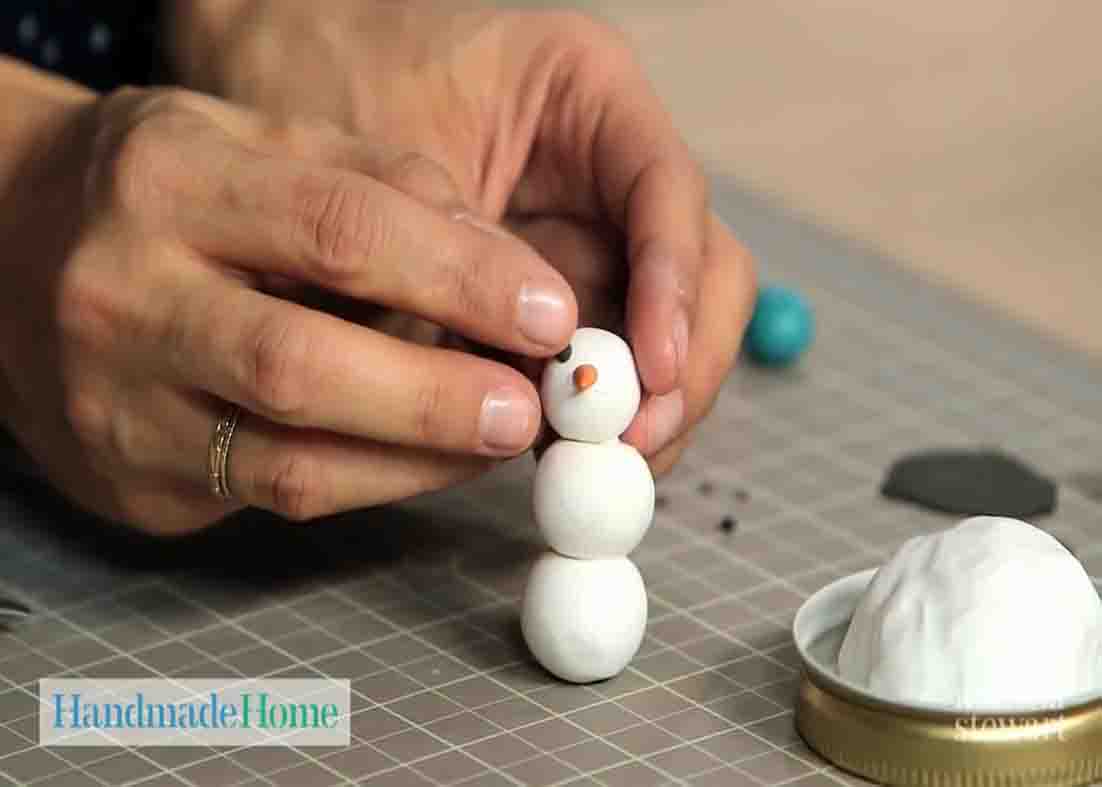
Take the lid of the jar and a ball of tin foil. Squeeze it tight and create a little lump that fits inside the lid. Take a piece of polymer clay, roll it out into a ball, then flatten it with a rolling pin. Wrap this around your tinfoil lump. Now, to make a snowman that will go with the snow globe, roll three white balls in descending sizes. Put a little dot of glue on the biggest ball and adhere it to the medium-sized ball, and the third ball on top of the medium one, squishing it down. Next, take a little piece of orange clay and roll it in your fingers until carrot shape. Snip off the carrot to make the little nose. Put a little dot of glue and stick it in the center of the snowman’s face. For the snowman’s eyes, roll tiny black pieces, put a dot of glue and adhere them in place. For the scarf, roll out one skinny string of blue and red. Squish them together, snip them in half, and bring them together. Roll them out, trim off the end, and wrap it around the snowman’s neck. Now for its top hat, take a piece of black clay, roll it out flat, and cut a little circle out. Adhere it to the snowman’s head, then place a cylinder-shaped black clay on the top of the hat.
[social_warfare]
Step 2
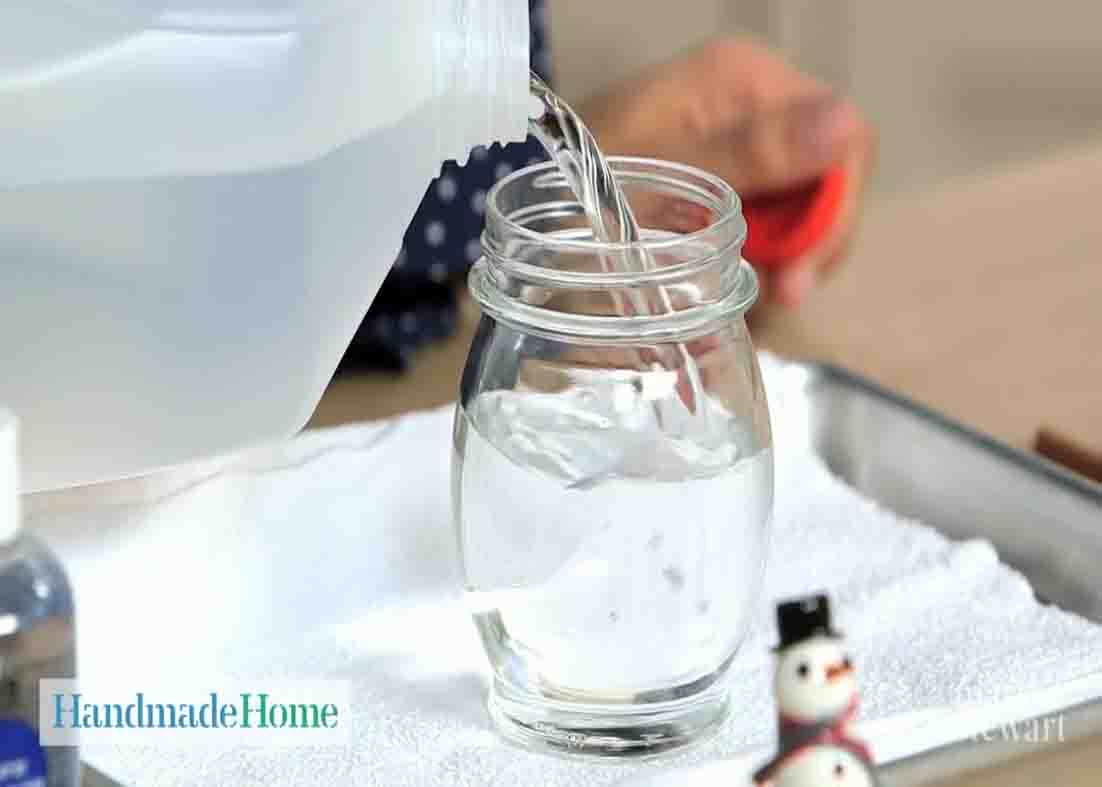
After you finish your snowman, adhere it to the top of his snowy mound (tinfoil wrapped with white clay.) Take a piece of tin foil and your jar and shape the tin foil around your jar. Remove the jar, place the snowman inside, and put them in the oven. Bake at 275 degrees F for 20 minutes. Once the snowman is ready, apply a liberal amount of glue to the base of the snowman and press it to the center inside of your lid. Paint your snowman with clear nail polish and allow it to cure for 48 hours. Now to finish the snow globe, fill the jar almost to the top with distilled water, add a couple of drops of glycerin, then add glitters. Mix it up, then add a bit of the waterproof silicone glue around the lip of the jar to make sure it doesn’t leak. Add the snowman and twist on the lid until tight.
Easy DIY Snow Globe Tutorial


