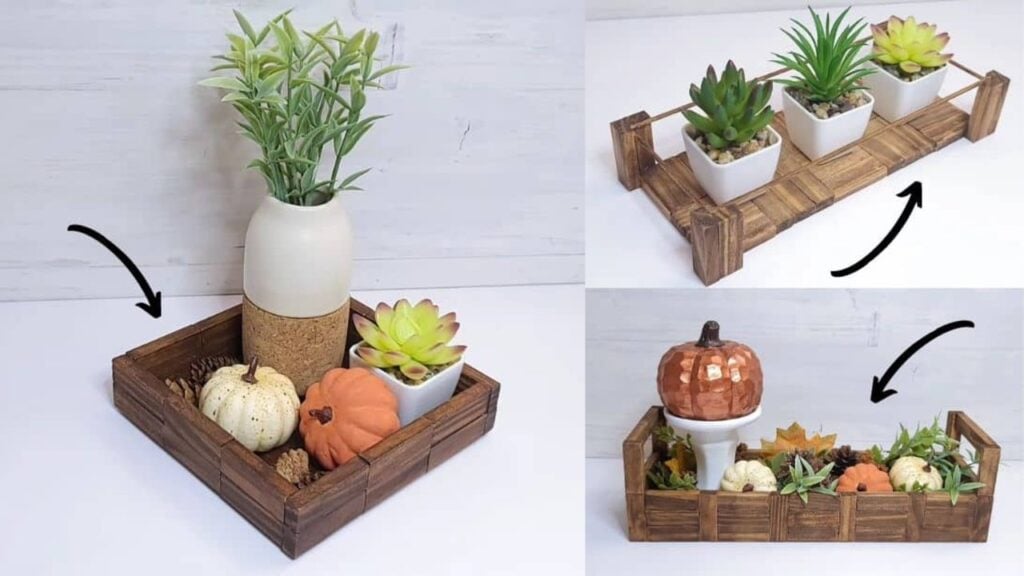
This faux high-end DIY project by Crafting With JC on YouTube turned out so adorable and can be used for any decor or plants! What I love about this project is that it only needs tumbling tower blocks from the Dollar store and nothing else, of course, you’ll be needing some basic craft tools, but other than that, these planters and trays are purely made out of wooden blocks. Each tray and planter is also super simple and easy to build, and in just a few minutes, you can have a rustic and pretty tray that costs only around $1.
Materials:
Decorative wood tray
- 24 tumbling tower blocks (Dollar Tree)
- 6 super jumbo craft sticks
- Wood glue
- Waverly Antique Wax
Rustic wood tray
- 38 tumbling tower tlocks (Dollar Tree)
- 3 bamboo skewers
- Wood glue
- Waverly Antique Wax
Wood planter box
- 74 tumbling tower tlocks (Dollar Tree)
- 17 jumbo craft sticks
- Wood glue
- Waverly Antique Wax
Directions:
Decorative wood tray
First, glue together 3 blocks on their short side, then create a total of 8 rows, and glue every 2 rows together on their long sides. Create a square frame using the rows and with them placed standing up, then glue them together in place, lay 6 craft sticks close together, place the frame blocks on top, trace the shape, and trim the sticks. Lay down the craft sticks side by side, then hold them together in a place by gluing small sticks on top of them, then flip the whole piece over, apply glue on the outer sides of the base, and adhere to the frame blocks. Stain or paint the whole piece or leave them as is, and you’re all done, you can use it as a tray for your decor or keys.
[social_warfare]
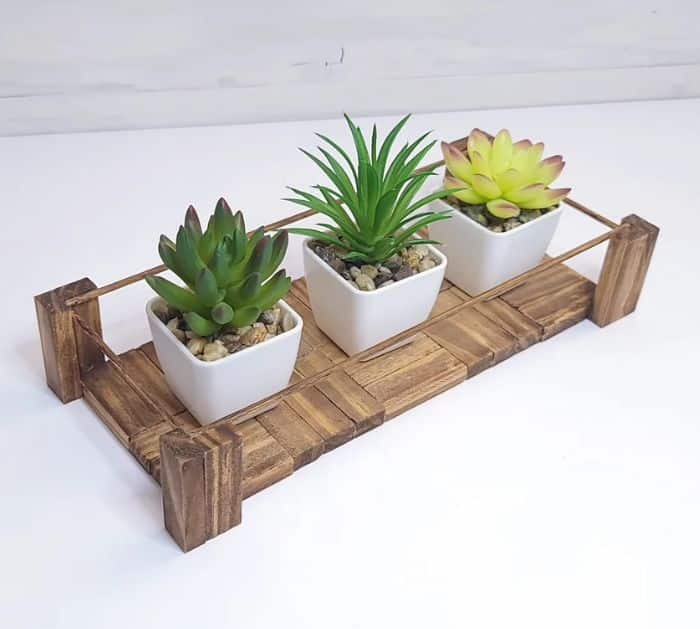
Rustic wood tray
Glue 3 blocks together on their long side, then make 10 pieces of this and start gluing them together on their side alternating the directions making 5 in a row. You can paint or stain the tray, then glue 2 more blocks together on their long side creating an “L”, and make a total of 4 sets. Glue the 4 brackets on all 4 corners of the tray, then stain them as well, measure skewers on all 4 sides of the tray, trim them accordingly, and glue them in place. You’re all done and you can now place your plants or succulents inside.
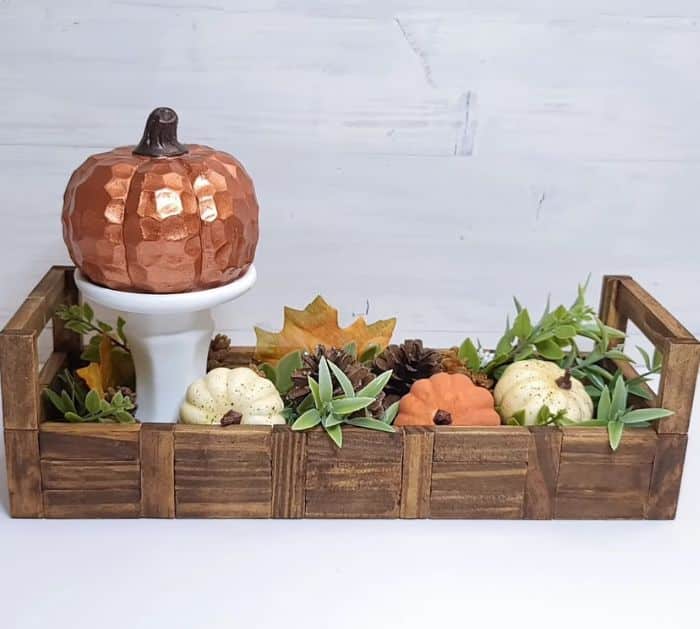
Wood planter box
Glue 3 blocks together on their long side and create a total of 14 sets, then glue together 5 sets in a row separated by a single block in between, and add single blocks on each end as well. Make a total of 2 sets of this, for the leftover blocks, glue 2 of them together, then assemble the pieces to form a rectangle, and glue them in place. To create the base, lay the craft sticks, then place the box on top, trace the inner area, and trim it down. Stain or paint the whole piece, then start gluing 6 pieces of blocks on each inner long side, and adhere the trimmed craft sticks on top. Trim a thin piece of the craft stick to fill the gap, then grab 4 blocks, and create a “C” shape for the handle. Make another set, then glue the handles on each side of the tray, and you’re done! You can use this as a planter box, decor organizer, or anything you want.
*All image credit belongs to Crafting With JC via YouTube. Follow and subscribe to her channel for more!
3 High-End Planters & Trays Using $1 Tumbling Tower Blocks


