Halloween is just around the corner! If you’re planning to attend a party—whether solo, as a couple, or with a friend—and you’re searching for cute and creative matching costume ideas you can easily make at home, then you’re in the right place.
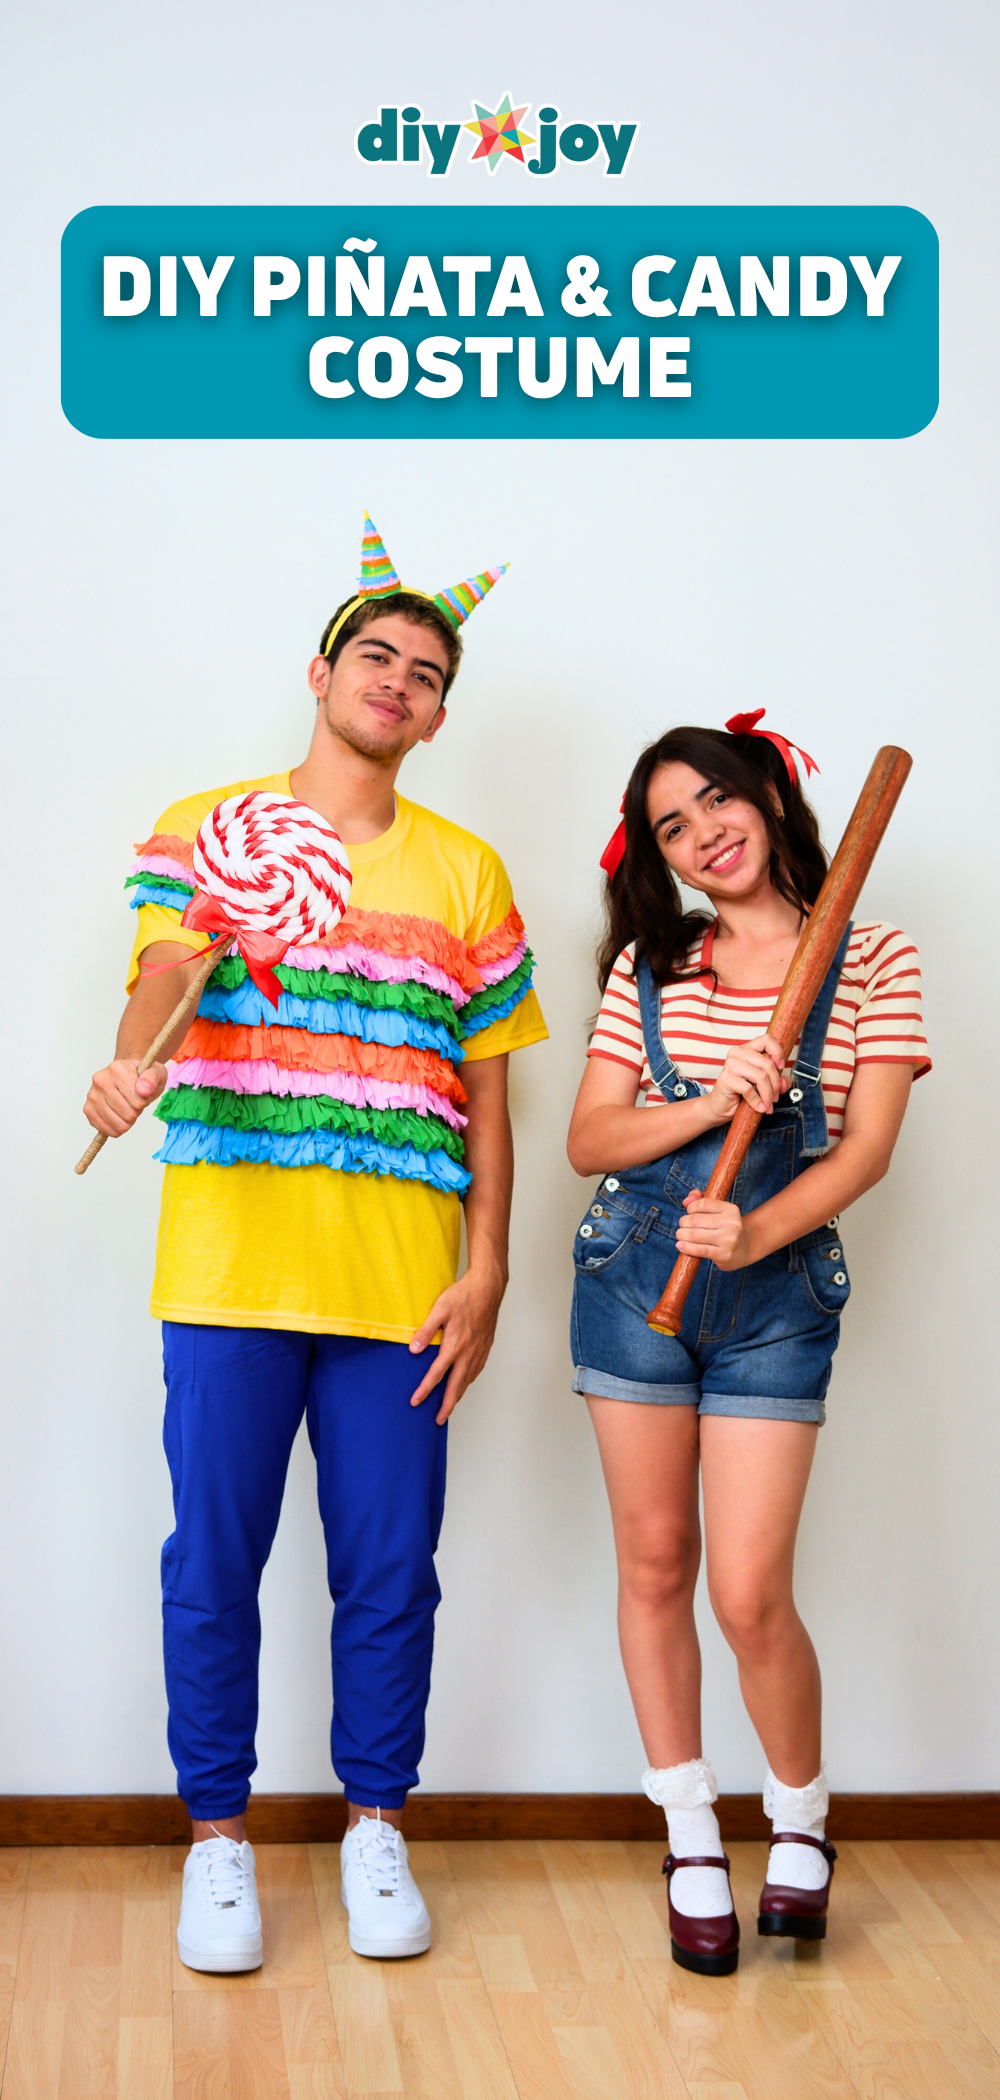
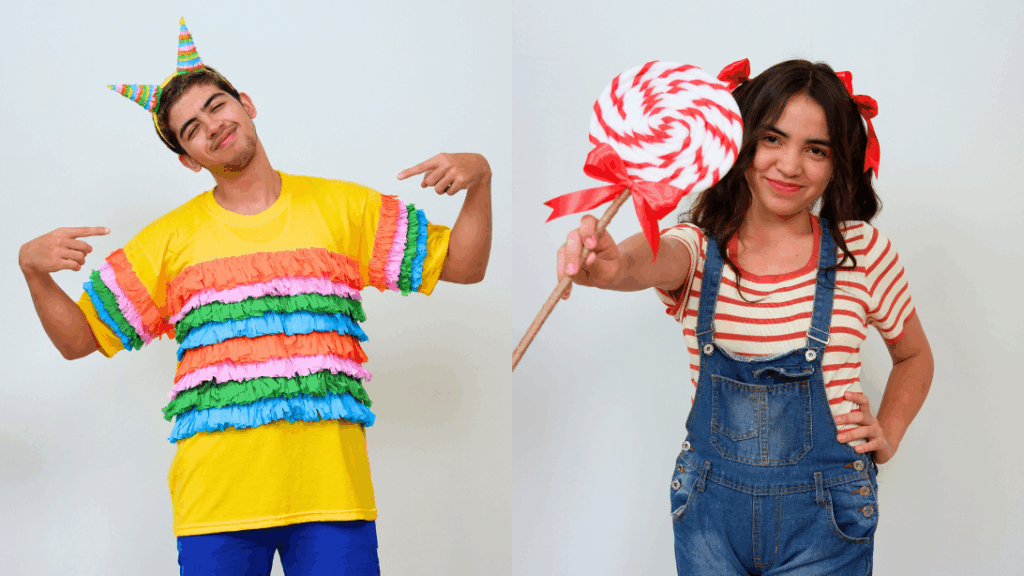
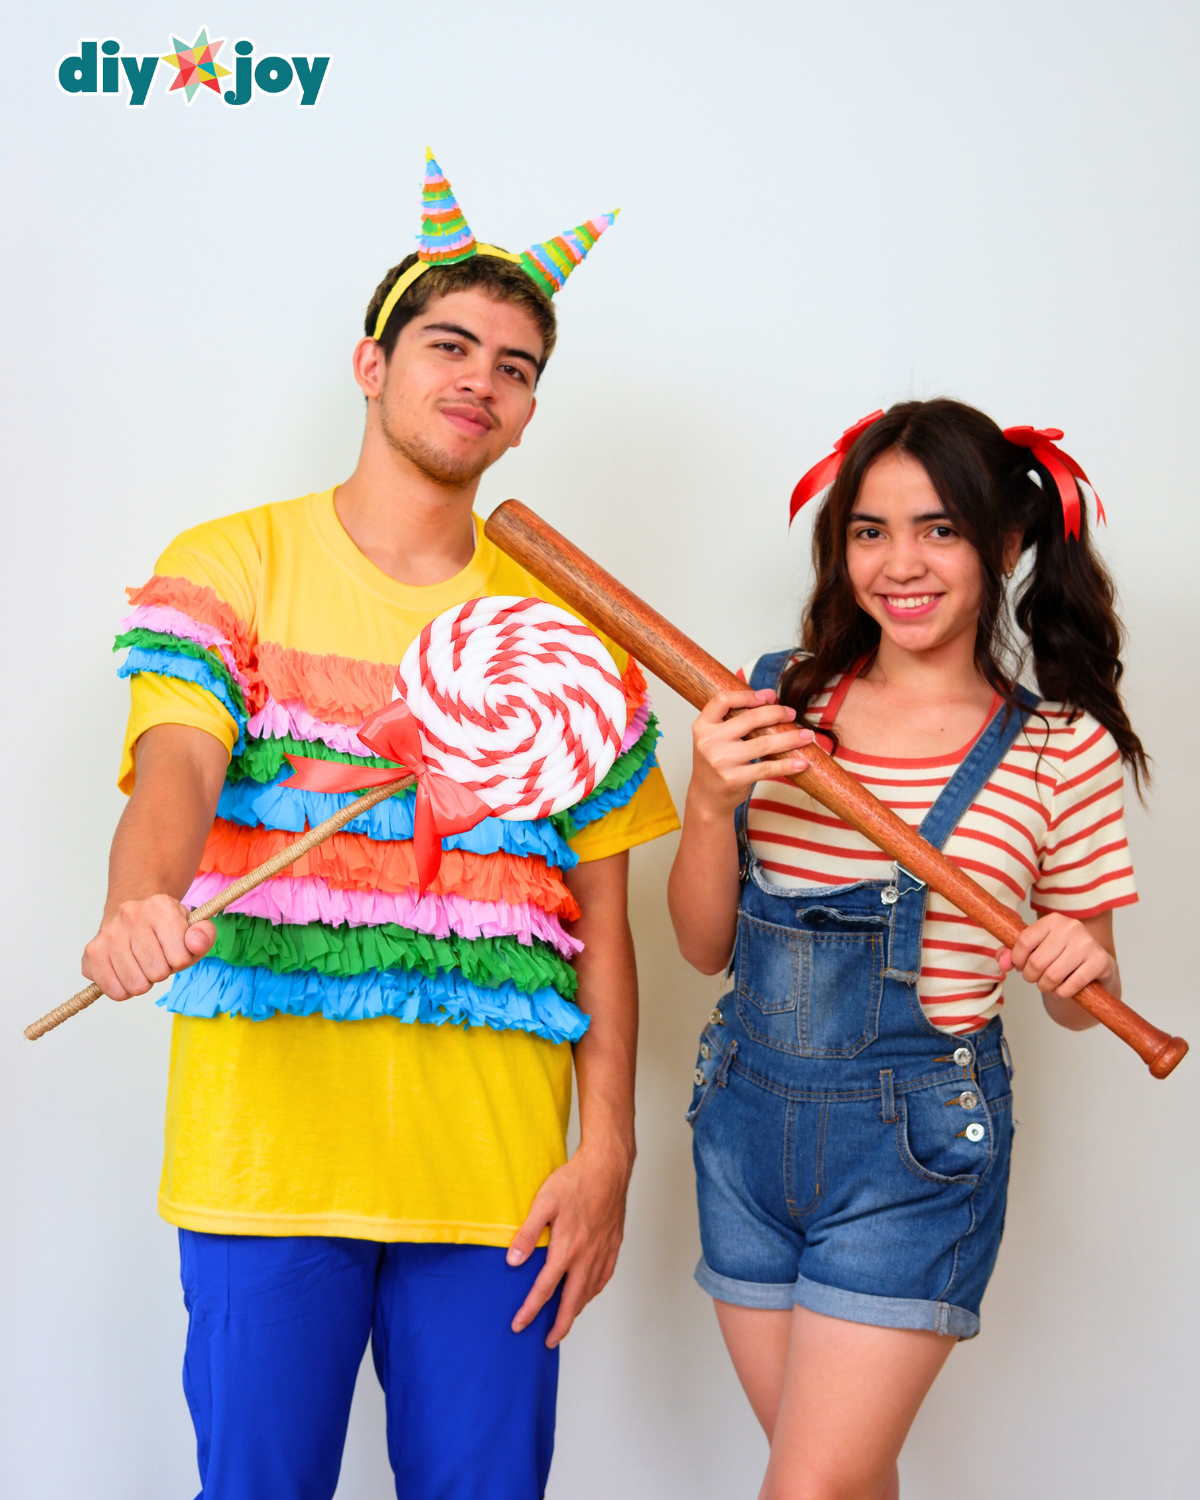
This DIY piñata and candy costume is the perfect last-minute Halloween idea that’s both fun and affordable to recreate. The materials you’ll need are simple and easy to find, and the finished look is guaranteed to get everyone’s attention.
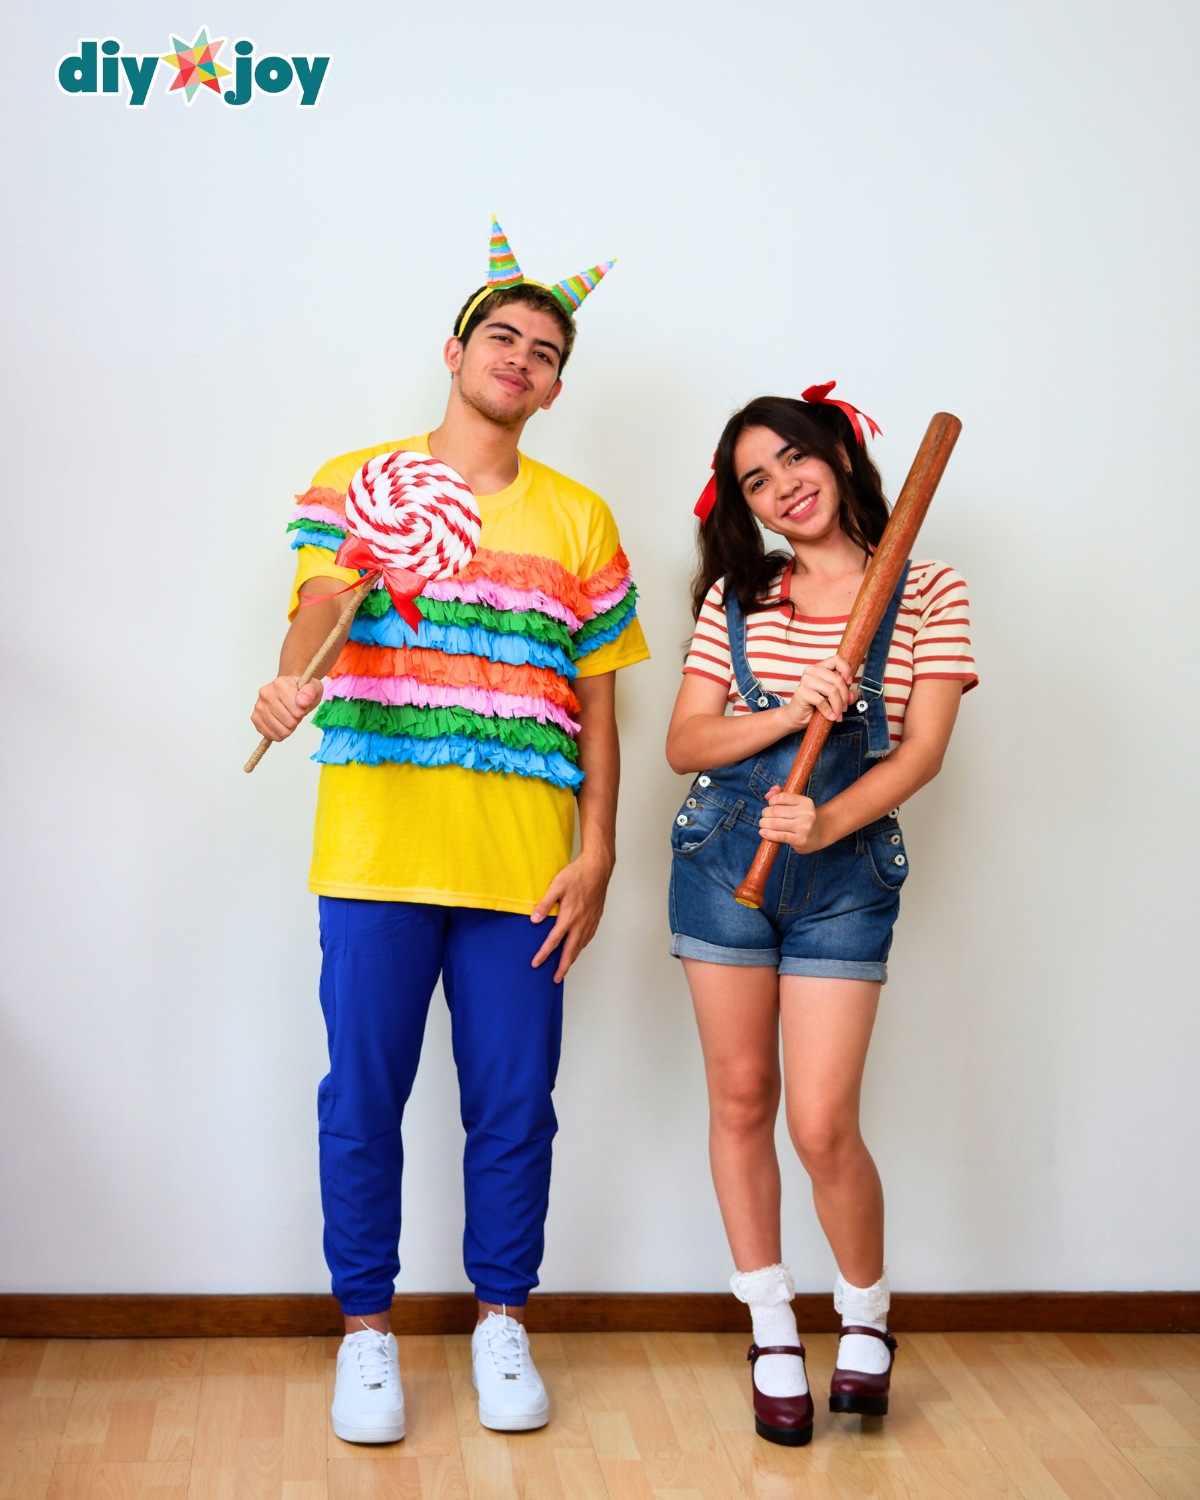
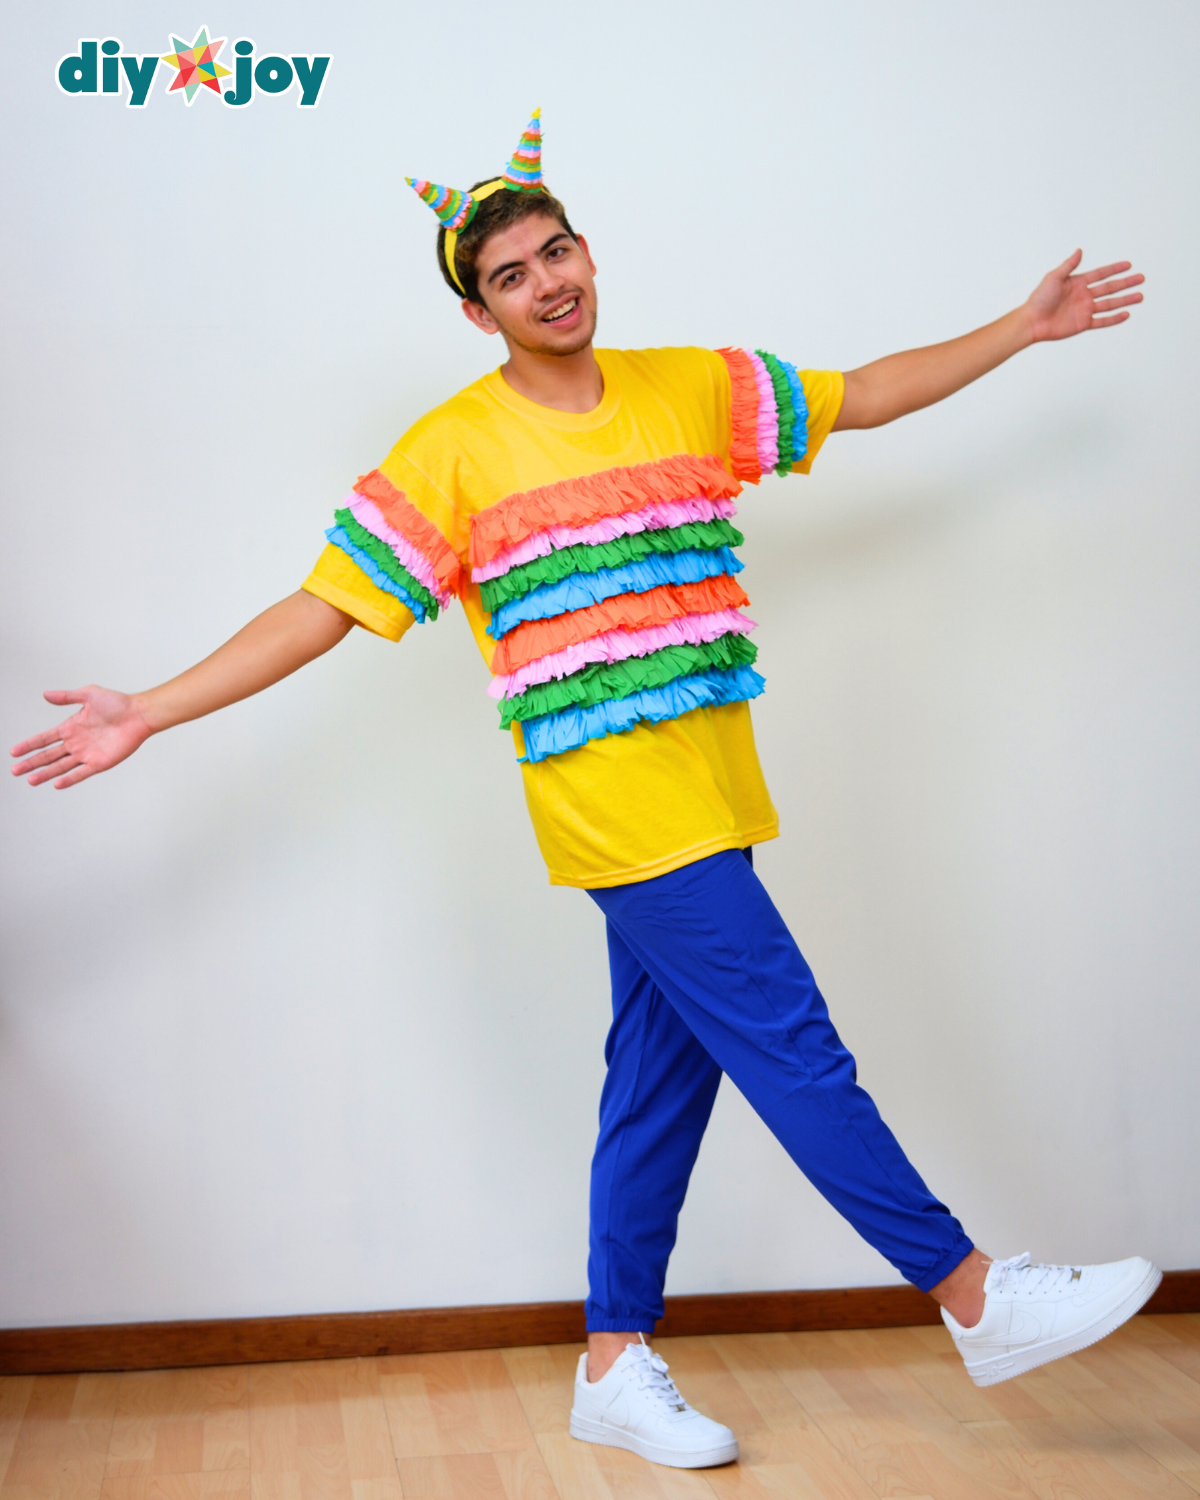
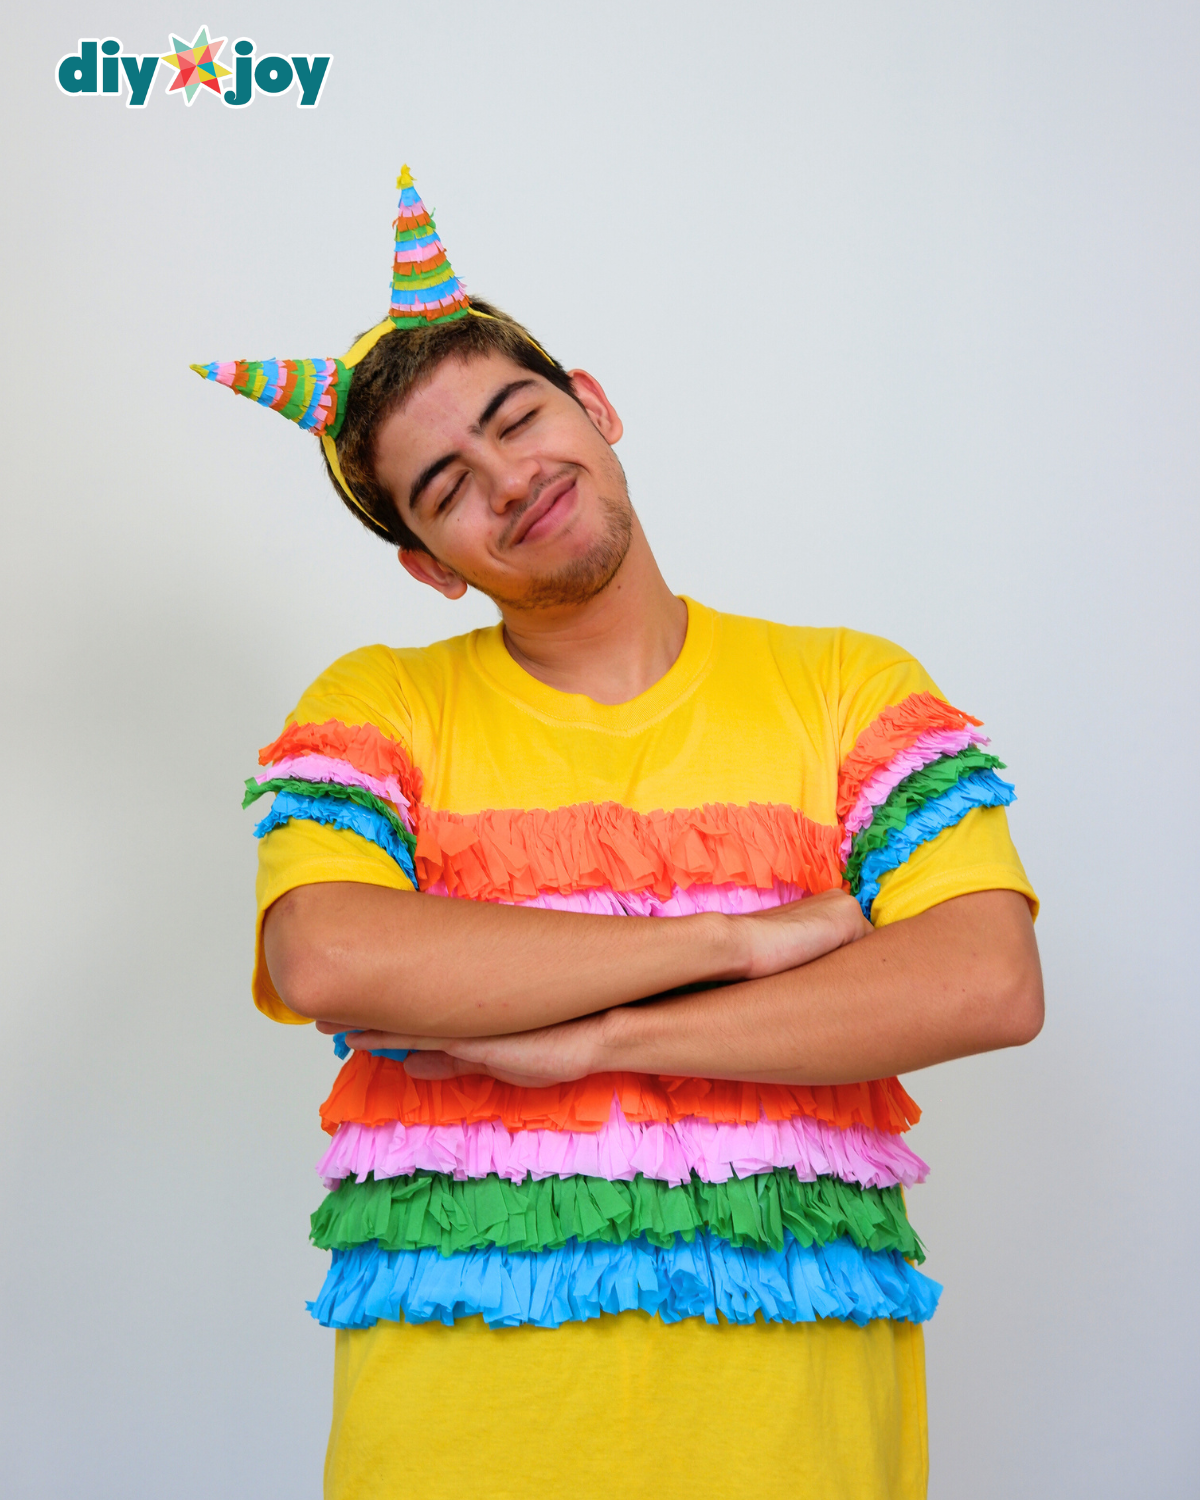
The piñata costume features bright crepe paper fringes that you can easily attach to a masking paper base, making it sturdy enough to dance and party in all night! The best part? You don’t have to ruin your shirt to make it. The paper backing peels off effortlessly when you’re done celebrating, leaving your outfit perfectly intact.
RELATED: 30 Creative DIY Halloween Costume Ideas
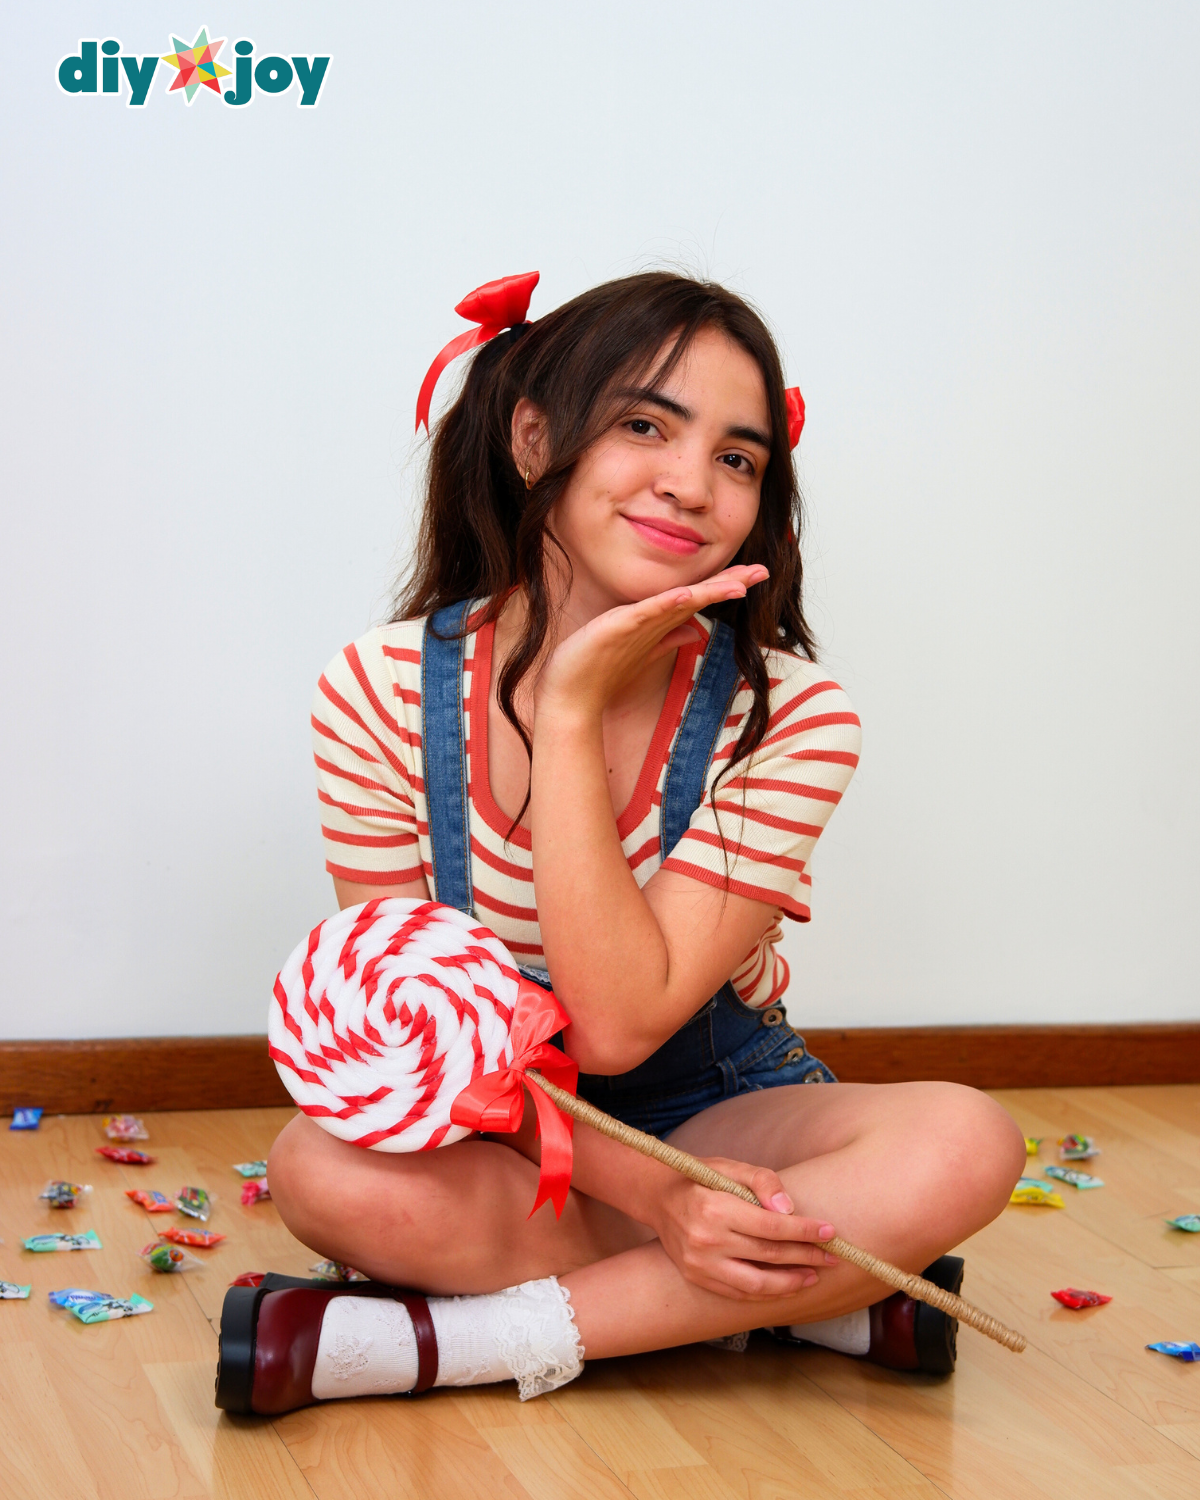
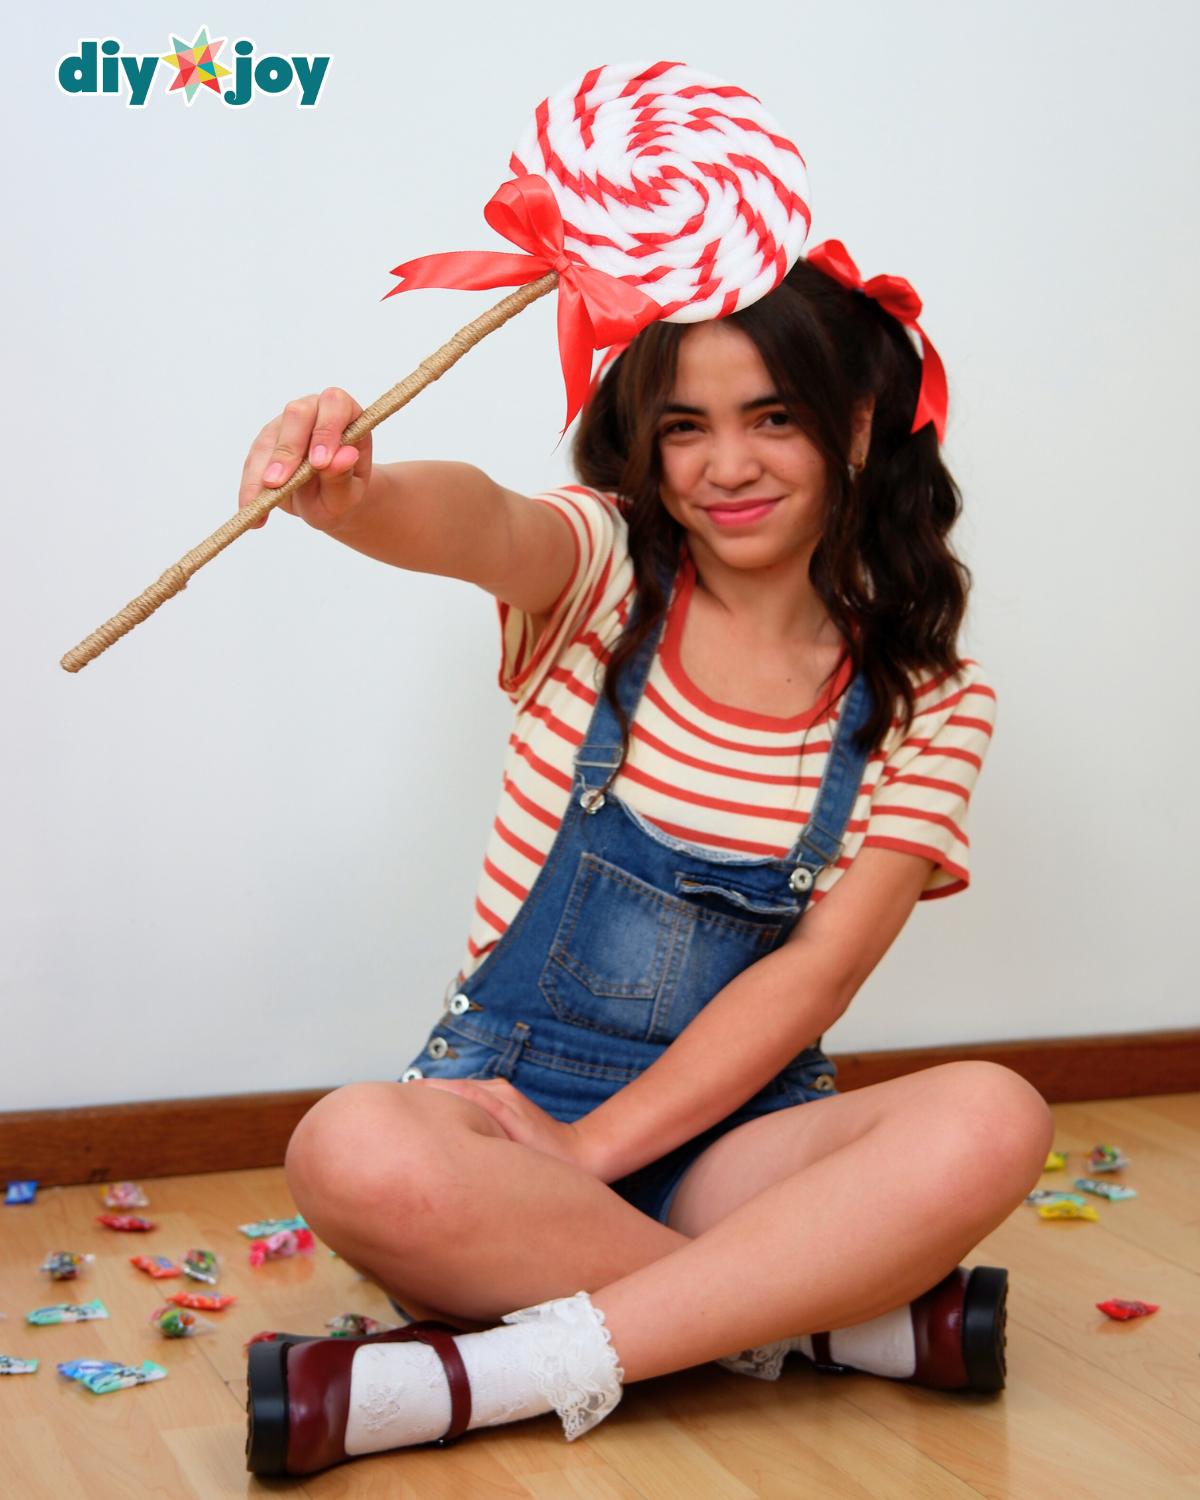
The matching candy costume is equally adorable. Its highlight is a giant swirl lollipop prop that completes the sweet and playful vibe. To make it even more fun, the candy costume wearer can carry a baseball bat as a prop—ready to “hit” the piñata for a comic touch!
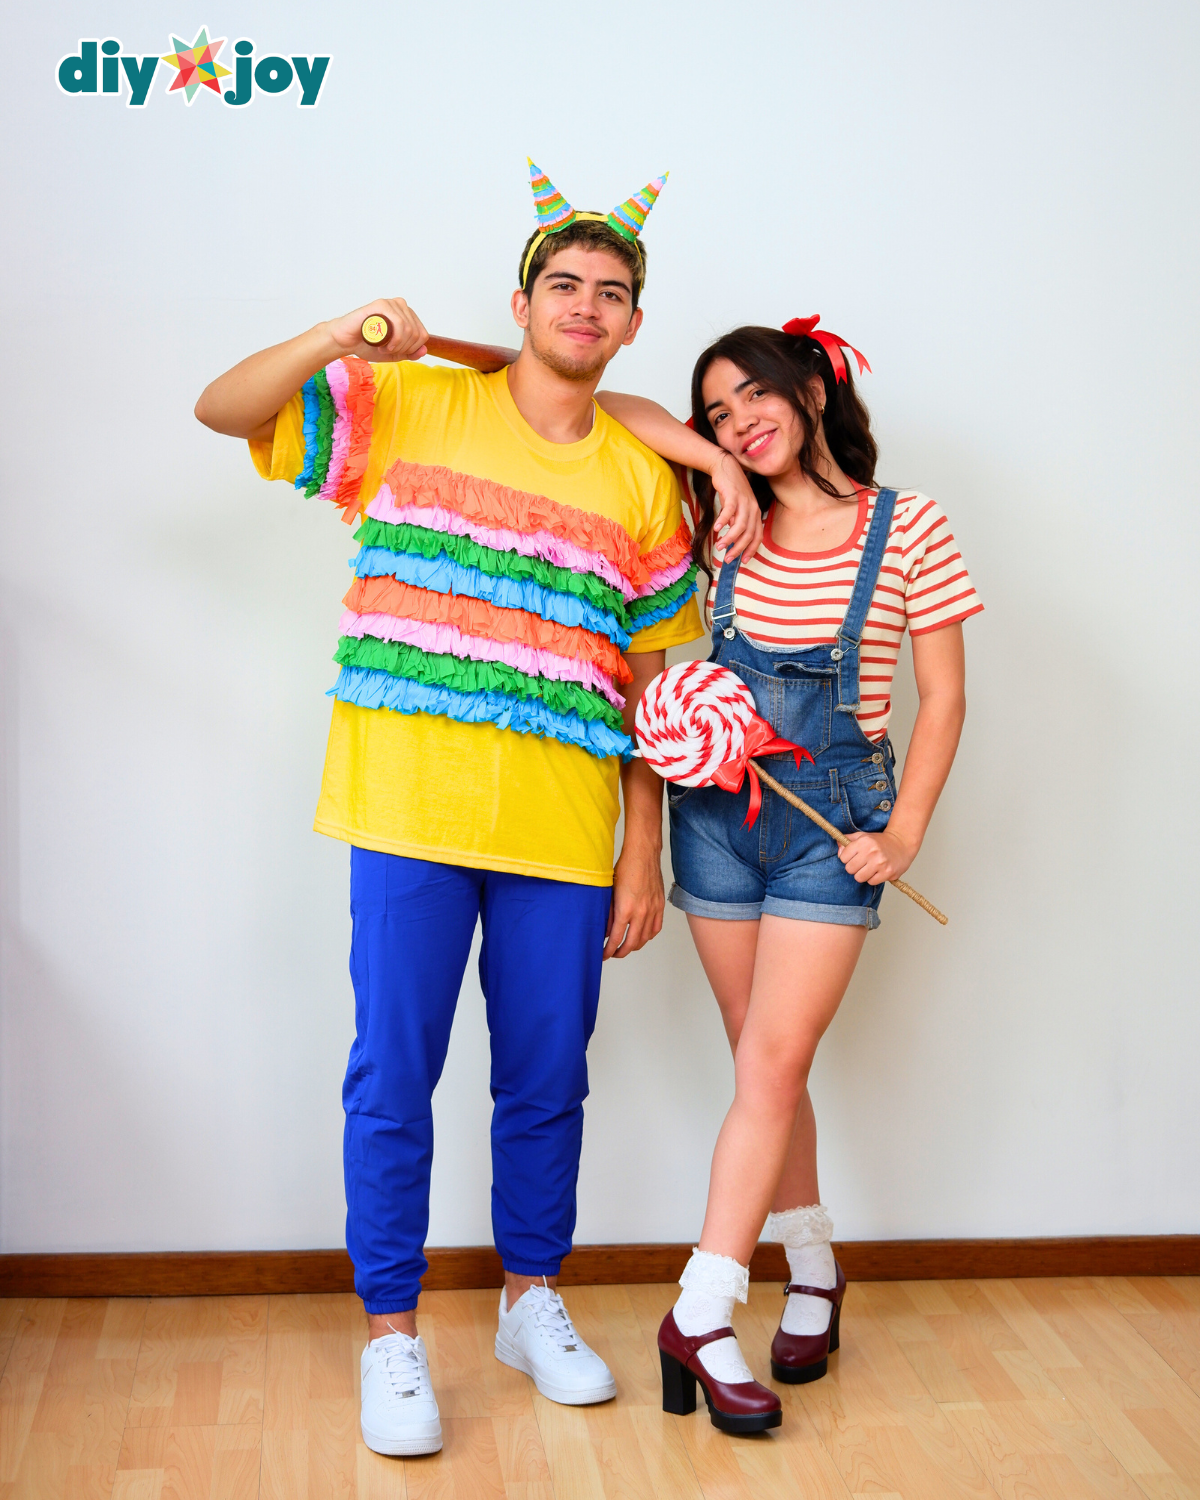
This costume pair works perfectly for couples, siblings, or best friends, and you can easily switch it up to fit anyone. Turn overall shorts into pants, or swap bright blue joggers for shorts or a skirt—it’s completely customizable depending on who’s wearing it.
Follow the step-by-step tutorial below to learn how to make both the piñata and candy costumes from scratch. I promise, the results will be irresistibly cute and guaranteed to make you the hit of any Halloween party. You can read along or craft as you go while watching the video tutorial below.
What You’ll Need for the Piñata and Candy Costume
How to Make a Piñata Costume
Piñata Shirt and Headdress
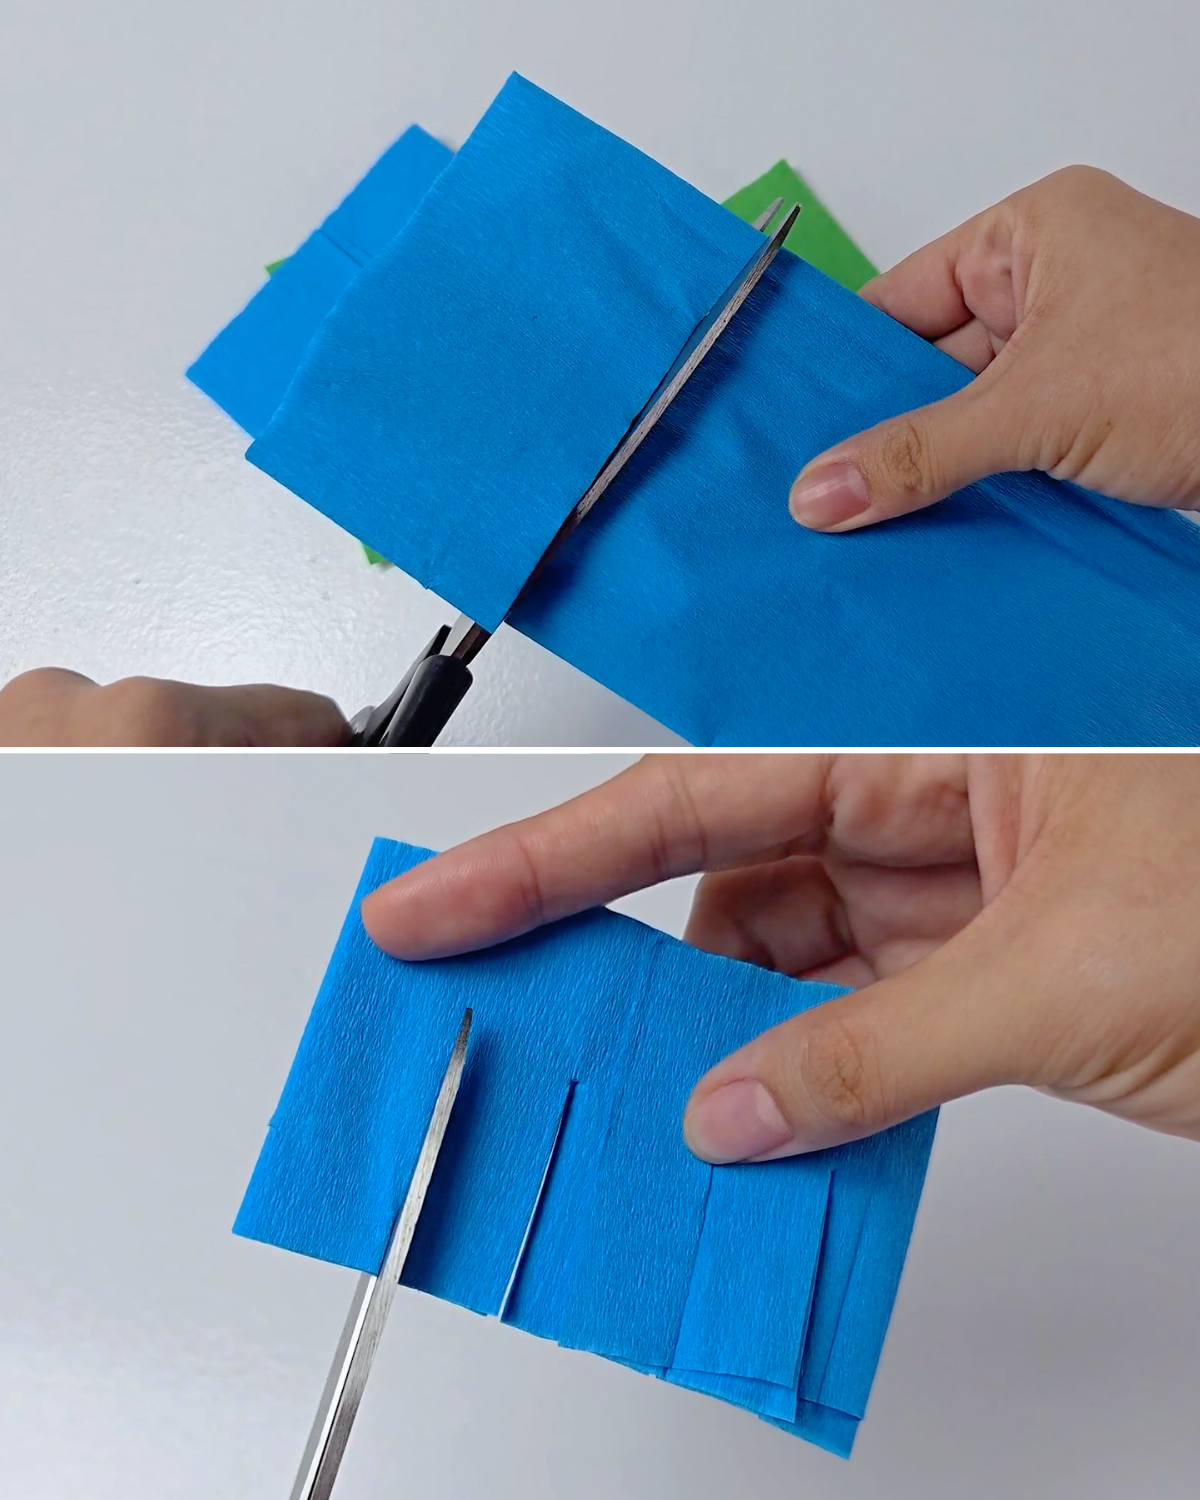
Step 1: Prepare the Crepe Paper
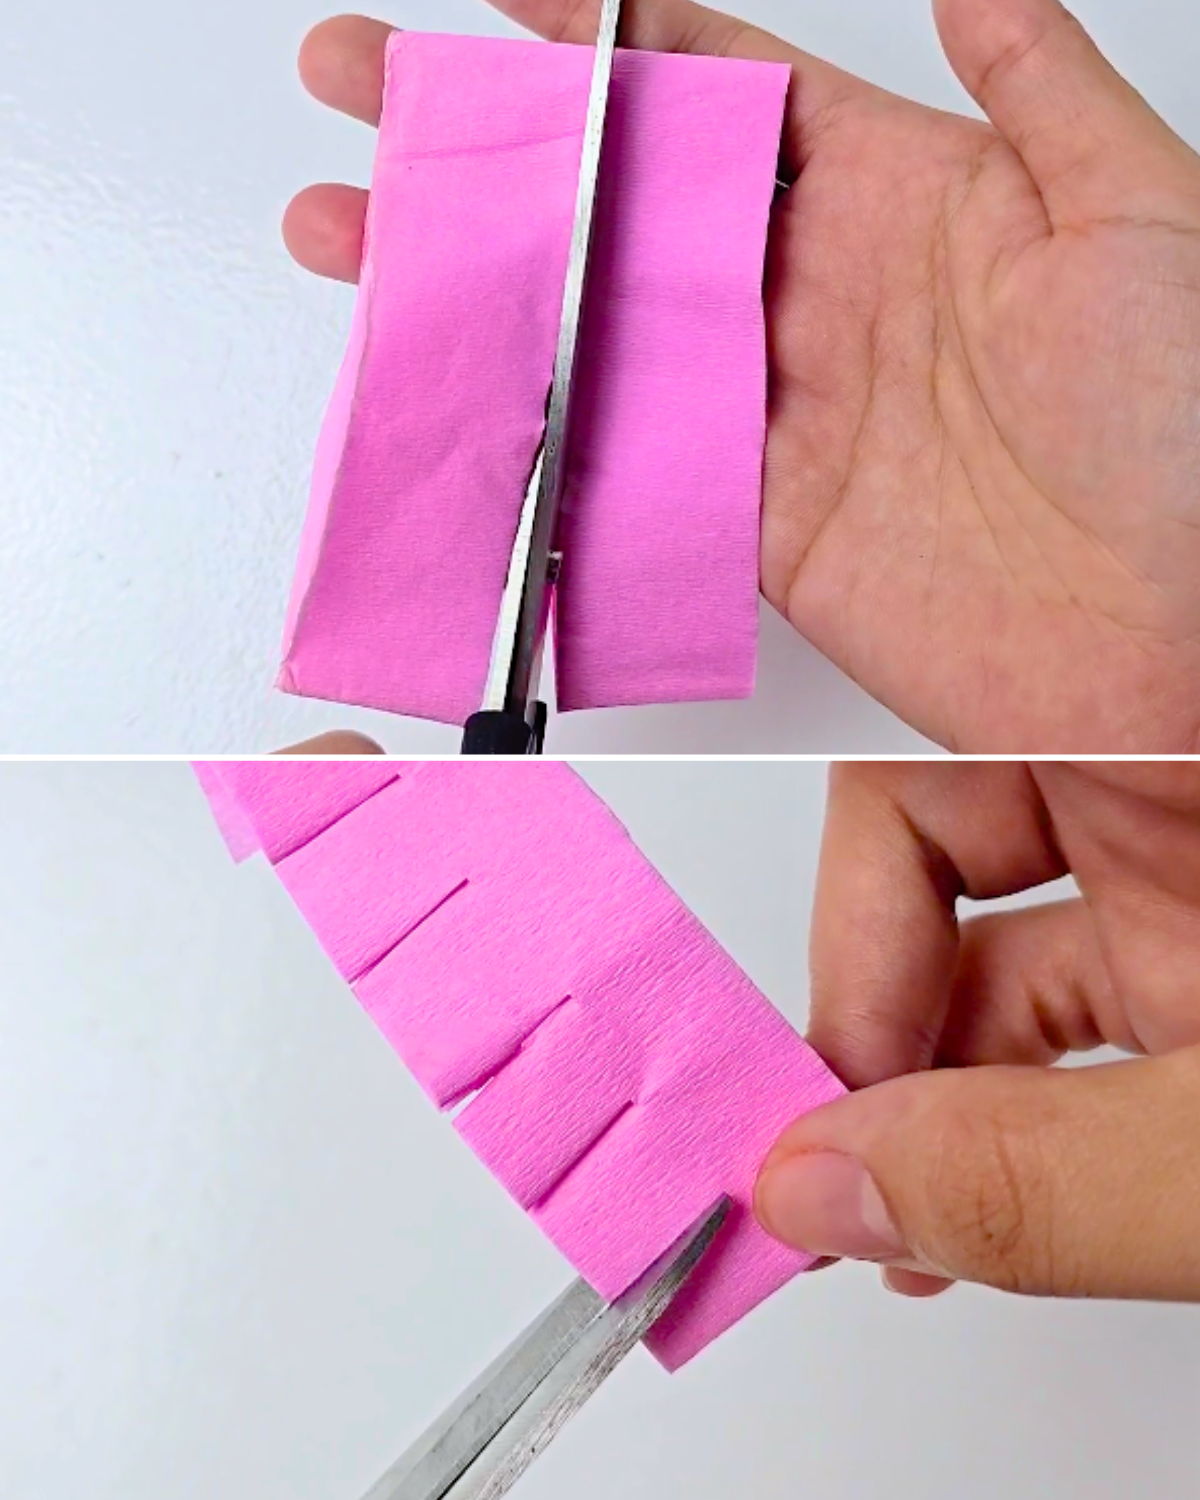
Gather your assorted crepe papers and cut them into 5-inch-wide strips. Then, cut fringes or small notches along the bottom edge to create texture and movement.Step 2: Mark and Gather the Crepe Paper
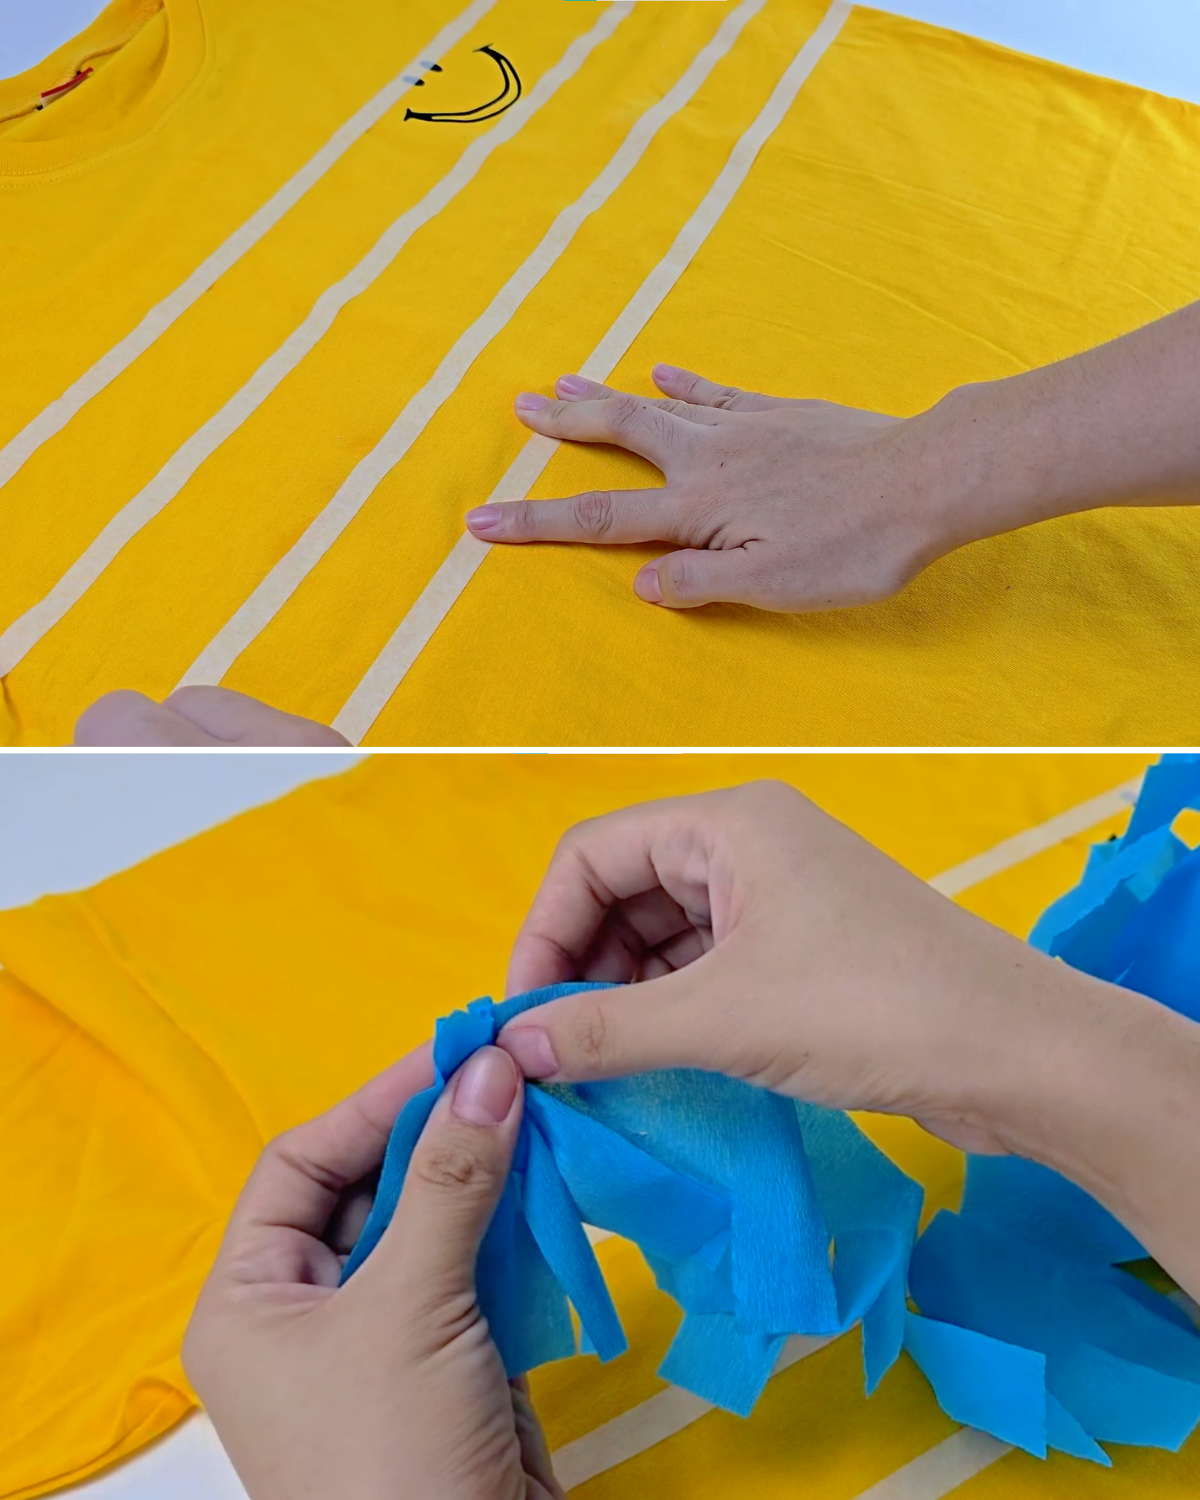
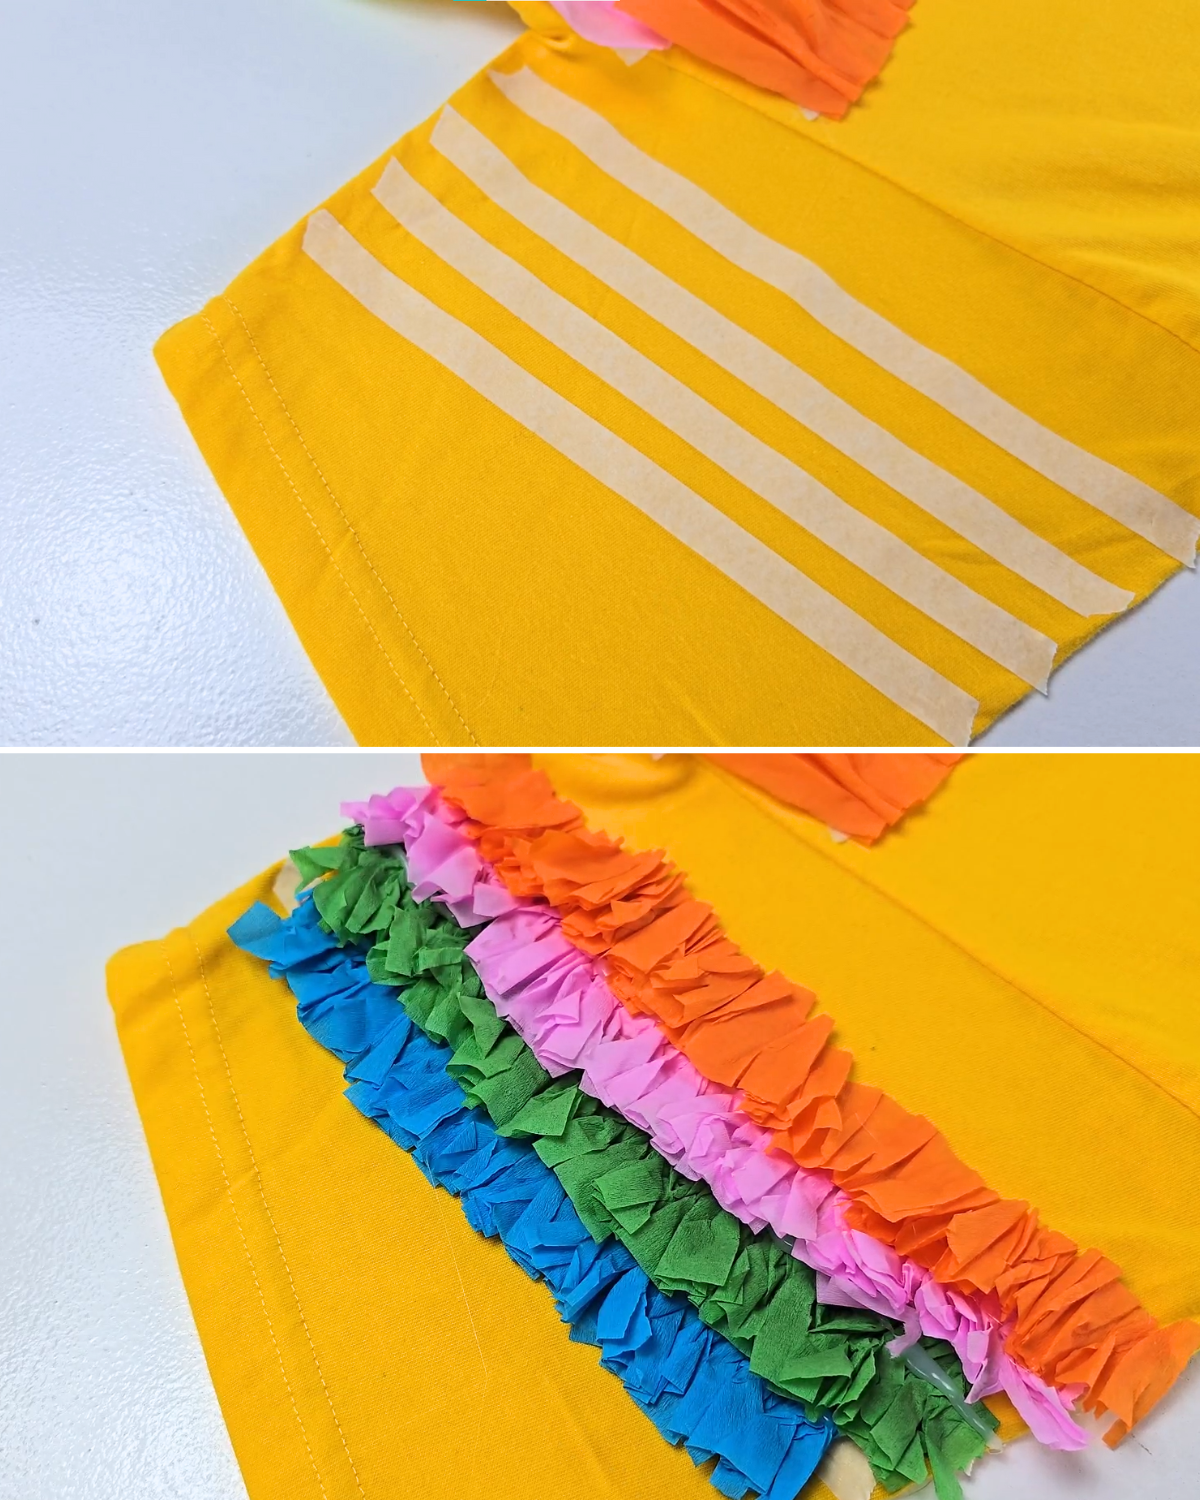
Use masking tape to mark where each fringe layer will go on the front of your shirt. Then, unfold the crepe paper strip and gently gather it along the top edge to prepare it for attaching.Step 3: Attach the Crepe Paper Layers
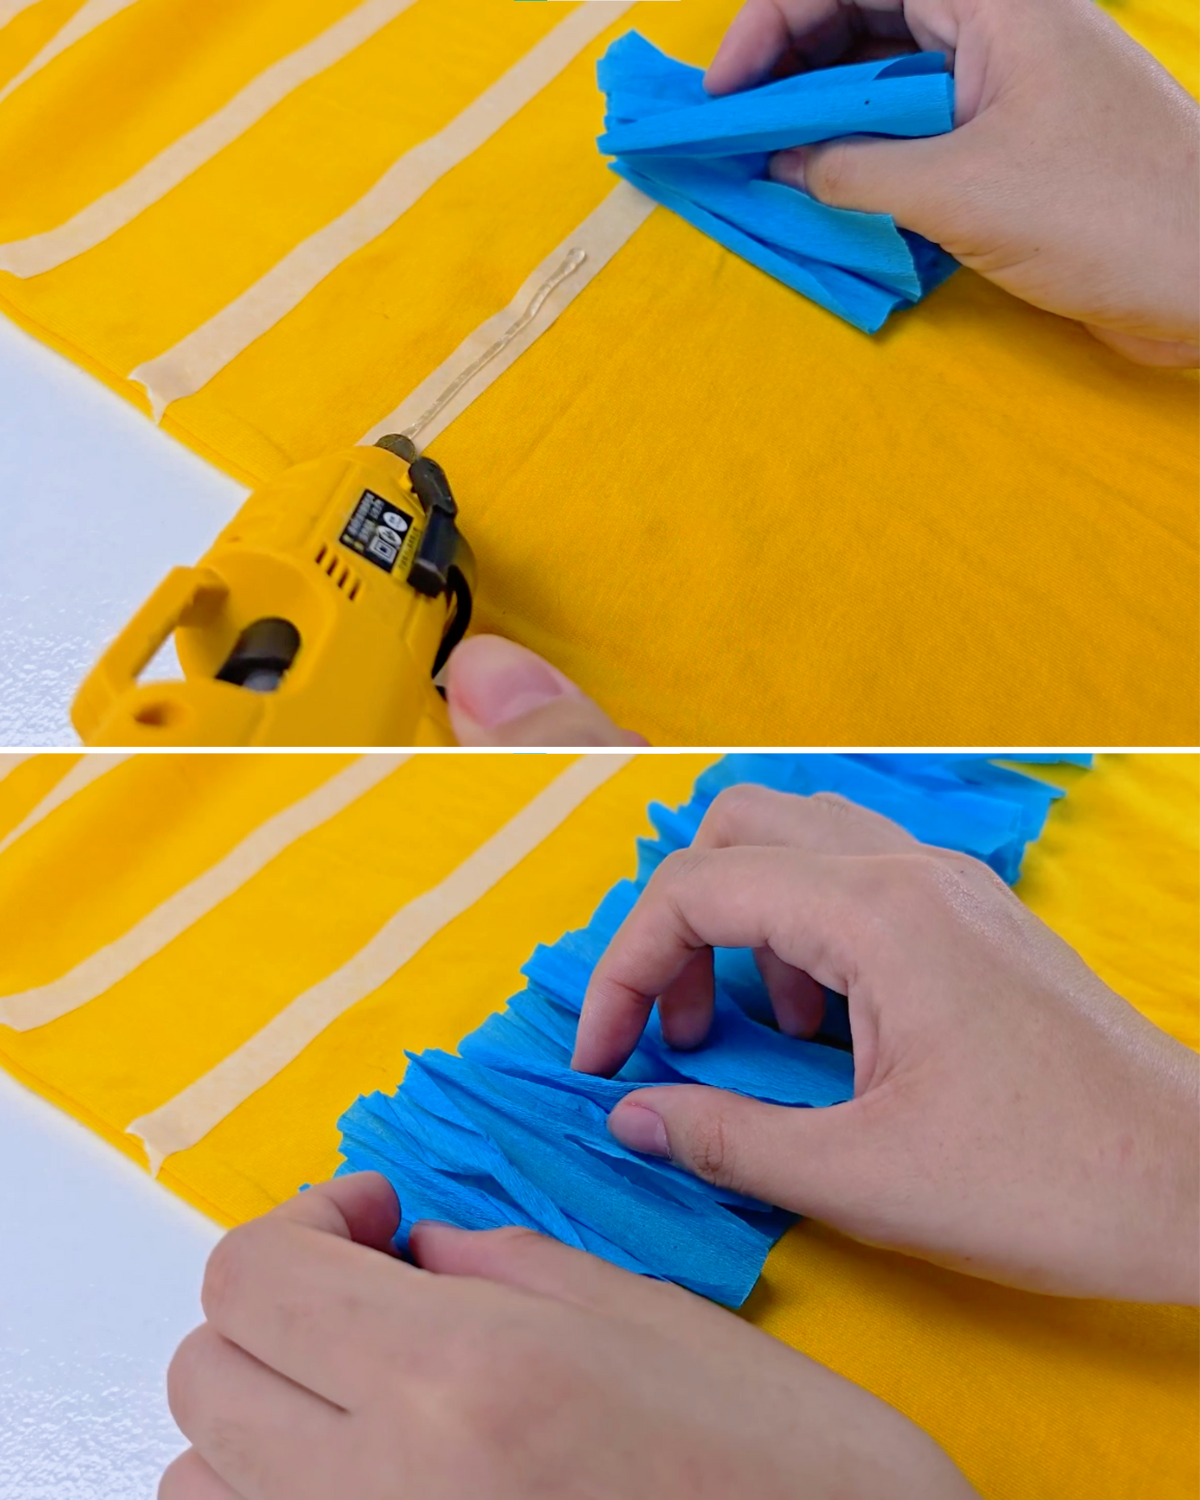
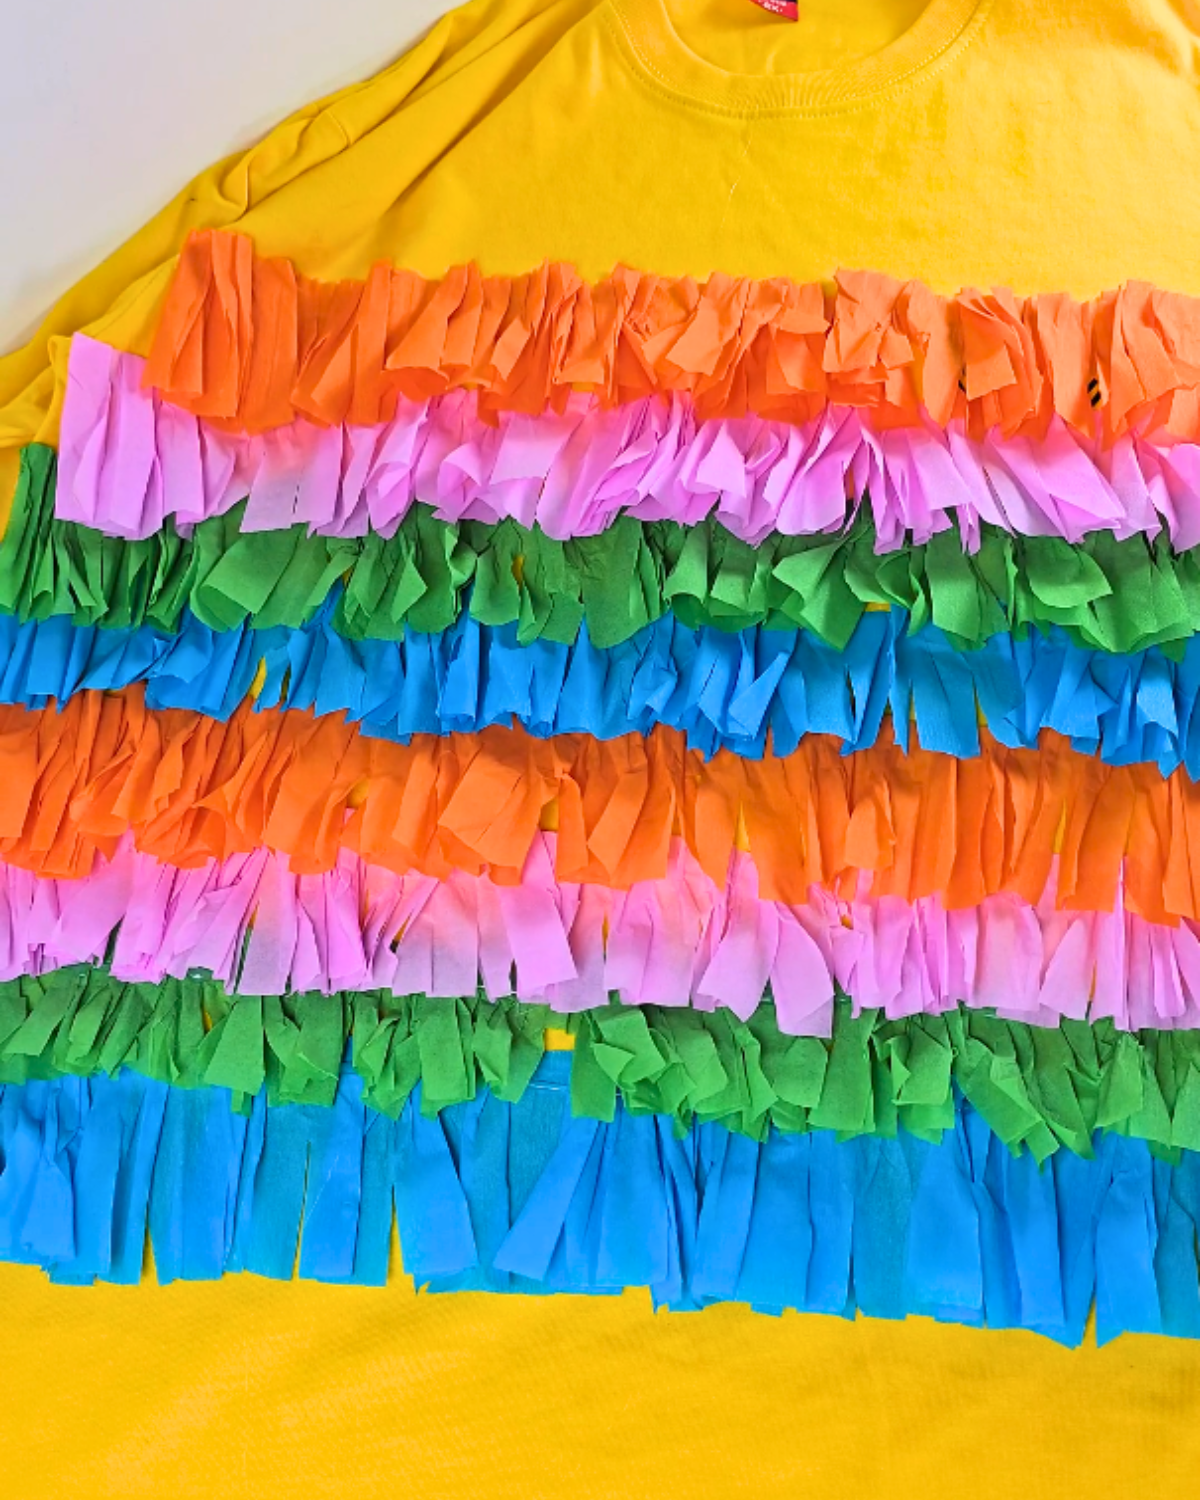
Apply hot glue in small sections over the masking tape, then carefully press the gathered crepe paper onto the shirt. Continue this process from the bottom layer up to the top. For the next layer, use a different color of paper to create a colorful, layered effectHere’s how it should look when done!
Step 4: Add Fringe to the Sleeves
Follow the same process as the front of the shirt, but cut the crepe paper shorter—about half of the original 5-inch width.Note: Mark the Sleeve Fringe Placement
Since the fringes are shorter, mark the sleeve with masking tape at closer intervals to ensure even spacing for each layer.Step 5: Cut the Cardboard for the Headdress
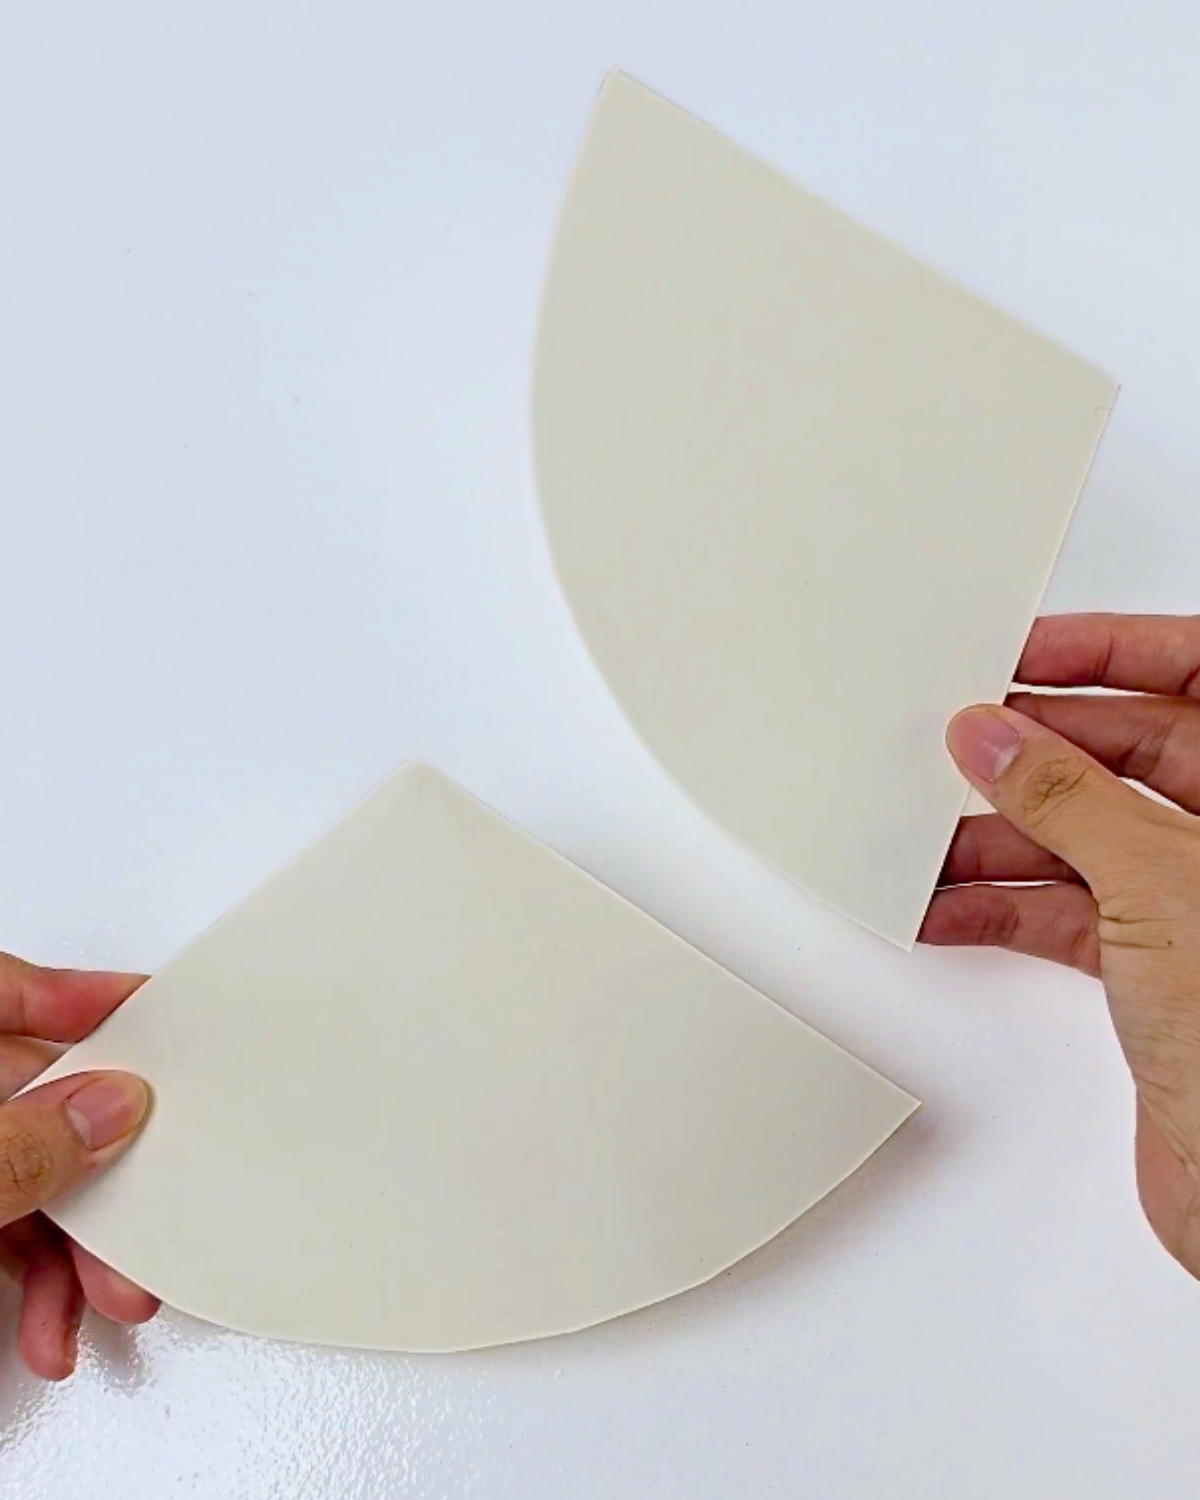
For the matching headdress, cut the cardboard into two right-angled triangles.Step 6: Form the Cone Shape
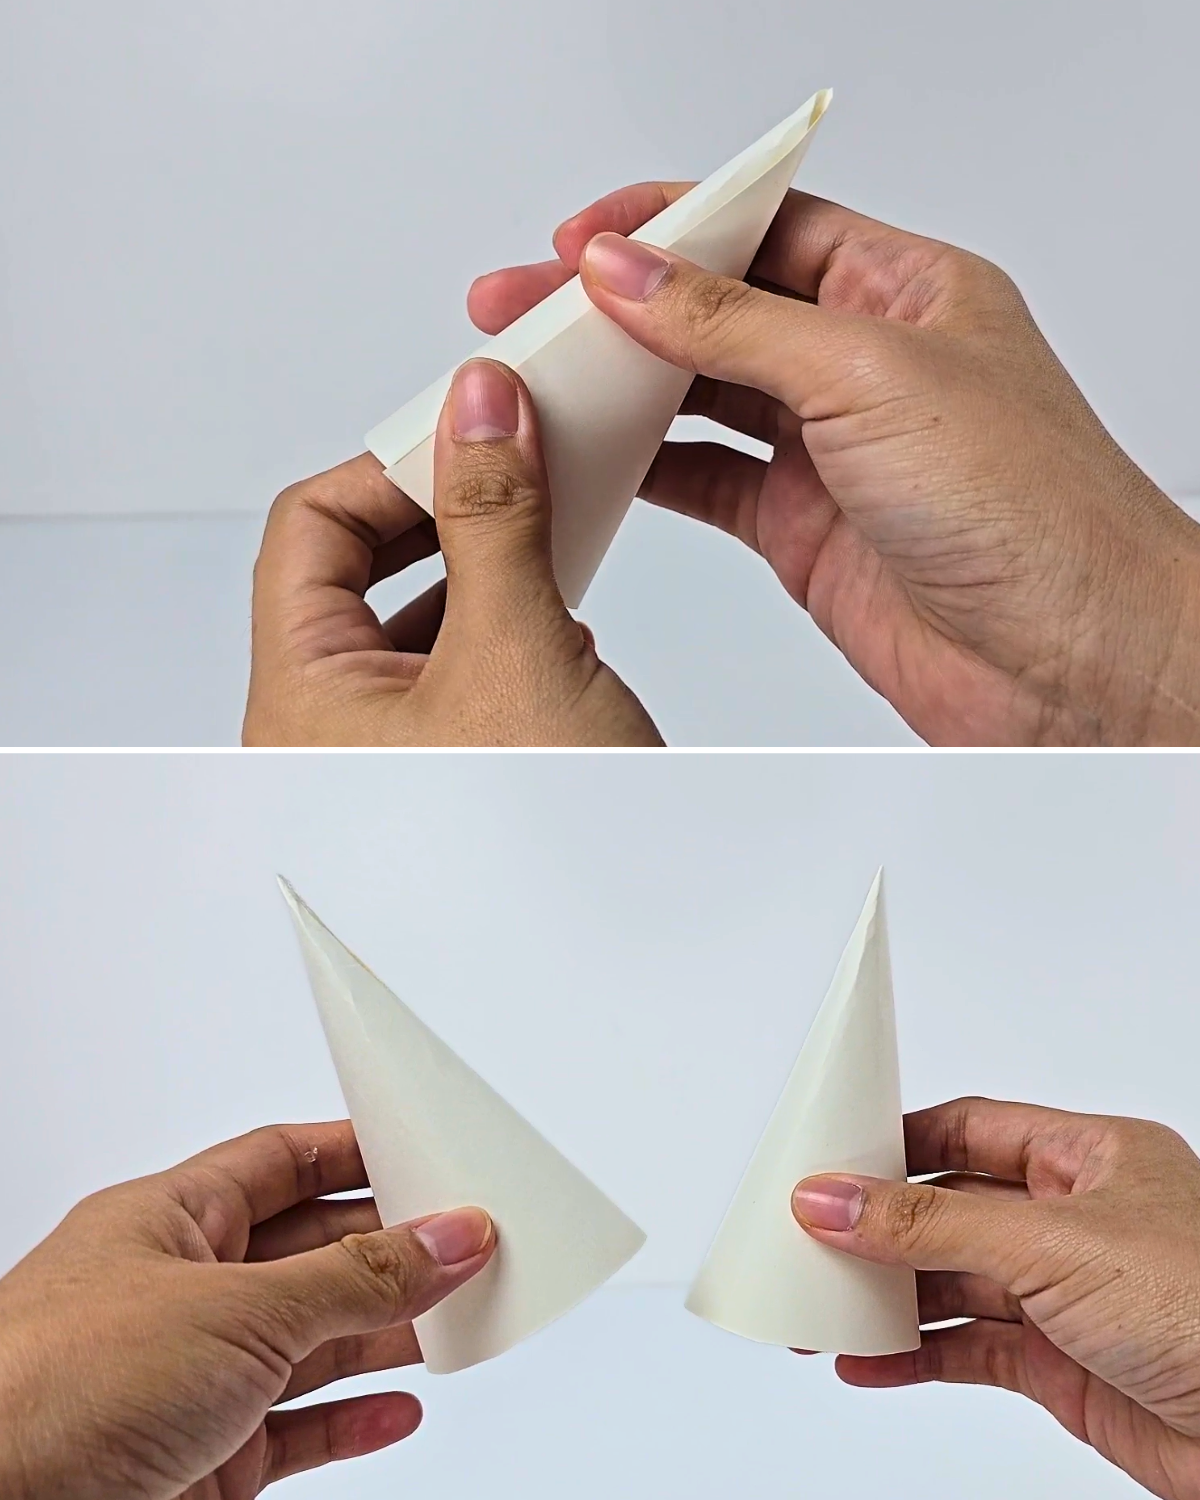
Fold each triangle so the edges meet, creating a cone shape for the headdress. Secure the edges together with hot glue.Step 7: Attach Layered Fringes to the Cone
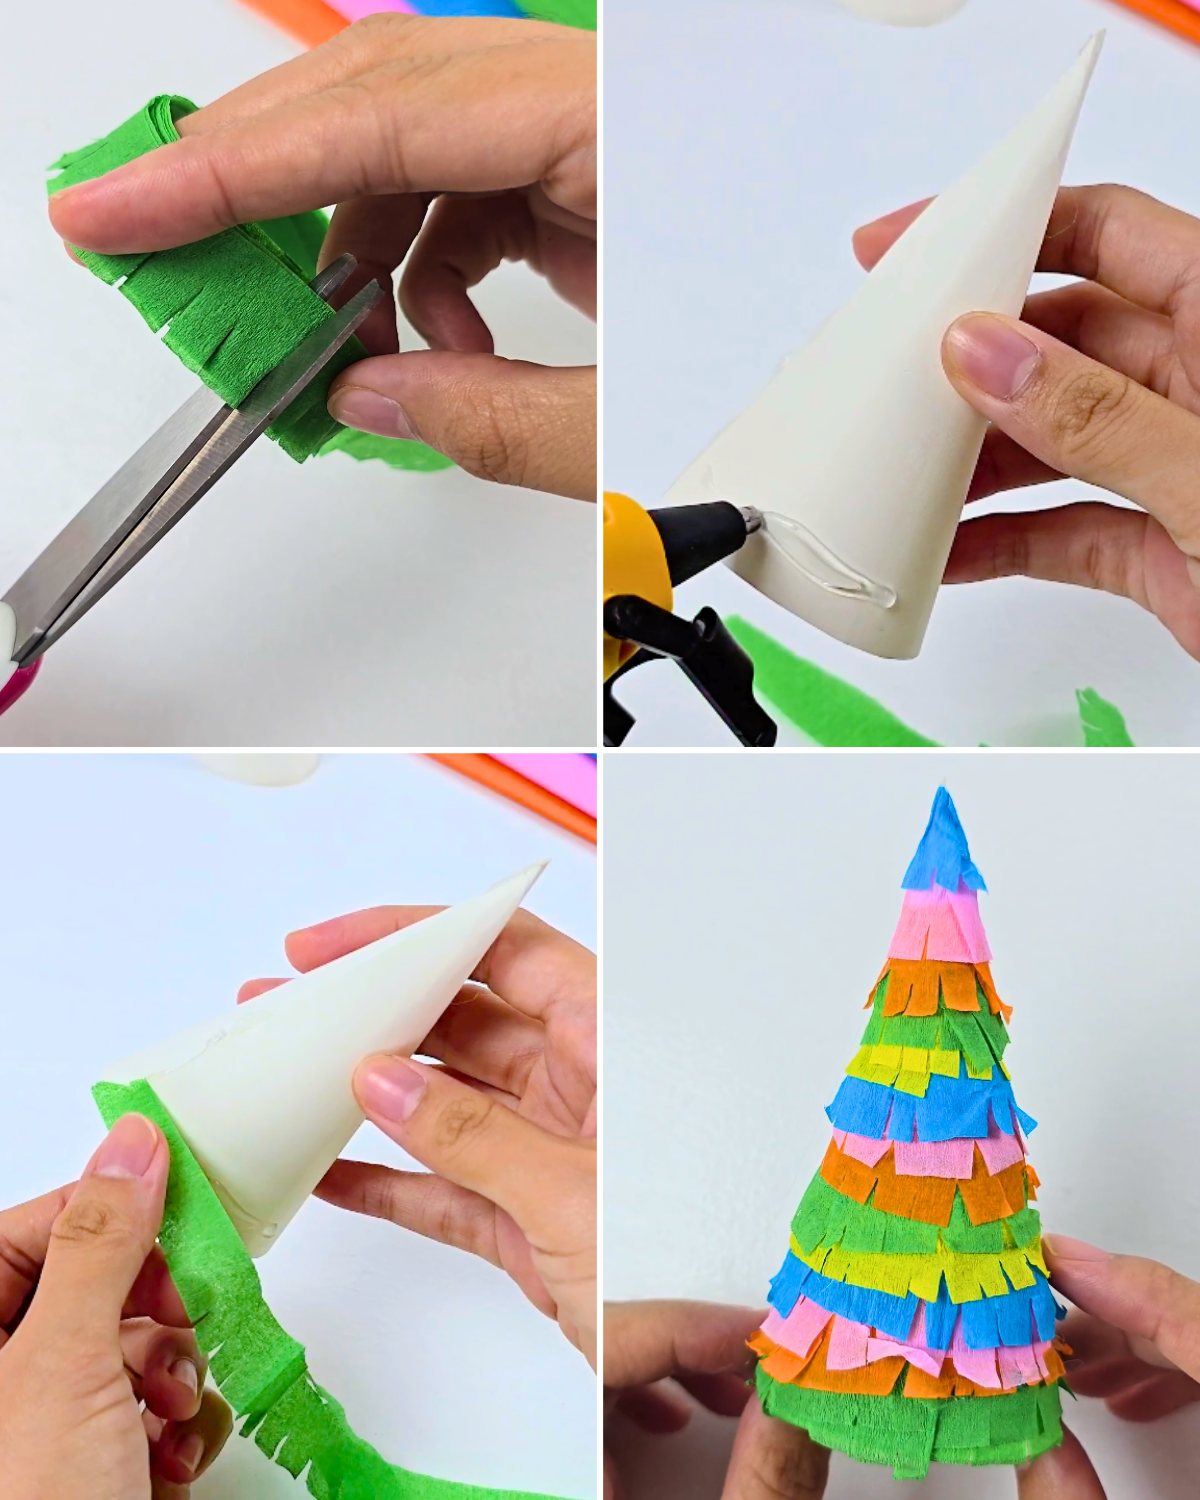
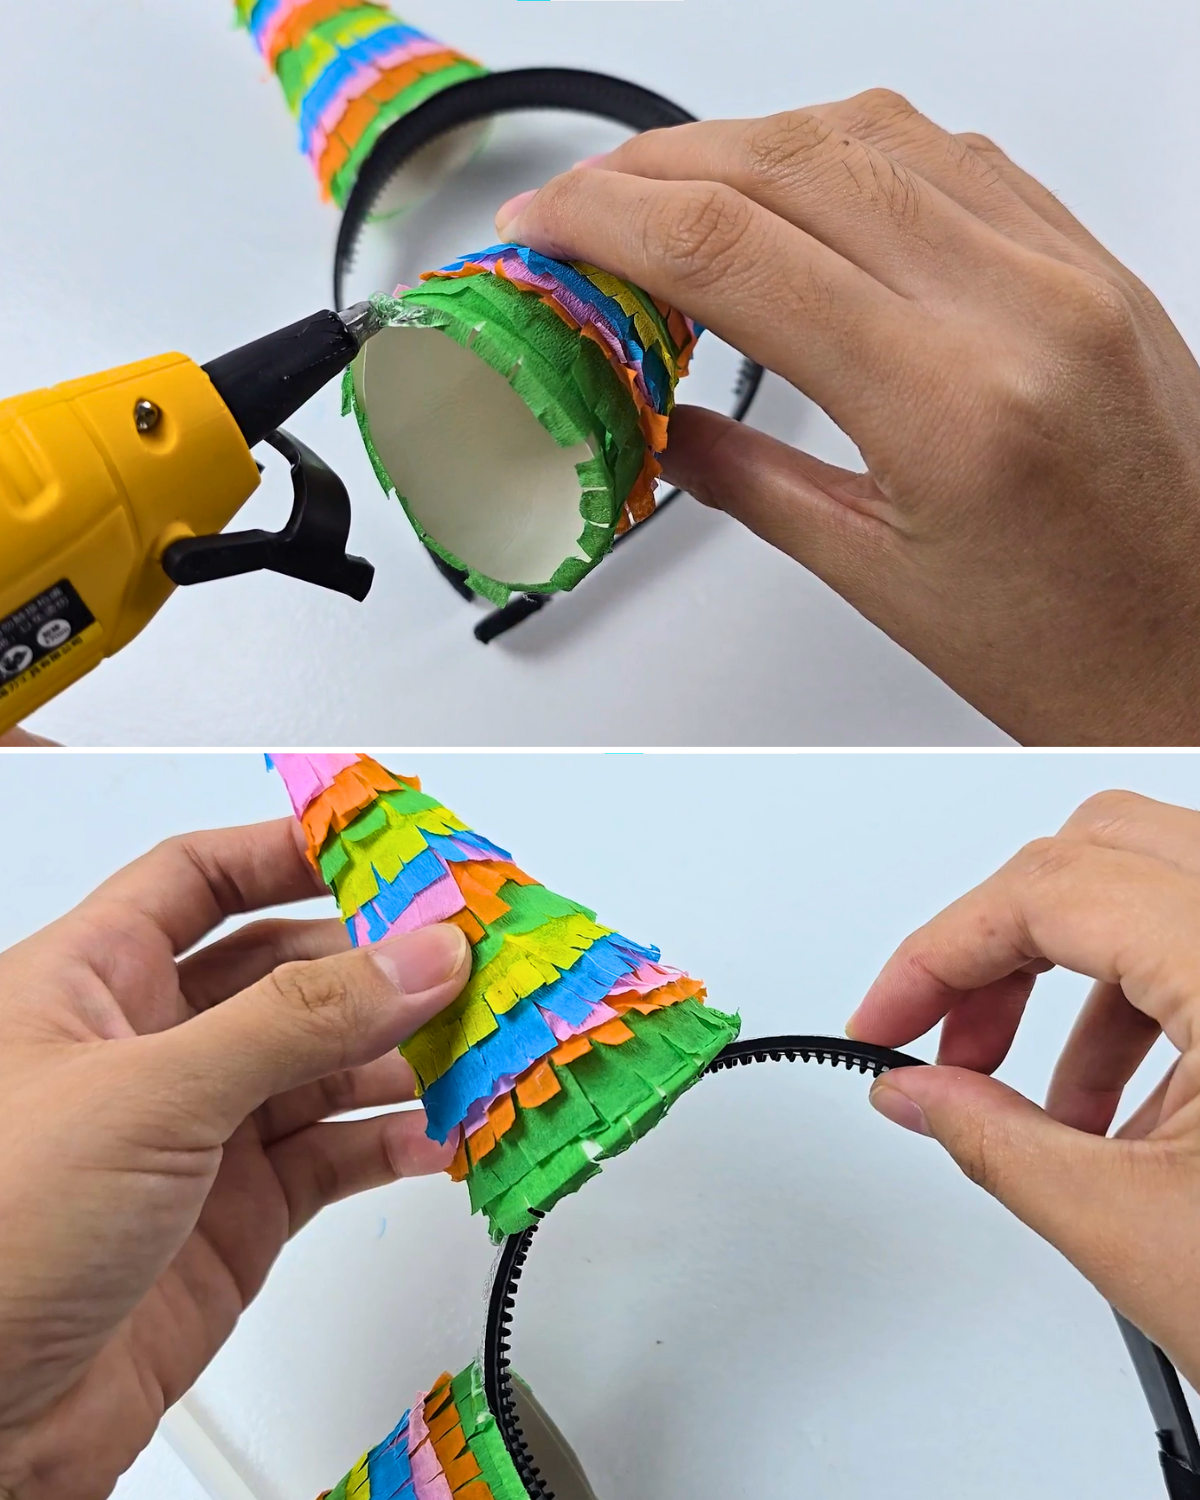
Add crepe paper fringes all around the cone, layering them from the bottom up for a full, textured look.Step 8: Attach the Cones to the Headband
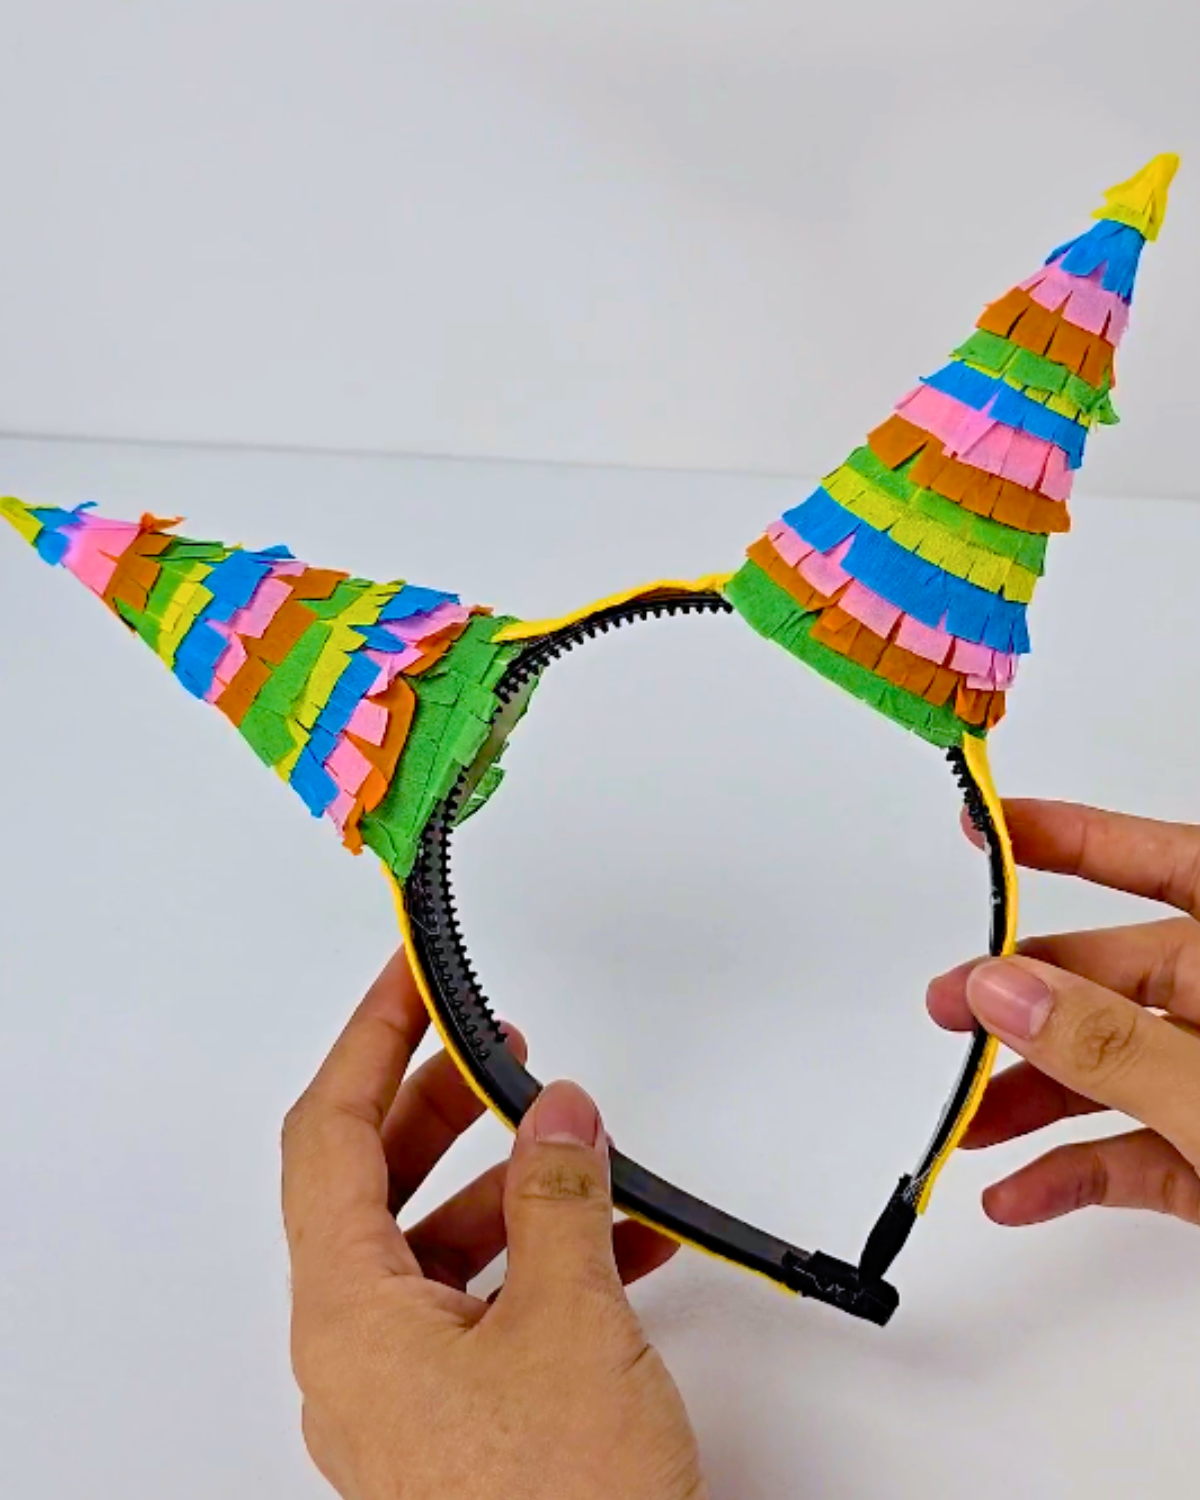
Apply hot glue to the base of each cone, then press them onto a plain headband, spacing them evenly for a balanced look.Here’s How It Looks When Finished!
Giant Swirl Lollipop Prop
Step 1: Prepare the Lollipop Stick and Strips
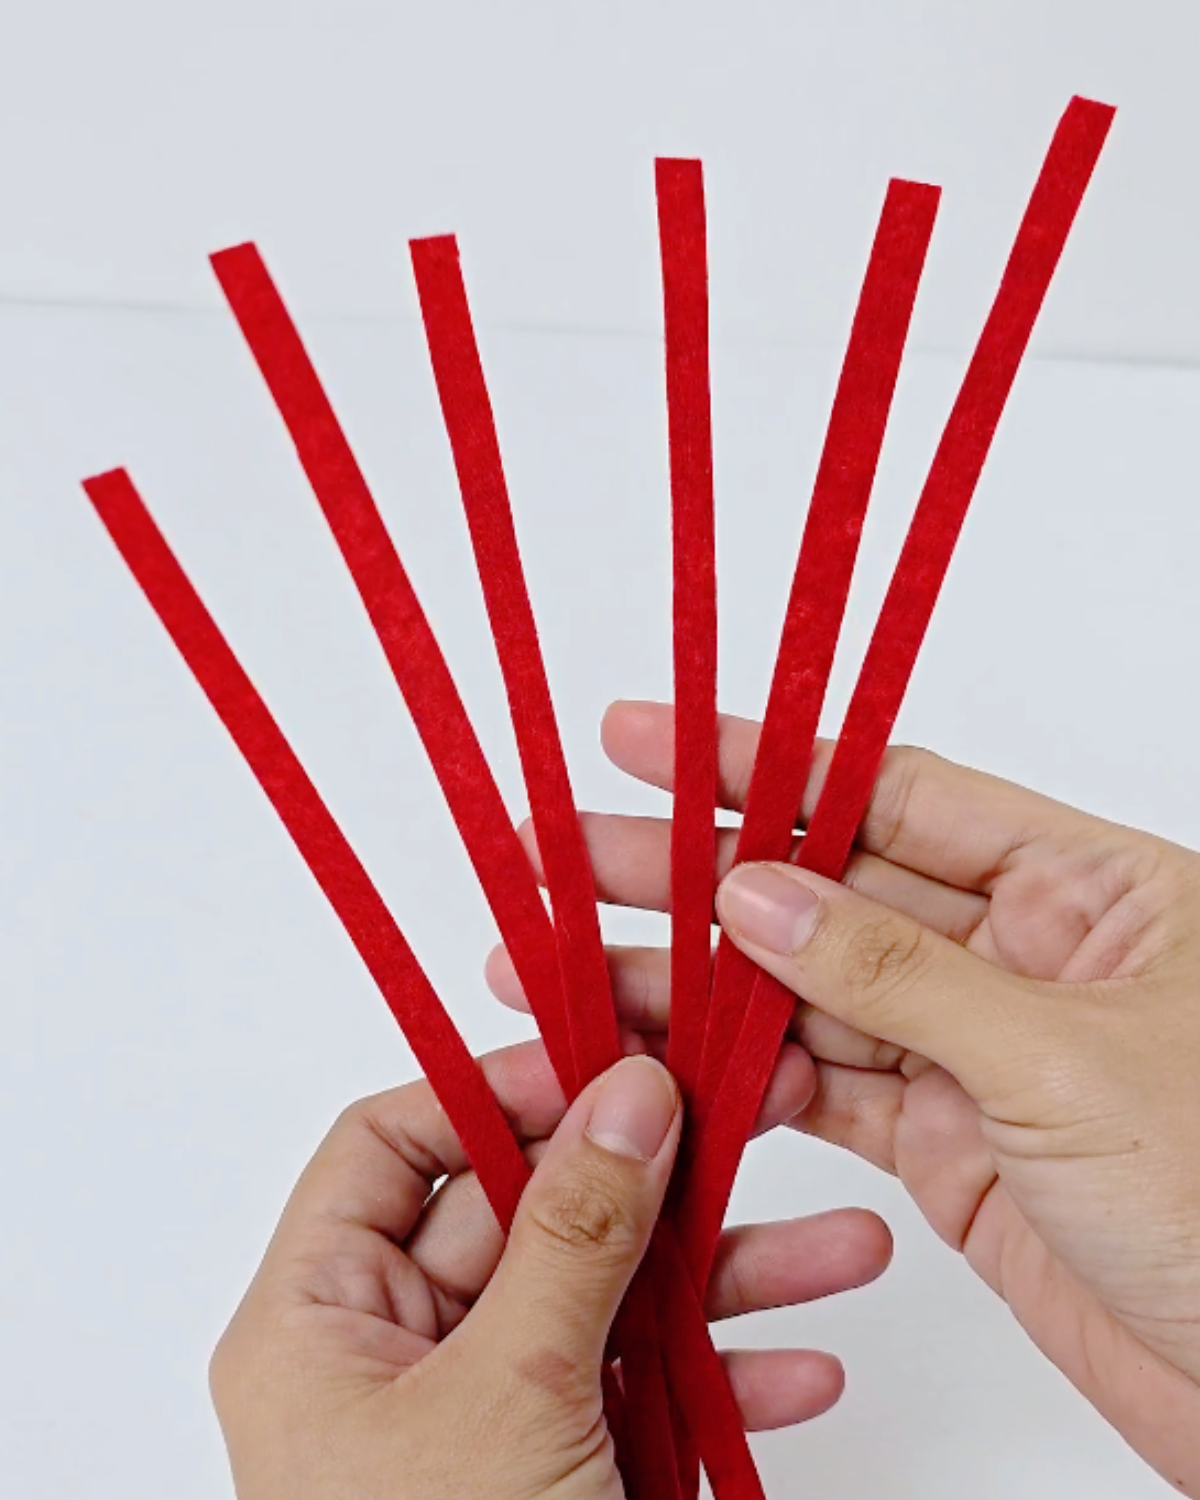
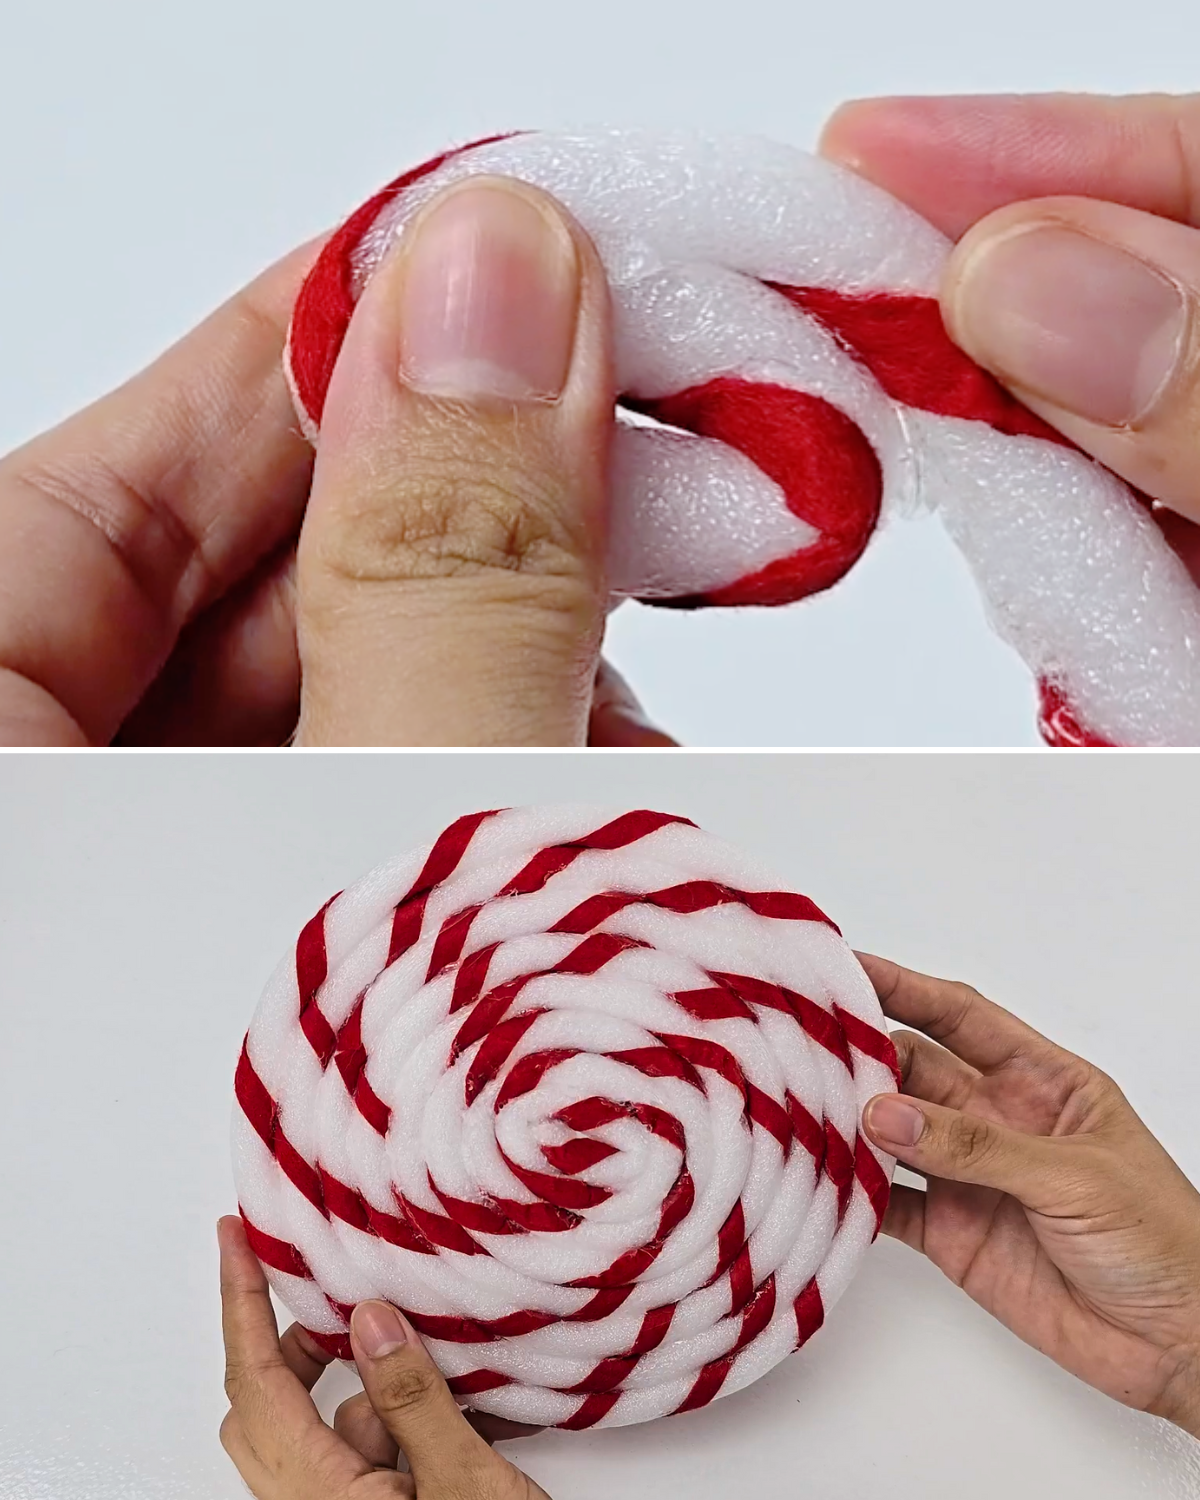
Measure the required length of a 12mm foam stick by rolling it around to test the size of your lollipop, then cut a few thin strips of red felt or electrical tape to use for wrapping.Step 2: Wrap the Foam Stick
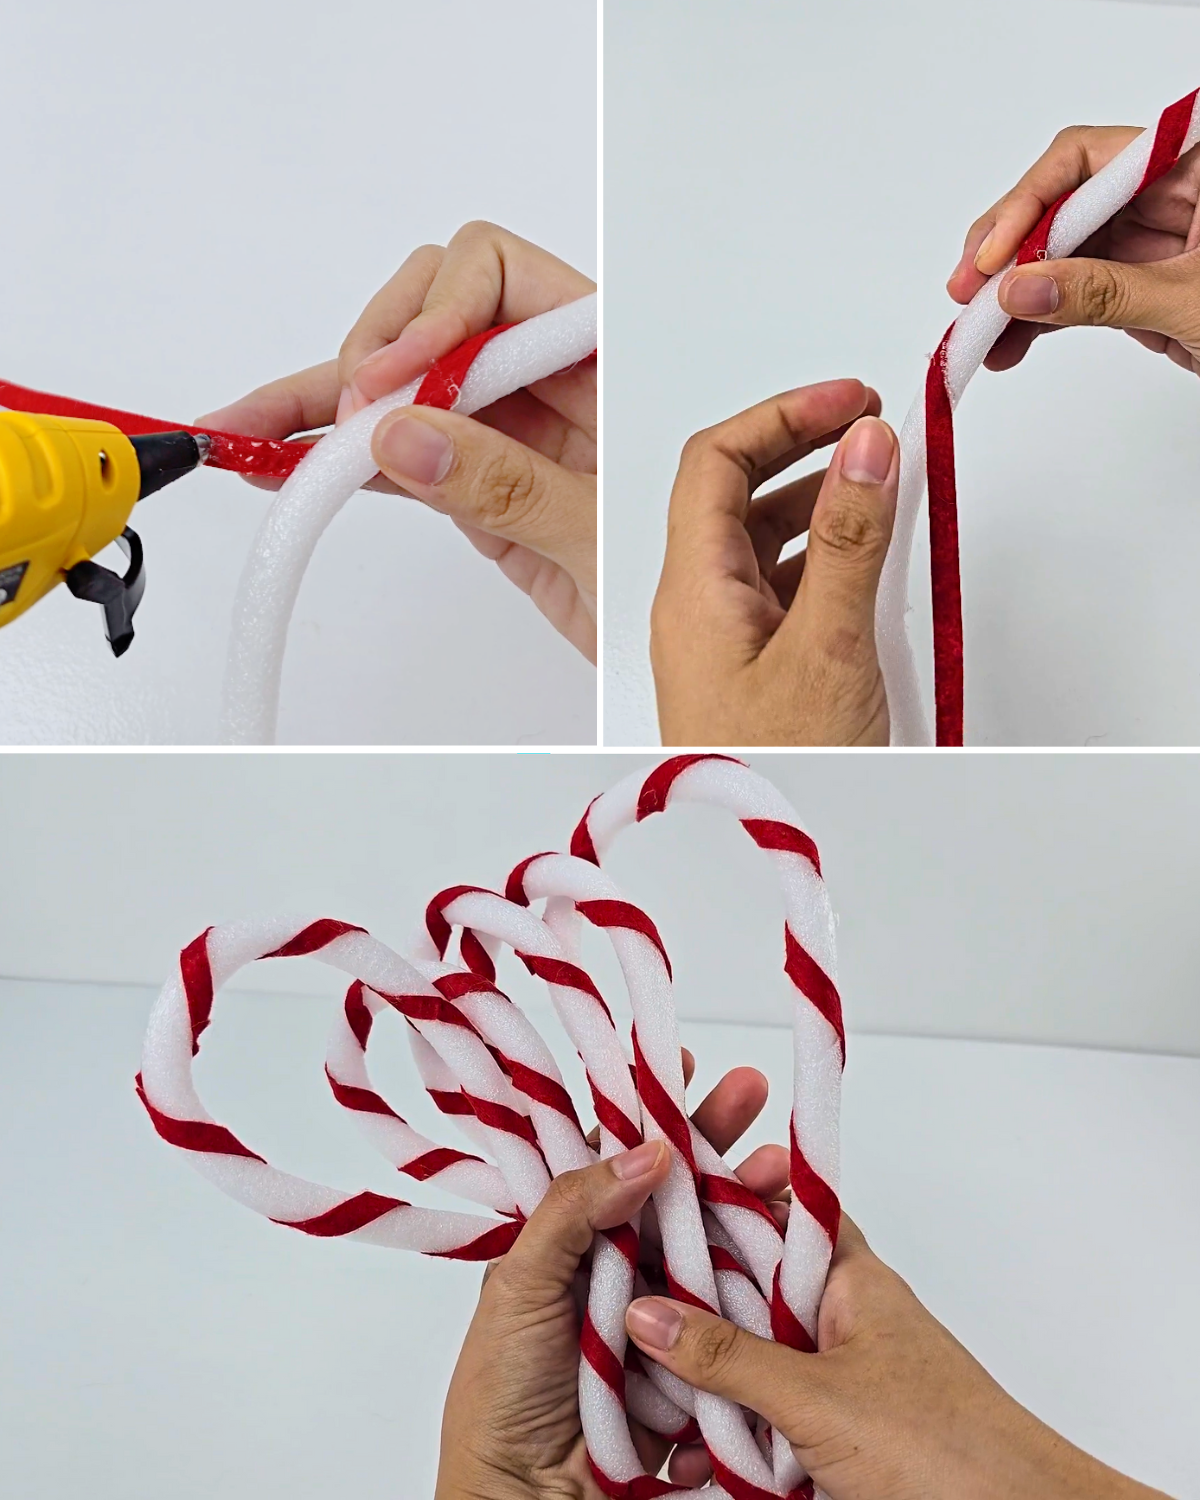
Apply hot glue to a strip, then place it diagonally on the tip of the foam stick. Continue wrapping the strip around the stick until the entire length is covered.Step 3: Form and Secure the Foam Base
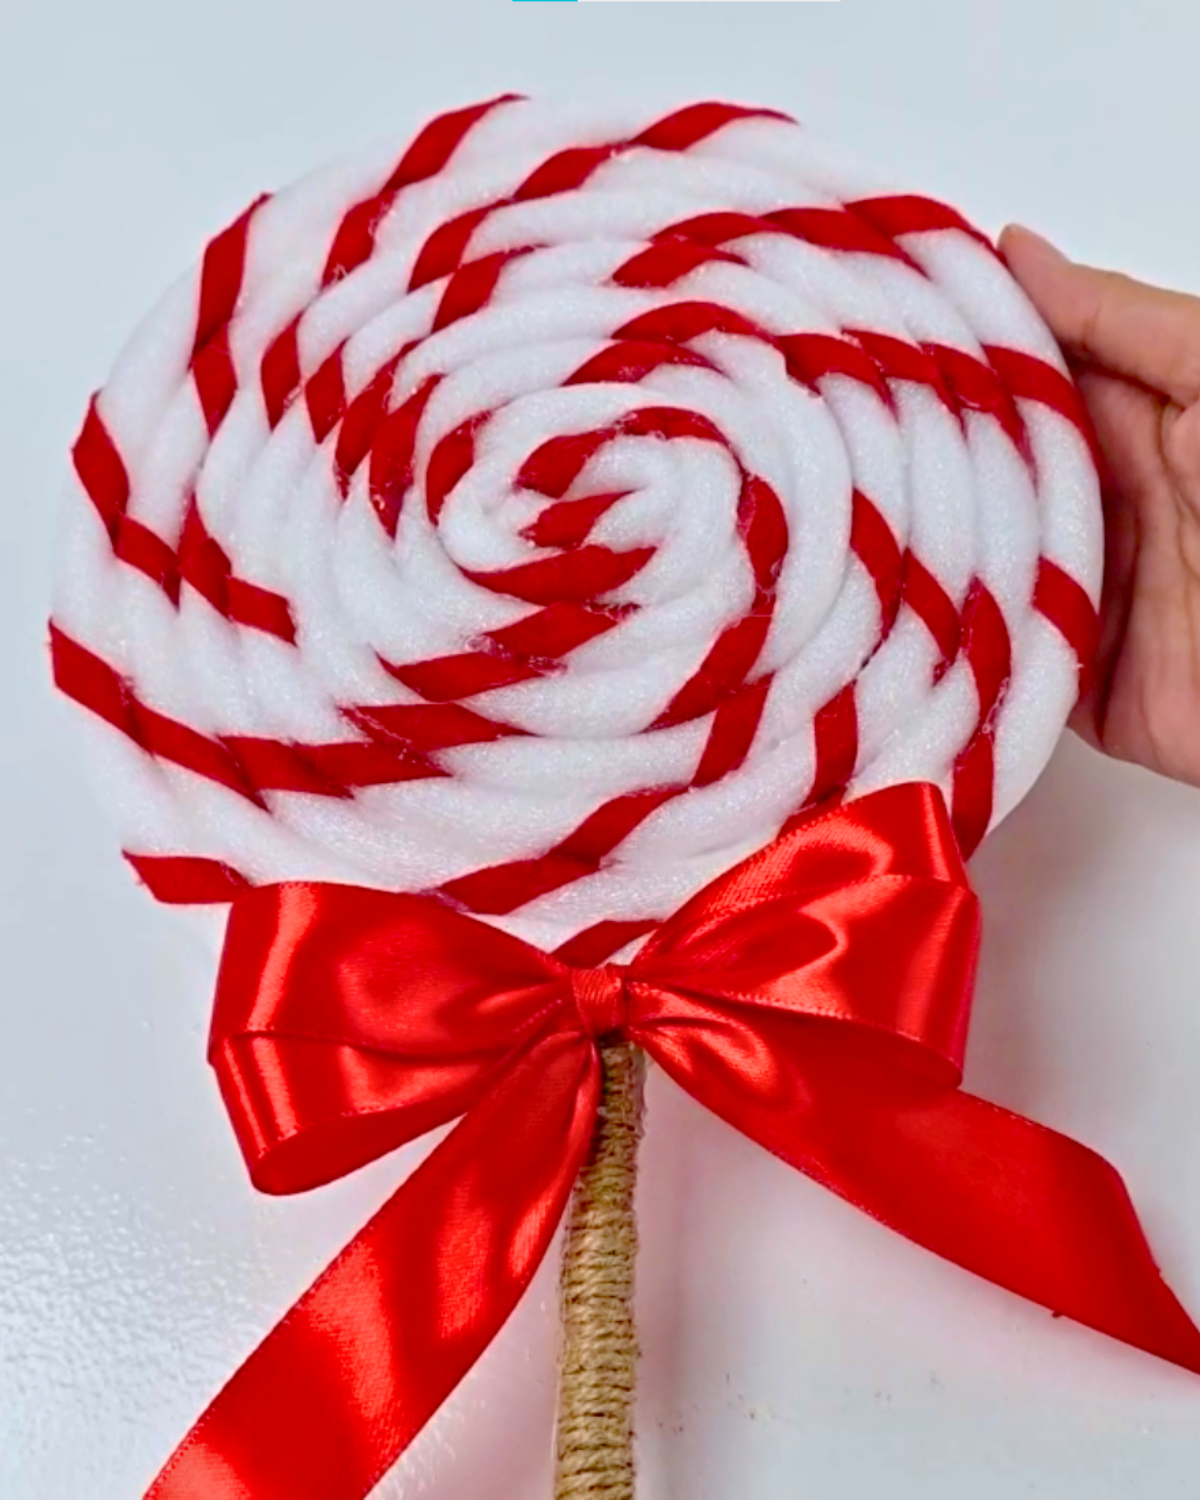
Fold down one end of the foam about 2 to 3 inches and secure it with hot glue. Continue wrapping the foam around itself, adding hot glue along the sides as you go, so it forms a swirl that resembles a lollipop by the end.Step 4: Add the Stick and Ribbon Bow
Attach a stick to the bottom of your lollipop swirl, then cover the base with a ribbon bow to hide where the stick is attached.
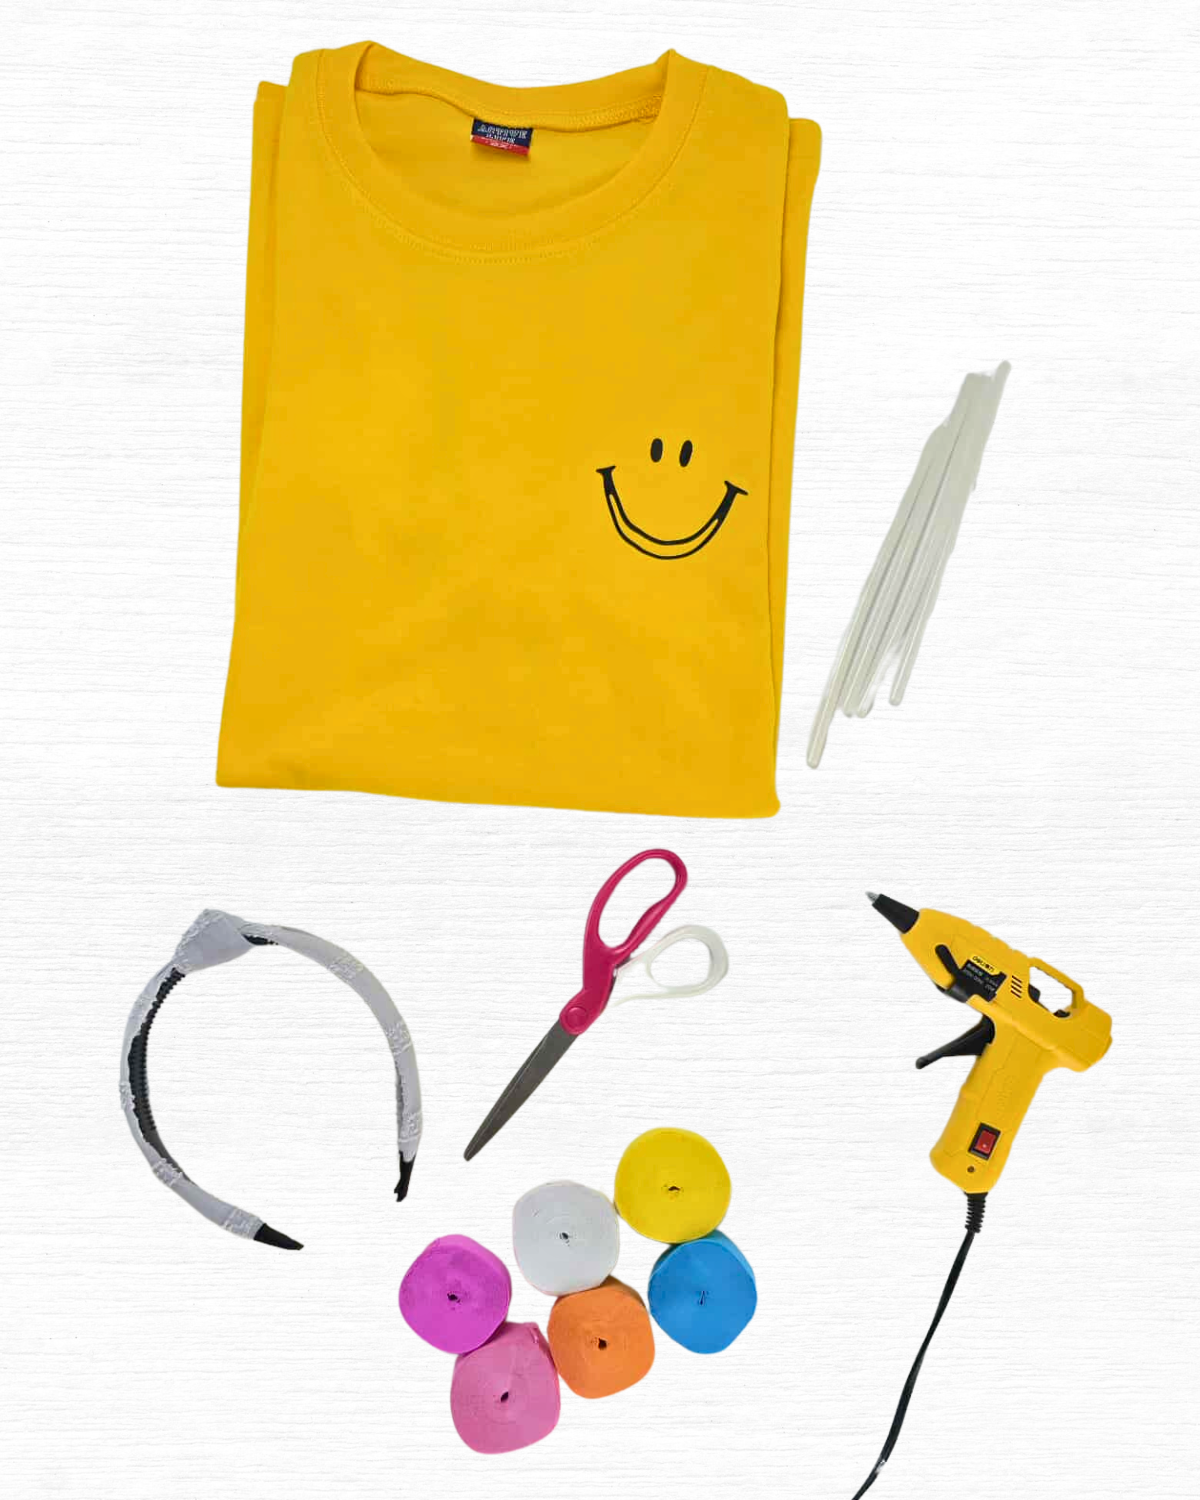
Materials
- Yellow Oversized Shirt
- Crepe Paper, assorted colors
- Masking Tape
- Scissors
- Hot Glue Gun and Glue Sticks
- Headband
- Cardboard
- Overall Shorts or Pants
- Striped Shirt
- 12mm Foam Stick
- Red Electrical Tape or Felt Paper
- Stick, for the handle of the lollipop
- Ribbon
How to Complete the Piñata Look
Pair your Piñata shirt with bright blue joggers, shorts, or a skirt. White shoes work best, but any pair you have will do!
How to Complete the Candy Look
Wear a striped shirt or top under overall shorts or pants, then add matching hair ribbons for pigtails or wear a hat instead. Complete the look with baby doll pumps and lace socks, or go for cute, simple sneakers.
Our Viral Crafts
Paper Crafts
Paper Crafts
Candles & Soap
Crafts
*If you love this craft, then visit our official website, follow our Facebook page, and subscribe to our YouTube channel for more!
DIY Piñata and Candy Costume