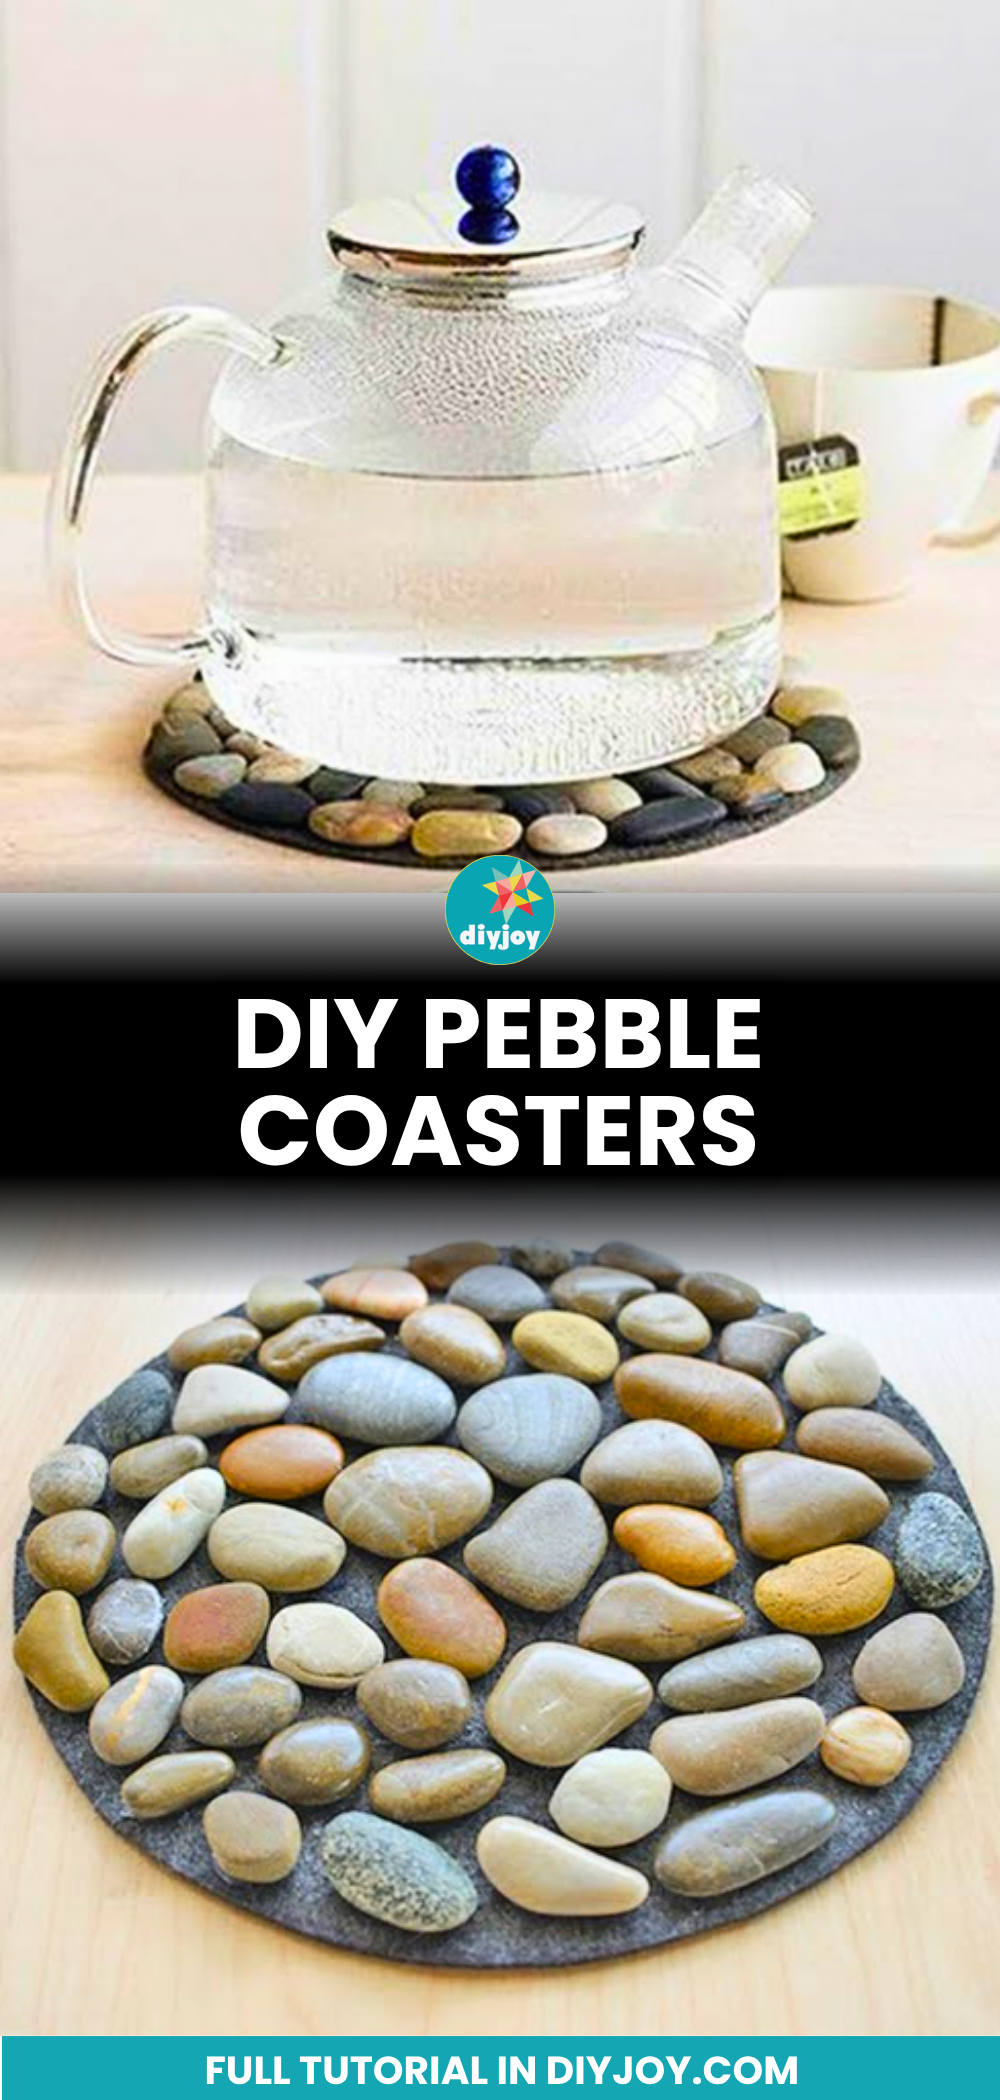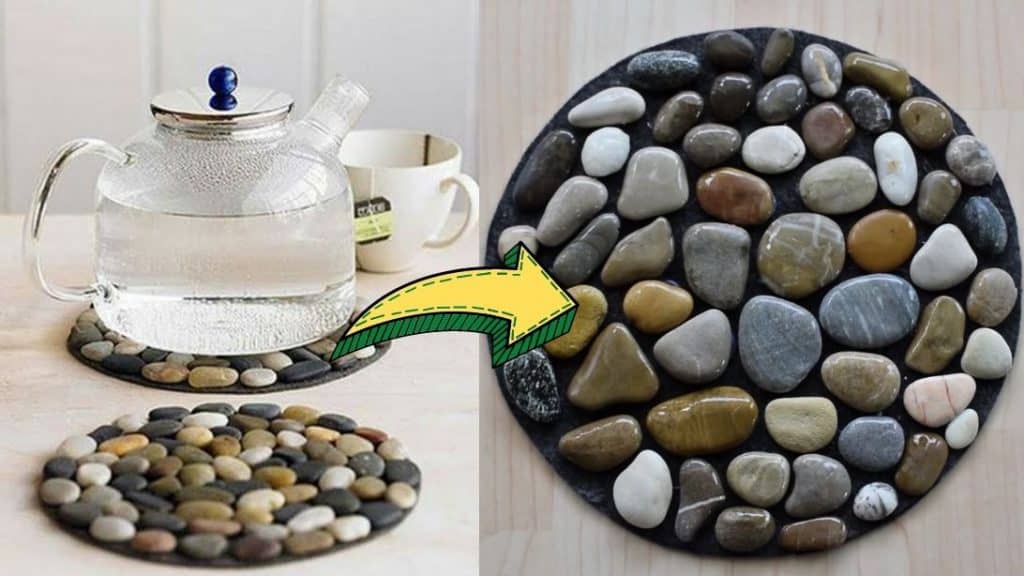
Learn how to use a bunch of pebbles and transform them into an adorable coaster with very few easy steps! You can use them on your mugs or bowls, give them as a gift, or you can even sell them. If you want to try it out, then proceed to read down below for the full instructions, and watch the video tutorial as well. Hope you enjoy making this DIY project by Pink Cloud on YouTube as much as I did.
Materials:
- A pile of flat pebbles
- A piece of felt fabric
- An object in the desired shape (round, cube, triangle, square)
- Scissors
- Pen
- Hot glue gun and glue sticks
- Clear varnish spray (optional)
Directions:
Step 1
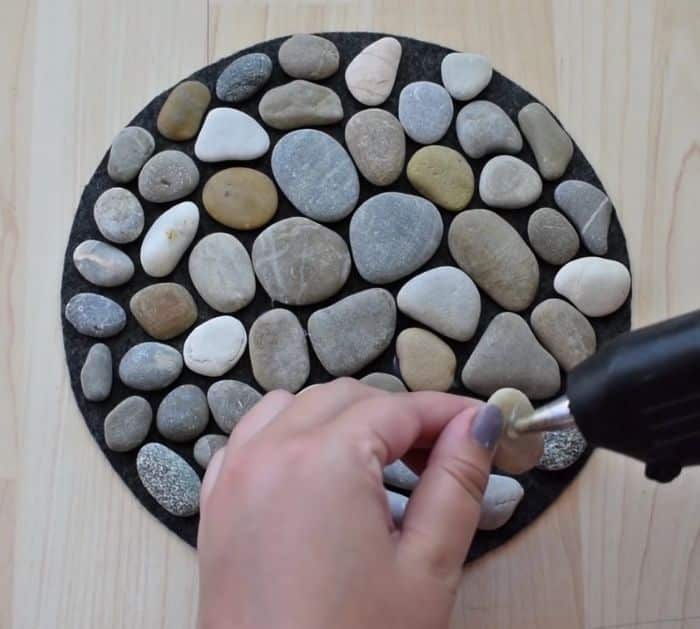
Gather a pile of flat pebbles, then wash them well, and let them dry completely. You can separate them according to size, shape, and color, then set them aside. Take a piece of felt and a marking pen, then grab an object with the shape that you want and place it on top of the felt. Trace the shape onto the fabric, and then cut it out.

[social_warfare]
Step 2
Take the sorted pebbles, then place them on top of the cutout felt however you want. Once you’re contented with how it looks and is arranged, then you can start dabbing hot glue on the back of each pebble, then fix them on the felt fabric securely. When you’re done, you can take some transparent varnish and spray it all over the pebbles to make them shiny, then leave them to dry completely before using.
*Thanks to Pink Cloud via YouTube for all images used here. If you loved this DIY project idea, then you’ll surely love her other videos too, so give her channel a visit and subscribe!
Easy DIY Pebble Coasters Tutorial