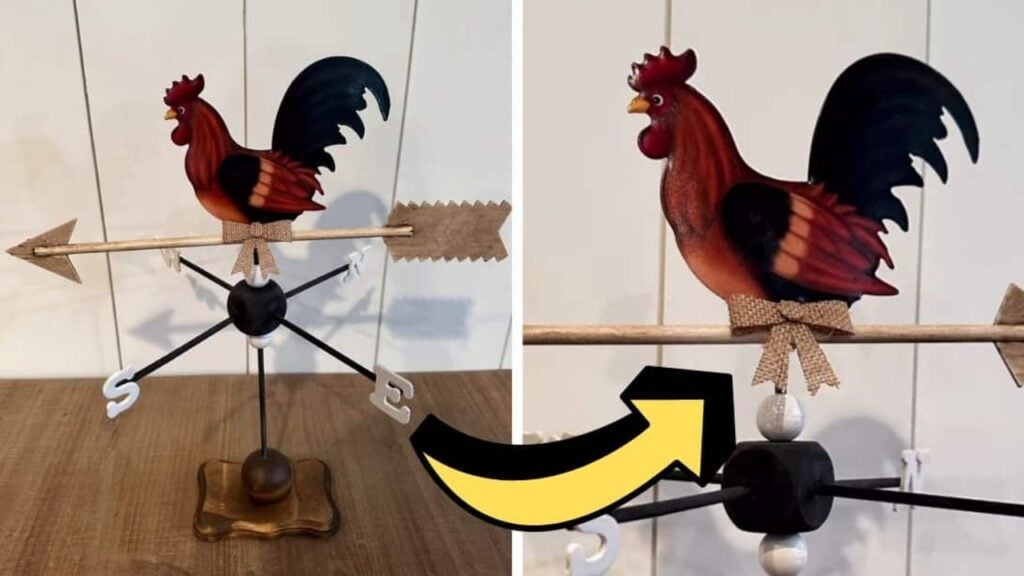
I’ve always adored weathervanes and think that they look so cute, so when I saw this video tutorial by Chalk It Up Fancy on YouTube, I immediately knew that I had to make one of these! It was so easy to piece together and all of the materials required for this project can be purchased from the nearest Dollar and craft store, and you can design and color them however you want.
Materials:
- Arrow decor
- Wooden cube
- Wooden dowels
- Wooden letters, N, S, E, and W
- Wooden beads
- Wire or jute string
- Chicken sign
- Wooden circle
- Flat wood, for the base
- E6000
- Hot glue gun and glue sticks
- Cutter
- A piece of ribbon or bow
- Drill
- Scissors
- White paint
- Black paint, or any color you want
- Gel stain
- Paintbrush
Directions:
Step 1
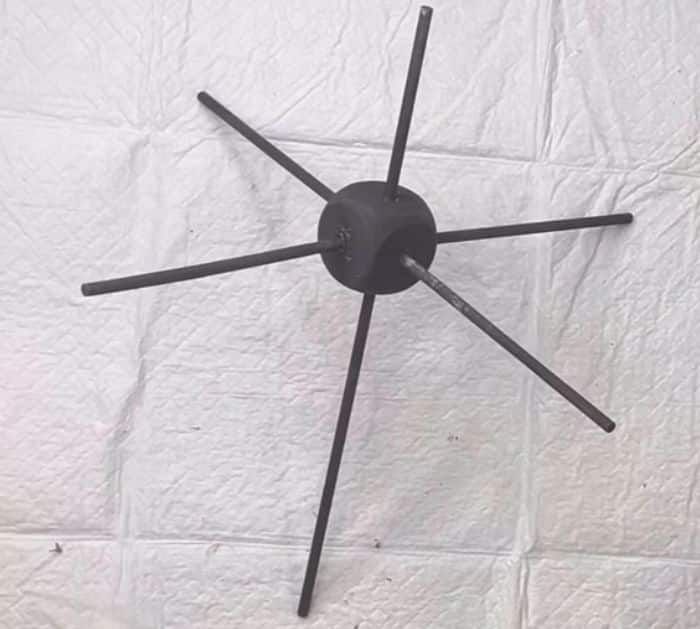
Paint the arrow decor white, then apply the gel stain, and once fully covered, wipe it out nicely with a napkin. Drill a hole on each side of the wooden cube, then paint it black along with 3 wooden dowels, and let them dry completely. Paint the wooden letters white on both sides and set them aside to dry, then insert 1 wooden dowel through the center of the cube, cut the rest of the dowels in half, and insert them on each hole on the sides of the cube making sure to attach them with E6000 and hot glue.
Step 2
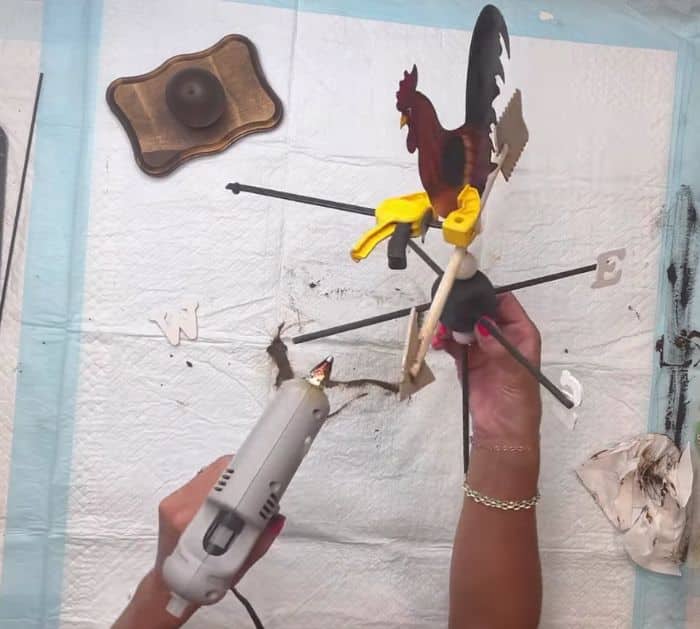
Adhere the white painted wooden beads on the top and the bottom of the cube to make sure it doesn’t fall down, then attach the arrow to the top of the long wooden dowel, and secure it with a wire or jute string. Cut off the legs of the chicken sign, then adhere it to the top of the dowel with E6000 and hot glue, then hold it in place with a clamp, and allow it to dry completely. Drill a hole at the center of a wooden circle, then adhere it to a flat wood, and stain them together until entirely covered.
[social_warfare]
Step 3
Attach the letters to each end of the shorter wooden dowels, then insert the weathervane into the prepared base making sure to apply an ample amount of E6000 and hot glue on them, and let them dry completely. For a final touch, attach a cute ribbon or bow underneath the chicken as shown in the video tutorial, and display your Weathervane decor anywhere you want.

*All these images are credited to Chalk It Up Fancy via YouTube. Give her channel a visit and subscribe for more!
How to Make a DIY Farmhouse Weathervane Décor


