
I’ve always wanted to own a lantern or two, I just think that they’re really beautiful and add a rustic and cozy vibe. However, I find them expensive that’s why I decided to look for an easy tutorial that I can do. I was glad when I found this craft by sana sea ? Rim ? Rahaf on YouTube, now I have a few lanterns that I can say I got in a cheaper deal, some materials I used are repurposed while the other I bought from the dollar store, I was happy with what I got and might make more DIY projects like this in the future.
Materials:
- 4 pieces of 12×6 inches Picture frame
- Garden mesh
- Wooden sticks
- Foamboard, white
- 4 pieces of 1 to 1.5 x ½ inches (½ inch thick) Wood pieces
- White spray paint
- White chalk paint, or any white paint
- Grey chalk paint, or any grey paint
- Sponge
- Brush
- Pliers
- Scissors
- Hot glue
- Styrofoam ball
- Metal binder ring
- Fairy lights
Directions:
Step 1
Disassemble and remove the parts of the picture frame then set aside. Take the frames and spray paint with white, then roughly paint with grey chalk paint using a sponge to create streaks. Once all frames are painted, attach the glass back using hot glue, then set aside. Cut out a 6×6 inches foam board, then apply grey chalk paint using a sponge to create streaks. Attach the foam board at the bottom of the glass case with the painted part up.
[social_warfare]
Step 2
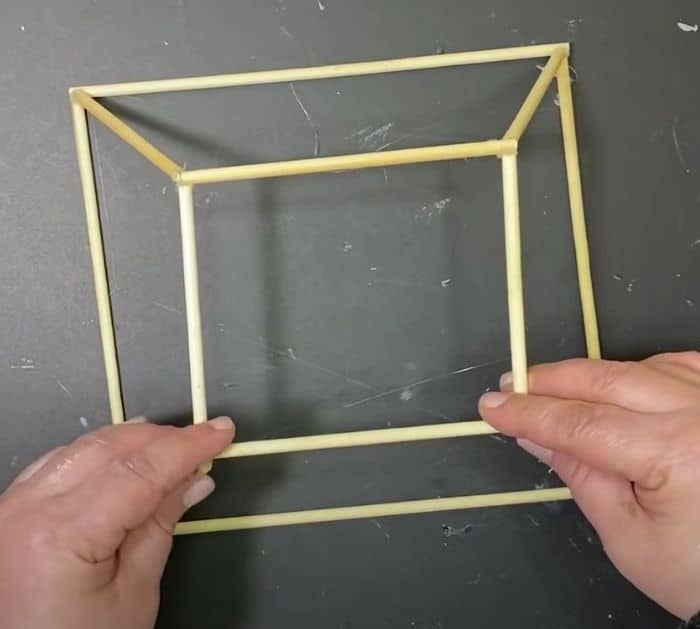
Cut out another 6×6 inches foamboard and a smaller one about 3×3 inches. Cover them with grey paint using a sponge as well, then set aside. Take the wooden sticks then cut 4 pieces 6 inches long, 4 pieces 3 inches long, and 4 pieces 2 to 2.5 inches long. Assemble and square the 6 inches long sticks, as well as the 3 inches long sticks. Place the bigger wooden square and attach the 2 inches long sticks on each corner in a slanted upward position, then place the smaller wooden square at the top.
Step 3
Get the shape and size of each space of the wooden stick piece, then mark and trace it onto the garden mesh. Cut it out then attach it on each side of the assembled wooden sticks using hot glue. Remove excess with pliers or scissors if necessary. Cover the mesh with white chalk paint, then sponge paint with grey chalk paint. Attach the bigger painted foam board at the bottom and the smaller ones at the top then set aside.
Step 4
Cover the small wooden pieces in white paint, then once dry attach at the bottom of the glass case as its feet. Insert the metal binder ring at the top of the Styrofoam ball (you can insert beads at the rings and secure them with hot glue to hide the opening of the ring), then cover the ball with grey chalk paint. Attach the ball on top of the mesh lantern head, insert fairy lights or led candle inside the glass case then place the head of the lantern on top.

*These amazing images are all credited to sana sea ? Rim ? Rahaf via YouTube. Check her other content and follow for more!
Easy DIY Dollar Tree Lantern Tutorial


