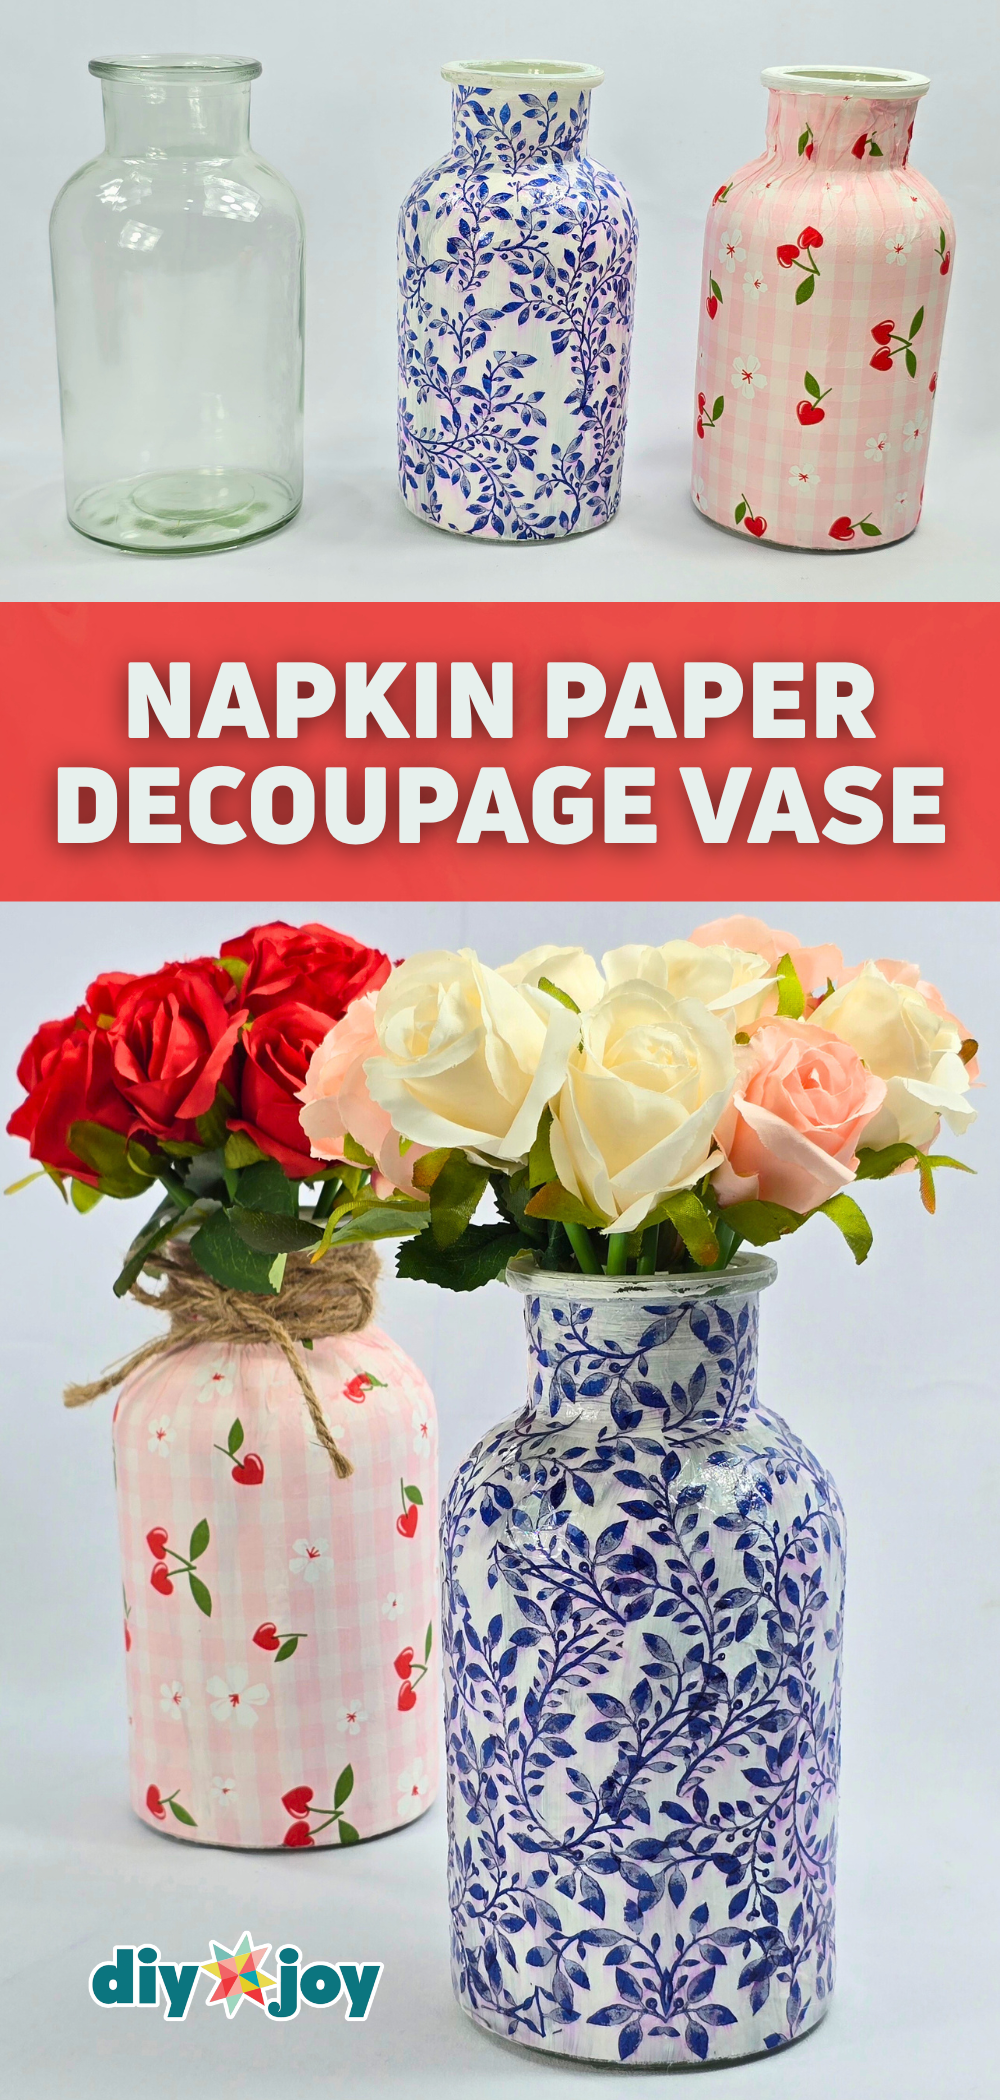
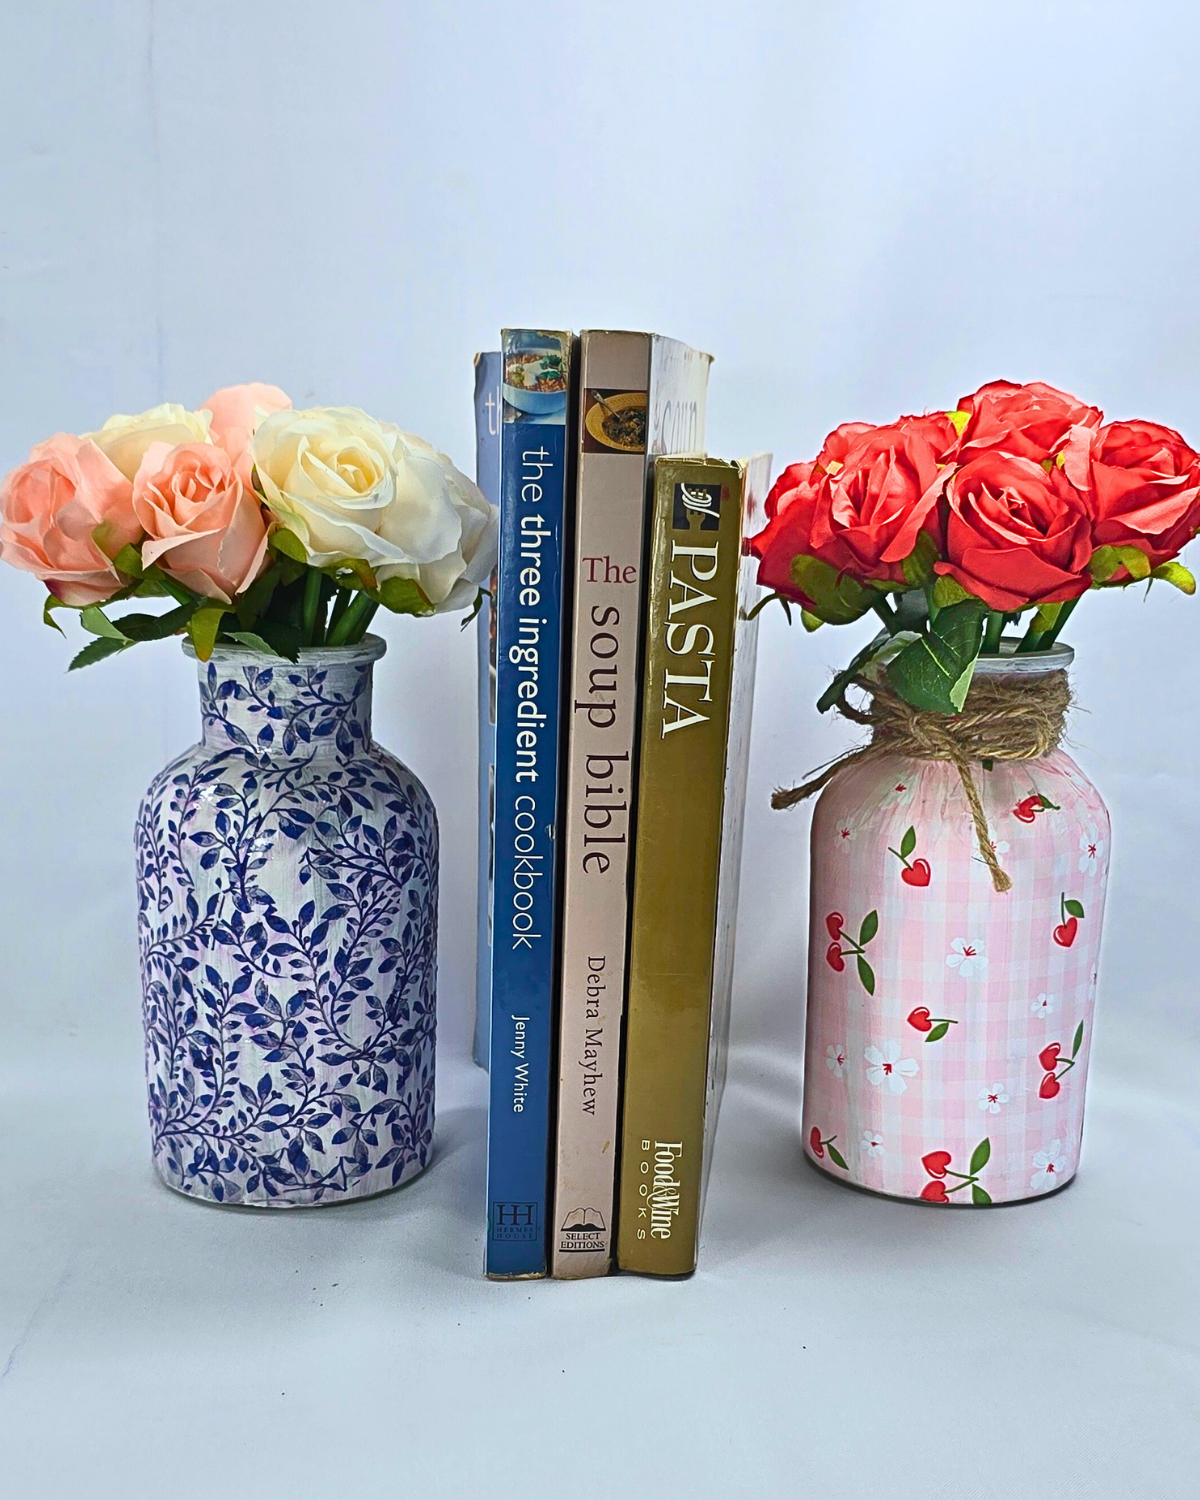
You know those empty glass jars you hang on to just in case? I had one sitting in my kitchen—nothing fancy, just a plain old jar that I got from the Dollar Store, but haven’t really decided on what to do with it next—and instead of getting rid of it, I decided to turn it into something pretty. With a little napkin paper, some glue, and zero expectations, I ended up making the cutest decoupage vase that now lives on my center table.
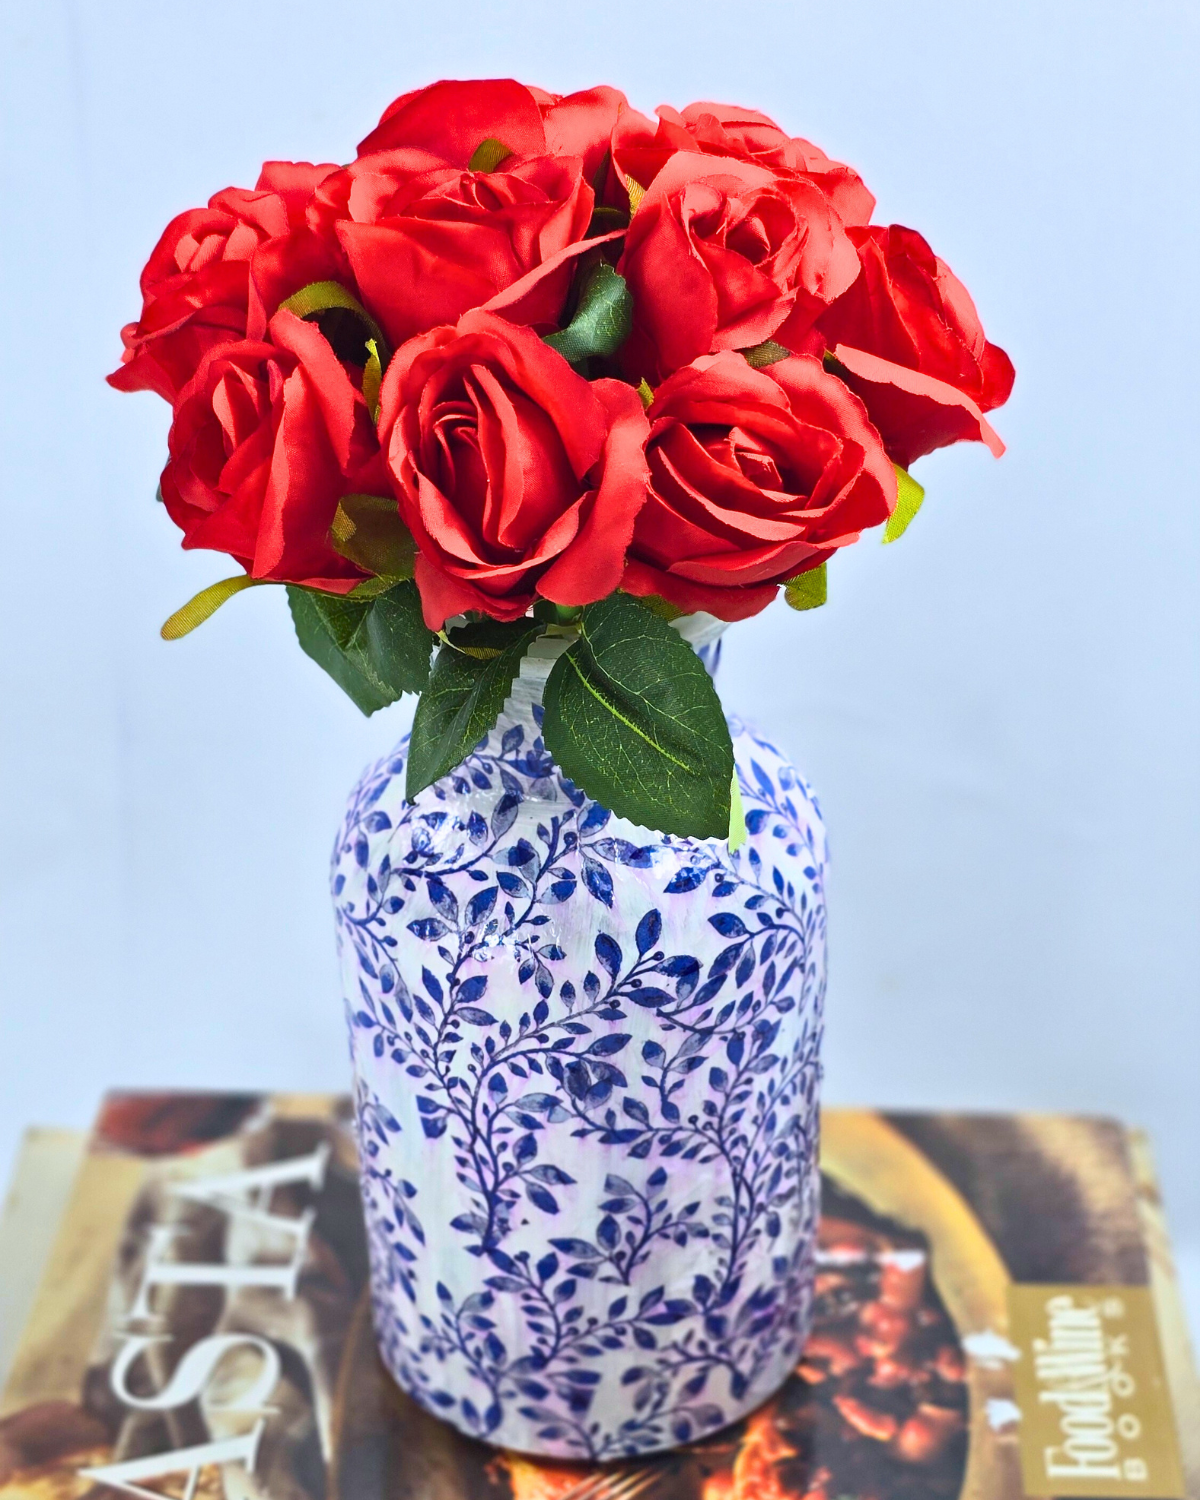
This project is perfect if you love decorating on a budget or just want a calm, creative moment for yourself. Using simple materials—a cheap glass jar and a paper napkin—you can make an elegant DIY vase that looks like something you’d find at a craft market or would order online. No fancy tools, no stress, just an easy and beautiful way to upcycle what you already have.
RELATED: Easy DIY Air Dry Clay Jewelry Tray
Whether you’re crafting for fun, refreshing your home decor, or making a heartfelt gift, this napkin paper decoupage jar tutorial is the perfect place to start. Go ahead and read the step-by-step instructions below to learn how to make your own decoupage vase, then give it a try!
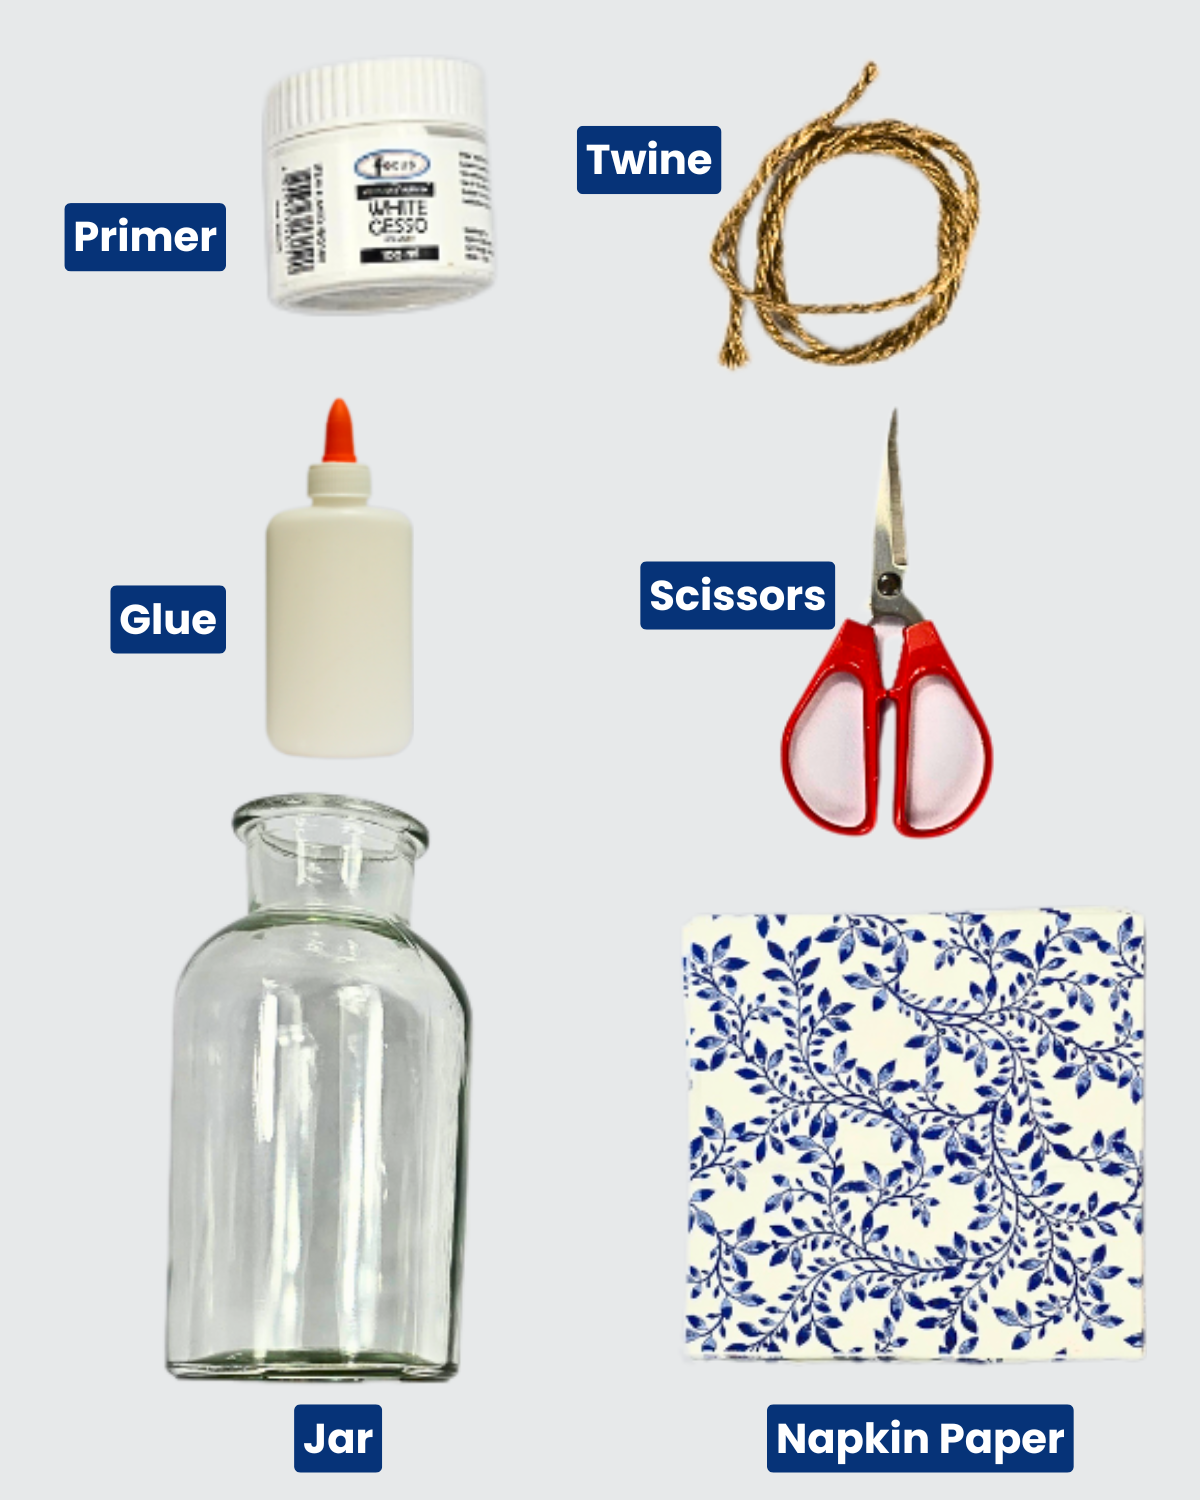
What You’ll Need for Decoupage Vase
How to Make a Decoupage Vase
Step 1: Preparing the Jar

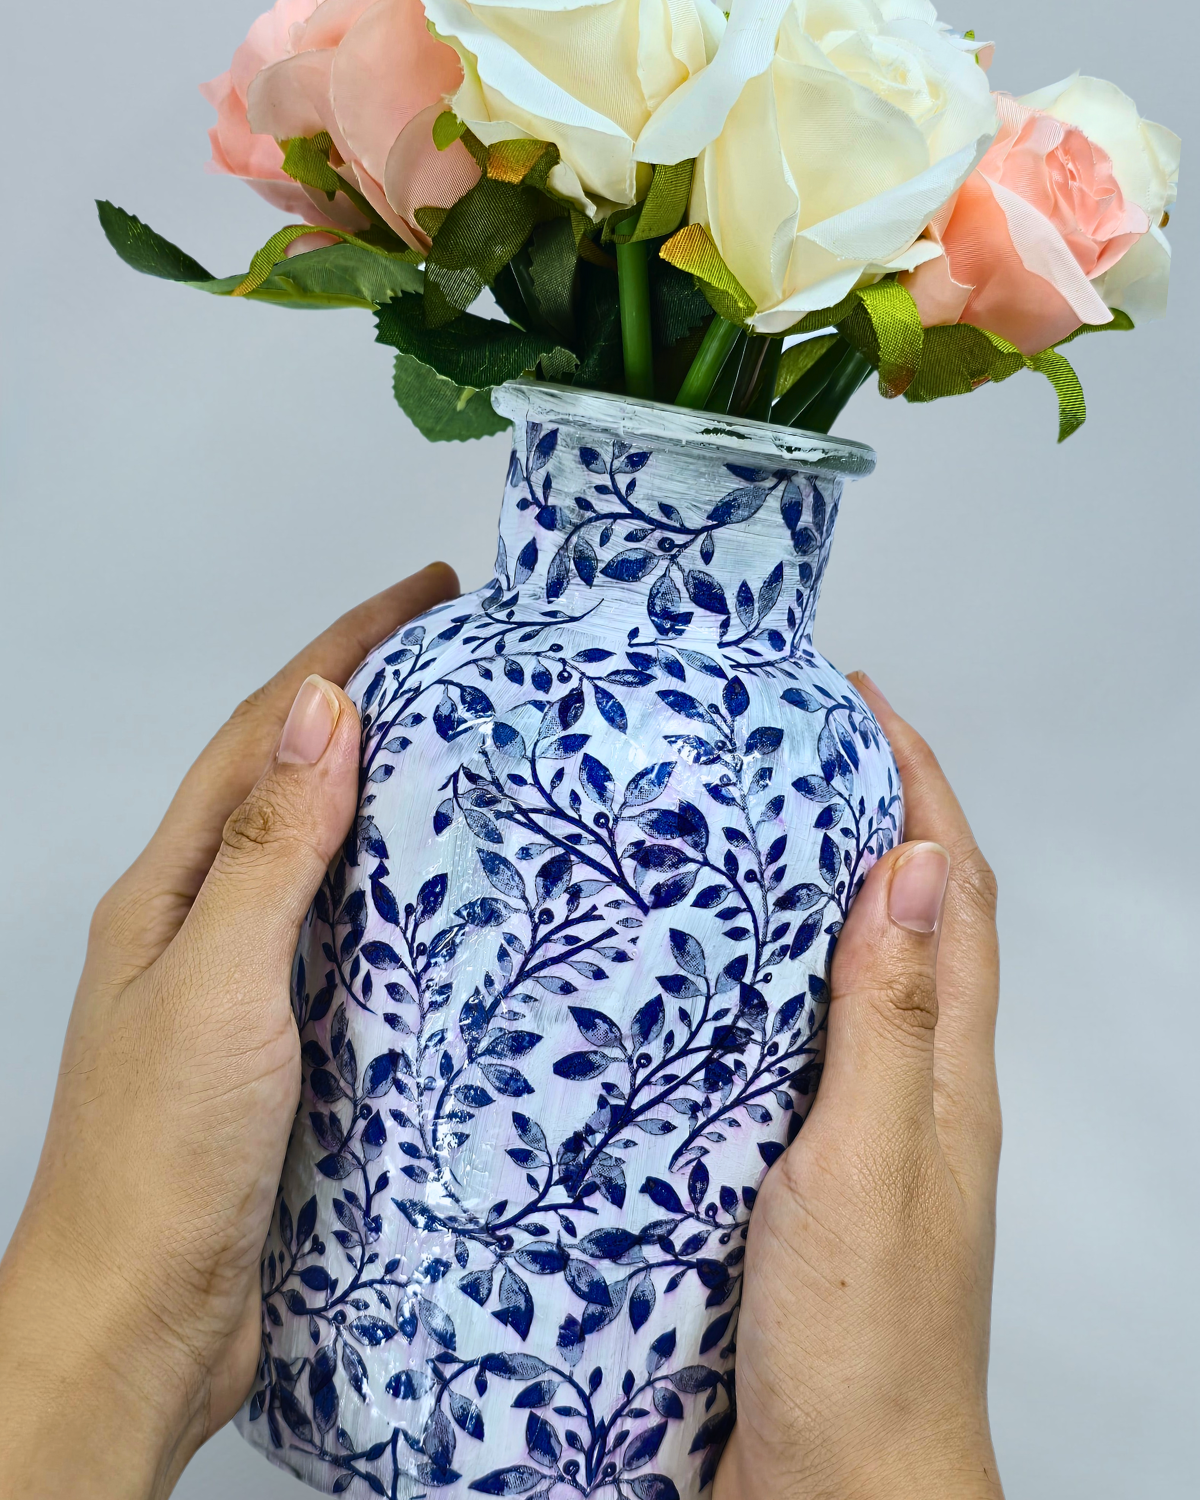
Find a glass jar or vase; any shape will work, then make sure to clean the exterior, and start applying white paint all over it. Feel free to add a second coating if needed; the goal is to make sure that the vase is entirely covered with white paint.Step 2: Cutting Out the Napkin Paper
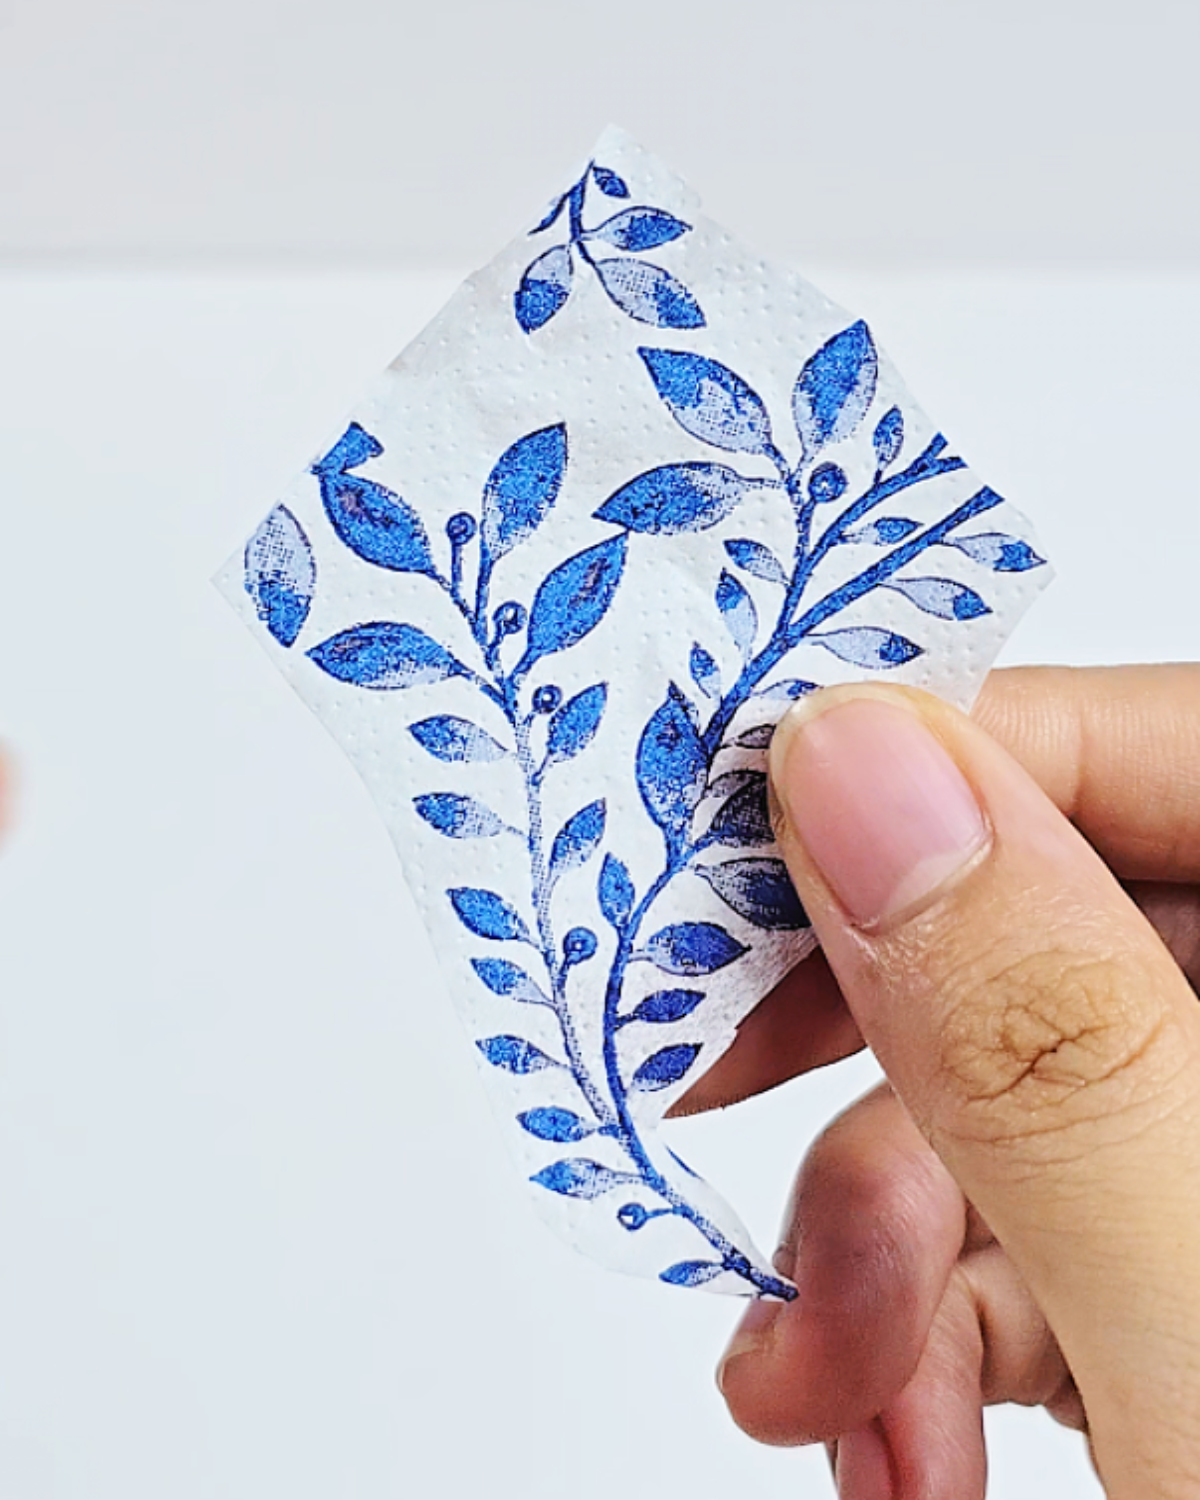
Check the pattern of your napkin paper and identify which part you’d like to remove and transfer to your jar. Try to cut as close as possible to the pattern, leaving out only a few white parts on the edges, and then remove the backing paper.Step 3: Transferring the Pattern
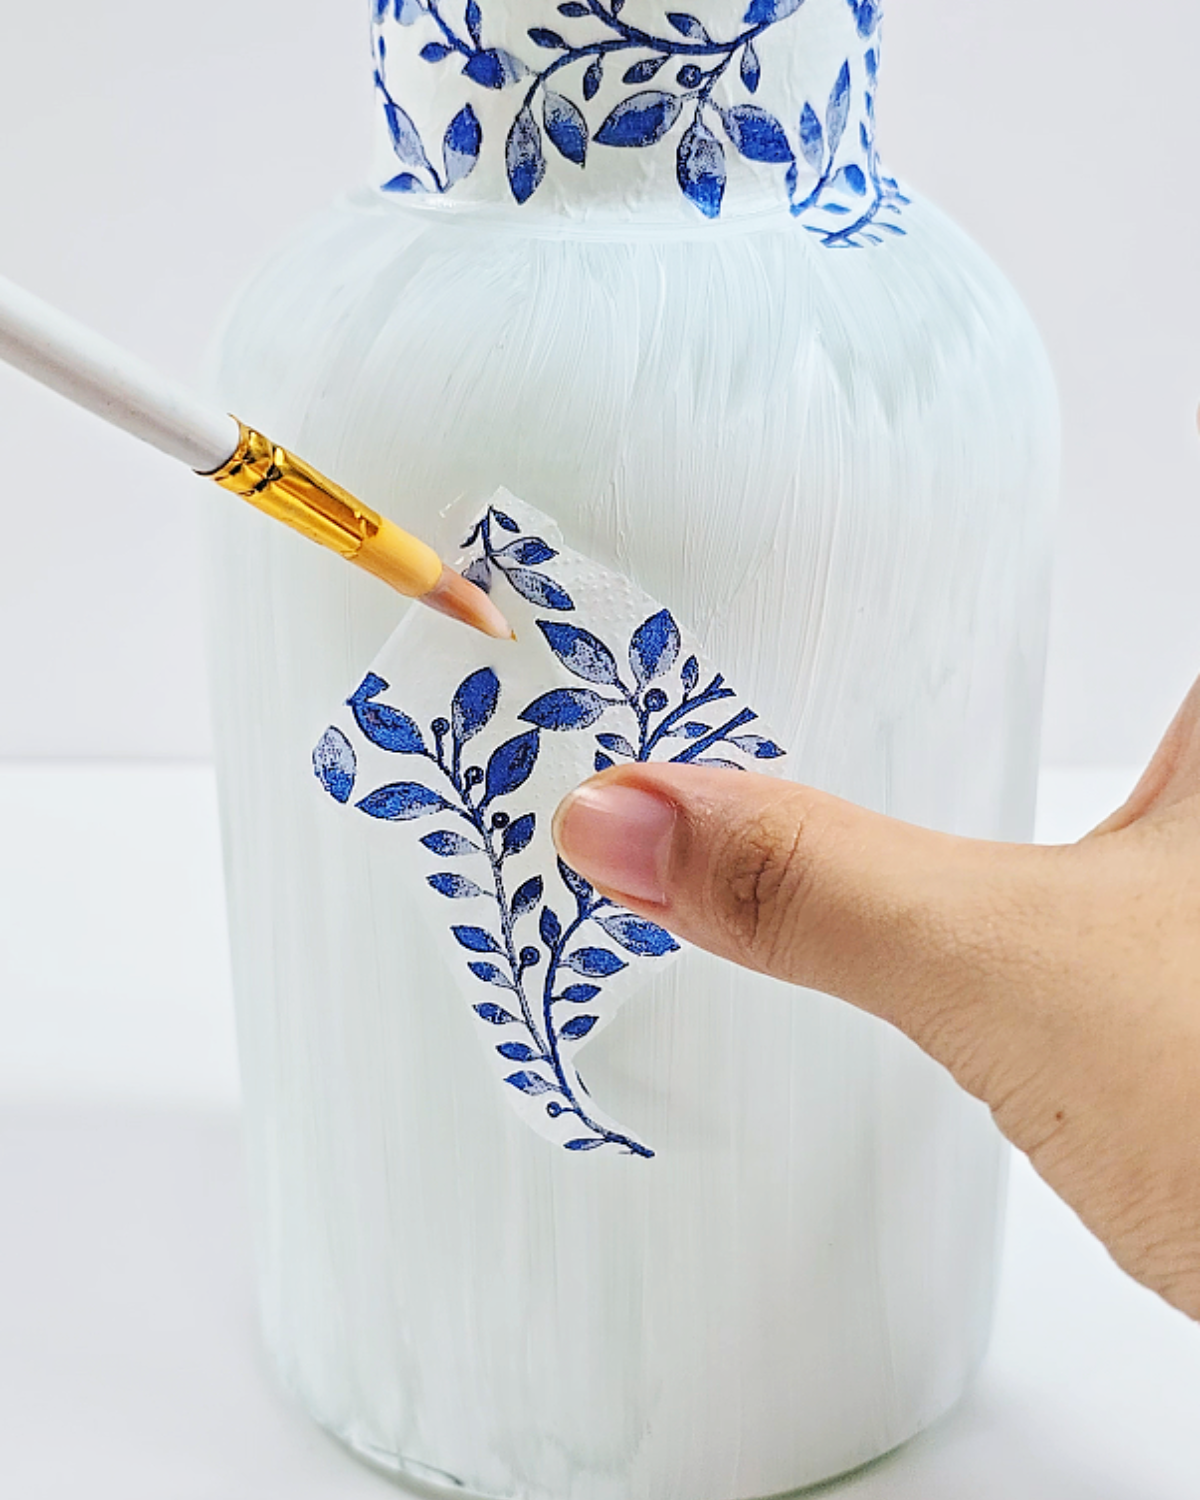
You can apply some Mod Podge (white glue and water mixture will work as an alternative) over the area where you’ll place the pattern first, or put the pattern directly without applying Mod Podge.
Once the pattern is settled, apply more Mod Podge all over the paper until it sticks in place completely. Repeat the process and keep adding more patterns all over the vase until entirely covered or the desired design is achieved.Step 4: Applying UV Resin
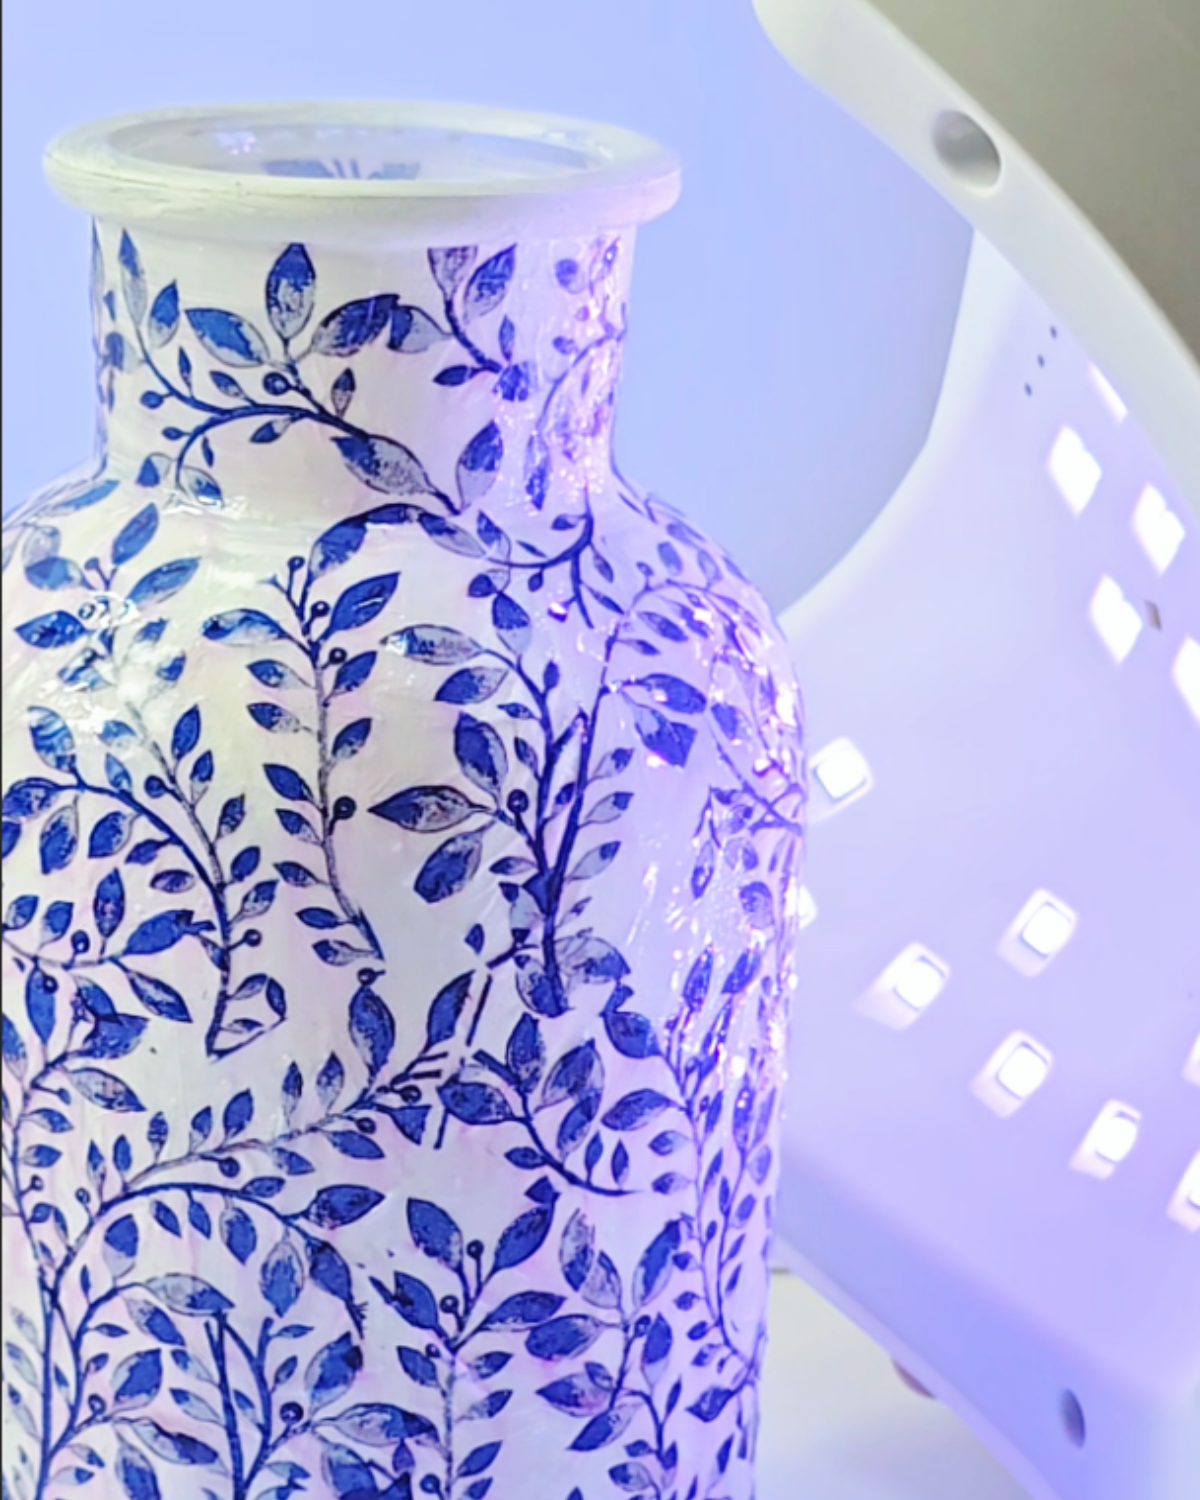
This step is completely optional, and you can leave your vase as is at this point if you like. However, if you want to add some extra security and shine to your vase, you can seal the paper by applying UV resin. If you don’t have or don’t want to use resin, a clear nail polish will work!Step 5: Curing the Resin
Let the resin cure using a UV lamp. If the jar doesn’t fit under the lamp, hold and rotate the lamp all over the vase. Work in sections to ensure even curing. You can also use the lamp for nail polish if that is what you used on your vase.Your vase is now ready for use!
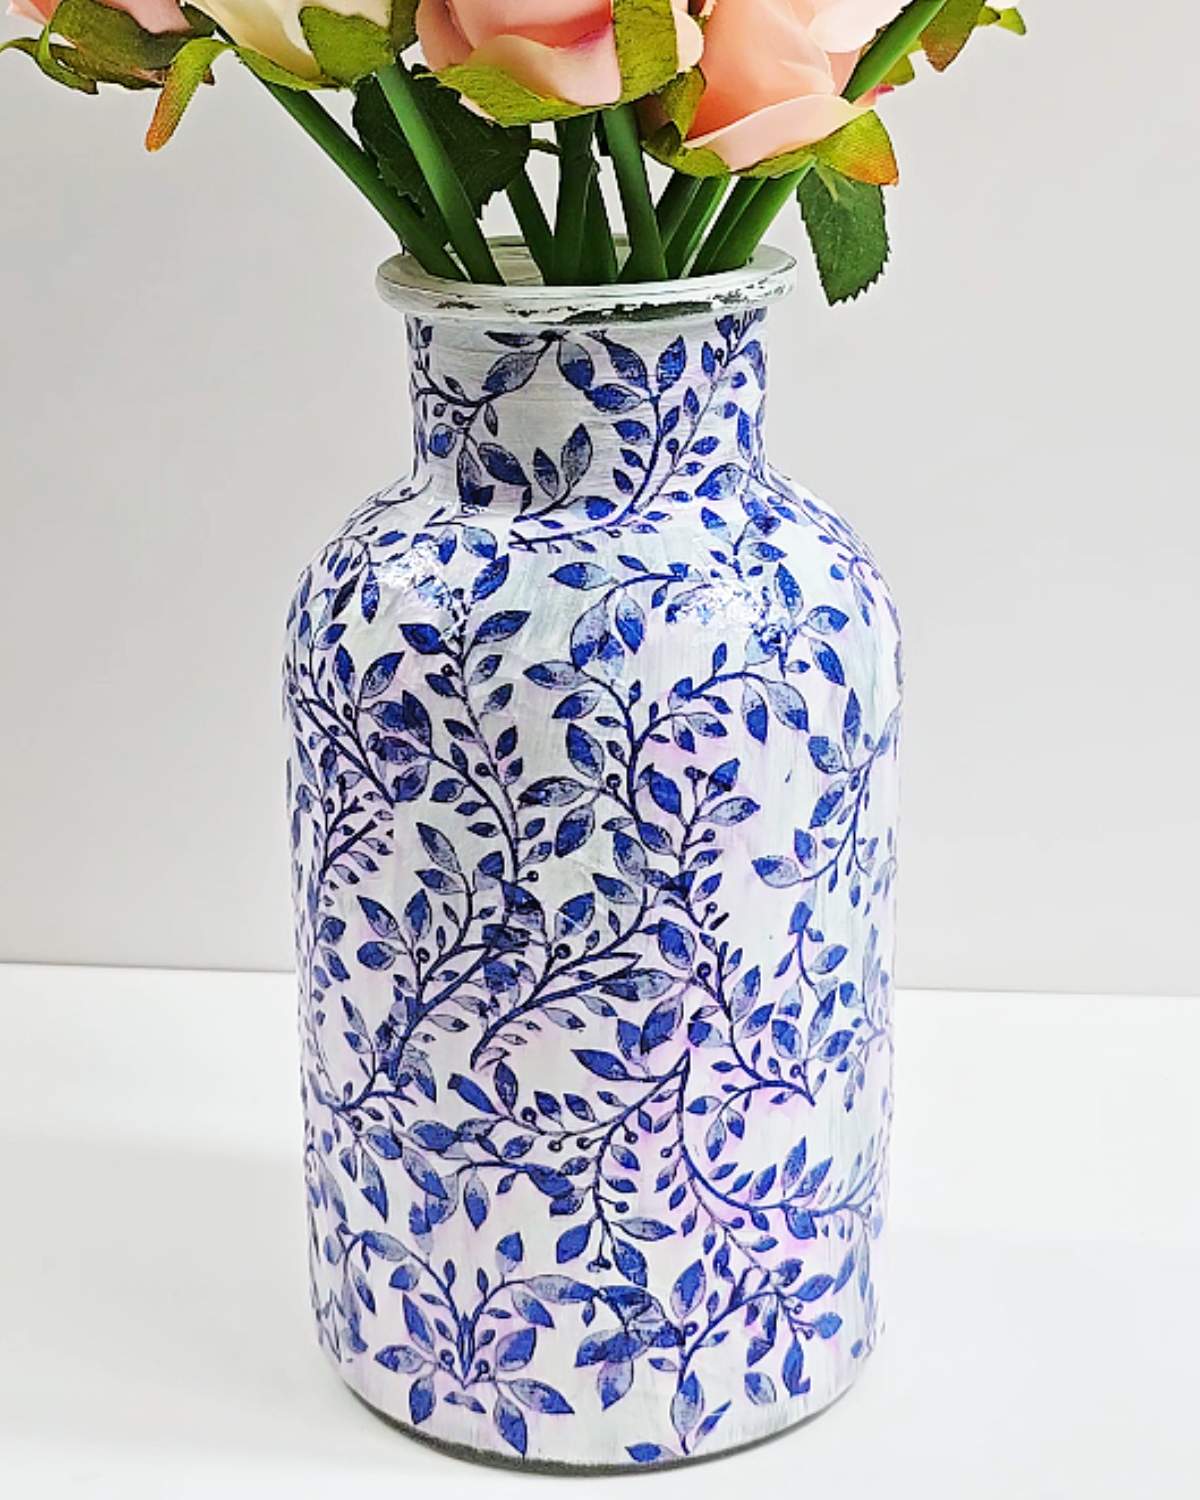
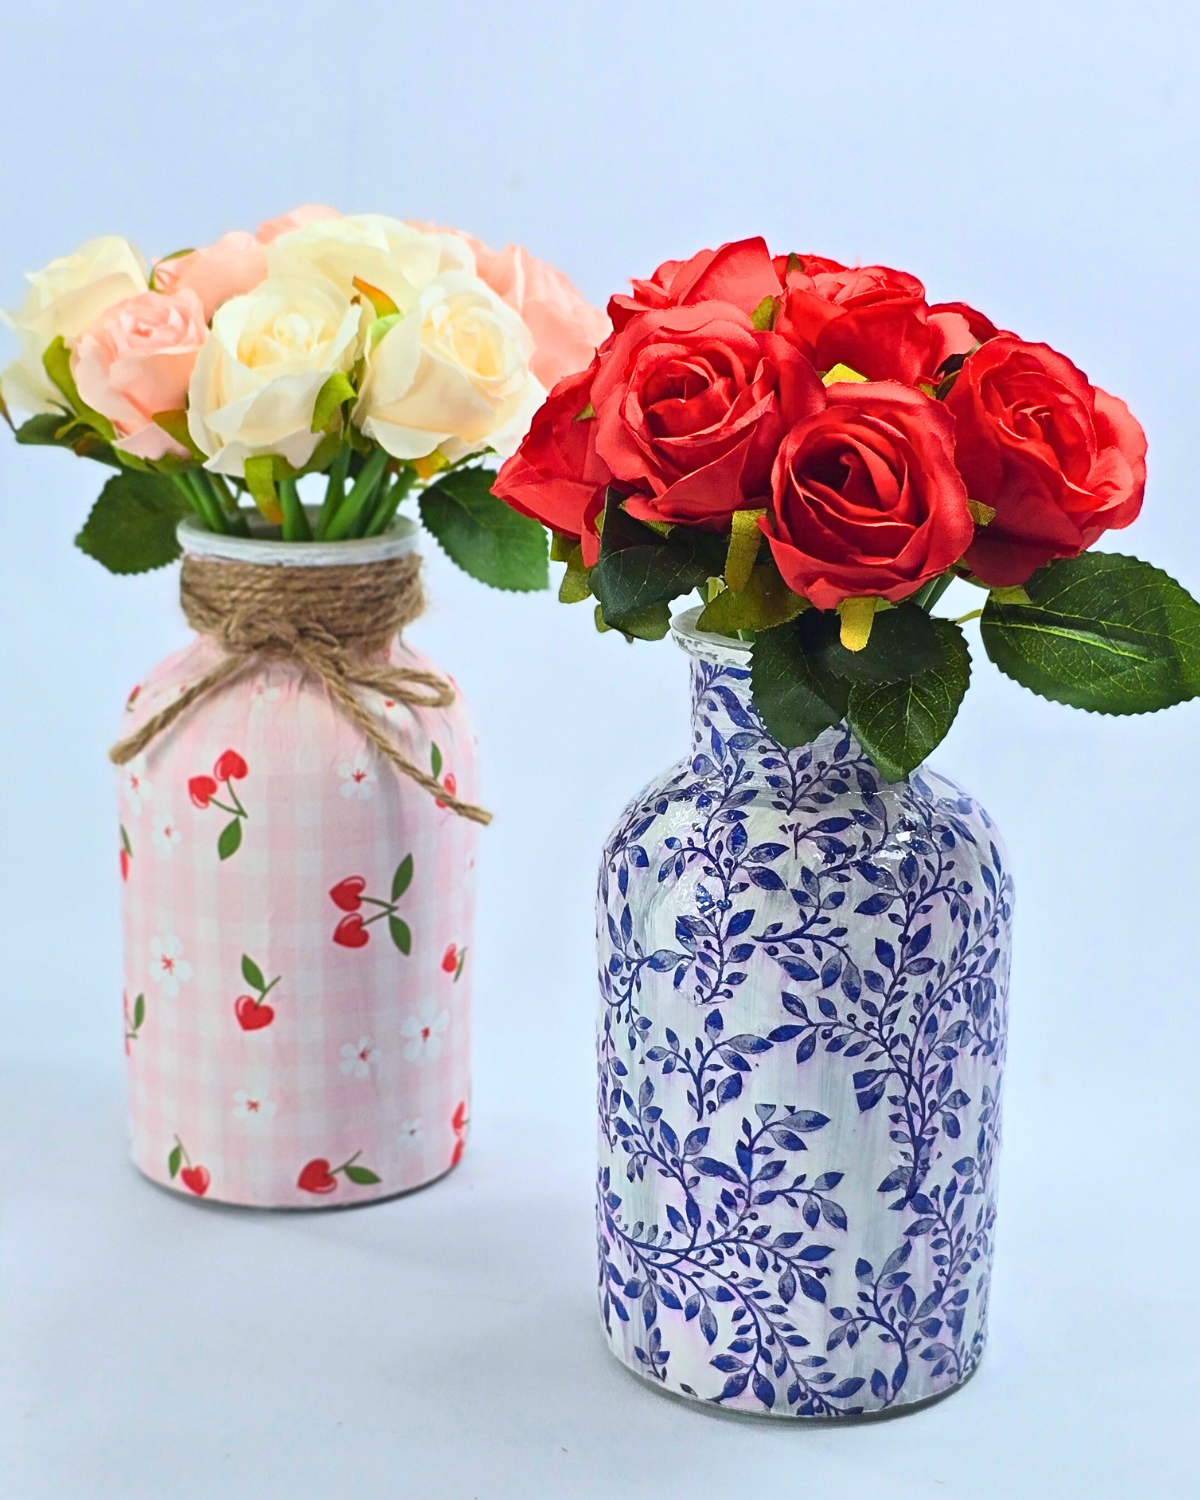
Add in any flowers that you want and place your vase on your shelf, table, or kitchen counter!


Materials
- Napkin Paper
- Scissors
- Primer or white acrylic paint
- Mod Podge or a white glue and water mixture
- Glass jar or vase
- Twine, optional
![]()
Pro Tips
Apply Glue from the Center Outward
To avoid tearing or wrinkling the napkin, start brushing your glue (or Mod Podge) from the center of the napkin outward, using a soft brush. Light, even strokes help press the napkin down without bubbling or shifting the design.
Don’t Worry About Perfect Edges
If the napkin tears a little or doesn’t line up perfectly—that’s okay! Decoupage has a beautiful, handmade feel, and those tiny imperfections just add to the character. You can even trim or sand the edges lightly once it’s dry for a cleaner finish.
Our Viral DIY Crafts

Paper Flowers

Crafts

Paper Flowers

Crafts
*If you love this craft, then visit our official website, follow our Facebook page, and subscribe to our YouTube channel for more!
DIY Decoupage Vase Using Napkin Paper