I’ve always been into making handmade flowers, trying out all kinds of materials—paper, fabric, and most recently, cocktail straws. It was one afternoon, and I was just storing away some leftover straws and thought, “Why not make something pretty out of these?” Before I knew it, I was cutting and shaping petals, and putting them together into a beautiful flower that rivals the ones that I’ve made previously.
These flowers have ended up everywhere—some sit in jars on my windowsill catching the light, others I give to friends and family because they’re easy gifts that don’t need any watering. And every now and then, I tuck one into a gift box just to surprise someone.
For me, making these flowers isn’t just a craft, it’s a way to slow down, get creative, and share a little happiness in everyday moments. They’re light, quick to make, and I can whip up a bunch pretty fast to brighten up tables and gift bags. Honestly, these little flowers really do make people smile—that’s what makes it worth it.
Seriously, your next get-together could be a lot more fun with just a few of these around. And you don’t have to be a crafting pro—this is simple enough for kids, quick enough for busy days, and flexible enough to make on your own. Once you start, you’ll probably find yourself spotting chances to add these little blooms everywhere—picnics, school events, and I bet you’d even want to try making them using different color combinations. So grab some straws, get creative, and turn an ordinary cocktail straw into a beautiful flower that stays fresh forever!
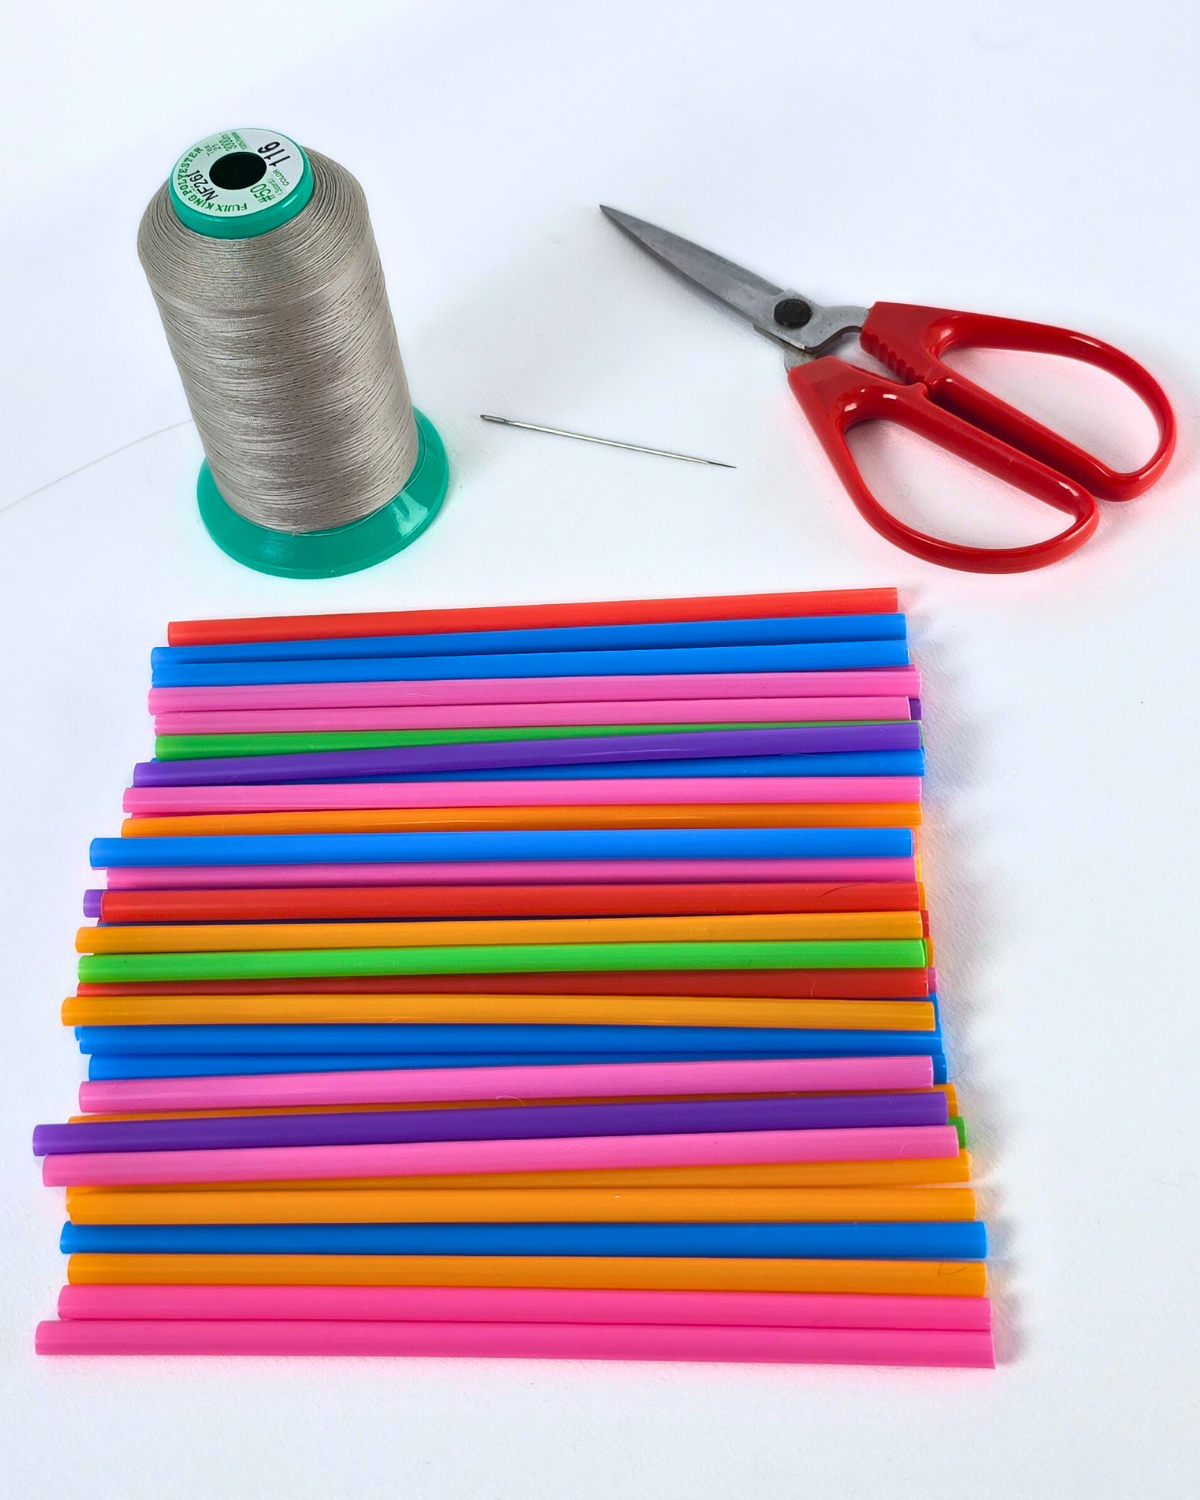
Materials for Cocktail Straw Flower
How to Make a Cocktail Straw Flower
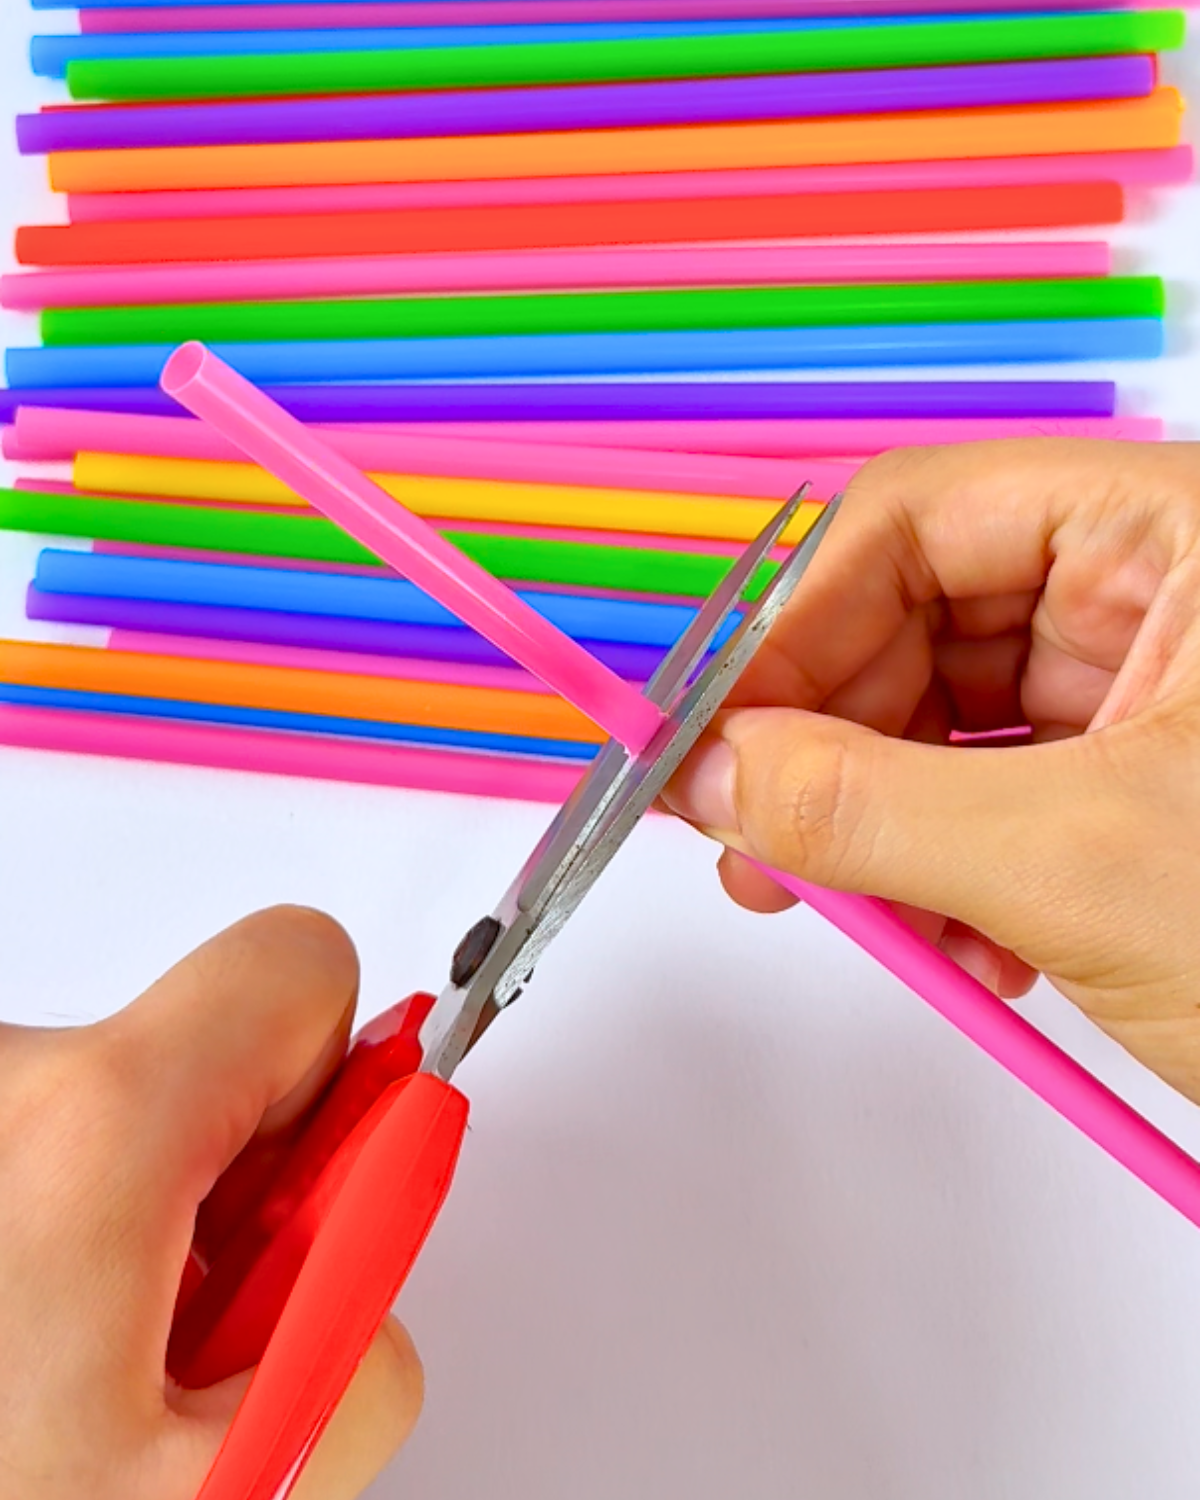
Step 1: Cutting the Straws

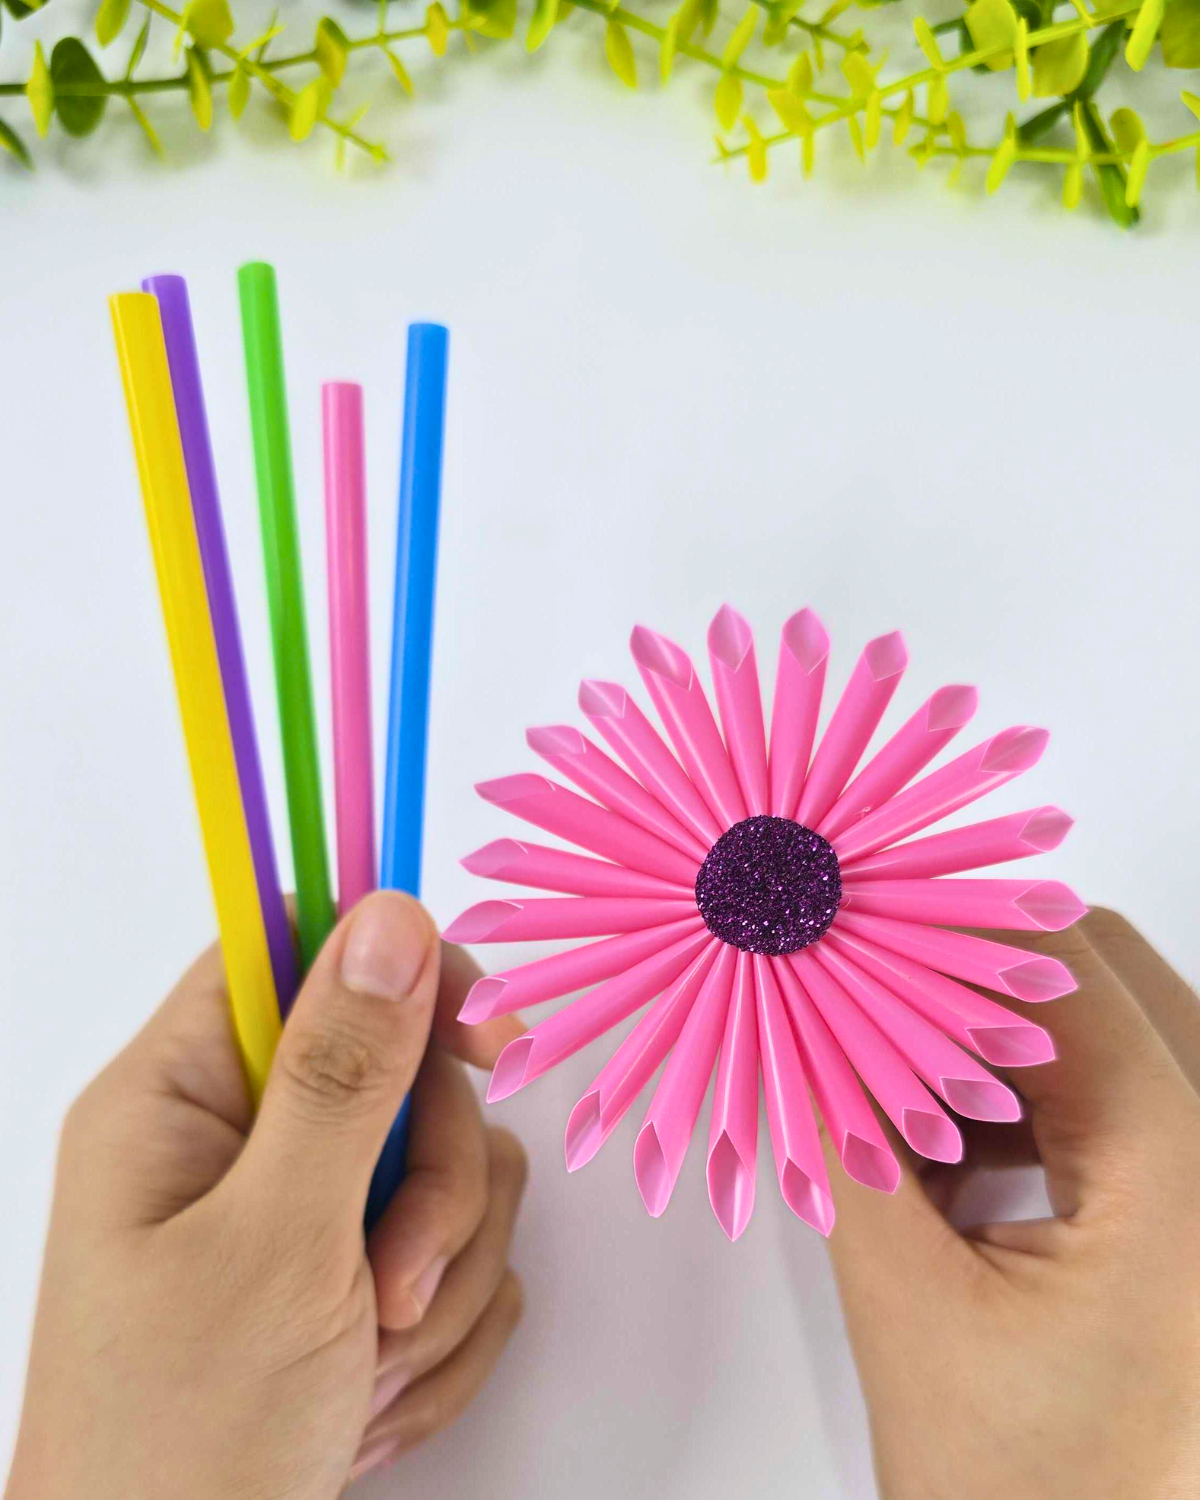
Choose about 6 cocktail straws in the colors you like. Cut off the flexible, bendable section (the corrugated part) from each straw. Then, cut the remaining straight parts in half. By the end, you should have around 12 straight straw pieces to work with.Step 2: Sewing the Straws Together
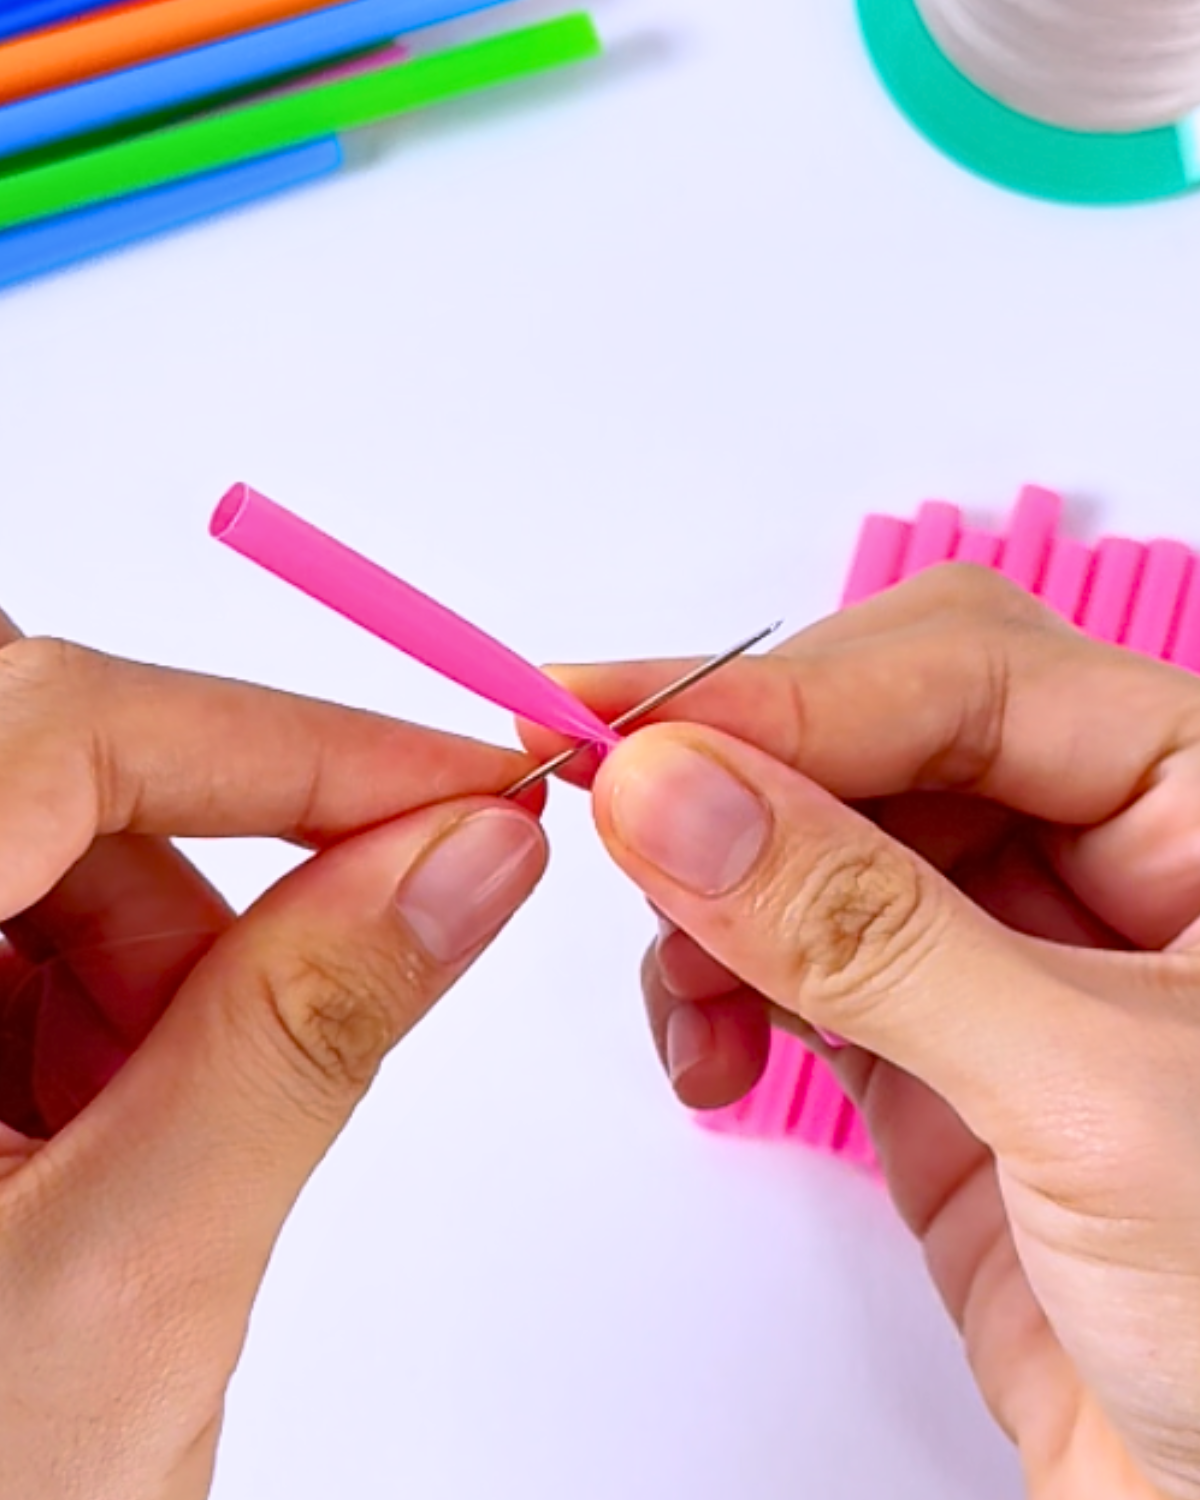
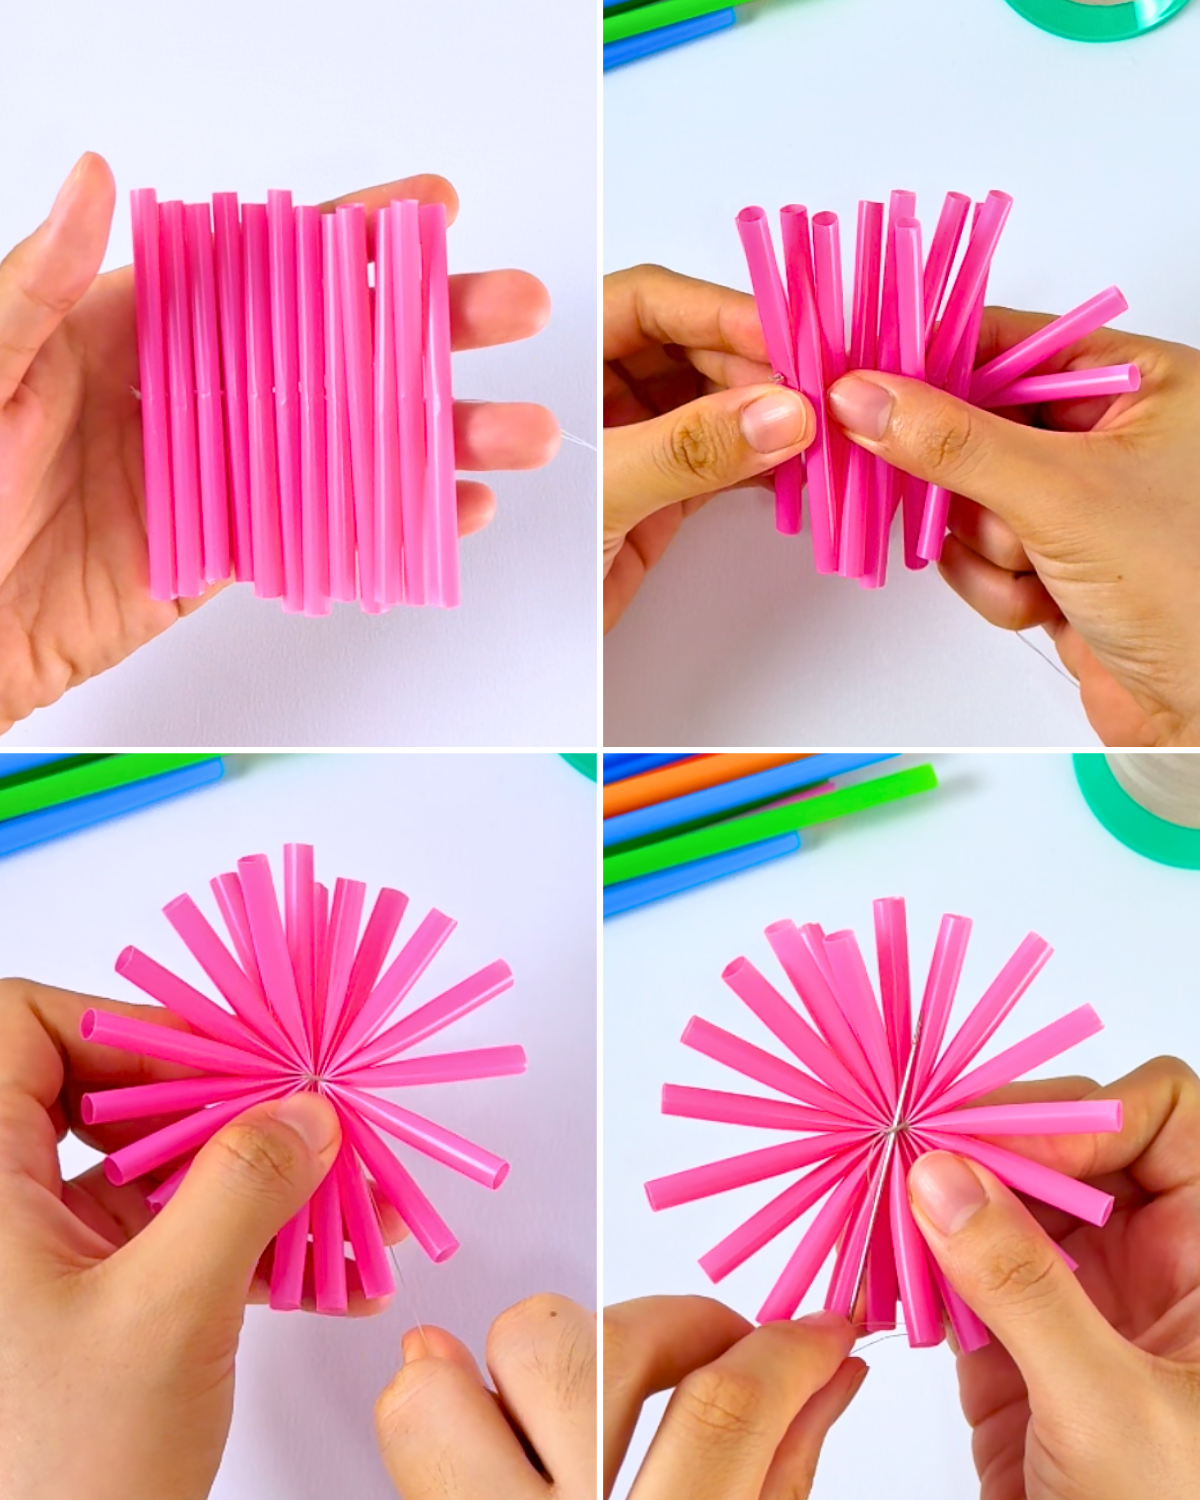
Once you have all 12 straw pieces, thread a needle and start sewing. Pierce the needle through the center of one straw piece, then stack another piece on top and sew through it as well. Continue stacking and sewing all 12 pieces together, then pull the thread tight to secure them in place.Step 3:
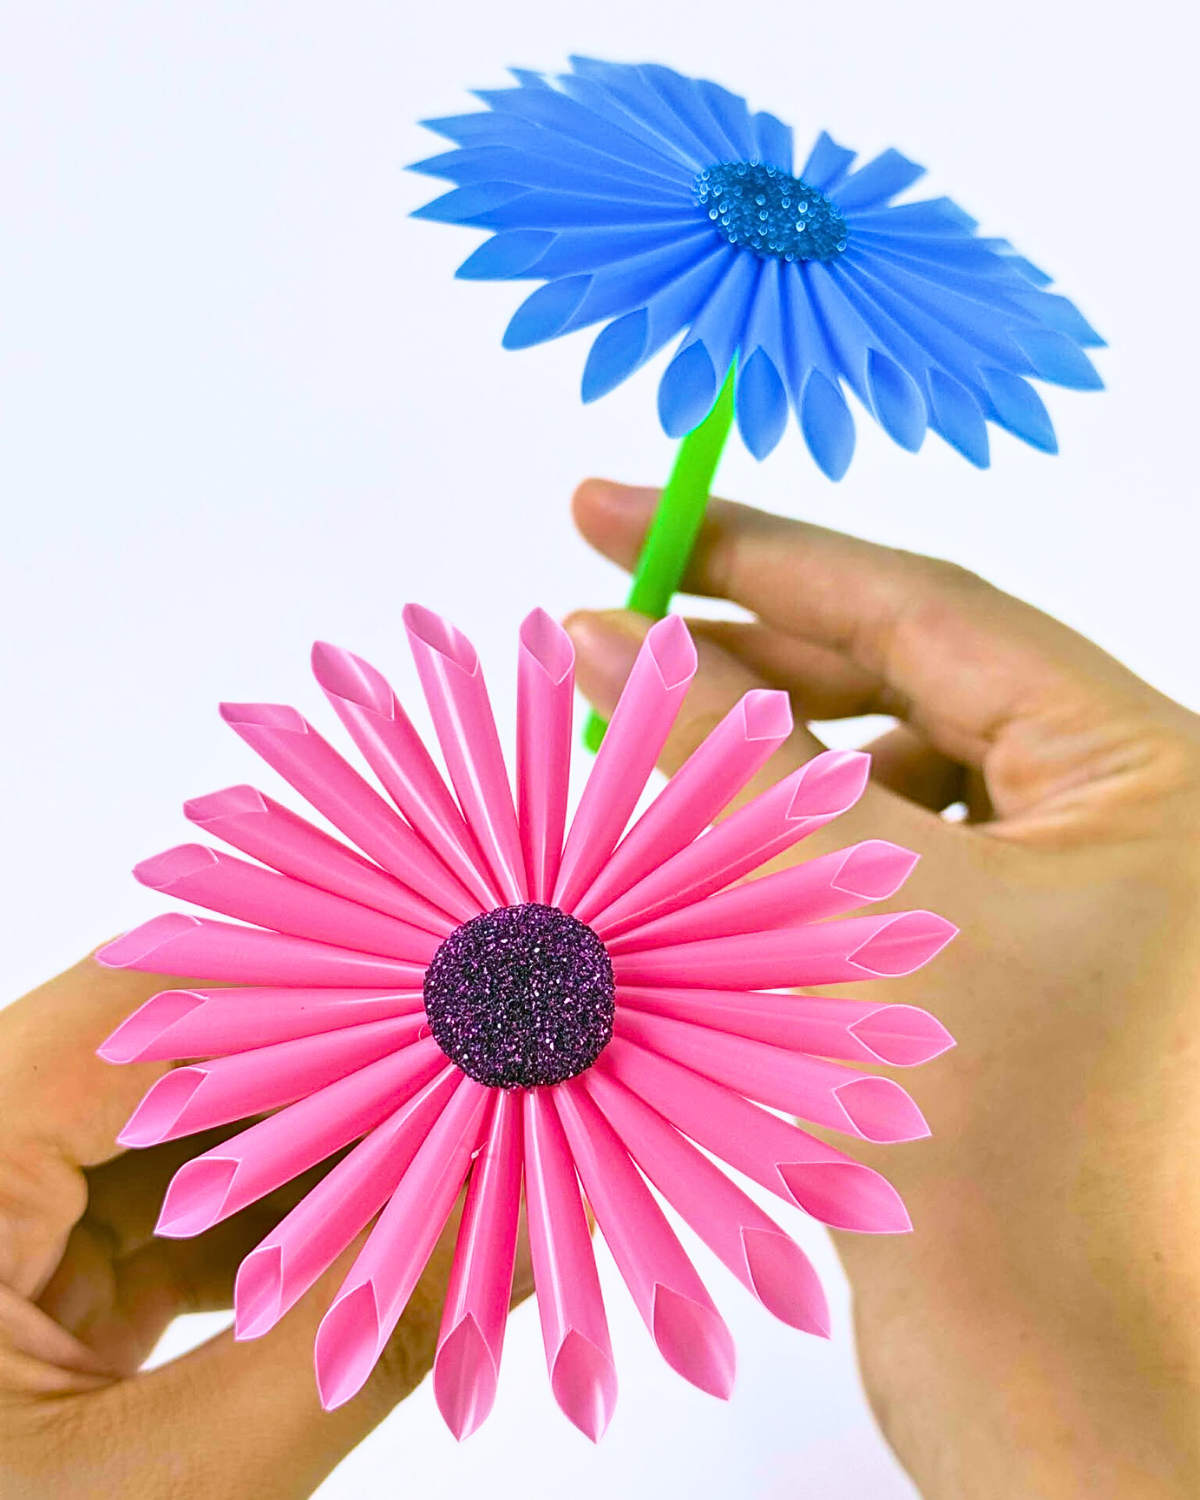
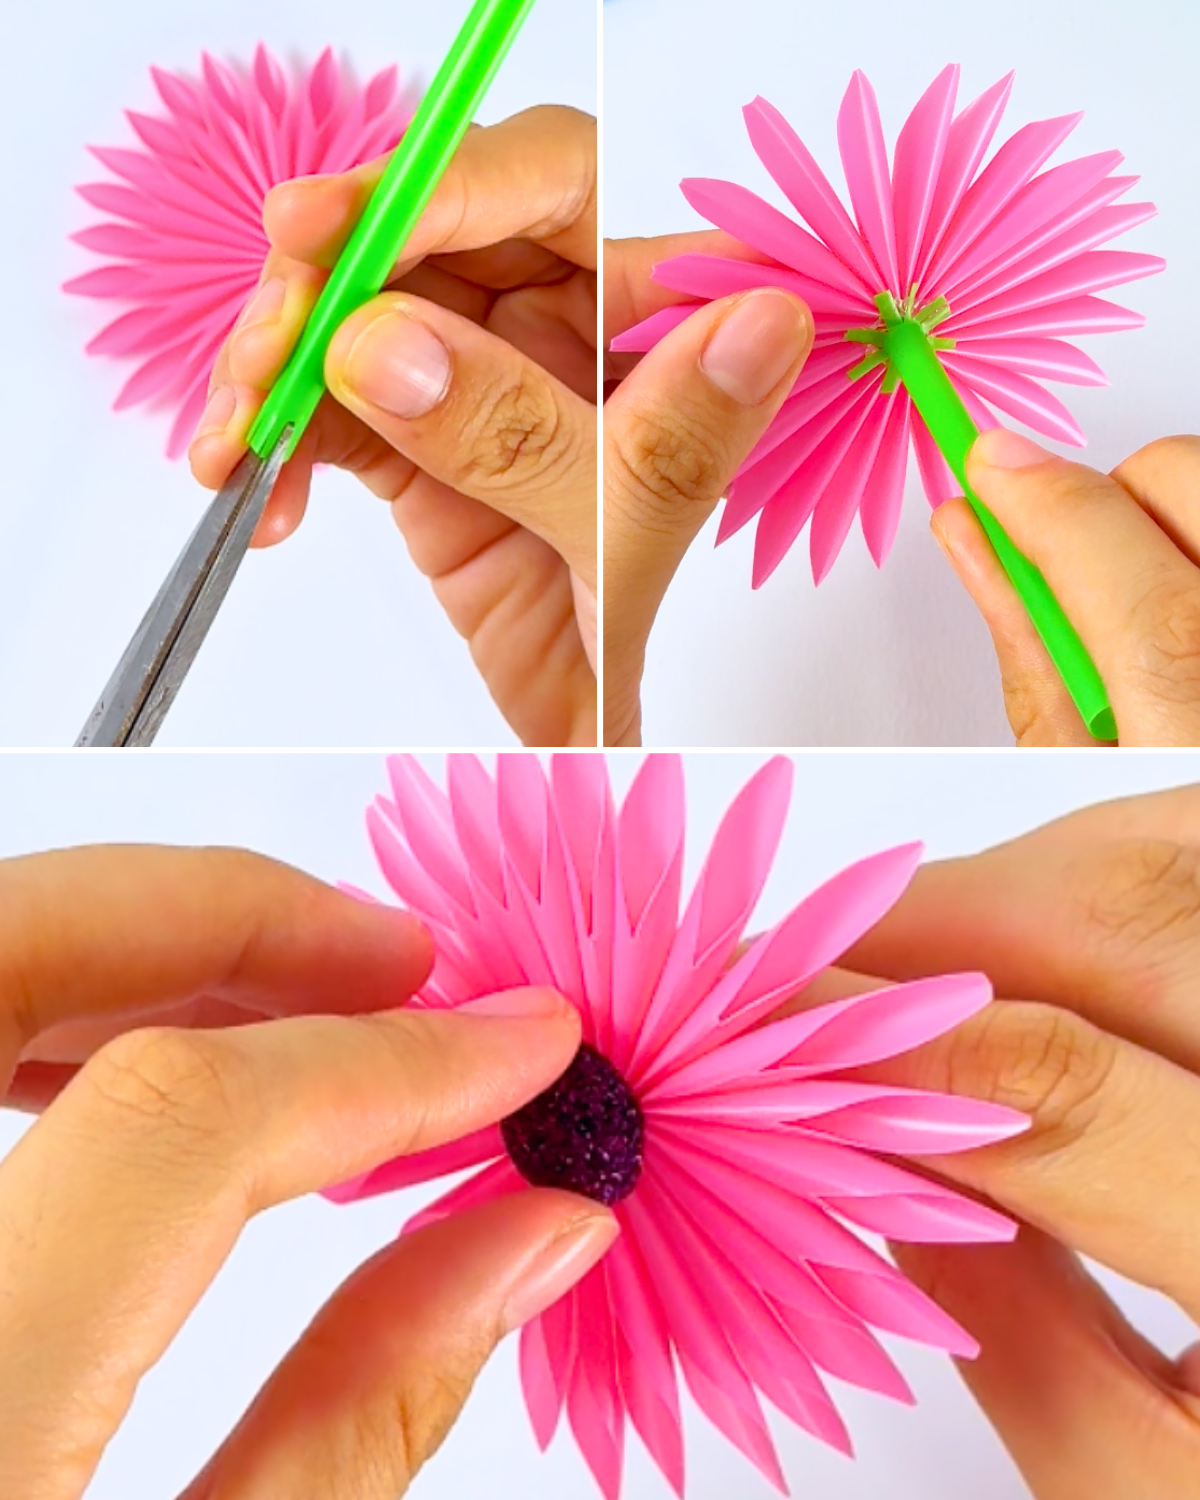
Hold the working thread tightly and keep pulling until all the straw pieces gather tightly in the center. As you pull, the ends of the straws will spread out, forming a circle. Once you’re happy with the shape, wrap the thread around the center several times to secure it, then tie a knot to keep everything in place. For more details, trim the top of the petals at an angle.Step 4: Making the Stem
To make the stem, take a green straw and cut off the bendable part. Then, cut the straw in half. Take one half and make small slits at one end, gently spreading them out. Apply hot glue to the spread slits, then attach this end to the bottom of your flower, just below the center.
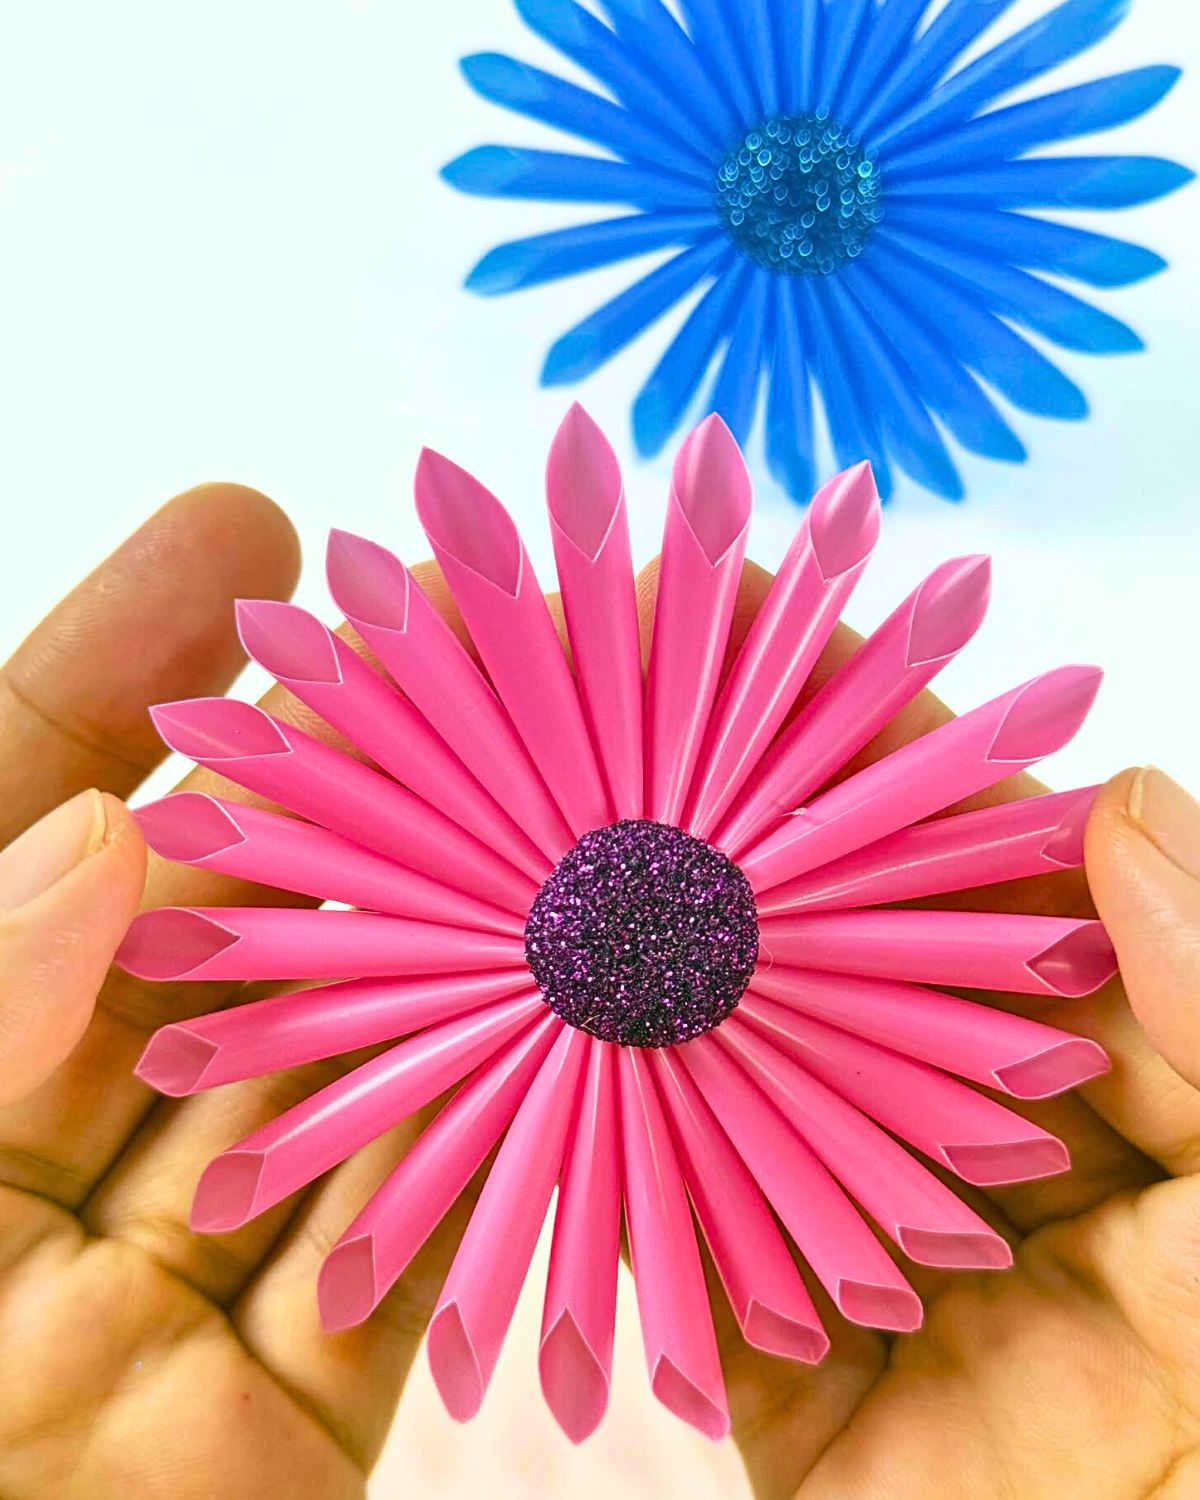
Cut a small circle from a glitter foam sheet for the flower’s center. To give it a slight curve, gently place the circle at the bottom of an iron (make sure to do this carefully). Once shaped, attach it to the top center of your flower with hot glue to finish the look.
Materials
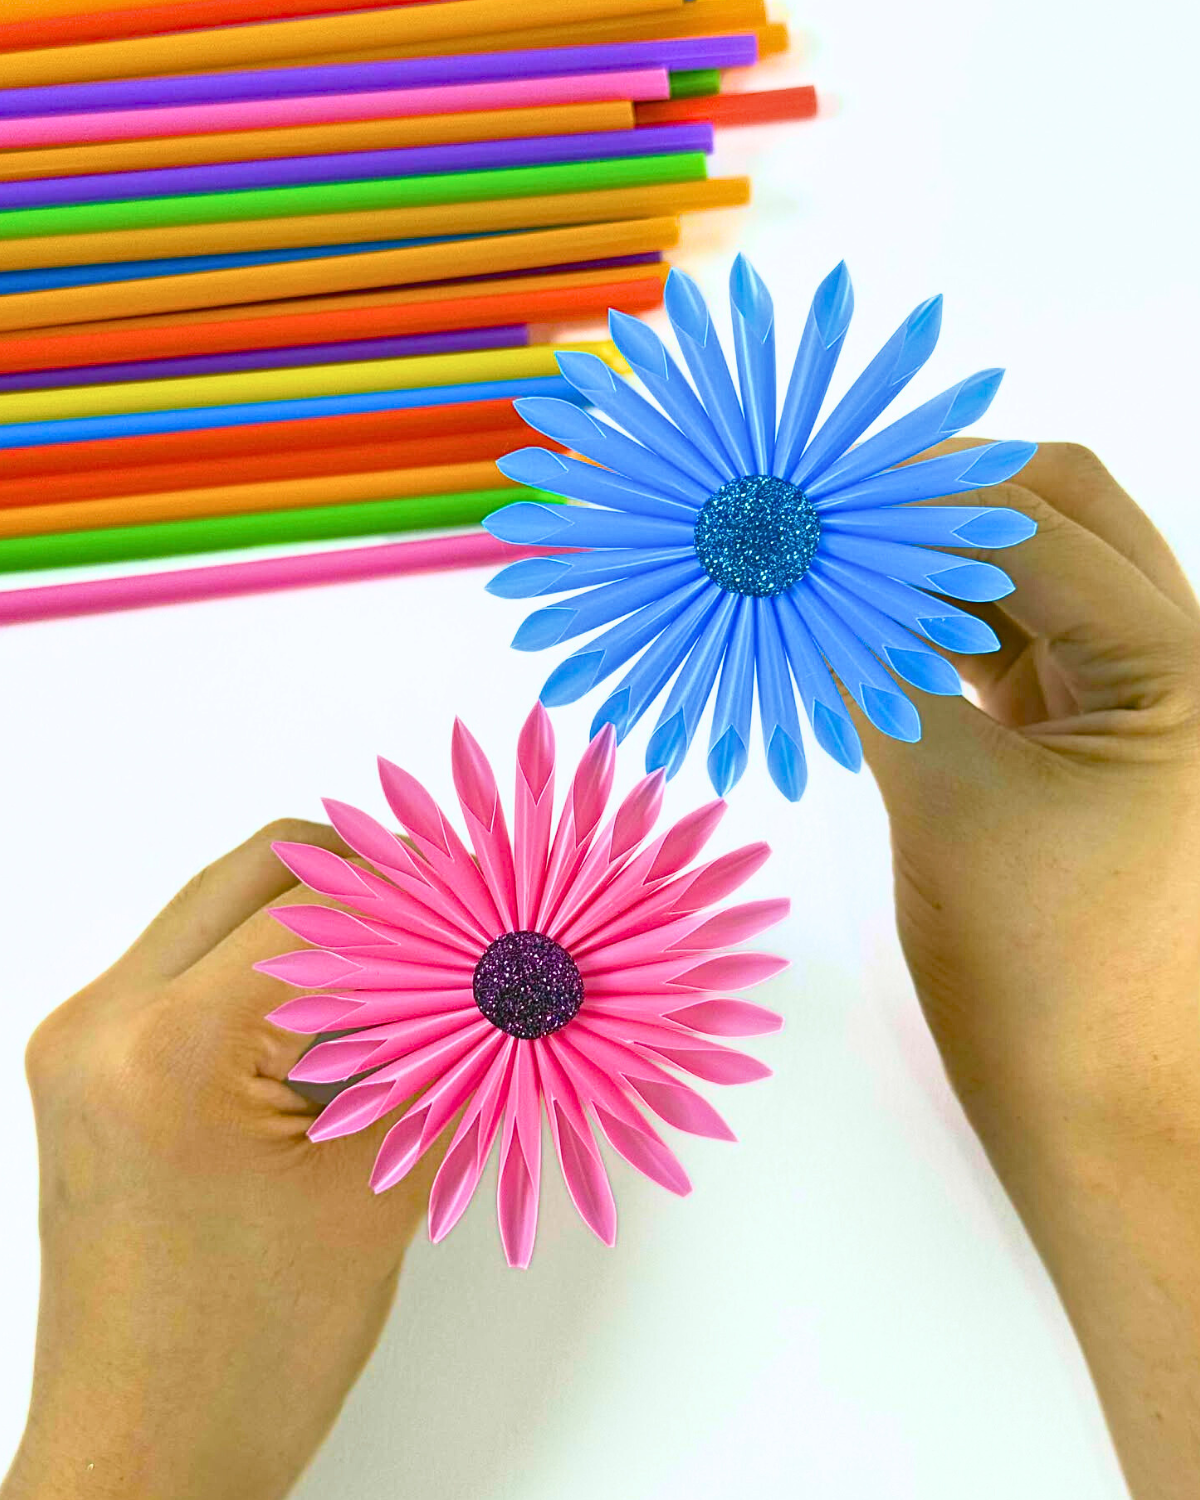
- Cocktail Straws
- Glitter Foam Sheet
- Scissors
- Needle
- Thread
- Hot Glue Gun and Glue Sticks
![]()
Why Make These Flowers?
- They’re a quick, budget-friendly way to add a personal touch to parties, gifts, or even home decor.
- Perfect for all ages—kids can join in, making it a fun family activity.
- Unlike real flowers, these never wilt, so you can enjoy your colorful creations anytime without any maintenance.
DIYJOY’s Popular DIY Crafts

Paper Flowers

Crafts

Paper Flowers

Crafts
*If you love this craft, then visit our official website, follow our Facebook page, and subscribe to our YouTube channel for more!
DIY Cocktail Straw Flowers Tutorial