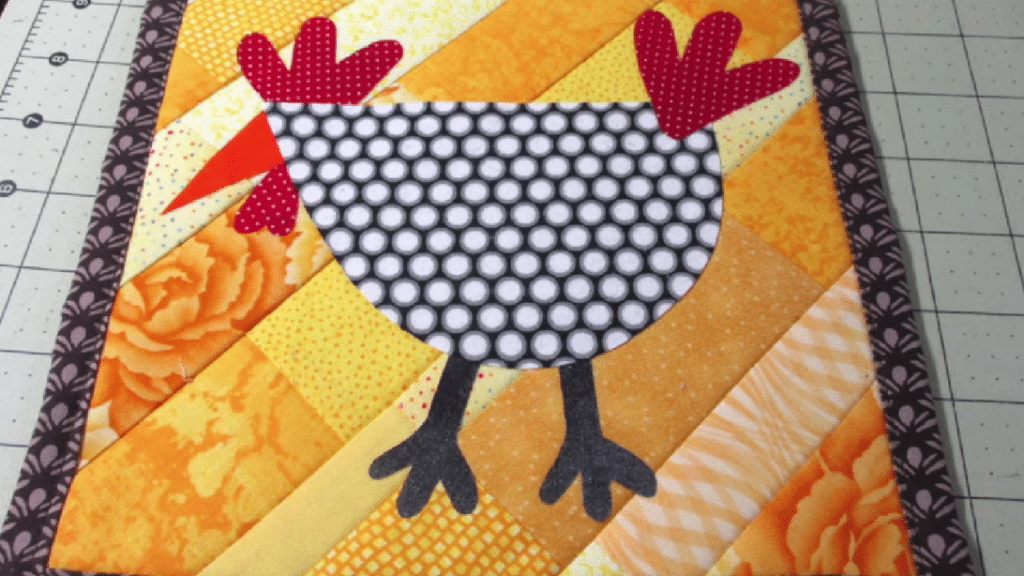
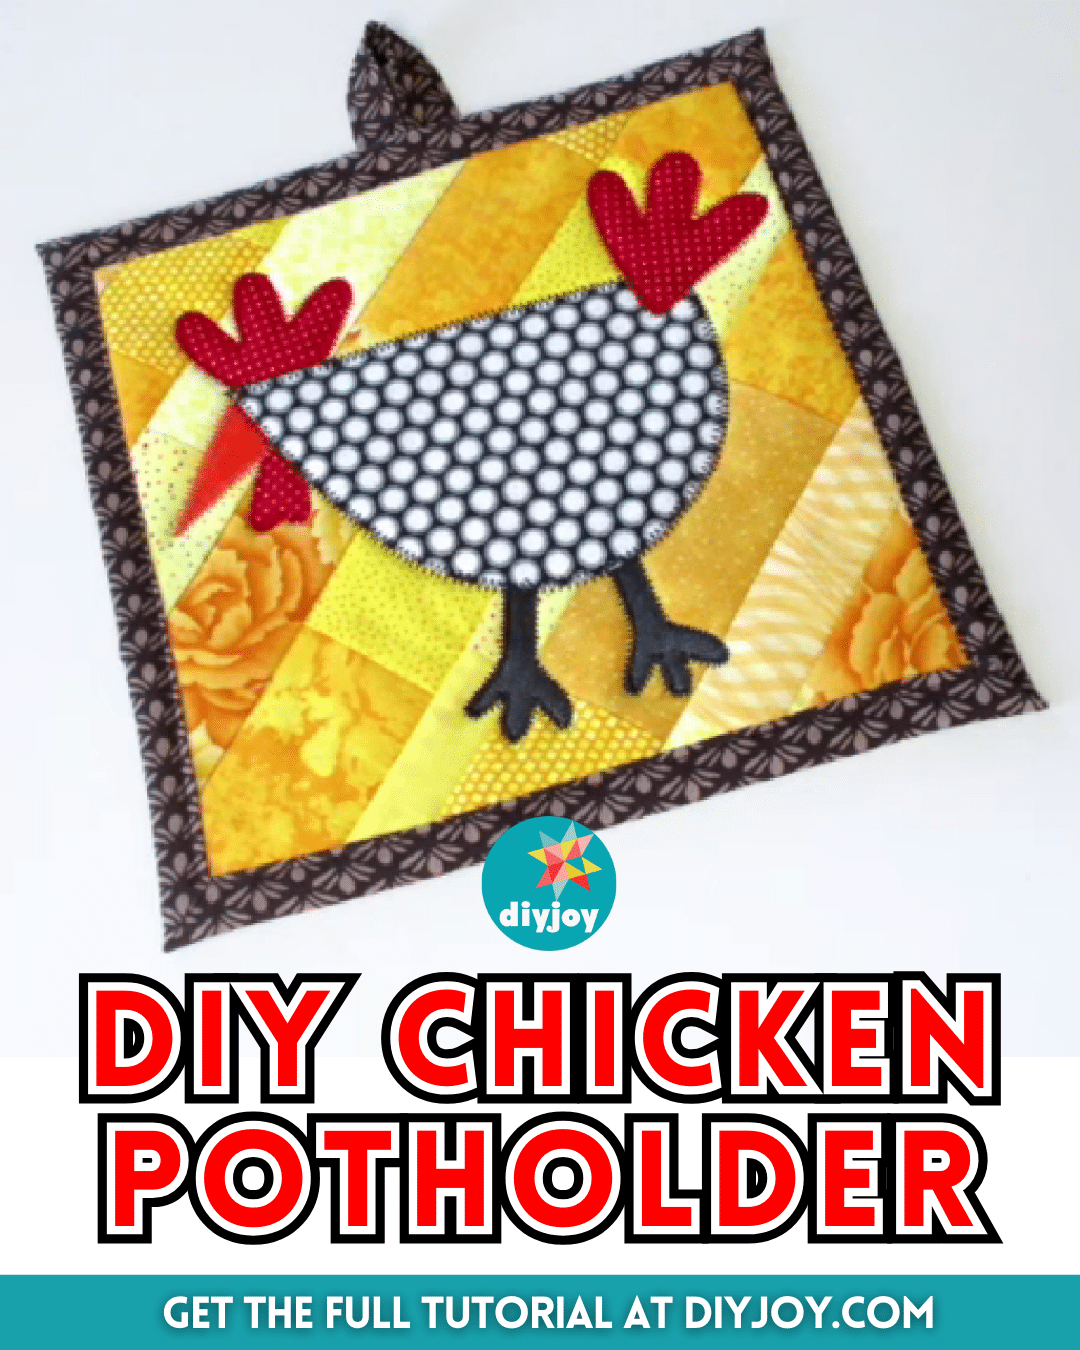
Believe it or not, this chicken potholder by Debs Days on YouTube is so easy to make that even beginners can try it. It’s made up of fabric strips and you can use scraps if you want, plus, you can finish a whole piece within just a few minutes.
RELATED: Scrappy Autumn Leaf Potholder Sewing Tutorial
Learn the steps to making this project and try making your version using any combination of fabric colors that you want. Simply follow the written instructions down below and while you’re at it make sure to watch the video tutorial as well.
Materials for DIY Chicken Potholder:
- Fabric strips
- Backing fabric
- Fabric, for the chicken
- Fabric, for the hanging loop, optional
- Cotton batting and Insul-Bright
- Paper-backed fusible web
- Marking pen, pencil, or chalk
- Ruler
- Scissors or rotary cutter and a cutting mat
- Fabric pins
- Needle and thread
- Iron, for pressing
- Sewing machine
- Template (Click here to download the template)
How to Make a Chicken Potholder:
Step 1
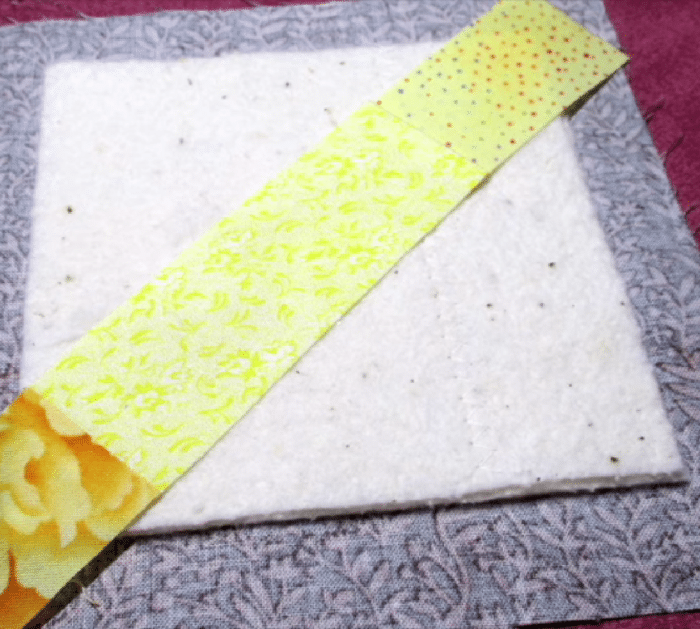
Place the backing fabric with its wrong side up, then stack the batting and Insul-Bright in the middle, and baste the stack to prevent it from moving. Place a strip diagonally at the center with its right side up, then place another strip on top with its right side down, and make sure its edges are aligned.
Step 2
Pin them in place, then stitch along the edge with ¼ inch seam allowance making sure not to stitch beyond the batting, and press the strip open. Add another piece following the same steps you did, then keep adding strips until you reach the corner. Do the same to the other side, then flip the piece over, pull the backing away, and cut off the excess fabrics from the batting.
Step 3
Now, trim the backing so it’s 1¼ inch away from the fabric, then fold the corner of the backing, unfold, and cut along the crease line. Fold the cut corner and press, then fold the sides so the raw edges meet, and fold the backing over one more time and press. Do the same all around the sides, then adjust the mitered corner if needed, and topstitch near the edges.
Step 4
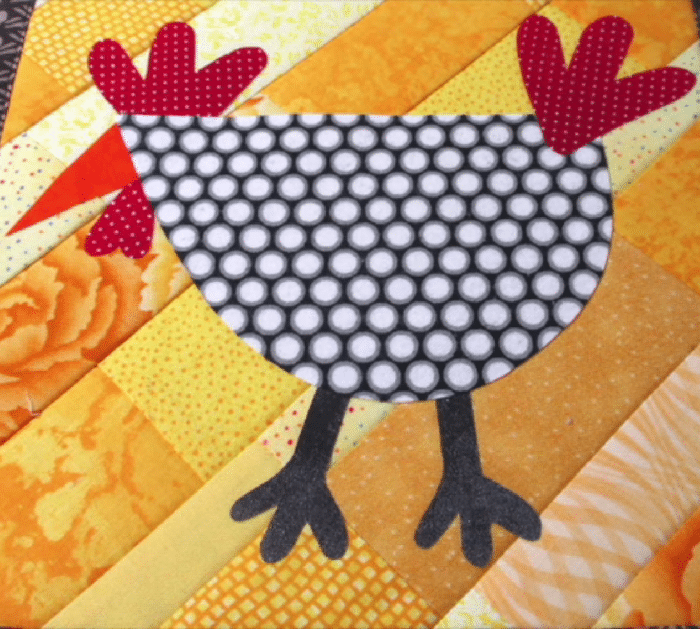
Trace the chicken template on the fusible web, then fuse the piece to the wrong side of the fabric, and cut out the traced shapes. Remove the paper and arrange the chicken in the center, then topstitch around the edges of the shape, and add the hanging loop if desired.
*All image credit belongs to Debs Days via YouTube. Follow and subscribe to her channel for more!
Easy DIY Chicken Potholder Tutorial


