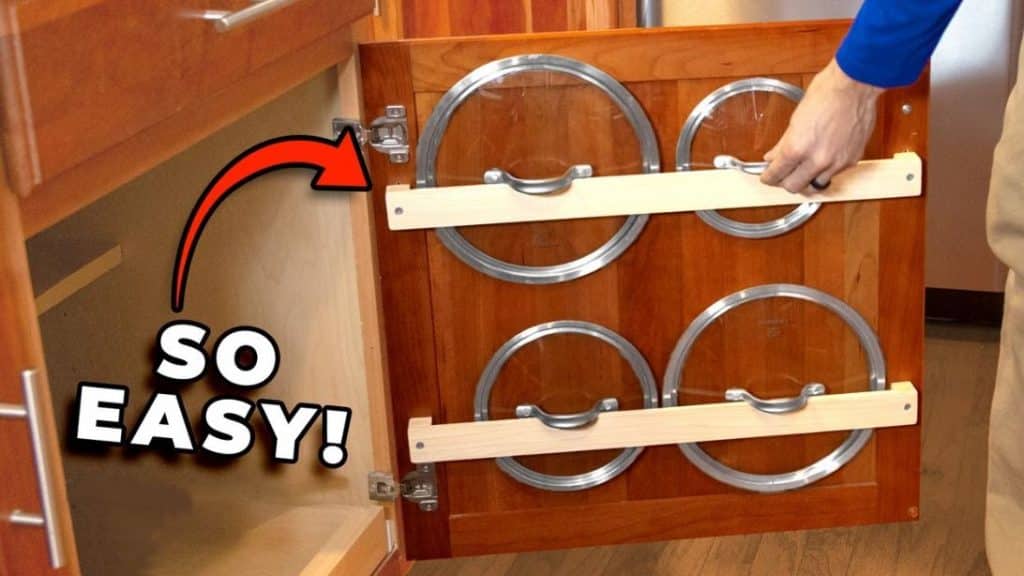
I have always struggled to organize all of my pot lids because no matter what I do or how I stack them, they always come out cluttered and look so cramped together, and they are even sometimes difficult to remove. That’s why I wanted an organizer for my pot lids that is simple and neat looking but most importantly, space-saving and this project by Fix This Build That on YouTube is exactly what I have been looking for!
Materials:
- Poplar wood
- Wood glue
- CA glue
- Miter saw
- Drill
- Screws
- Sandpaper or sanding machine
- Water-based polyurethane
- Plan (Click here to download the plan)
Directions:
Step 1
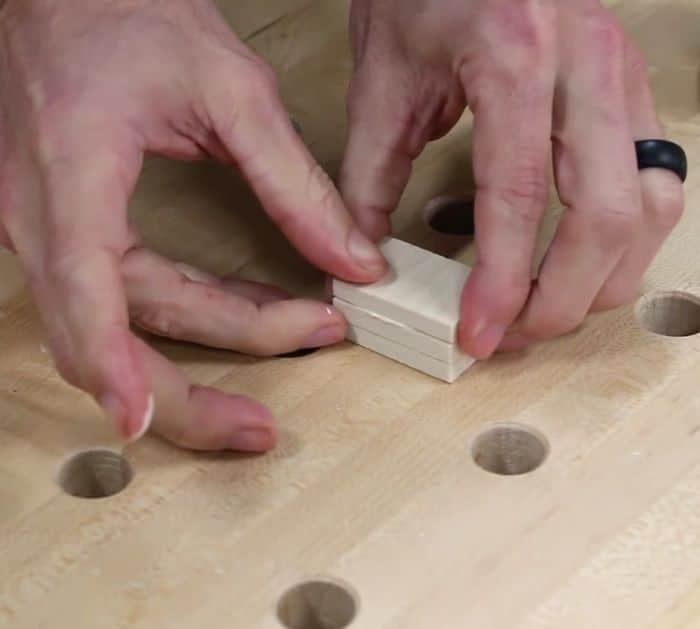
Measure the width of your cabinet’s opening as well as the distance between the sides of the doors, then cut the poplar wood into ¼-inch strips that are 1.5 inches by 3 feet long each, and start by cutting six 1-inch spacers for the rack. Sand the blocks smoothly and remove all of the sharp edges, then glue the three spacers together using wood glue and CA glue, and smoothen the whole spacer flat.
[social_warfare]
Step 2
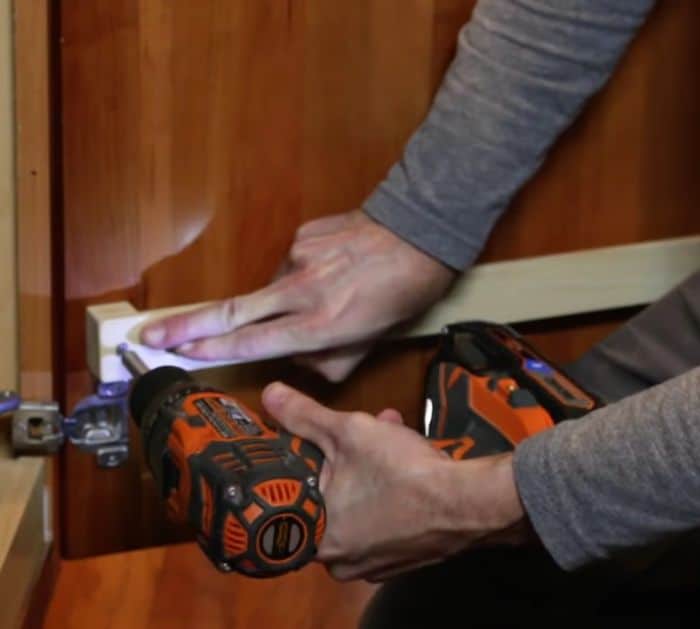
Next, attach the spacer to the long piece on each side using glue, then hold it down with a clamp, and let it dry. Using the same process, create two more racks, then once dry, sand them nicely until smooth, and pre-drill the pilot holes before coating the pieces with polyurethane making sure to sand in between each coat. Install the racks to the cabinet door with screws, then install the other racks spacing them evenly, and you’re done!
*Thanks to Fix This Build That via YouTube for all images used here. If you loved this project, then you’ll surely love his other videos too, so give his channel a visit and subscribe!
Easy DIY Cabinet Lid Organizer Tutorial


