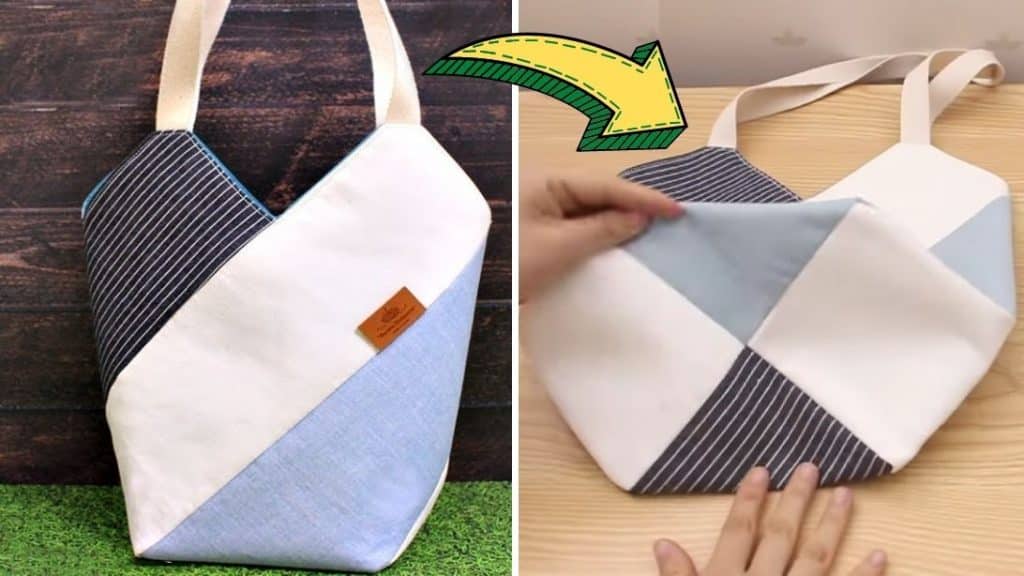
Can you believe that it only took a few scrap fabrics to make this beautiful windmill tote bag by sewingtimes on YouTube? Well, you better try making it and see for yourself. You can use this anywhere, give them as a gift, or sell them.
Materials:
- 4 pieces of 6*21 inches outer fabric, different colors and patterns
- 4 pieces of 5½*20½ inches lining fabric
- 1 piece of 8¾*12⅝ inches lining fabric, for the pocket
- 1 piece of 8¾*12⅝ inches lightweight woven fusible interfacing, for the pocket
- 47½ inches long webbing strap, cut in half
- 4 pieces of 4¾*19¾ inches fusible fleece
- Scissors
- Marking pen
- Pins
- Clips
- Button snaps
Directions:
Step 1
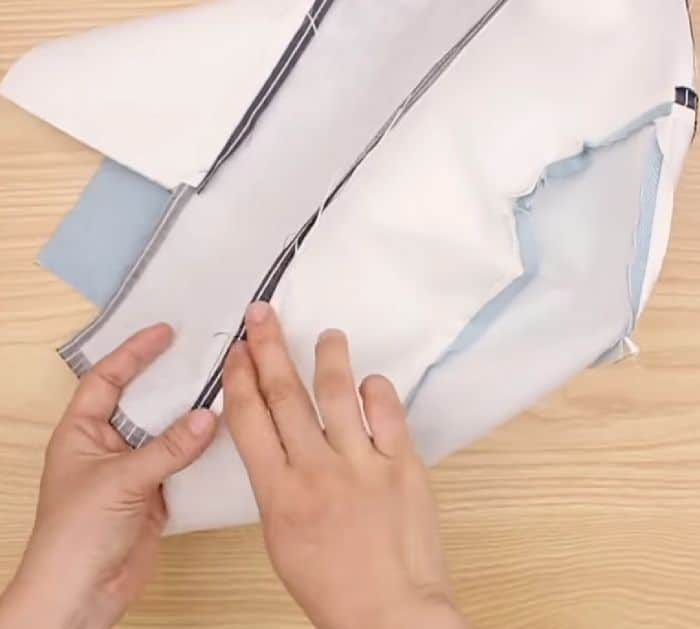
Attach the fusible fleece fabrics onto the wrong side of the outer fabrics by pressing them with an iron. Mark 0.4″ around the fused fabrics and cut them out. Grab 1 fused fabric and lay it with its right side up, then overlap another fused fabric horizontally at the bottom with its right sides facing down and their edges matching. Mark 0.4″ down from the shorter side of the overlapped fabric, then sew them together leaving 0.4″ at the top corner unsewn, notch the fabric underneath right where the overlapped fabric ends. Repeat the process for the other 2 fabrics, then after sewing, spread all of them open. Stack them together with their right sides facing, the vertical fabrics beside each other, and the horizontal fabrics at the bottom are both facing out. Mark 0.4″ from both sides of the bottom center of the fabric, and sew them together with a 0.4″ seam allowance. Make notches on every intersection of the fabric, spread the fabric open, then fold 1 fabric on top of the fabric beside it, and match their edges together. Sew the outermost side with a 0.4″ seam allowance. Repeat the process to the next fabric until you’re done building the whole body of the bag, press the seams open.
[social_warfare]
Step 2
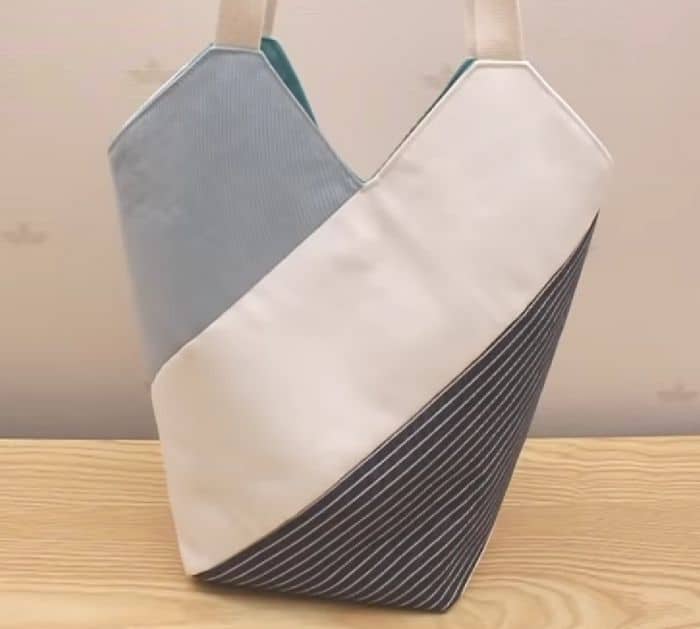
Repeat all of the processes above to the lining fabric pieces until you’ve built another set of bags, then set it aside. Attach the lightweight woven fusible interfacing to the lining fabric for the pocket by pressing with an iron. Fold it in half with its right side facing, then pin both sides in place, curve the lower corners, and then trim it out. Sew both sides leaving a gap at the bottom center unsewn, then notch the curved areas, and turn it right side out. Give it a good press, then make 2 top stitches at the folded longer side of the fabric. Find its midpoint and sew in the middle of the lining fabric, then sew all sides of the bag leaving only a small gap at the side unsewn, and then press it with an iron. Sew the webbing strap to the pointed edges of the bag, then attach a button on the right side of the lining fabric. Insert the main fabric on the lining fabric with its right sides facing inside. Sew them together, then turn the bag right side out through the gap on the side of the lining fabric. Sew the gap shut, then give the bag a good press, and topstitch all around the upper seams of the bag.
*All these images are credited to sewingtimes via YouTube. Give her channel a visit and subscribe for more!
DIY Windmill Tote Bag Sewing Tutorial