Grandma’s flatware is the one inherited thing nobody knows what to do with, because it is too nice to use and too plain to display. These old silverware ideas put it back to work: spoon bowls flattened and stamped into cheese markers or cabinet pulls, forks bent into photo holders, knives and spoons glued into a starburst mirror, handles sawn and bent into cuff bracelets. Some of it is quick craft-paint work at the kitchen table and some of it wants a vice, a hacksaw and a drill with a metal bit. Silver plate bends easily at the thin points and fights you at the thick ones, so read the whole item before you start cutting.
1. Silverware Wind Chime

Flattening is the whole job, and a vice does it better than a hammer. She squashed the spoons flat in a bench vice with pieces of rubber bicycle tire on the jaws so the metal came out smooth instead of scarred. Fork tines get bent into a cross with flat nose pliers, alternating front and back, then the tips curled up with needle nose. Punch a starter dent with a pick before you drill each handle or the bit will skate straight off the silver. Fishing line and surgeon’s knots hold the tiers, and pearls and crystals fill the gaps.
Get the full tutorial at Marianne Songbird.
2. Dining Room Starburst Mirror
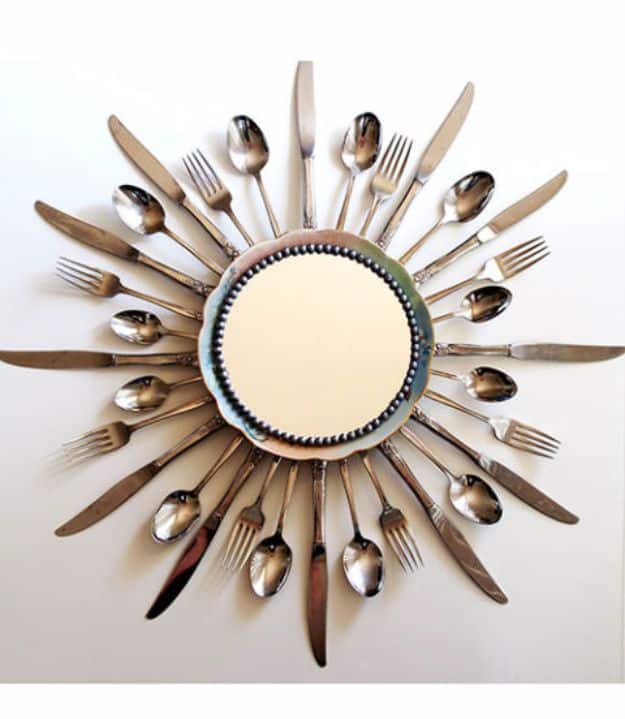
Twelve knives, eight forks and twelve spoons around a seven inch round mirror, and the structure is two cardboard circles glued together with a decorative plate on top. Press the plate rim into the cardboard first and trace it, because that traced line is what keeps thirty-two pieces radiating evenly instead of drifting. Knives go down first since they are widest, then forks and spoons fill between. Her update is the part to pay attention to: the hot glue let go after about eighteen months and she rebuilt it with E6000. Beads around the mirror edge hide the join.
Get the full tutorial at Beverly at Flamingo Toes.
3. Stamped Spoon Handles
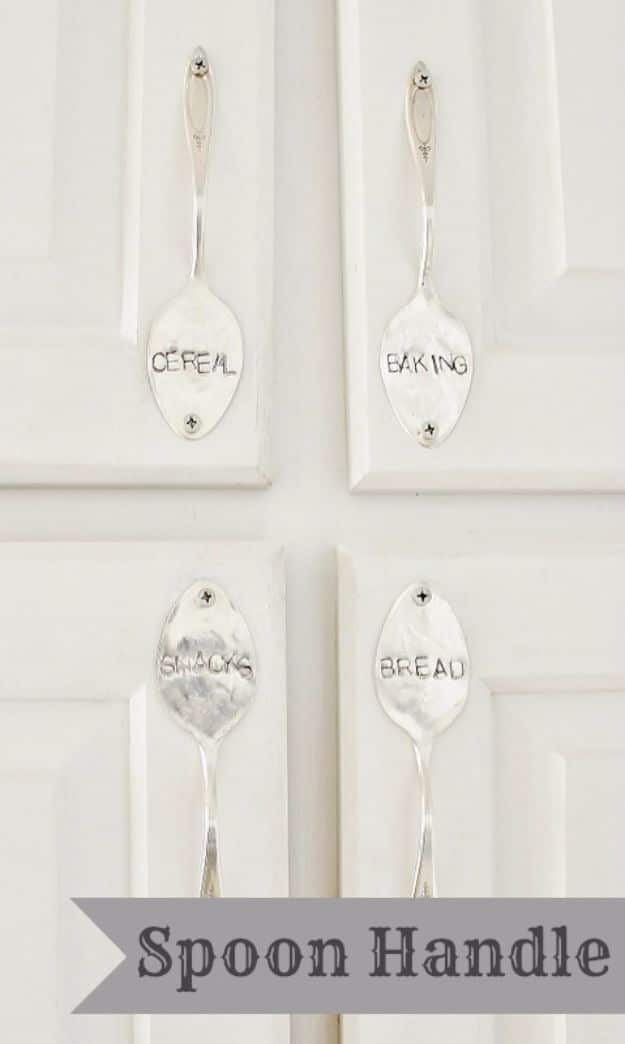
Four spoon bowls screwed flat to white cabinet doors, stamped CEREAL, BAKING, SNACKS and BREAD, with the handles curving down as the pull. Her method is gentler than it looks. Flatten the bowl with a rubber mallet rather than a steel hammer so the silver is not scarred, then bend the handle with your hands, following the curve the spoon already has until it reads as a handle, and press harder for a tighter one. Stamp next. Then tape the spoon to a block of wood and drill a hole at the top and the bottom before you screw it on.
Get the full tutorial at KariAnne Wood at Thistlewood Farms.
4. Paint Dipped Silverware DIY
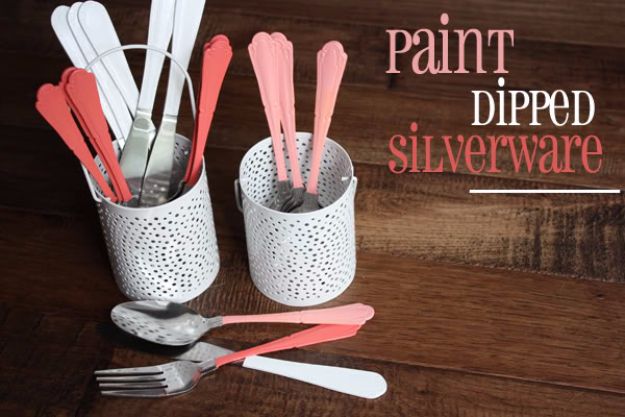
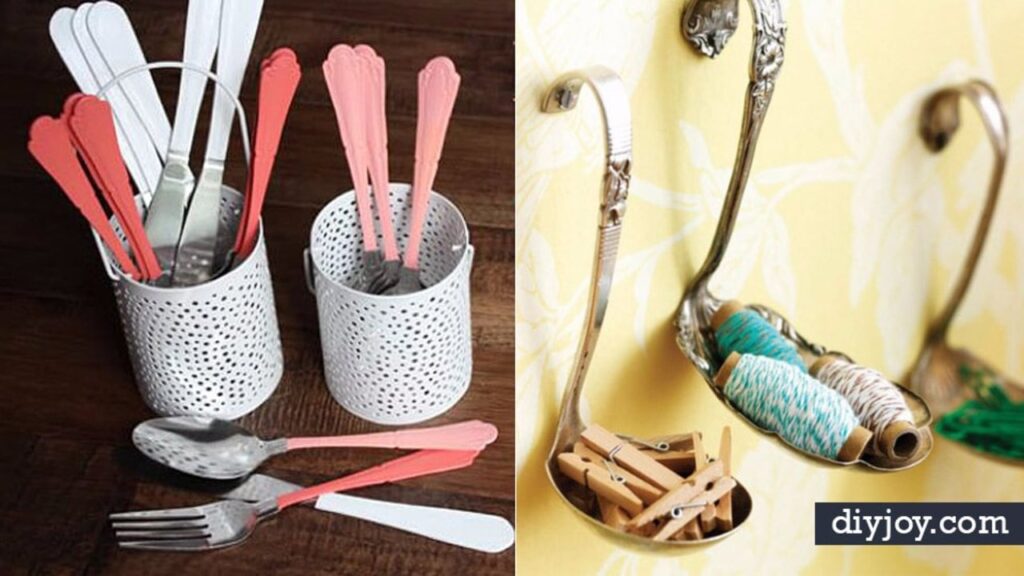
Dollar store flatware at a dollar for a two piece set, craft paint rather than spray, and the safety rule is the one detail that matters. Tape off the top half where food goes before you paint, and seal only the painted section, because acrylic sealer has no business anywhere near a mouth. Several thin coats beat one thick one; craft paint chips if you handle it between coats. Her own answer on washing is honest, that hers have never been near a dishwasher and only come out for occasions. Coral, pale coral and white in the photograph.
Get the full tutorial at Jessica DeMaio.
5. Silverware Spoon Flowers
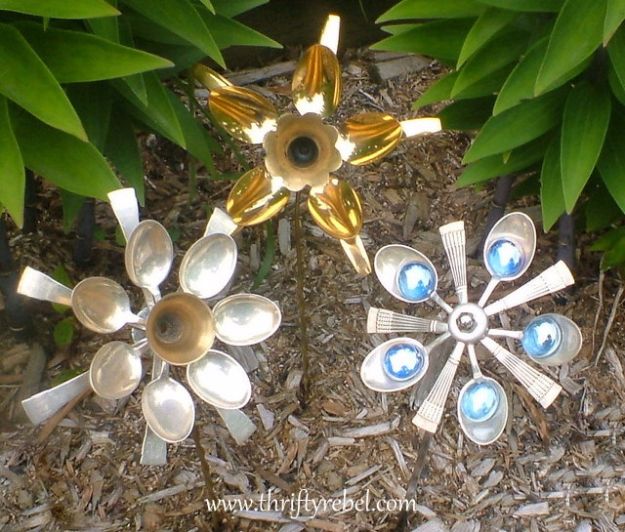
Three flowers on stakes in a mulched bed, each one a ring of spoon and fork bowls fanned around a centre. Her build is simpler than it looks. A washer big enough for the spoons you are using is the base, the handles get bent back behind it, and every piece is glued to the washer at the neck with Marine Goop, which holds up outdoors and wants a window open while you work. Craft supply bottles prop the whole arrangement in place while the glue cures. A vintage candle snuffer with a handle that unscrews makes the centre.
Get the full tutorial at Tuula at Thrifty Rebel Vintage.
6. DIY Beaded Silverware
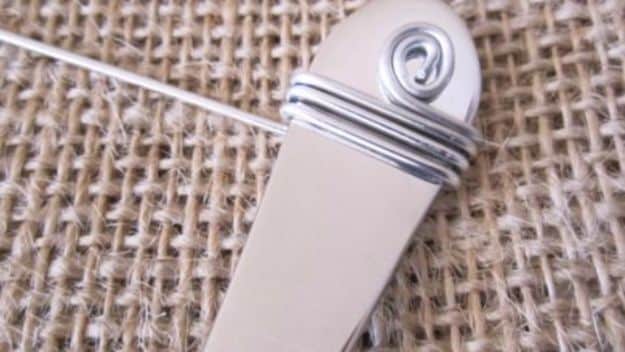
Wire wrapped around a plain handle with beads caught underneath it, which turns a boring stainless serving set into something for a table you have laid properly. Lay the beads out along the handle first and look at them before you commit, because the pattern is the whole design. Cut about twelve inches of craft wire, curl a small coil at each end with round nose pliers, then wrap, catching each bead as you go and finishing with a coil at the top. A dab of glue under the first and last bead stops the whole thing creeping. Hand wash.
Get the full tutorial at DIY JOY.
7. Silverware Lamp
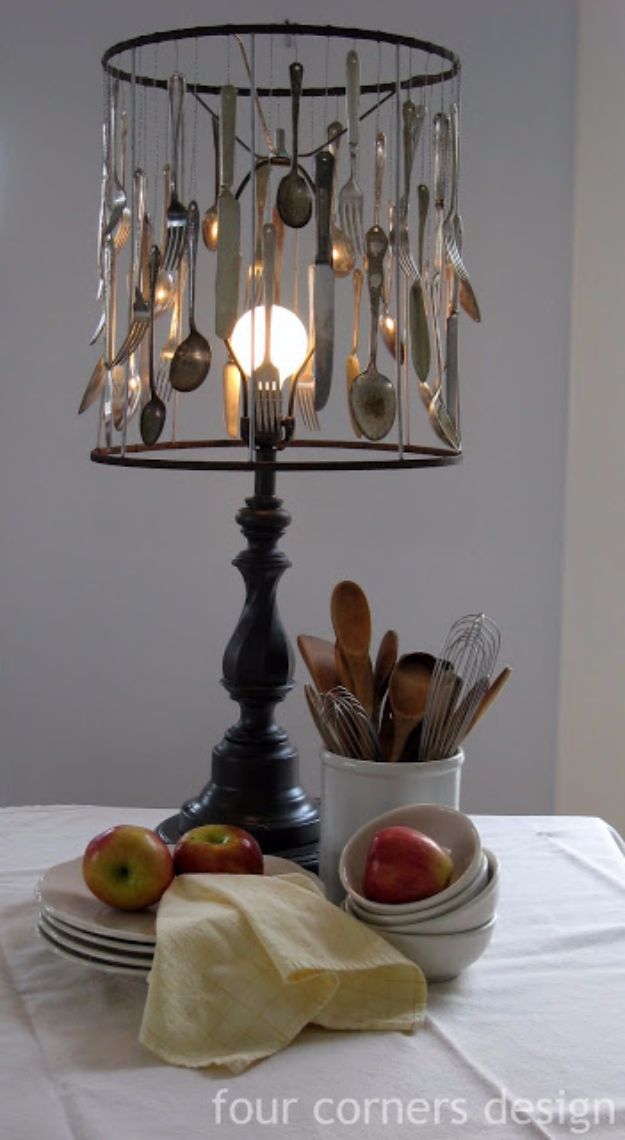
Forty pieces hung from a bare wire lampshade frame so the bulb sits inside a curtain of spoons, forks and knives, and the light bounces off forty different worn finishes. The hanging method is simple and worth copying: thread thin wire through the hole in the top of each handle, fold it in half, twist it into a single strand and leave an inch or two untwisted at the top to wrap around the shade rim. Silk seam binding ribbon wound round the rim afterwards hides every wire. Paint the base in several thin coats and let it cure for weeks.
Get the full tutorial at Amy at Studio Four Corners.
8. Fork Photo Holder Base
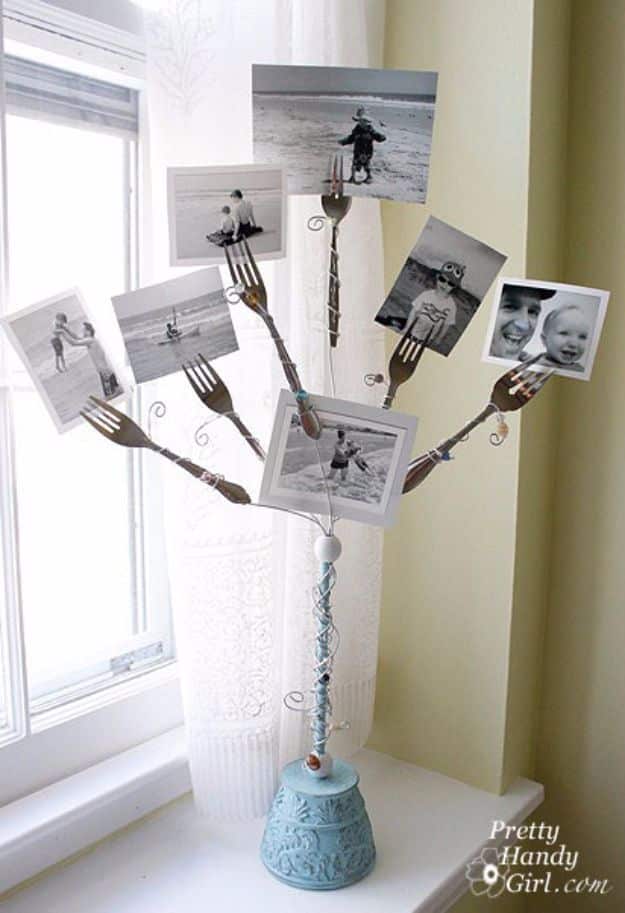
Six forks on wire stems rising out of one small wooden base, each one holding a black and white photograph, and the whole thing costs about two dollars. Thrift store forks run around a quarter, the wooden base about seventy cents, and the stems are sixteen gauge utility wire. Drill the base with a sixteenth inch bit, thread beads down each wire, and set the wires into the holes with E6000. Paint and a scrapbook paper top with Mod Podge finish the base, and a circle of felt underneath keeps it from scratching a windowsill.
Get the full tutorial at Brittany Bailey at Pretty Handy Girl.
9. Silverware Cheese Markers
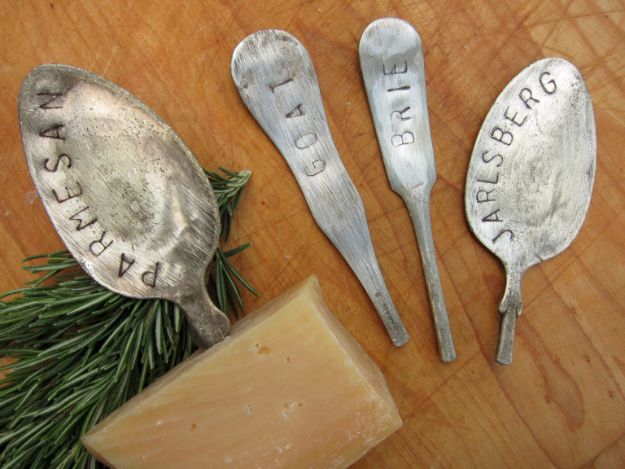
Four markers on a board with a wedge of parmesan and a sprig of rosemary, stamped PARMESAN, GOAT, BRIE and JARLSBERG. The separating trick is the good one: bend the spoon bowl or fork tines back and forth over the edge of a brick until the metal fatigues and the top snaps clean off the handle, then sand the raw edge smooth on the concrete itself. Hammer the piece flat on a bench block first, stamp with one strong hit per letter, and trace the letters with a permanent marker before sanding the surface back.
Get the full tutorial at Tiffany Lane.
10. Funky Kitchen Art
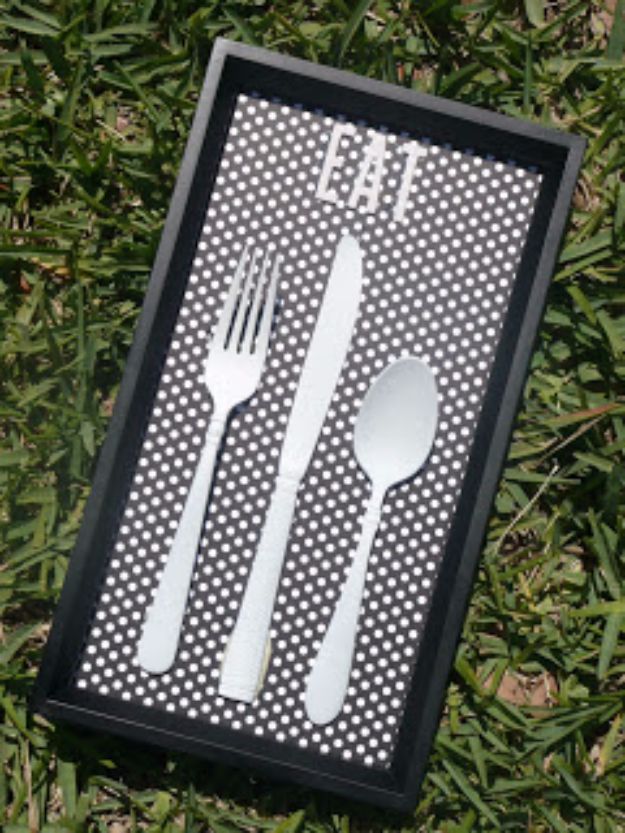
A black frame with black and white polka dot scrapbook paper behind the glass, a spray painted fork, knife and spoon glued straight onto it and the word EAT in chipboard letters up in the corner. The utensils and the frame were a dollar twenty-five all in, three pieces at a quarter each from a thrift shop and a dollar frame. Tacky glue holds the paper to the glass and Gorilla Glue holds the metal. Her accident is the best part: she ran out of white paint, finished in chalkboard black, and it gave the frame a far better finish.
Get the full tutorial at Rachel at I Love My Three Sons.
11. Painted Cutlery
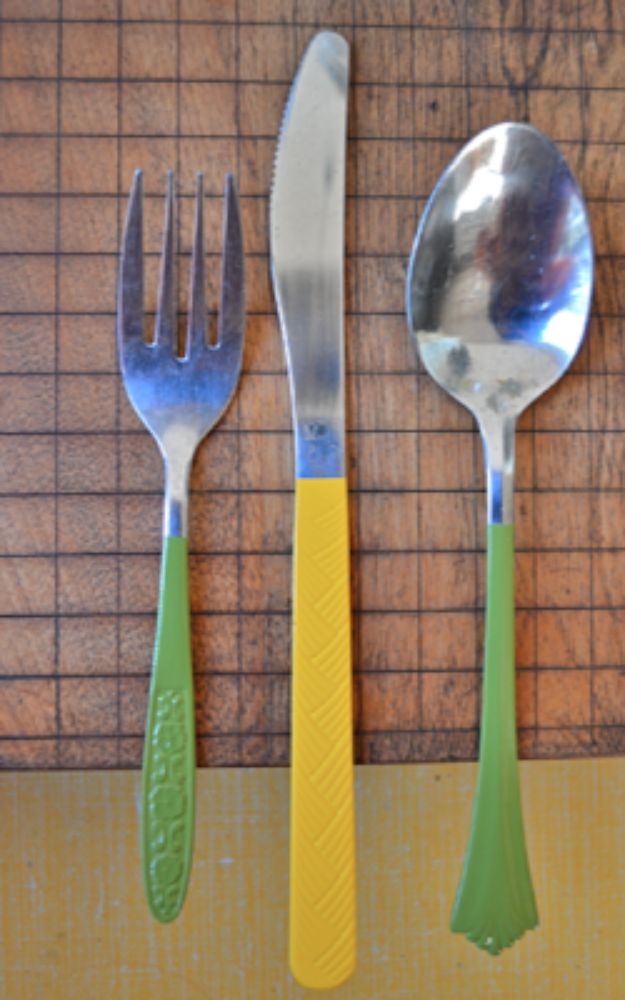
A fork, knife and spoon with the handles sprayed in mossy green and mustard yellow and a crisp line where the paint stops. This is the dishwasher-safe version of the paint dipped idea above, because it uses Rustoleum clean metal primer and then enamel, which is non toxic once dry and is what serving ware gets painted with anyway. Tape the line, lay the pieces on cardboard with the handles hanging off so you can hit both sides, five minutes between primer and colour, twelve hours to dry, then leave it a further forty-eight to cure.
Get the full tutorial at The Atlanta Institute of Stitches and Crafts.
12. DIY Silverware Jewelry
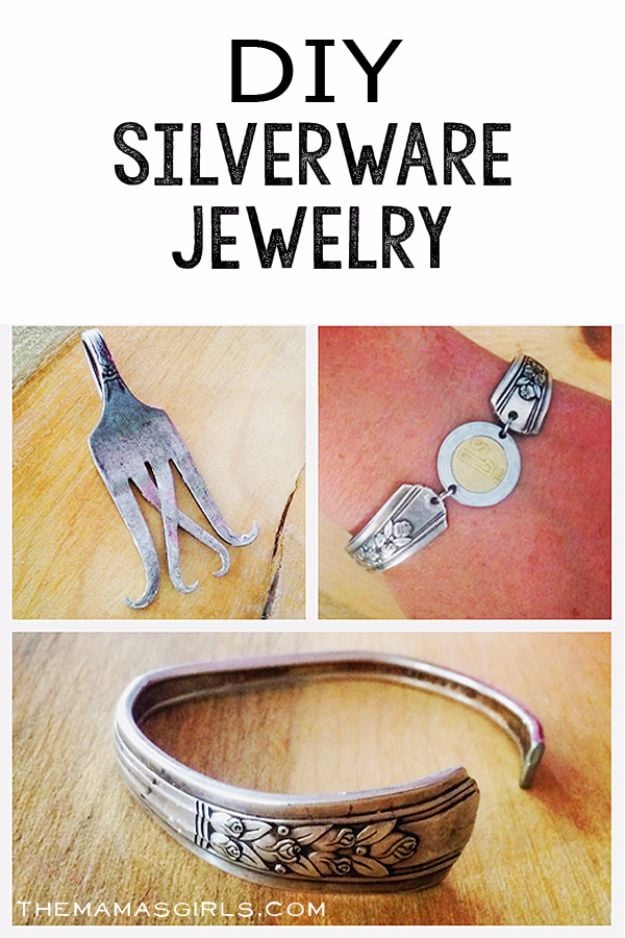
A fork bent into a hanging pendant with the tines curled, a bracelet made of two handle ends joined by a coin, and a wide cuff with a flowered handle pattern running round it. Her honesty about the difficulty is the most useful thing on the page: most blogs say it is easy, and she found it a genuine challenge that took real trial and error. Silver is softer than the tools, so wrap the piece in fabric while you bend it, use rubber coated pliers, cut with a hacksaw in a vice and drill with a proper metal bit.
Get the full tutorial at Ali at The Mamas Girls.