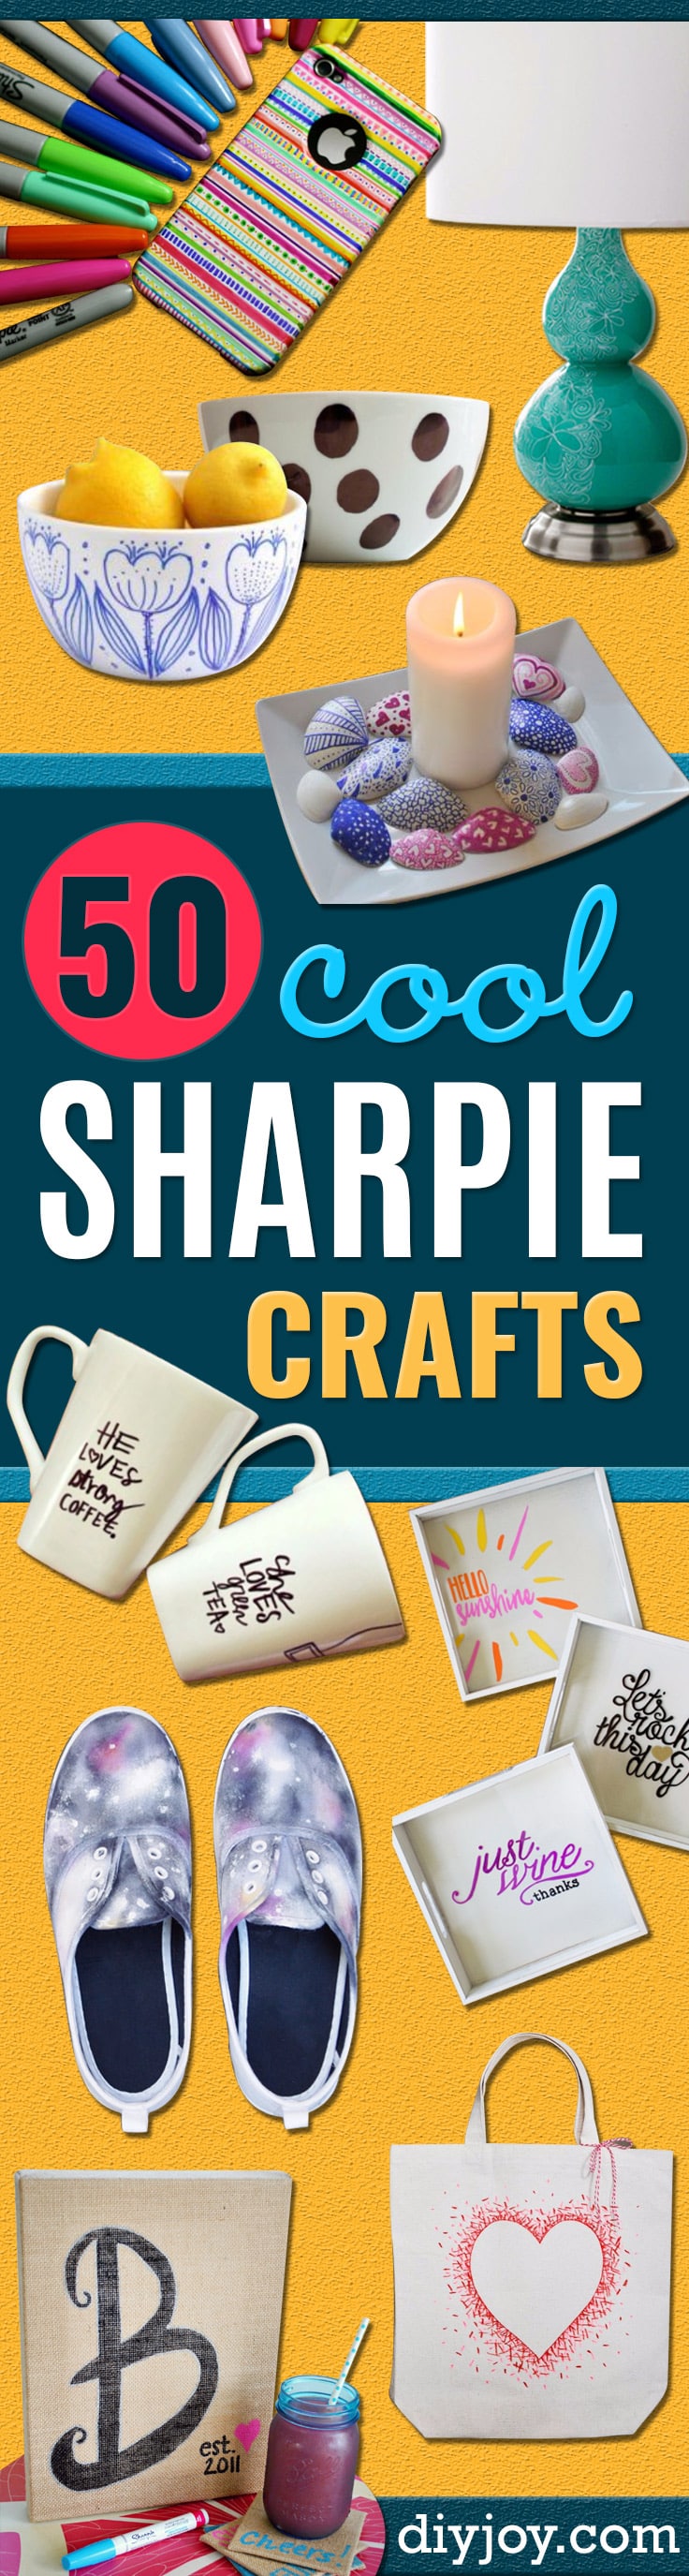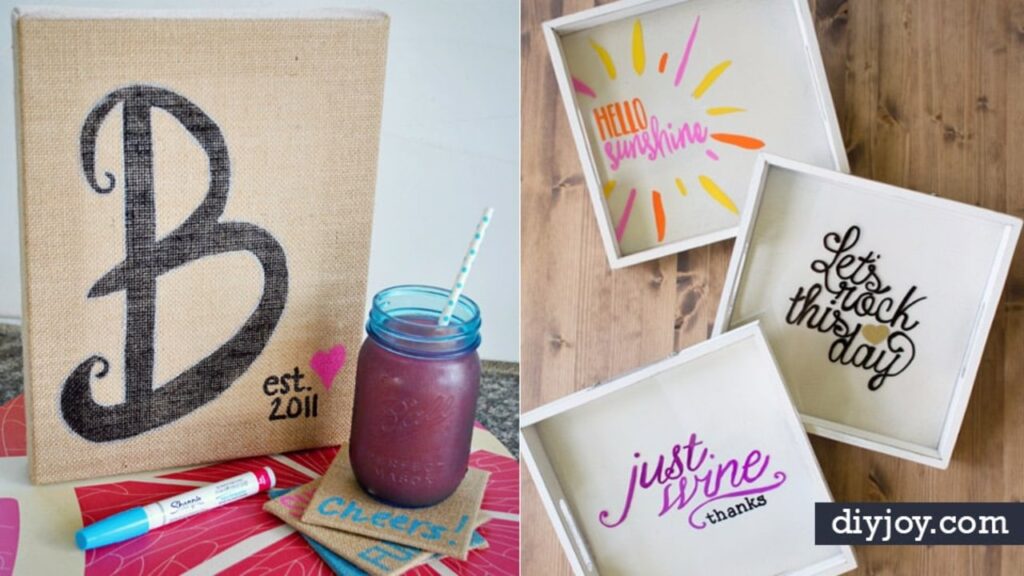
There are three different markers hiding behind the word Sharpie, and picking the wrong one is why a project peels. The regular permanent marker is the one in every drawer, and it is what tie dye shirts, doodled lightbulbs and painted shells want. The oil-based paint pen is opaque, sits on top of glass and ceramic, and is what mugs and glassware and metal need. The water-based paint pen is the one for walls, because latex will cover it later without priming. Get that right and the rest of these Sharpie crafts are just drawing. Below there are mugs that bake hard in a home oven, a whole wall of hand-drawn wallpaper for eight dollars, rocks, shoes, bookends, a denim jacket tattooed with henna patterns and a wine tray anyone who can trace can make.
DIY Sharpie Crafts
1. DIY Watercolor Sharpie Planter
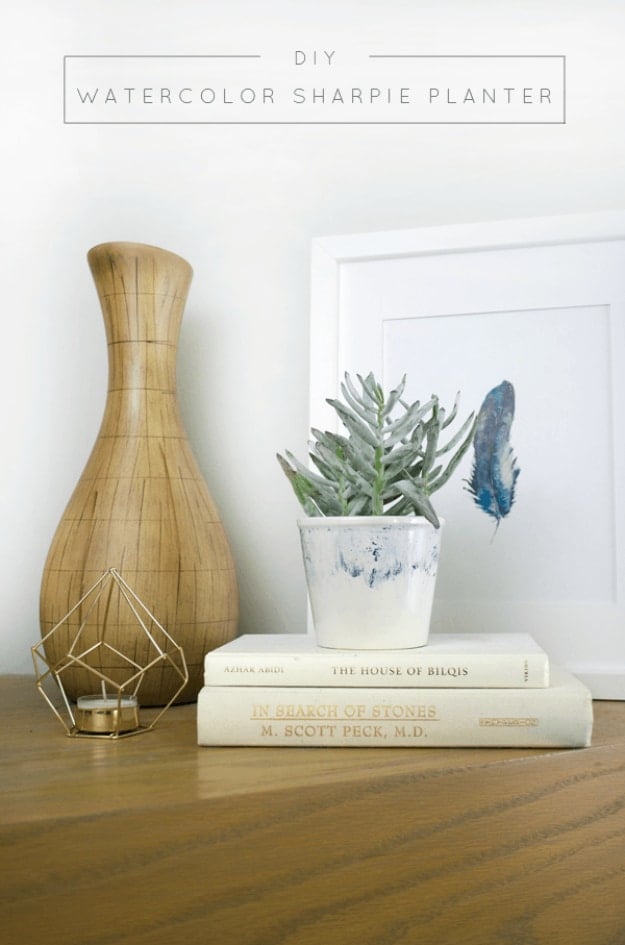
Rubbing alcohol is what turns a Sharpie into watercolor, and this is the simplest place to see it happen. Draw a band of colour around a plain ceramic pot, an inch or so down from the rim, then dribble alcohol over the drawing and rub up and down through it with a paper towel wrapped around one finger. More alcohol, then tip the pot upside down and back to keep the pigment travelling. Navy over a little black gives the deepest bleed. Wipe the rim clean before it dries and leave it, because it hardens on its own.
Get the full tutorial at Brepurposed.
2. DIY Dipped Kitchen Jars
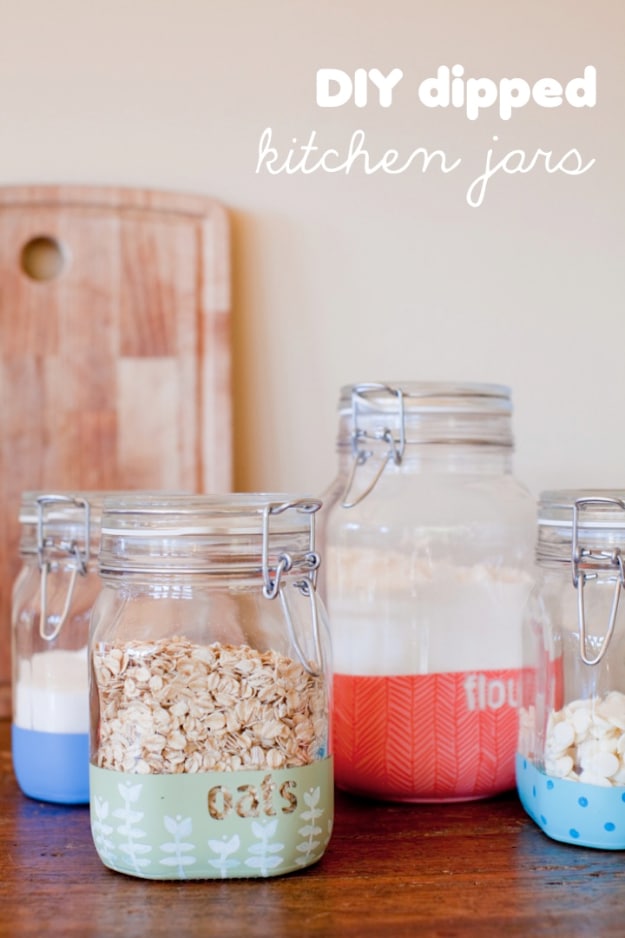
Clamp-top kitchen jars with a band of flat colour around the bottom and the contents named on the front in small neat lettering, which is the part that makes a shelf of oats and flour look deliberate. Colour blocking the base rather than the whole jar is a sensible choice, because the ingredient stays visible through the top. Glass needs an oil-based paint pen, not a regular Sharpie, and the lettering is easier if you write it on paper first and slip the paper inside the jar to trace.
Get the full tutorial at This Little Street.
3. Custom Wine And Tray Glasses
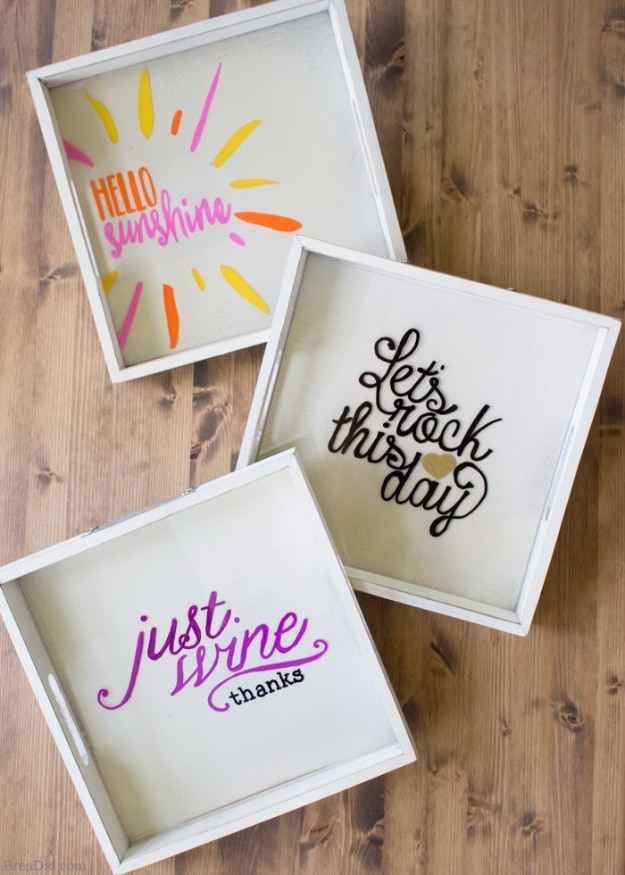
Built for a craft party, which is why every step is traceable rather than freehand. A printable pattern goes face down under a sheet of plexiglass cut to fit a wooden tray, gets traced with an oil-based Sharpie paint marker, and the whole set of tray plus four stemless glasses lands at about twenty dollars. The patterns print backwards on purpose, so the ink ends up on the underside and never gets scratched. The paint pens dry fast enough to finish everything inside half an hour. Hand wash the glasses.
Get the full tutorial at Bren Did.
4. Sharpie Chevron Wallet
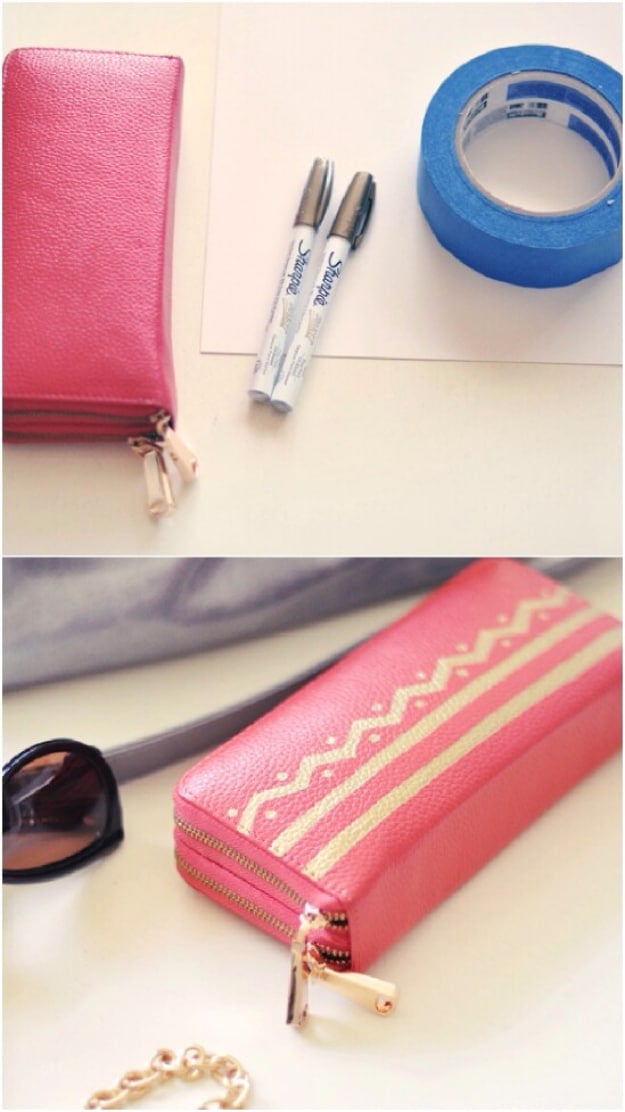
Painter’s tape does the geometry and a metallic gold paint pen does the rest. Tear or cut the tape into strips, lay them down as stripes, then angle small pieces into triangles for the chevrons, fill the gaps with the pen and pull the tape off. The torn edge of the tape is worth using rather than the cut one, because it leaves a slightly ragged line that reads as hand-painted. The dots go on freehand at the end. It dries quickly, which on a leather wallet that lives in a bag matters.
Get the full tutorial at Love Maegan.
5. DIY Sharpie Tea Towels
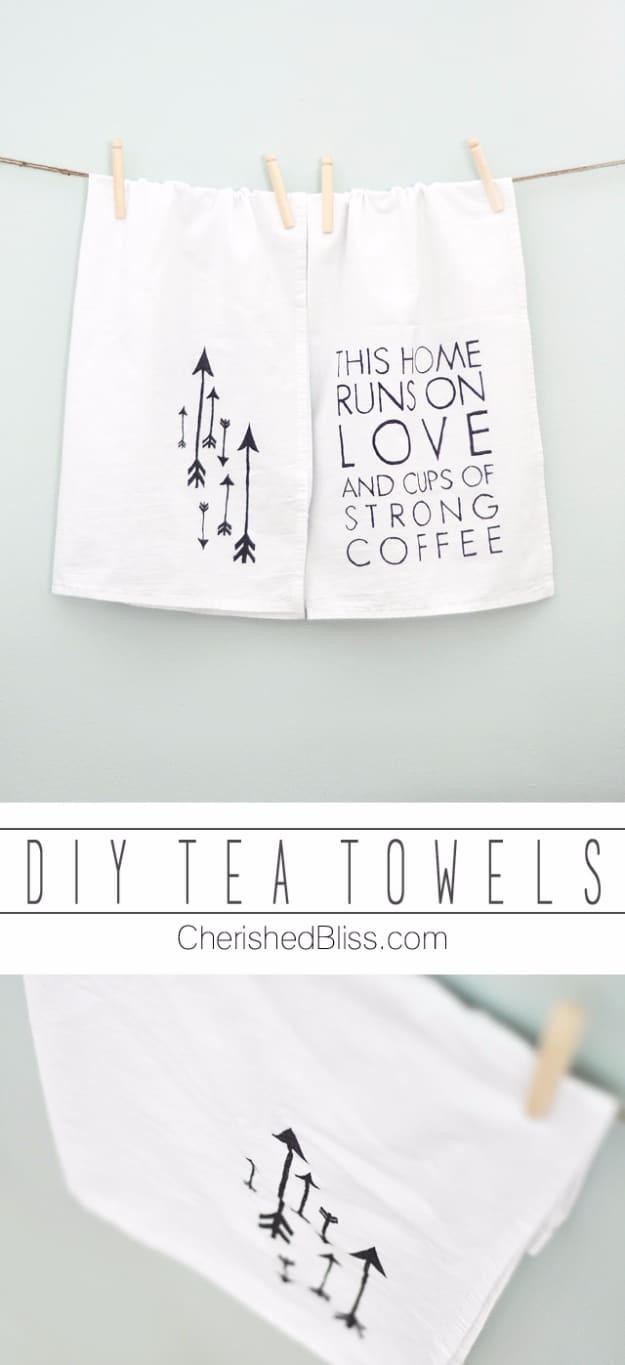
Tracing, not drawing, which is why these come out looking bought. A printable goes under a flour sack towel, the weave is thin enough to see the lines straight through, and you follow them with a Sharpie. Wash and dry the towels first so they do not shrink around the design later, and iron them flat before you start. Then leave them a few days before the first wash so the ink sets properly. The design does fade a little over time, which on a kitchen towel that gets used daily is a fair trade.
Get the full tutorial at Cherished Bliss.
6. DIY Sharpie Monogram Mug
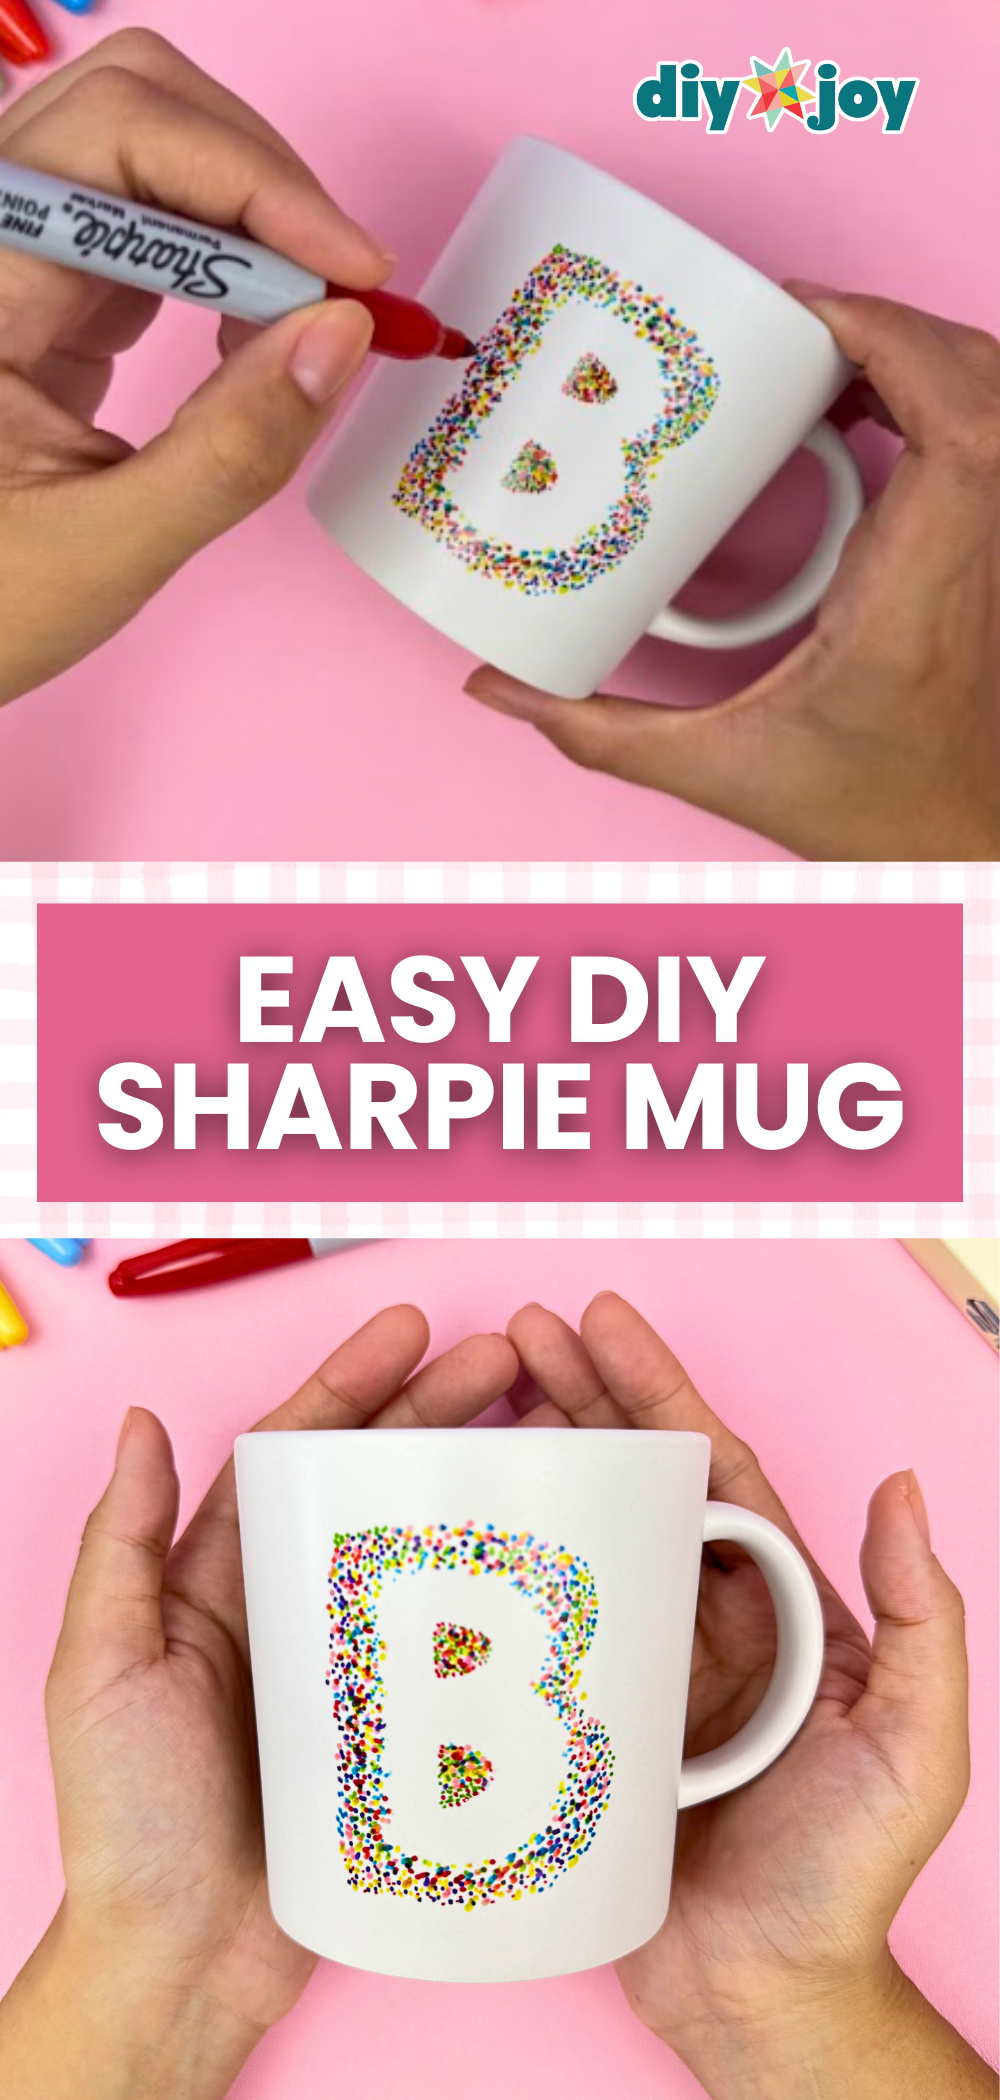
A letter, a paper stencil and a cloud of coloured dots, and the letter itself is never drawn. Write the letter on paper, cut it out, coat the back with glue and wait for the glue to turn white before pressing it onto the mug. Then dot around it in as many Sharpie colours as you like, tight against the paper edge and thinning out as you move away. Peel the paper off and a clean letter is sitting there in negative space. Practise the letter on paper first, because size is harder to judge on a curve.
Get the full tutorial at DIY Joy.
7. Easy Sharpie Embellished Citronella Buckets
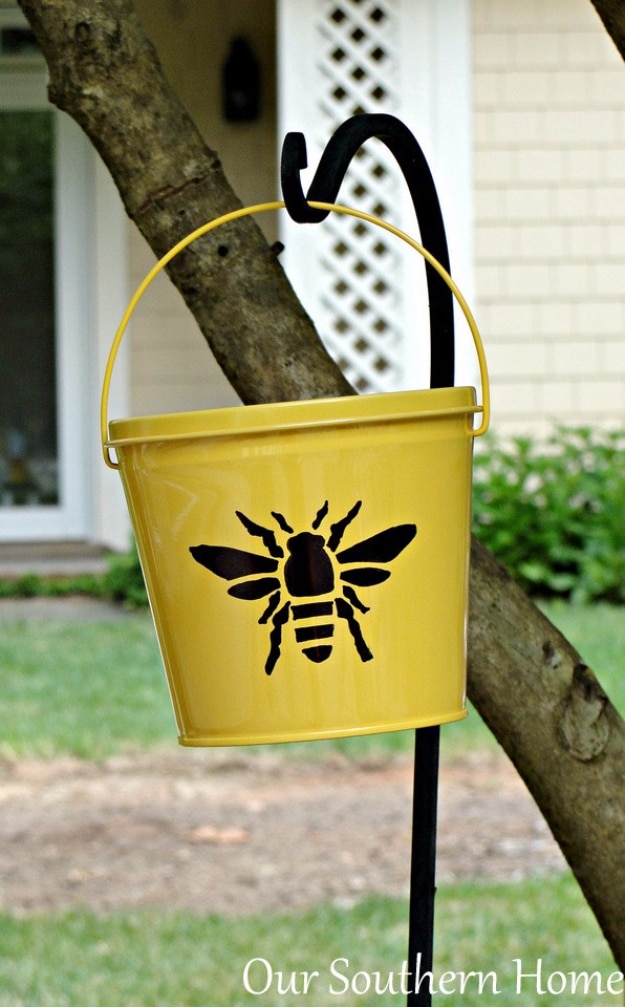
Shop-bought citronella buckets, a stencil and a black Sharpie, and the tip in this one is worth the visit on its own. Tape the stencil down, outline the shape lightly first, then lift the stencil off and fill the outline in, because filling while the stencil is still down is what causes bleed underneath. And if it bleeds anyway, a dab of nail polish remover on a q-tip, blotted on a tissue first, takes it straight off the painted metal. The other two buckets on the page were freehanded over a pencil sketch.
Get the full tutorial at Our Southern Home.
8. DIY Sharpie Mug
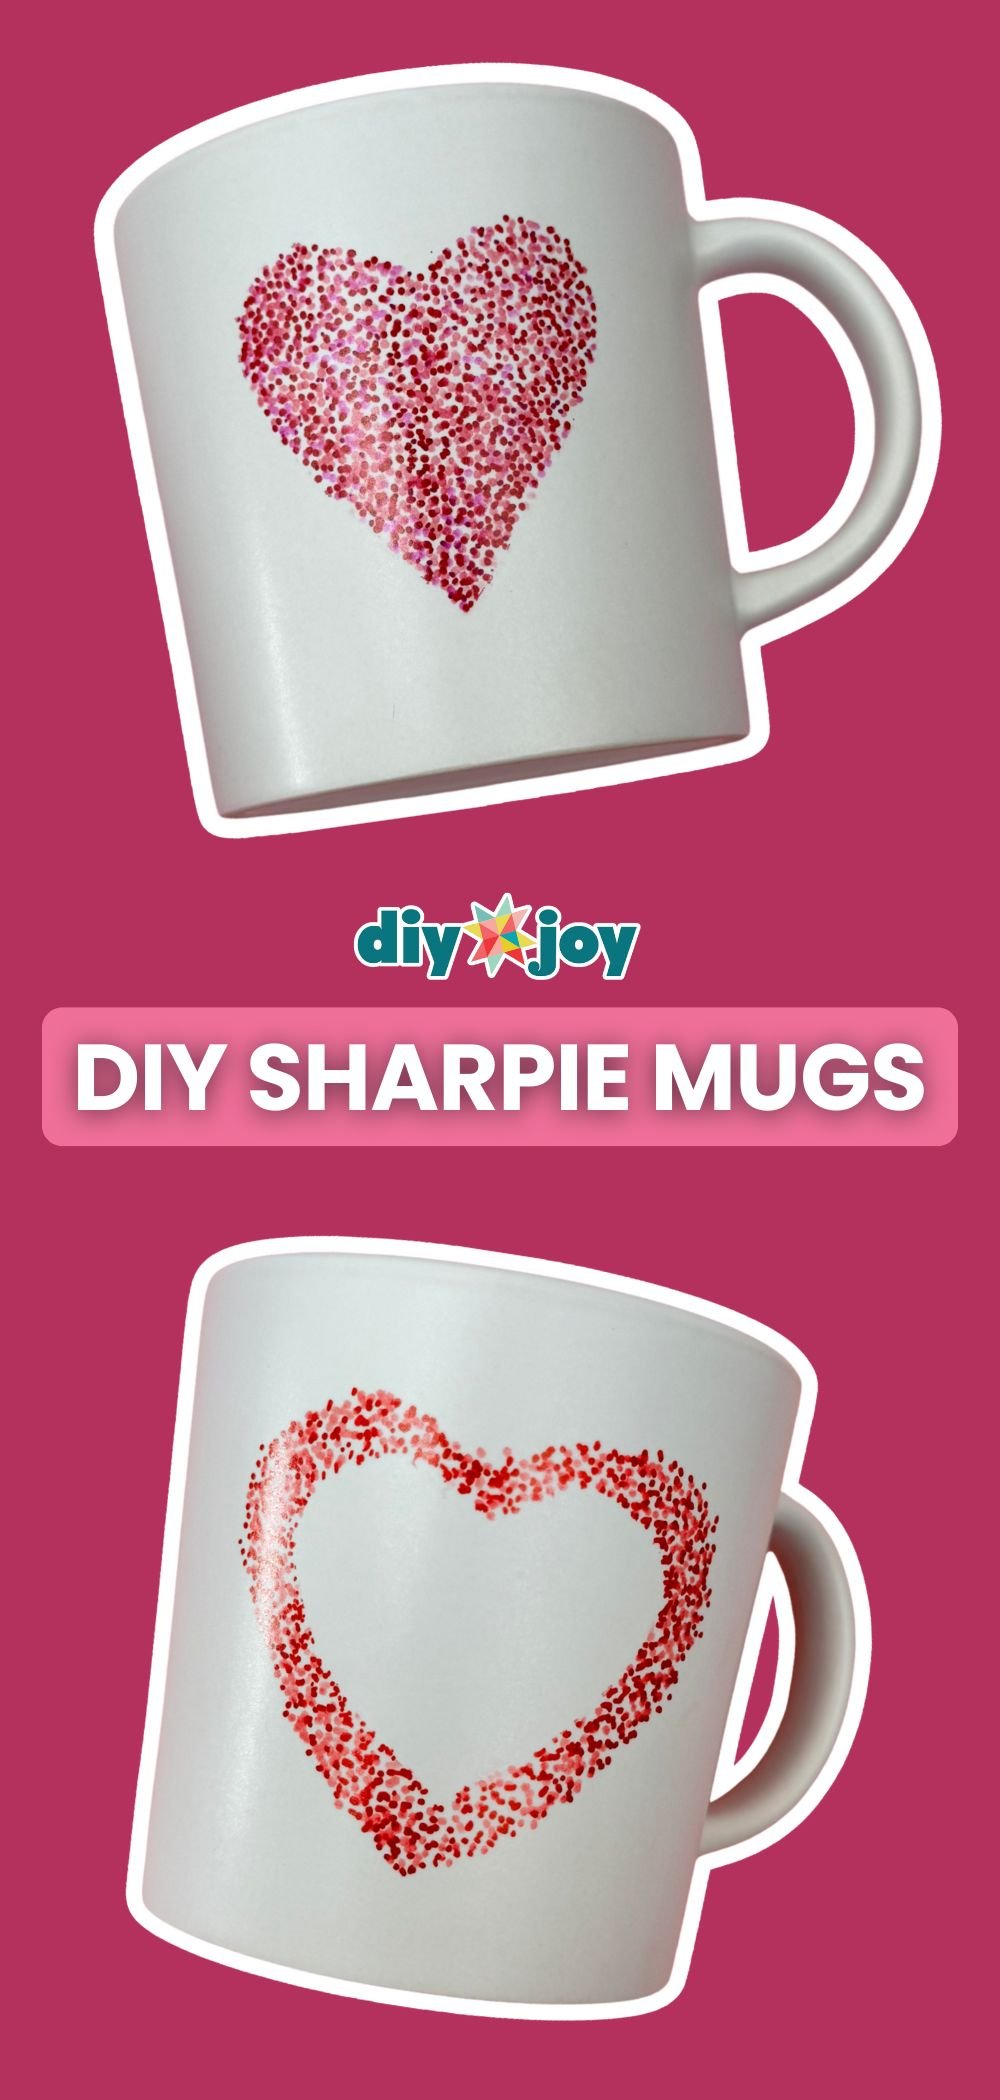
The Valentine’s version of the mug trick, hand drawn rather than stencilled, and the lettering is the whole project: a few words, a small doodle and enough white space around them that the mug still looks like a mug. Ceramic is unforgiving of hesitation, so the practical advice is to write the phrase out on paper at actual size first and only then commit to the curve. Rubbing alcohol on a cotton bud wipes a wobbly letter off cleanly before it is baked, which is the mercy that makes this project beginner friendly.
Get the full tutorial at DIY Joy.
9. DIY Cress Cups With A Face
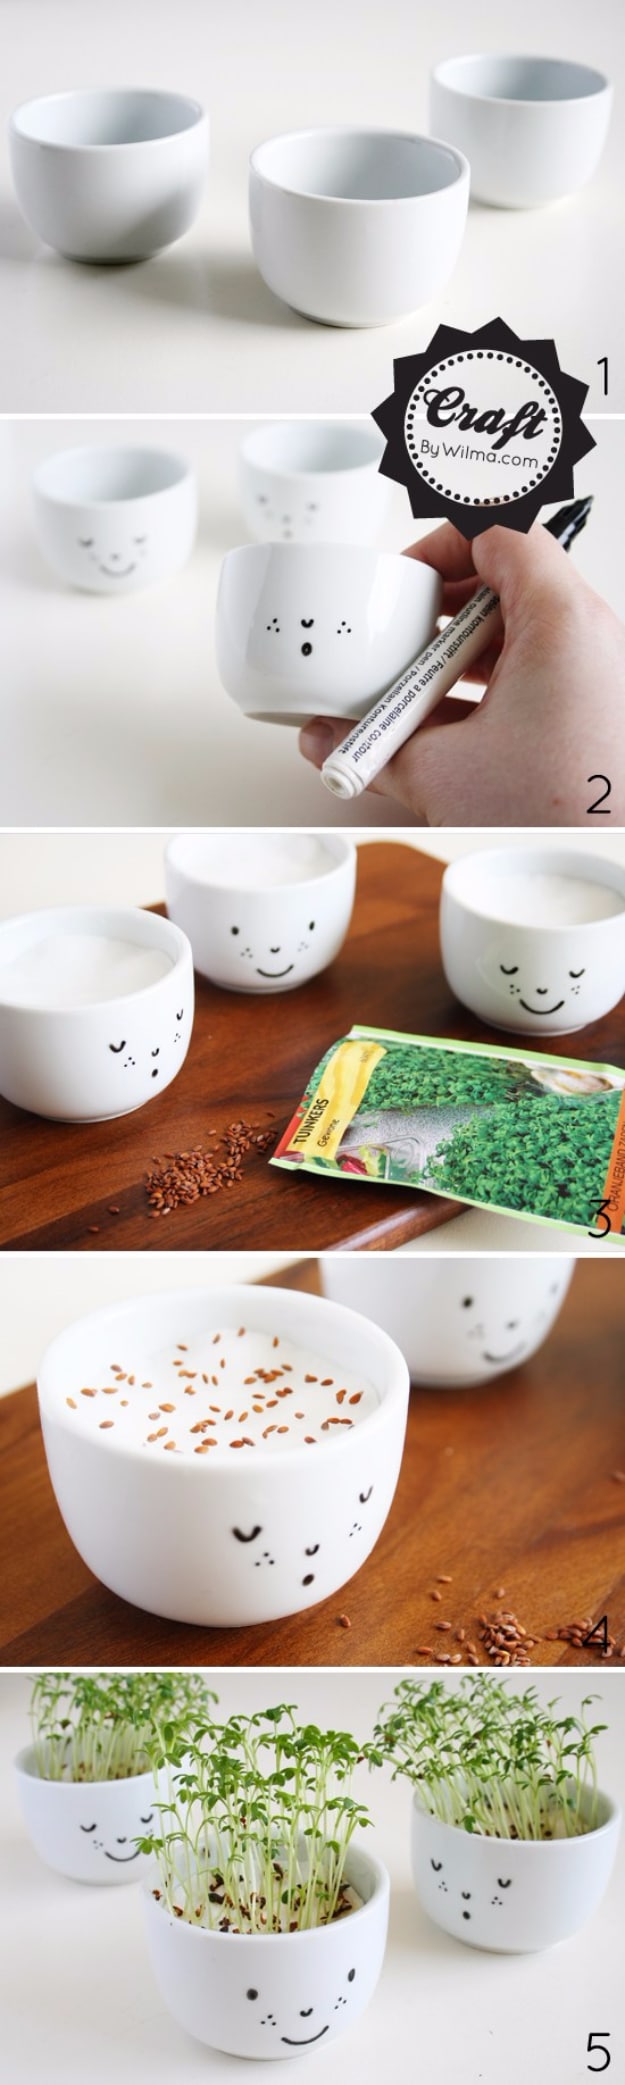
Thrift shop sake cups with faces drawn on them, growing cress for hair, and it is a genuinely good project to hand a child. Wash the cups properly, draw the faces with a black ceramic marker and bake them according to whatever the marker’s packaging says, because bake times vary by brand. Then a few layers of cotton pads in the bottom, soaked right through, and cress seeds scattered on top. Somewhere bright but out of direct sun, watered daily, and there is green hair within a few days.
Get the full tutorial at By Wilma.
10. DIY Sharpie Wallpaper
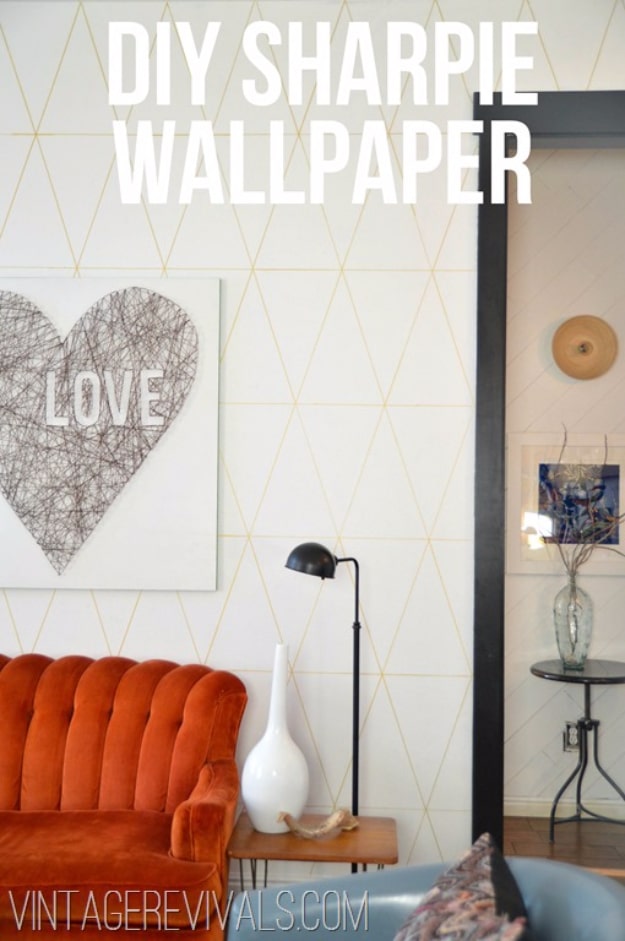
A whole feature wall of hand-drawn geometric pattern for eight dollars, using three water-based Sharpie paint pens and a straight edge. Water based is not a detail, it is the point: latex paint will cover water-based ink later without priming, and it will not cover oil. Start at the ceiling and work down, so the full motif sits at the top and any broken repeat lands at the skirting where nobody looks. The horizontal guide lines here are eighteen inches apart with a twelve inch triangle base, and a level does the rest.
Get the full tutorial at Vintage Revivals.
11. Easy DIY Sharpie Journals
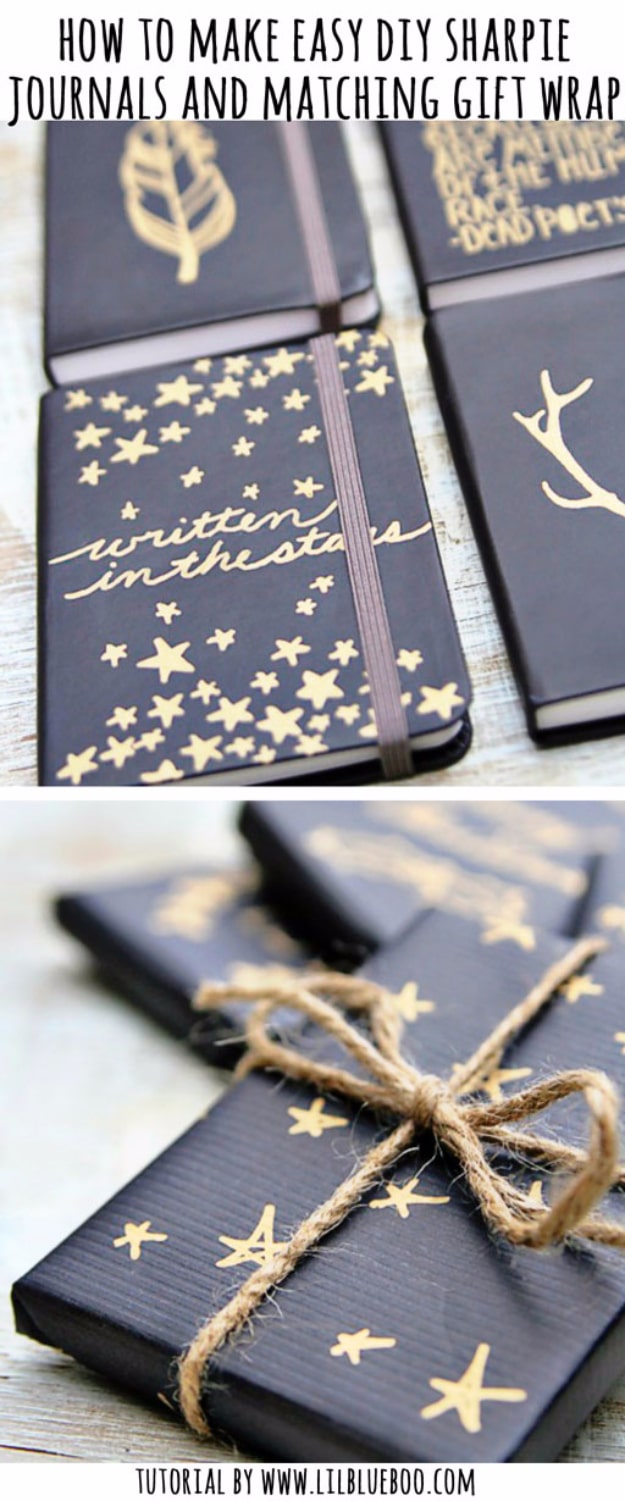
Plain dark journals, under three dollars each with a craft store coupon, turned into gifts with a metallic marker. The useful part is the transfer paper: white chalk transfer paper lets you draw the design out properly first, and a damp paper towel wipes the chalk lines away once the metallic ink is down, so nothing has to be freehanded on a surface you cannot erase. Antlers, stars and a quote were the three designs. The same marker and a roll of black kraft paper give matching wrapping.
Get the full tutorial at Lil Blue Boo.
12. Sharpie Zip Locks
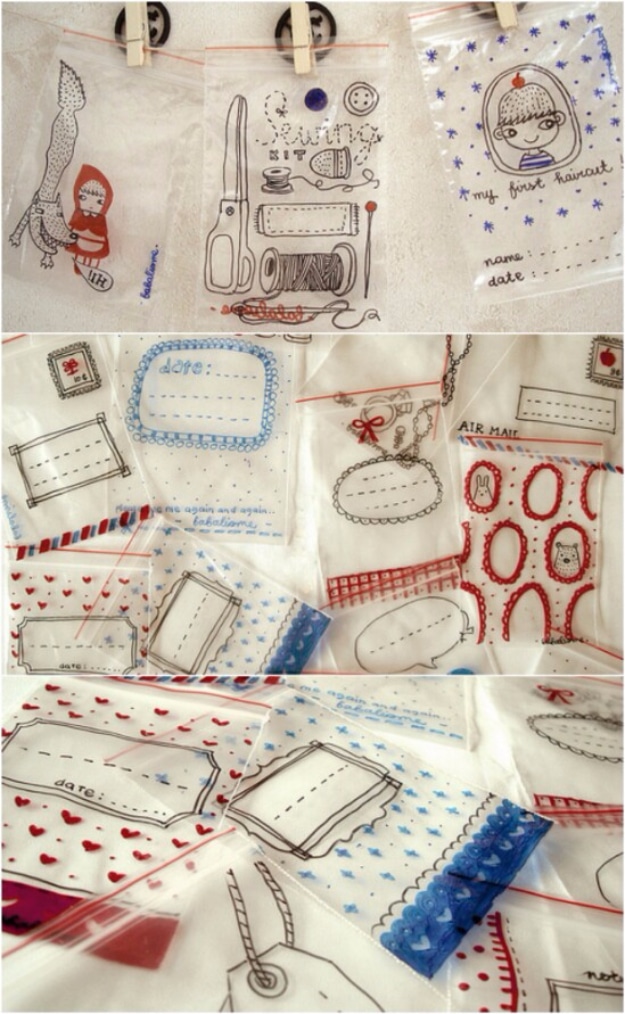
Plastic zip bags drawn all over in black, red and blue, made for an art swap because those were the only permanent marker colours in the house. It is a small idea with a lot of uses: a bag of chargers, a travel kit of small things, a lunch that arrives with a drawing on it. Permanent marker sits on a plastic bag without smudging once it dries, and the bags can be wiped out and used again, which is the part that makes it more than a novelty.
Get the full tutorial at Babalisme.
13. Galaxy Print Shoes
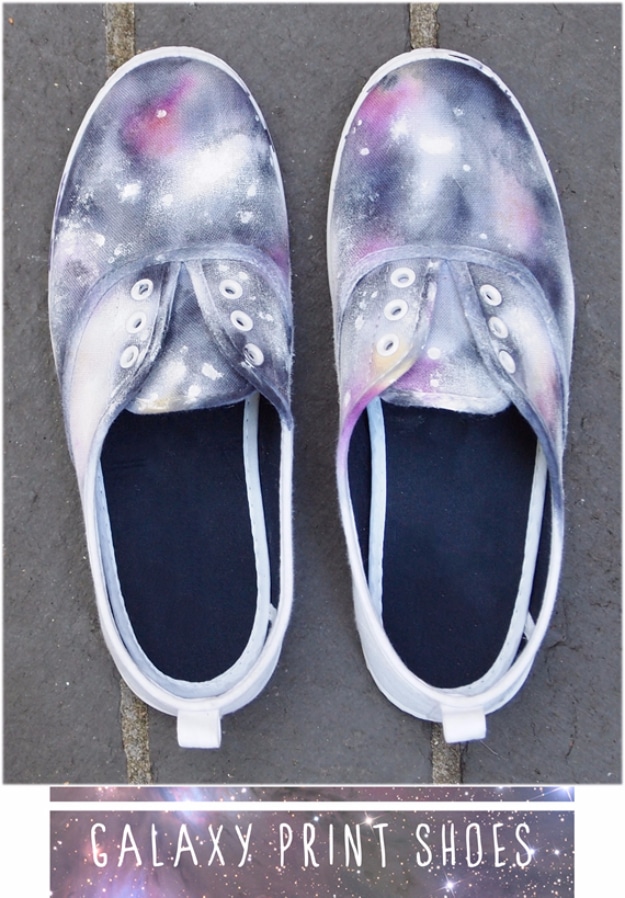
Plain white canvas sneakers turned into a night sky, and it is the same alcohol trick as the tie dye shirt applied to a shoe. Blues, purples and pinks go on in overlapping patches, then rubbing alcohol spreads and softens the edges until it reads as nebula rather than as marker. Stuff the shoes with paper first so the canvas is taut and the colour cannot pool in a crease. White specks flicked on at the end with a toothbrush are what turn a purple shoe into a galaxy.
Get the full tutorial at Time For Tea.
14. Sharpie Paint Marker Accent Wall
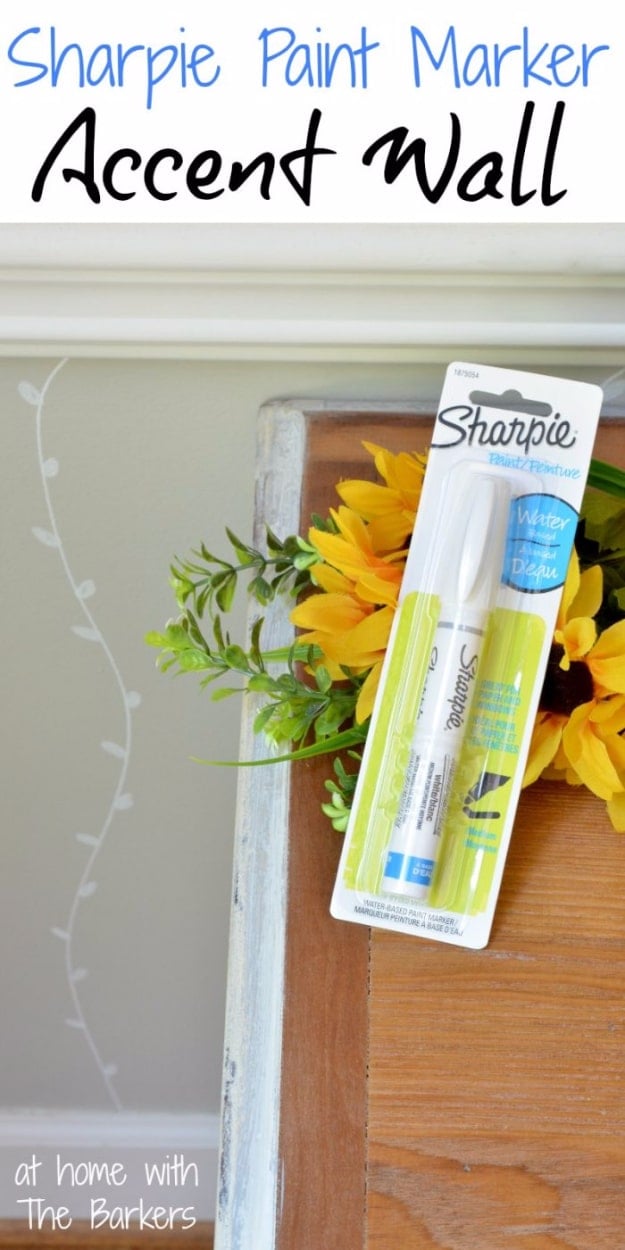
Freehand, no stencil, and the measurements are the only structure. The first wave line starts about four inches below the cabinets, and the rest are spaced nine inches apart, marked up the wall with little tabs of painter’s tape so there is something to aim at. Then roughly seven small ovals along each side of every wave, dropping to about five where the wall is shorter under a window. One paint marker did the whole kitchen wall and was not even finished. Stencils bleed, and this is why she skipped one.
Get the full tutorial at At Home With The Barkers.
15. Sharpie Rocks
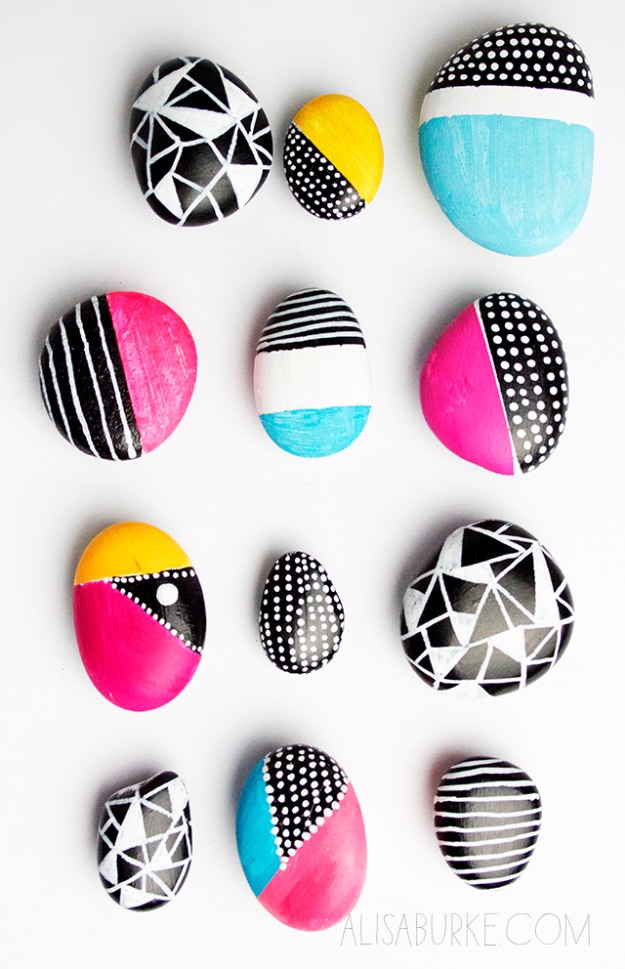
Twelve smooth beach stones, each one half painted and half left bare, in black and white geometrics with the odd pop of pink or turquoise. Half is the rule that makes the set work: a clean line across each rock, pattern on one side, plain stone on the other. Stripes, dots, triangles and a couple of solid blocks are the full vocabulary here. They want smooth stones rather than rough, since a pitted surface drags the nib, and a coat of clear sealer keeps them from fading if they live outdoors.
Get the full tutorial at Alisa Burke.
16. Painted Labels With Sharpies
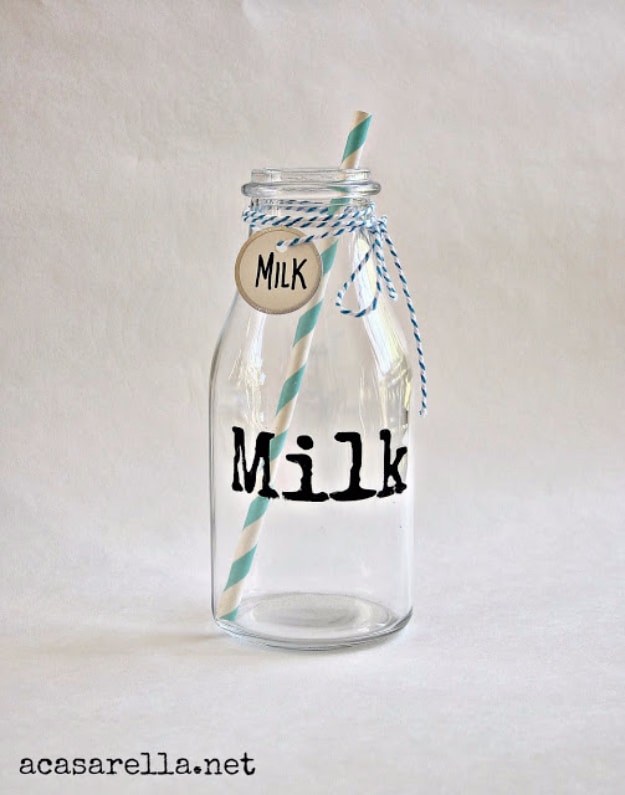
Glass milk bottles labelled in solid black lettering, and the method is stencilling rather than handwriting. Adhesive-backed vinyl cut on a cutting machine becomes a template, the template goes on the bottle, the letters get coloured in with an oil-based paint pen and the vinyl peels away once the paint is dry. The maker’s own honest caveat: it survived a scrub with a Brillo pad and a dishwasher cycle only partly, so these want hand washing. A deliberately imperfect font hides any wobble in the fill.
Get the full tutorial at A Casarella.
17. Anthropologie Plate Art Knockoff
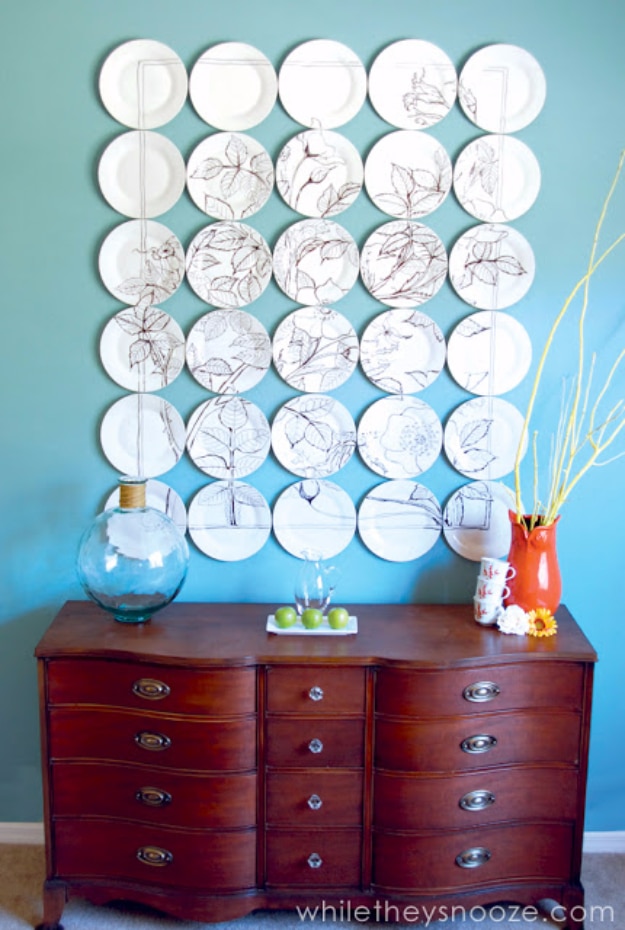
Thirty dollar-store plates, one Sharpie and a borrowed projector, standing in for a Molly Hatch piece that sells for seven and a half thousand dollars. The projector throws the artwork onto the assembled wall of plates and the design gets traced straight across the joins, which is what makes the whole grid read as one picture. Stick a Command strip on the back of every plate and label them A1, A2, B1 and so on before anything comes down, because putting thirty traced plates back in the wrong order ruins it.
Get the full tutorial at While They Snooze.
18. Sharpies And Shells Craft
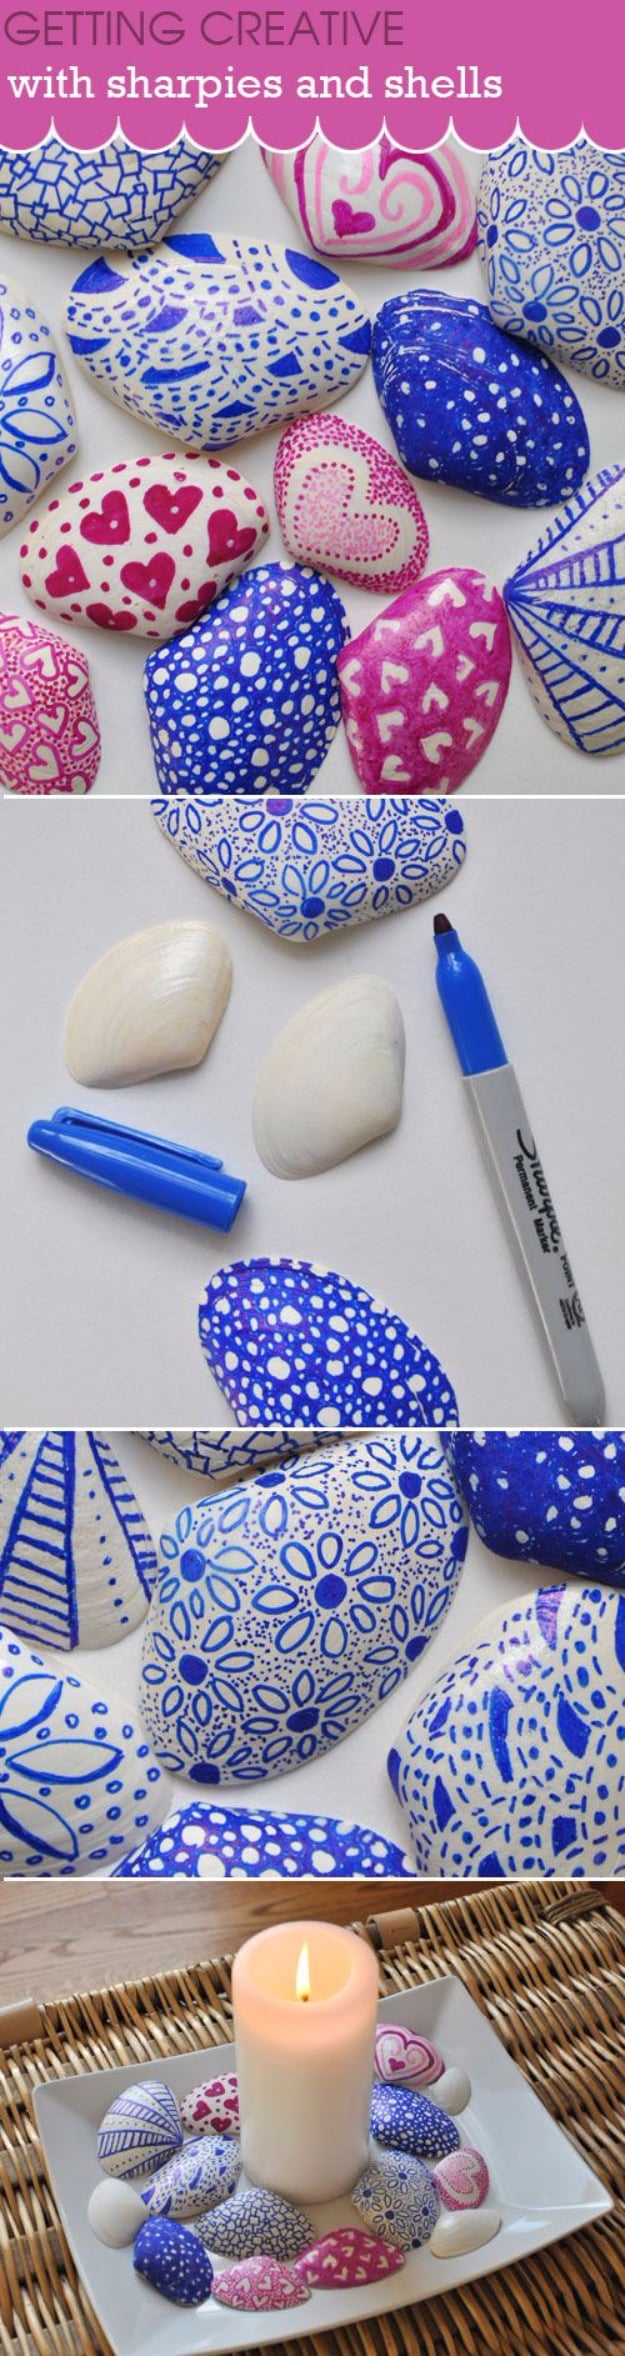
A box of plain white shells that had been sitting in the garage, doodled over in a single colour each, which is the constraint that makes them look like a set rather than a craft session. Blue shells got random patterns, pink shells got hearts. A standard Sharpie was used rather than a fine point, and the maker’s answer to the obvious question is that finer nibs do suit more intricate work. Tumbled into a bowl or ringed around a candle, a whole box of them earns its place.
Get the full tutorial at Creative In Chicago.
19. Faux Chalkboard Art With Sharpie Pens
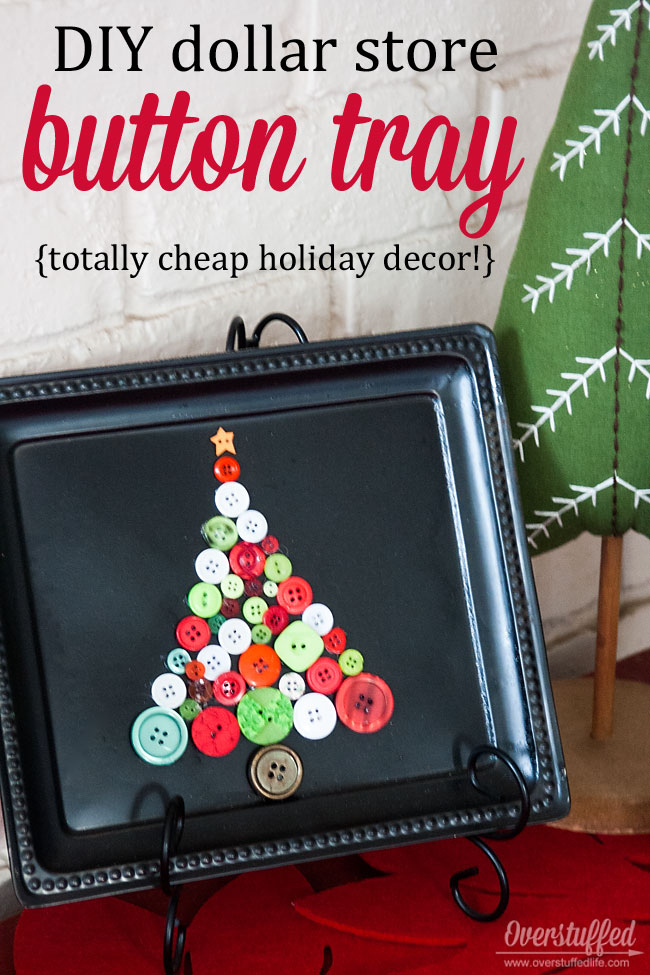
Not a chalkboard, a canvas pretending to be one, which is the smarter choice in a damp basement laundry room where real chalk would smear. A twenty by twenty four canvas gets spray painted black in a satin finish, then the lettering goes on in white oil-based paint pens. Satin rather than gloss matters, because gloss makes the paint pen skid. The result is permanent, which is the point: it is art rather than a message board, so pick words you will still want to read in a year.
Get the full tutorial at Overstuffed Life.
20. Sharpie Mug DIY
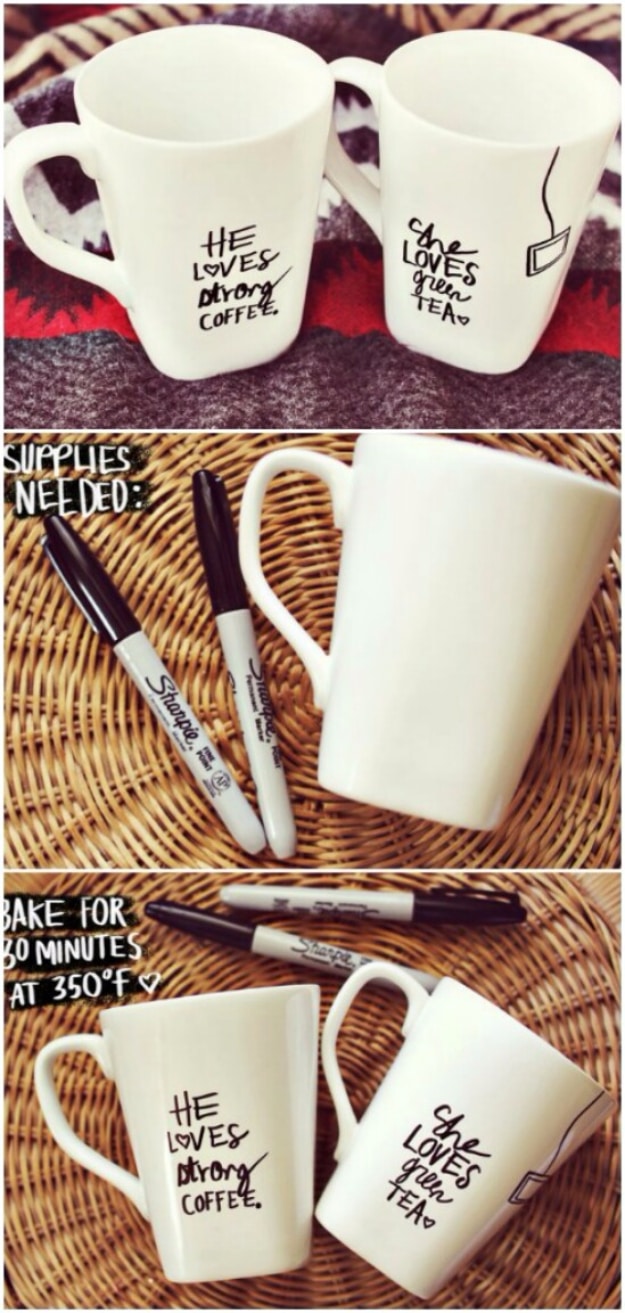
The pair that started the whole marker mug trend, and what makes this one worth the click is that it was actually tested. Any colour of permanent marker on any porcelain dish, thirty minutes at three hundred and fifty degrees, then left to go completely cold before it is washed. Scrubbing with a sponge and soap did nothing to the lettering at all. A dishwasher cycle took off half of it, so these are hand wash only. The honest update added later is that it does not hold for everybody, and proper porcelain paint markers are the reliable version.
Get the full tutorial at A Beautiful Mess.
21. Sharpie Tie Dye T-Shirt
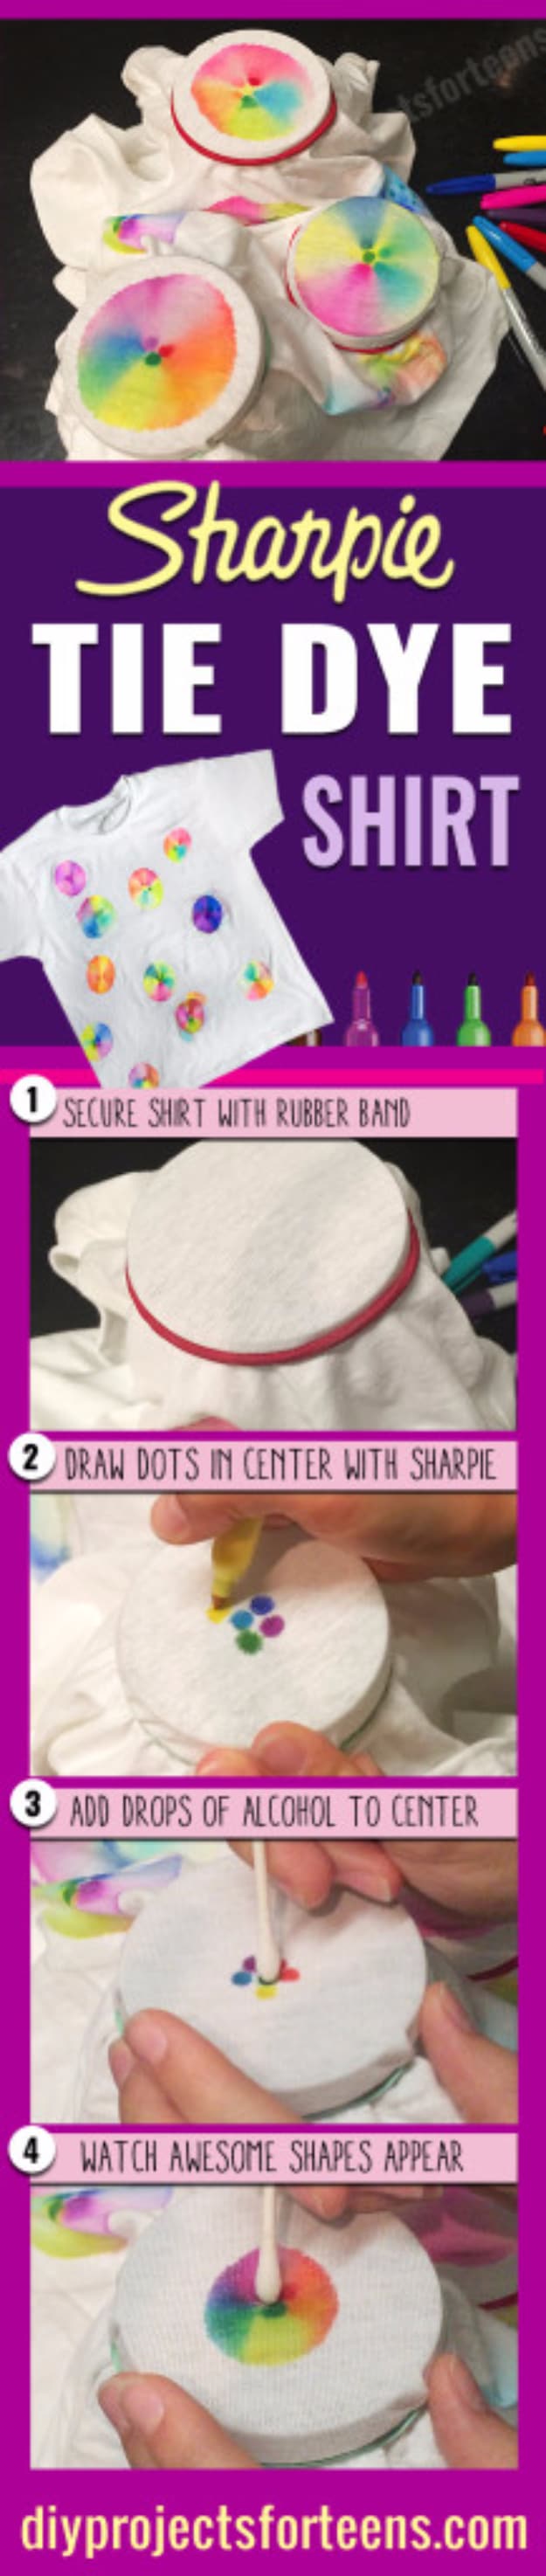
The shirt gets stretched over the mouth of a mason jar and held with a rubber band, which gives a taut, flat circle of fabric to work on and keeps the alcohol off everything underneath. Start with a pea-sized dot in the middle, then ring it with dots in other colours, leaving gaps so they do not touch. Then dab rubbing alcohol on with a q-tip, again and again, and the colour blooms outward into circles. Move the jar, repeat, and the shirt fills up with overlapping starbursts.
Get the full tutorial at DIY Projects For Teens.
22. DIY Cowtan Tout Bamboo Graphic Pattern
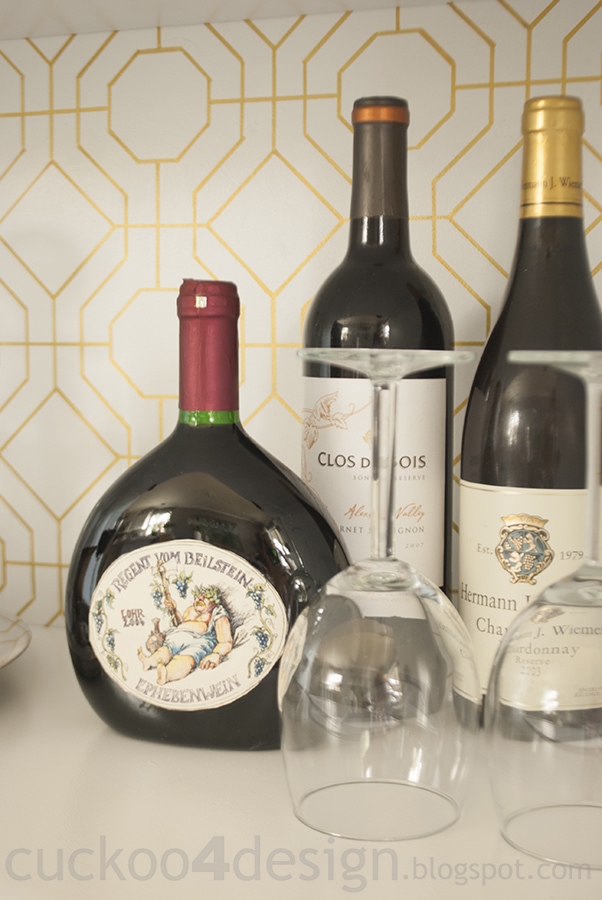
A designer wallpaper pattern copied onto the back panel of a bar cabinet for the price of a marker. The pattern was rebuilt in Illustrator, printed across several sheets, taped into one large piece, then transferred onto the painted board with transfer paper underneath and traced. Only then does the gold Sharpie come out, run along a ruler. Clear satin spray seals the whole thing at the end. It took a long time, which the maker says plainly, and that is worth knowing before you start on a big panel.
Get the full tutorial at Cuckoo4Design.
23. DIY Tribal Print Iphone Case

A matte white phone case covered edge to edge in tiny coloured pattern bands, drawn with ordinary permanent markers in every colour to hand. The two honest notes from the maker are the useful ones: the crooked lines are what create the effect, so do not chase neatness, and this takes a lot of patience because the detail is the whole point. A protractor is easier to work against than a long ruler on something this small. Clear nail polish over the top makes it shine and makes it last.
Get the full tutorial at Expect The Unexpected With Denise.
24. Gold Monogrammed Greek Key Bookend
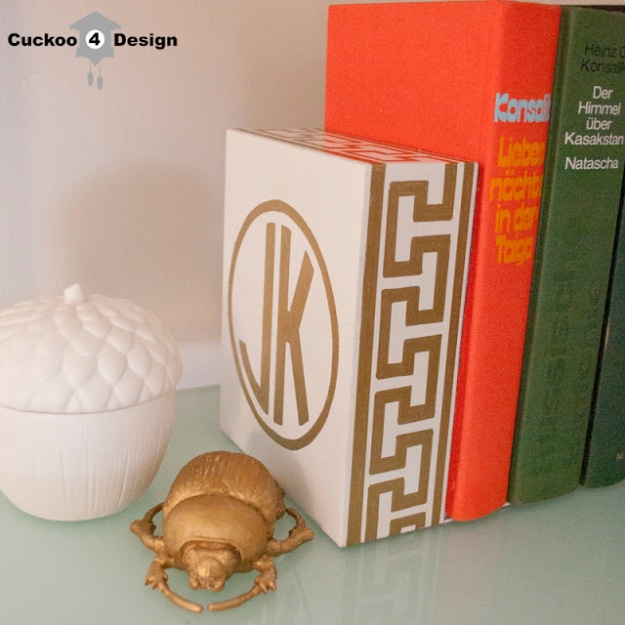
A scratched brass auction bookend, too far gone for polish, primed and sprayed white and then drawn on in gold. The template was built in Illustrator, printed and copied onto the metal with transfer paper, so the Greek key border and the circled monogram are traced rather than freehanded. The pair cost a dollar. What makes this one worth copying is the order of operations: fix the surface first with primer and paint, and only then treat the marker as decoration on a good base rather than as a cover-up.
Get the full tutorial at Cuckoo4Design.
25. Wooden Disks And Sharpies
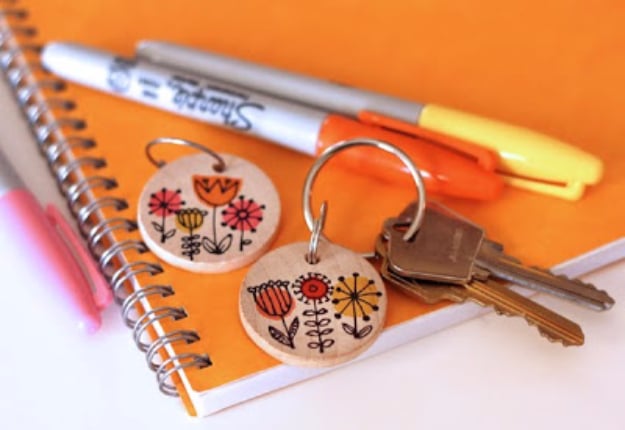
Ten cent wooden disks from a craft store, drawn with little flower doodles, and this is the item on the page that teaches the most about the material. Markers bleed on bare wood, and the way to control it is pressure: press lightly and the line holds, lean on it and it feathers. Put the light colours down before you draw any black lines, or the black will bleed into everything. A light coat of spray acrylic first stops the bleeding entirely, but it darkens the wood a couple of shades.
Get the full tutorial at How About Orange.
26. Easy Dotted Sharpie Mugs
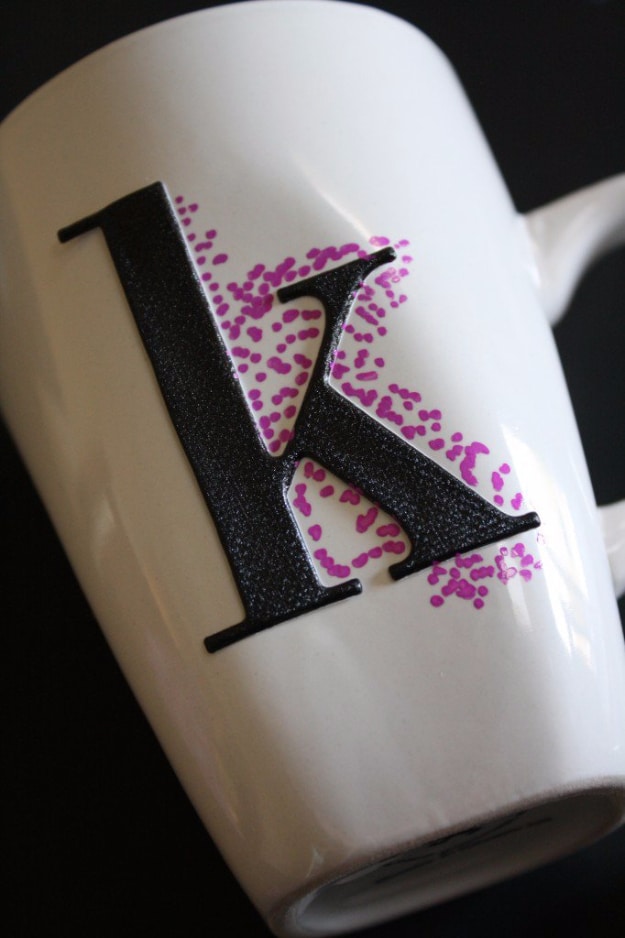
Dots, thousands of them, clustered into a shape and thinning out at the edges. Oil-based Sharpie paint pens go on plain white mugs, then the mugs go into the oven at three hundred and fifty degrees for thirty minutes, and here is the part most versions leave out: turn the oven off afterwards and let the mugs cool down inside it rather than pulling them out. Sudden temperature change is what cracks ceramic. Check that the mug has no metallic trim, because gold rims and ovens do not mix.
Get the full tutorial at Designer Trapped.
27. Sharpie Beaded Necklace
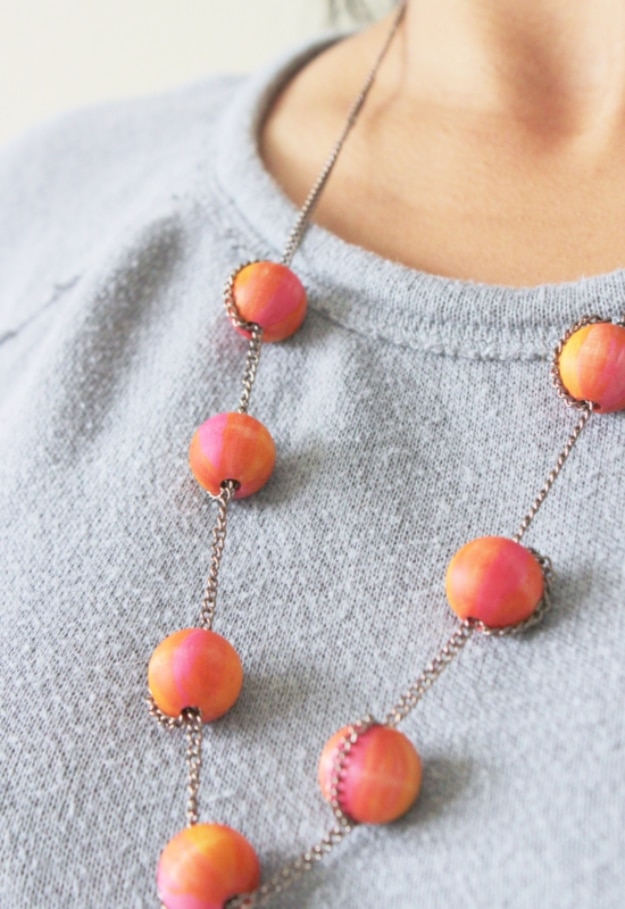
Plain wooden beads coloured by blending two or three marker colours into each other on the bead, so each one graduates from orange into pink rather than sitting flat. That blend is the whole project. Strung on chain with clasps, the beads spaced out rather than bunched, the maker’s first go at jewellery cost under ten dollars including the findings, and the sharpies were already in the house. Fabric cord works instead of chain if you want it softer, though the metal is what makes this one look bought.
Get the full tutorial at Our Designed Life.
28. Lightbulb Doodles
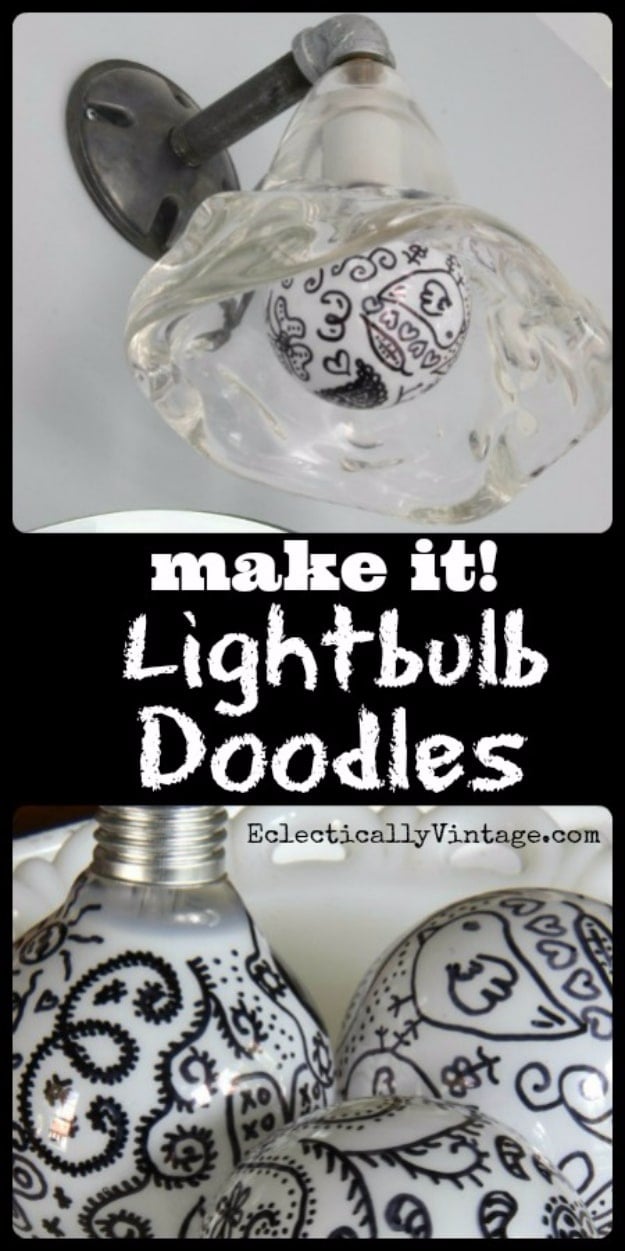
Plain white lightbulbs covered in black paisley doodles, and the two tips make it. Work one section at a time and rest the bulb on a small container while that section dries, a few minutes, or your hand will smear everything you just drew. And when you reach the printed wattage, do not try to work around it: cover it with a big filled circle and make that circle the centre of a flower. They can go back into a fixture or sit in a bowl as a pile of pop art.
Get the full tutorial at Kelly Elko.
29. Tattoed Denim Jacket
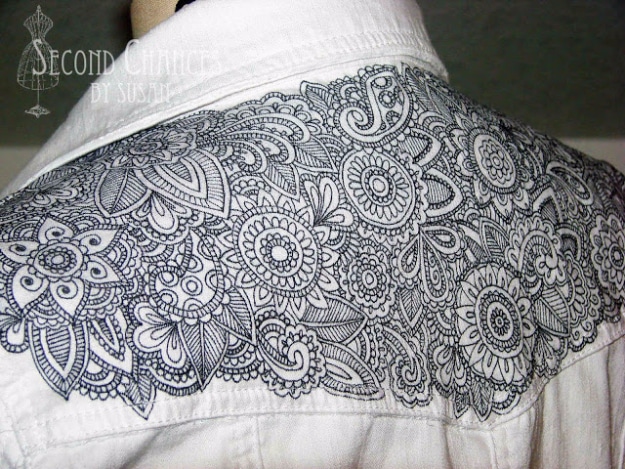
The most involved thing on this page and the most impressive. A thrifted white denim jacket gets henna-style patterns drawn across the shoulders with an ultra fine point marker, then parts of the design are filled in with Elmer’s washable clear glue, squeezed from an empty paint tube for control. Dried glue resists dye. The jacket is then lowered into Rit Denim Blue five minutes at a time for an ombre, and when the glue washes out, the protected areas stay pale. The stitching stayed white too.
Get the full tutorial at Second Chances By Susan.
30. DIY Gold Confetti Dot Glass
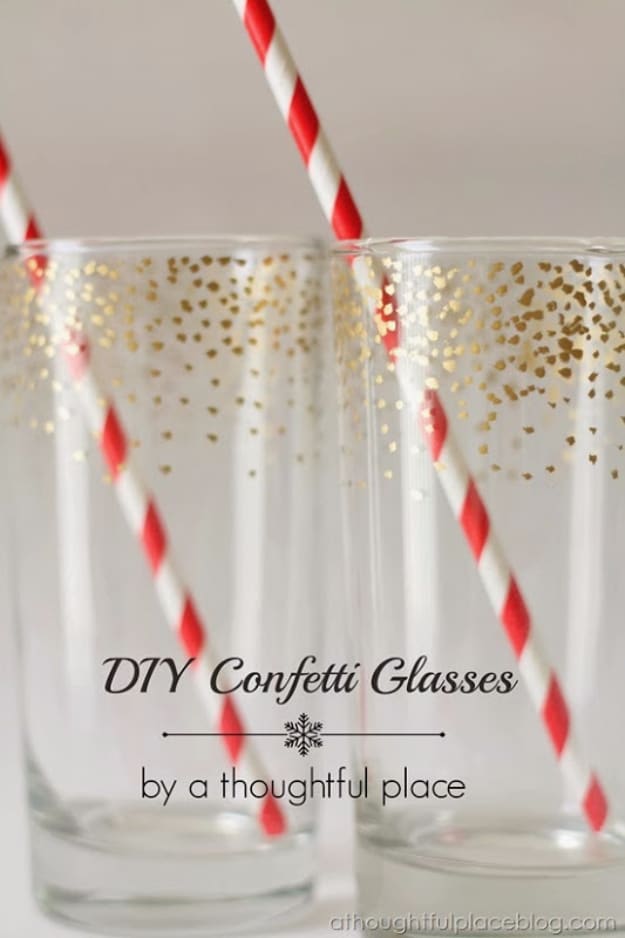
Two cast-off glasses from the giveaway pile and a gold leaf pen, copying a shop’s holiday confetti glassware for nothing. The detail that makes it look bought rather than dotted at random is density: pack the confetti close together near the rim and let it scatter and thin as it goes down the glass. Make sure the pen is flowing properly before it touches the glass, and turn the glass rather than moving your hand. These are for holding straws and stirrers on a bar cart, not for drinking out of.
Get the full tutorial at A Thoughtful Place.