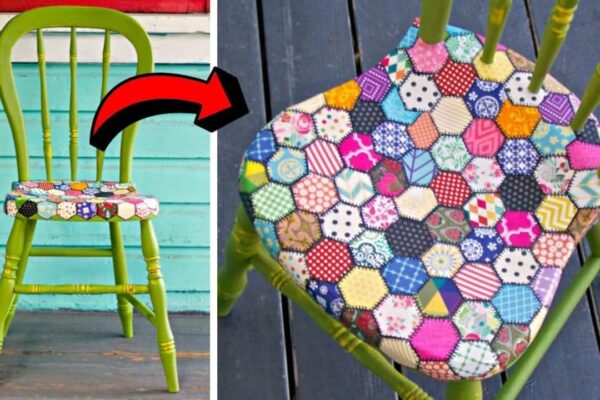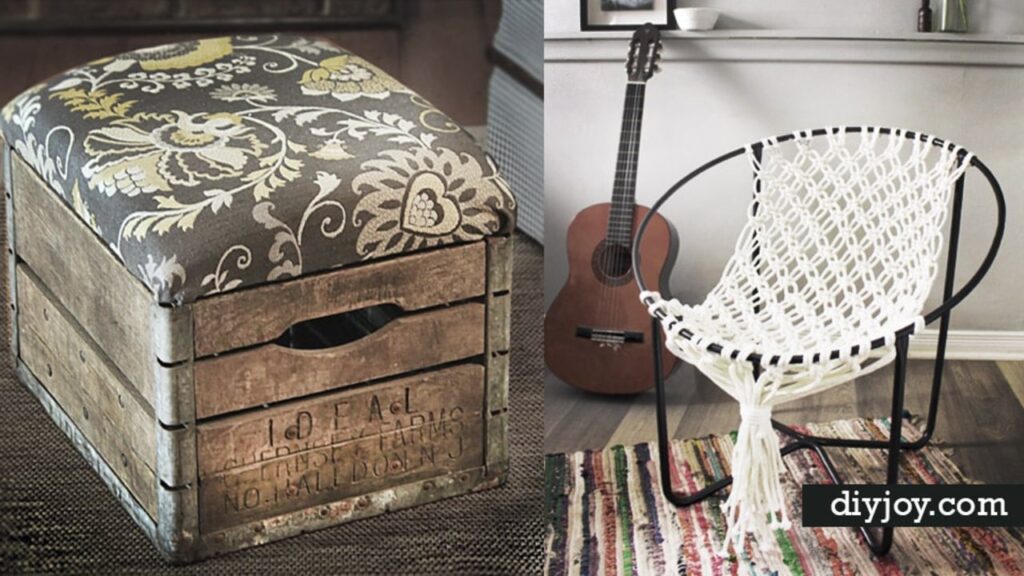
Ever noticed how a room never seems to have enough places to sit? These 22 creative DIY seating ideas fix that without a trip to the furniture store. DIY seating covers anything you build, cover or rescue to sit on, from step stools and bar stools to hammock chairs, dining chairs and folding chairs. Some are quick paint jobs you can finish in an afternoon, like a gold dipped bathroom stool or a cow print seat recovered with nothing but a staple gun. Others are weekend builds, like an industrial pipe bar stool or a hanging macrame chair that eats a whole lot of rope. Curb finds and thrift store chairs show up again and again, because a sturdy old chair with good bones is the best starting point there is. Grab a staple gun, a can of spray paint and a fabric you love, and pick your project!
1. Painted Kitchen Stools
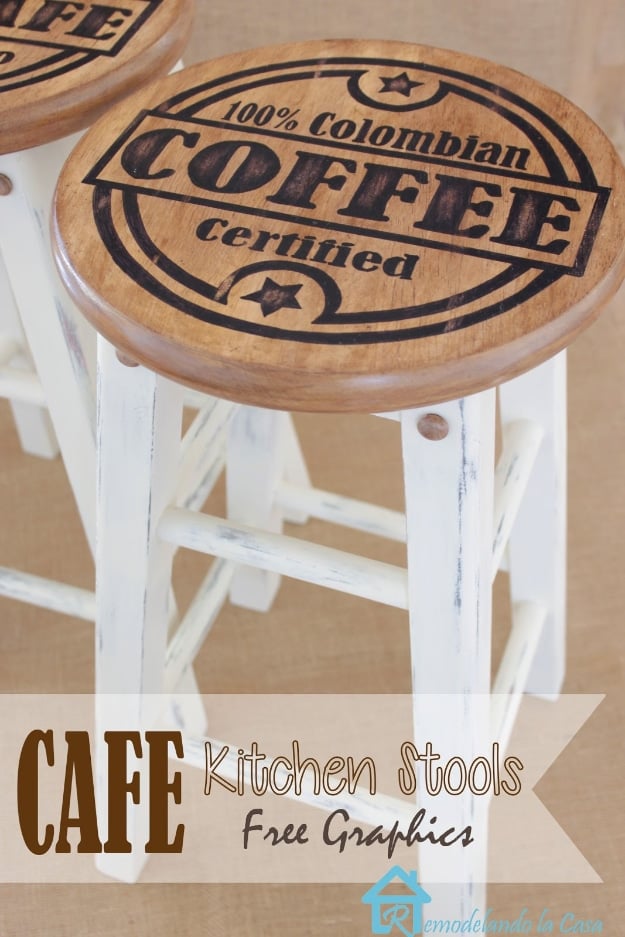
These painted kitchen stools started as a well used pair of plain wooden stools that had served as step ladders, snack tables and a paint station. After a good sanding, a small skirt cut from 1×2 boards was added under each seat, plus wooden screw covers for detail. The legs got red and blue spray paint, then black on top, sanded back so the bright colors peek through. A coffee label graphic was transferred to each seat with graphite paper and filled in with a black Sharpie, then sealed with two coats of stain.
Get the full tutorial at Remodelando la Casa.
2. Farmhouse Style Stool
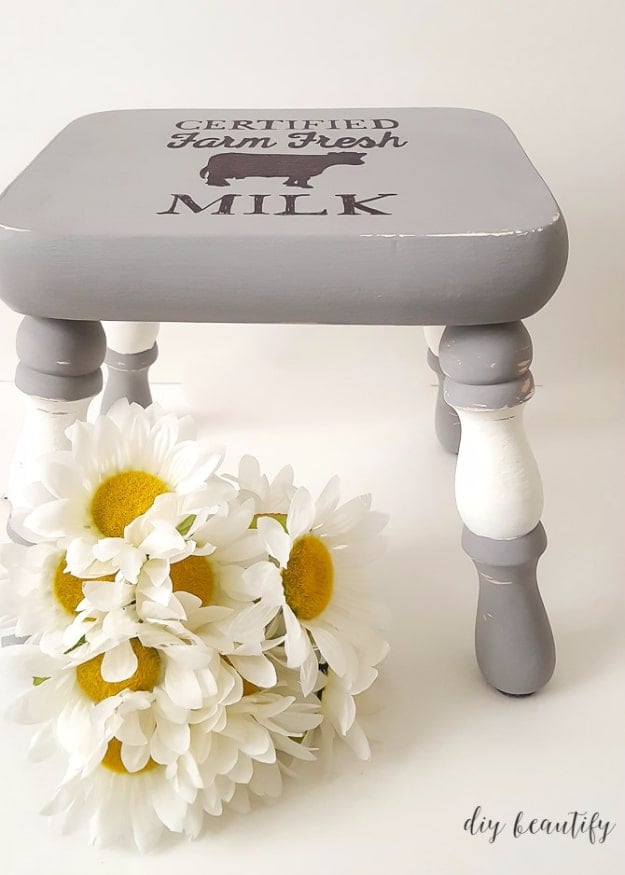
A faded pink family step stool gets a farmhouse style update with an all natural chalk style paint in soft gray and creamy white. The paint has no odor, covers well and distresses with almost no effort, so go lightly with the sanding sponge or too much comes off. The milk graphic on top is a free download from The Graphics Fairy, painted on with a black Sharpie instead of a stencil. A glaze finishes it and adds an aged look. It is a small, satisfying project for a kitchen or bathroom step stool.
Get the full tutorial at DIY Beautify.
3. DIY Industrial Bar Stool
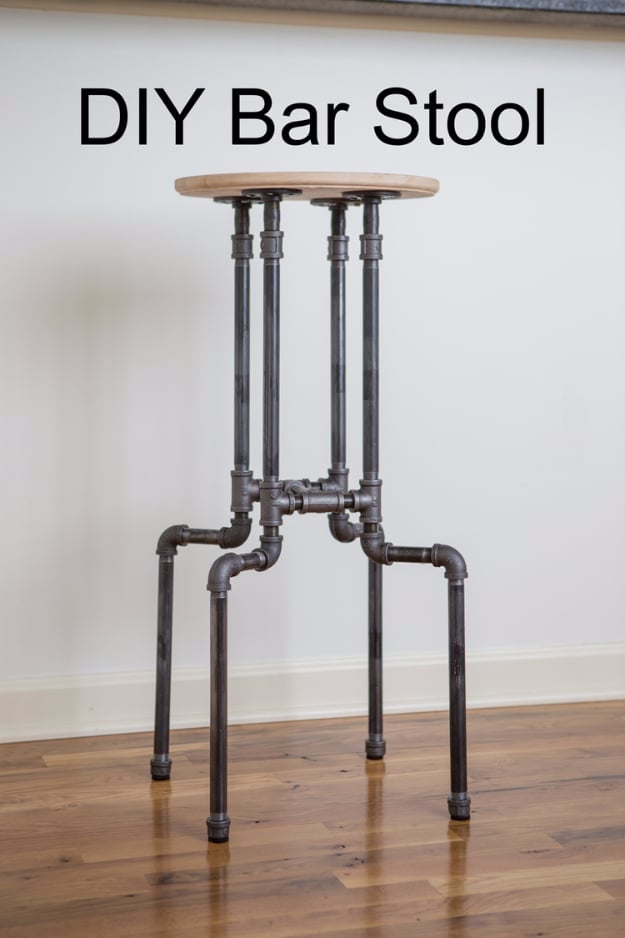
This DIY industrial bar stool is built from black iron plumbing pipe and a round wooden seat, and it fits right into a loft with high ceilings and exposed pipes. Every part is 1/2 inch: four floor flanges, eight 12 inch pipes, tees, elbows, close nipples and caps. Peel off every sticker and bar code before assembly, since the adhesive is a pain later. Vice grips help line up the joints, and the end caps go on last. Fair warning, each stool came to about $110, so this one is about style more than savings.
Get the full tutorial at YOGABYCANDACE.
4. DIY Bathroom Stool
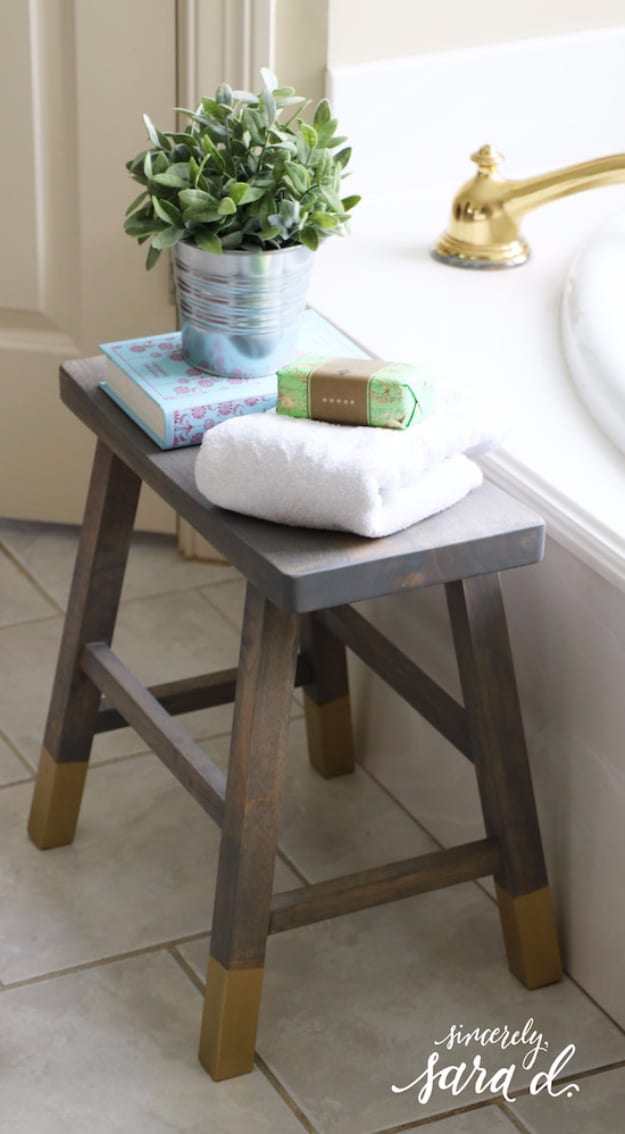
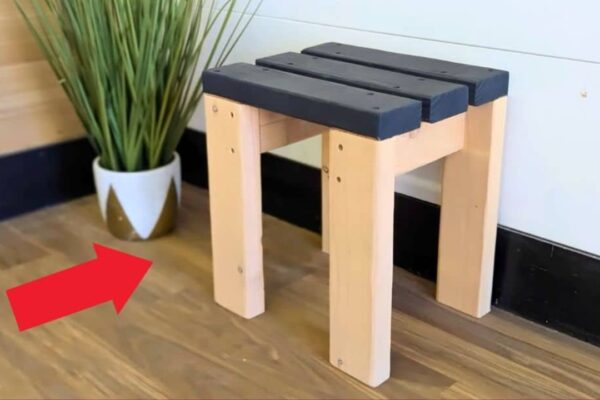
This DIY bathroom stool gives a high end look to an unfinished wood stool that arrives already assembled. Two coats of weathered gray wood stain go on with a lint free rag, with gloves to protect your hands. Once the stain is dry, tape off the bottom of each leg and paint the tips with brushed metallic gold for a dipped look. It takes several coats for full coverage, so reach for gold spray paint instead if the weather is warm. Set it beside the tub for a plant, a towel and a good book.
Get the full tutorial at Sincerely, Sara D.
5. DIY Upcycled Vintage Step Stool
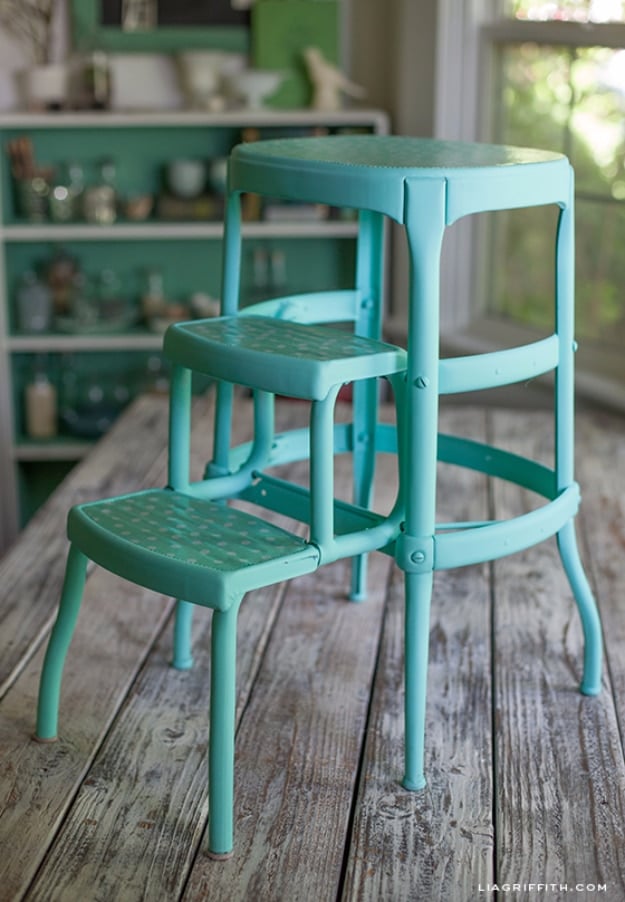
A flea market find, this vintage step stool with retractable steps gets a fresh start with one can of aqua spray paint. Polka dot oilcloth, a coated cotton that wipes clean, covers the steps and the top for a cheerful pop of pattern, held to the metal with high strength spray adhesive. The finished stool is practical for reaching high shelves or shooting photos from above, and it looks like a piece of retro kitchen decor when nobody is standing on it.
Get the full tutorial at liagriffith.com.
6. DIY Geometric Step Stool
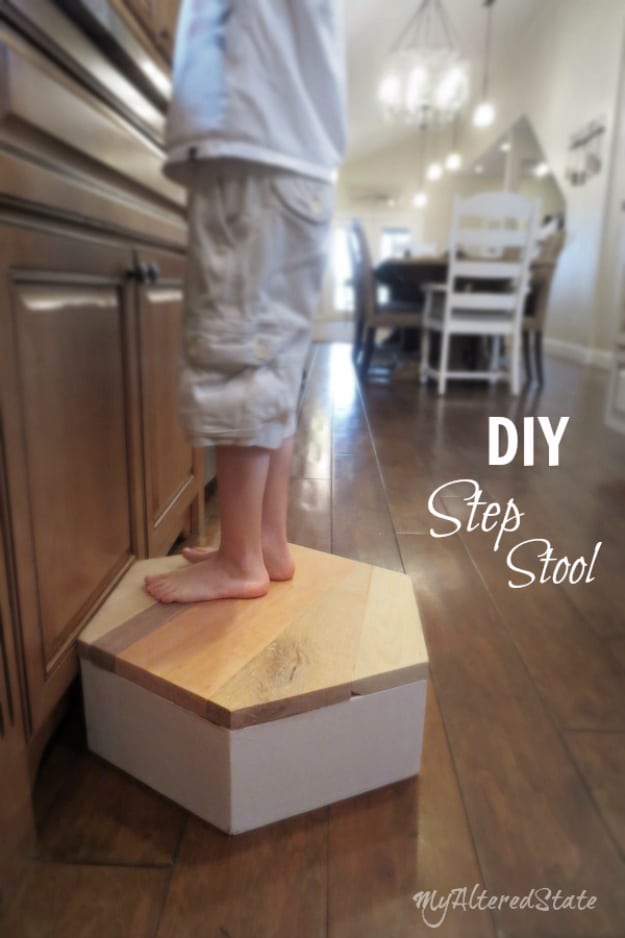
This DIY geometric step stool is a hexagon, built from a 2×6 cut into six 9 inch sections with 30 degree angles on each end. Pocket holes from a Kreg jig join the base, and a bench vise holds the pieces while they come together. The top is a patchwork of odd shaped scrap wood, glued and nailed on, then traced from underneath and trimmed with a miter saw and a jigsaw. Sand the seams smooth, paint the base white and wax the top. Make a few and they stack like stepping stones.
Get the full tutorial at My Altered State.
7. DIY Rustic Milk Crate Ottoman
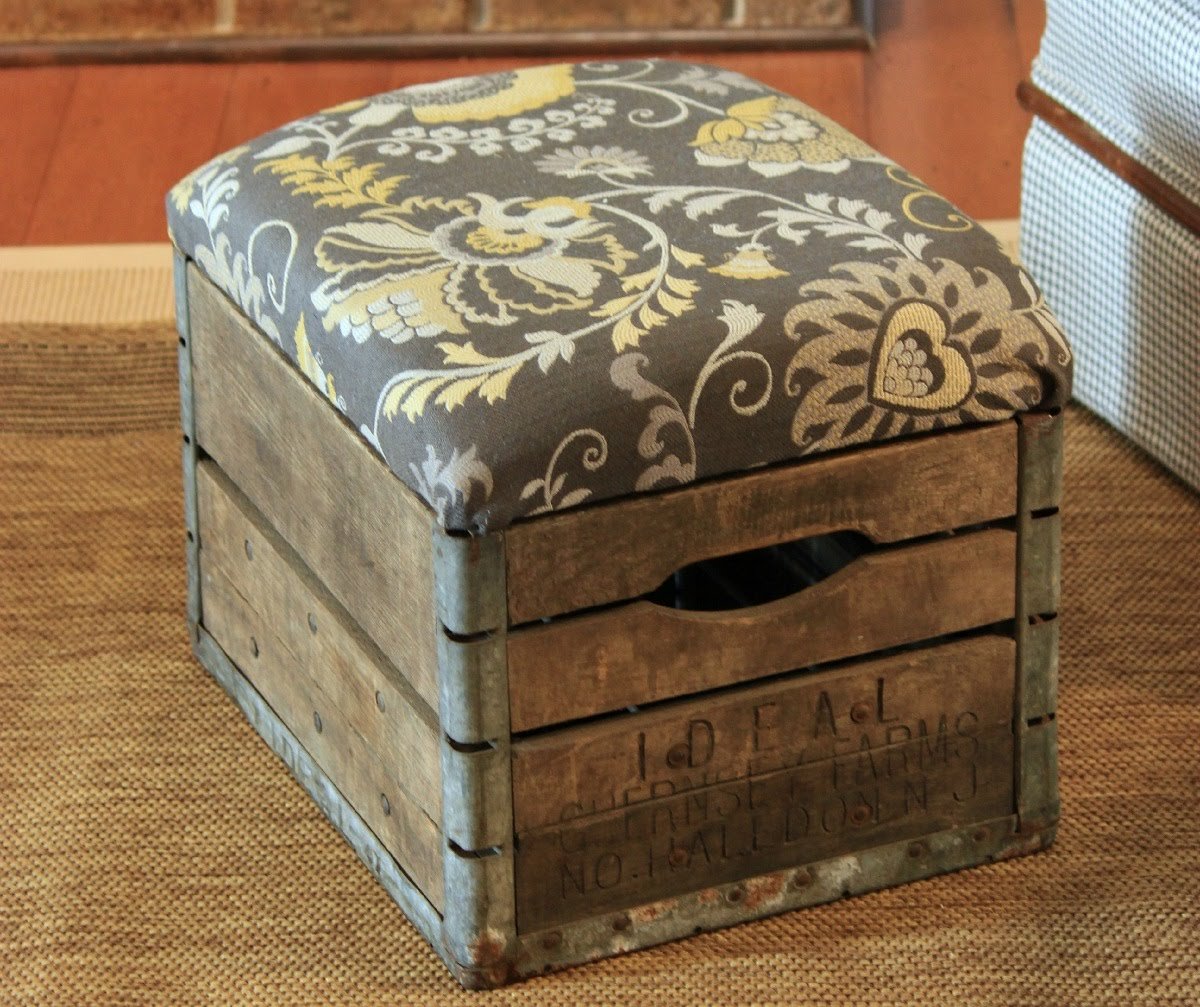
A vintage wooden milk crate makes a charming base for a farmhouse ottoman. The crate gets a padded, fabric covered top, so it becomes a footrest or an extra seat you can pull up anywhere. Pick a bold fabric that complements your sofa, and the old crate stamps on the sides do the rest. It is quick and cheap, and one can be made in about an hour. Hunt flea markets and antique stores for crates with a bit of character, since the worn wood is the whole charm.
Get the full tutorial at DIY JOY.
8. DIY Hanging Macrame Chair
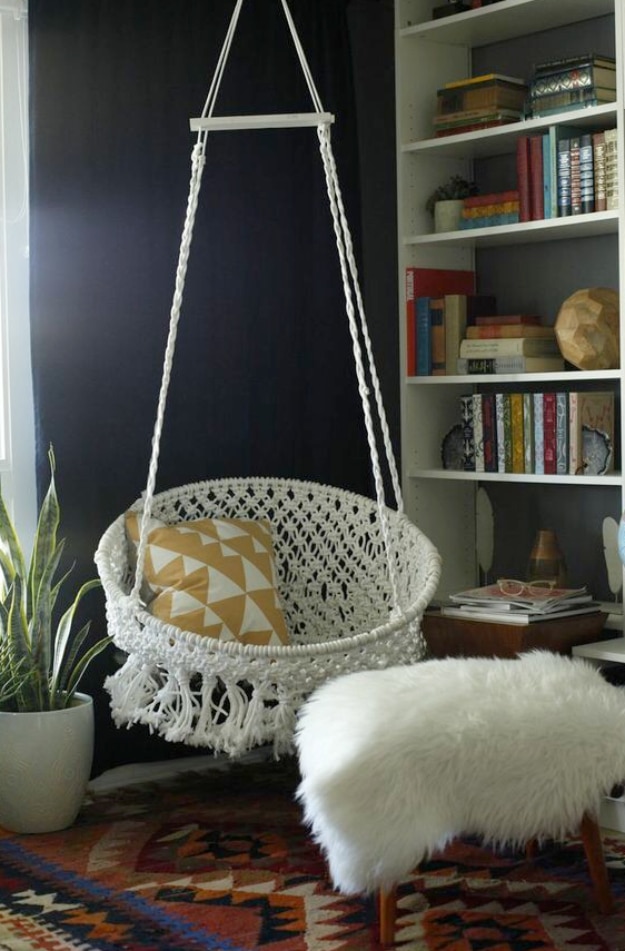
This DIY hanging macrame chair is a knock off of a pricey store version, built on a round chair frame with the legs cut off. Plan on lots of rope: about 120 pieces of clothesline cut 10 feet long for the sides alone, plus more for the braided hanger. Wrap tape where you cut so the ends do not unravel. The pattern starts with square knots around the hoop, then alternating square knots all the way around. It took real trial and error, so give yourself a few afternoons.
Get the full tutorial at Classy Clutter.
9. DIY Hammock Chair
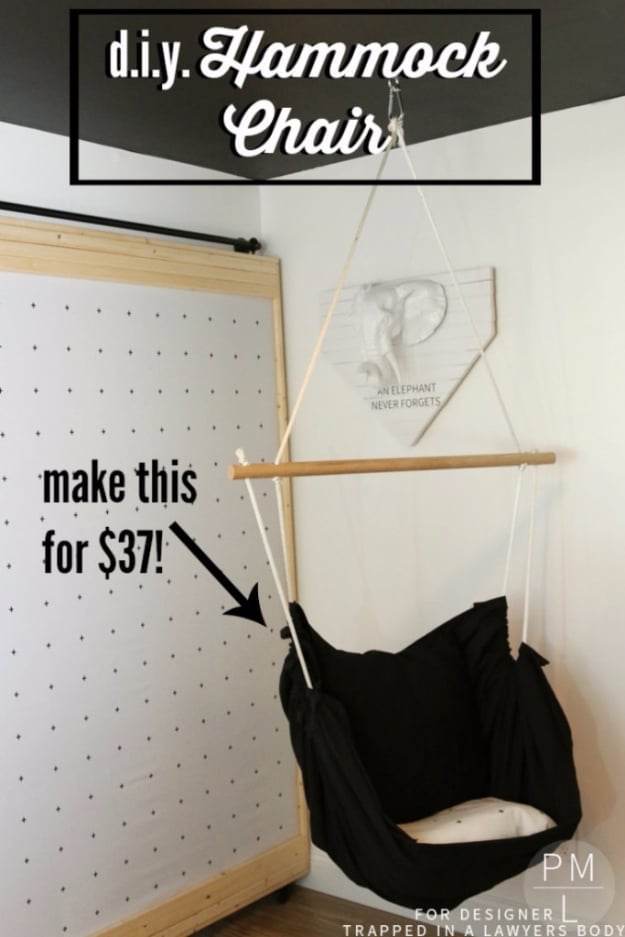
This DIY hammock chair costs about $37 and uses 2 yards of duck canvas, a 36 inch oak dowel, 14 feet of braided rope, a spring link and an eye bolt. Fold the canvas and cut it at an angle so the head end is narrower than the foot, which helps it hold its shape. Hem the top and bottom, then sew wide side channels for the rope. Drill four holes in the dowel and thread the rope through without cutting it. Check the eye bolt’s weight rating before anyone climbs in.
Get the full tutorial at Kaleidoscope Living.
10. DIY Macrame Hammock Chair
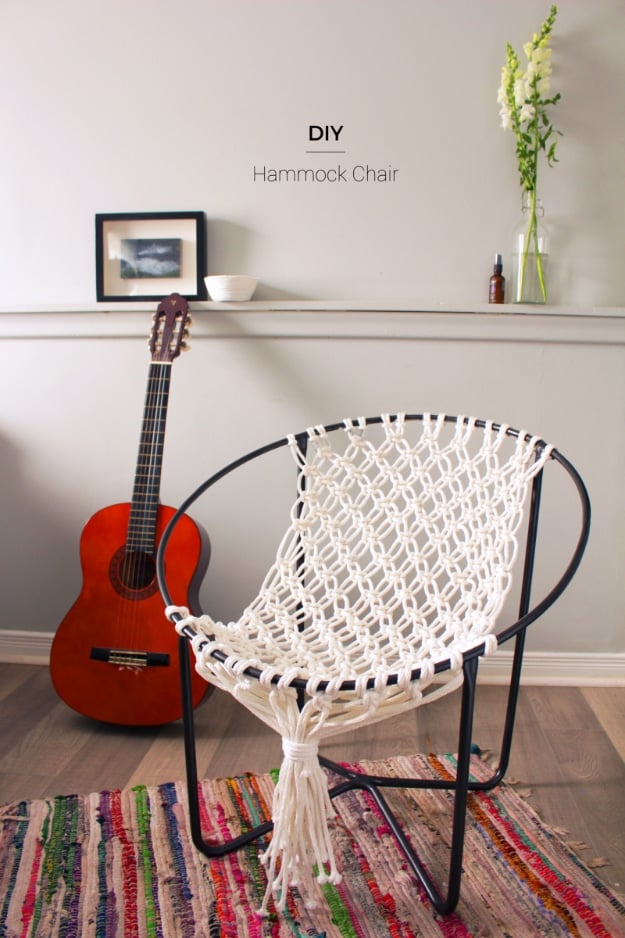
This DIY macrame hammock chair is a true beginner project and needs just a circular chair frame, macrame cord and sharp scissors. Look for 4 or 5 mm cord, and check that the frame is sized for adults. Cut 16 pieces of cord 16 feet long, fold each in half and loop it over the top of the frame, pulling the ends through the loop. From there the whole pattern is the macrame square knot, worked row after row down the chair. A free pattern on the source page walks through every step.
Get the full tutorial at Fish & Bull.
11. Mod Podge Chair
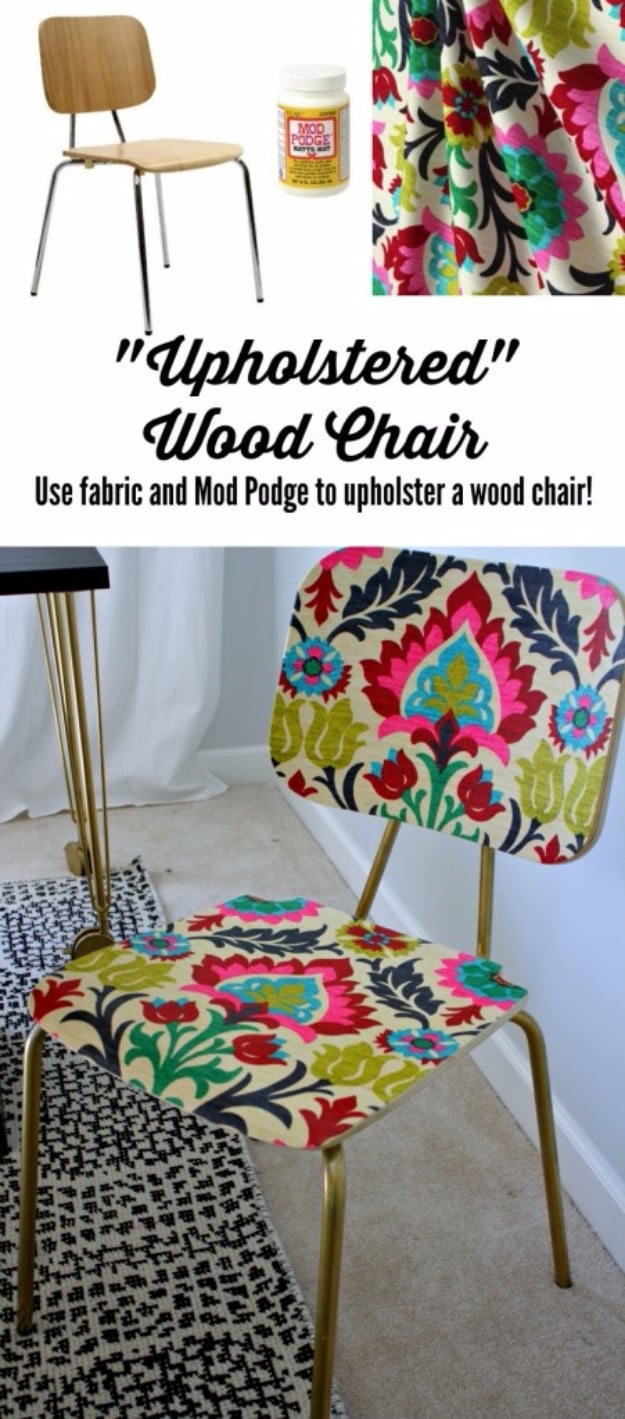
Decoupage is a budget friendly way to get a designer chair without any upholstery. Start with a basic wood chair, about 1 yard of fabric and matte Mod Podge, and spray the metal legs gold if you like. Brush Mod Podge onto the seat and back, lay the fabric on and smooth it, then trim the excess with an Exacto knife. A foam brush and a few more coats of Mod Podge seal the fabric in place. Plan for about three hours, and pick a bold print for the biggest payoff.
Get the full tutorial at Kaleidoscope Living.
12. Yarn Woven Rattan Chair
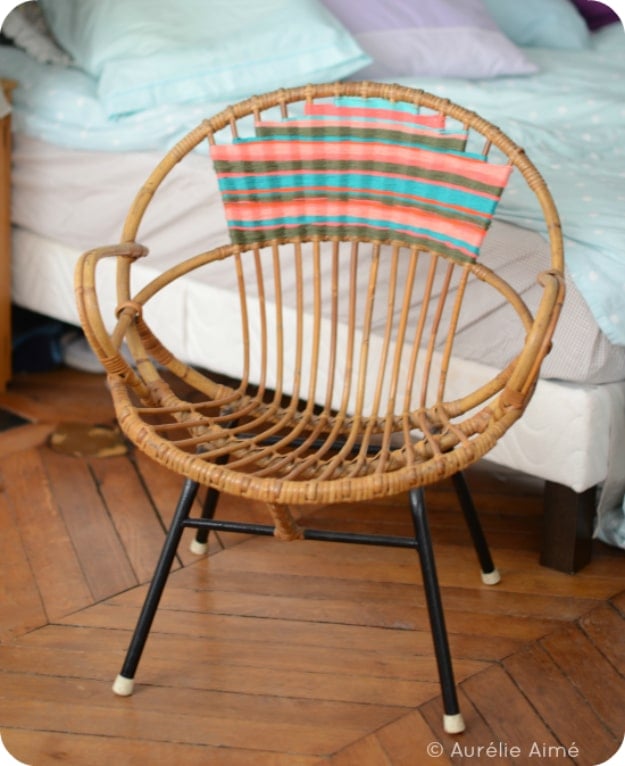
A small 1960s rattan chair gets a woven makeover with leftover yarn. Gather yarn scraps of the same thickness and wind them into mini balls small enough to pass between the rattan bars. Knot the first one at the very bottom bar, then weave back and forth between the bars until the yarn runs out. Knot it, start the next color and keep going. Push each row down tight so no gaps show. Expect about three hours of work, and it turns out to be surprisingly relaxing.
Get the full tutorial at aurelieaime.blogspot.com.
13. Knock Off No Sew Dining Chair
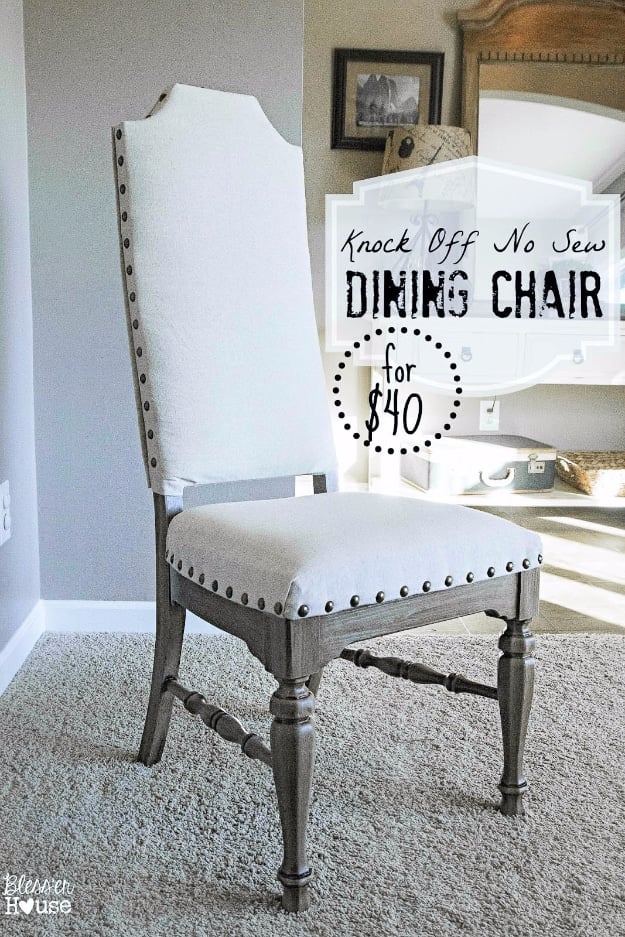
Six 1970s dining chairs from Craigslist became Pottery Barn and Restoration Hardware look alikes for about $40 each. The curved finials were cut off with a jigsaw along level lines, then the legs were primed, painted gray and stained walnut for a weathered look. Egg crate mattress foam pads the backs and seats, covered in canvas drop cloth with spray adhesive, staples and hot glue. There is no sewing anywhere. Antique gold nailheads, about four packs per chair, finish the edges.
Get the full tutorial at Bless'er House.
14. Homemade Viking Chair DIY
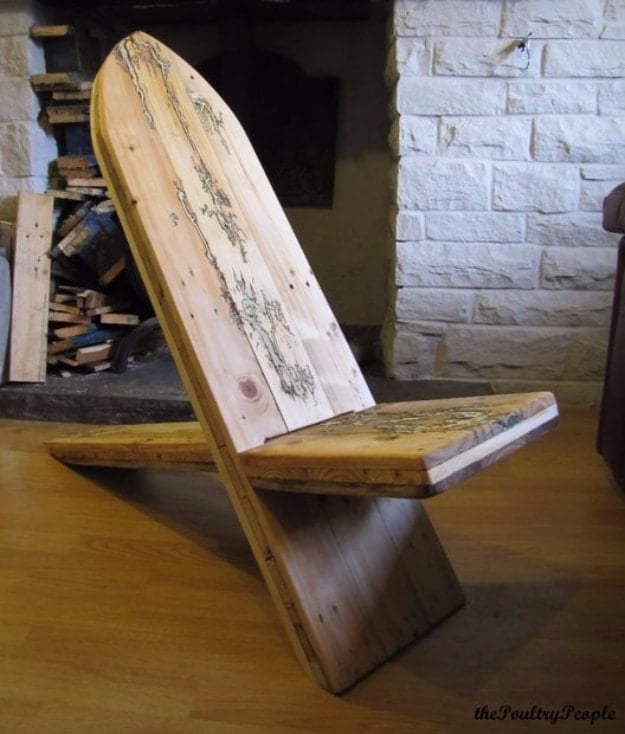
A Viking chair is made from two boards that slot together, with no glue, screws or nails. One board slides through a slot cut in the other, creating a seat and backrest that brace each other. It comes apart in seconds and stores flat, which makes it perfect for camping or a deck. Use new lumber or salvaged pallet wood. A handsaw, jigsaw, drill and sander handle the build, and it can be finished in under an hour. Two videos on the source page show it start to finish.
Get the full tutorial at The Homestead Survival.
15. DIY Chevron Chair
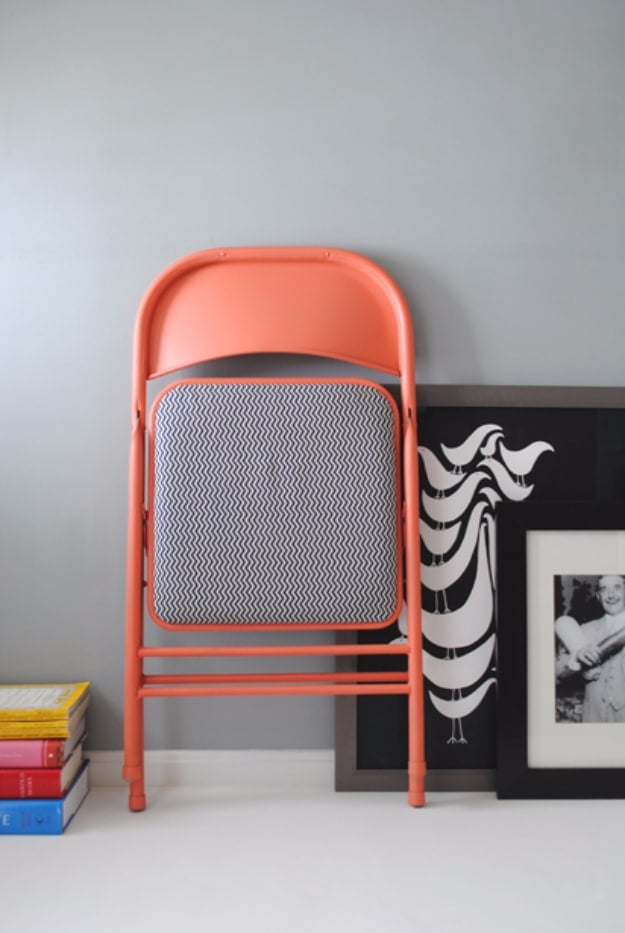
Dull metal folding chairs get a splash of color and pattern in an afternoon. Unscrew the seat cushion and set it aside. Wipe the frame clean and, on a drop cloth in a ventilated spot, spray two thin coats of paint with slow side to side passes, about two cans per chair. Prime first if the chair is dark or very smooth. Lay the cushion face down on a 20 inch square of fabric, trim about 3 inches past the edge, and staple the center of each side before the corners. Let it dry overnight.
Get the full tutorial at Design For Mankind.
16. Drab To Fab Folding Chairs
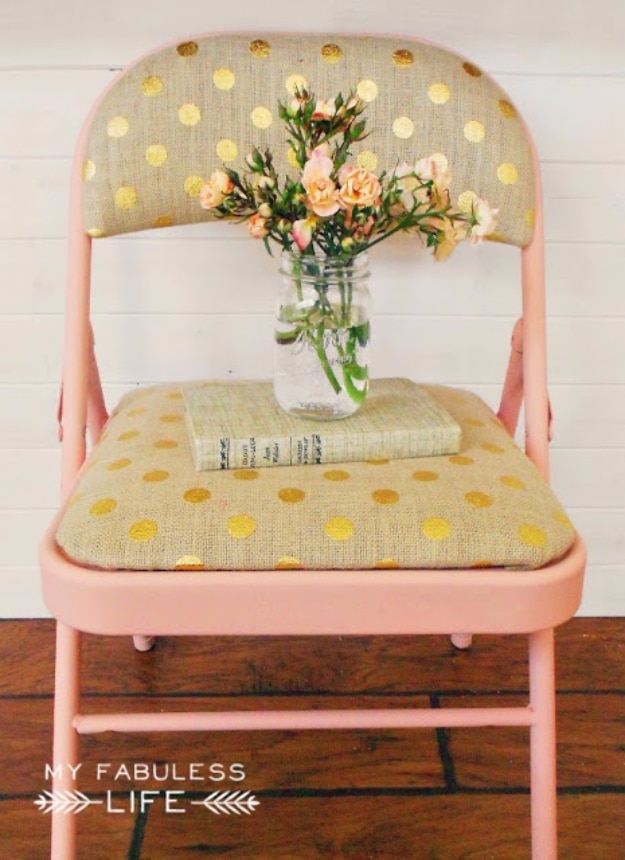
Brand new folding chairs get a party ready makeover with spray paint and remnant fabric. Remove the seat and back pads first. If plastic fasteners hold the seat, clip them with wire cutters rather than pulling, or they tear right through the padding. Spray paint the frames, about one can per chair, in shades like blush and soft green. While they dry, wrap each cushion in less than half a yard of fabric, pull it tight and staple it over the old cover. Reattach the pads with 1 inch screws.
Get the full tutorial at WhipperBerry.
17. Wooden Chair Makeover
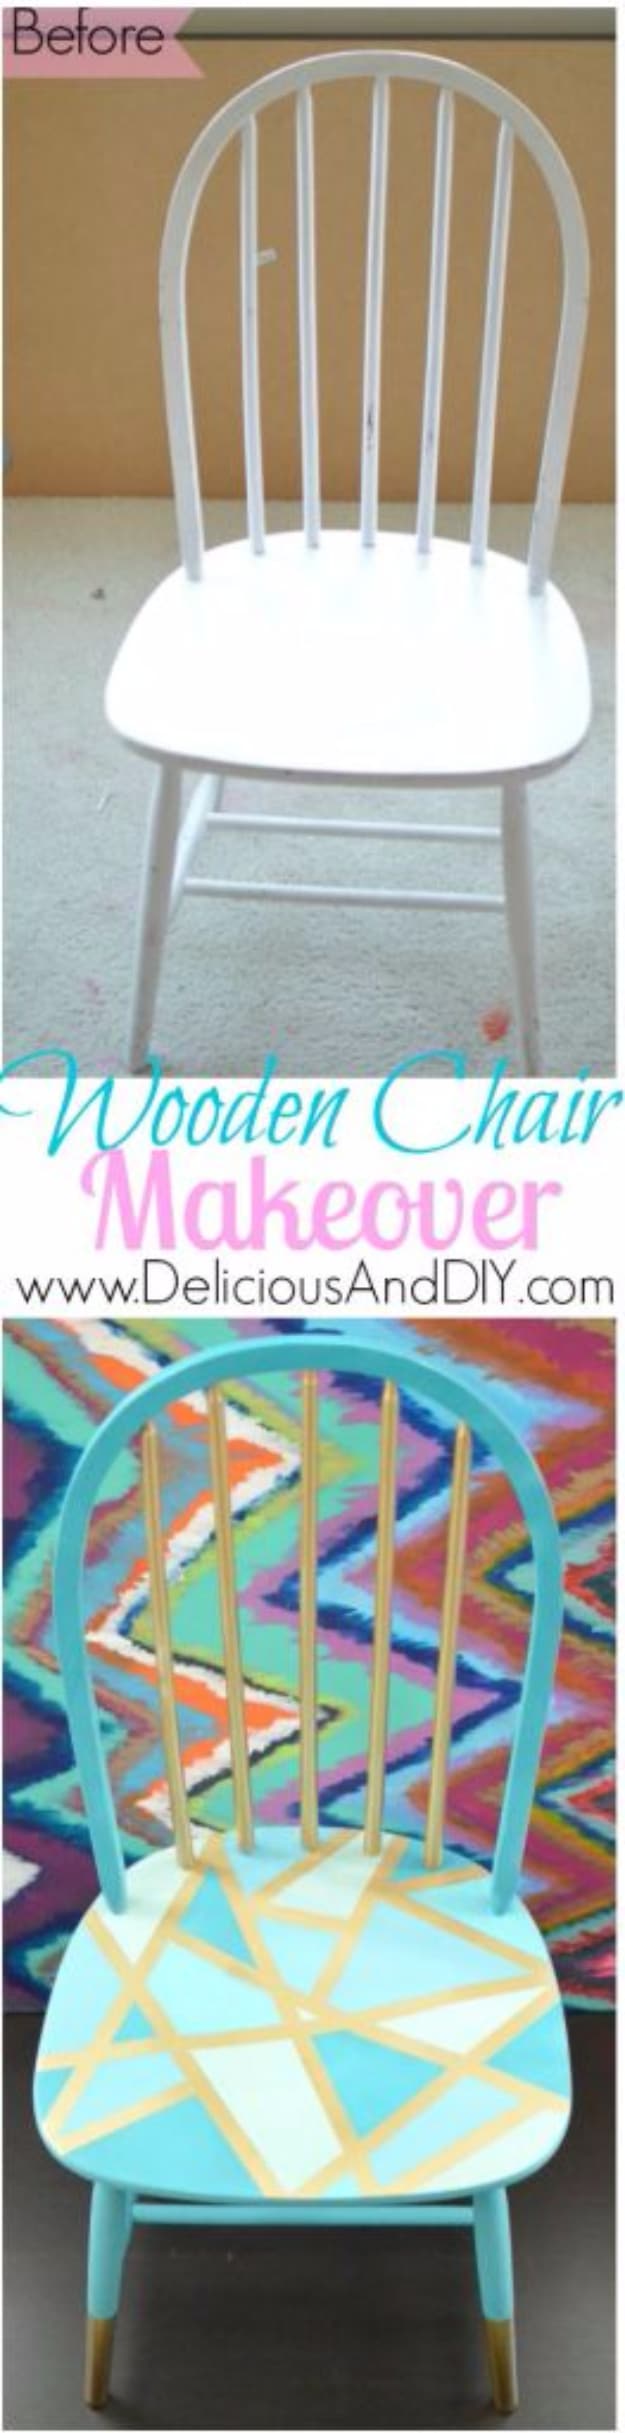
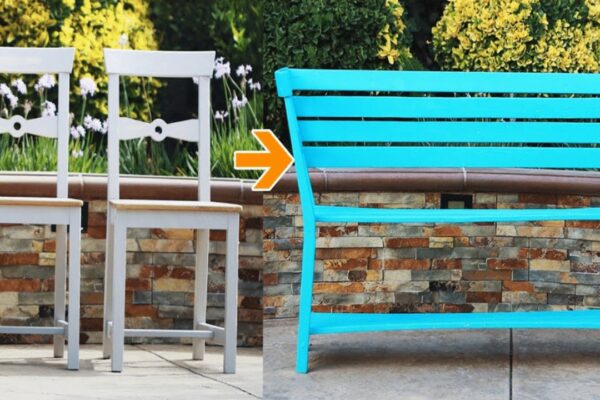
A free white wooden chair turns bright and geometric in about an hour. Spray the whole seat with metallic gold paint first, so gold lines show through at the end. Once dry, tape off any design you like across the seat and back. Paint over everything in four shades running from mint to ocean blue, then pull the tape to reveal the gold. Tape the tips of the legs evenly and spray them gold for a dipped look, and keep gold liquid gilding on hand for touch ups.
Get the full tutorial at Delicious And DIY.
18. Udder Madness Chair Makeover
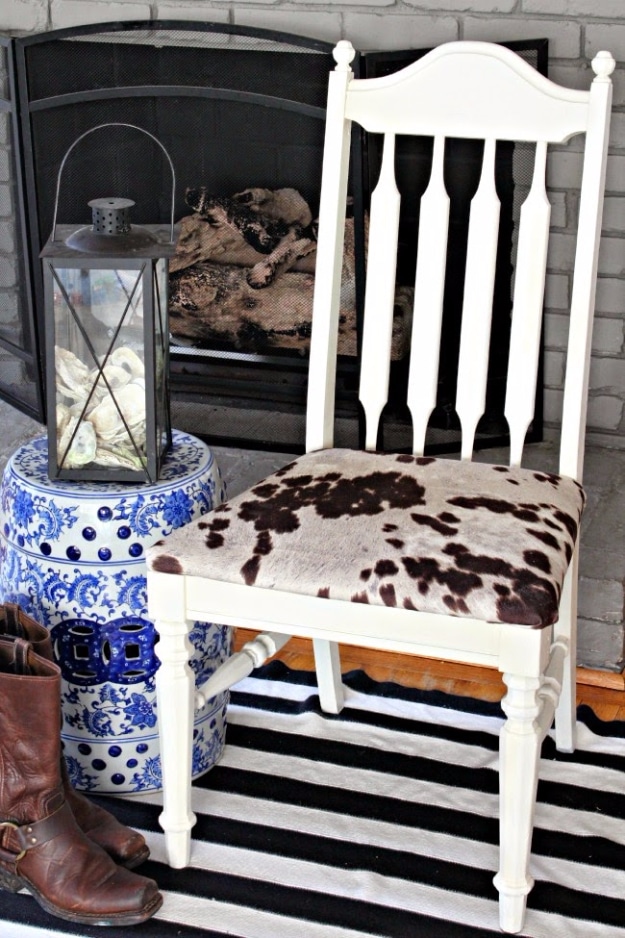
Two grimy secondhand chairs become dining room standouts with spray paint and faux cow print fabric. Unscrew the seats from the frames, which usually takes just four screws under the cushion. Lightly sand and wipe the frames, then spray them with Rustoleum Heirloom White, about three light coats from one can. Cut the cow print fabric to size and staple it right over the old fabric if the new one is thick enough. Screw the seats back on and they are ready for dinner.
Get the full tutorial at Southern State of Mind.
19. Refinish Folding Chairs
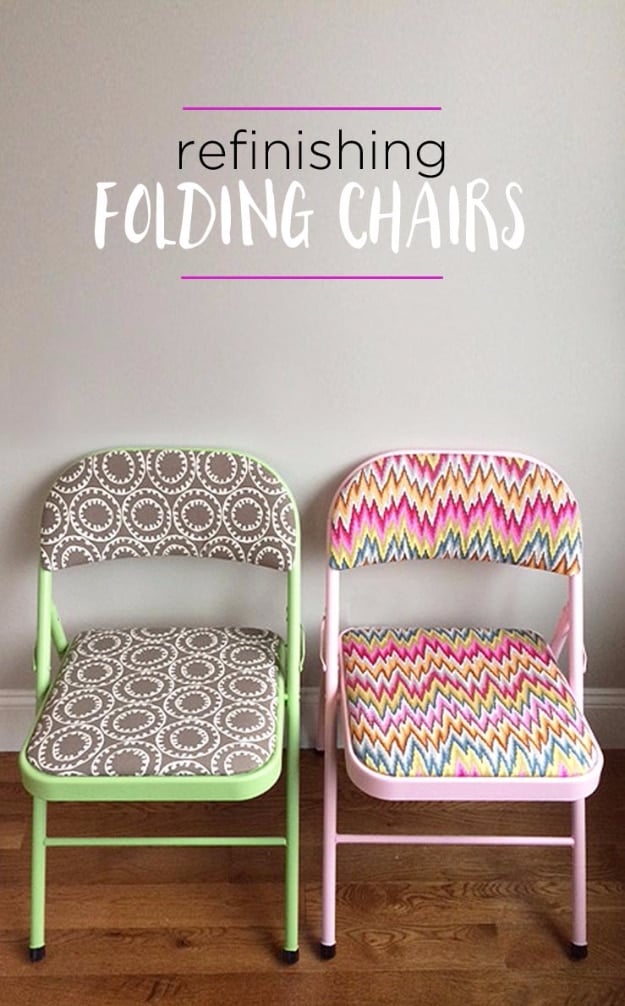
Learn how to refinish folding chairs so they look like real furniture instead of party rentals. Choose cushioned folding chairs with pads held on by standard screws, and keep the screws somewhere safe. Spray paint each frame, about one can per chair. Cover the back and seat cushions with less than half a yard of remnant fabric each, stapling it taut on the underside, then screw the pads back on. Bold prints over mint and pink frames look sweet in a home office, a playroom or a girl’s room.
Get the full tutorial at Ideas for the Home.
20. Vintage Cane Chair Pair Makeover in Grey Velvet
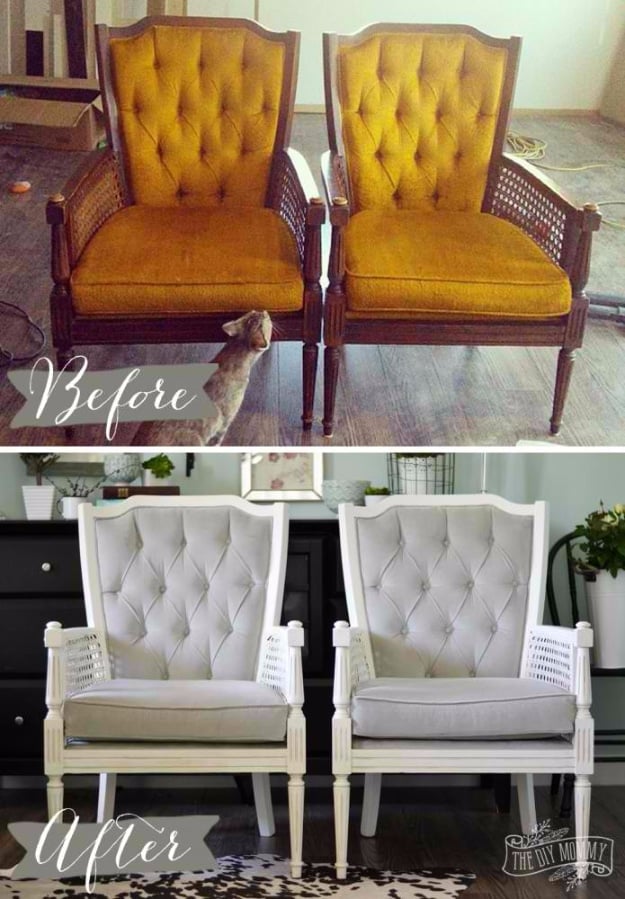
A pair of mid century cane chairs from an online classifieds ad gets a full refresh. Strip the old upholstery and foam, and pull every staple with pliers and a staple remover, the hardest part of the job. Clean the wood with degreaser and give it a light sanding. Three coats of homemade chalk finish paint in a soft off white cover the old finish without full stripping. New silver cotton velvet, applied by a professional upholsterer, turns them into heirloom pieces.
Get the full tutorial at Cozy DIY Home.
21. Painting Fabric With Chalk Style Paints
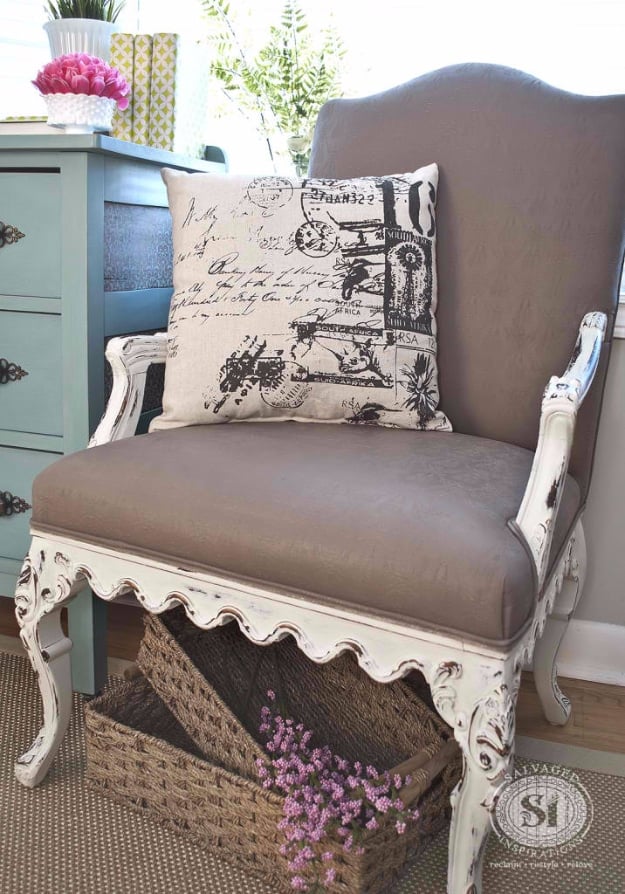
A salvaged granny chair with pink upholstery gets a whole new look by painting the fabric itself. The frame went on in Bone White chalk style paint without sanding first, and it still stuck well. The fabric got Cardamom Brown, which covered the pink easily. Instead of misting the fabric with a spray bottle, dip the brush in water and then in paint. Sanding the frame and masking with painters tape would give a neater finish, but even this relaxed approach looks amazing.
Get the full tutorial at Salvaged Inspirations.
22. Reclaimed Victorian Balloon Back Chairs
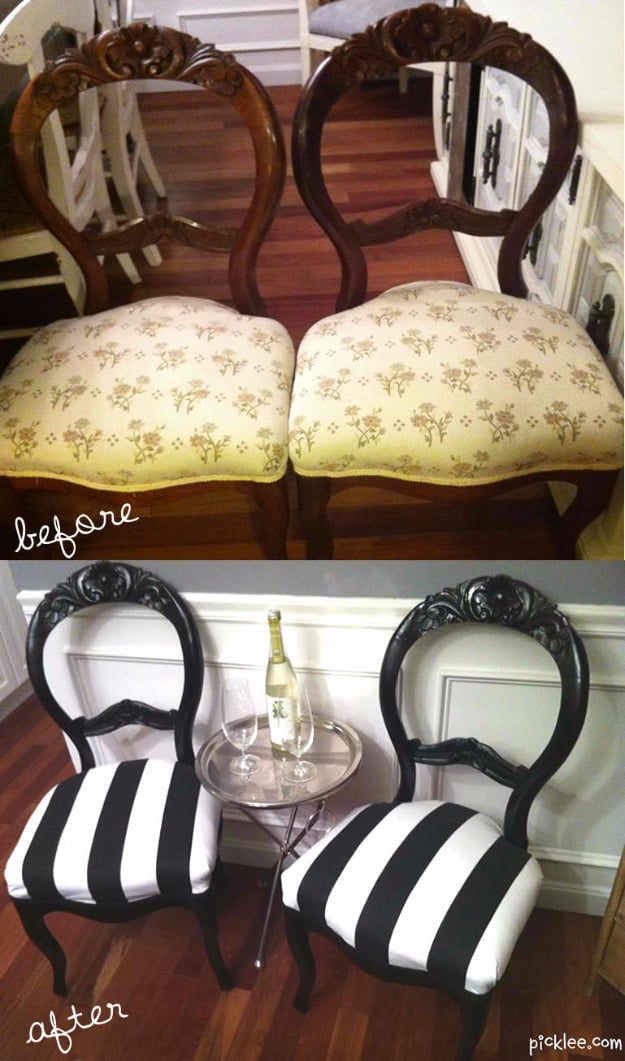
A pair of solid mahogany Victorian balloon back chairs from the late 1800s, won at an estate auction, gets a bold Hollywood Regency update. Carefully remove the tattered seat upholstery in one piece so it can serve as a template for the new covers. A first coat of duck egg blue did not suit them, so jet black paint went right over it. After curing, a light coat of lacquer adds shine, and black and white striped fabric covers the seats.
Get the full tutorial at Picklee.