Do you love rustic home decor? So do I! I’m so enthralled with this table and HAD to have one for my living room! I didn’t have all the equipment I needed to do this, so I went over and used my Daddy’s….Dad’s do come in handy! Being the retired Mechanical Engineer that he is, he just had to get involved and I welcomed the help!
This table is such an improvement over than the one that I was using and it provides much more space for me to put things on. I’m so excited to have this beautiful piece of furniture in my living room. It makes an amazing difference and has added a whole new dimension to the room! You’re gonna love this and if you don’t get into doing this particular type of project, get your Dad or one of your friends to help you make yours too! Guys (and some gals) are always looking for a project and this one is the perfect.
Here’s what he does in the tutorial…
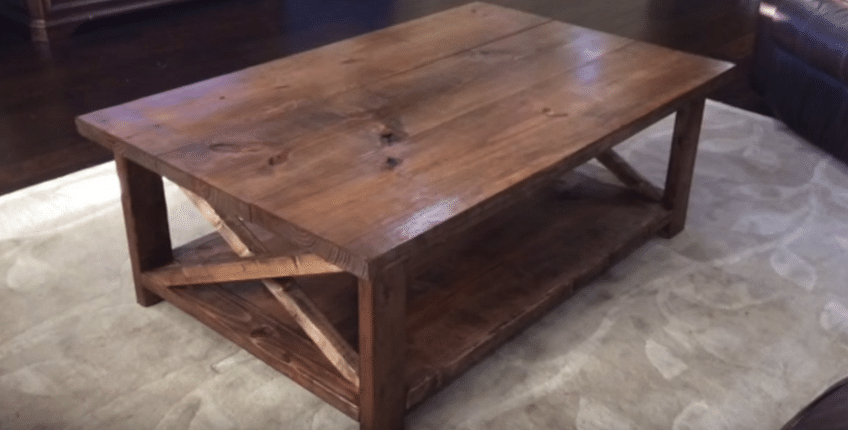
Legs are cut at 17″, bottom shelf cut approx. 41.5″, table top and bottom shelf supports are cut at 27-3/4″, side aprons are cut at 41-1/2″. After all cuts are finished it’s time to assemble the table. Add the pocket holes, assemble the legs and supports, use 2-1/2″ pocket hole screws and wood glue, pocket hole clamp is used to hold the supports together, while putting in the screws. Add more pocket holes, now it’s time to attach the bottom shelf with 1-1/4″ pocket hole screws and wood glue. Attach bottom shelf to side support, attach bottom shelf to the legs, then attach side aprons, using clamp again, attach screws. Then trace the angle for the X’s and cut on the mitre saw, attach the X’s with clamps and 2-1/2″ drywall screws, drill a pilot hole first, then add the 2-1/2″ screw, do the same thing on the other side, creating the X. Then sand the bottom shelf at 20x speed. Placing the wood on the top for the surface of the table, sand top at 20x speed. Then attach the table top, putting in the pocket holes and pocket screws for attaching, like you’ve done before, to attach the boards together. Now you’re ready for staining! It’s much easier to watch the step by step tutorial. You’re gonna enjoy this table! It’s well worth the time spent to make this!