I learned to drywall by doing it, including the sanding at the end, and what that taught me is that some jobs are worth handing to a professional and a great many more are not. These remodeling hacks are firmly in the second group. Every one of them changes the way a room reads without a demolition day, a permit or a plumber: a golden oak banister goes dark, a tub apron gets panelled, a chrome faucet turns oil rubbed bronze for the price of a can of spray paint, a wall gets planked for about thirty dollars. Most cost less than a takeout dinner, several are finished in an afternoon, and the before and after photos are frankly ridiculous for the effort involved. Start with the smallest thing in the room you dislike most.
1. Inexpensive Tub Trick
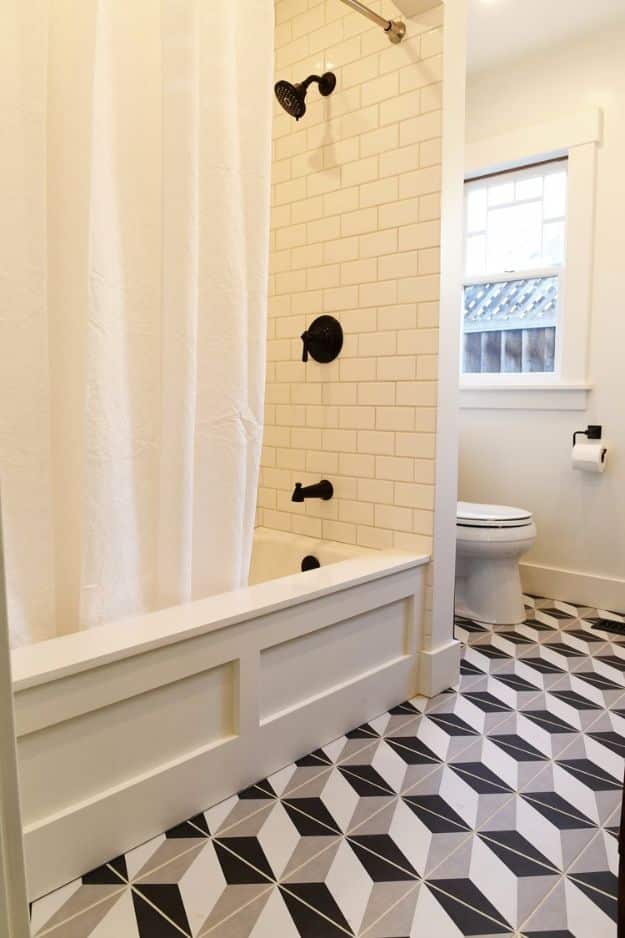
The cheapest cast iron tub you can buy is the plain five foot builder’s tub with a flat apron front, and this is the trick that makes it look like the expensive one. It gets set up on four by four pressure treated sleepers, which raises it about four inches so it reads as more substantial and is genuinely easier to climb in and out of. Then the tapered apron gets shimmed and faced with panelling. Clean the apron with denatured alcohol and scuff it with 80 grit where the shims land.
Get the full tutorial at Spruce and Pine.
2. Plank a Wall for $30
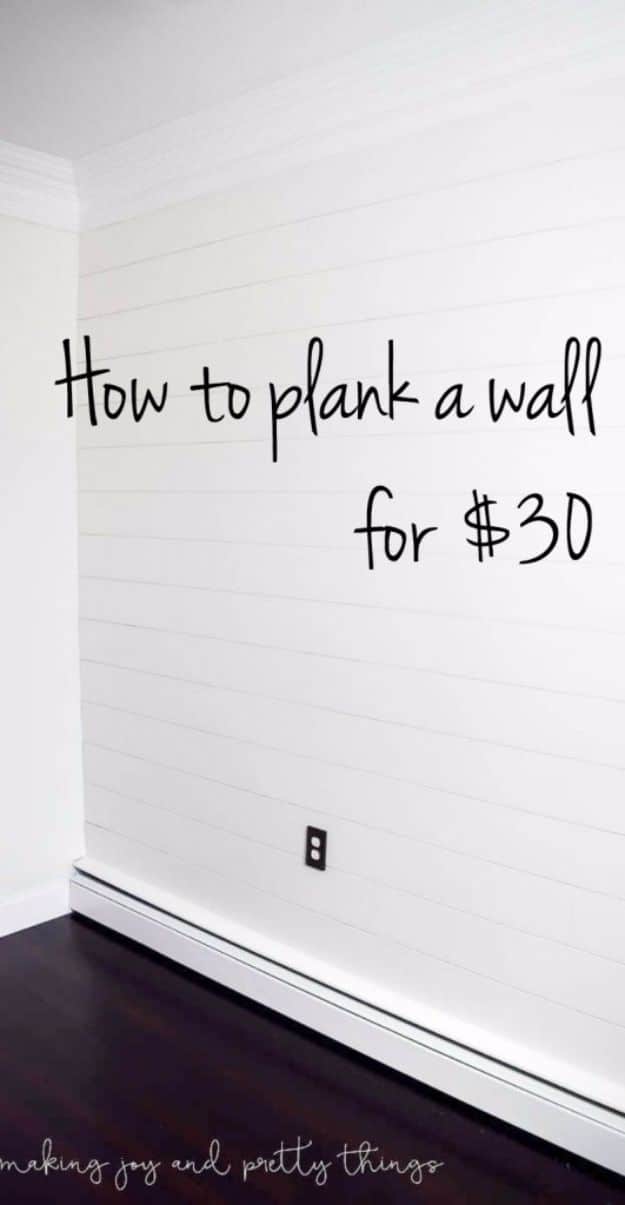
Shiplap boards from the home improvement store run close to thirteen dollars for a single eight foot length, which is how a feature wall turns into a four hundred dollar wall. This one uses cheap sheet stock ripped into planks instead and comes in around thirty dollars for the room. Find your studs and snap a chalk line from the crown moulding down to the baseboard over each one, then nail the planks off with eighth inch spacers between them to hold that shiplap gap. Tile spacers or scrap strips both work.
Get the full tutorial at Making Joy and Pretty Things.
3. Countertop Makeover Using Contact Paper
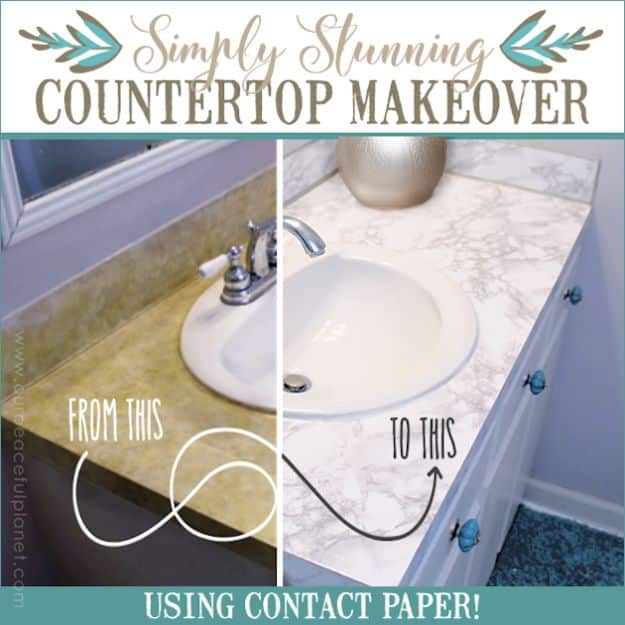
Granite look contact paper over an ugly countertop is a well known cheap fix and it has well known problems: visible seams, water creeping under them, edges that peel where people brush past, and a surface that nicks if you look at it wrong. What makes this version worth reading is that it addresses most of them, so water and peeling stop being the failure point. You still cannot cut on it or set a hot pan down. There is a one year update at the bottom of the post, which is worth reading before you start.
Get the full tutorial at Craft Your Happiness.
4. Spray Paint Shower Fixtures
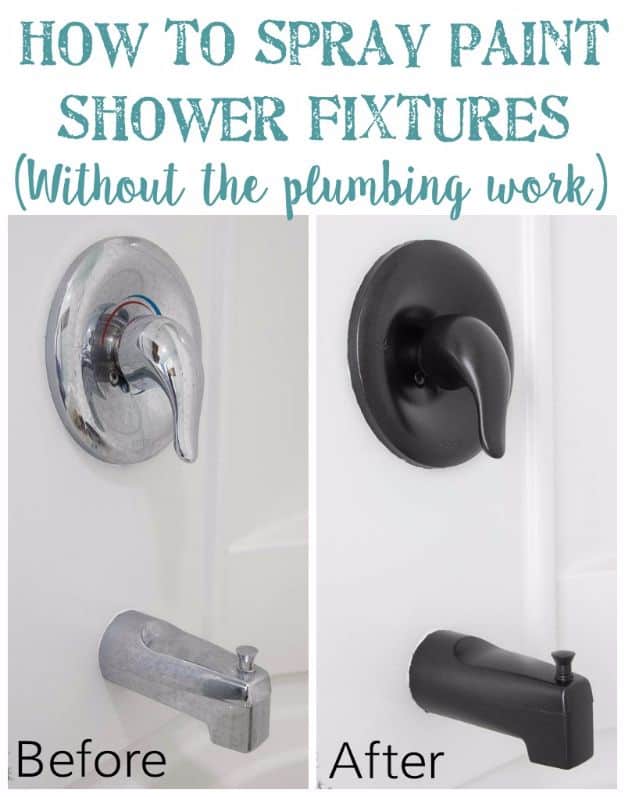
Swapping a shower trim set out means a plumber if there is no access panel behind the wall, and that is a few hundred dollars to change a color. Spray paint gets you the same result from the front. The handle and spout here went from chrome to oil rubbed bronze with an oil rubbed bronze universal spray paint, with no plumbing tools involved and no water shut off. It is the finishing touch that makes a whole bathroom makeover look intentional rather than half done, and it costs less than one takeout meal.
Get the full tutorial at Bless'er House.
5. DIY Ceiling Fan Makeover
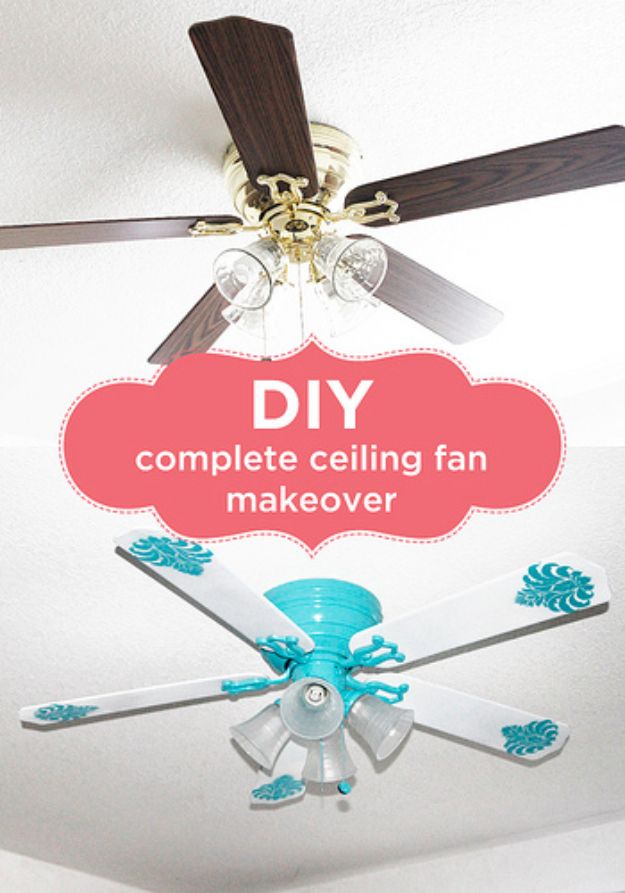
Most ceiling fans are ugly in a very specific dated way and replacing one is expensive, so this is a paint job instead. The fan comes apart and gets wiped down, the metal parts take two coats of spray paint, the glass shade gets a coat of pearlized glaze for a soft frosted look, and the blades get a stencil sprayed on. Tape off every electrical part first. Then the critical step almost nobody mentions: weigh the blades afterward, because uneven weight between them makes the fan wobble.
Get the full tutorial at Yarns and Buttons.
6. Update Vent Covers With Spray Paint
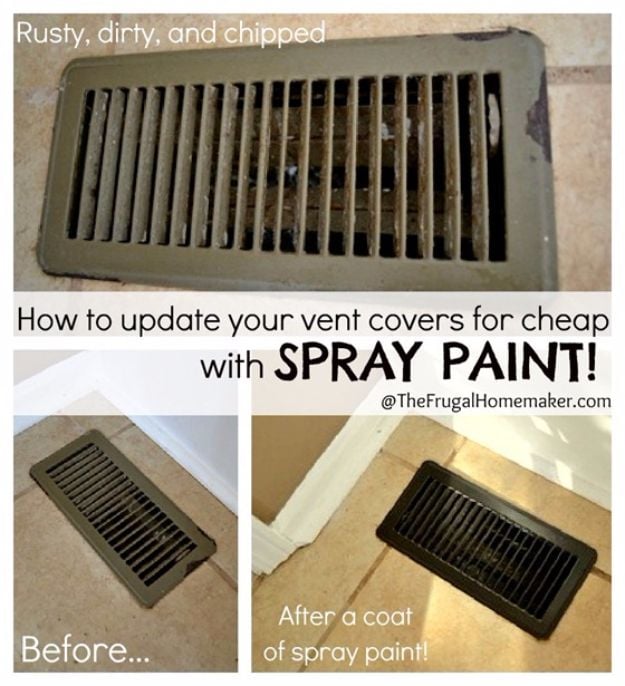
Floor vent covers rust, chip and generally look dreadful long before anything else in a room does, and new ones are an annoying expense for something nobody admires. Pull every one in the house, scrub the dust and grime off in the sink, let them dry completely, then take them outside and give them several light coats of spray paint from all angles. Light coats, not one heavy one. The originals in this post have been down over a year with frequent vacuuming and mopping around them and still have no chips.
Get the full tutorial at The Frugal Homemaker.
7. DIY Fireplace Makeover
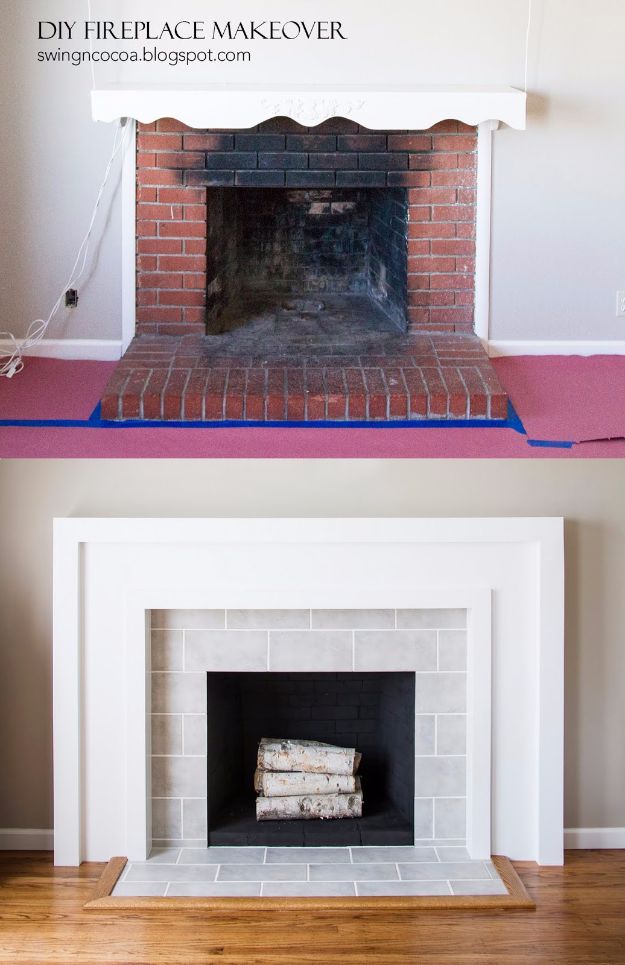
A red brick fireplace with a dated hearth is a hard thing to live with and an expensive thing to have rebuilt. This one gets a white painted mantel and surround with new tile over the face and hearth, and the details are where it earns its place. Seams get caulked with the edges taped off first so the caulk line stays clean. The floor trim is mitered from a single nine foot length with almost nothing to spare, so the cuts were measured six times and taped before cutting to stop the wood splintering.
Get the full tutorial at SwingNCocoa.
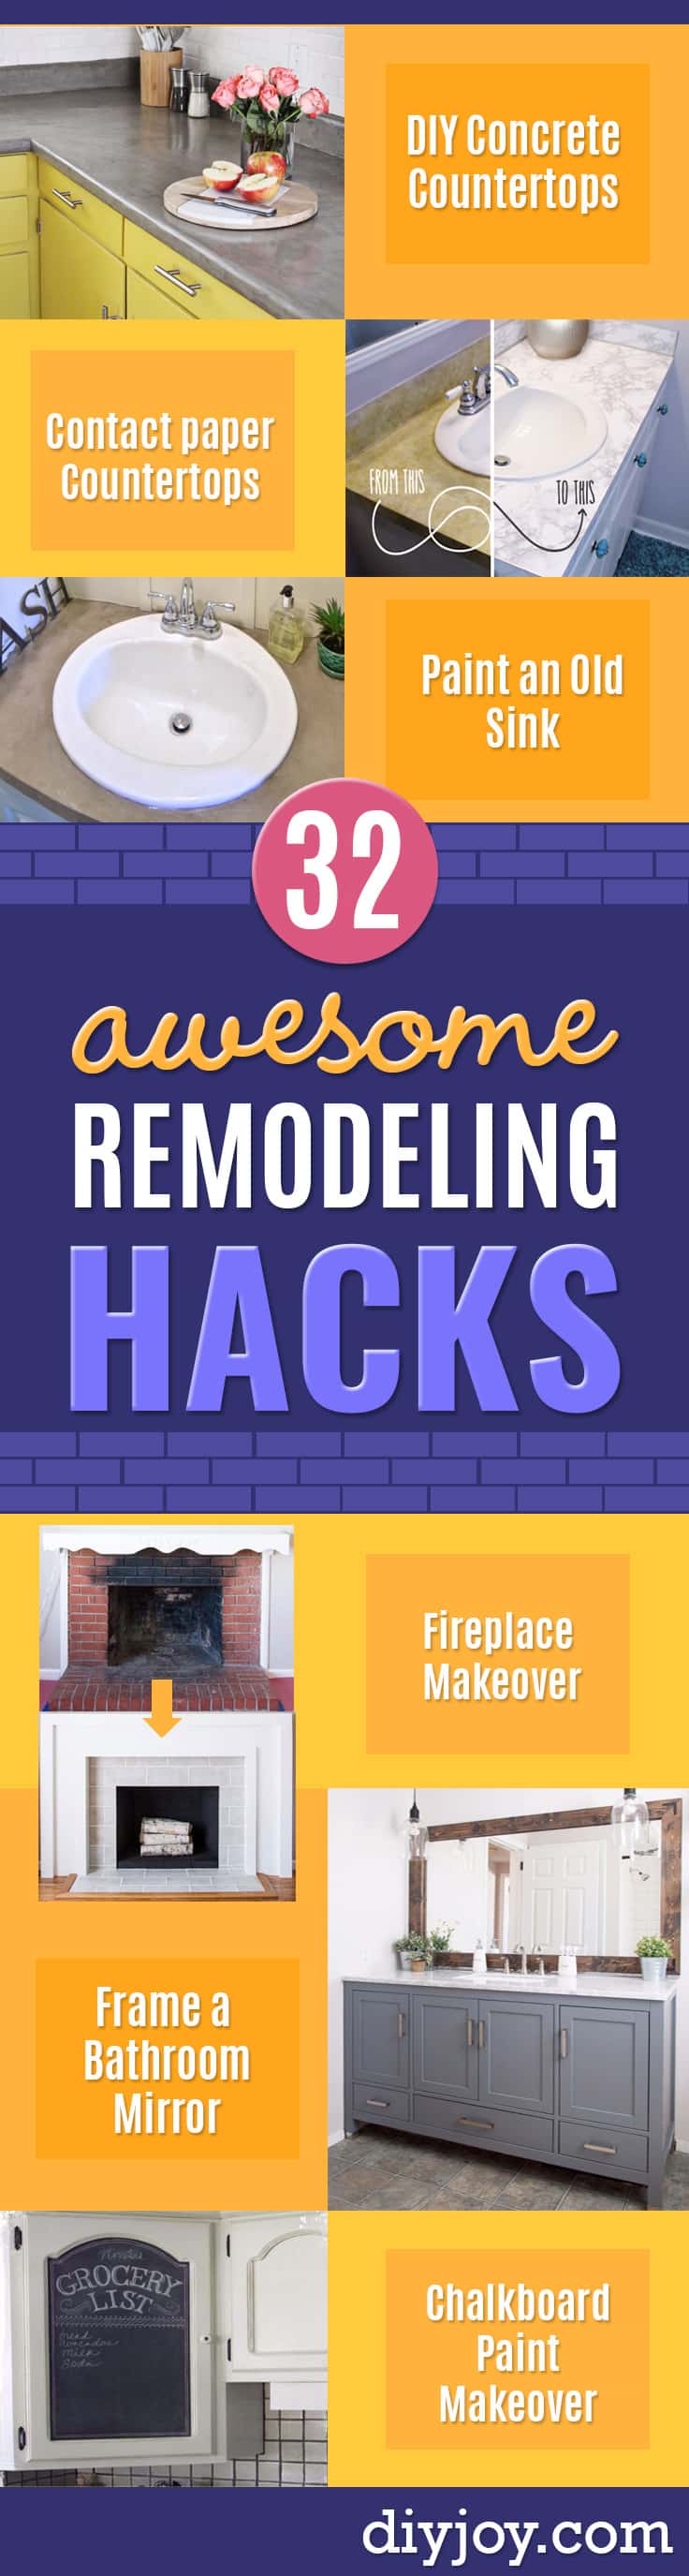
8. DIY Overlay Concrete Countertops
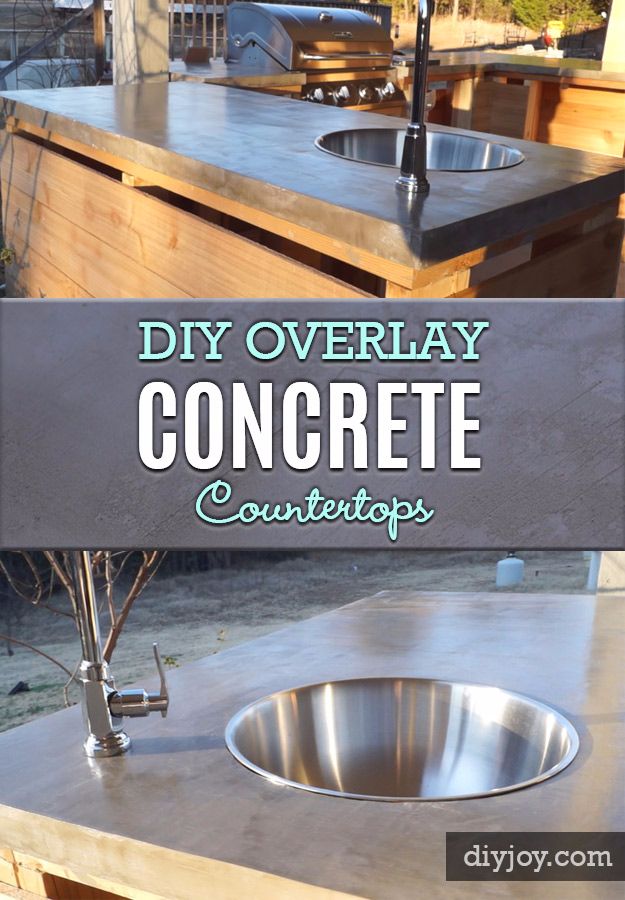
Pouring a concrete countertop is a serious job. Overlaying one is not, and that difference is the whole point of this method: instead of casting a slab, you spread thin layers of concrete straight onto the existing surface or a wood base. The first layer goes on thin, then you repeat the process four more times, sanding the dried surface before each new layer goes down. On the final pass, fill any small uneven lines with a thin skim, let it dry, then sand it smooth. There is a full video tutorial with it.
Get the full tutorial at DIY Joy.
9. Faucet Face Lift
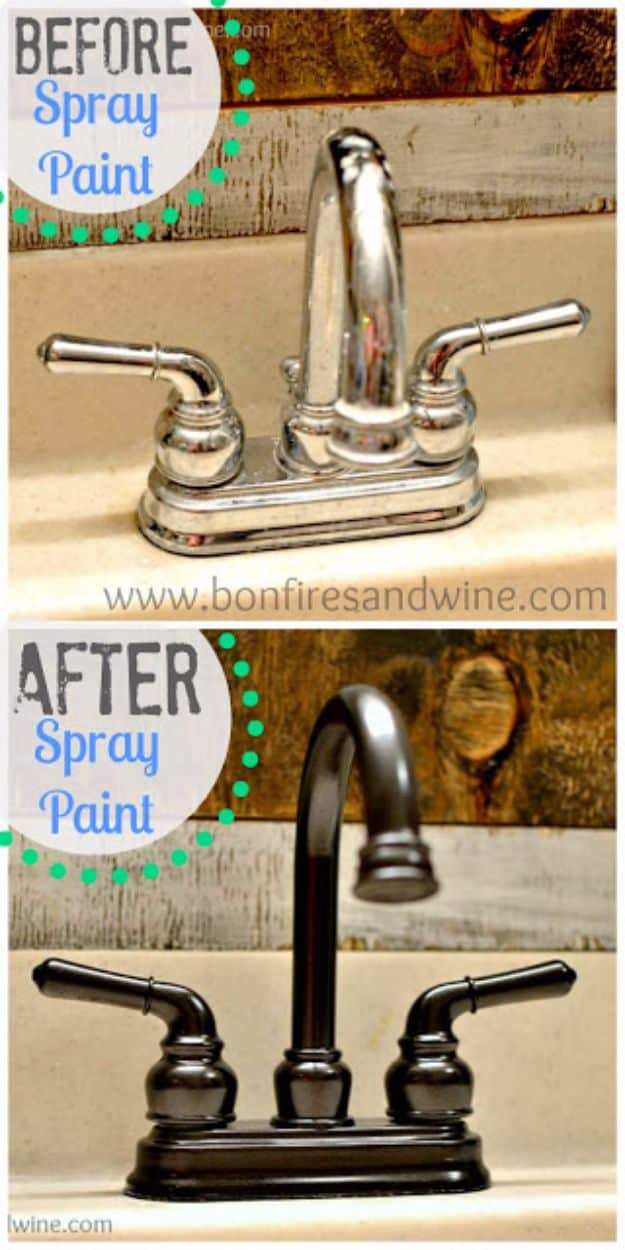
A twenty five dollar builder faucet starts looking rough within a couple of years, and the cheapest possible rescue is paint. This one was sanded lightly with a wire wheel on a grinder to knock the shine and the rust back, primed with whatever primer was already in the shed, then given two coats of a metallic oil rubbed bronze spray with full drying time between them. The honest note from the maker is that she had never painted a faucet before, so longevity is unknown. It cost nothing, since everything was already on hand.
Get the full tutorial at Bonfires and Wine.
10. Transform Your Oak Banister
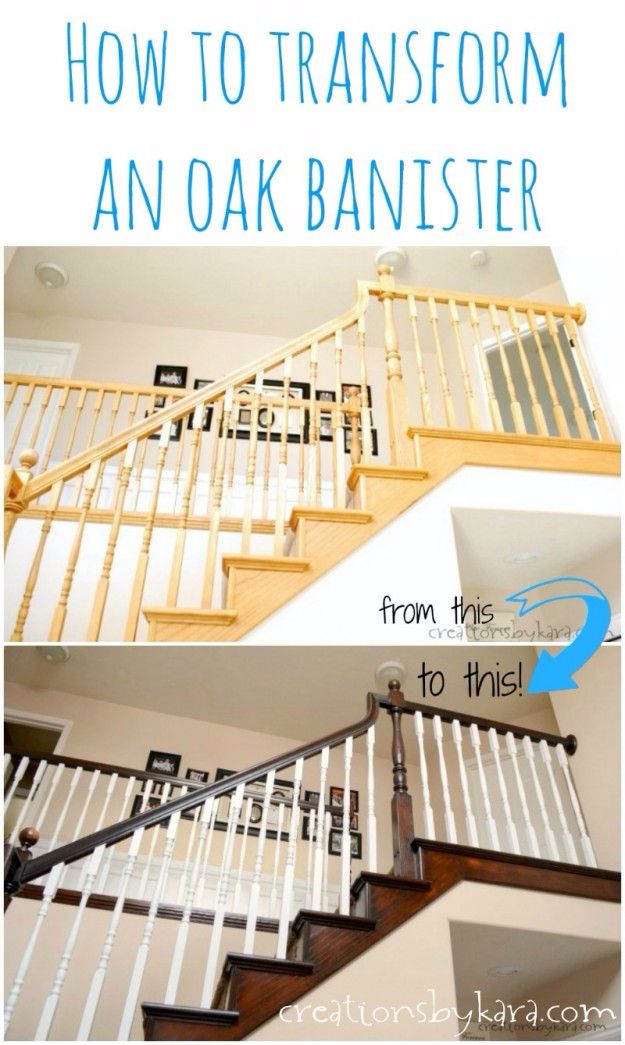
Golden oak handrails and spindles date a staircase faster than almost anything else, and the fix is stain on the rail and paint on the spindles. Sand the whole banister first. You do not need to strip it back to bare wood, you need to take off the gloss and any thick patches so the new stain can actually soak in. Then get every particle of dust off, vacuum first and then tack cloth, because dust is what ruins the finish. A gel stain does most of the heavy lifting on the rail.
Get the full tutorial at Creations by Kara.
11. Cover Laminate Countertops
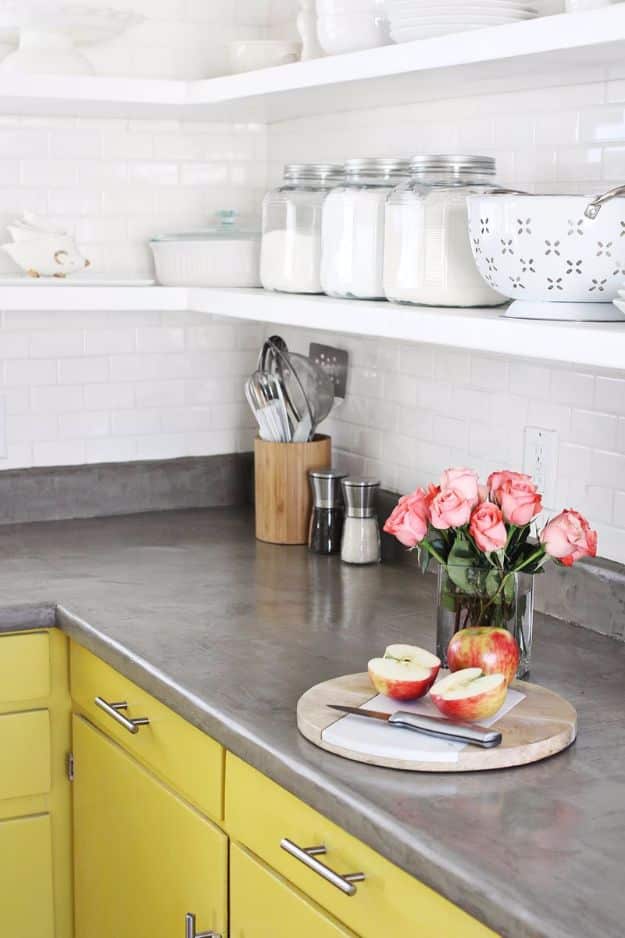
This is a feather finish cement skimmed straight over existing laminate, and the result reads as poured concrete for a fraction of the cost. Sand the laminate with a coarse paper first, because the cement grips a rough surface and slides off a smooth one, then wipe it clean and let it dry. Tape above the backsplash to protect the wall tile and grout. Mix small batches, one part water to two parts dry cement, in a disposable container. One warning worth heeding: get a sealer and check whether it is food safe.
Get the full tutorial at A Beautiful Mess.
12. Add More Storage in the Kitchen
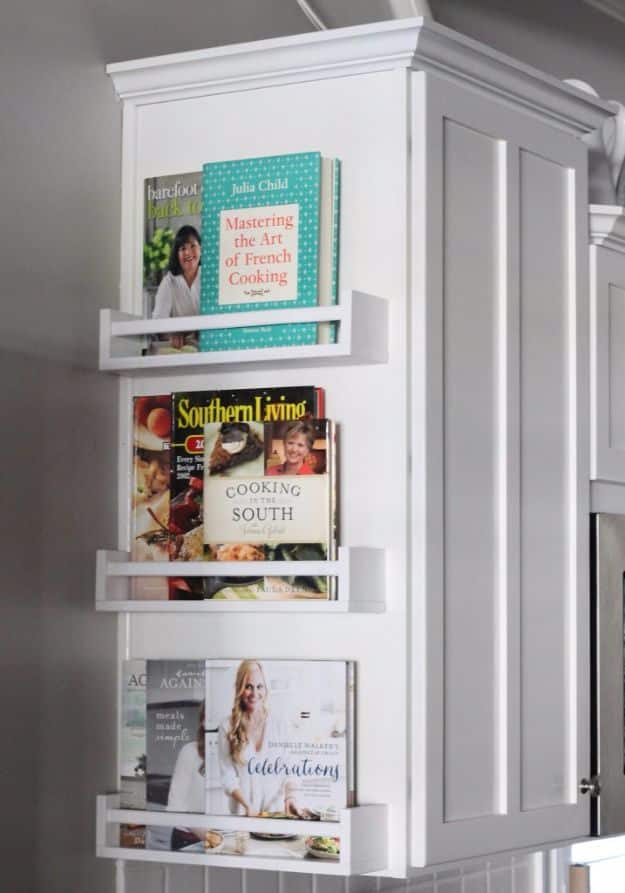
Kitchens run out of wall long before they run out of things to store, and the neglected surface is the outside end of a cabinet run. Three IKEA spice racks mounted in a column up that side panel turn it into a cookbook shelf, which gets the stack off your counter and makes the books part of the decor instead of clutter. They cost $3.99 each, got a coat of white spray paint before they went up, and each one holds two or three books within easy reach. No cabinets are harmed.
Get the full tutorial at The 2 Seasons.
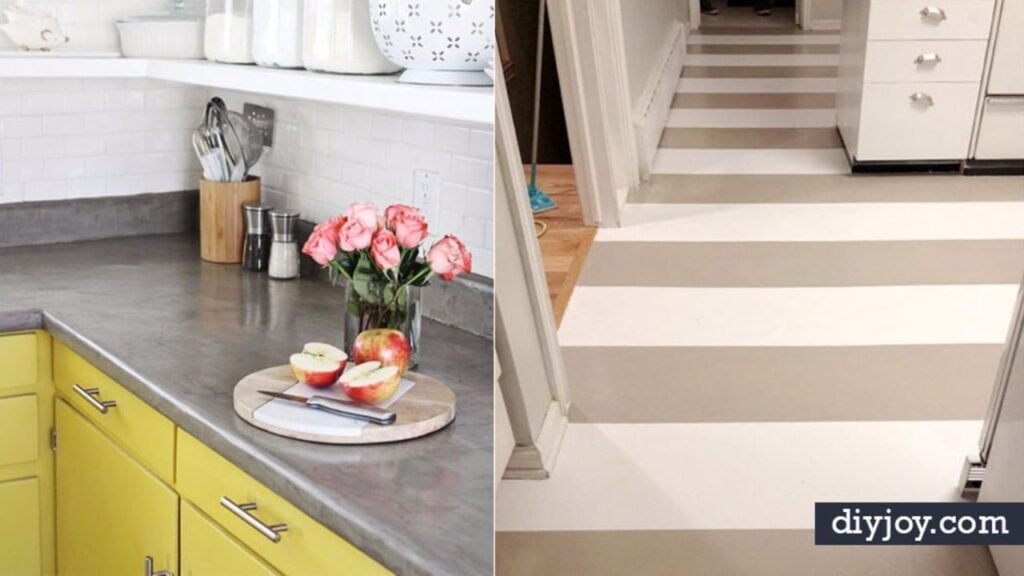
13. Paint Your Linoleum Floors
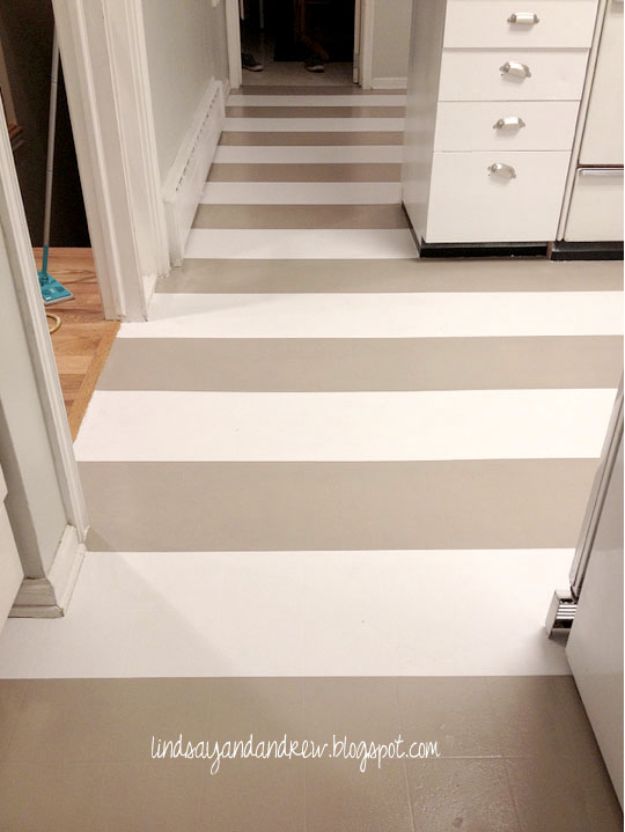
Everyone will tell you painting a linoleum floor cannot be done and that it will crack and peel, and the reason it usually does is prep. The floor here was sanded specifically to take the gloss off, then filled and sanded again so the primer had a clean scuffed surface to bond to. Linoleum flexes and moves more than wood does, which is exactly why the bond matters. An all surface bonding primer went on first, then two colors of porch and patio floor paint laid out in wide stripes.
Get the full tutorial at Lindsay and Drew.
14. Faux Thick Baseboard Trick
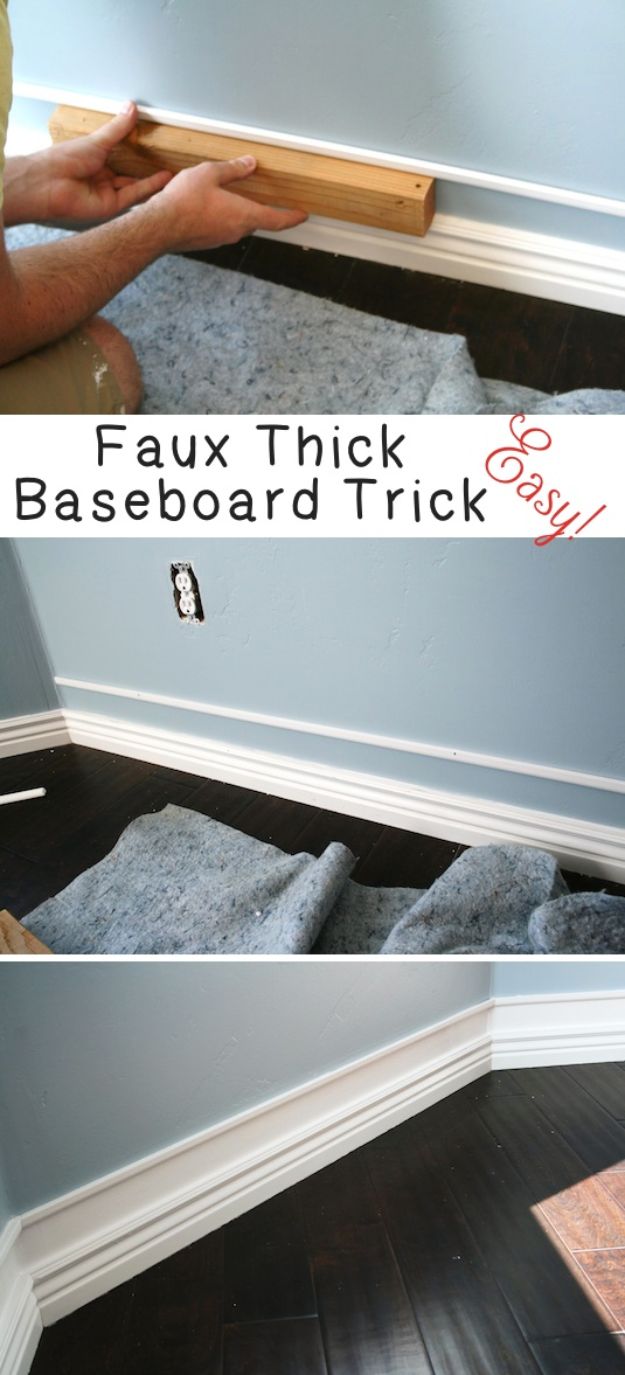
Chunky tall baseboards make a room look expensive and ripping out what is there to install them is a genuine project. The trick is to leave the existing baseboard alone and add a second strip of trim above it on the wall, then paint the wall between the two pieces the same color as the trim. From any normal standing distance it reads as one very substantial baseboard. Use a scrap of wood as a spacer guide so the new strip sits at the same height all the way around the room.
Get the full tutorial at The House of Smiths.
15. Paint An Old Sink
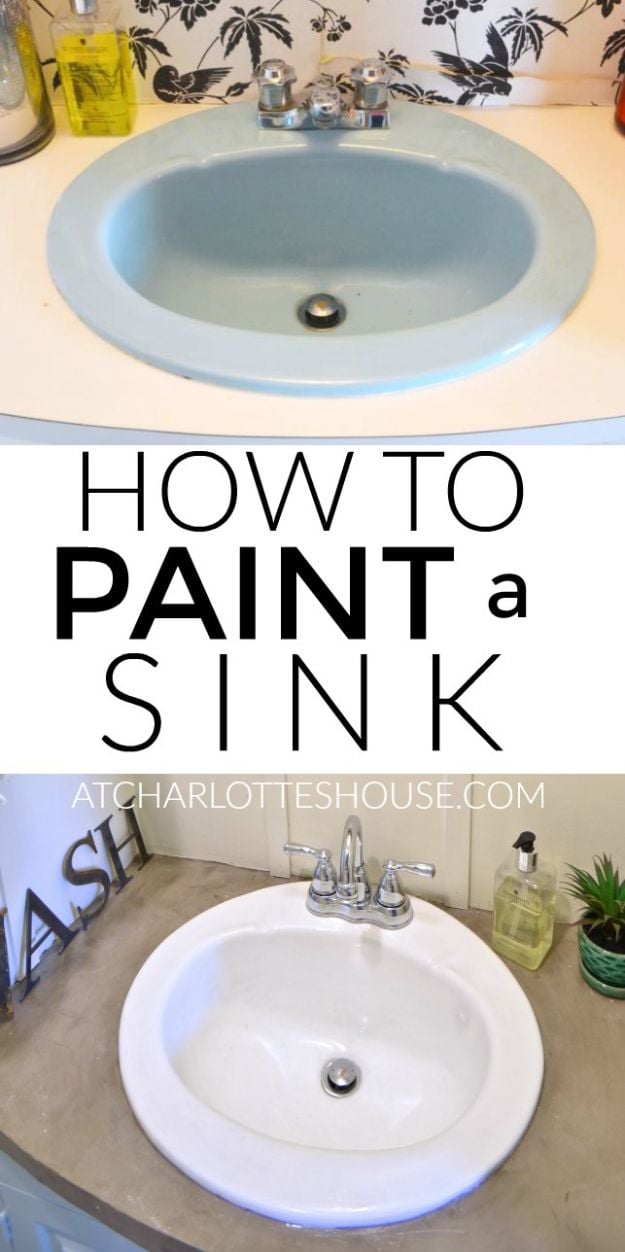
A colored bathroom sink is a strong commitment made by somebody else, decades ago, and replacing one is a plumbing job plus whatever the new sink costs. Painting it is neither. The faucet comes off first, which is easier than it sounds: shut the water off, disconnect the two nuts holding the supply lines, then undo the two nuts underneath holding the faucet body to the bowl. The hardest part genuinely is contorting yourself under the basin. Then the bowl gets painted and put back to work.
Get the full tutorial at At Charlotte's House.
16. Add Color To Your Ceilings
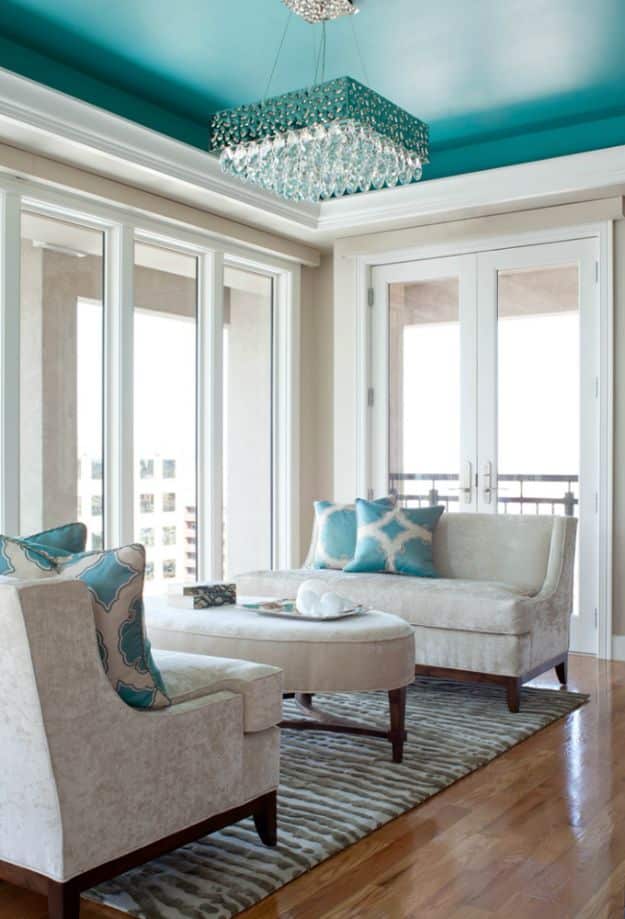
The ceiling is the one surface in a room that everybody leaves white by default, and painting it is the cheapest way to make a neutral space feel designed. In this Denver penthouse the recessed ceilings are painted turquoise, which picks up the accent color used in small doses elsewhere and makes the whole palette look deliberate rather than accidental. A recessed or tray ceiling is the easy place to start, because the drop already frames the color for you and you are not committing the entire room.
Get the full tutorial at House of Turquoise.
17. Chalk Board Paint Makeover
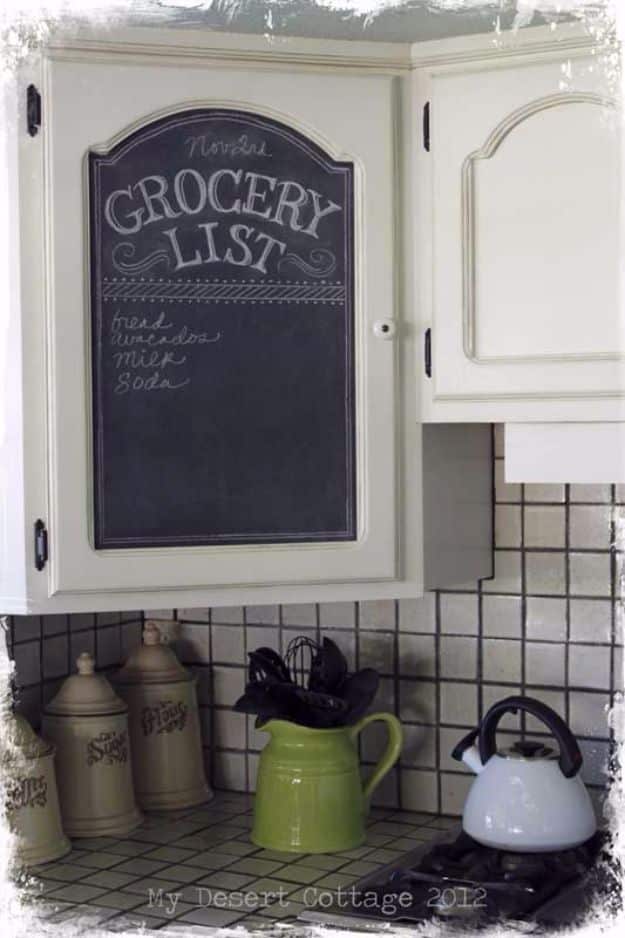
The clever part of this one is that the chalkboard is not painted onto the cabinet at all. A paper template is traced onto thin masonite from the hardware store, cut out, sanded at the edges and dropped into the recessed panel of a cabinet door, where friction holds it. Three coats of black chalkboard paint go on with a foam roller. Painting the board flat on a table rather than on a vertical door makes the lettering far easier, and nothing permanent has been done to your cabinetry.
Get the full tutorial at My Desert Cottage.
18. DIY Charging Station
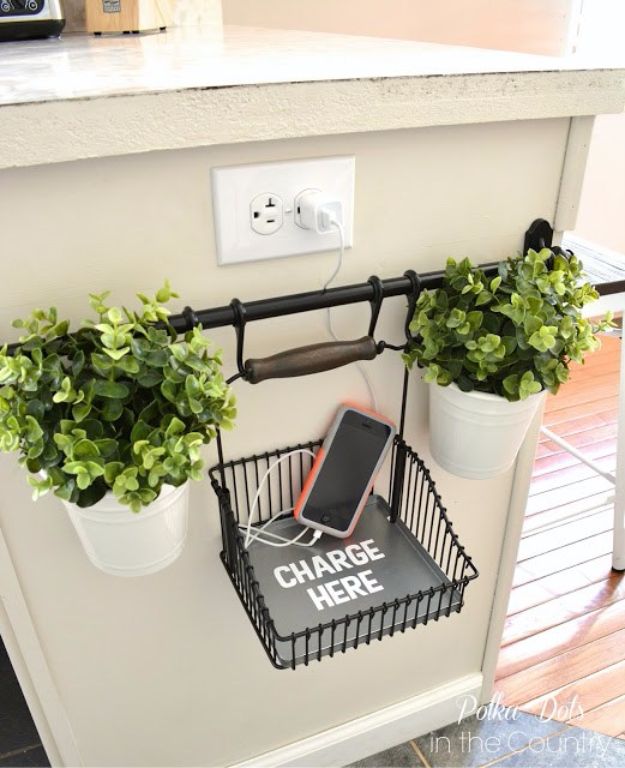
Phone chargers on the kitchen counter are a losing battle, particularly with guests who all gravitate to the same outlet. This solves it with an IKEA rail system mounted on the end of a cabinet right beside that outlet: a hanging wire basket holds the phones and the cords, with a couple of small planters on the same rail so it looks like decor rather than a cable pile. Swapping the dated almond outlet for a white one while you are there is what makes the whole corner look finished.
Get the full tutorial at The V Spot.