Paper flowers are the rare craft that looks far harder than it is, and they never drop a petal on the table. These 30 paper flower ideas run the whole range, from a rolled sticky note rose that takes two minutes to a whole wall of giant cardstock blooms, so there is something here whether you have an hour or a free Saturday. The materials are just as varied: crepe paper, cardstock, tissue, coffee filters, book pages, origami squares, cupcake liners and, yes, toilet paper, which works far better than it has any right to. Many come with free printable templates or SVG cut files, so a Cricut or Silhouette does the fiddly cutting if you own one and scissors do it if you do not. Use them for weddings, party backdrops, gift toppers, garlands or a vase that never needs water. Every tutorial links back to the maker who worked it out.
1. Crepe Paper Wildflower
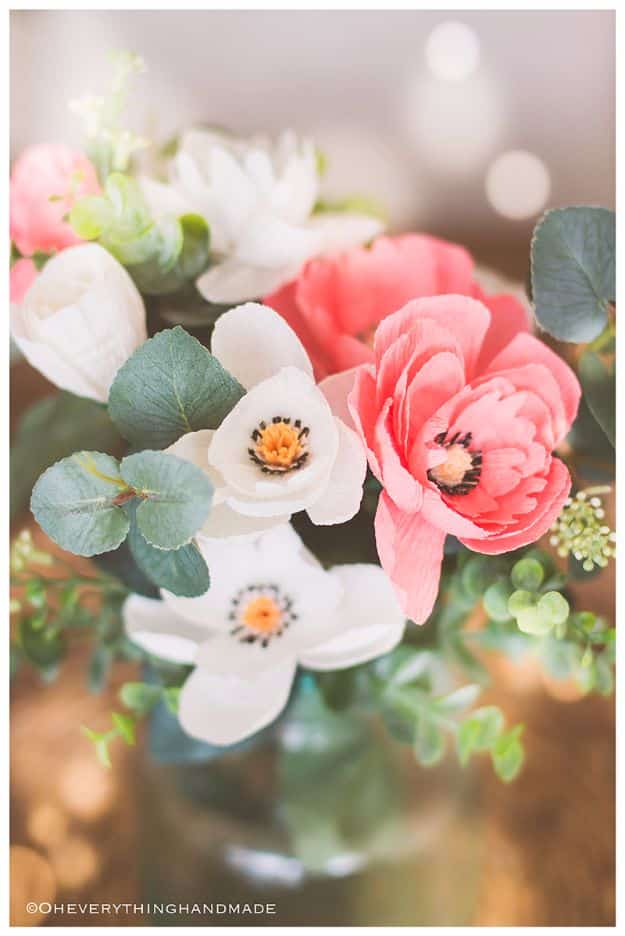
A crepe paper wildflower that the maker recommends as the very first paper flower anyone should attempt, with a full video tutorial at the foot of the post. The paper is Italian crepe, which is heavier and holds a shaped petal far better than the party streamer kind. One piece of styling advice from the page is worth taking: add faux greenery to fill the bouquet out, eucalyptus, lamb’s ear or rosemary, because a handful of paper blooms on their own always looks a little sparse next to the same number of real ones. Coral, white and cream together, in a clear vase, is the combination shown.
Get the full tutorial at Oh Everything Handmade.
2. Tissue Paper Poppy Magnets
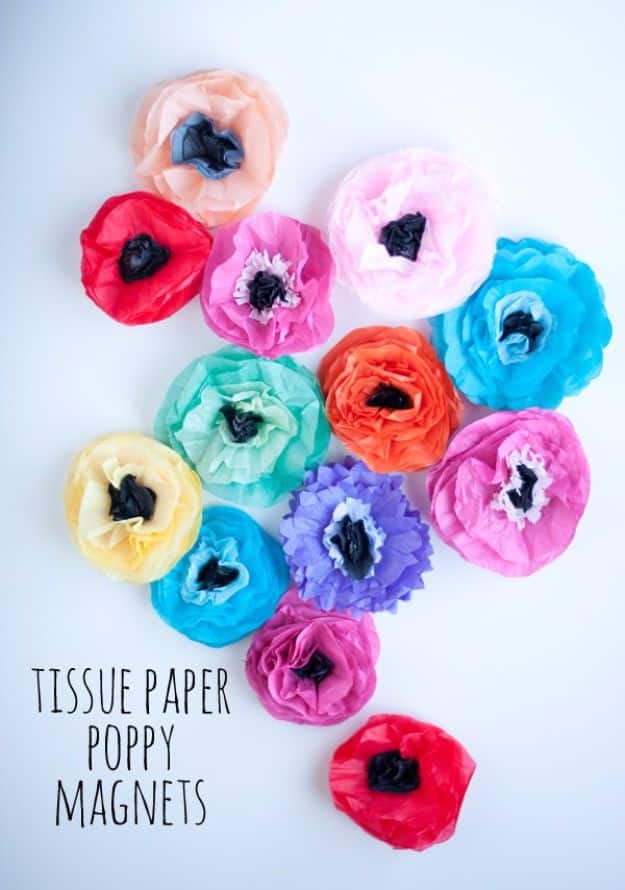
Tissue paper poppies with magnets on the back, so they do a job on the fridge instead of sitting in a vase. The supply list is tissue paper, magnets, pipe cleaners, hot glue, scissors and a pencil, and you can make a stack of them in an evening. Cut a pile of circles for the flower and a smaller pile, about five, for the center, stack them with the small ones in the middle and skewer the lot with a pipe cleaner, bending the tip over so it cannot slip out. Then glue and pull each layer up around the center one at a time, which is what makes the cupped poppy shape.
Get the full tutorial at This Heart of Mine.
3. English Daisy Paper Flowers
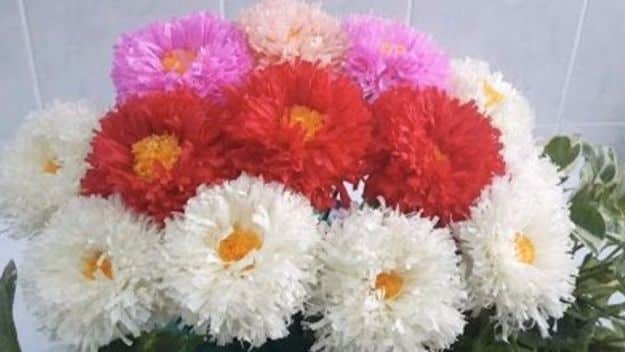
White and pink layered daisies that look far more complicated than they are, which is the best kind of paper flower. They sit beautifully in a vase, but the better use is flat on a wrapped present, where one daisy does more than any bought bow. Grouped in a dense mound, white and deep pink together, they read as a florist’s arrangement from across a room. This one is ours rather than somebody else’s, so the whole step by step is right here on DIY JOY.
Get the full tutorial at DIY Joy.
4. Pretty Paper Flower Centerpiece
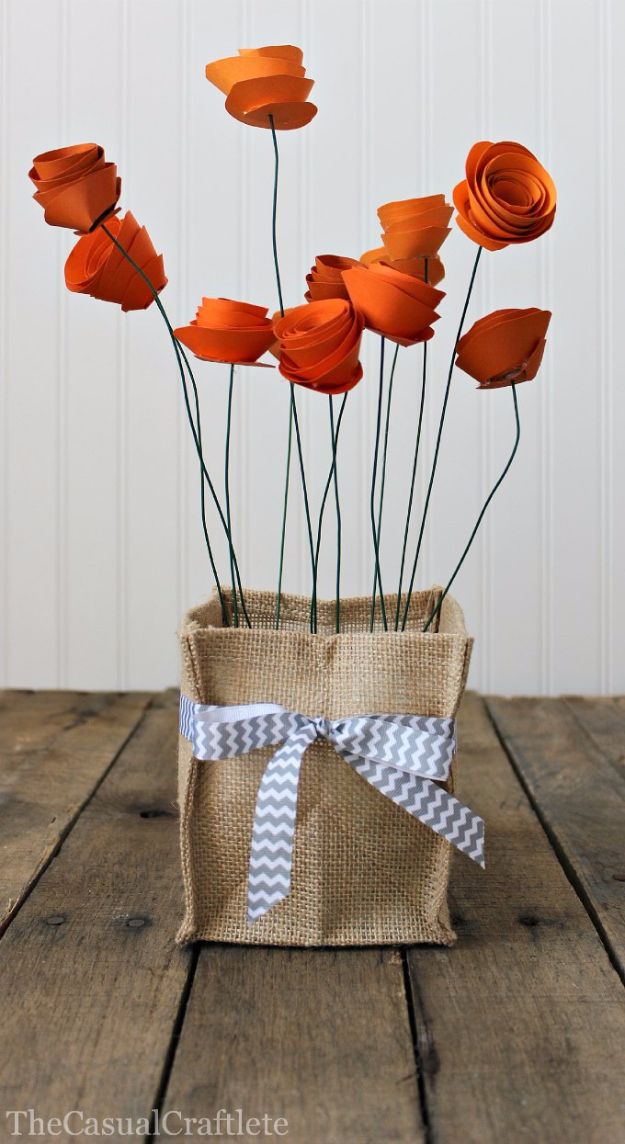
Rolled paper roses on floral wire, standing in a burlap wrapped vase, and the whole thing comes down to one shape repeated. Cut scrapbook paper into 6 by 6 inch squares, trace a spiral circle onto each one and cut along the pencil line, trimming the end off to round it. Roll from the outside in, keeping the first few turns tight and then letting it relax as you reach the base. Glue the base down, let it set, then push floral wire through it for a stem. Three shades of one color rather than three different colors is what makes the finished group look considered.
Get the full tutorial at The Casual Craftlete.
5. DIY Paper Spider Mums
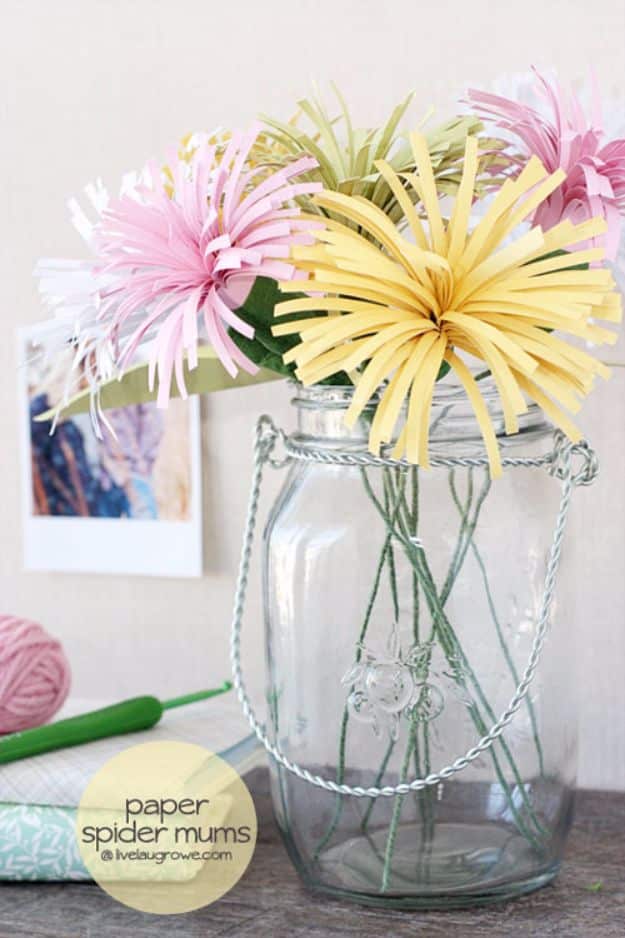
Spider mums in pastel cardstock, all spiky fringe and no fiddly individual petals, which makes them much faster than they look. Cut 12 by 12 inch cardstock into strips roughly two to three inches wide, then fringe along one edge with fringe scissors or a large pair of ordinary scissors. Roll each fringed strip up into a bud, with a strip of double sided tape inside as you go so it cannot unroll on you, then wire the base and wrap it in green floral tape. Pull the fringe outward at the end to let the flower bloom. Pastels in a big glass jar for Easter or Mother’s Day.
Get the full tutorial at Live Laugh Rowe.
6. Paper Wisteria
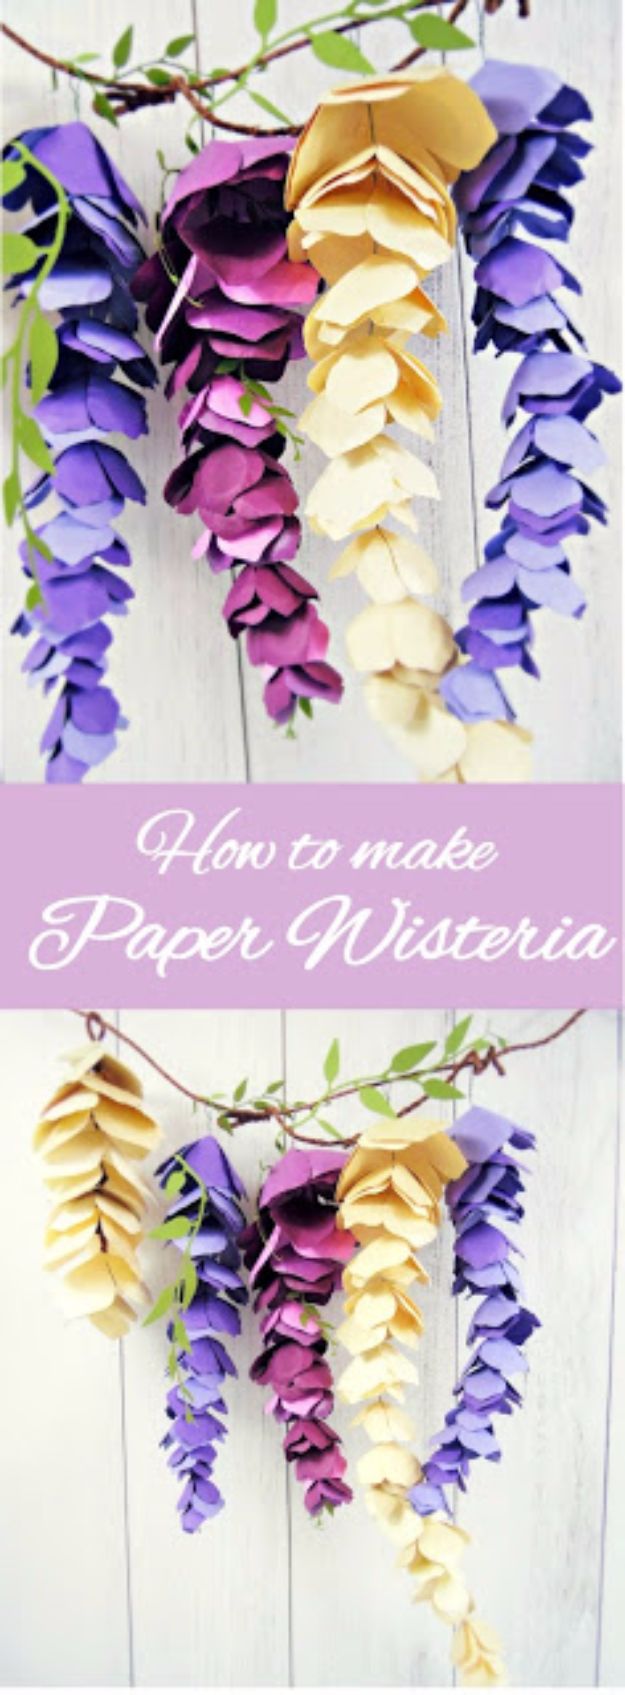
Hanging wisteria in cascading purples and creams, built for weddings, arches and photo backdrops, and it is the single most dramatic thing on this list for the money. Use 65 lb card stock rather than a lighter paper, because the maker deliberately chose card stock over tissue so the finished piece survives being stored and rehung rather than crumpling after one event. Twenty two gauge wire runs through it, small pearl beads finish the tips, and a rolling mat and tool shape the individual blooms. Templates are available from the maker’s shop, and the step by step lives in a full video rather than in text.
Get the full tutorial at Catching Colorflies.
7. DIY Book Page Flowers
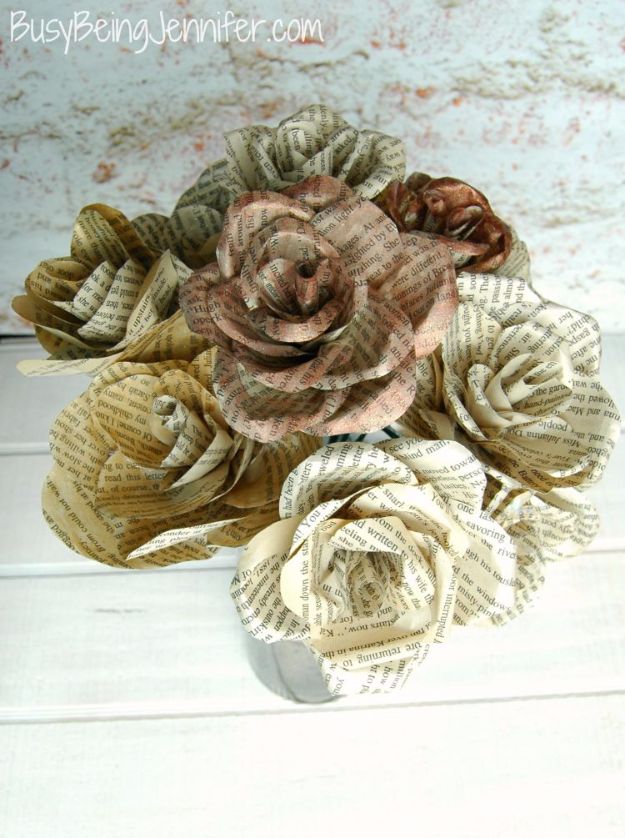
Roses rolled from the pages of a falling apart old book, and the maker warns they are addictive, which is fair. Pull the pages out of any old book, no need to sacrifice a favorite, and cut petals using a template for the largest shape. Hot glue holds them, floral wire makes the stems, and ribbon or lace finishes the base. The optional step is the one that changes everything: painting the pages before you roll them, so the printed text shows faintly through a wash of fall color. Vase them, wreath them, or wire them onto a Christmas tree as unusual ornaments.
Get the full tutorial at Busy Being Jennifer.
8. DIY Giant Paper Flowers
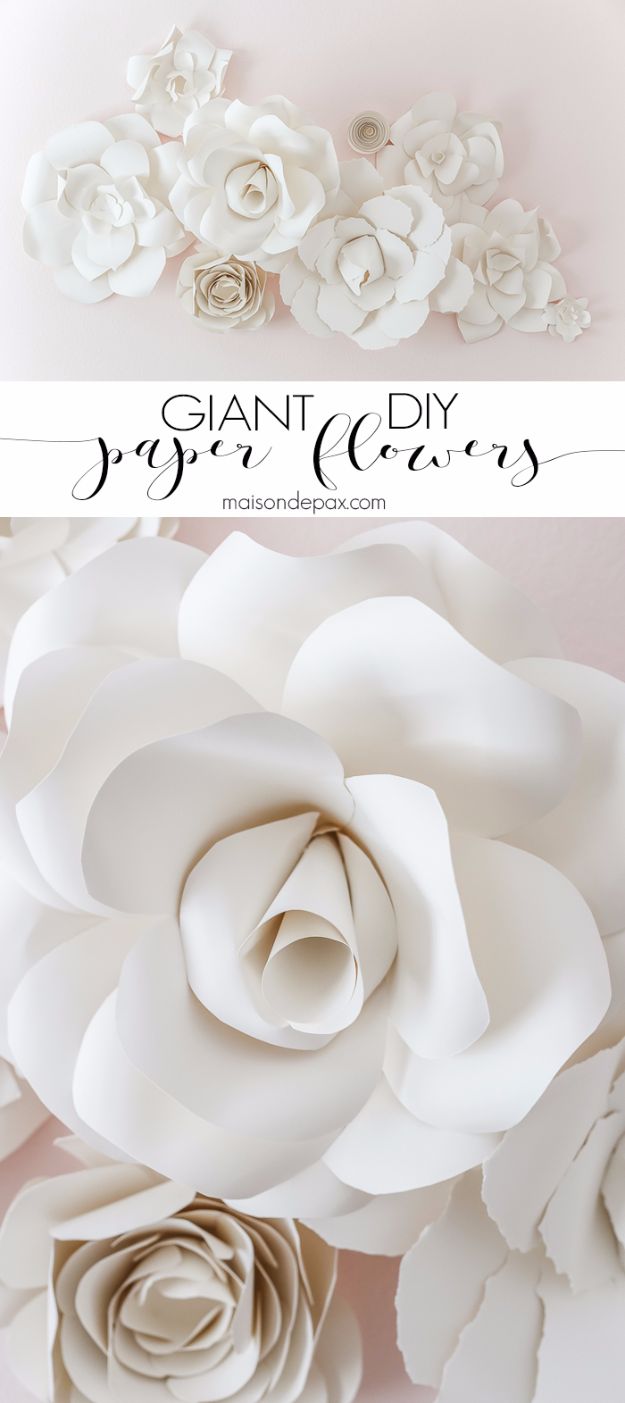
An entire wall of giant paper flowers, made for a nursery, and the paper choice is the decision that matters most. Crepe and tissue were both tried and rejected for lacking substance; the answer was French cotton paper in Natural, 118 lb, which is essentially cardstock, at about thirty dollars for fifty sheets of 12 by 12 and enough for the whole wall with sheets to spare. Supplies beyond that are a pencil with a good eraser, sharp scissors, a hot glue gun and a pipe or any smooth cylinder for curling petals. There is no template, just five steps: choose your size, cut petals, create depth, glue in stacks, make a center.
Get the full tutorial at Maison de Pax.
9. Watercolor Paper Rose
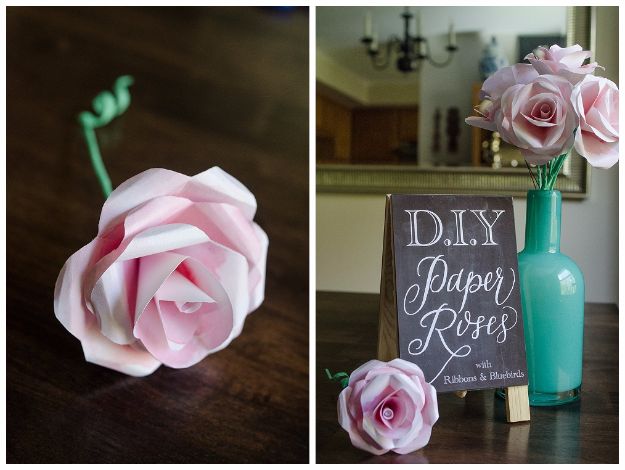
A rolled paper rose with a twist: watercolor the paper first, so the finished bloom shades from pale at the base to deep at the edge instead of sitting flat in one color. Standard printer paper is the right weight, and the tutorial says so explicitly, because anything heavier makes the flower stiff and hard to shape. A fabric and paper glue holds it together. This is the same spiral rose everyone has made once, given a fresh look, and it works just as well with maps or sheet music if painting is not your thing. It came out of a live DIY station at a wedding show.
Get the full tutorial at Capitol Romance.
10. Crepe Paper Water Lily
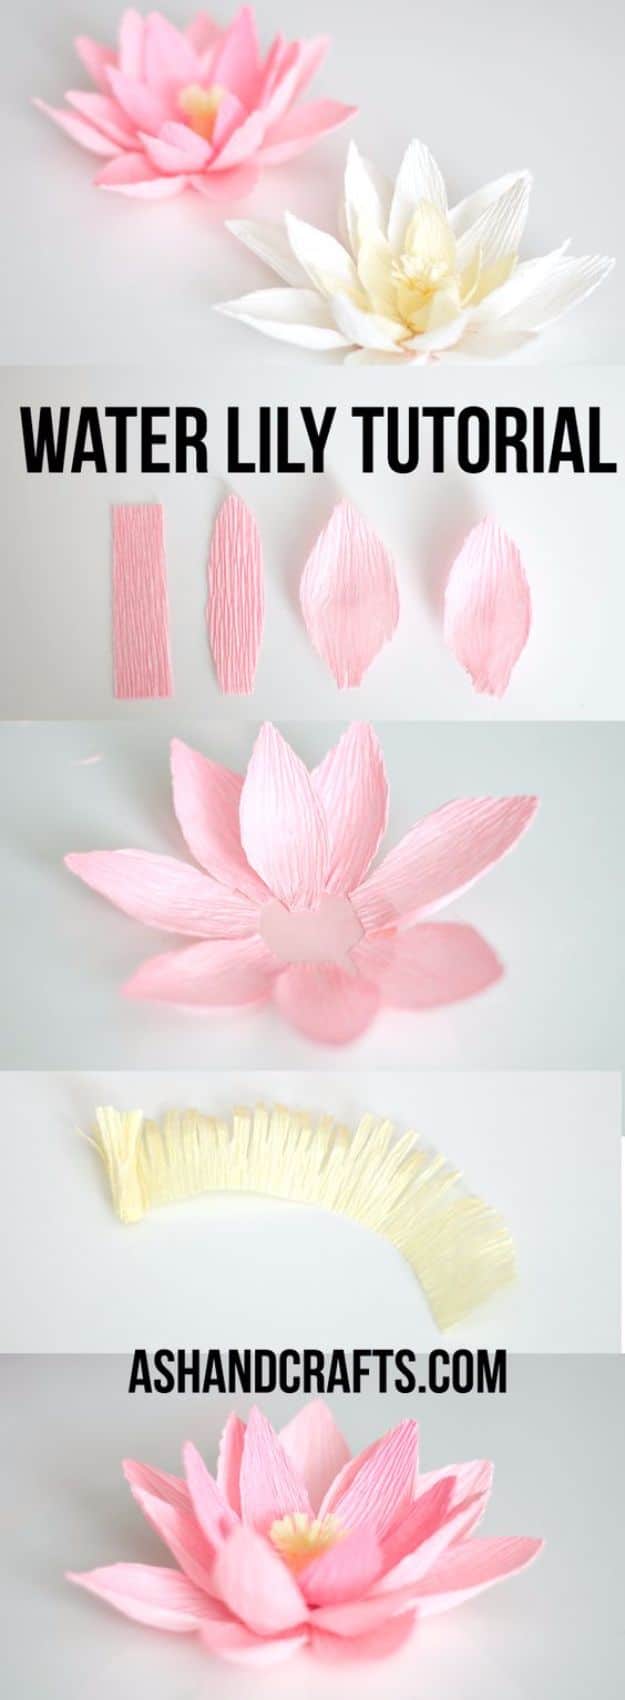
A crepe paper water lily built in three layers on a two inch cardstock circle, and the method is simple enough to describe in a sentence: shape a petal, glue it to the base, repeat. Cut your crepe into strips about half an inch by two inches, making sure the crinkles run along the length rather than across it, which is what lets the petal curve. You need about twenty strips. Seven petals go in the outer layer, six in the middle and six in the center, and each layer is cut narrower than the one before it, so the widest petals sit on the outside.
Get the full tutorial at Ash and Crafts.
11. Paper Flower Pomander
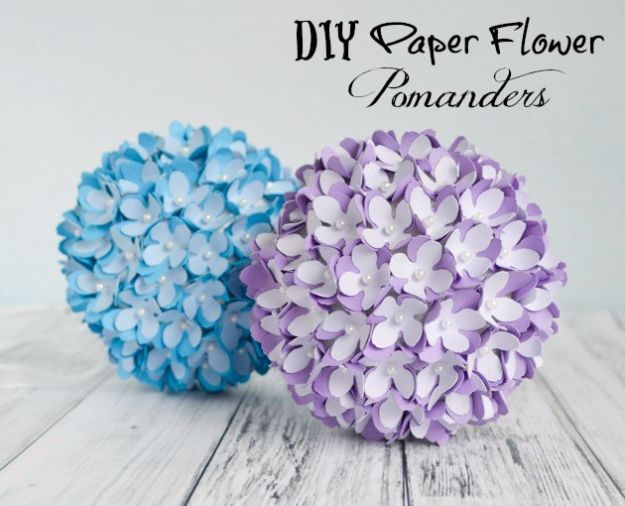
Flower covered balls, also called kissing balls, hung from chair backs to line an aisle, and the honest note on the page is the useful one: bought ones start around twenty five dollars each, and now the maker knows why, because they take a while. They are not difficult though, just patient work, and no particular craft experience is needed. Eight were made for one wedding in alternating blue and purple. Use two shades of each color and cut the inner petals slightly smaller than the outer ones, which is what gives each little flower some depth instead of a flat disc.
Get the full tutorial at The Artisan Life.
12. Simple Paper Flowers
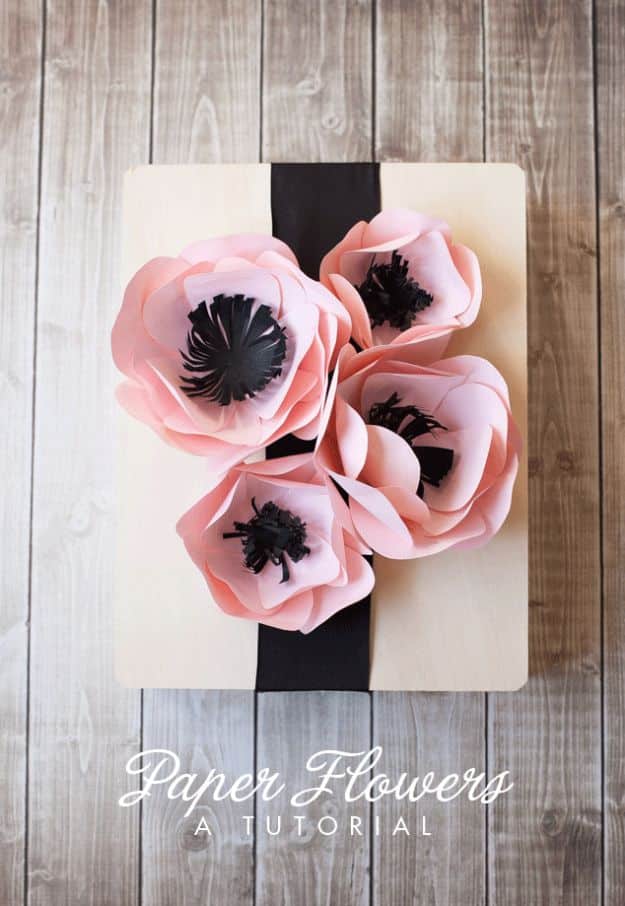
Pale pink paper flowers used to cover a wooden gift box, and the honest time estimate on the page is the best thing about it: about the length of a television episode makes four of them. There is a free printable file with petals in three sizes, and both flowers use them. The larger flower takes six large petals and nine medium; the smaller one takes six medium and six small. The templates are laid out to fill the page with as many petal shapes as will fit, so count your flowers first and print accordingly. Pale pink cardstock with a black center is the combination shown.
Get the full tutorial at Frog Prince Paperie.
13. DIY Extra Large Paper Flowers
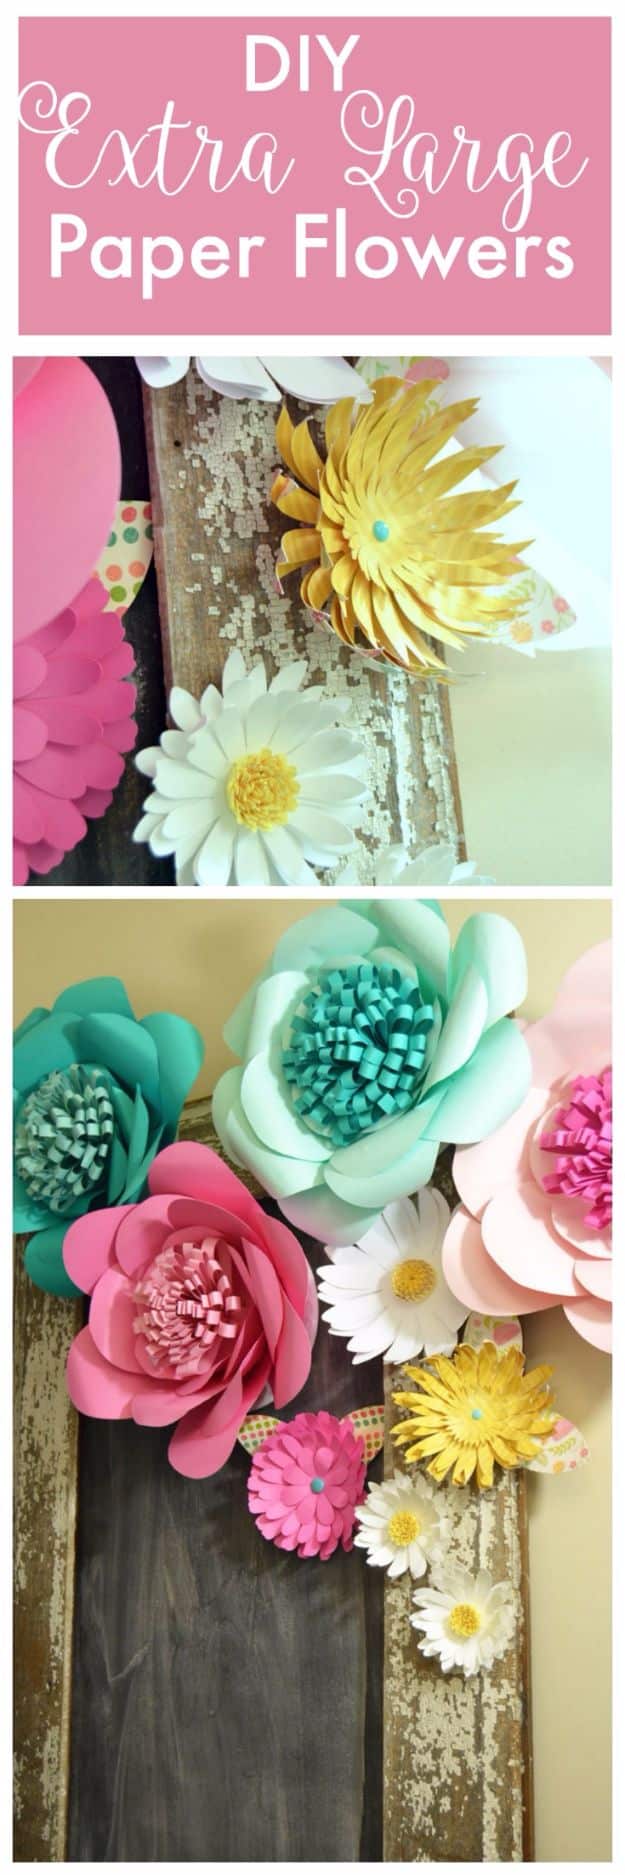
Extra large paper flowers cut on a Silhouette, about fifteen inches across each, and the maths is worth knowing before you start: each one takes six large, six medium and six small petals, which is twelve sheets of 8.5 by 11 cardstock per flower. Free cut files are offered at the end of the post for anyone with a machine. The genuinely useful tip is what happens at the back. Instead of mounting each flower on a scrap of paper, mount it on a paper plate, which gives you a rigid disc that Command Strips will actually stick to, so the whole display comes off the wall without taking the paint with it.
Get the full tutorial at Create and Babble.
14. Easy Paper Flower Backdrop Assembly
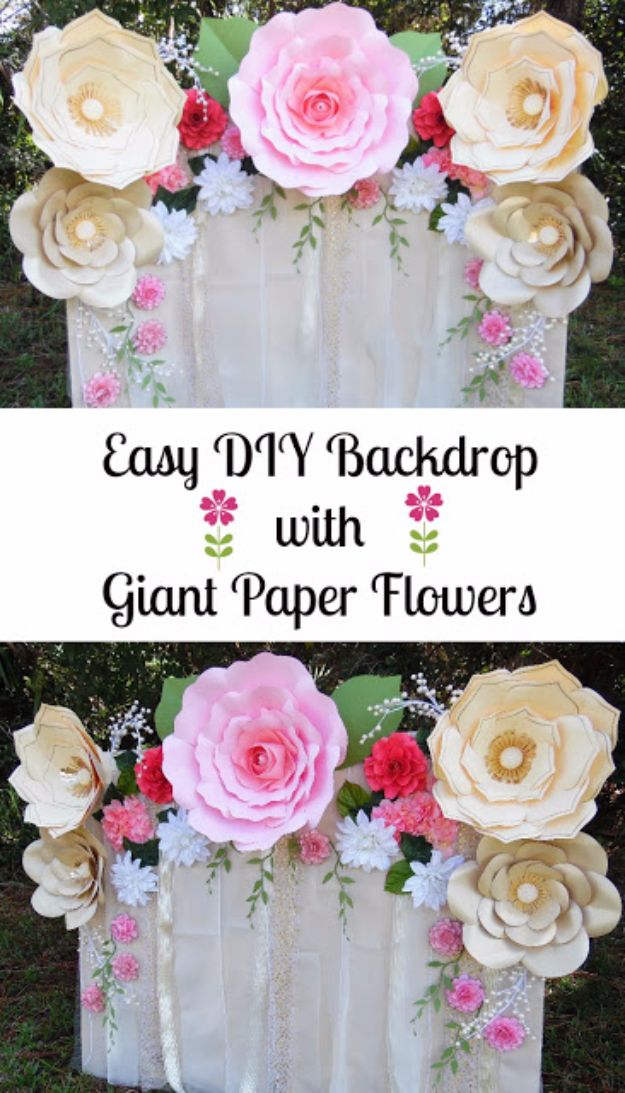
The part of a paper flower backdrop nobody explains: how to lay it out once the flowers are made. The base is a cardboard project board from a craft or office supply store, three feet by four, spray painted and left to dry for an hour. Fabric strips get glued along the top and left to hang down the front, a mix of textures, lace ribbon, tulle, pearl strands and cut fabric. Then the flowers go on largest first, laid out dry until the arrangement looks right and only then glued, generously, pressed firmly until dry. Silk flowers and paper greenery fill the gaps at the end.
Get the full tutorial at Abbi Kirsten Collections.
15. Paper Hyacinth Flowers
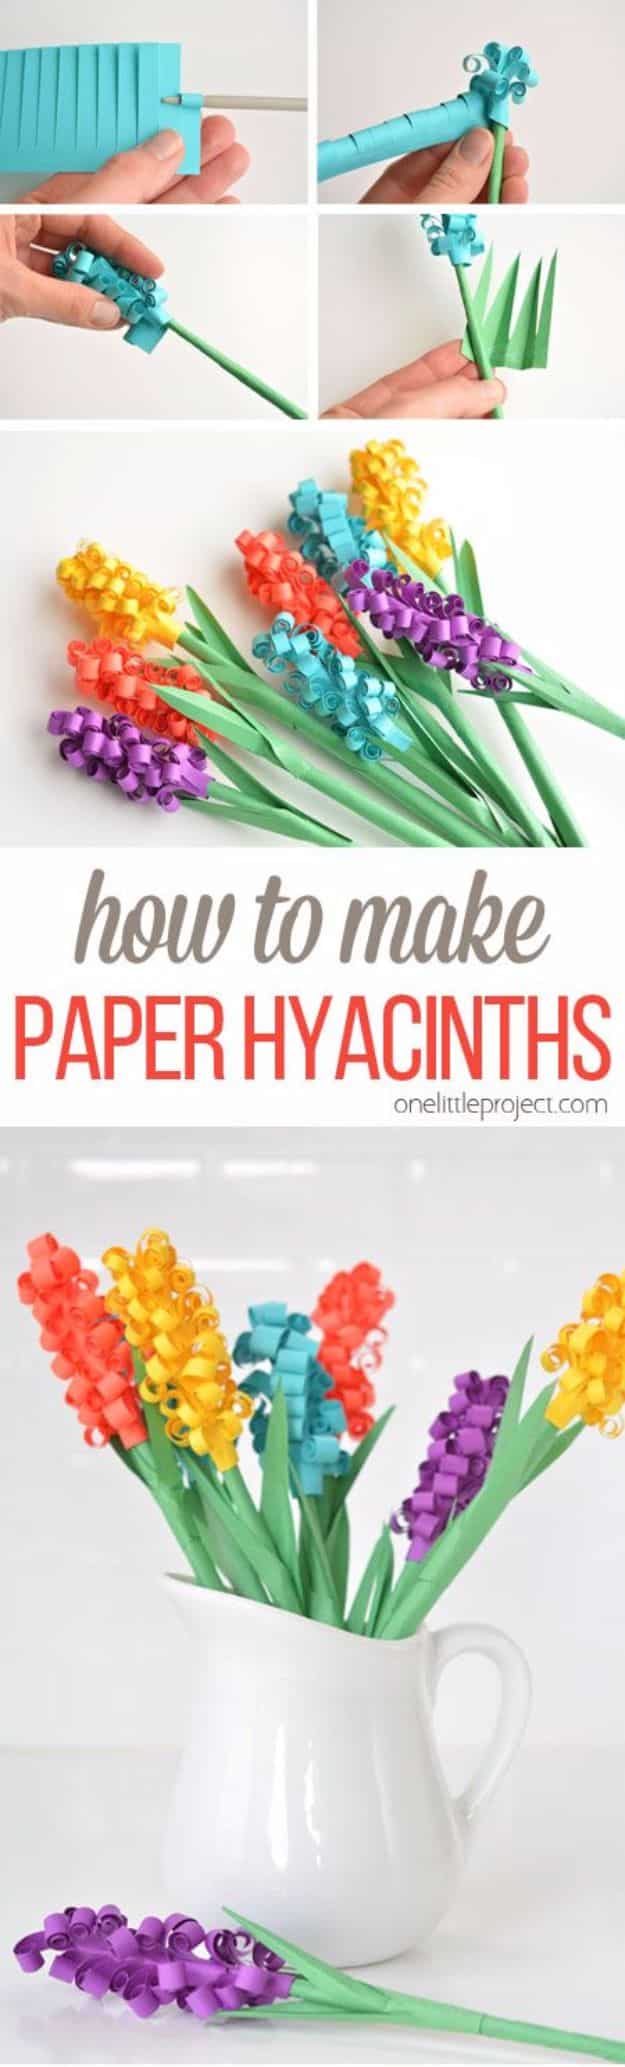
Fringed paper hyacinths in every color, and the best part is how the speed picks up. The maker admits they look tedious and then says that by the third one she was down to about five minutes each, which is exactly the reassurance most people need before starting a project like this. They finish looking real enough that her four and six year old immediately demanded their own in bright pink. Card stock is the paper, fringed along one edge and then wrapped around a stem, and a jugful of them in mixed colors is a genuinely convincing spring arrangement.
Get the full tutorial at One Little Project.
16. 3D Paper Flowers With Your Cricut
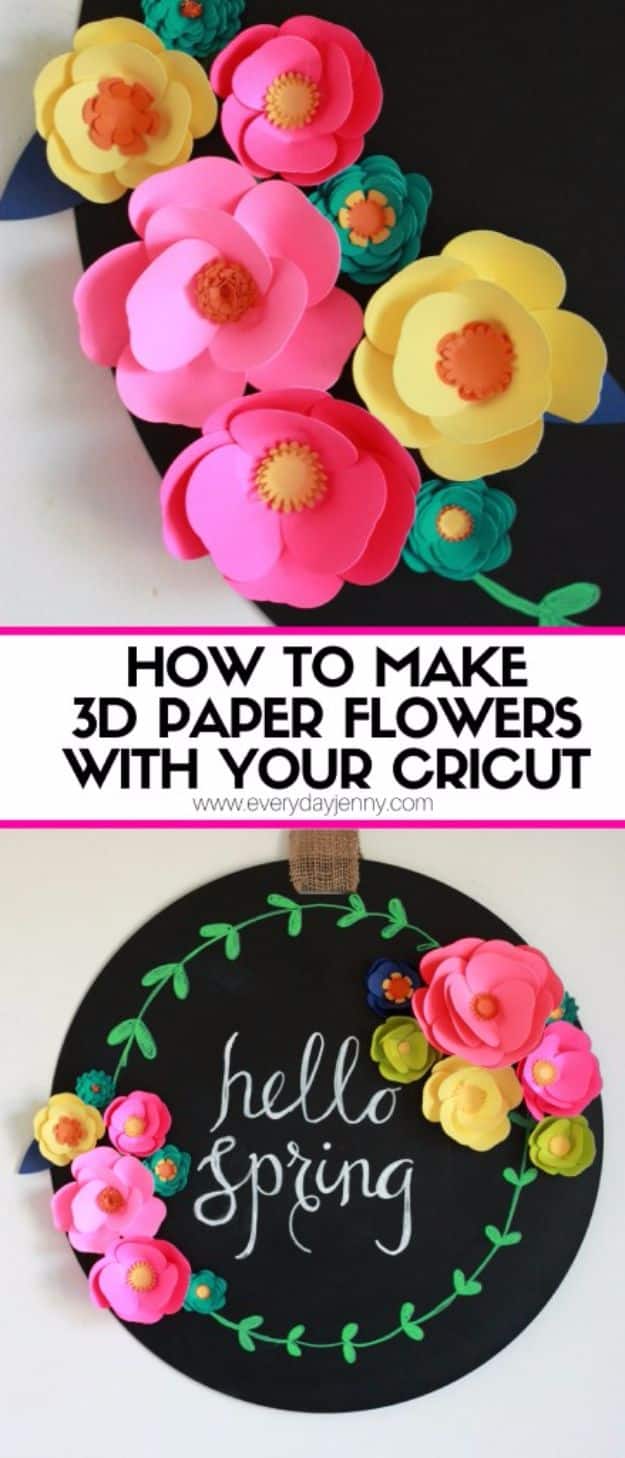
Bright 3D paper flowers with magnets on the back, cut on a Cricut Explore Air 2, and the design work is done inside Design Space with no template to download. Insert a circle, unlock it and drag it into an oval, then weld three ovals together to make a petal unit, plus a circle base about the same width as the petals. Cut twelve petals at roughly three inches for a large flower, eight at two inches for a medium. The step that creates the dimension is small and easy to skip: cut a half inch slit in the base of each petal, put a dab of glue on one side and fold the other over it.
Get the full tutorial at Everyday Jenny.
17. Crepe Paper Flowers For Mom
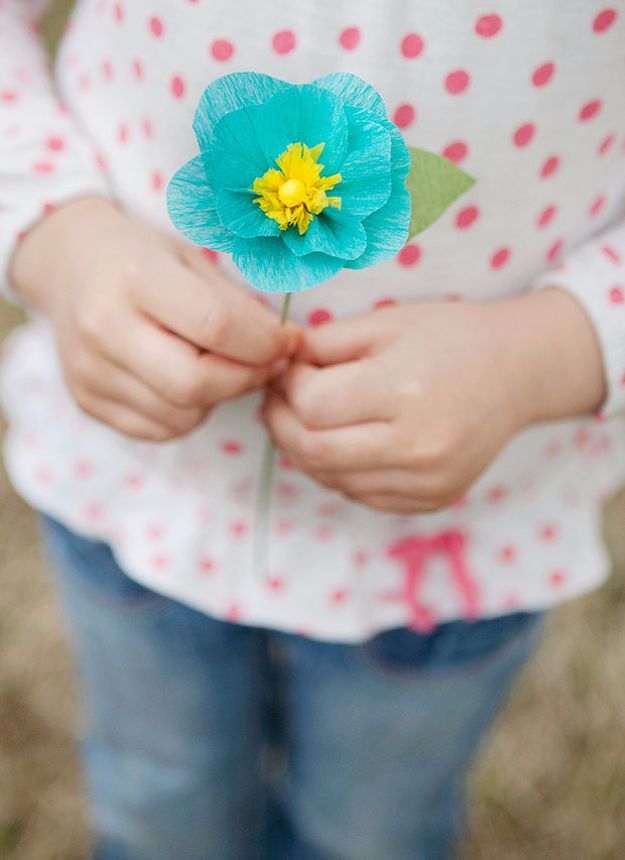
Crepe paper flowers built from the middle outward, which is a different approach from most and much more forgiving. Start with the center: cut a square of crepe paper, roll a small ball of cotton, place it in the middle and twist the paper tightly around it to form a short stem, or twist it around floral wire and secure with green floral or washi tape for a long stemmed version. Fringe a folded strip of crepe with tiny snips and wrap it round and round the center for texture. Petals come from a five to six inch length of crepe cut into a strip. Scraps of ribbon, lace and felt finish it.
Get the full tutorial at The Art of Simple.
18. Watercolor Flowers
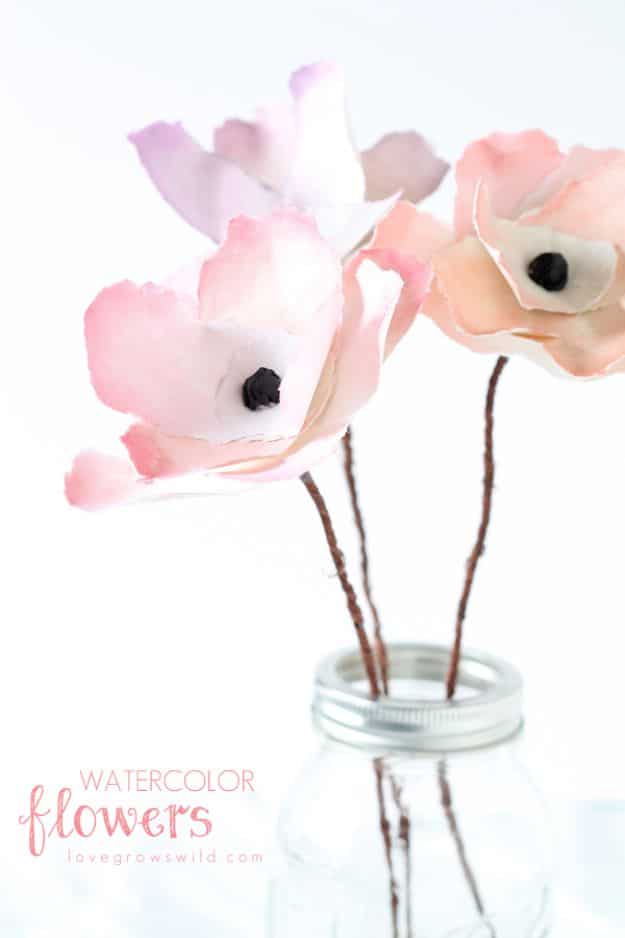
Torn and painted paper petals on wire stems, and the tearing is the point. Cut the paper into rectangles about four by three inches, then tear each one into a petal shape by hand rather than cutting it, which gives a soft rough edge no pair of scissors can imitate. Paint each petal with watercolor, fading the color from one end to the other for an ombre effect, and let them dry. Make a small tear in one end of a petal, slide brown floral wire into it and secure with a dab of hot glue or tape, then keep adding petals in a stagger until the flower looks full.
Get the full tutorial at Love Grows Wild.
19. Paper Flower Backdrop
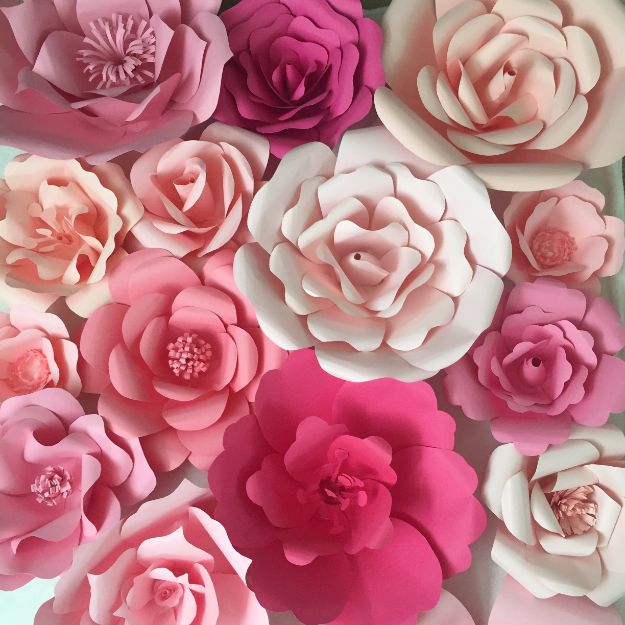
A full wall of paper roses in pinks and creams, packed edge to edge with no gaps, which is what separates a backdrop that photographs well from one that looks sparse. Mixing three or four sizes is what does it, big open blooms anchoring the arrangement and small tight ones filling the spaces between them. Shading from deep pink through blush to cream across the wall gives it depth rather than a flat block of color. The wall in the photograph has no single focal bloom, just an even spread of sizes, which is the forgiving version to attempt first.
Get the full tutorial at Ash and Crafts.
20. DIY Giant Dahlia Paper Flowers
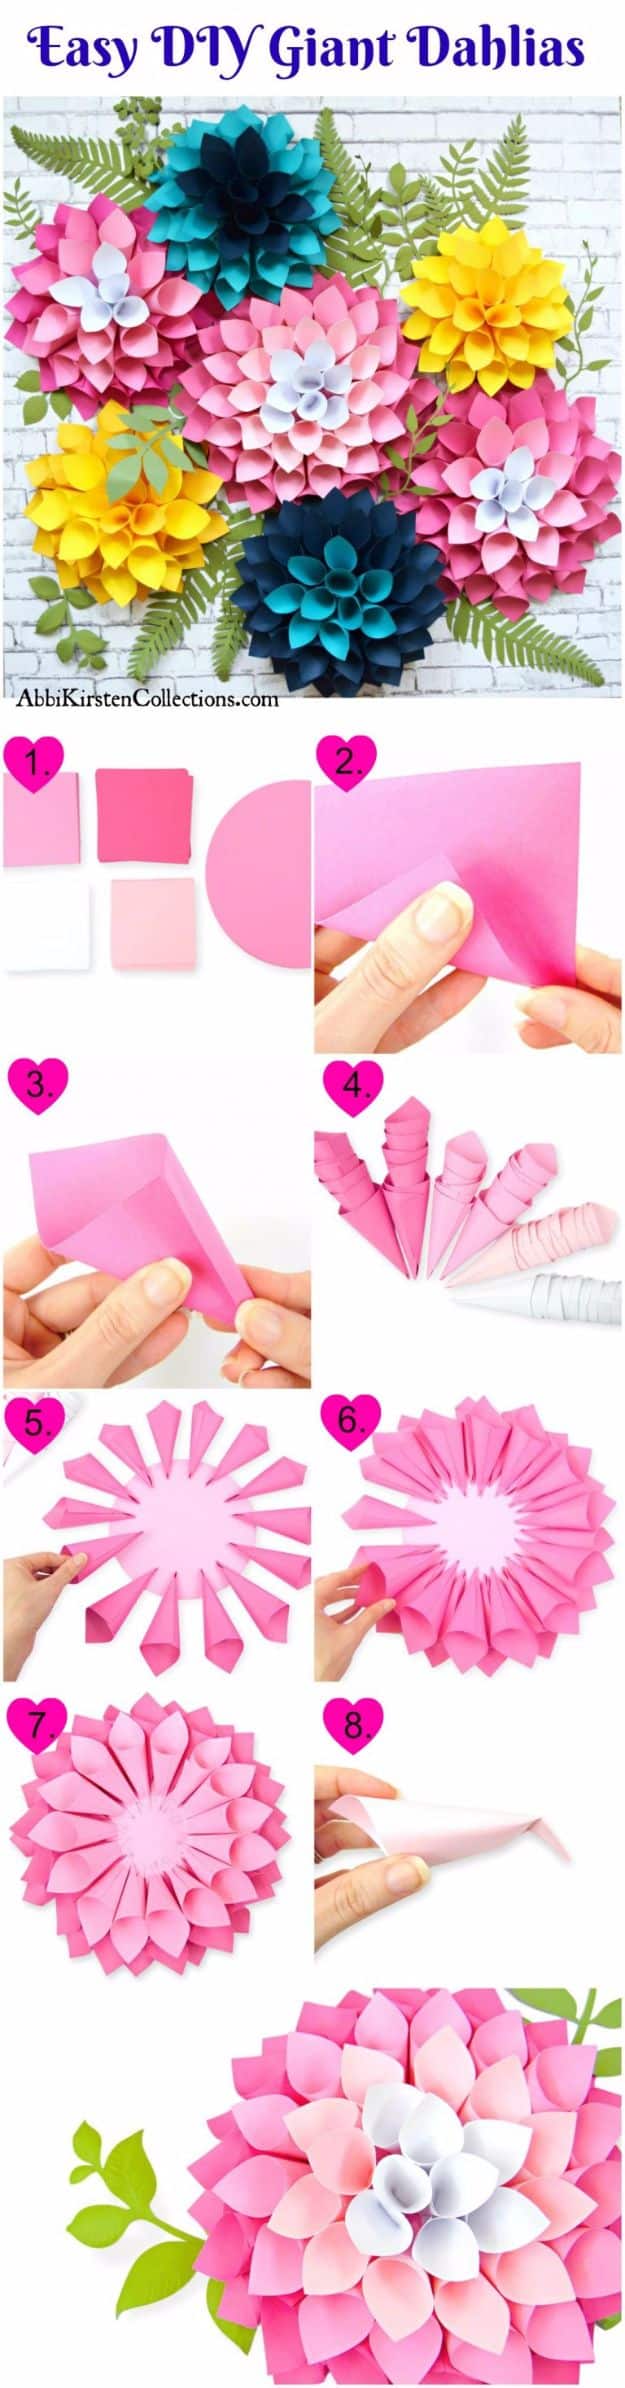
Giant paper dahlias with a free PDF template and free SVG cut files, which the maker gave away despite the same tutorial appearing in her published book, and that is worth knowing before you go looking for a paid version. The surprise is how simple the shapes are: the whole template is built from specially sized circles and squares, nothing more, which is why she describes them as beginner proof and kid friendly. Cutting by hand is entirely feasible for the same reason. The ombre effect in the version shown comes from using several shades of cardstock and working from dark at the outside to pale at the center.
Get the full tutorial at Abbi Kirsten Collections.
21. DIY Easy Swirly Paper Flower
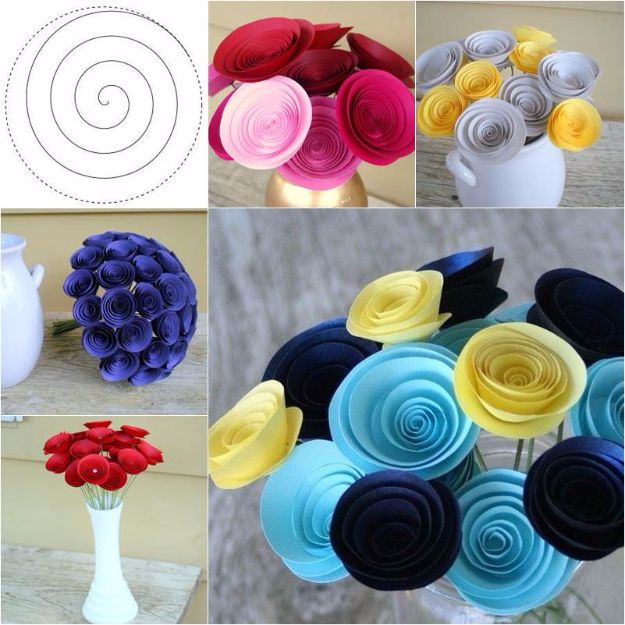
The swirly rolled flower, reduced to five steps and a template, and it is the fastest thing on this whole list. Print or draw the template, cut along the solid line, then roll it from the inner point outward, adjusting the layers as you go so they sit evenly, and glue the petal in place at the end. Colored card stock is the paper. That is the entire method. Ornaments are optional. Make twenty in an evening and you have a bouquet, a pomander ball or a row of them in a white jug, which is exactly what the photographs show.
Get the full tutorial at i Creative Ideas.
22. Coffee Filter Flowers
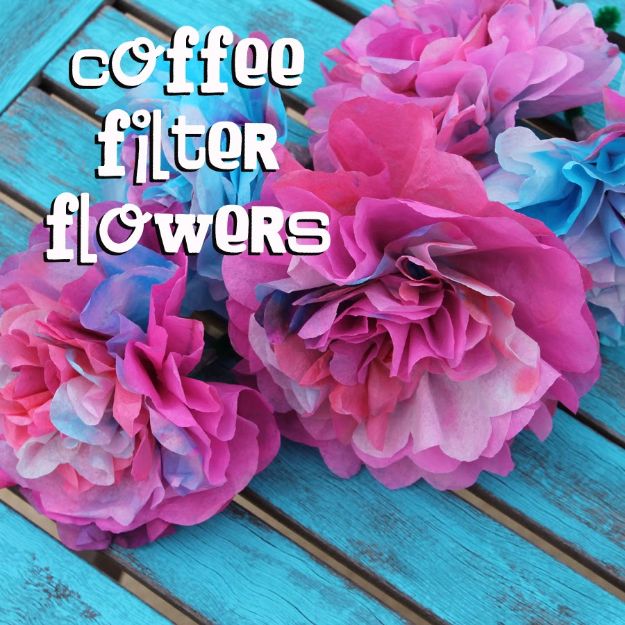
Coffee filters dyed to whatever color you need, which makes this the cheapest way to fill a room with flowers. A pack of filters costs almost nothing and takes dye beautifully because the paper is thin and absorbent, so the color runs and blends at the edges the way a real petal does. Dye them, let them dry, fold, cut, fluff the layers apart and add a stem. They work as garlands, wreaths, full bouquets and table centerpieces, and dyeing to match a party palette is the obvious use. Bright pink and blue together, on a turquoise table, is the combination shown.
Get the full tutorial at Doodlecraft.
23. DIY Marigold Paper Flower Garland
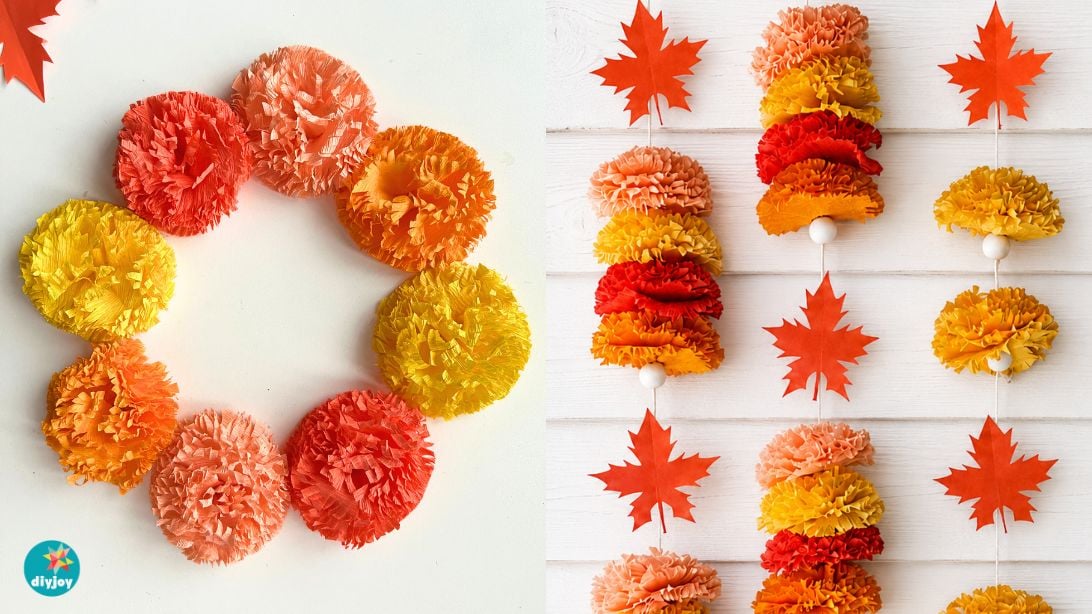
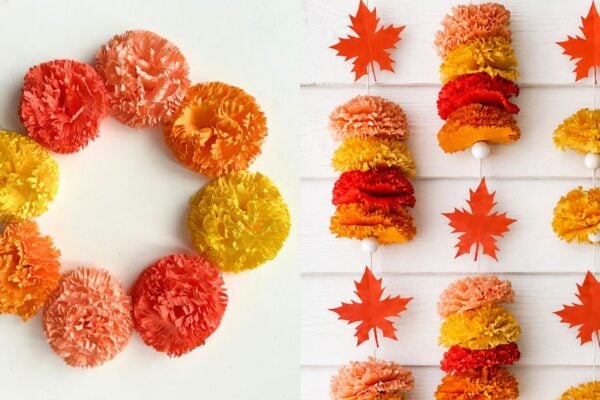
Crepe paper marigolds strung into a garland, which is the fall decoration that earns its keep on a wall, a desk or a staircase and comes back out every October. Each flower is a stack of crepe strips cut along one edge, stapled through the middle and fluffed open, so there are no petals to cut individually. Multi blade scissors are the tool to find if you plan to make a lot, they cut the fringe in one pass and save a genuinely tedious hour. A 360 degree rotating stapler helps too. String, a large needle and a few small white pom poms finish it.
Get the full tutorial at DIY Joy.
24. DIY Paper Ranunculus For Beginners
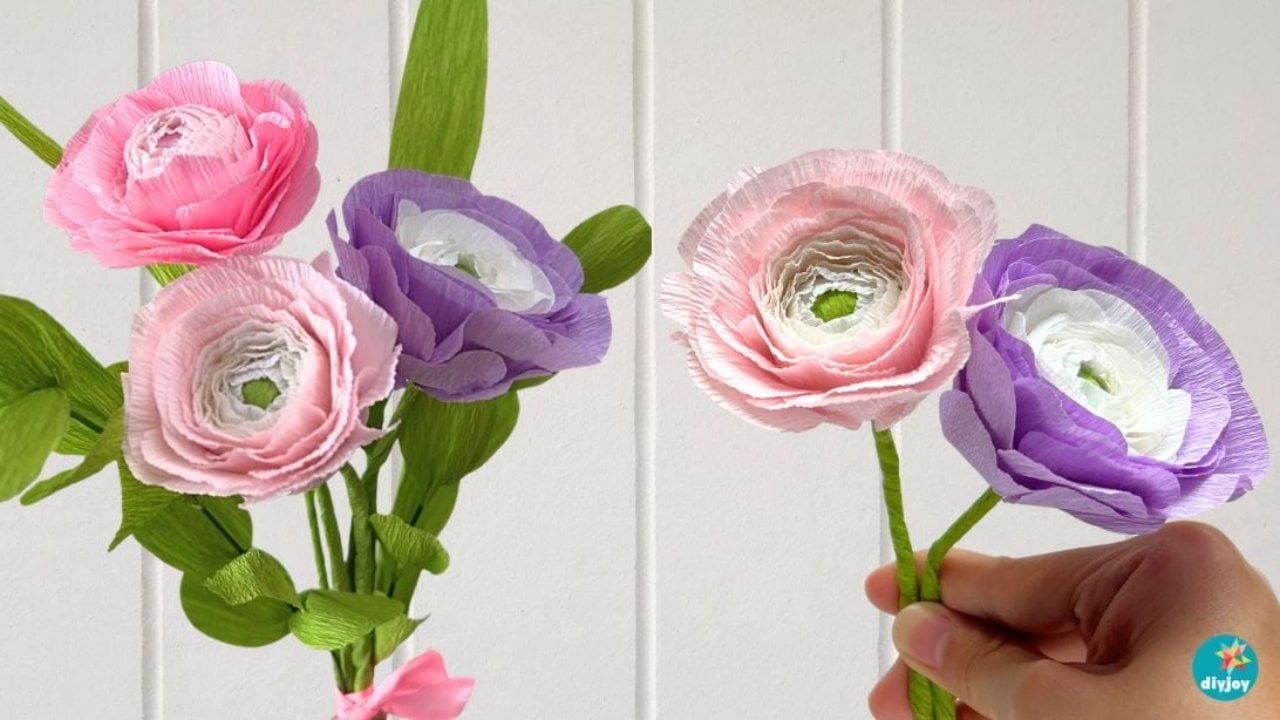
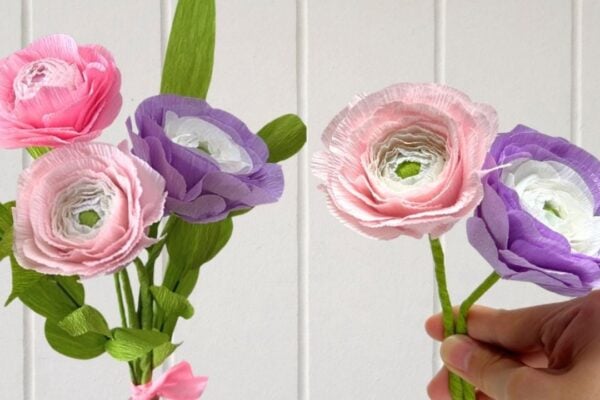
Ranunculus are the flower with the absurd petal count, all those tight overlapping layers, and that is exactly what makes them look expensive in paper. Be warned before you start: one flower means cutting and gluing a great many petals, so this is a project for an evening rather than ten minutes. It is easy work though, just repetitive, which is why it is genuinely a beginner project. Crepe paper, floral wire, a glue gun and glue sticks, aluminum foil and scissors is the whole list. Pink, orange, violet and yellow all work. Bunch several into a bouquet for a gift or a centerpiece.
Get the full tutorial at DIY Joy.
25. Paper Roses For Beginners
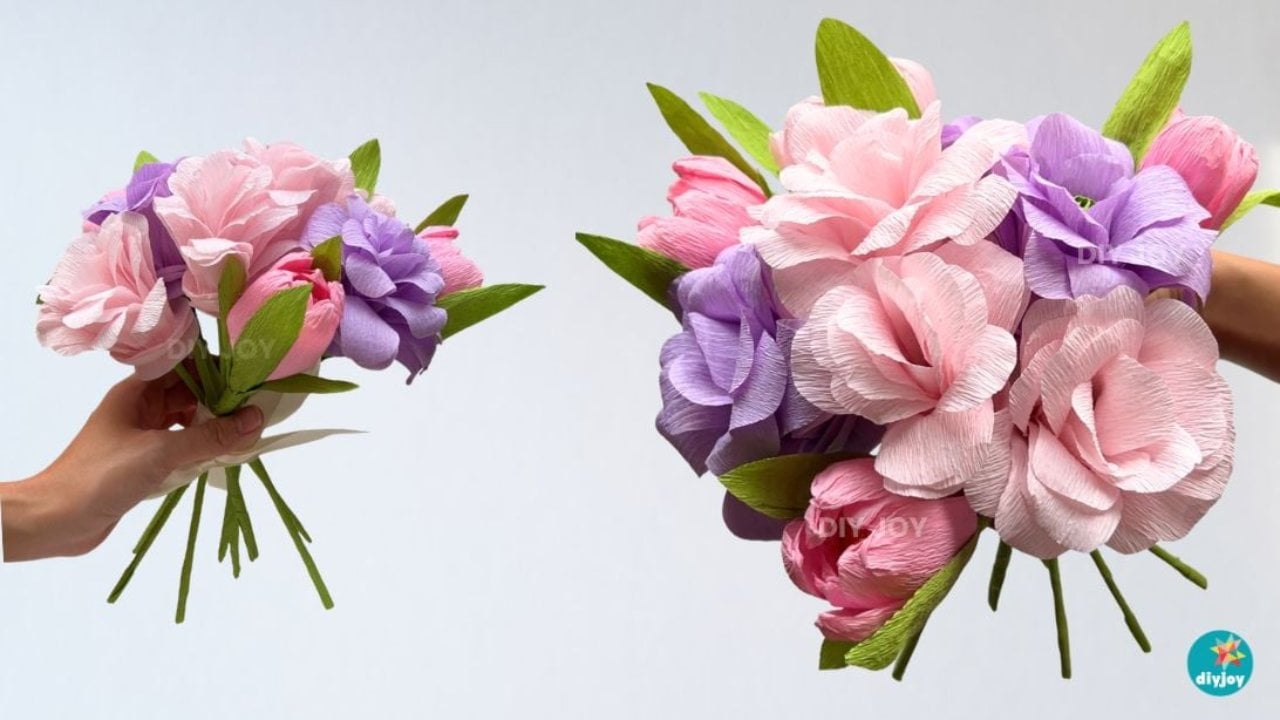
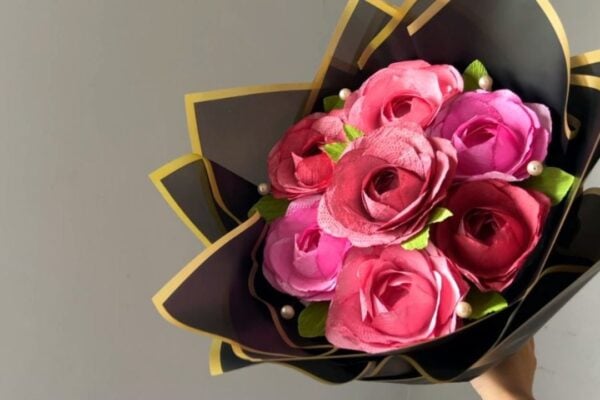
The easiest paper rose going, and the claim is a specific one: under ten minutes per flower once the technique clicks. What makes it beginner work is that there are no individual petals to cut at all. One long strip of pink crepe paper, one strip of green for the leaves and a skewer is the entire supply list, and the rose forms as you roll and gather the strip along the skewer. Roses are the paper flower people ask for most, and most tutorials make them look fiddly. This one does not. Add a few paper tulips for volume and you have a bouquet.
Get the full tutorial at DIY Joy.
26. Toilet Paper Flower Bouquet
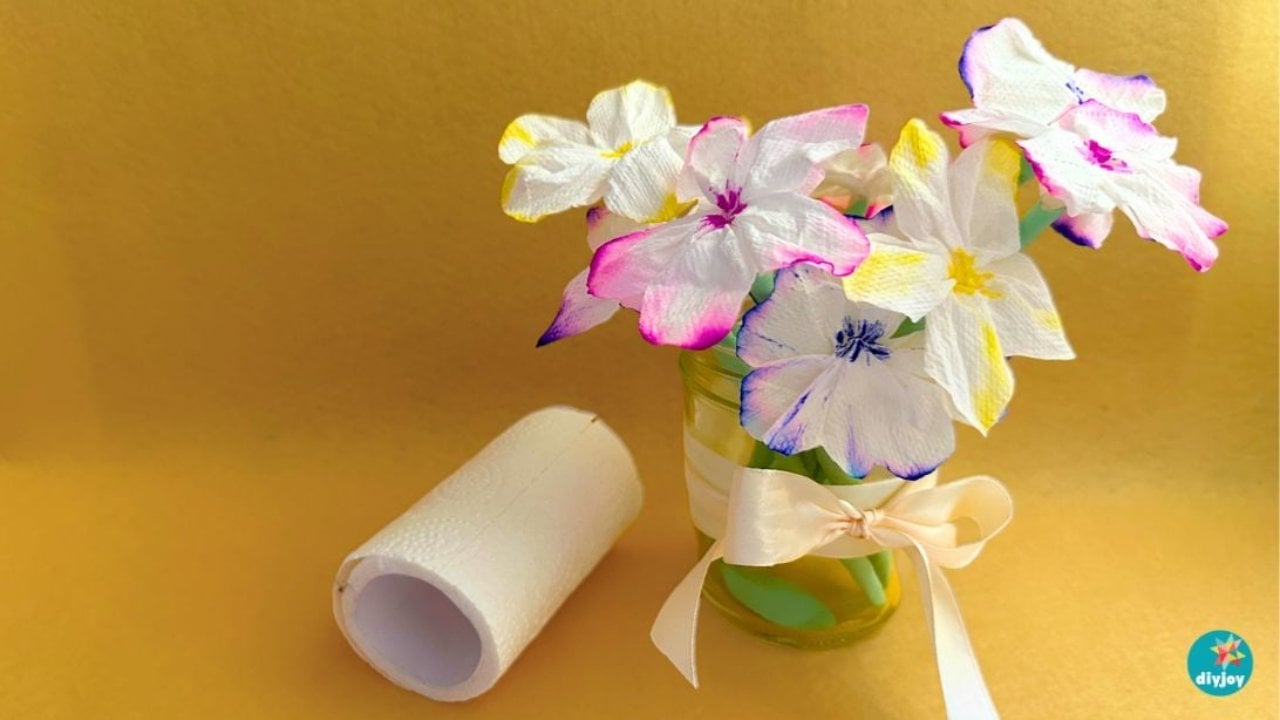
Toilet paper is the last thing anyone reaches for to make flowers, being flimsy and only available in white or brown, and that is precisely the argument for trying it. It holds its shape surprisingly well once it has dried, and because the supply is already in the cupboard the whole project costs nothing. The method is a fold: lay the tissue with the short side facing you and fold it four times, then shape from there. The steps are easy enough for children, so it works as a rainy weekend activity. A painted edge on white tissue turns a plain bloom into something quite convincing.
Get the full tutorial at DIY Joy.
27. How to Make Paper Tulips
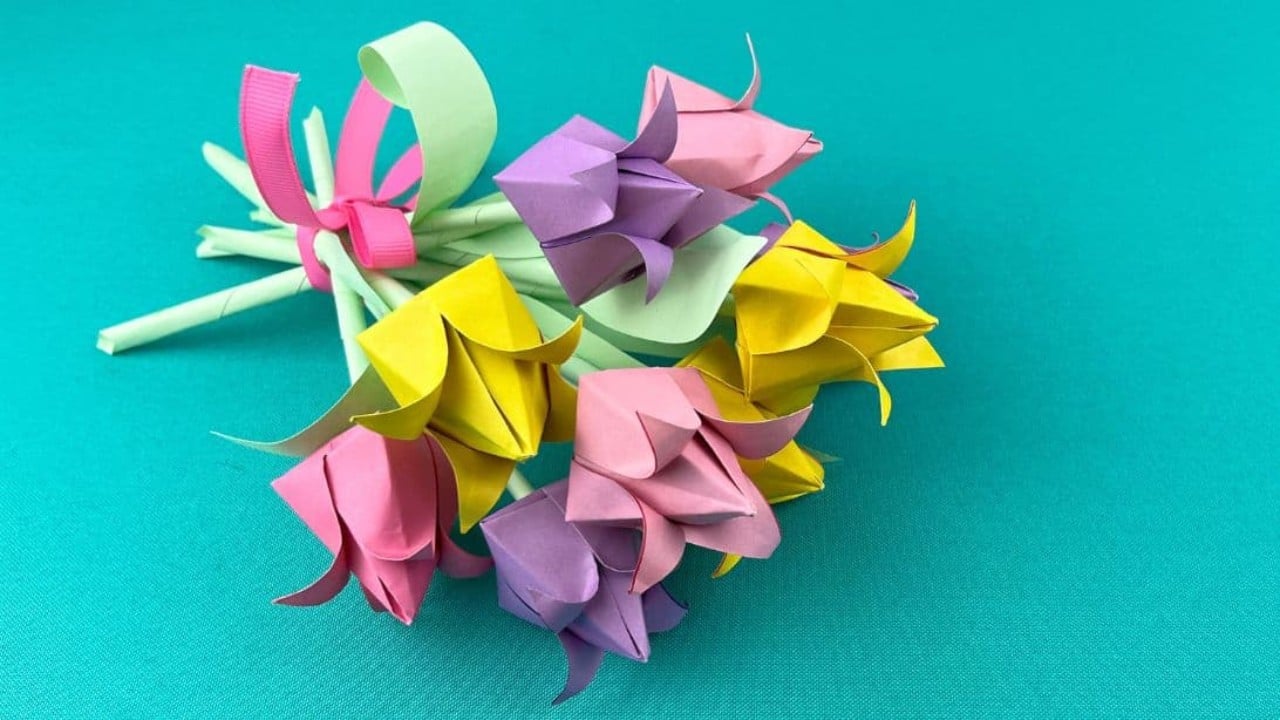
Origami tulips, and the folding is the whole project: no cutting and no glue in the traditional origami sense, though a little of each is needed here to attach the stems and leaves. If you can fold a paper airplane you can fold one of these. Origami paper for the bloom, green colored paper for the stem, a skewer, scissors, glue and optional ribbon. The one recommendation worth following is the paper: pastels rather than primaries, because soft colors mimic the gentle shades of real tulips and the primaries read as a school project. A bunch in mixed pastels tied with ribbon is a lovely handmade gift.
Get the full tutorial at DIY Joy.
28. Easy Paper Flowers With Cupcake Liners
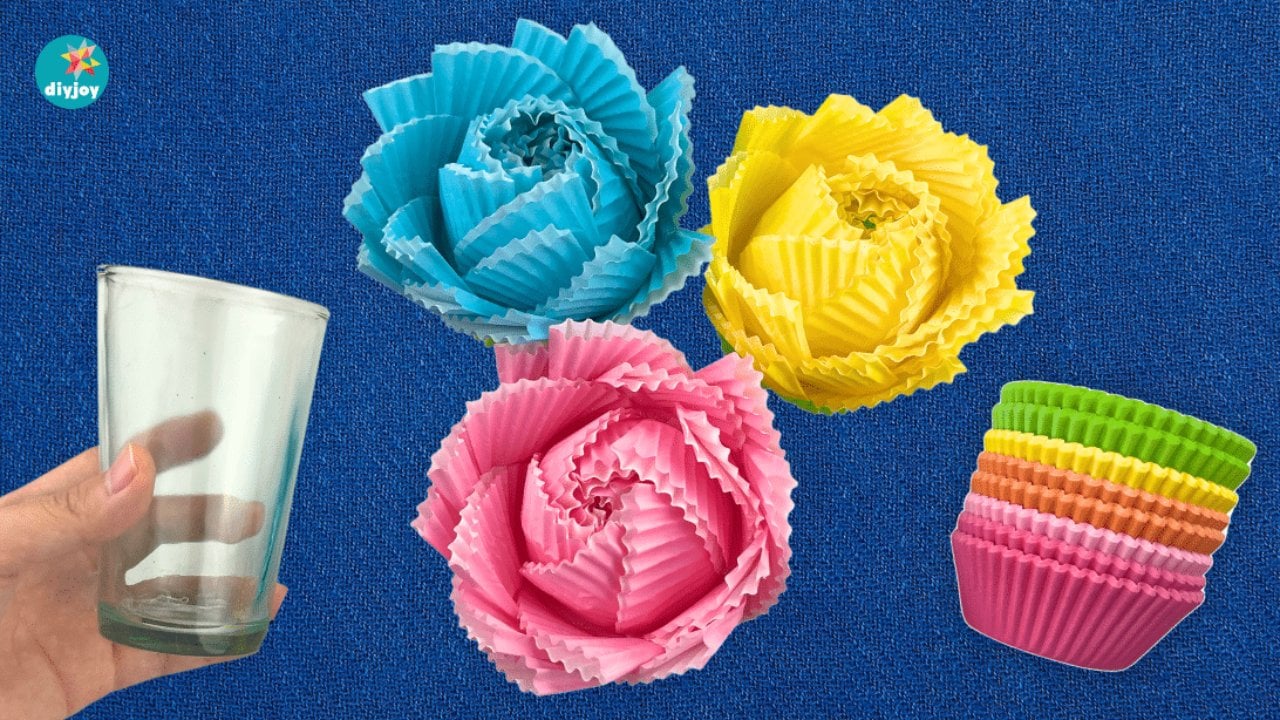
Cupcake liners already have the pleats and the cupped shape built into them, which is why they make such convincing flowers with almost no work. They come in packs of a hundred for pocket money, in every color and pattern going, so a bag of liners is an afternoon of flowers. There is nothing fiddly about the method and children can help with the folding. Use them as party or shower decorations, hang them, add stems for individual blooms or gather a pile into a bouquet. Once you have made these, the same idea works with coffee filters, crepe paper and origami paper.
Get the full tutorial at DIY Joy.
29. How to Make Paper Flowers With Post-It Notes
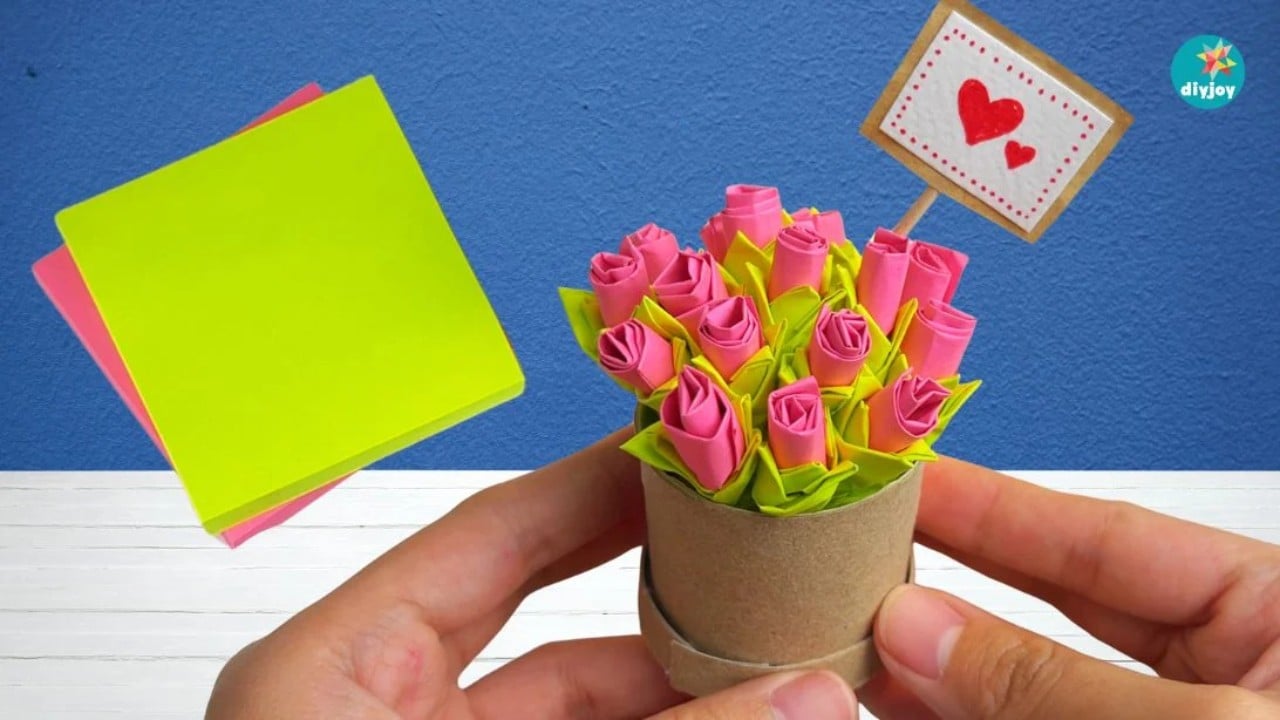
The entire supply list is a pad of sticky notes, a bit of glue and an empty cardboard tube. Nothing to buy, no punches, no templates, no special paper. Cut a sticky note into a spiral or a fringed strip, roll it tightly from one end and let the sticky edge hold the rose closed, which is the detail that makes this work at all. Green notes become fringed leaves wrapped around the base. Each flower takes about two minutes and a full bouquet takes under an hour, sitting in a trimmed down toilet roll vase. Perfect for a desk, a classroom or a small handmade gift.
Get the full tutorial at DIY Joy.
30. How to Make a Paper Lily
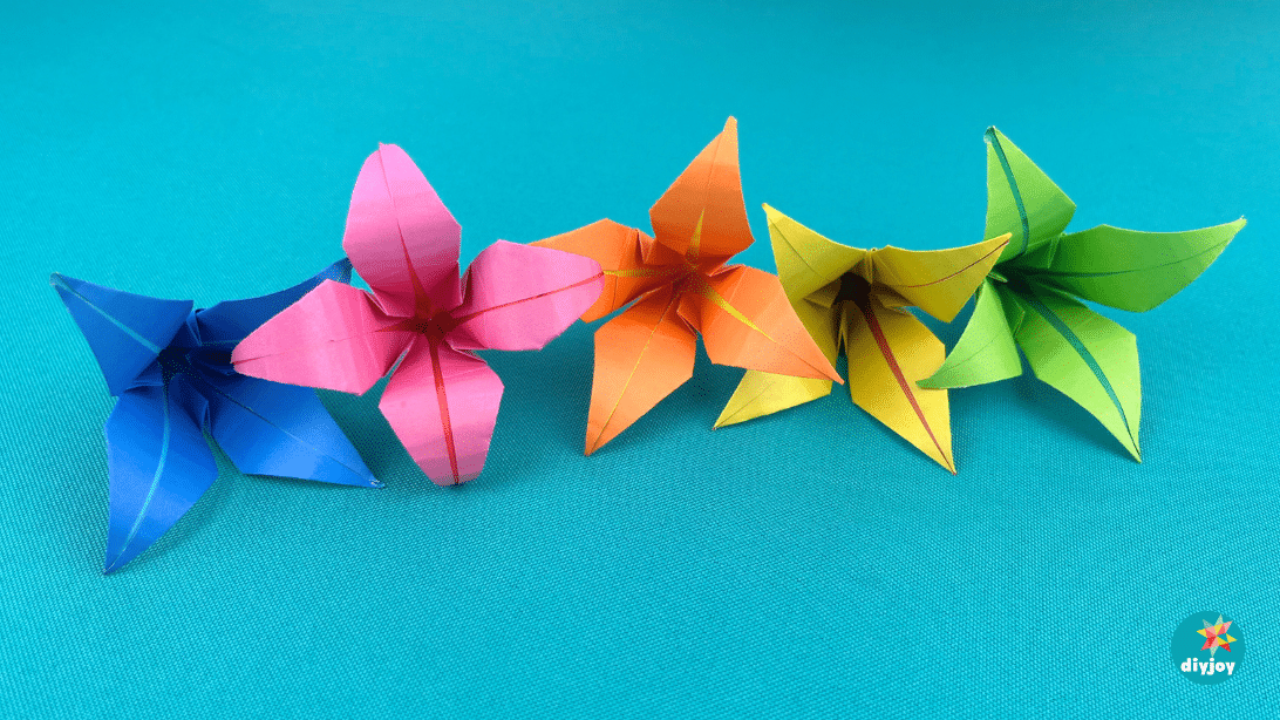
One square of paper and a wooden skewer, and that really is the whole materials list, which makes this the cheapest project here and the most forgiving, because a mistake costs another square of paper and nothing else. The folds are ordinary origami folds repeated on all four sides: fold in half both ways and diagonally both ways, collapse along those creases, fold the sides into the center line, then open and flatten each fold in turn. Thirteen short steps in total. The skewer comes in right at the end to curl the petal tips outward, and that single move is what turns a folded shape into a lily.
Get the full tutorial at DIY Joy.