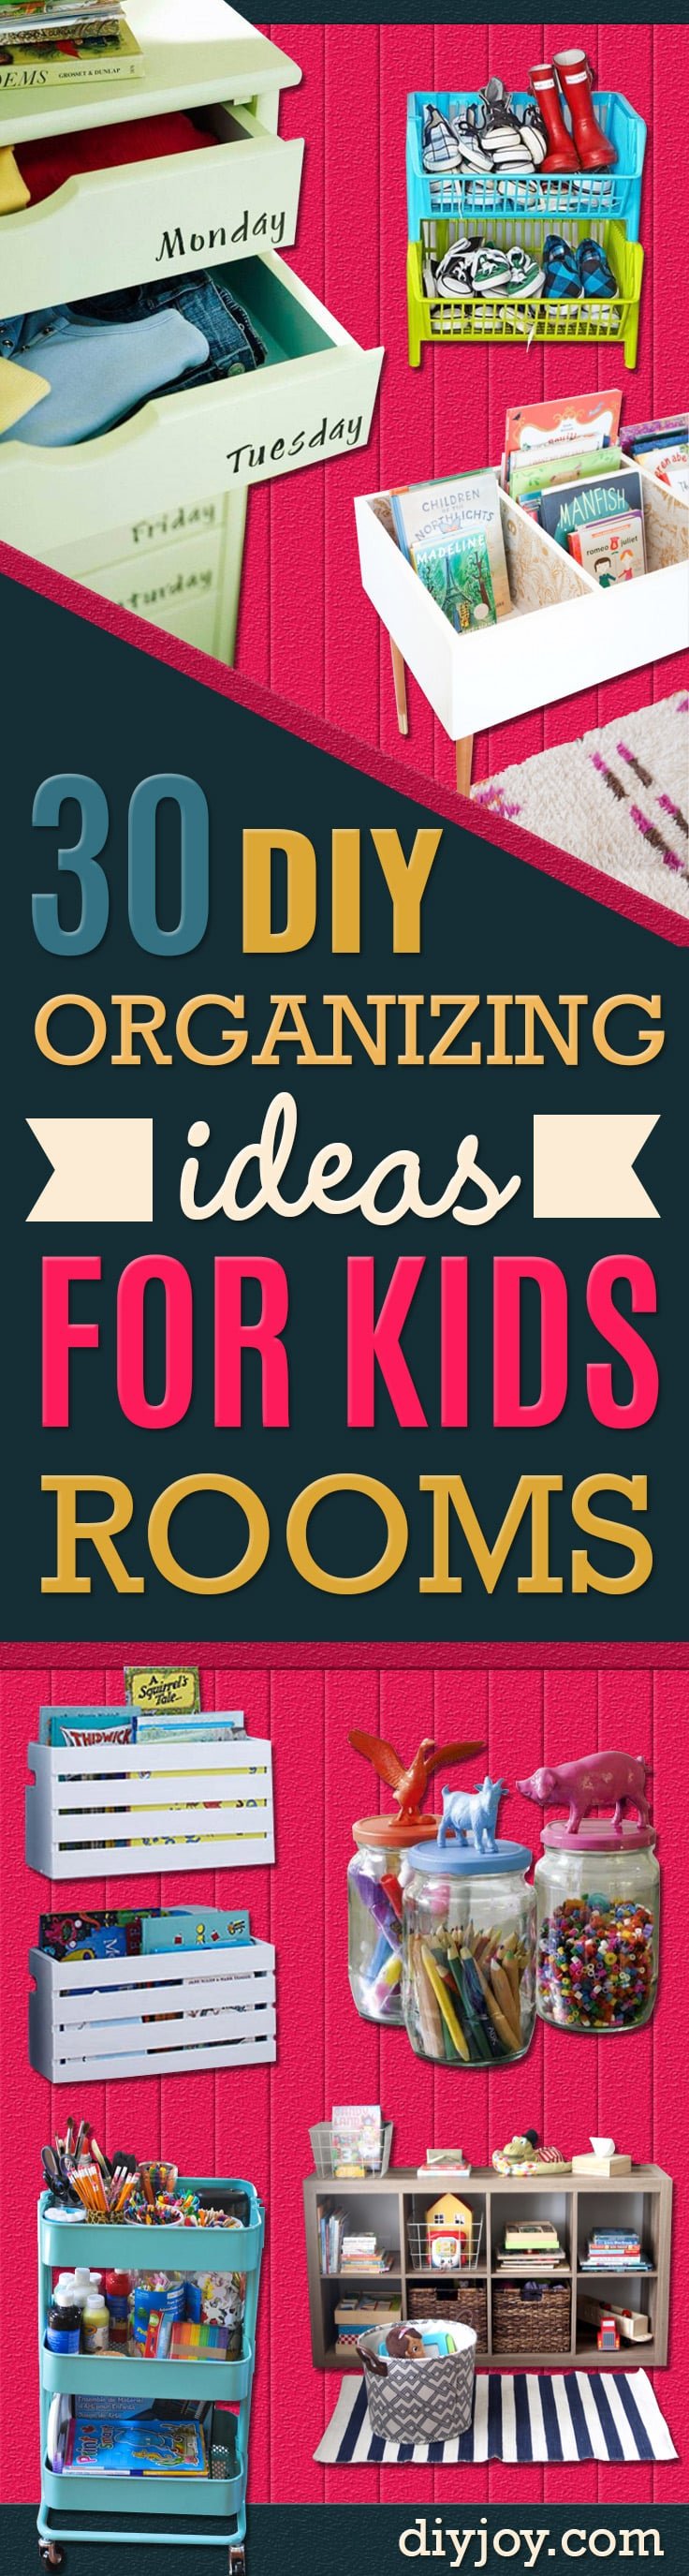
A kid’s room does not get messy because the kid is messy. It gets messy because half the things in it have nowhere to go. That is the thread running through all 18 of these DIY organizing ideas for kids rooms: give every category a home at a height a four year old can reach, and the floor mostly takes care of itself. There are cube shelves and a front facing book bin for the books, PVC pipe and mason jars for the tiny things that vanish, a rolling art cart and a fold down homework desk for the paper, a wardrobe for dress up, and two beds built on kitchen cabinets for when the room is simply too small. Most cost under twenty dollars. A few cost a Saturday.
1. Manage Toys Without A Playroom
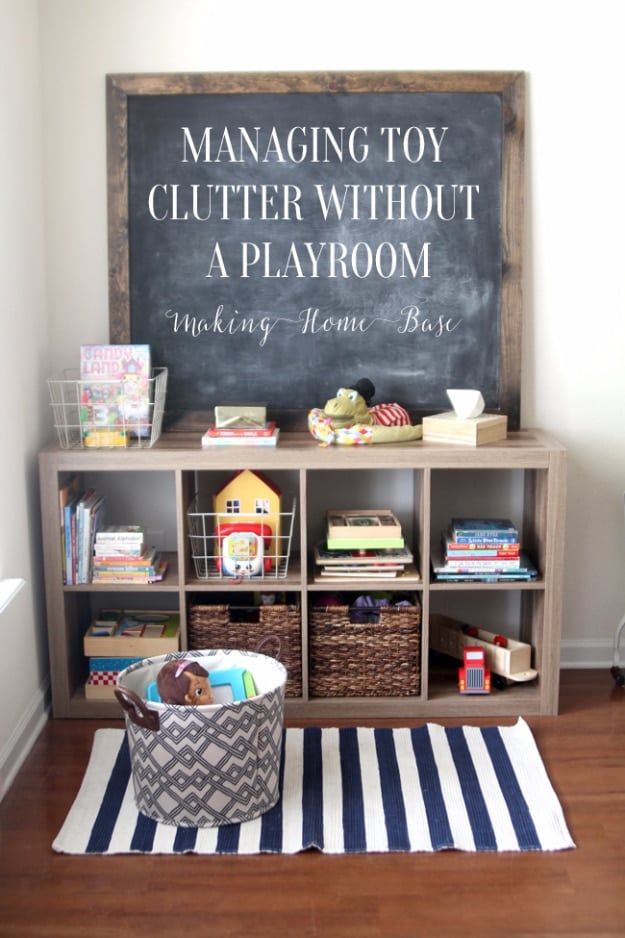
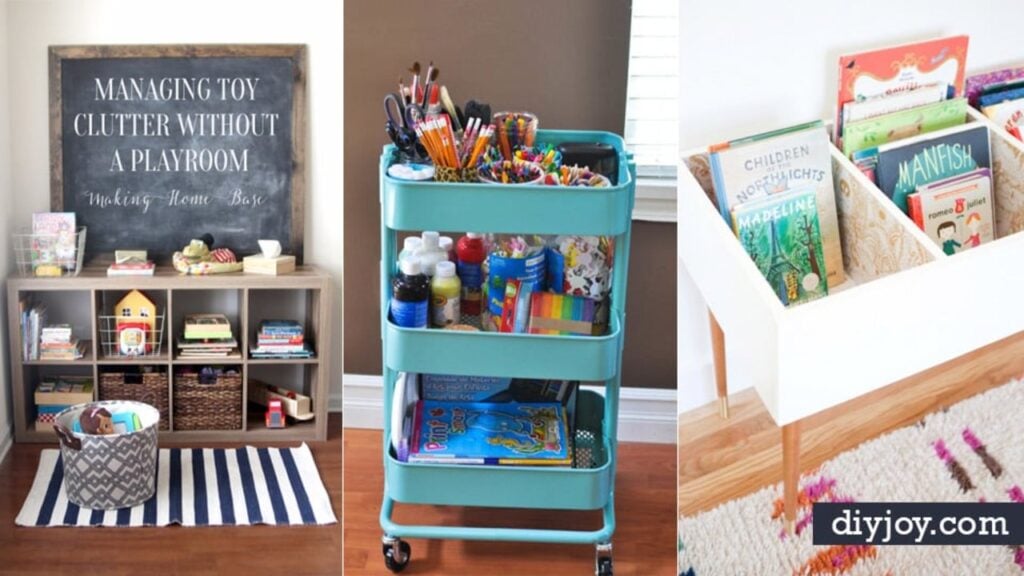
No playroom, no problem. The whole idea is to pick one corner of the living room and let the toys live there instead of everywhere. An eight cube organizer does the heavy lifting, with fabric and wicker baskets dropped into the openings and smaller lidded bins tucked inside those for the tiny figurines that end up underfoot. Puzzles, books and wooden sets stay out on the open shelves so a kid can see them without pulling down everything else. A big framed chalkboard on top makes the corner look deliberate, and since it all sits at kid level, cleanup stops being your job.
Get the full tutorial at Making Home Base.
2. DIY Kids Book Bin
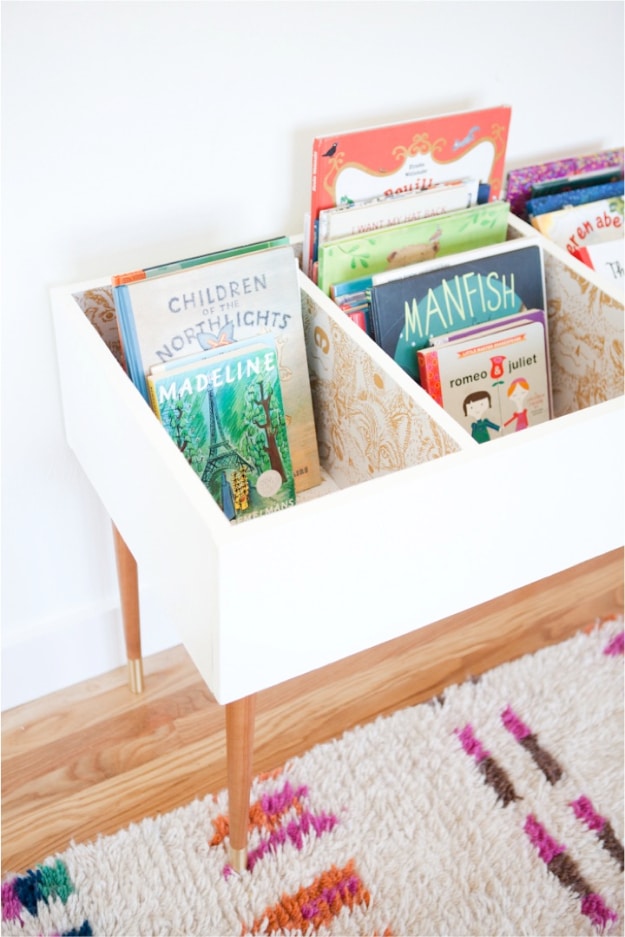
Picture books never fit a normal shelf. They are too tall, too floppy, and they end up in a leaning stack beside the bed. A shallow white box split into three bays fixes it, because the books stand face out and a small kid can flip through them like records instead of pulling the whole row down to find one. Tapered mid century legs with brass tips lift it to toddler height and keep it from reading as a toy box, and the dividers are lined in patterned paper so the inside still looks finished when it is empty.
Get the full tutorial at This Little Street.
3. Kids And Nursery Closet Organization
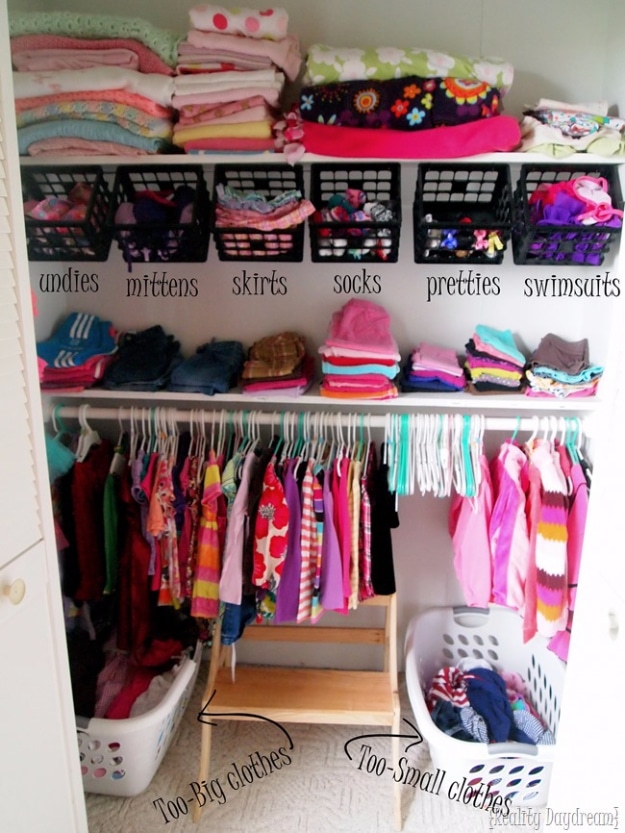
Five years is a long time for a closet system to survive small children, and this one has. Painting the inside white is the free part and it does more than you expect. Then the deep shelves get split horizontally into two shallower ones, so nothing hides behind anything. Little plastic crates about eight by five hang from cup hooks under the shelves for socks and hair things, adhesive clothespins on the wall hold tutus, and two laundry baskets sit on the floor, one for outgrown clothes and one for the wrong season. Rope lights around the doorway mean she can see what she is choosing.
Get the full tutorial at Reality Daydream.
4. Curtain Rod Shelf
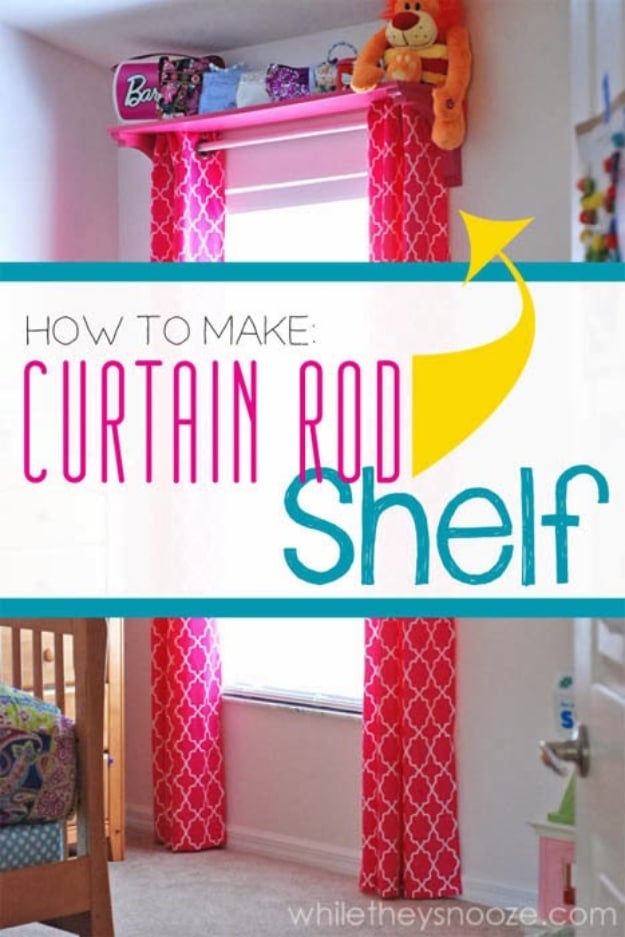
This one is almost a trick. Two corbels get a hole drilled through the middle, slightly wider than a one and a half inch dowel, and that dowel becomes the curtain rod. A plain board rests on top of the corbels and becomes a shelf. Drill the holes before you paint, because touching up around a fresh hole is miserable. Prime and paint the board, brackets and dowel, and if you only paint the underside and edges of the shelf nobody will ever know. Corbels run five to ten dollars each and the dowel is about a dollar fifty, which beats the price of a decent curtain rod on its own.
Get the full tutorial at While They Snooze.
5. Animal Topped Mason Jars To Organize Kids Supplies
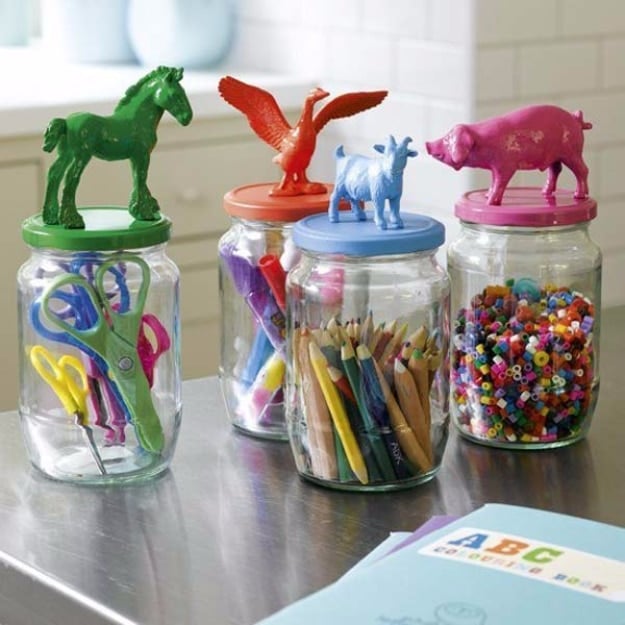
Every kid room has a drawer of loose crayons, beads and hair clips. These jars sort them and look like something you would buy. Glue the flat lid to the band first and let it dry, then glue a plastic animal’s feet to the top of the lid and let that dry too, and only then spray paint the animal and lid together in two coats so the color reads as one piece. Rushing the drying is how you get a tacky pig. A hot glue gun works if you do not have super glue, and plastic jars are the safer call for a child’s room.
Get the full tutorial at Mason Jar Crafts Love.
6. Organize Kids Art Supplies
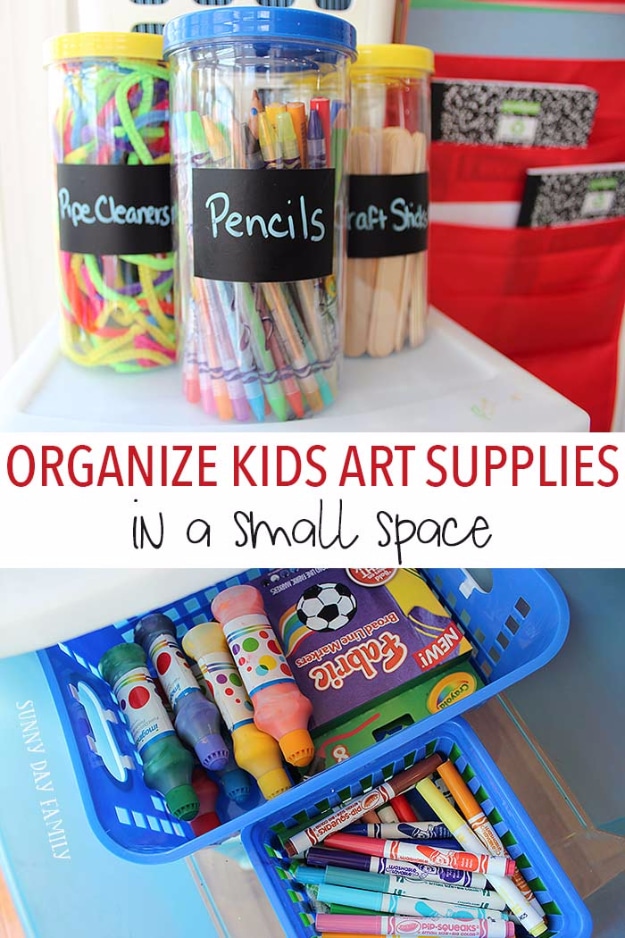
This is the small space version, built on a three drawer plastic unit rather than a closet. Inside the drawers, tall handled baskets take the fat markers, small square baskets stack so each child gets their own set, and canisters hold brushes, pencils, craft sticks and pipe cleaners. Everything wears a chalkboard label written with a chalk marker, which is the bit that makes a kid put things back. Then the walls do the rest: a four dollar hanging trash can holds stickers and sticker books, and a ten pocket file chart on command hooks takes all the paper. Chalkboard contact paper down the middle of the table means the table is a supply too.
Get the full tutorial at Sunny Day Family.
7. The Art Cart
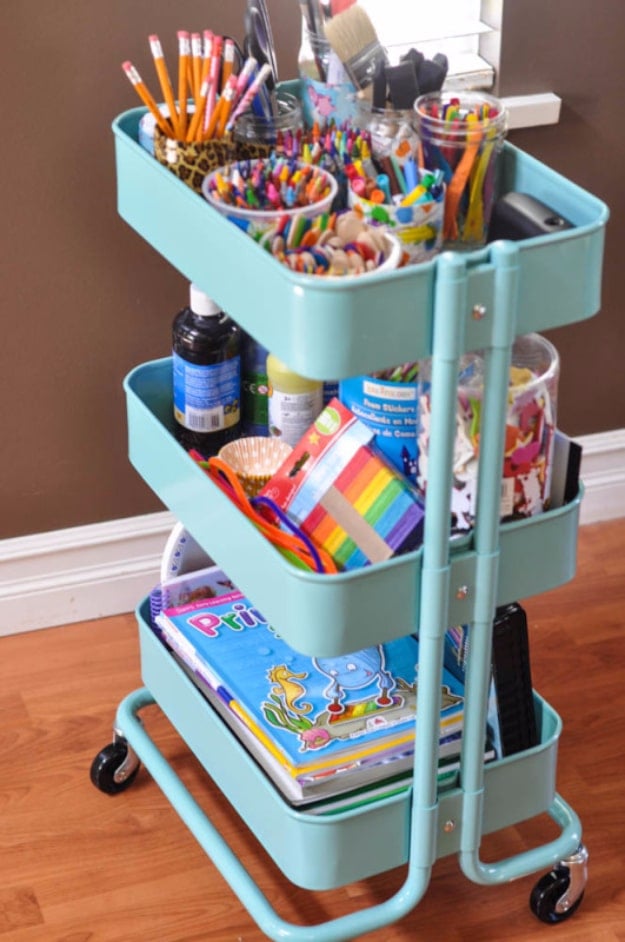
A three tier rolling kitchen cart is the single best piece of furniture for craft supplies, because it holds a ridiculous amount and then rolls out of the room when company comes. Upcycled tin cans and jars hold the markers, crayons, glue sticks, scissors and pipe cleaners, and wrapping each can in patterned tape does two jobs at once: it looks better, and it covers the sharp rim around the top, which is not a small detail on a can a five year old reaches into. Keep white glue off the cart entirely if your floor is carpeted. You will thank yourself.
Get the full tutorial at Suburble.
8. Organize Kids' School Memorabilia
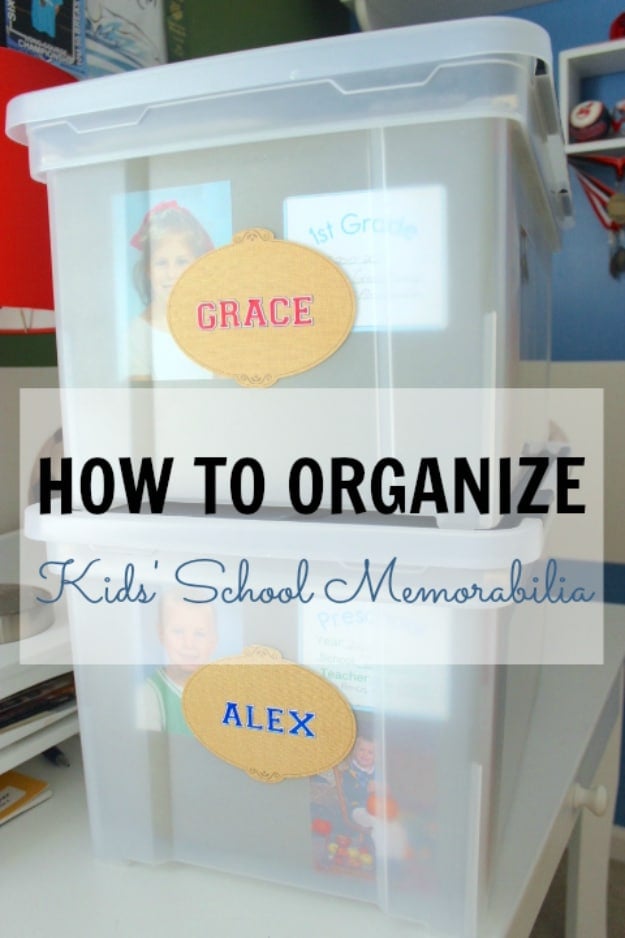
The rule that makes this work is one box per child, forever. A twelve gallon flip top file box sets the limit, and when the box is full something has to leave, which is far kinder than a garage full of undated drawings. Inside, a labeled hanging folder for every grade from pre-K through high school, with each label carrying the year, the school, the teacher and a school photo so you can watch the face change as you flip. Artwork, certificates, programs, the odd story. Scout badges and playbills go in too. At graduation you hand the whole box over.
Get the full tutorial at Get Organized HQ.
9. DIY Bedside Organizer
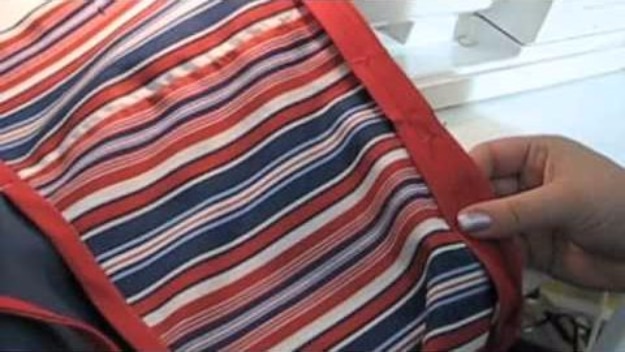
The books, the water cup, the glasses, the little flashlight. All of it ends up on the floor by morning unless there is somewhere for it to go, and a bedside caddy is the somewhere. This one slips between the mattress and the box spring so the weight of the bed holds it, which means no hardware, no holes in the wall and nothing to knock over in the dark. The pockets sit at the side of the bed exactly where a hand lands. It is a straightforward sewing project, and the tutorial it points to walks through the whole thing.
Get the full tutorial at DIY Joy.
10. Dress Up Storage
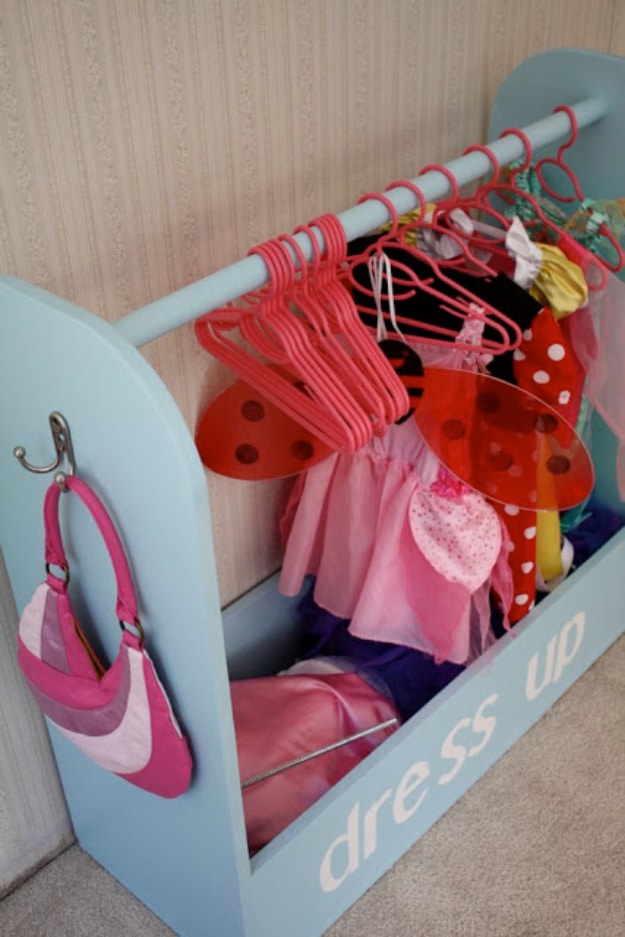
Costumes on a low rod get worn. Costumes in a bin get forgotten at the bottom of the bin. This is a plywood box with two sides, a bottom, a shallow tray along the base and a dowel across the top, screwed together and painted. The finished piece is fourteen by thirty six at the bottom, the side pieces run thirty four and a half by nine, and the dowel is thirty four and a half long. Two hooks on the outside take the bags and the hats. Built from scrap plywood it came to under fifteen dollars all in, most of that being paint and hooks.
Get the full tutorial at Craftiness Is Not Optional.
11. Jar Storage For Art Materials
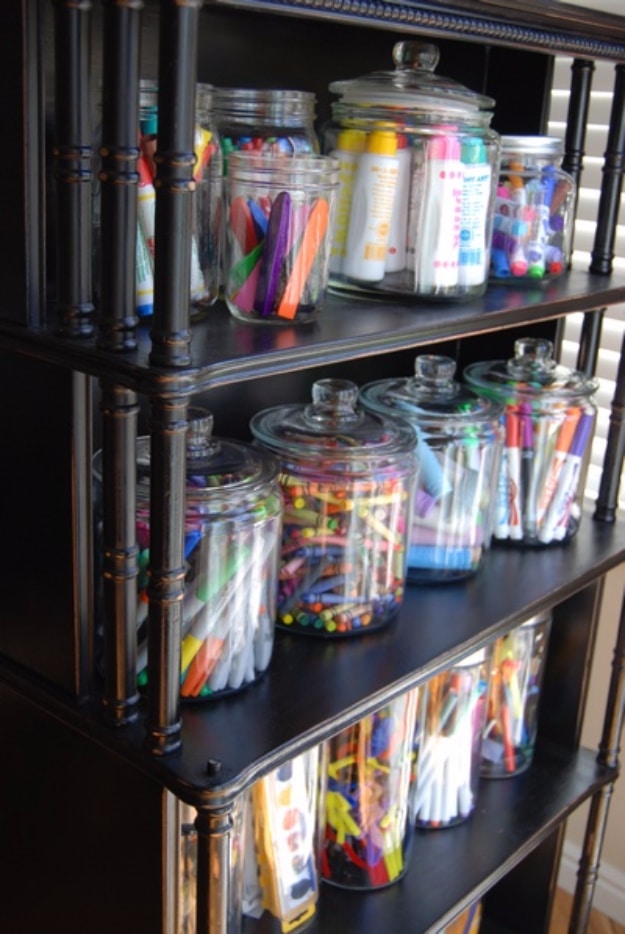
The whole argument here is in sight, in mind. Crayons, markers, paints and chalk go into clear glass jars on an open bookshelf right beside the kitchen table, where a kid passes them twenty times a day. Hidden in a cupboard they may as well not exist. It costs you a little visual tidiness, which the shelf gives back by making the color look deliberate rather than scattered, and it buys a noticeable amount of coloring instead of screen time. Group one supply per jar so nobody has to dig, and keep the lids off the ones in daily use.
Get the full tutorial at Raising Lemons.
12. Baby Boxes With Names
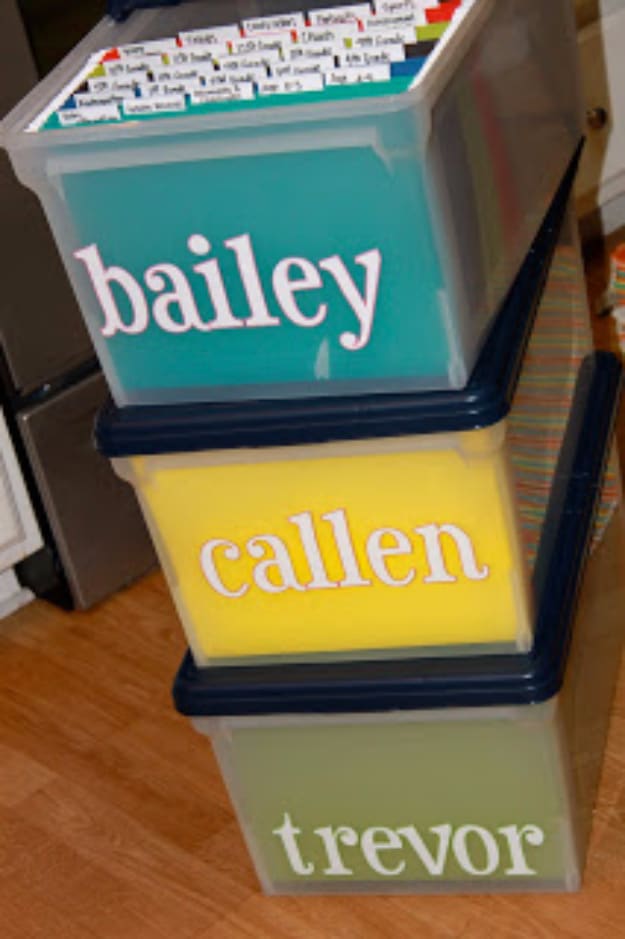
One clear tub per child, the name across the front in vinyl, and a strip of colored paper slid behind it so the lettering actually reads. That is the entire system and it is better than it sounds, because the transparent sides let you see what is in there without opening anything, and the boxes stack. Inside the top one, tabbed dividers split the contents by grade so the clothes and keepsakes stay in order as they go in. Pick one tub size and buy them all at once, because mismatched bins are what makes a closet look chaotic even when it is tidy.
Get the full tutorial at Destination Of Domestication.
13. Beds With Storage

When a room has to hold two beds and there is no floor left, you build up. These sit on kitchen cabinets, sixty dollars worth from a Habitat ReStore, with framing added behind them to carry the mattresses. The result is drawers and doors along the whole base, a little corridor between the beds that the kids crawl through, and a corner cabinet turned into a lit play nook. Salvaged cabinet doors and a pair of roadside shutters became the shelves. The whole build came in just under a hundred dollars and took about a week, which is less than one bought bed frame.
Get the full tutorial at United Pages Of Alabama.
14. Stuffed Animal Storage Zoo
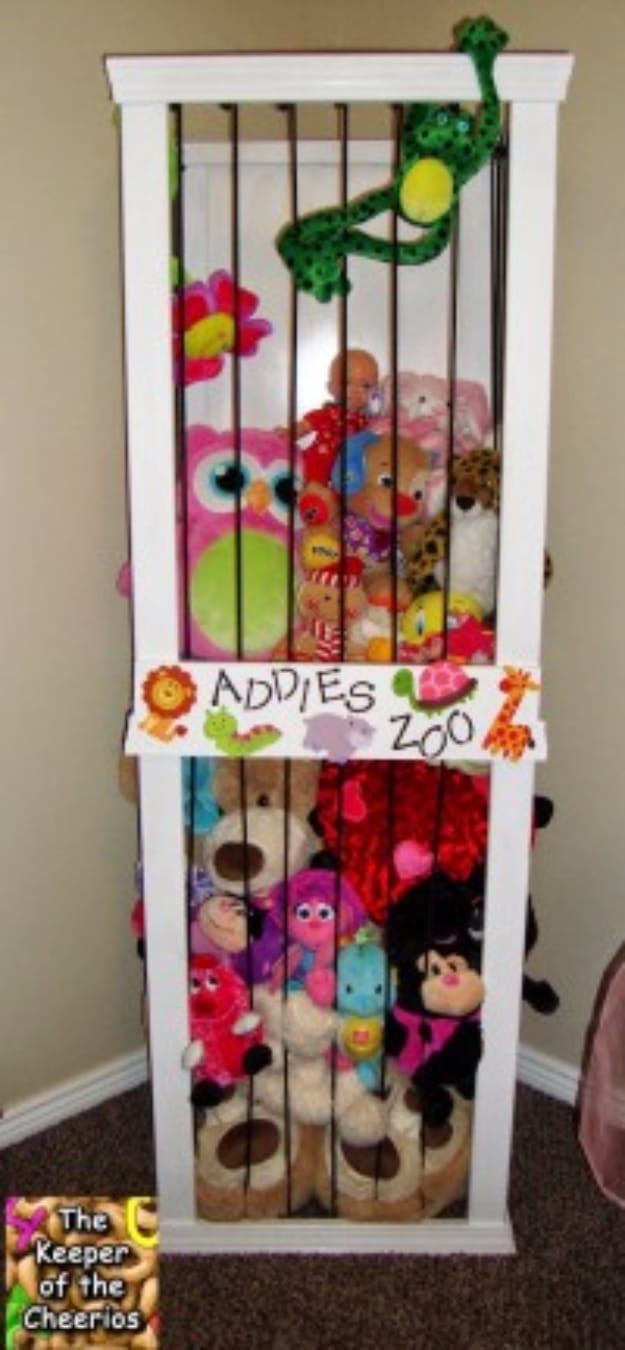
Black bungee cord stretched across a white frame makes a cage the animals cannot climb out of and a child can reach straight into, which is why this beats any bin. The frame is four pre-primed one by two boards cut into twenty four inch lengths to make three square sections, top, middle and base, with a masonite back and baseboard trim around the outside. A hundred foot roll of shock cord is cut to length and screwed on at three heights. Screw the boards rather than nail them, because screws hold and pins do not. Anchor the whole thing to the wall and supervise, since anything that looks like a ladder will be climbed.
Get the full tutorial at The Keeper Of The Cheerios.
15. DIY Kids Homework Hideaway Wall Desk
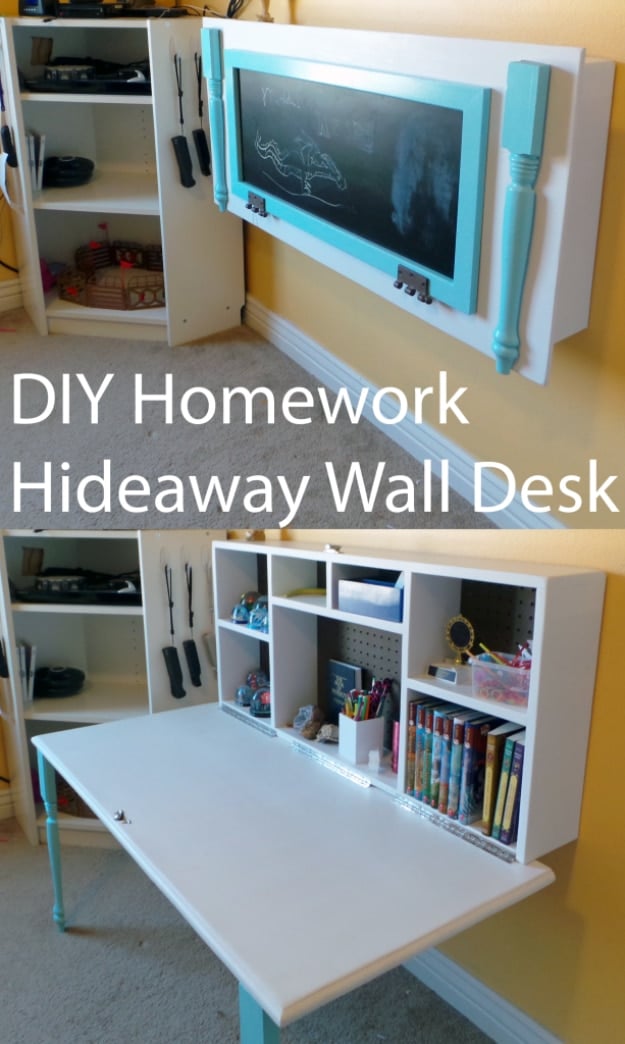
Closed it is a chalkboard on the wall, open it is a full desk. The cabinet is pine, forty four by nineteen and a quarter inside a forty eight by twenty four front, with a dado groove routed along the inside edges to take a twenty four by forty eight pegboard back. Three twelve inch piano hinges carry the fold down top, a sash lock holds it shut, and a twenty one inch decorative leg cut lengthwise on a table saw swings out to support it. Dry fit every piece before a single screw goes in. If it does not sit right empty, no screw will fix it. About a hundred and fifteen dollars in materials.
Get the full tutorial at Organized Mom.
16. Simple And Organized Children's Art Supplies
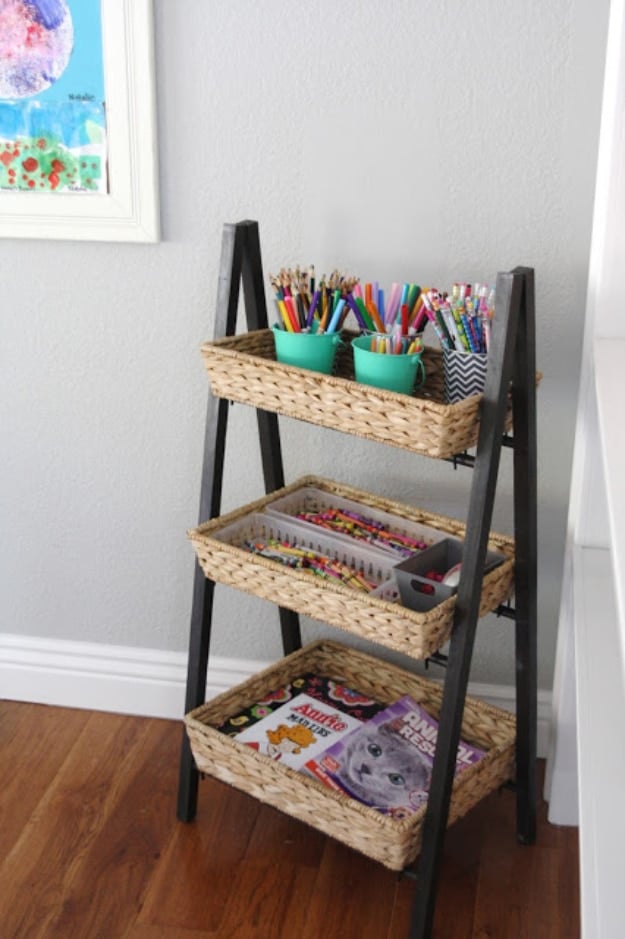
Sometimes the answer is one good piece of furniture. A tiered ladder shelf with woven baskets tucks into a corner, takes no real floor and still holds everything. Small decorative tins inside the top baskets keep the washable markers, twistable crayons, coloring pencils and plain pencils separate instead of jumbled, with one tin for erasers, scissors and tape. Crayons go in a container in the second basket, coloring books flat in the bottom one. Magazine files on the shelf alongside take the cardstock and construction paper upright, which is the only way paper stays flat. None of the containers need to be expensive.
Get the full tutorial at Simply Organized.
17. DIY Matchbox Car Storage
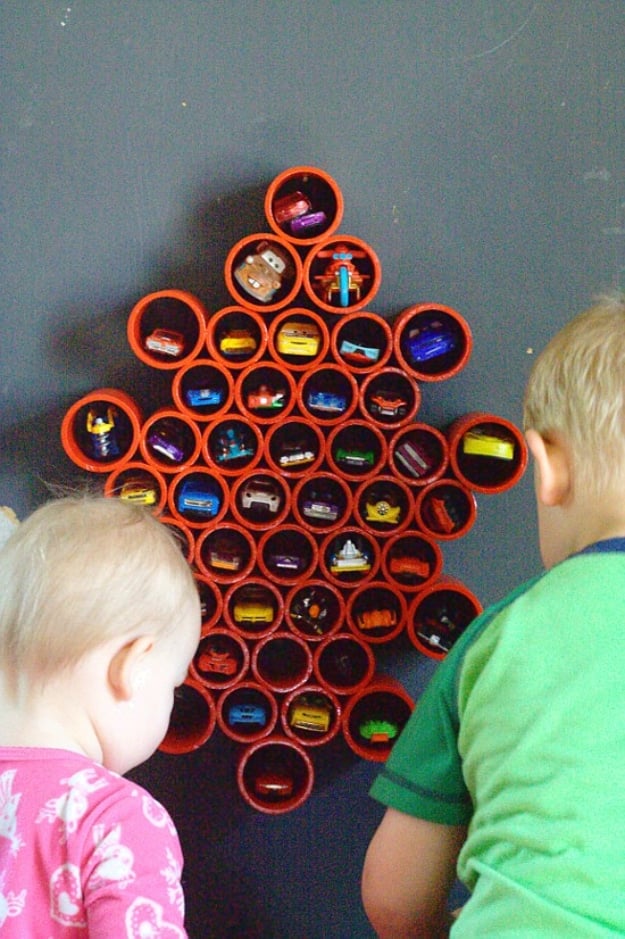
Little cars in a bin are noise and nothing else. Cut into three inch lengths and glued into a diamond, two and three inch PVC pipe turns the collection into a wall display where every car is visible and every car has a parking space. Clean each cut end with PVC primer before the cement or the joints will let go, arrange the whole diamond dry before you glue anything, then spray paint it outdoors in several light coats. Drill through the top piece and hang it on a ninety degree hook. Cut more lengths than you think you need. Everyone underestimates how many cars there are.
Get the full tutorial at The Gracious Wife.
18. Dress Up Headquarters

A dead dresser from the back of a shed becomes the best thing in the room. Gut it, saw out the drawer supports, nail a piece of plywood into the base and paint the whole shell. Staple batting to the inside walls, stretch fabric over the batting, then hot glue ribbon along the edges to hide every staple. A spring curtain rod wedges across the opening for the hangers, labeled bins on the floor of it take the gloves and the headbands, and decorative knobs screwed to the outside hold necklaces on one side and hats on the other. Using what was already in the house, this one cost two dollars and twelve cents.
Get the full tutorial at A Turtles Life For Me.