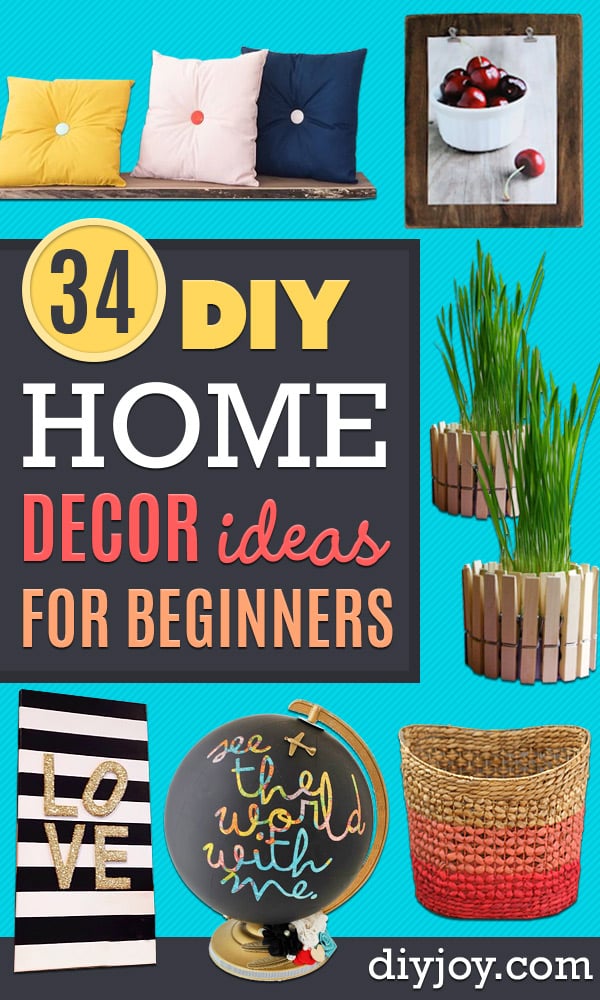
Nobody’s first home decor project is the pegboard wall. It’s usually a vase, some tape and a can of spray paint, and that’s exactly where this list starts. These 24 DIY home decor ideas for beginners go from a fifteen minute basket made out of $3 worth of paint stir sticks up to a full plywood pegboard, and most of them sit closer to the paint stick end. You’ll find a tuna can turned into a planter, burnt out light bulbs wrapped into twine pears, a headboard that is only paint, and three pendant lights built out of wooden bowls. Pick by the tools you own rather than by the photo: anything glued, taped or wrapped is doable tonight, and the plant stand and the clock want a saw and a free Saturday.
24 Easy DIY Home Decor Ideas
Table of Contents
- 24 Easy DIY Home Decor Ideas
- 1. Upcycled DIY Light Bulb Mini Planter Tutorial
- 2. DIY Dreamy Dreamcatcher
- 3. DIY Tin Can Desk Organizer Tutorial
- 4. Bandana Pillows
- 5. Giant Pegboard DIY
- 6. DIY Midcentury Plant Stand
- 7. DIY White Brick Vase
- 8. Colorful Headboard
- 9. DIY Punch Rug Artwork for Beginners
- 10. DIY Glass Terrariums
- 11. DIY Modern Table Runner
- 12. DIY Yarn Chandelier
- 13. Lightbulb Pear
- 14. Clothespin Planter
- 15. Confetti Decorative Letters
- 16. DIY Glitter Love Canvas
- 17. Metal Flower Bicycle Wheel Wreath
- 18. DIY Photo Clipboards
- 19. Pendant Lights
- 20. Paint Stick Basket
- 21. Twine Wrapped Cabinet Hardware
- 22. DIY Confetti Tray
- 23. Roman Numeral Clock
- 24. DIY Flower Wall Hanging
1. Upcycled DIY Light Bulb Mini Planter Tutorial
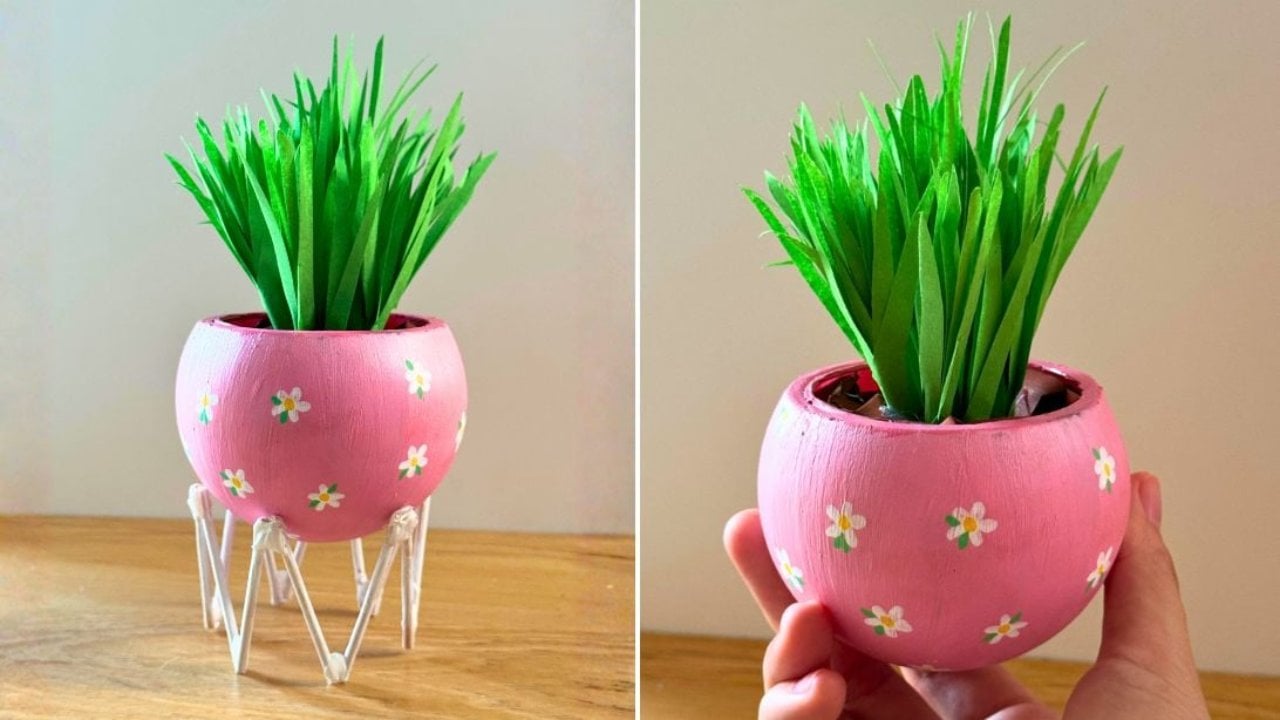
A dead bulb is not rubbish, it’s a glass globe you already paid for. The round part becomes the planter body, and because the shape is already there the whole project comes down to cleaning it out, standing it up and filling it. Succulents suit it best since they want almost no soil, though artificial or paper plants work just as well and never need watering on a desk nobody sits at. Paint the glass, draw on it, or leave it clear so the roots show. It is a spring craft, a desk piece and a way to stop throwing glass away, all at once.
Get the full tutorial at DIY Joy.
2. DIY Dreamy Dreamcatcher
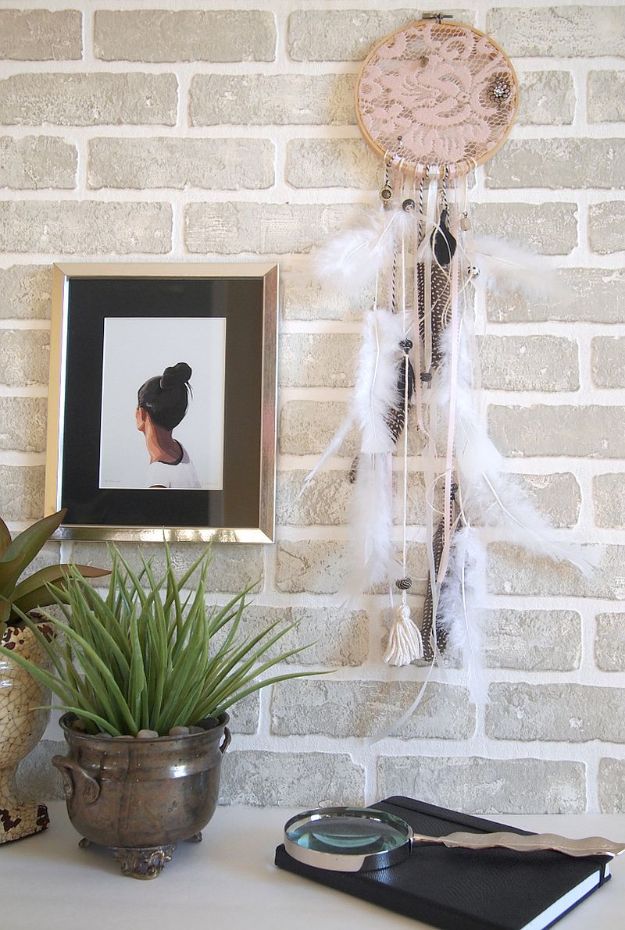
An embroidery hoop, a piece of lace and a handful of feathers, and the hoop size is entirely yours to pick. Lay the lace over the inner ring, drop the outer ring back on, center the pattern and pull the edges tight before you trim right up against the wood. Loose weave fabric slips, so a dot of glue at the rim saves the whole thing sagging in a month. After that it’s tying: ribbon, string, twine, wool, whatever you have, in varied widths so the tail reads as texture rather than fringe. Keep every knot on the back and the front stays clean.
Get the full tutorial at Thalita Murray for Decoist.
3. DIY Tin Can Desk Organizer Tutorial
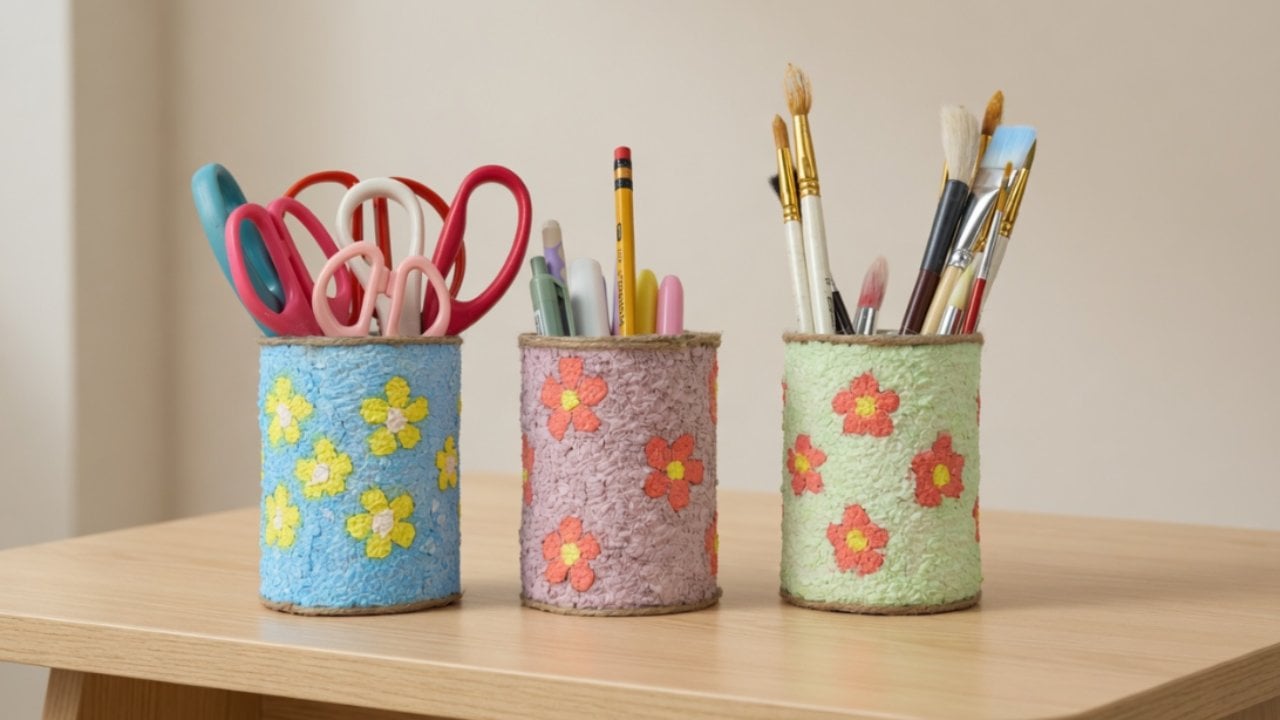
Empty tin cans, tissue paper, paint and a paper mache technique, which together turn the recycling into storage that does not look like recycling. The paper mache layer is what does it: it hides the ridges and the label glue and gives the paint something to sit on, so the finished can reads as a pot rather than a soup tin. Group two or three at different heights for pens, scissors and brushes. The floral finish shown is one option and the shape takes any color scheme, so it can match a desk you already like instead of fighting it.
Get the full tutorial at DIY Joy.
4. Bandana Pillows
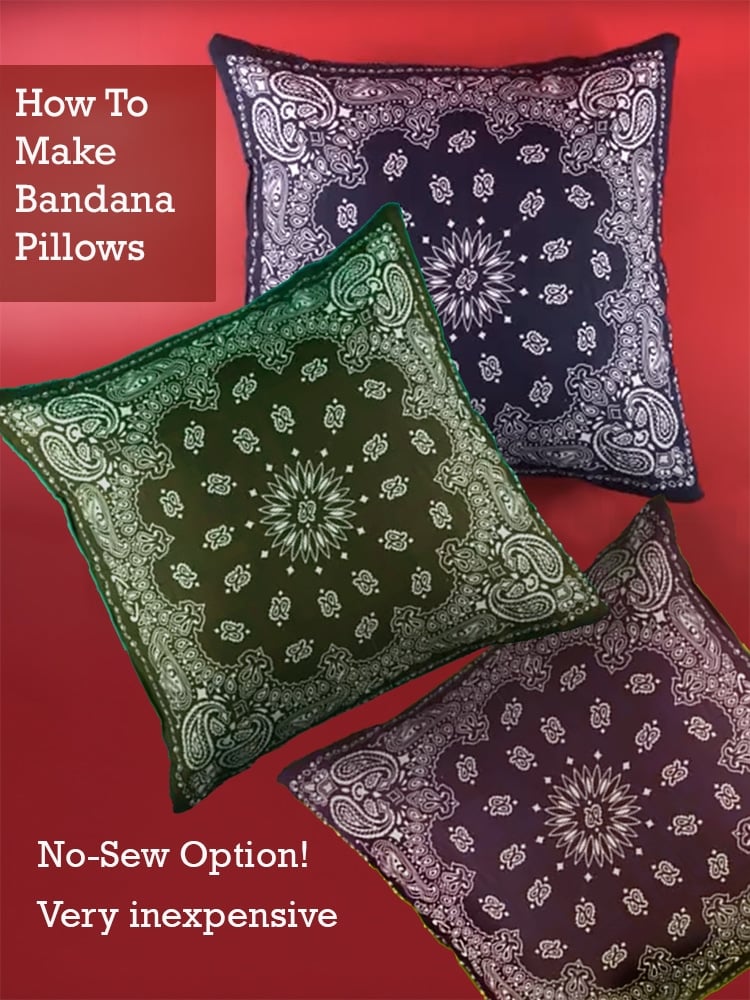
Dollar store bandanas, and that is the entire reason this one works. A pillow comes out at a couple of dollars, which means a whole sofa’s worth costs less than one cushion in a shop, and buying the bandanas in bulk drops it further. There is a no-sew version if a machine is not in the picture, so the project survives a total beginner. The paisley print does most of the design work by itself, and the finished pillows genuinely do not look like anything sold in stores. Good as Christmas and housewarming gifts made ahead in a batch.
Get the full tutorial at DIY Joy.
5. Giant Pegboard DIY
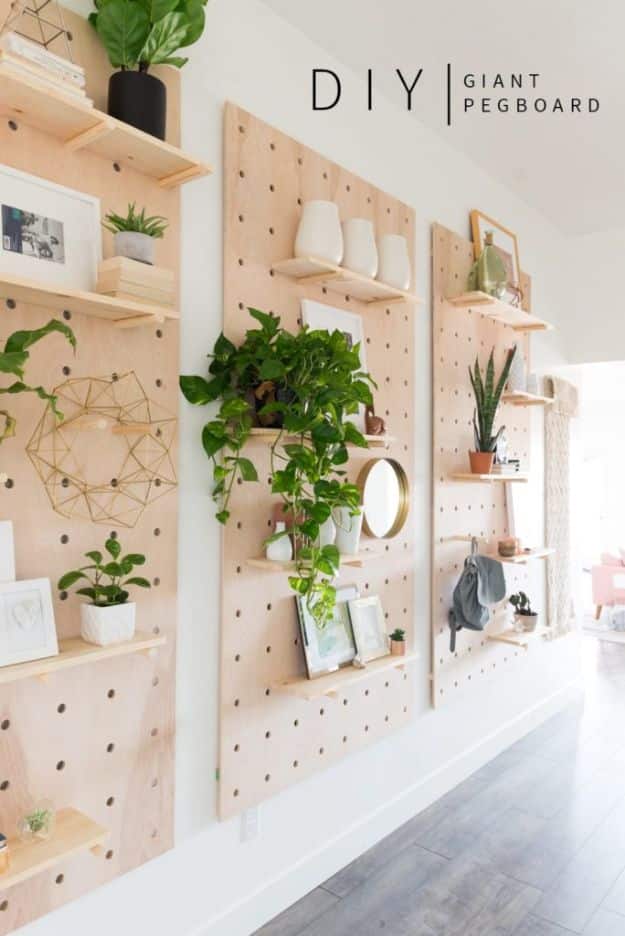
This is the big one on the list and the only project here that needs a truck. Each panel is a 4×8 sheet of half inch plywood with a sheet of ordinary pegboard used as the drilling guide, 1×2 framing behind it and one inch wooden dowels as the pegs. Hole spacing decides the whole look: six inches apart, with the first and last rows set three inches in from the edge so nothing lands awkwardly at the corner. A one inch Forstner bit is what keeps the holes clean. Because the pegs move, one wall becomes shelves, art hanging and coat storage by turns.
Get the full tutorial at Vintage Revivals.
6. DIY Midcentury Plant Stand
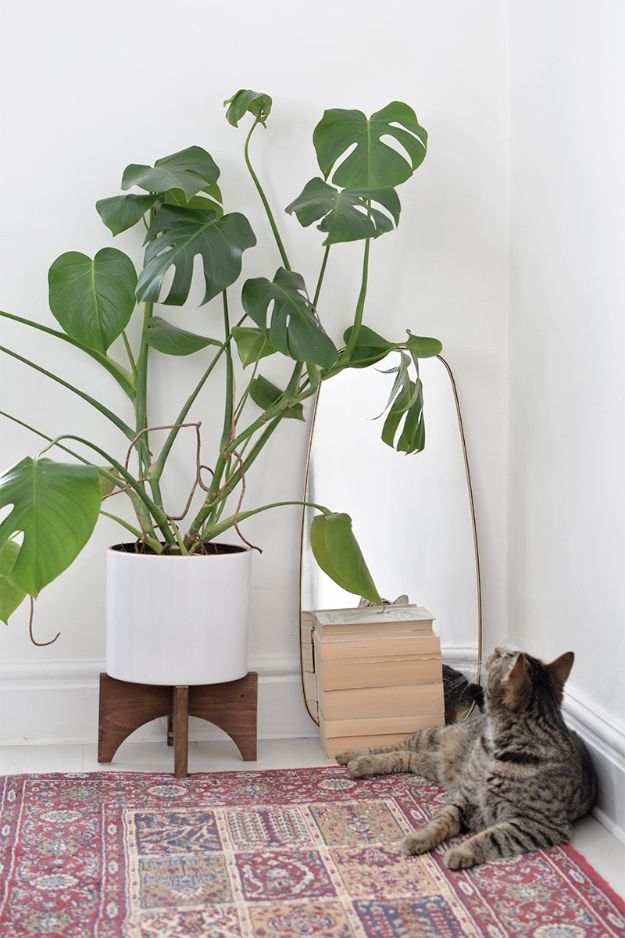
Two pieces of timber that slot into each other, which is why it looks harder than it is. Measure the pot first and build to that: 24cm pot, 25cm stand. Cut a 50cm length, mark the middle to split it into two 25cm halves, then draw round a small plate on each half to get the curved leg before cutting them apart. The two notches in the middle are the joint, and they are the only fussy bit, so cut them narrow and pare back with a chisel until the halves sit flush. Wood dye at the end is optional and takes it from pine to mid century.
Get the full tutorial at Caroline Burke, Burkatron.
7. DIY White Brick Vase
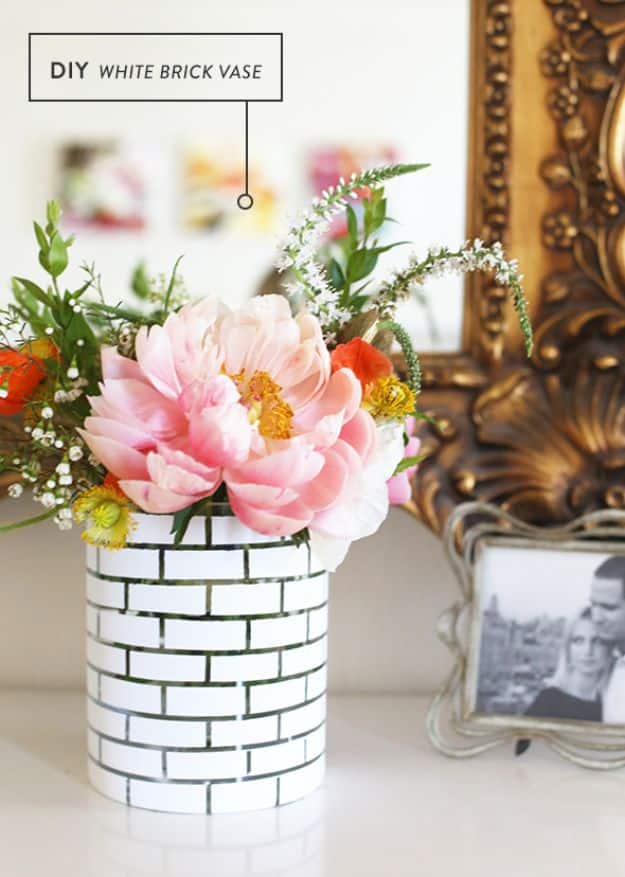
Tape and spray paint on a jar you already own, and it takes about ten minutes of actual work. Very thin masking tape gets wrapped round the glass in even horizontal lines roughly half an inch apart, then short pieces go on vertically about an inch apart to break those bands into bricks. Cover the base with wide painters tape, spray white, let it dry, peel. Anywhere the paint has crept under an edge scrapes straight off glass with a knife, which is the part that makes this forgiving. It turns a supermarket vase into something worth putting peonies in.
Get the full tutorial at Liz Stanley, Say Yes.
8. Colorful Headboard
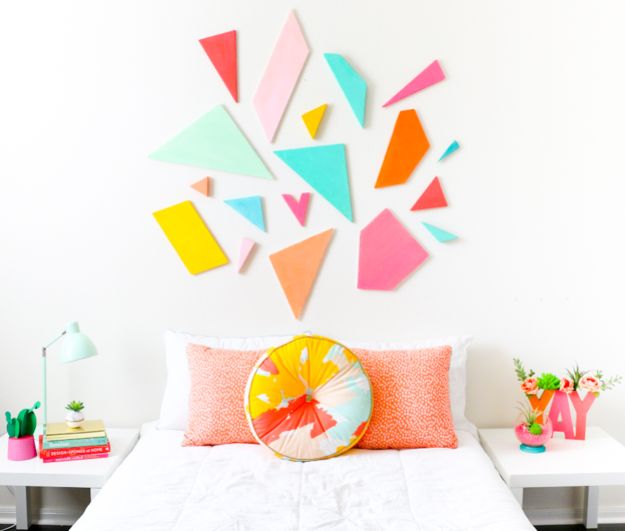
There is no headboard here at all, which is the point. Painted geometric shapes go straight on the wall above the bed in coral, mint, yellow and pink, arranged loosely so the cluster reads as a headboard without anything being attached to anything. That makes it the cheapest bed upgrade going and the easiest to undo, which matters in a rental or a room a child will have outgrown by spring. Keep the shapes varied in size and let a few drift away from the middle; an evenly spaced grid kills it. Pull one shade into the pillows and the whole wall pulls together.
Get the full tutorial at Kara, A Kailo Chic Life.
9. DIY Punch Rug Artwork for Beginners
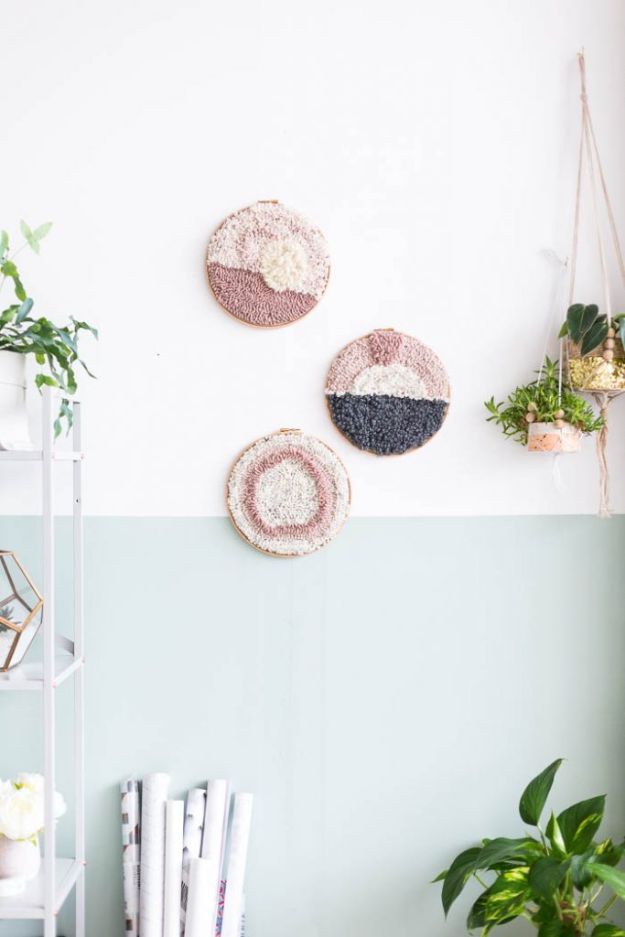
Punch needle has a reputation for being expensive to start, and this tutorial exists to argue with that. The needle used has a thicker point and an adjustable length, which means it takes chunky yarn straight from the stash instead of the specific wool most guides insist on, and the backing is plain hessian rather than a branded monk’s cloth. The result is three small round hoops rather than a rug, so a first attempt is an hour rather than a month. Half the technique here comes from careful research and half is frankly improvised, and it is honest about which is which.
Get the full tutorial at Fall For DIY.
10. DIY Glass Terrariums
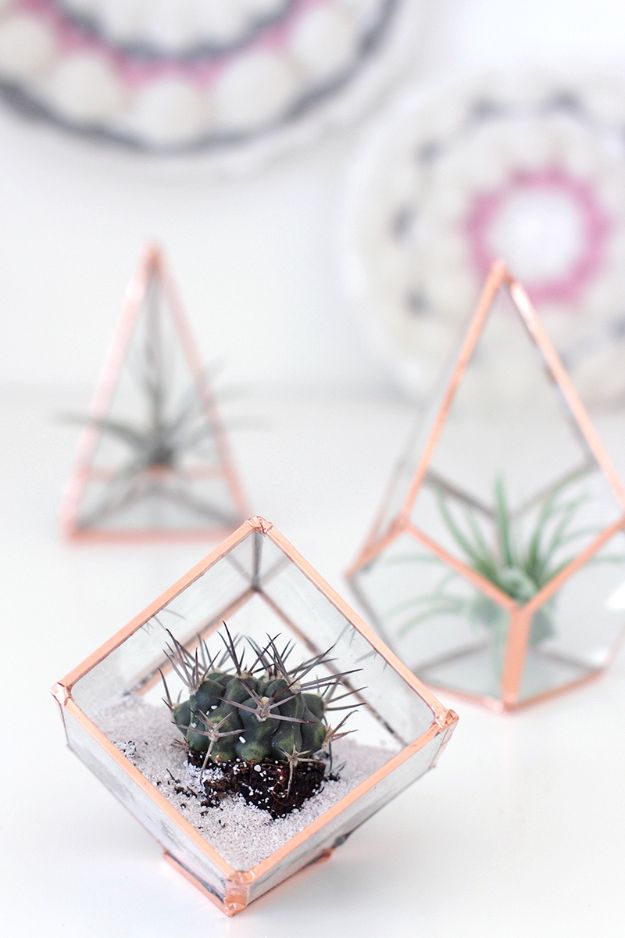
Copper edged geometric terrariums, and the creator is unusually straight about the difficulty: she had never cut glass before, found it extremely hard, and nearly did not publish the tutorial at all. That honesty is worth more than the project. Acrylic sheet is offered as the sane alternative and behaves the same way with the copper foil and E6000. Print the template, practice cuts on scrap before touching your good glass, and wear the gloves and goggles, which are listed for a reason. Finished, they hold air plants happily, and succulents only if the seams are genuinely sealed.
Get the full tutorial at Why Don't You Make Me.
11. DIY Modern Table Runner
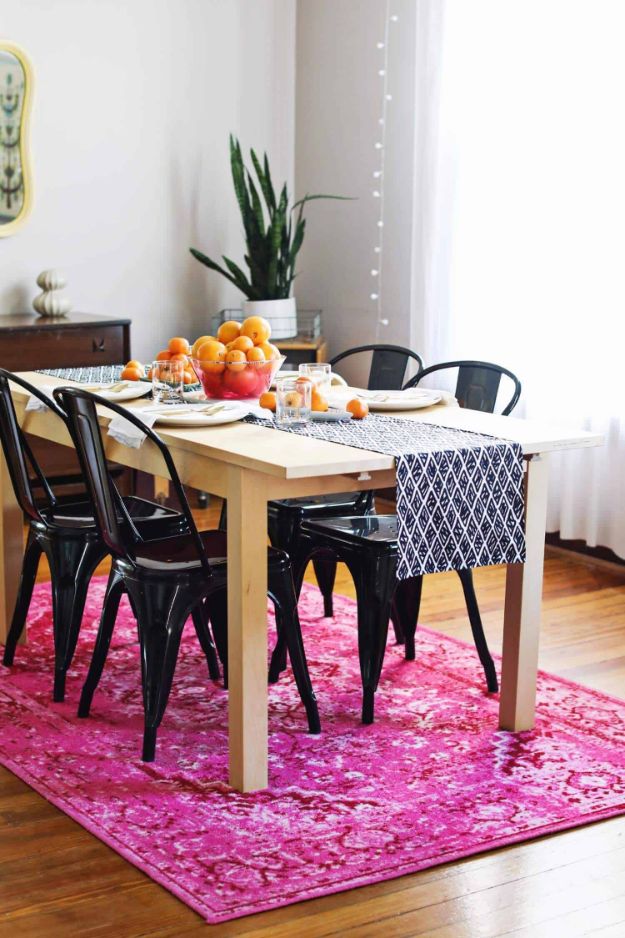
Straight lines only, and the maths is the entire tutorial. Measure the table, add two feet if you want the runner to drape over the ends, and cut two lengths of cotton at 15 inches by whatever that total is; a six foot table takes an eight foot runner, so 15 by 98. Prewash and dry the fabric before you cut or the first wash will shorten it for you. Pin right sides together, sew, turn, press. The same cut, made shorter, gives matching placemats, and pom pom trim on the ends is the one flourish worth adding.
Get the full tutorial at Rachel Denbow for A Beautiful Mess.
12. DIY Yarn Chandelier
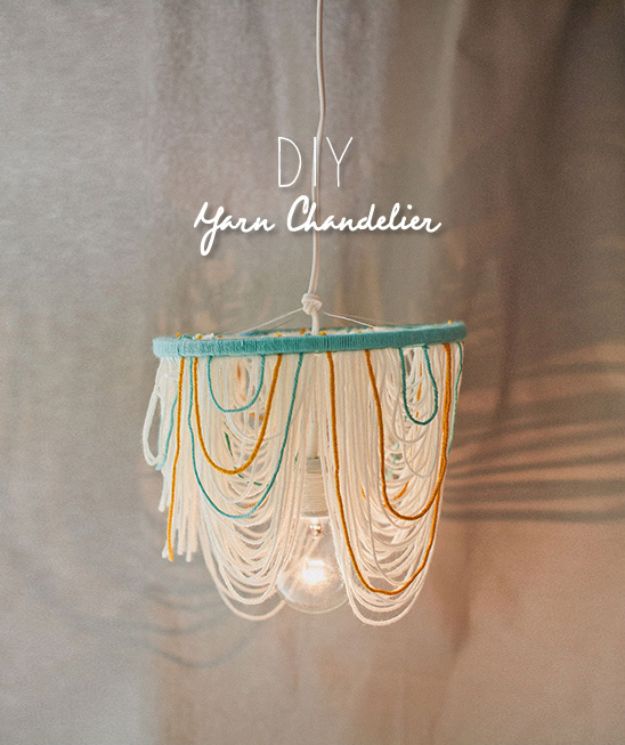
A twelve inch sewing hoop, a cord, a bulb and a lot of yarn. The inner hoop gets wrapped in double stick tape first, which is what holds the loops in place while you work, then yarn is looped round it until it is full and the loops hang in swags below. A few strands in a contrast color go in afterward rather than being planned, so the color reads scattered instead of striped. The outer hoop is wrapped in a third color and clamped over the top. An Edison bulb is the right finish, and the shade casts almost no heat.
Get the full tutorial at Lindye Galloway with Your Cloud Parade, on Wedding Chicks.
13. Lightbulb Pear
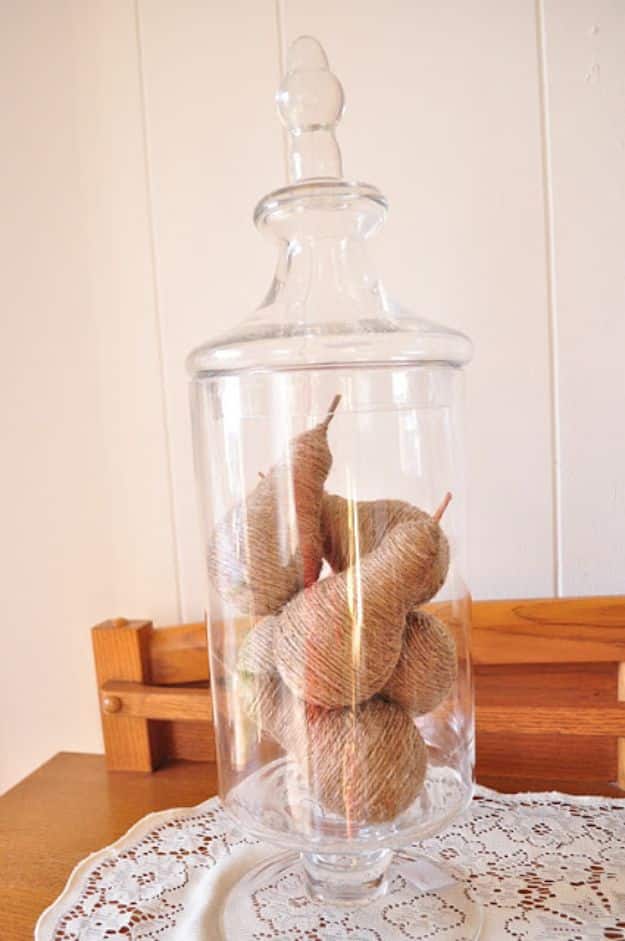
Burnt out bulbs, twine and a stick from the garden, and the shape does all the work because a light bulb is already pear shaped. Cut a short piece of stick for the stem and hot glue it to the narrow end, then glue the twine down at the base of that stem and start wrapping. Keep the wraps tight and add glue every few turns, and add considerably more once you reach the wide part of the bulb, where twine slides off if you let it. A jar of them makes an inexpensive gift, and they cost whatever the twine cost.
Get the full tutorial at 906 E. Chic.
14. Clothespin Planter
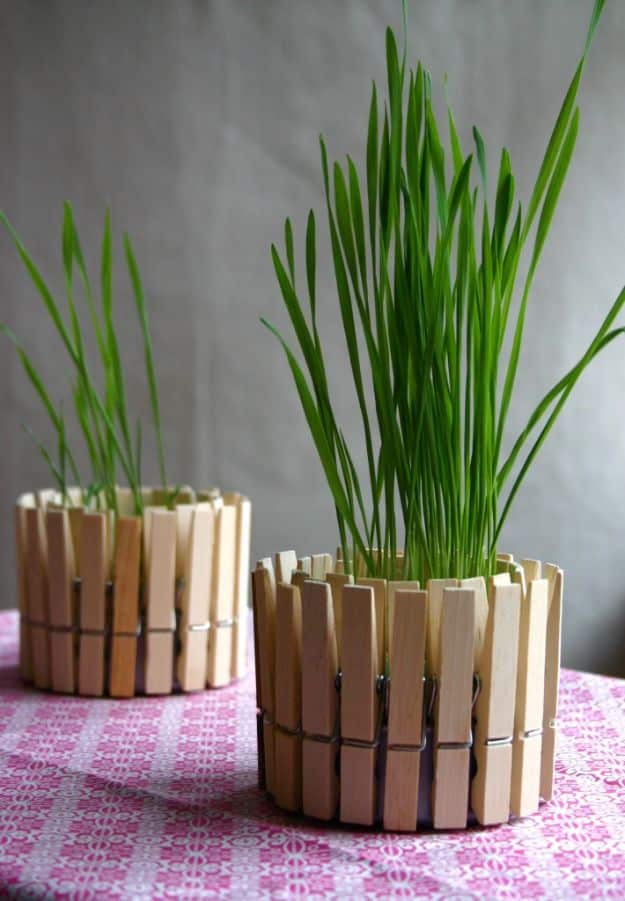
A five ounce tuna can with clothespins clipped all the way round the rim, and that is genuinely the whole build. No glue, no cutting, nothing sharp, which is why the creator pitches it at children making something for their mother. Construction paper hearts tuck into the gaps between the pins, so the decoration changes with the occasion. The plant inside is wheatgrass grown in a wax paper cup, though any small pot slips in. Drop a glass votive in instead of a plant and the same can becomes a candle holder for a spring table.
Get the full tutorial at Camilla, Family Chic.
15. Confetti Decorative Letters
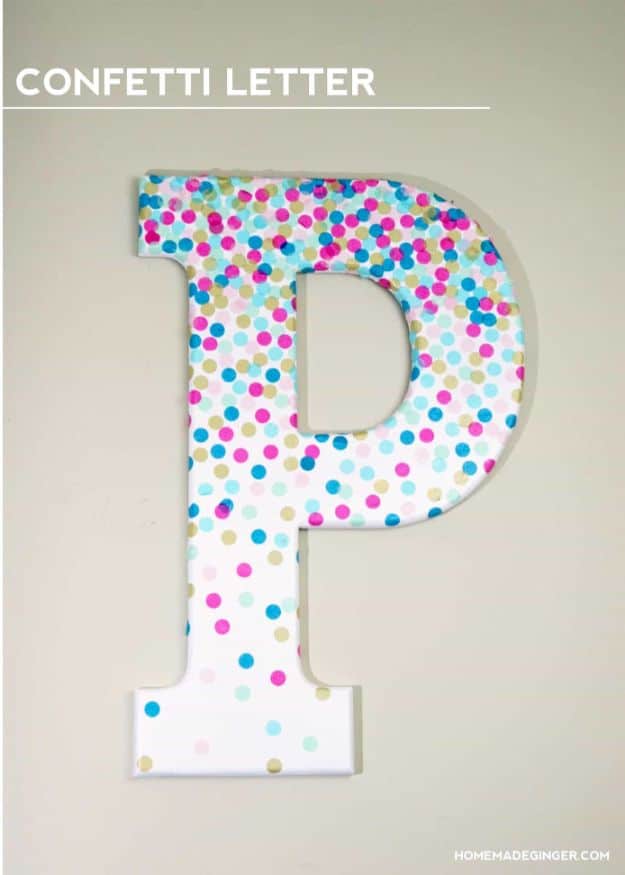
Tissue paper punched into dots with a large hole punch, then decoupaged onto a wooden letter, and it needs no skill whatsoever. Paint the letter first if the color it came in is wrong; white under bright confetti is what keeps the dots reading as confetti rather than mud. The only real technique is working in small sections, because Mod Podge grabs fast and a whole letter’s worth of glue will skin over before you have placed half the dots. Gloss or matte both work. One letter suits a nursery, a row of them spells something over a desk.
Get the full tutorial at Mod Podge Rocks.
16. DIY Glitter Love Canvas
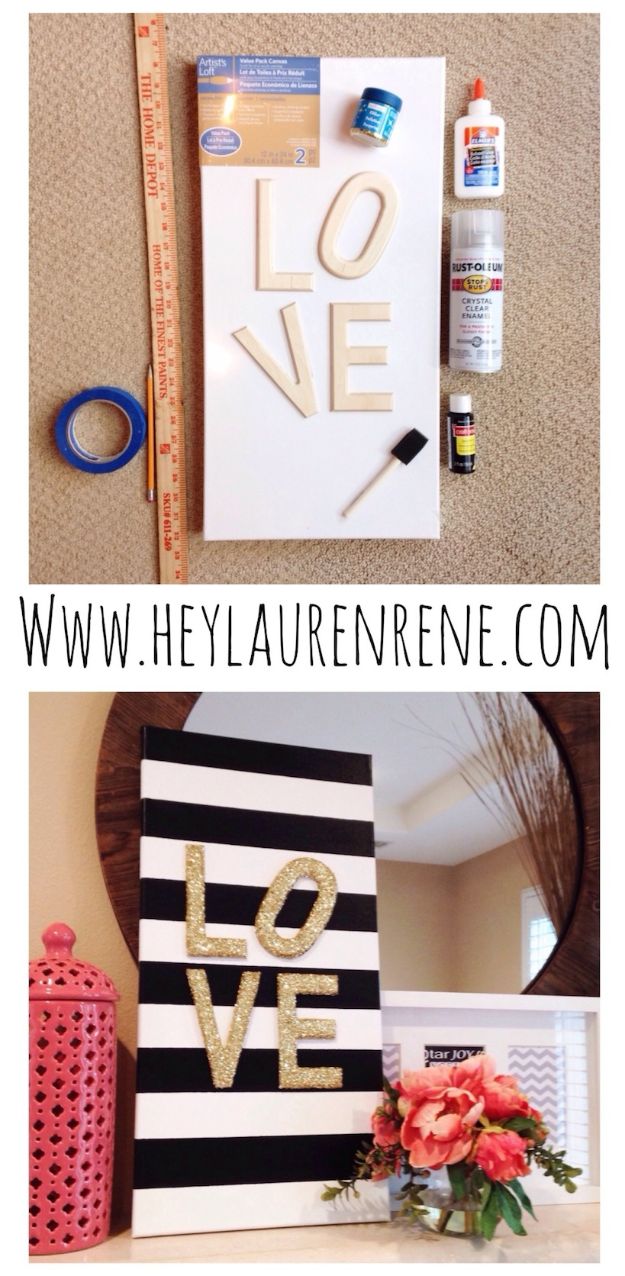
Wooden craft letters glittered separately, then glued onto a painted canvas, which is the order that matters. Coat each letter in Elmer’s glue with a sponge brush, lay them on newspaper and pour the glitter on generously, then shake the excess off onto a second sheet so you can save it. Give them a couple of minutes to set and hit them with clear enamel spray, which is the step that stops gold glitter migrating around the house for the next year. The canvas underneath is black gloss acrylic on a 12 by 24, marked out with a yardstick and painters tape.
Get the full tutorial at Hey Lauren Rene.
17. Metal Flower Bicycle Wheel Wreath
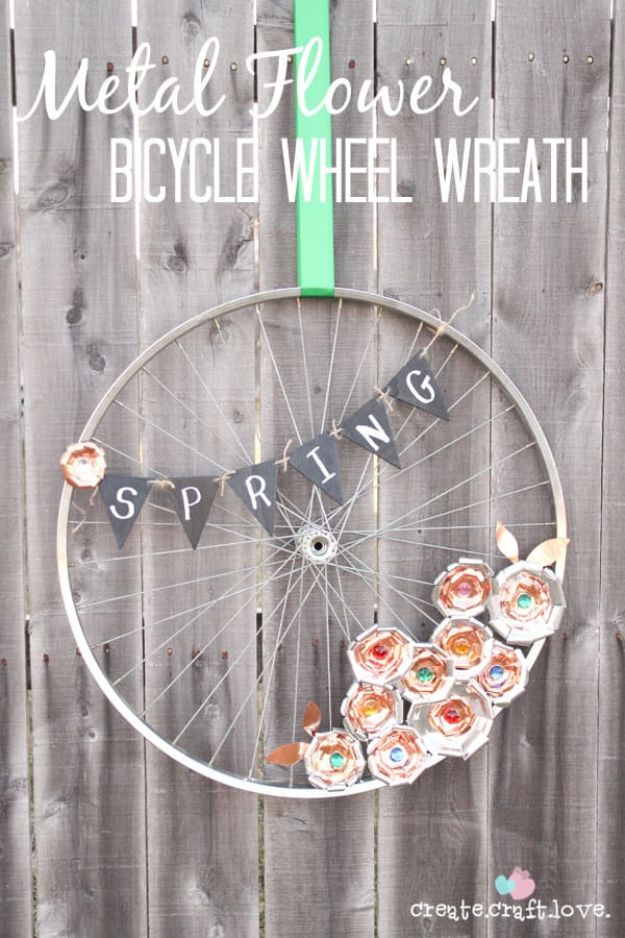
A bare bicycle wheel makes the frame, which is why this reads as a wreath and not a hoop of greenery. The flowers are cut from aluminum and copper craft metal on a Cricut, then shaped by hand, glued with E6000 and centered with large rhinestones. Metal is the right material for a front door: it does not fade in sun, does not sag in rain and survives a whole season outside where a fabric wreath would not. A small fabric banner strung across the spokes is what makes it seasonal, so the same wheel changes word by word through the year.
Get the full tutorial at Create Craft Love.
18. DIY Photo Clipboards
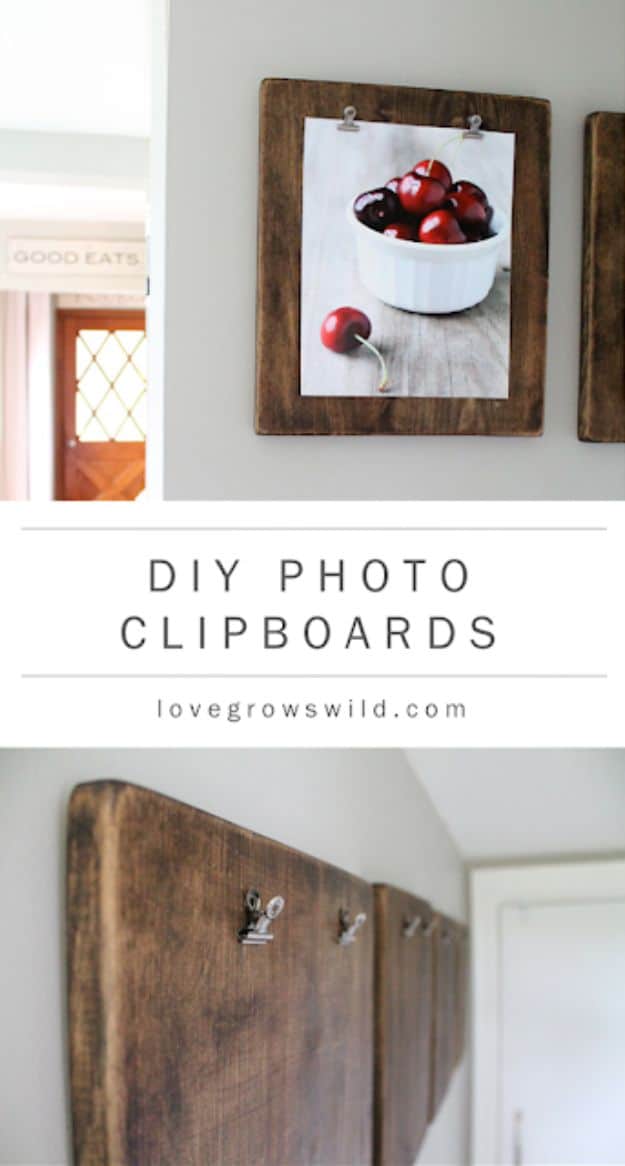
Stained wooden clipboards hung in a row, with the photographs simply clipped in. The whole idea is that nothing is permanent: no frames to open, no mounts to cut, no nail holes when the picture changes. They were hung high along a narrow kitchen wall specifically so nobody’s shoulder catches them walking past, which is the kind of detail you only get from someone who lives with it. Print at a standard size so every board takes any photo, then swap them by season, by holiday, or whenever the last set stops feeling current.
Get the full tutorial at Love Grows Wild.
19. Pendant Lights
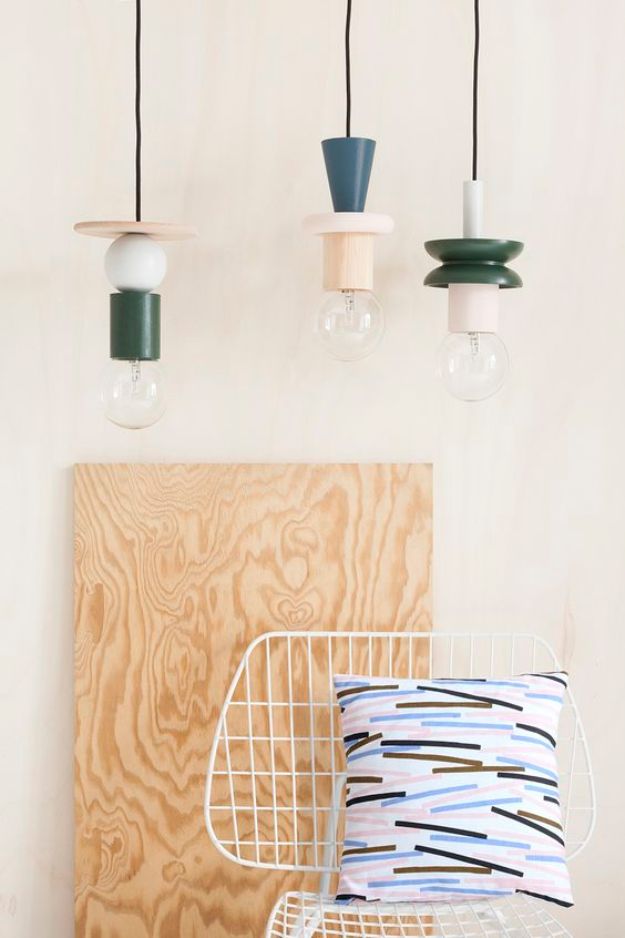
Three bare bulbs on black flex, each one wearing a stack of painted shapes, hung at staggered heights over a plywood panel. The clever part is what the shapes actually are: a wooden pencil pot, a couple of small wooden bowls, a polystyrene ball, a ring and a cone, a cardboard tube. Each piece is drilled through the middle and threaded onto the fabric cable like a bead, then painted, at least two coats, or left as raw wood for contrast. Stagger the drop lengths or three identical pendants read as shop fitting. Against raw plywood the painted shapes look deliberate, which is a cheap trick worth stealing for a rented kitchen.
Get the full tutorial at Helene Pinaud and Julien Schwartzmann, Heju.
20. Paint Stick Basket
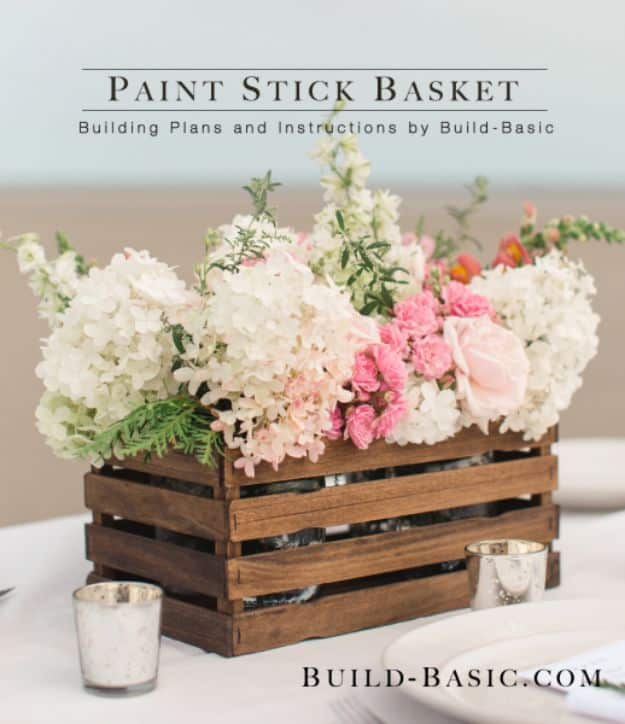
Three dollars and fifteen minutes, which is the most honest cost and time pair on this list. Twenty paint stir sticks, a half inch square dowel and 3/8 inch staples, with the cut list doing the thinking for you: eight sticks at seven inches for the short sides, eight at twelve for the long sides, four at 11 3/4 for the floor and six dowel pieces at 5 1/4 for the corner posts. Overhang each stick an eighth of an inch at the corners for the lapped look, and color the staples with a paint pen so they vanish into the stain.
Get the full tutorial at Build Basic.
21. Twine Wrapped Cabinet Hardware
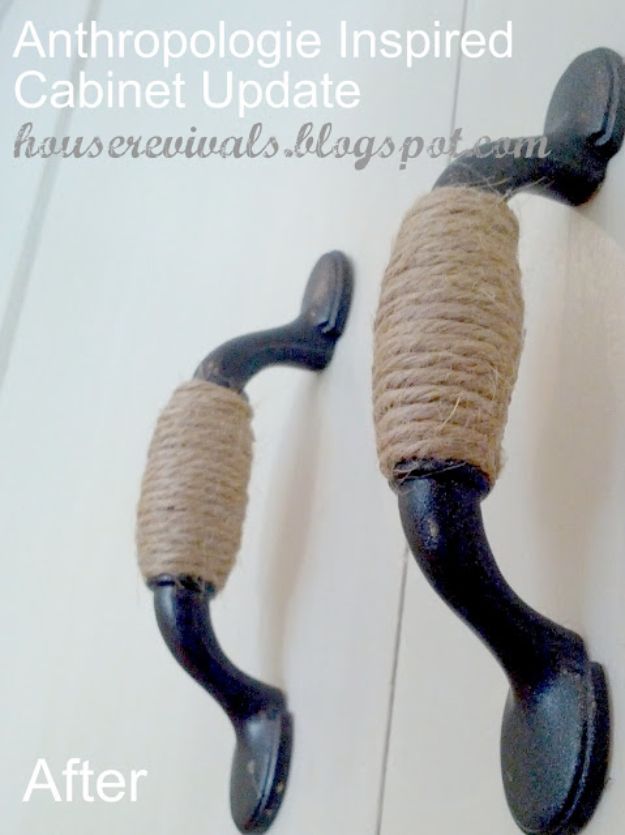
Under five minutes a handle once the paint is dry, which makes a whole kitchen an evening rather than a project. The existing handles come off, get cleaned, primed and sprayed in oil rubbed bronze, and then jute or cotton twine is wrapped around the middle section only, leaving the mounting ends bare so everything screws back exactly where it was. Start with an over and under knot, tuck the tail back and wrap over it, then hide the last tail under the loops with a dot of clear drying glue. Nothing is drilled and nothing is replaced, which is the part that matters in a rental.
Get the full tutorial at House Revivals.
22. DIY Confetti Tray
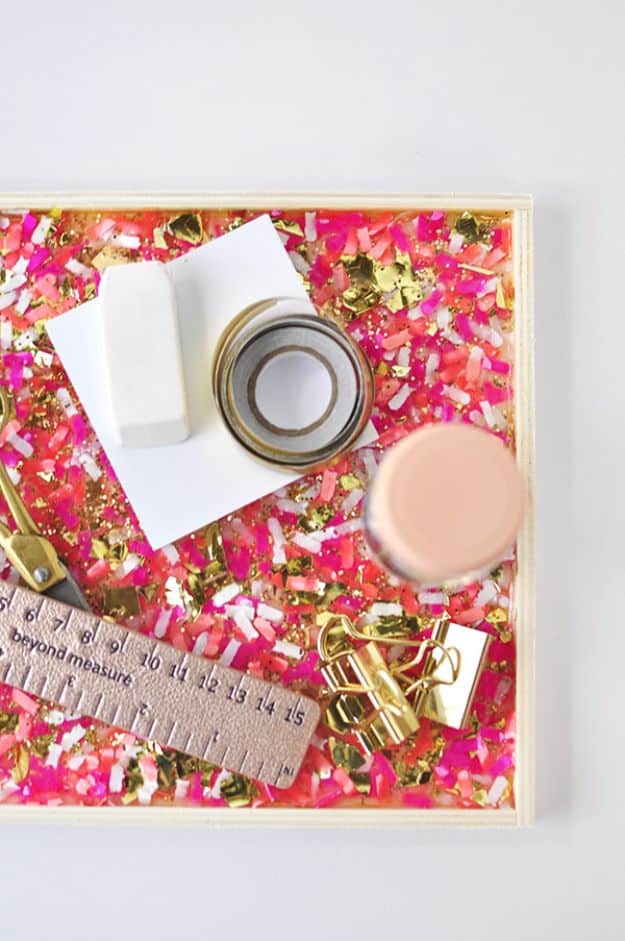
Paper confetti scattered under a layer of Mod Podge Dimensional Magic, which pours out thick and self levels into what looks like poured resin without any of the mixing or the fumes. The creator reshot this one two years after making it and posted both sets of photos side by side, because the paper had kept drying and the finish had shifted from hot pink toward coral. That is worth knowing before you pick your confetti: the color you seal in is not quite the color you will have later. Either way it makes a bright catch all for a desk.
Get the full tutorial at Delineate Your Dwelling.
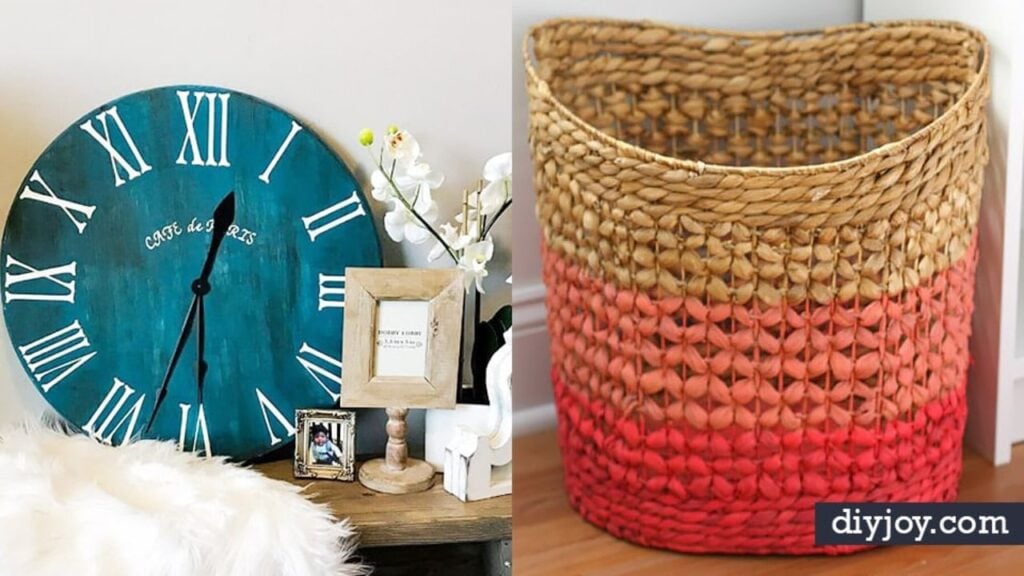
23. Roman Numeral Clock
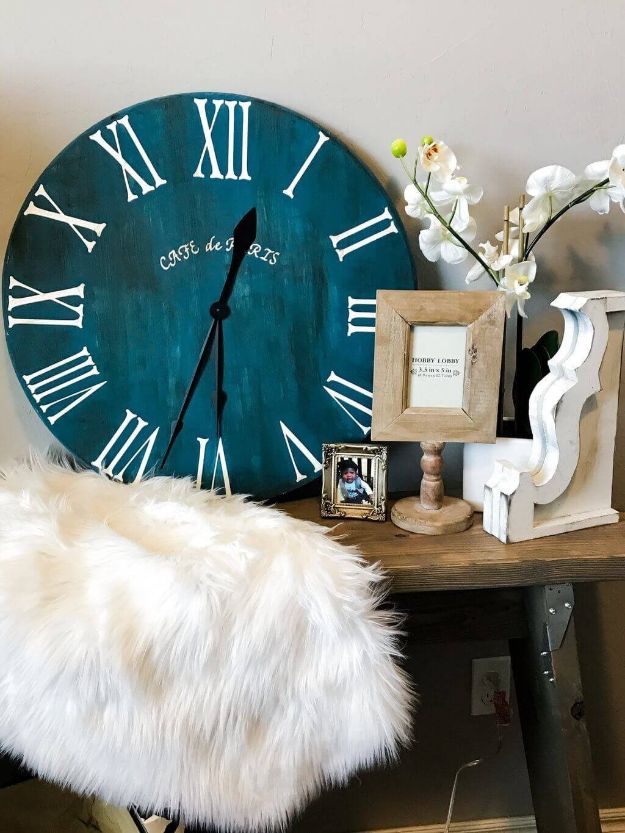
A 24 inch wooden round from the hardware store, a Roman numeral decal and two colors of paint, with no woodworking at all. Sizing is the one place this goes wrong: the decal is sold for a 24 inch face and one big chain’s pre-cut rounds come up slightly under that, so check the round against the decal before you buy either. Chalk paint is the choice here purely because it dries fast enough to keep working. Press the decal down with a credit card or a scrap block, then lift the transfer layer slowly so the letters stay behind on the wood.
Get the full tutorial at Handmade Haven.
24. DIY Flower Wall Hanging
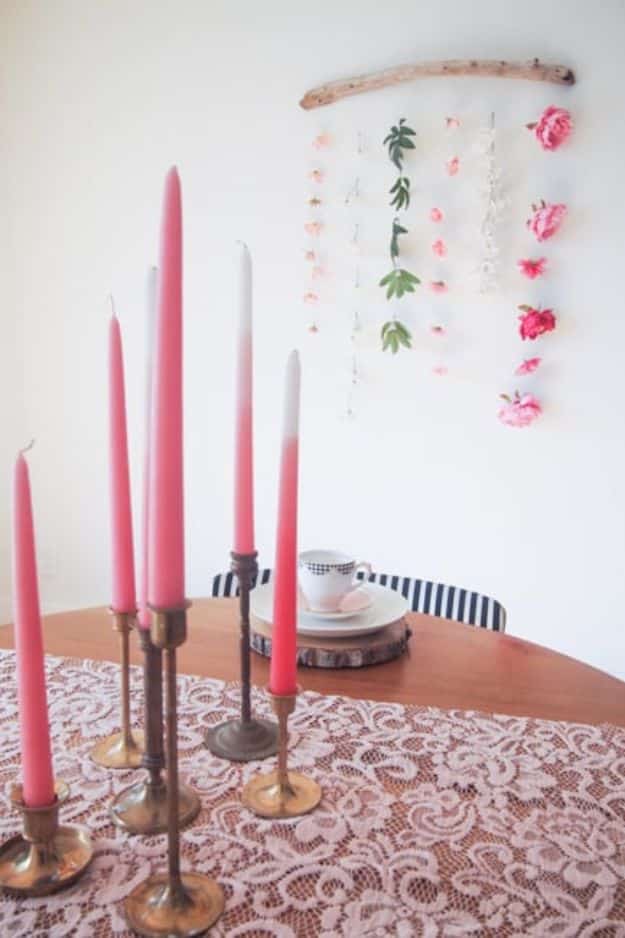
Zero dollars, because every flower on it was already in the house. Faux blooms and leaves are threaded onto lengths of thread and hung in loose vertical lines from a piece of driftwood, spaced so the wall shows between them rather than crowded into a curtain. Faux is the right call and not a compromise here: real flowers would be brown within the week and this hangs happily for a season. Uneven spacing and different strand lengths are what stop it reading as a craft store kit. Candles on the table in front finish the whole corner.
Get the full tutorial at The Learner Observer.