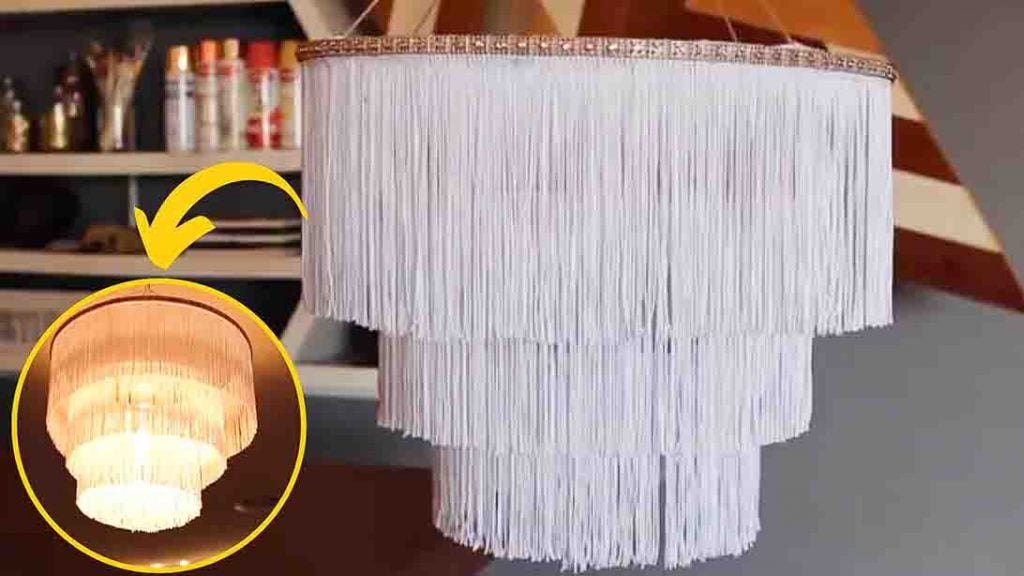
Are you looking for a weekend DIY project? Try making this DIY chandelier from Living to DIY with Rachel Metz on Youtube! This DIY is a fun and easy project you can do while hanging out with your friends. You can make this and hang it with a light or not; it’s totally up to you. Mine has a light, and it’s beautifully hung in my bedroom. It’s also an inexpensive DIY project, with the materials all from Dollar Tree. Watch the video tutorial below to learn the step by step instructions.
Materials:
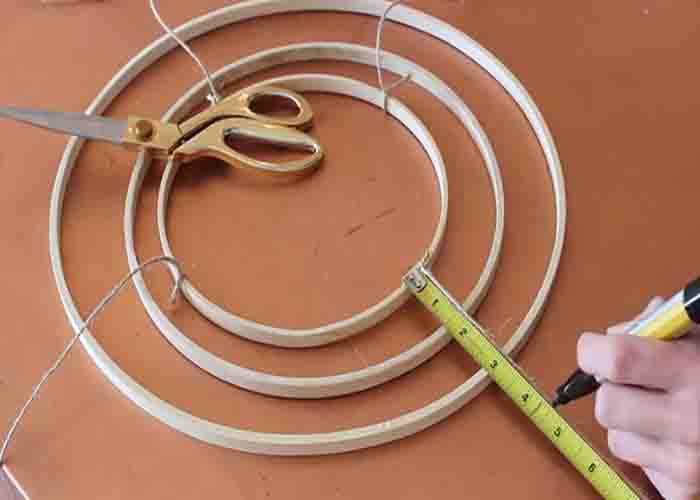
- 8″, 10″, 14″ embroidery hoop
- rope (or yarn)
- fringe (the same color as your rope)
- measuring tape
- sharpie
- hot glue
- scissors
- trim
- spray paint (the same color as your fringe)
Directions:
Step 1
Disassemble the hoops, and use only the halves that don’t have the metal on them. Next, paint your hoops with the same color as your fringe and let them dry. In the meantime, grab your rope, cut four longer pieces, and start assembling the skeleton of the chandelier. Tie the strings, onto the smallest circle first, in four areas. Then, pull the first string tight, and mark it at a place that makes sense to space your chandelier out. Do this to the remaining three strings. After this, go ahead and tie that black dot up to the second hoop. Repeat what you just did from the second hoop to the biggest hoop.
[social_warfare]
Step 2
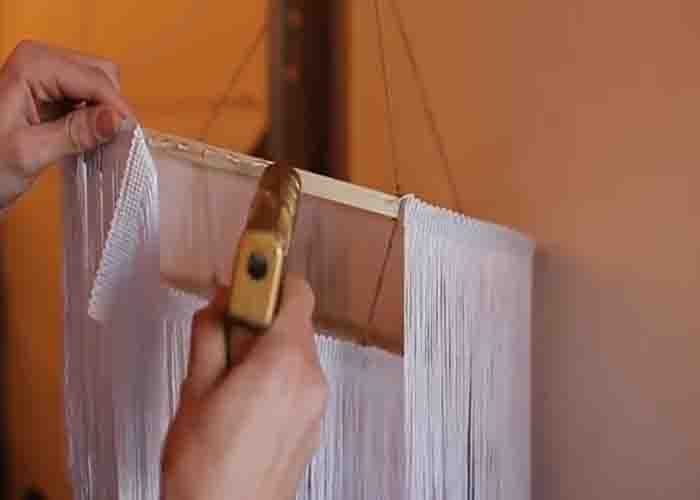
Once you’re done tying all the knots into the hoops, tie your final one where you’re going to be able to hang it. Next, flip the entire thing over and start to glue the fringe on. Put hot glue on the smallest hoop first, then attach the fringe. Cut the excess off. Continue this until you attach all the fringe down to the largest hoop. Once you’re done, trim all the fringe to get them even. Finally, hot glue your trim on.
DIY Fringe Chandelier Tutorial


