A few weeks ago, I was really into making cottagecore crafts, which means lots of magical and fairy elements are involved. I kept seeing a lot of ideas online that I realized I’ve been watching countless videos for hours already. One project that really got me interested is DIY fairy jar lamps.
I wanted a soft night light—something warm, cozy, and not too bright—and that’s exactly what this project is. What makes this even better is that it’s super easy to make, and you can use an old or empty mason jar or any glass jar (pickle jars are the best!) for this craft.

These fairy light mason jars are great for bedrooms, gifts, and little corners of the house that need softening. But, if you want to be extra creative or have more fun, you may try turning these fairy lamps into hanging ones and hang them all over your garden or yard!
RELATED: Mason Jar Fairy Lights With Pressed Flowers
What makes this project so lovable—besides how easy it is—is how personal each one feels. Every DIY mason jar fairy light turns out a little different. You can use glitter, dried flowers, and various cut-out silhouettes for each fairy lantern jar. The end result? A dreamy, homemade fairy light jar that gives off the perfect glow for a bedside table, reading nook, or calming corner. Plus, it’s a great alternative to store-bought lamps and a beautiful way to upcycle jars you already have.

Whether you call it a fairy jar lamp, a DIY fairy lantern, or a homemade fairy light jar, one thing’s for sure: you will be obsessed with making them—it’s simple, soothing, and endlessly customizable.
So if you’ve been searching for a relaxing craft that turns into something you’ll actually use (or gift!), this is it. Try making your own DIY night light fairy jar and see how a little light can make a big difference.
What You’ll Need for Fairy Light Jar

How to Make a Fairy Light Jar
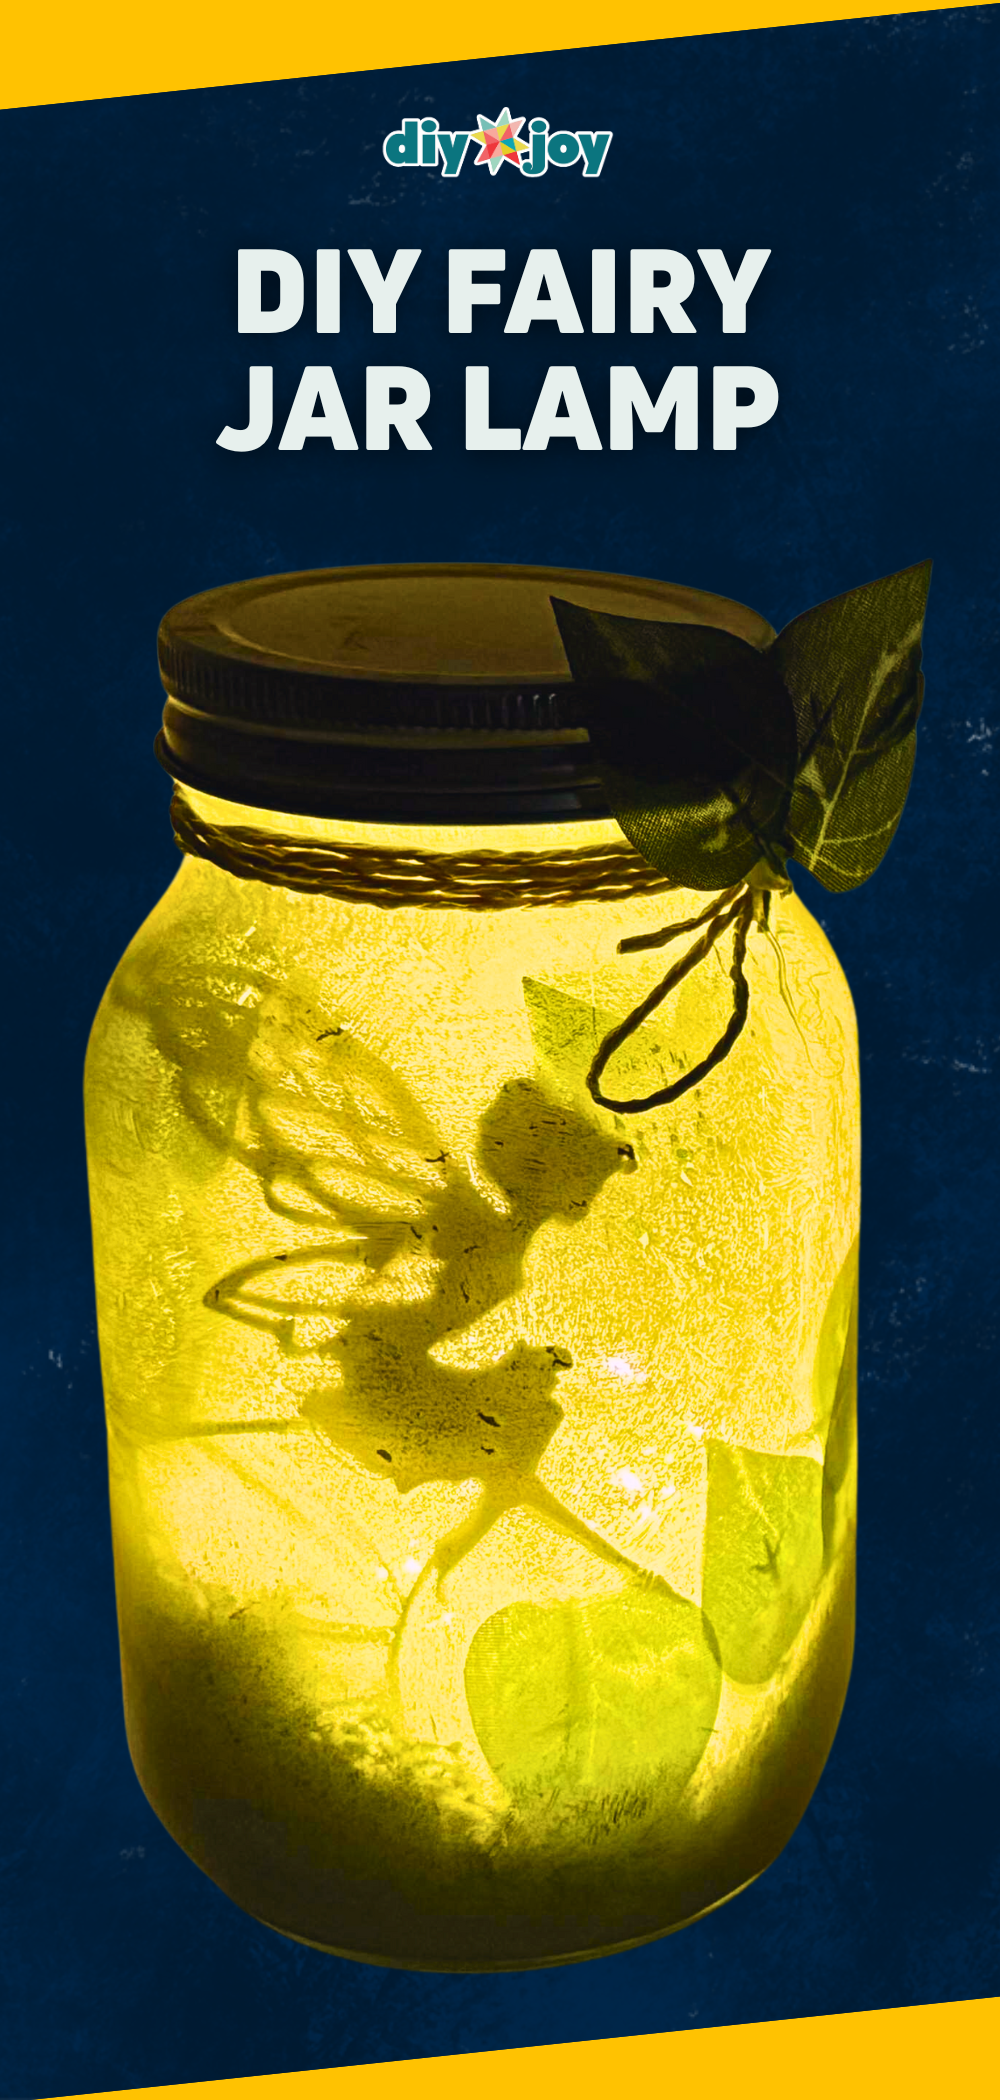
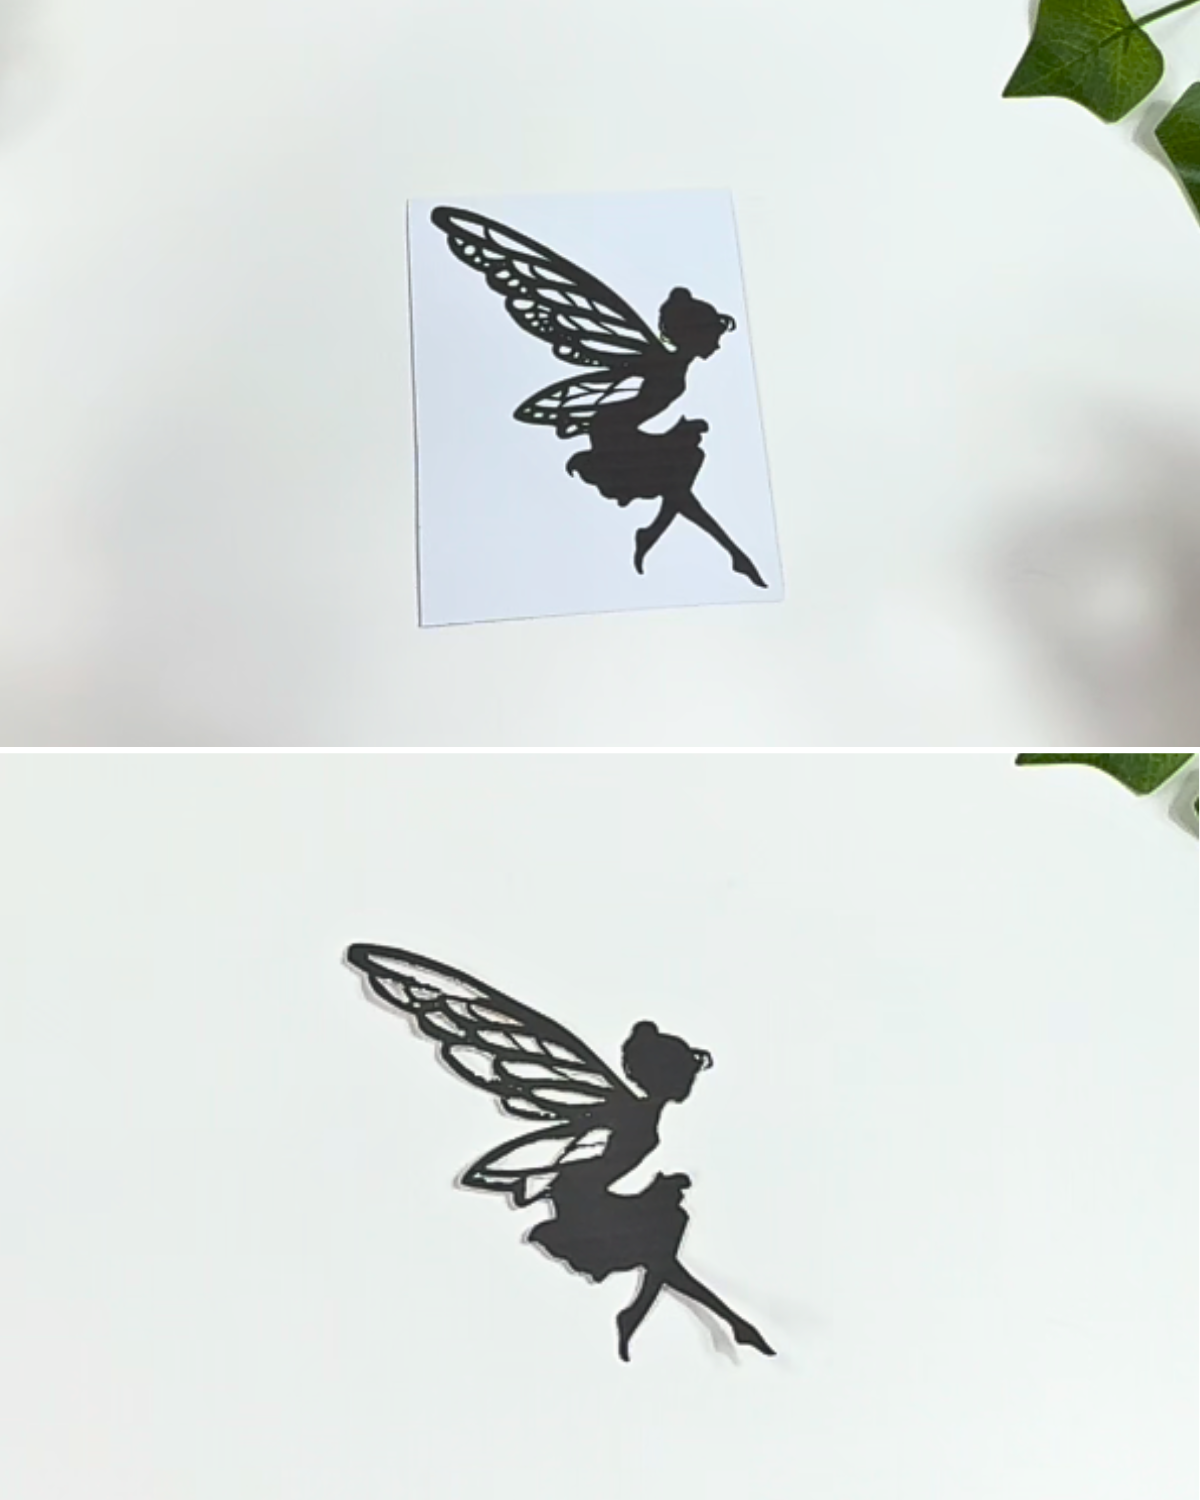
Step 1: Choosing the Pattern

Choose a fairy silhouette pattern or any pattern you want. You can combine silhouettes of trees, mushrooms, or even a house—anything you prefer! Print the pattern you choose on a piece of paper or cardstock, then cut out the shape until you’ve removed all white parts.Step 2: Painting the Jar
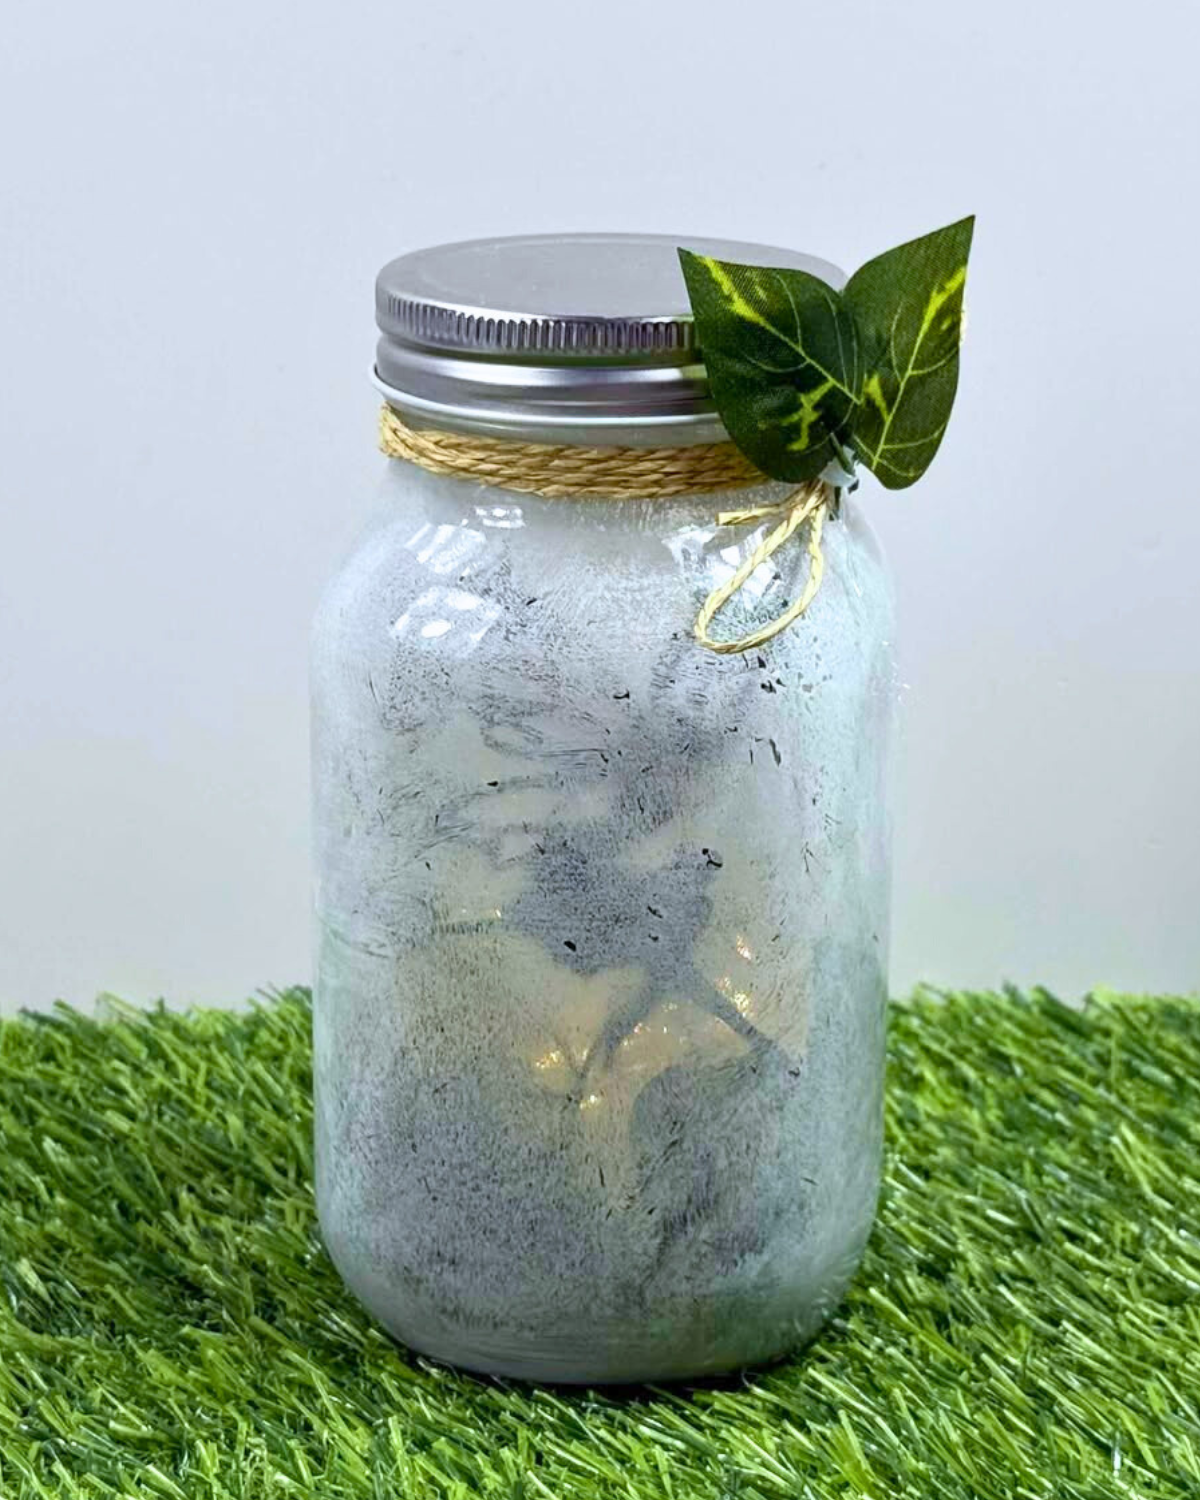
Paint the inside of the jar with white acrylic paint. But you can also use a primer paint, which has a thicker consistency and better coverage. You can either use a paintbrush or a sponge to do the job. Just make sure that the coverage is enough for the light to pass through.Step 3: Stuffing the Jar with Details
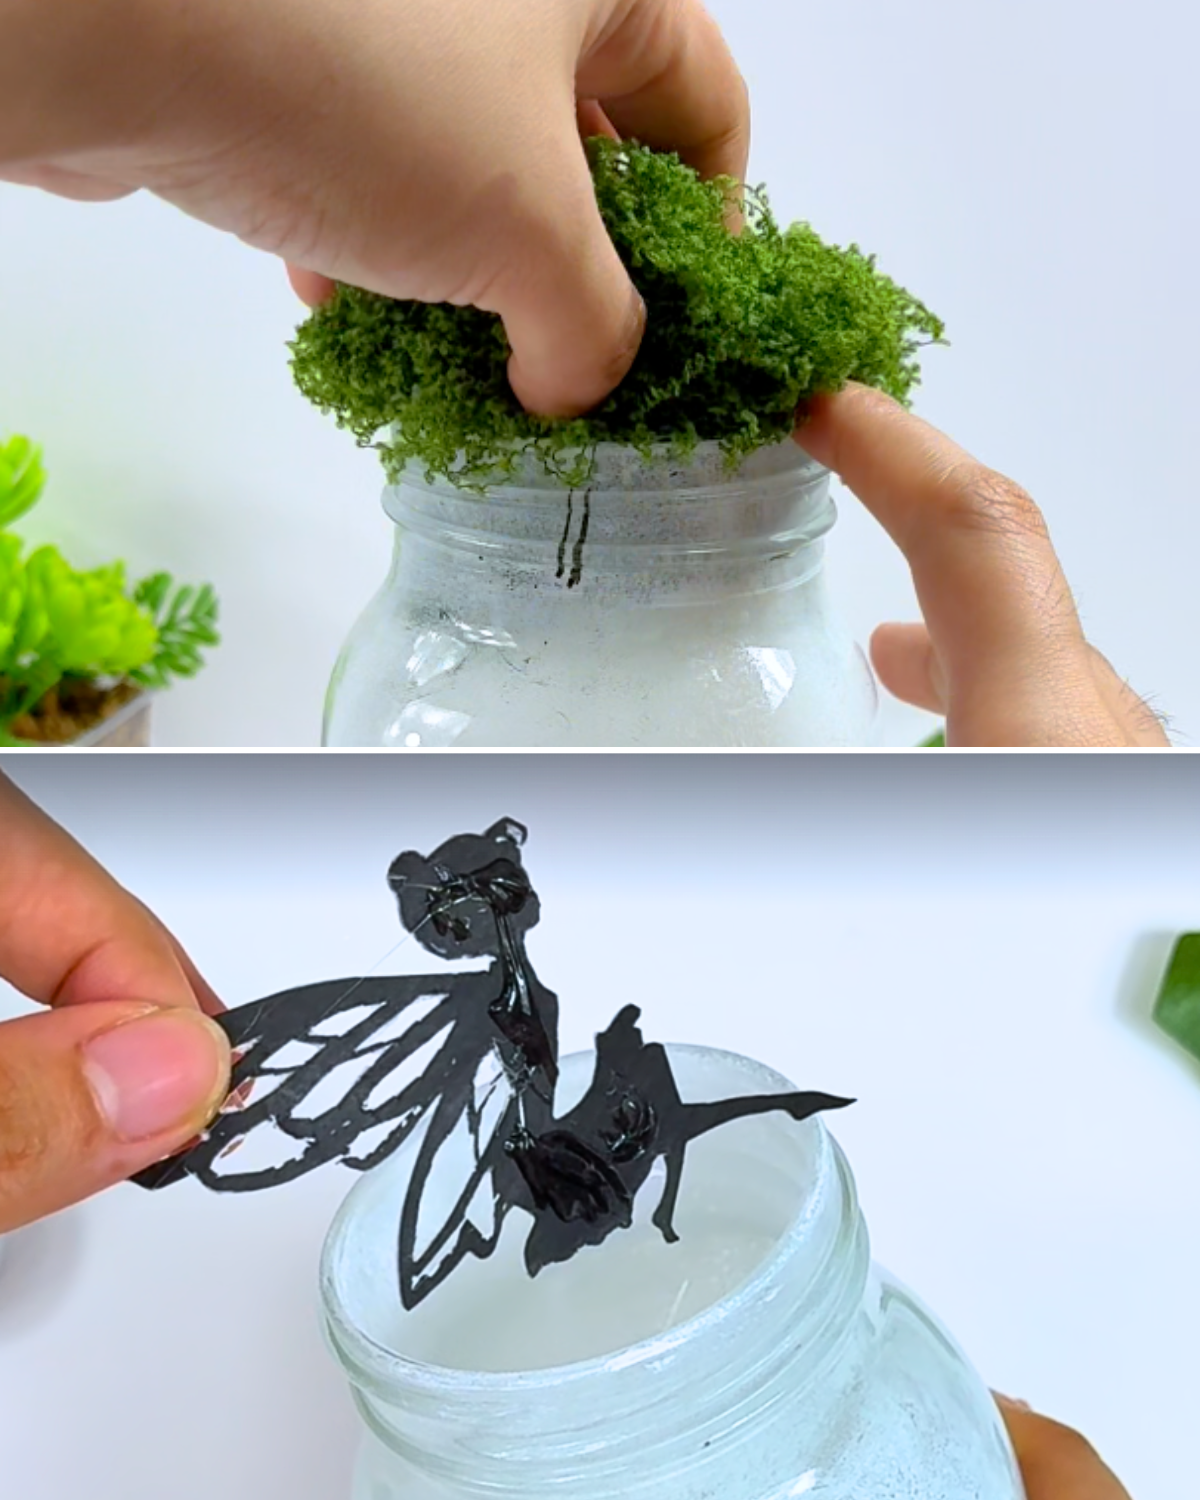
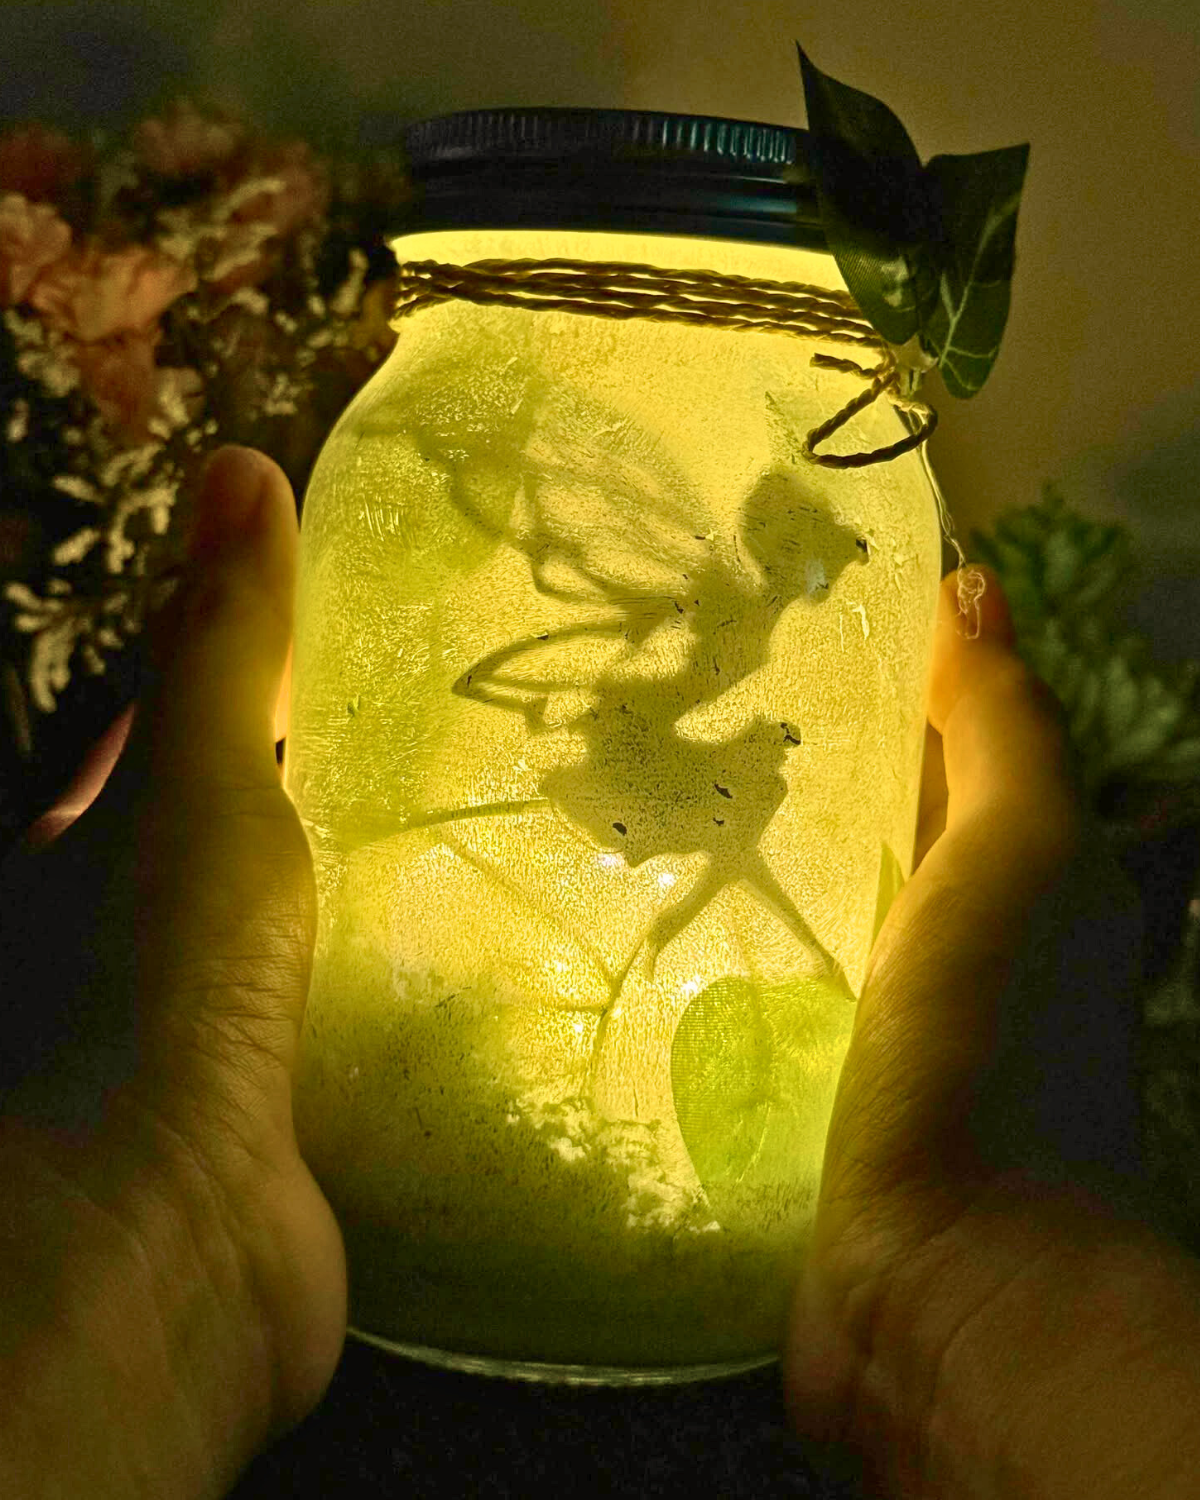
Add some fake moss to the bottom of the jar, or if you don’t have it, some crumpled tissue would work. Next, apply hot glue to the front of your silhouette cutout, then stick it to the inside of the jar.Step 4: Adding More Details
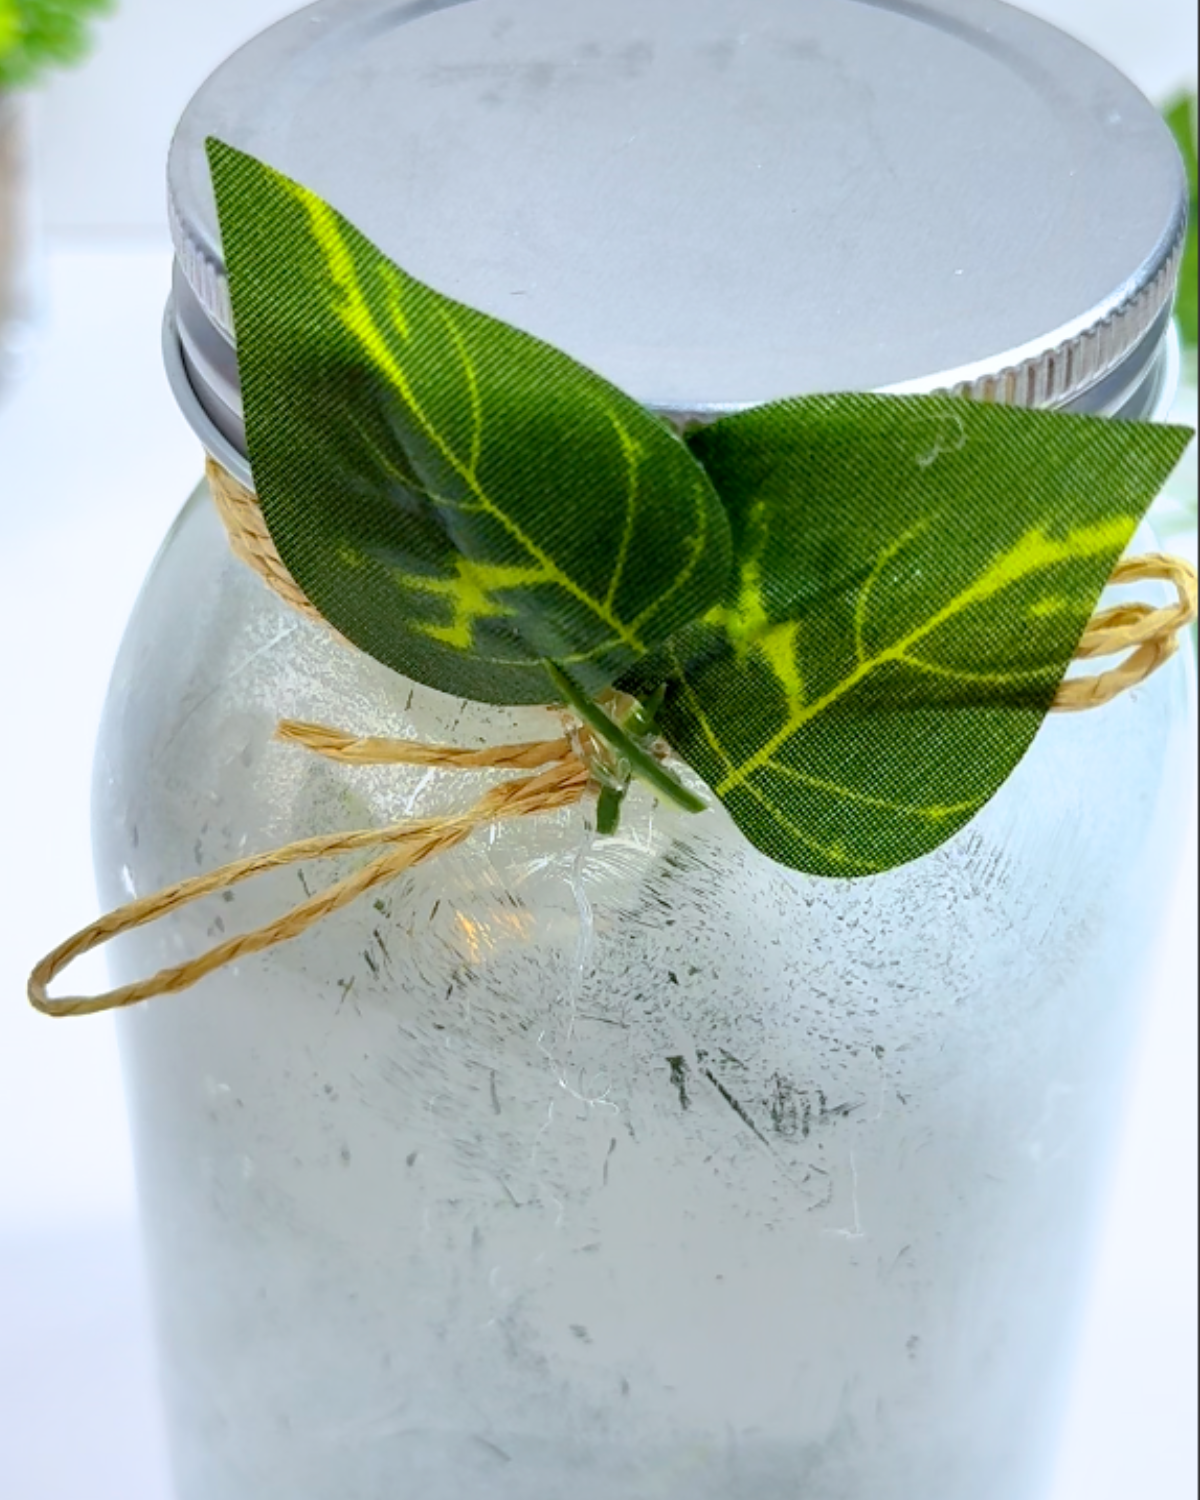
For more details, add some leaves inside the jar as well; they will cast a good silhouette along with the fairy. Once that’s settled, put a tea light inside the jar; fairy lights can also work for this project.Step 5: Decorate the Lid
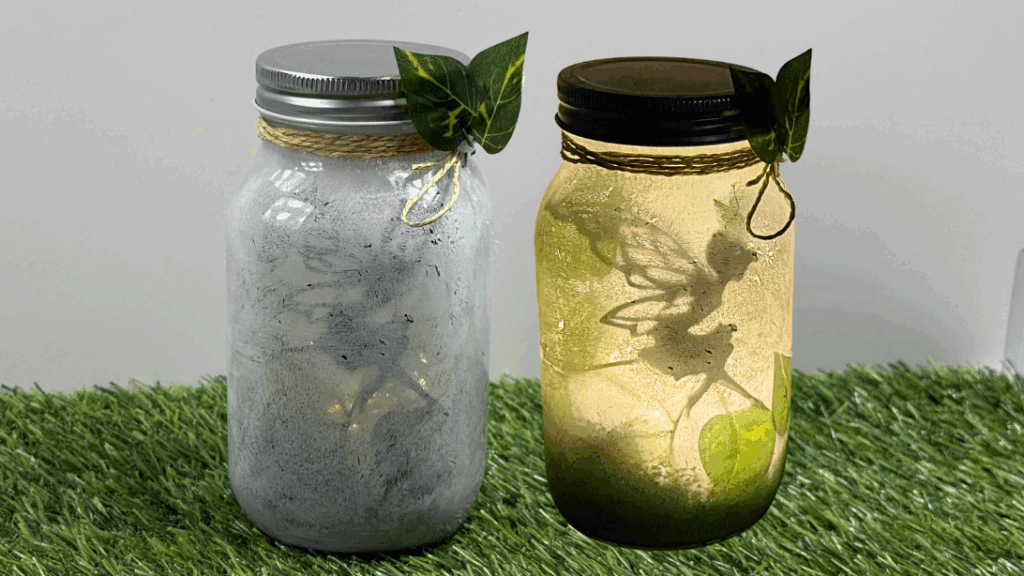
Wrap a piece of twine around the jar’s neck, then tie it tightly, and make a bow. Hot glue some leaves to the twine and watch the fairy jar lamp glow in the dark!Your fairy jar lamp is ready!
Look how pretty it is even with the lights still on, but wait until you see it in the dark!


Materials
- Mason jar or any glass jar
- Twine
- Primer or acrylic paint, white
- Scissors
- Silhouette template
- Tea light or fairy light
- Fake moss or tissue paper
- Paintbrush
- Artificial leaves
- Hot glue gun and glue sticks
![]()
Why You’ll Love This
Making this fairy light jar is the kind of DIY that doesn’t feel overwhelming. It’s quick, affordable, and can be tailored to any style or theme—whimsical, rustic, modern, or even holiday.
These make great gifts, night lights, or just lovely additions to a bookshelf or side table. And the best part? You can make it in any size that you want.
This fairy light mason jar project is also a great activity to do with kids, friends, or even just as a quiet evening craft. It requires no power tools, no expensive supplies, and no stress.

These Crafts Went Viral!

Crafts

Paper Flowers

Crafts

Paper Flowers
*If you love this craft, then visit our official website, follow our Facebook page, and subscribe to our YouTube channel for more!
Easy DIY Fairy Jar Lamp