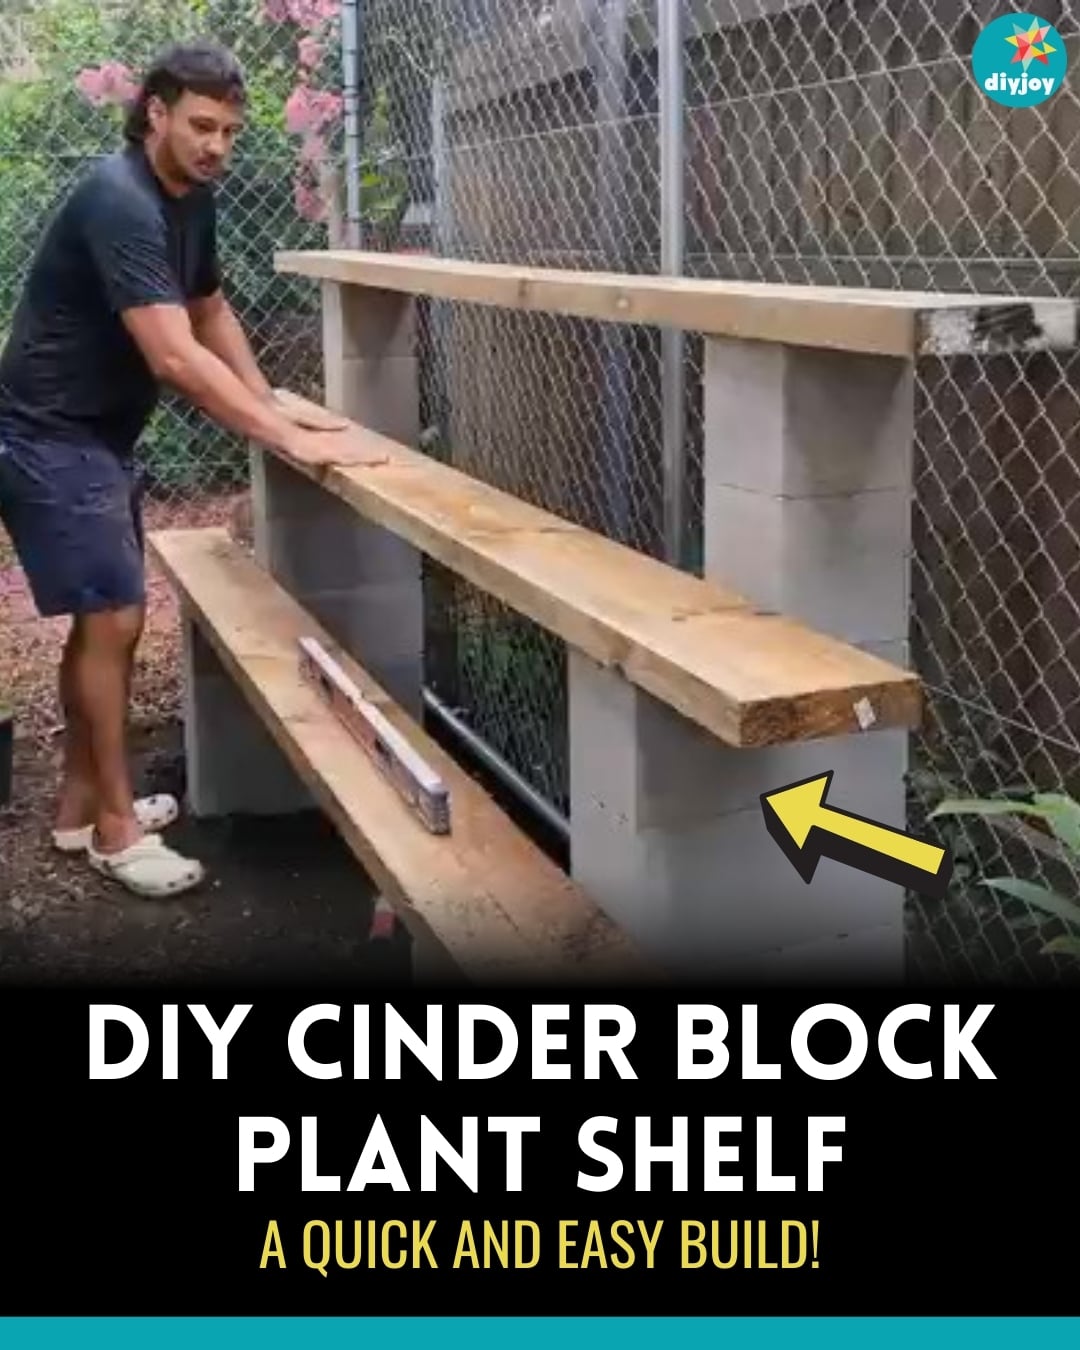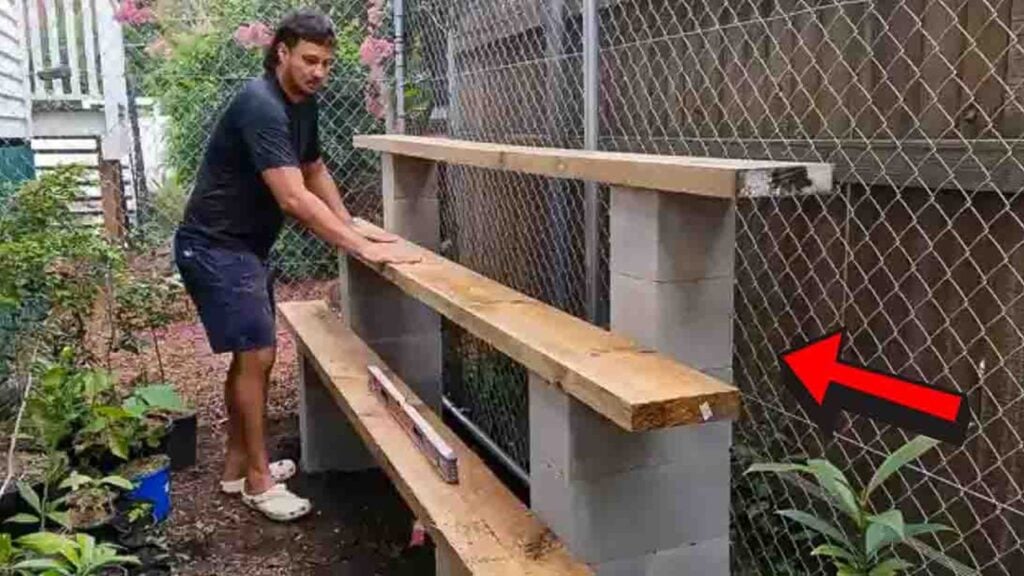
The part of a DIY cinder block plant shelf that decides whether it is still standing in three years is the gravel you cannot see. I learned to drum sand a floor without reading all the instructions, which I do not recommend, and I learned to drywall the same way. Now I read the instructions first, and read a couple of tutorials twice, before I start. So dig the hole, clear the soft topsoil, compact the gravel, and then start stacking. This build from My Tropical Fruit Forest Life on YouTube uses concrete blocks, timber sleepers and construction adhesive.
A DIY cinder block plant shelf is built on a compacted gravel base, with concrete blocks glued together using external construction adhesive and timber sleepers laid across them as the shelves. The supply list is 10 standard blocks, 10 single blocks, three timber sleepers, two tubes of adhesive and a 20kg bag of 5mm gravel. No mortar.
RELATED: DIY Cinder Block Planter Arrangement Tutorial
This DIY cinder block plant shelf from My Tropical Fruit Forest Life on YouTube is the ultimate cinder block shelf you’ll find. It’s a versatile, customizable display for your favorite plants, perfect for both seasoned gardeners and DIY enthusiasts alike. Learn how to build your own by watching the video tutorial below for the step by step instructions.
Materials:
- 10 – standard concrete blocks
- 10 – single concrete blocks
- 3 – timber sleepers
- 2 – tubes of external liquid nails construction adhesive
- 1 – 20kg bag of 5mm gravel
Directions:
Step 1
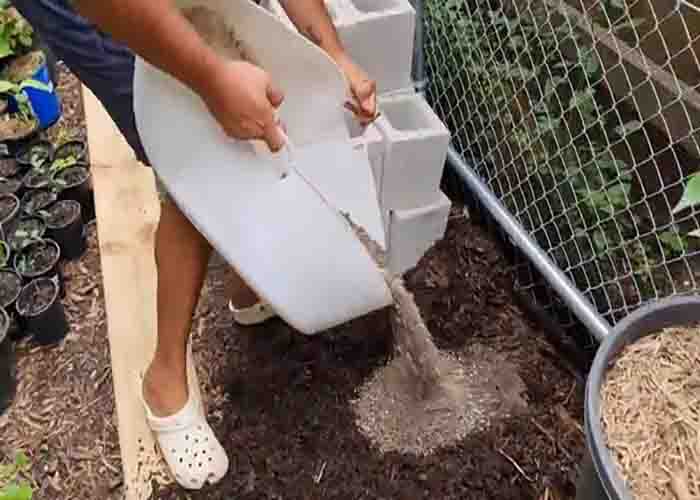
To start, determine the dimensions of the plant stand and the area where you’ll put it so that you can adjust how many materials to buy. Next, dig a wide and long hole in the designated area, making it large enough for the blocks to sit on, then clear out the soft topsoil. After this, pour gravel onto the hole, level it, then step on it to compact it.
Step 2
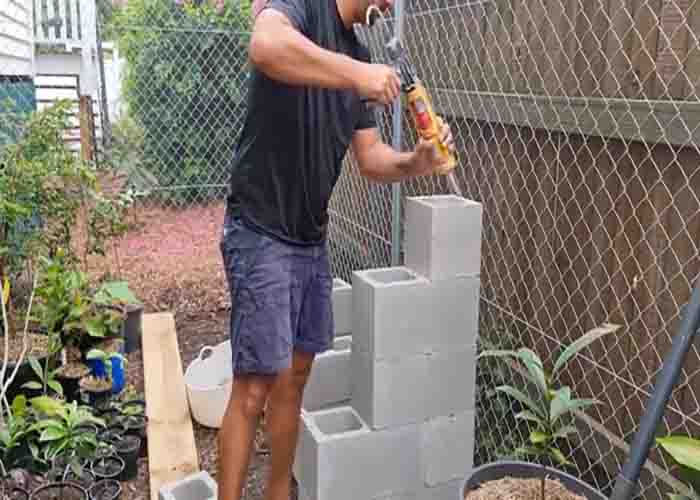
Next, place the first layer of the cinder blocks (one full block and one half) and once you’re satisfied, glue the blocks together using construction adhesive. After this, add a generous amount of adhesive all around the top, then put on the next layer. (Remember to stagger blocks if you’re building above one level.) Then, replicate the column on the opposite side. Once you’re done building the cinder blocks, add the timber and glue them to secure in place. Now, place your potted plants as you like.
Easy DIY Cinder Block Plant Shelf
Frequently Asked Questions
How many cinder blocks does this shelf take?
Ten standard concrete blocks and ten single blocks, plus three timber sleepers for the shelves themselves. You also need two tubes of external liquid nails construction adhesive and a 20kg bag of 5mm gravel for the base. Work out your dimensions and the spot it is going in first, because that is what tells you how much to buy.
Do you need to anchor a cinder block shelf?
Not with anchors, no. Stability comes from the base and the glue instead. You dig a hole wide and long enough for the blocks, clear out the soft topsoil, pour in the gravel, level it and then step on it to compact it properly. After that the blocks are glued to each other with external construction adhesive.
How tall can you safely stack it?
The build itself does not name a height limit, but it does give the rule that matters: stagger the blocks any time you go above one level, and put a generous amount of adhesive all around the top of each layer before the next one sits down. Build the matching column on the opposite side as you go.
What thickness of plank do you need?
Three timber sleepers, which is what the materials list calls for rather than a plank thickness. Sleepers are heavy and deep enough to span between two block columns with potted plants sitting on them, which is why they are used here. They go on last and are glued down to secure them in place.