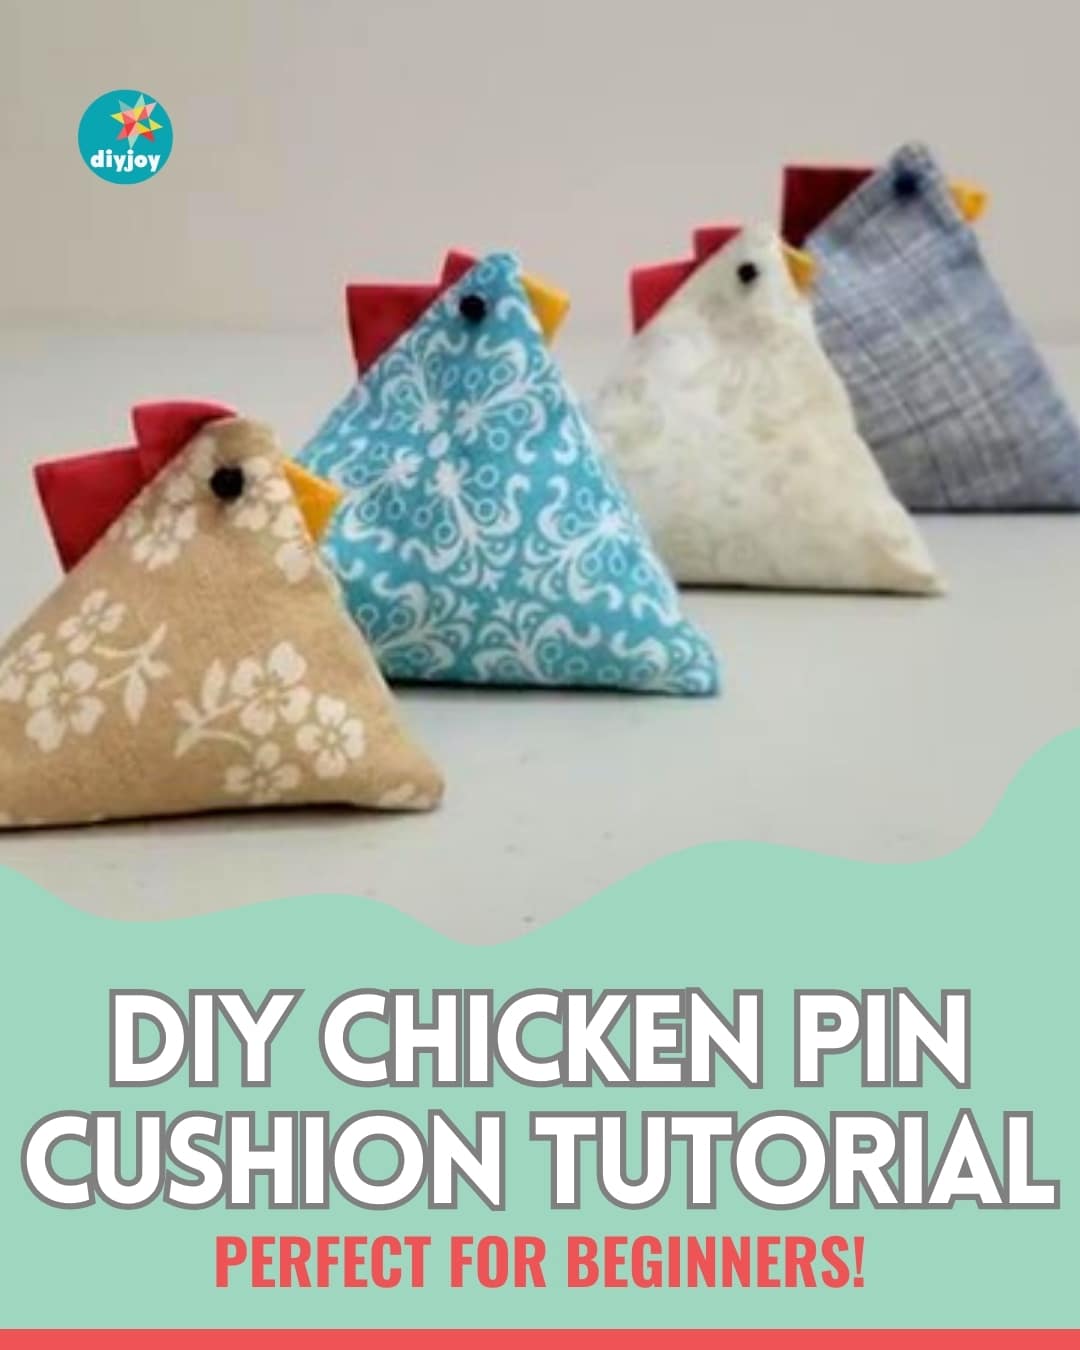
Crafting your own sewing tools not only adds a personal touch to your workspace but also infuses your creative process with a sense of satisfaction – like this DIY pin cushion from Little Chookie. How cute is this chicken cushion for your pins and needles, right? And the best part is it’s easy to make as it looks.
RELATED: DIY Cactus Pin Cushion Tutorial
This adorable accessory not only serves as a practical tool for storing your pins but also doubles as a delightful addition to your sewing kit. Watch the step-by-step process of transforming simple fabrics into a whimsical chicken pin cushion that will add flair to your sewing adventures.
Materials:
- fabric for the body
- fabric for the beak
- fabric for the comb
- two small black beads
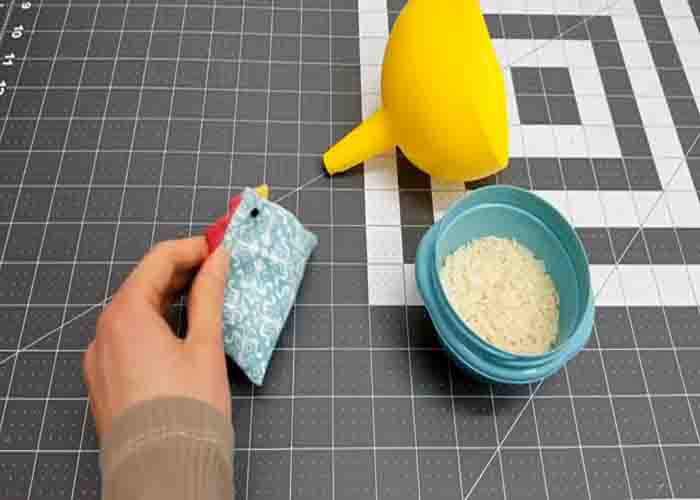
- 1 cup of rice
- funnel
Directions:
Step 1
Start by cutting two squares of 4″ x 4″ for the body. With the same fabric, cut a 1 1/2″ x 1 1/2″ square for the tail. Now with the comb fabric, cut a 1 1/2″ x 1 1/2″ square square and a 1″ x 1″ square. And with the beak fabric, cut a 1″ x 1″ square. Next, iron the two small squares into triangles. Place it right side down, fold the corner up across the diagonal, then press. Fold it in half again, and press. Repeat this to all 1″ and 1 1/2″ squares. Now, lay both the comb triangles, open the smaller triangle flap, then place the larger one about halfway into the smaller triangle. Clip to hold it in place.

Step 2
Moving on to the body, lay one of the squares, right side up. Take one of the beak triangles and place it on the left side near the top, facing inward (about 1/4″ from the top corner). Pin into place. Next, take the comb and lay it on the top left side, facing inward. Pin into place as well. After this, take them to the sewing machine, then sew down the beak and comb about 1/8″ from the edge. Now, take the other body square, lay it on top, right side down. Pin along the left and op side, and sew these two sides.
Step 3
Trim the top corner, then turn the piece inside out. Sew the two small beads to where the eye should be placed. After attaching the eyes, turn the piece again inside out. Pin along the bottom, then sew, leaving about a 1 1/2″ gap in the seam. To create the 3D shape, open up the last side of the body piece. Match the top and bottom seams on top of each other. After this, take the tail piece and pin, matching up the center to the seams. Pin the rest of the remaining seams, then sew. After sewing, turn the chicken inside out to the gap.
Step 4
Now, insert the funnel tip into the gap, then add the rice to stuff the chicken. To finish, hand sew the gap closed. Your DIY chicken pin cushion is now finished!
DIY Chicken Pin Cushion Tutorial