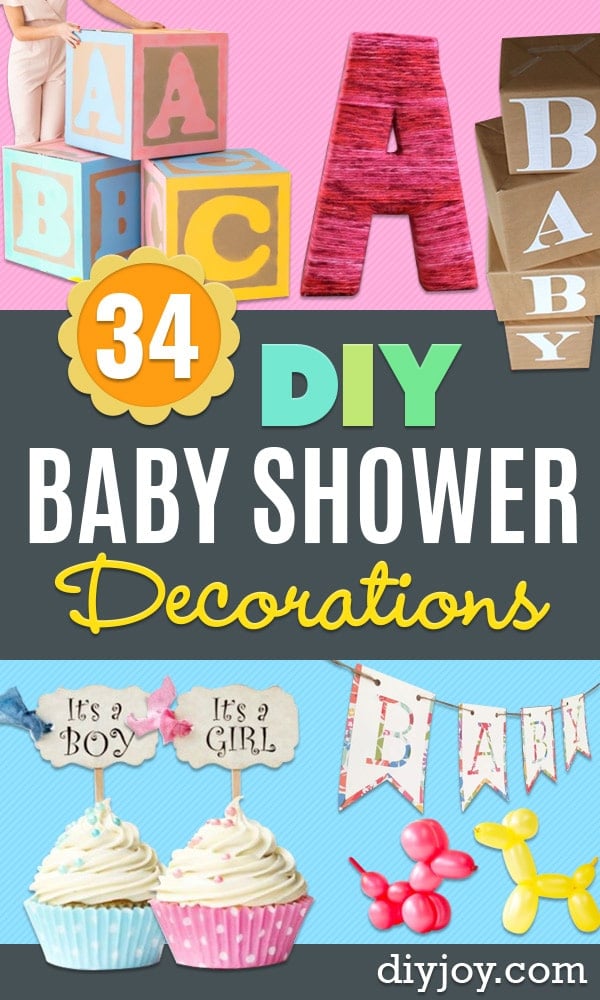
Shower decorations have a short working life and a big job to do, which is why buying them stings. Everything below is a DIY baby shower decoration you can make at a kitchen table in an evening, and a good half of it starts with things already in the house. Paper circles, yarn, a packet of diapers, a bag of balloons. There are garlands and banners for the wall, centerpieces for the tables, and a couple of clever ones that double as a keepsake the mum to be takes home, like a guest book everybody signs and a string of written wishes for the baby. When you have the decor sorted, there is a DIY baby gift to think about too, whether that means sewing for baby or a quick DIY baby blanket.
DIY Baby Shower Decor Ideas
1. Make a Onesie Bunting
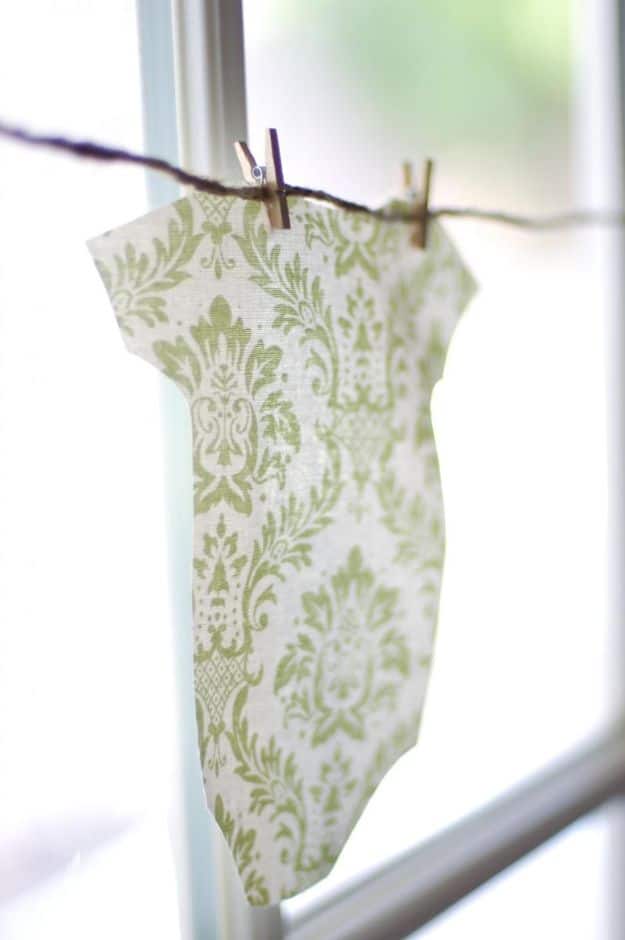
Fabric onesies pegged along a length of twine with miniature clothespins, and not a stitch anywhere. Trace a onesie shape onto the dull side of freezer paper, iron it shiny side down onto the right side of your fabric, then cut around it and peel the paper away. That freezer paper step is what makes the difference between a crisp little shape and a wobbly fraying one, because the fabric cannot shift while you cut. Free hand the template or print a picture of a onesie and cut round it. Match the fabric to the party colors and it reads instantly.
Get the full tutorial at Tikkido.
2. DIY Simple Baby Banner
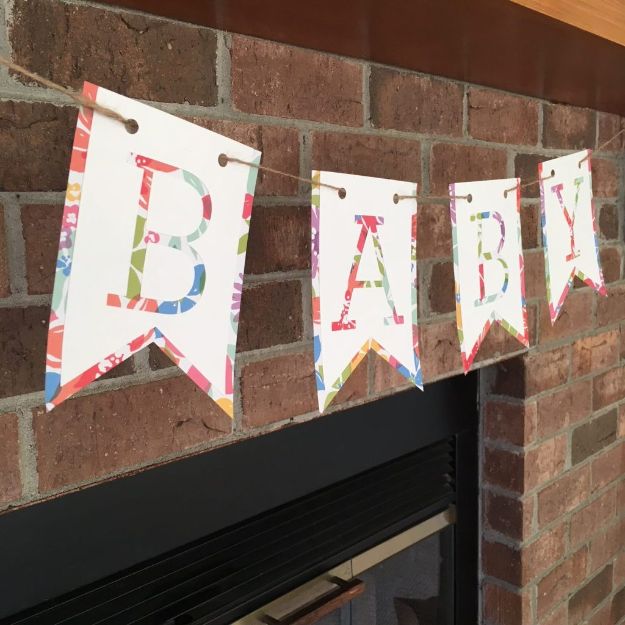
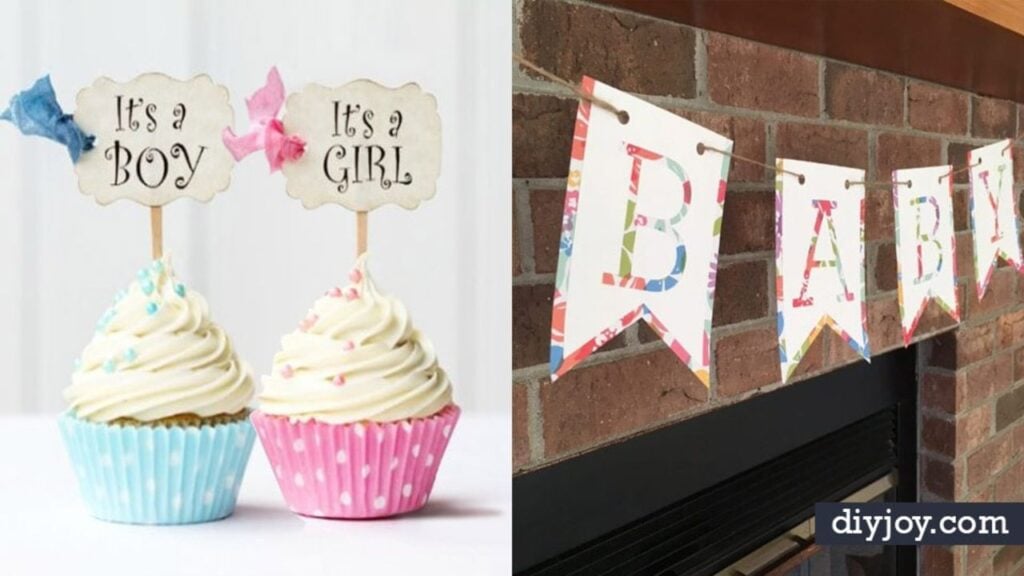
Pennant flags with a swallowtail notch, each carrying a single letter cut from a bright floral print, strung on twine along a brick fireplace to spell out baby. Simple to make and easy to scale, since adding a name just means more flags. The detail that makes this one work is the reverse: the letters are the pattern and the background is plain white, rather than the other way round, so it reads clearly from the far side of a room. Punch two holes at the top of each flag rather than gluing to the string, so the spacing stays adjustable.
Get the full tutorial at Coastal Kelder.
3. DIY Baby Socks Rose Flower Bouquet
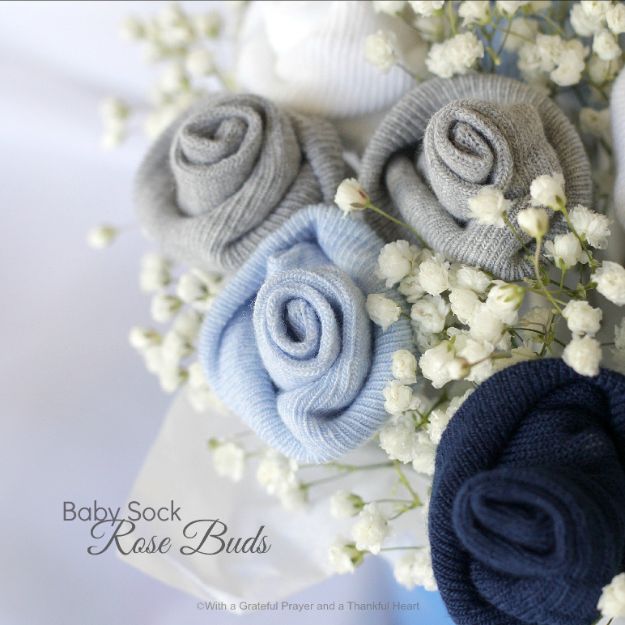
Lift the cuff, flatten the sock, then roll it softly from the toe edge up to the top. The roll does not want to be tight. Fold the top edge over onto the roll and fiddle with the shape until it reads as a bud, pulling the centre up for a longer flower or squashing it for a flatter one. Push a pop stick into the underside for a stem, tie a small yarn bow at the neck, and set them into floral foam cut to fit your container. Eight pairs of infant socks makes sixteen roses, and baby’s breath fills the gaps.
Get the full tutorial at Grateful Prayer Thankful Heart.
4. Baby Shower Cake Toppers
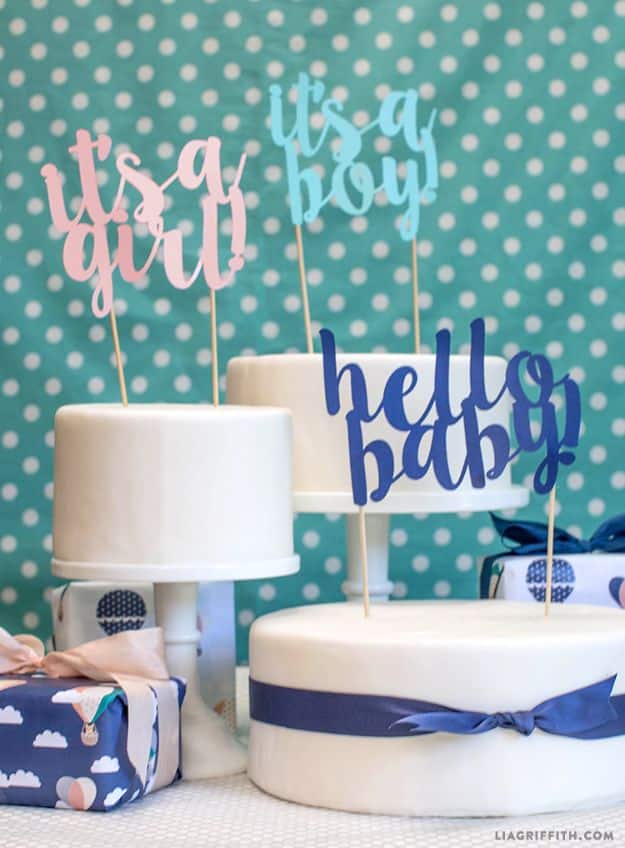
Script cake toppers cut from card stock and mounted on cocktail sticks, three designs reading it’s a girl, it’s a boy and hello baby, shown here in pink, pale blue and navy against a teal spotty backdrop. Cut them on a machine or by hand with a craft knife, tape two sticks to the back and push them into the cake. The thing that makes a paper topper look bought rather than homemade is card weight, so use the heaviest stock your cutter will take, because thin card droops the moment it stands upright on a soft iced surface.
Get the full tutorial at Lia Griffith.
5. DIY Diaper Snails
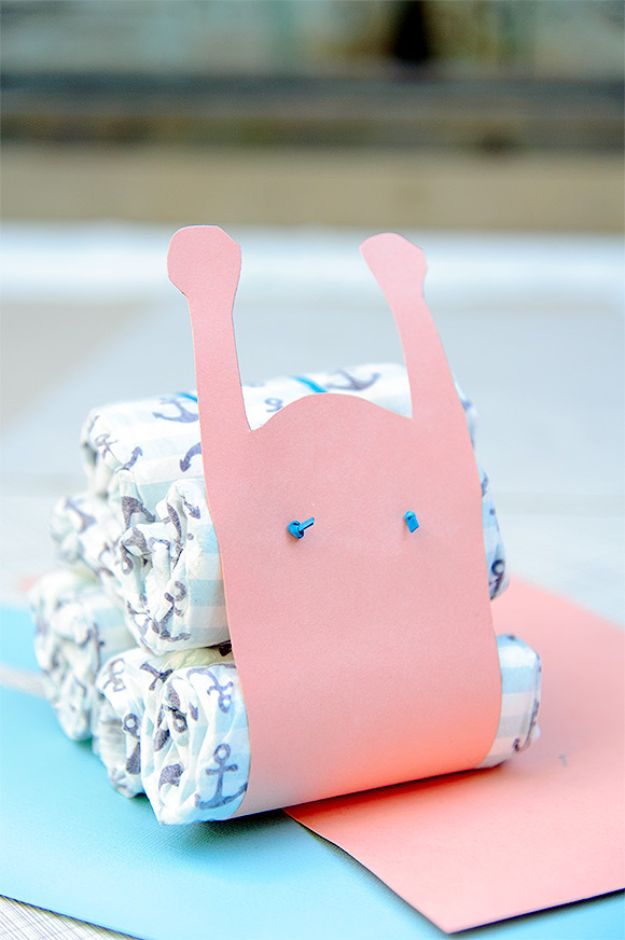
Five or six rolled diapers held inside a card stock snail shell, with rubber band eyes on stalks poking up from the head. Print and cut the template, trace it onto colored card, then punch a small hole at every marked dot with an awl or a thumbtack, widening them if the bands will not pass through. Cut a rubber band open into one long strip, thread it through the face holes and knot it to make the eyes. Test the tension with the diapers stacked in place before you tie the tail bands off, or the whole thing sags.
Get the full tutorial at Handmade Charlotte.
6. DIY Name Garland
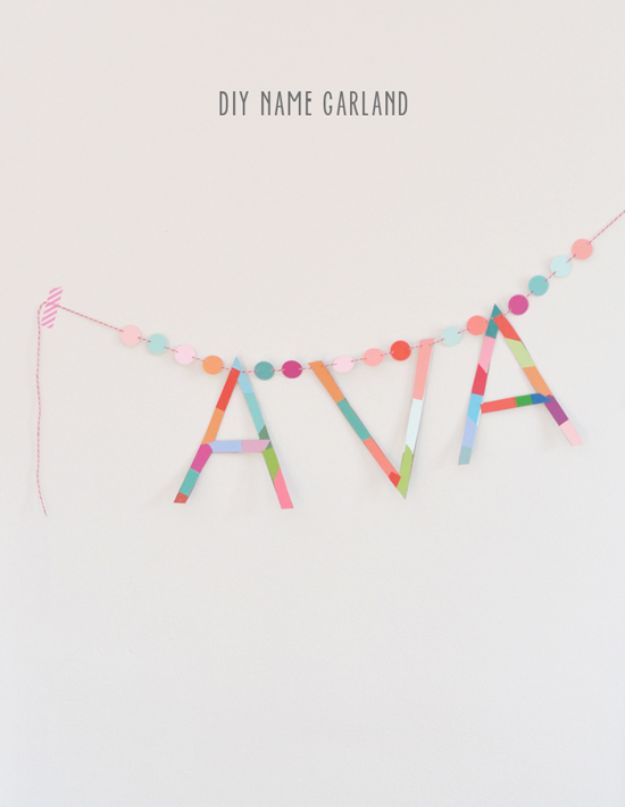
The baby’s name spelled in tall letters built from short strips of colored paper, hung on cord between runs of punched paper dots. The letters are the clever part: each one is assembled from flat straight strips in mixed colors rather than cut as a single shape, so every stroke is a different color and there is no curve to cut. That limits you to letters made of straight lines, which is most of the alphabet. Keep the dots between the letters small and the letters large, so the name is what the eye lands on first.
Get the full tutorial at Small for Big.
7. Make A Diaper Bouquet
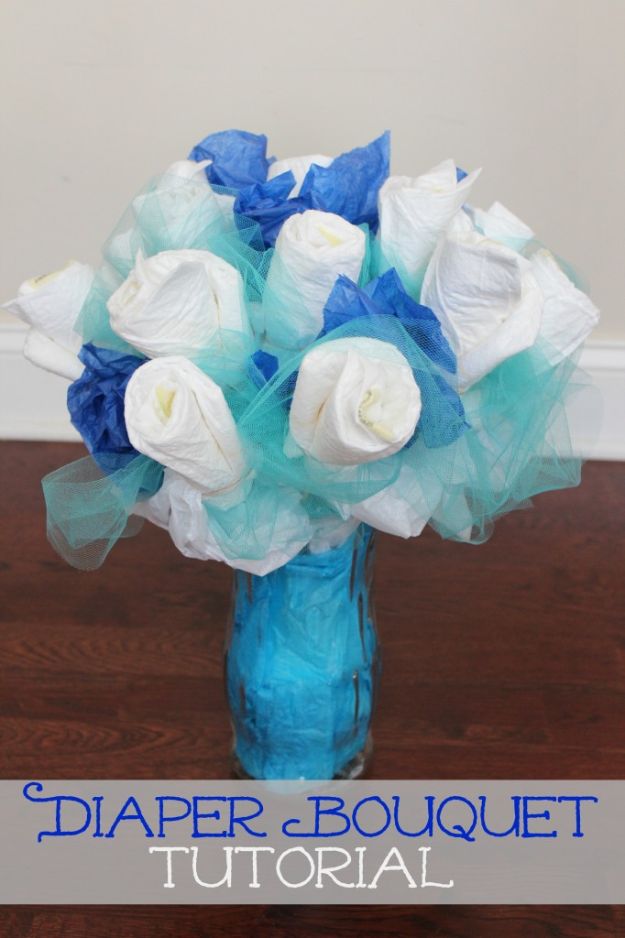
Roll each diaper with the top tucked in, band it near the base with a clear rubber band, and tape a wooden skewer to the bottom so it behaves like a stem. Wrap a styrofoam ball in tissue paper, drop it into a vase, pack the base with more tissue or with small baby things like soap and shampoo, then push the stems in. Tulle or tissue tucked between the blooms hides the bands, which is the step everybody skips and then wonders why theirs looks like rolled diapers. A vase this size takes about a dozen.
Get the full tutorial at Frugal Fanatic.
8. Sprinkle Baby Shower
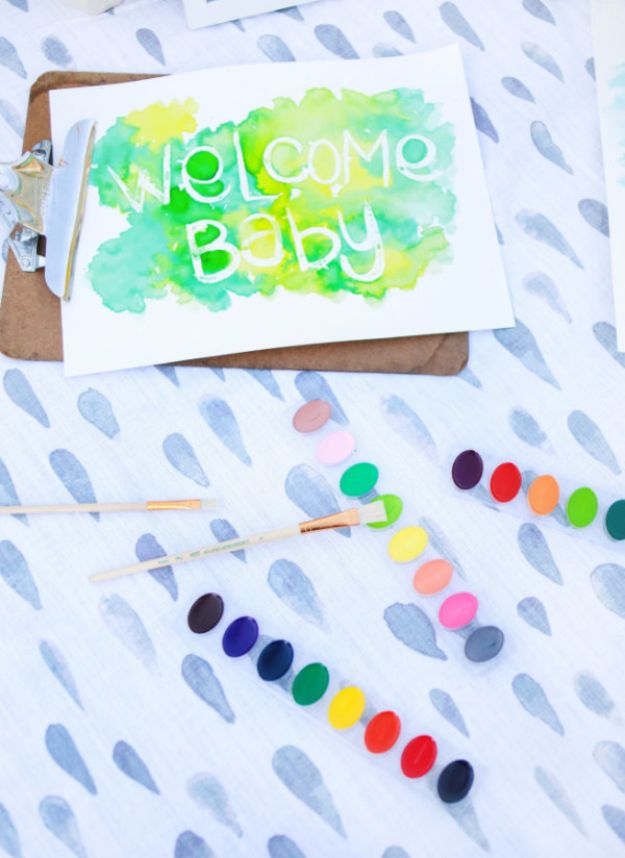
A watercolor welcome baby sign in progress on a clipboard, with two pans of paints and a couple of brushes laid out on a patterned cloth beside it. It is the simplest kind of shower decor and the most personal: paint the letters in with masking fluid or a white wax crayon first, then wash color freely over the whole card and let it resist. That resist is why the letters in the photograph look crisp under a very loose green wash. Set the paints out on a table and the sign becomes an activity guests make together rather than a job.
Get the full tutorial at Baby Shower Ideas 4U.
9. Wishes For Baby
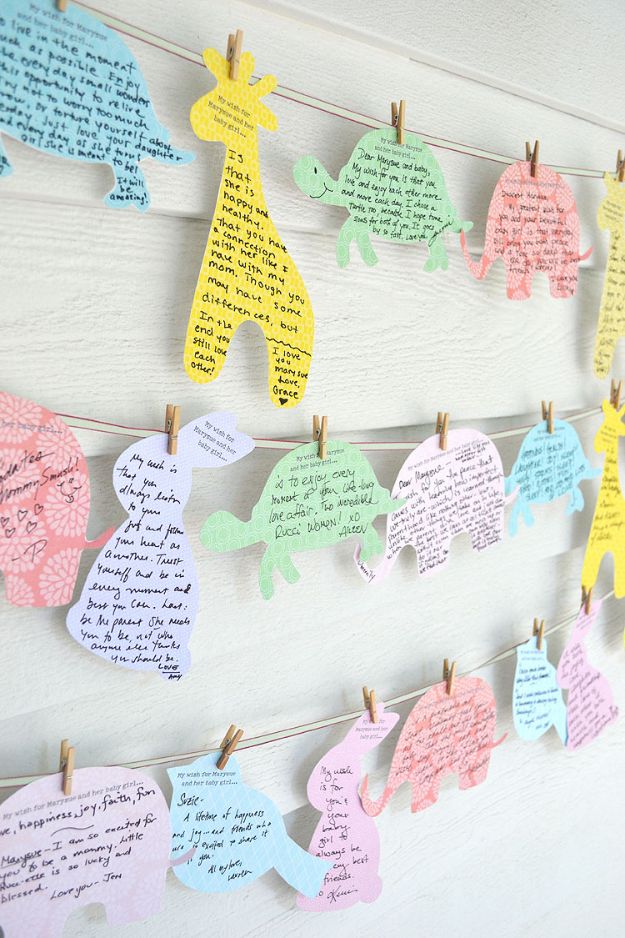
Animal shaped cards, elephants, giraffes, turtles, rabbits and birds, printed from a free template onto patterned paper, written on by guests and then pegged along cord with mini clothespins. Two things make it work. Print onto paper with a small light pattern rather than a bold one, so handwriting stays readable across the shape. And glue thin decorative paper onto card stock first if you are using wrapping paper, because a card that flops does not hold a pen. It hangs as decor during the party and goes home as a keepsake, or into a memory book.
Get the full tutorial at Artbar.
10. Elephant Baby Shower Guest Book Printable
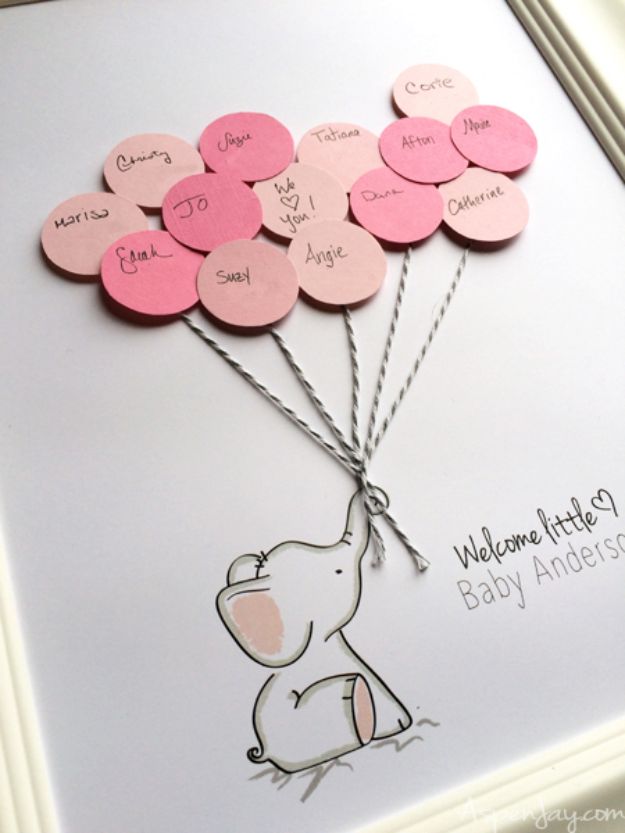
A free printable elephant holding a bunch of balloon strings, framed, with each balloon a punched circle of card stock that a guest signs. Print it at eleven by fourteen, type the baby’s name into the PDF text field before printing, then punch around thirty inch and a half circles from colored card. Put them out with pens during the party and mount the signed ones with quarter inch foam squares afterward, so they sit proud of the print. One thing worth copying: put the glass behind the backing board instead of in front, so the balloons lie flat against the paper.
Get the full tutorial at Aspen Jay.
11. Boho Animal Jar Baby Shower
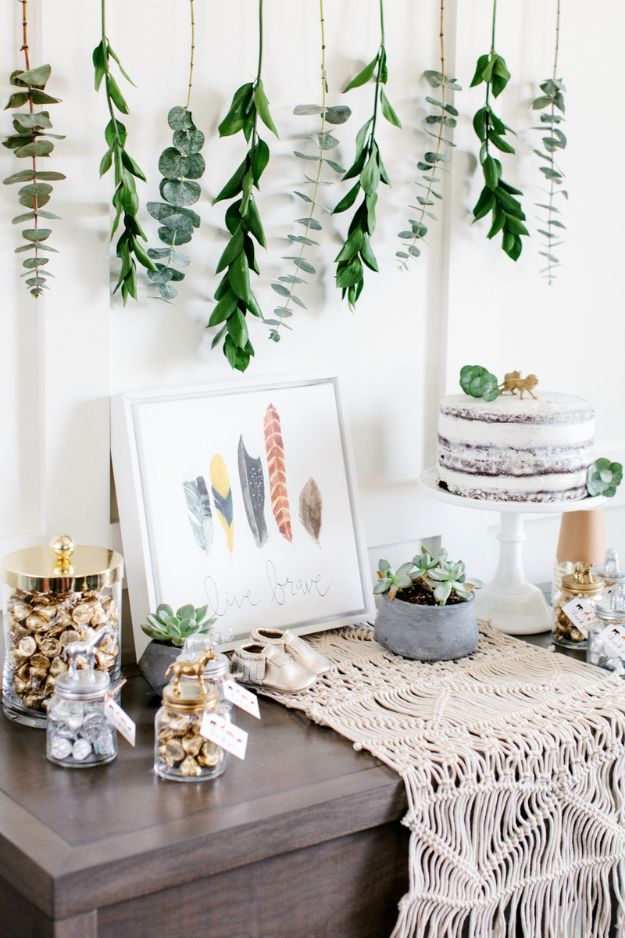
Small glass jars with a plastic animal glued to the lid and the whole lid sprayed metallic, filled with foil wrapped chocolates and tagged on jute twine. Super glue the figurine down first, let it cure, then unscrew the lid and spray it outdoors away from the jar. Print the thank you tags onto card stock or photo paper, trim and tie. Gold and silver against a neutral scheme is why this reads boho rather than childish, and the animals mean it suits a shower where nobody is announcing a color. Eucalyptus and a succulent or two finish the table.
Get the full tutorial at The TomKat Studio.
12. Baby Blocks
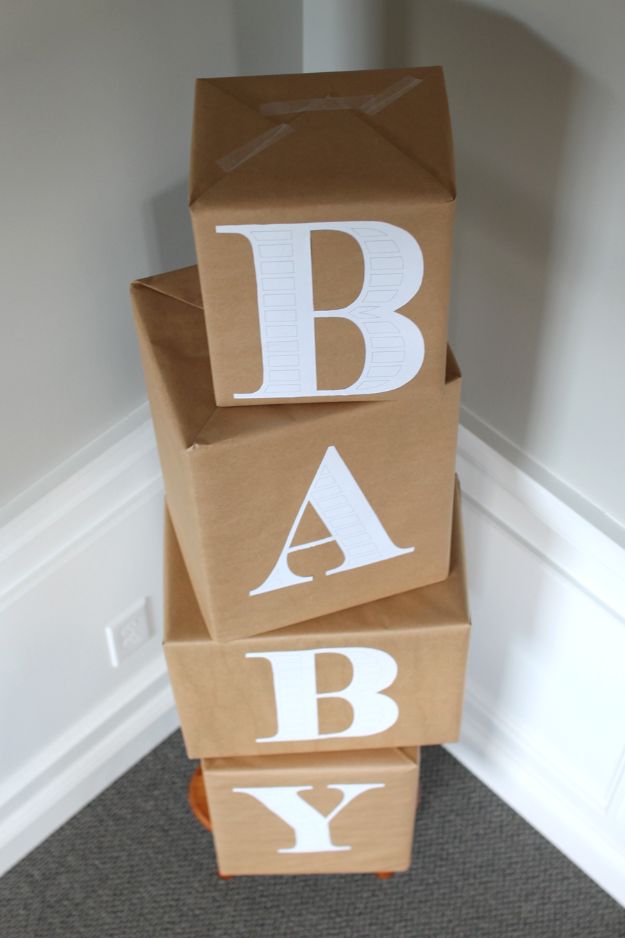
Boxes of diapers wrapped in plain brown kraft paper with a single large white letter on the front of each, stacked in a corner to spell baby. The joke is that the decoration is the gift, since the boxes are unwrapped and used afterward, and the whole cost is a roll of paper. It sits alongside coffee filter hanging balls and yarn wrapped wooden letters in the same room, all of it in burlap, grey and cream. Tape the paper on the back and underneath, where nobody standing in the room will see a join.
Get the full tutorial at Style Blueprint.
13. Easy DIY Party Centerpiece
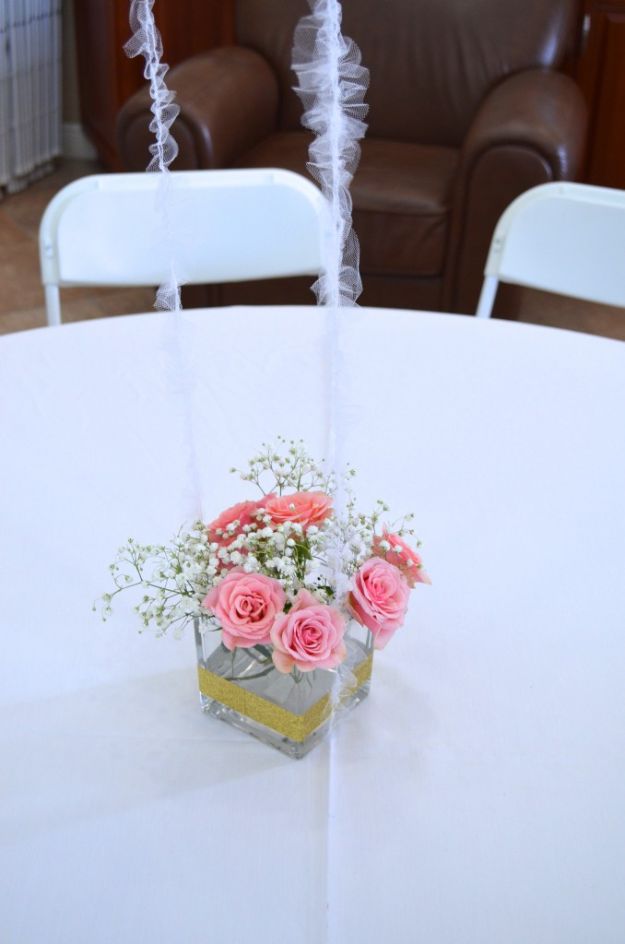
A low square glass vase with a band of gold glitter tape around the base, filled with pink roses and gypsophila, sitting in the middle of a round white clothed table with tulle streamers running up from it. Low is the whole point of a good table centerpiece, because anything tall means guests spend the afternoon talking around it. A band of tape or ribbon at the base of a plain vase costs almost nothing and reads as gold from across the room. Keep every stem cut short enough that the flowers sit below eye level when people are seated.
Get the full tutorial at Hello Nutritarian.
14. DIY Lemon Balloon Party Decorations
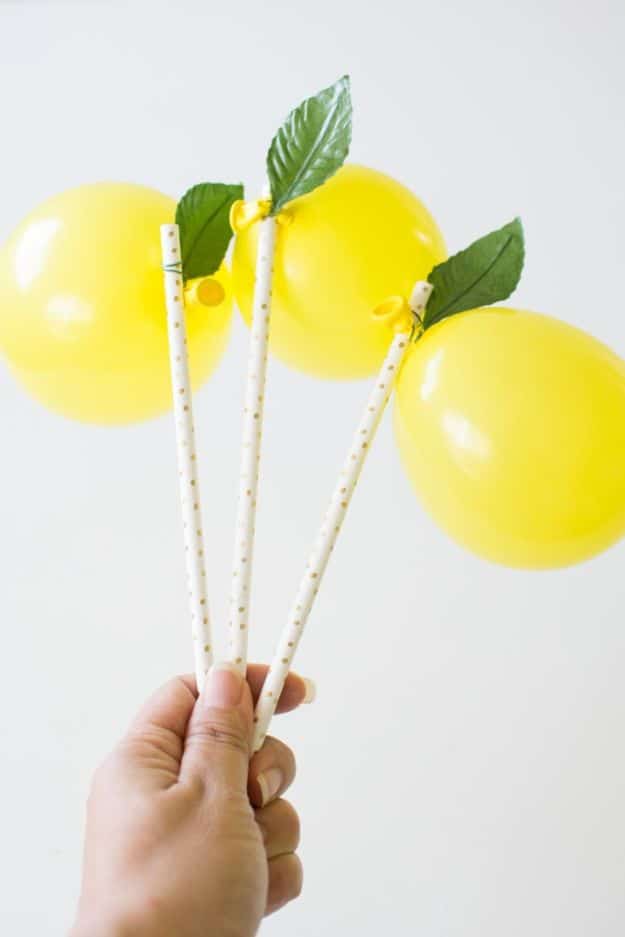
Five inch yellow balloons with a faux wired leaf twisted onto the neck of each, mounted on patterned paper straws so they stand up as lemons. Inflate, attach the leaf, then wind the leaf’s own wire around the straw, which is what holds the balloon on. Two steps and that is genuinely all of it. Skip the straws and they work as a garland or a backdrop instead, and the same three stuck into a cake top serve as a topper. Small balloons are essential: a full sized balloon goes round rather than lemon shaped and the illusion collapses.
Get the full tutorial at Twinkle Twinkle Little Party.
15. Woodland Themed Baby Shower
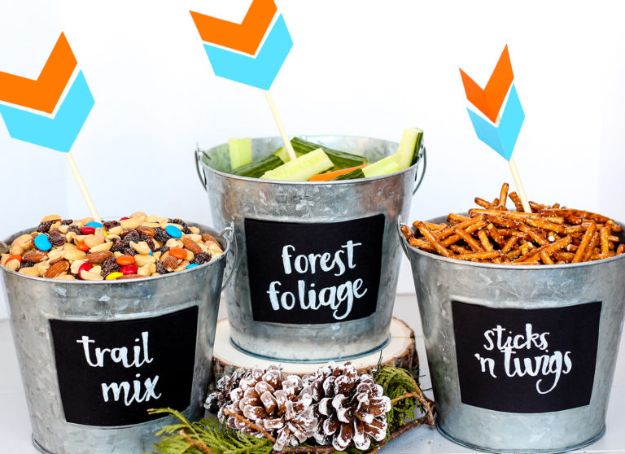
Galvanized buckets of snacks labelled in chalk marker on black card, trail mix, forest foliage and sticks and twigs, each flagged with an orange and blue paper arrow on a skewer. The labels are the cheap clever bit: rectangles cut from black card stock, written on with a white chalk marker and taped on, so a bucket of pretzels becomes part of the theme for pennies. The same post runs a pine cone garland knotted along yarn and a torn fabric banner tied to twine. Rename ordinary party food and the decorating is half done.
Get the full tutorial at The DIY Lighthouse.
16. Napkin Dress Tutorial
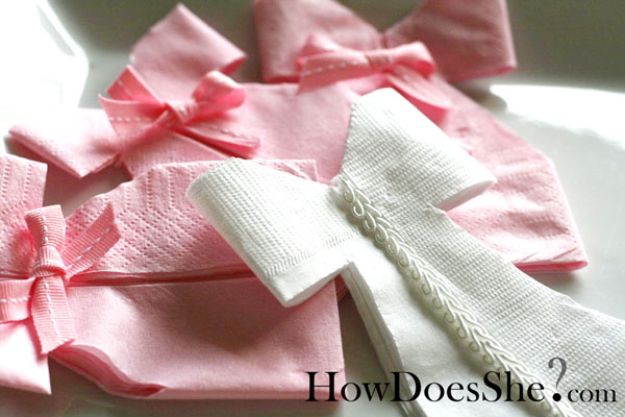
Paper napkins folded and cut into little dresses with a ribbon bow at the waist, shown in pink and white on a white plate. Fold each side of the napkin into the centre, fold it in half again, then cut a triangle into the folded edge to make the armholes and a shallow V at the top for the neckline. Glue on a bow and it is done. If your napkins are large the dress comes out shapeless, so trim the top down rather than accepting it. Two colors on the same plate looks deliberate; one color looks like you ran out.
Get the full tutorial at How Does She.
17. Yarn Wrapped Letter
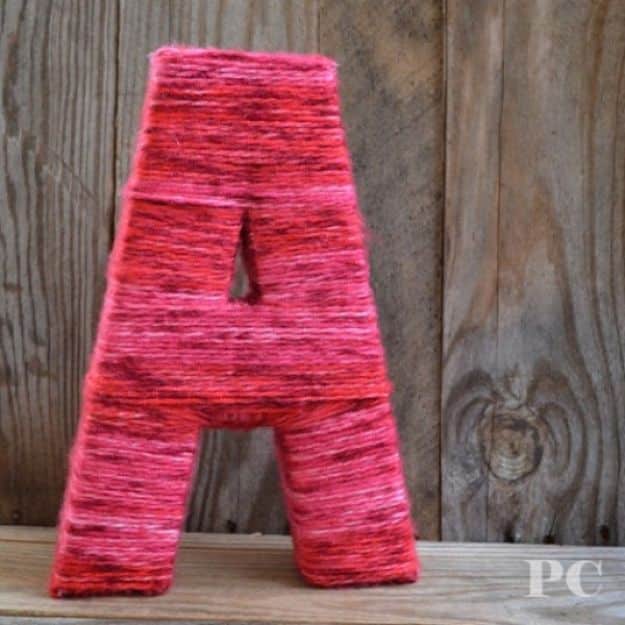
A papier mache initial wound tightly in variegated red and pink yarn, standing against grey boards. Decide your wrapping direction before you start, because once a few criss crossed sections have happened the only fix is to unwind everything. Work in one consistent direction all the way round and glue only on the inside edges or the back of the letter, so no glue shows on any face you will see. Inner corners on letters like A and R are where it goes wrong, so slow down there. Variegated yarn shades itself as it goes, which hides small inconsistencies.
Get the full tutorial at Poofy Cheeks.
18. DIY Pom Pom Chandelier
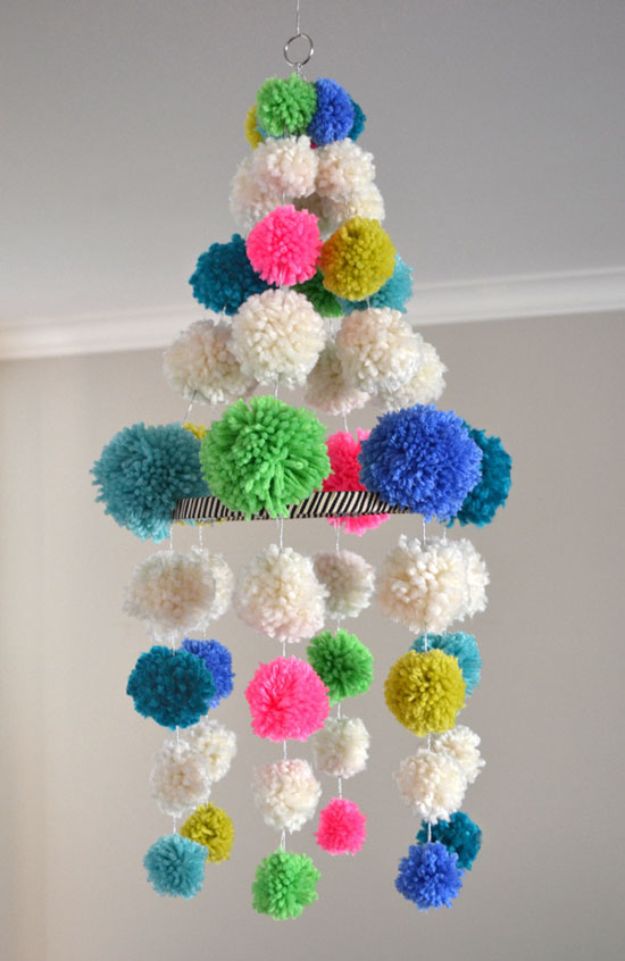
Dozens of yarn pom poms in cream, teal, blue, pink and lime, massed over a hoop and hanging below it in strands, suspended from a ring in the ceiling. It is a big, soft, cheerful shape that fills the empty space above a table, and it costs whatever the yarn costs. Mixing sizes is what keeps it from looking like a craft project, so make some large and some small rather than a uniform batch. Pack the top densely enough that no structure shows through and let the hanging strands vary in length so the bottom edge is not a flat line.
Get the full tutorial at Small for Big.
19. Circle Garland DIY
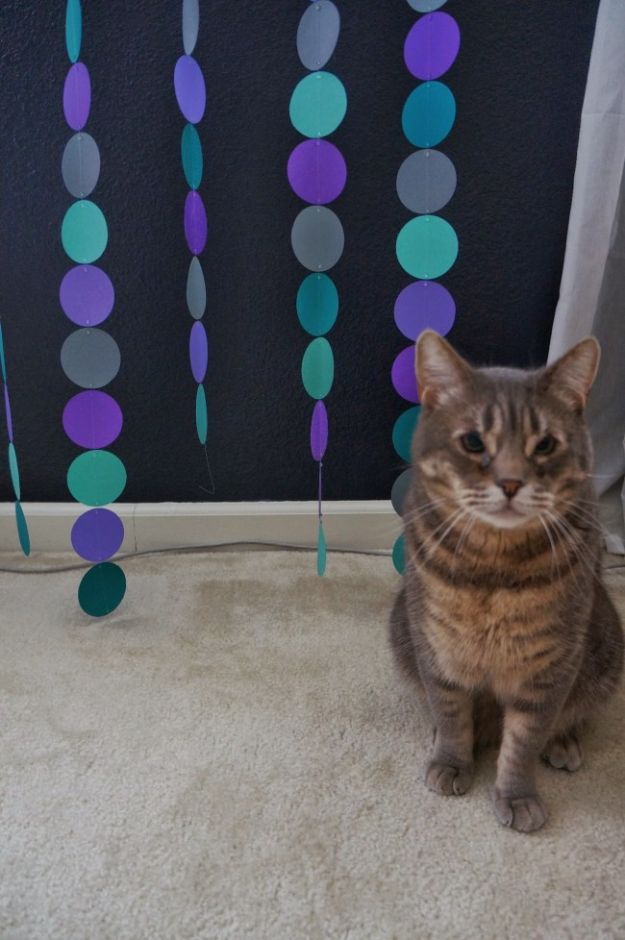
Strands of punched paper circles hot glued along fishing line, hung in front of a dark wall as a photo backdrop, in teal, purple and grey. Fishing line is the choice that matters, because it disappears at a distance and the circles look like they are floating. A circle cutter or a punch does the work; a cutting machine yields twelve circles per standard sheet if you have one. Be realistic about quantity before you start, because fifteen strands runs to something like two hundred and twenty five circles and several long evenings of cutting.
Get the full tutorial at Jay's Cup.