

Apple season is the best excuse to get crafty, and these 31 fun DIY apple crafts for fall run from the first day of school all the way to the Thanksgiving table. Teachers get the sweet stuff: paper cup apple gift boxes, a gold apple mason jar, felt coasters, glitter earrings and a soap that smells like pie. Kids get stained glass windows, pool noodle stamps and pinecone apple trees. And the grown-ups get gilded apples, rope wrapped apples, a book page apple and apple candles that take about ten minutes. Want one with a video? The DIY JOY no-sew felt fruit coasters come with an apple slice and a full tutorial.
1. Apple Yarn Garland

These yarn apples work like pom poms without the fussy trimming, so little hands can make most of the garland. Wrap yarn around two fingers about 100 times, which takes only a minute, slide the bundle off and tie a 3 inch piece of twine tightly around the middle. Fluff it into a round apple shape, then hot glue a small green felt leaf on top (an adult job). Tie the apples along a long piece of twine, spacing them with a tape measure. Make them all red, mix in green or swap to orange for pumpkins.
Get the full tutorial at The Best Ideas for Kids.
2. Wine Cork Apple

A wine cork apple is a teacher gift that never goes bad. Stand seven corks in a circle with one in the center and six around it, flat ends down, then hot glue them together in rows of two, three and two before joining the rows. Paint the flat front red, two coats if needed. For the stem, cut one cork in half lengthwise and again on an angle, trim it to a point and paint it brown; one cork makes four stems. Glue on the stem and a green felt leaf. Collected corks or a bag of new ones both work.
Get the full tutorial at Growing Up Gabel.
3. Rustic Wood Apple Cart
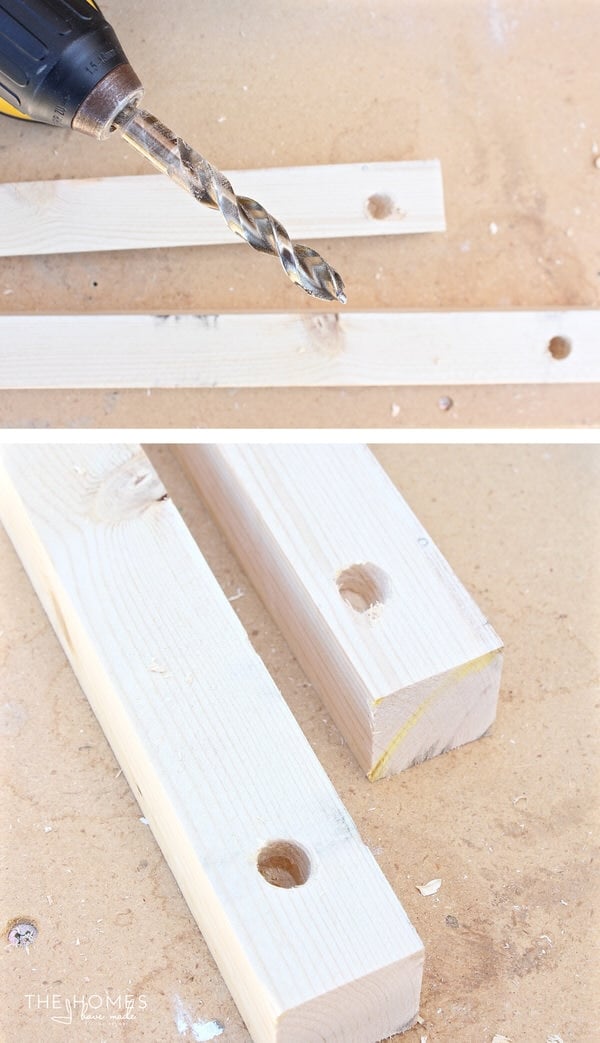
This apple cart starts as a basic rustic wheelbarrow built from a large wood crate, a 2 by 8 board, square balusters and a dowel axle. Cut a 7 inch wheel with a jigsaw, drill angled holes in two balusters for the axle, screw them under the crate and add short legs; the build takes about an hour. Then paint: chalkboard paint on the crate ends, white high gloss on the slatted sides and bright red on the handles, legs and wheel. Write the season’s message in chalk ink and fill it with apples, ornaments or flowers.
Get the full tutorial at The Homes I Have Made.
4. Apple Popcorn Pouches

Red 9 inch paper plates are sturdy enough to become apple shaped snack pouches. Trace an apple about 6 inches wide and 6 inches tall on the backs of two plates so the lines don’t show, cut them out and line them up red sides out. Punch an even number of holes around the edge, leaving about 1 1/2 to 2 inches open at the top for filling. Lace yarn or twine through the holes, knot it in back and hot glue a leaf sprig or a paper leaf to the front. Fill with popcorn for a back to school movie night.
Get the full tutorial at I Dig Pinterest.
5. Easy No Sew Fabric Apple Garland

This no sew fabric apple garland uses scrap fabric stuck to adhesive foam sheets, so there’s no hemming and no fraying. Print the free templates on cardstock and cut them out. Stick red fabric to the sticky side of one foam sheet and green fabric to another, trace the apple and leaf shapes on the foam side with a marker and cut them out. Hot glue a leaf and a small ribbon bow to each apple, punch two holes at the top and thread the apples onto twine. It works on a classroom wall, a mantel or a wreath.
Get the full tutorial at Positively Splendid.
6. Green Apples From Dollar Tree Jars

Round lidded Dollar Tree jars turn into green apples with paint, a stick and a couple of paper leaves. Chalk paint grips glass best, though regular acrylic works with three coats. A very light coat of antique wax adds the spots and shading real green apples have. Age the lid with gold rub-on finish blended with brushed nickel and dark brown craft paint. Glue on a curved stick from the yard and a pair of cardstock leaves folded for texture. Fill them with candy for an easy first day of school teacher gift.
Get the full tutorial at Little House of Four.
7. DIY Apple Balloons
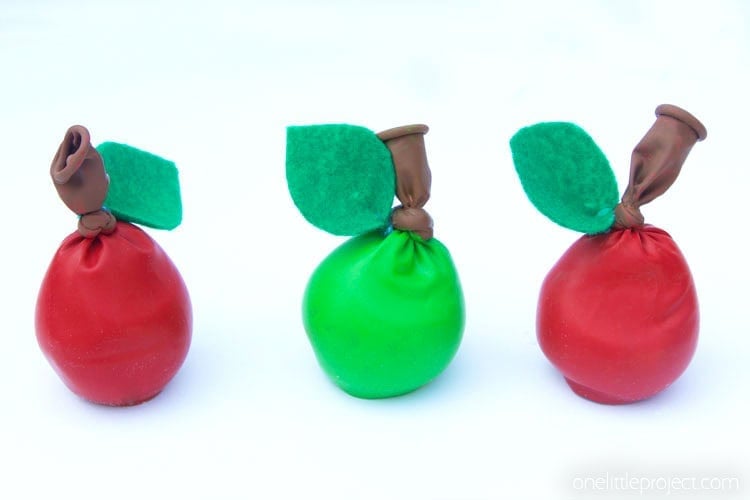
These apple balloons are really squishy stress balls, and all they need is a balloon and some flour. Use red or green balloons at least 8 inches in size, since smaller ones are too tight to squeeze. Push a funnel into the opening, spoon in flour up to the stem, squeeze out the extra air and knot it. Paint the knot brown to make a stem, then hot glue on a pinched green felt leaf. Rice, water beads or play dough also work as filling. They can pop with heavy use, so treat them as a few-weeks toy.
Get the full tutorial at One Little Project.
8. Printable Apple Boxes
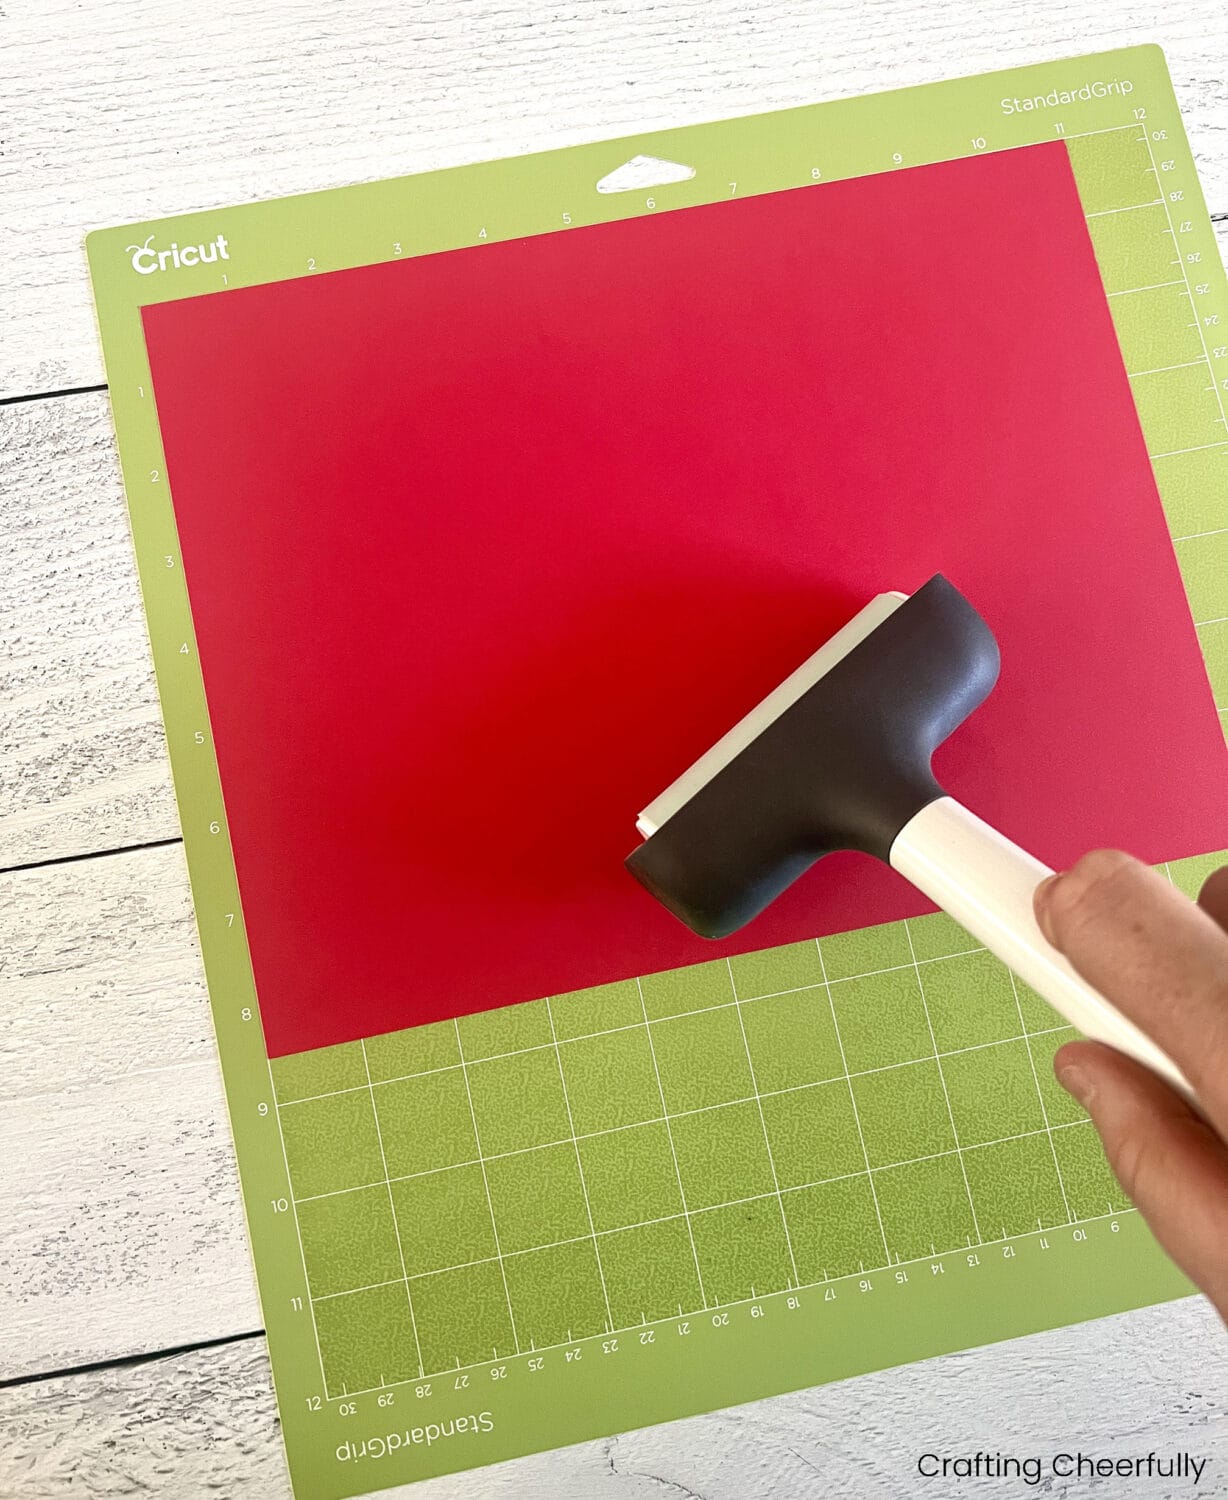
These apple gift boxes are cut from cardstock with a free SVG file that includes a lid, a base and an optional gift card holder insert. Pick a sturdy solid core cardstock, around 65 to 80 pound, so no white edges show after cutting, and use gold glitter paper for the apple cutout. Upload the file to your cutting machine, ungroup it, cut and score, then assemble with double-sided tape. No machine? Cut and score by hand with the included guide. Add cardboard to the bottom if the box will hold something heavy.
Get the full tutorial at Crafting Cheerfully.
9. Make a Book Page Apple

An old paperback with slightly yellowed pages makes the best book page apple; a thrift store copy costs pennies. Remove the covers, draw a half apple template on one cover and cut it out. Open the book near the middle, trace the template on the right side and cut through the pages a few at a time with a craft knife and a fresh blade, then repeat on the left side. Glue along the spine to close it, paint the page edges red with watercolor, fan it open and hot glue on a twig stem and a paper leaf.
Get the full tutorial at Hymns and Verses.
10. Apple Decor From Scrap Wood
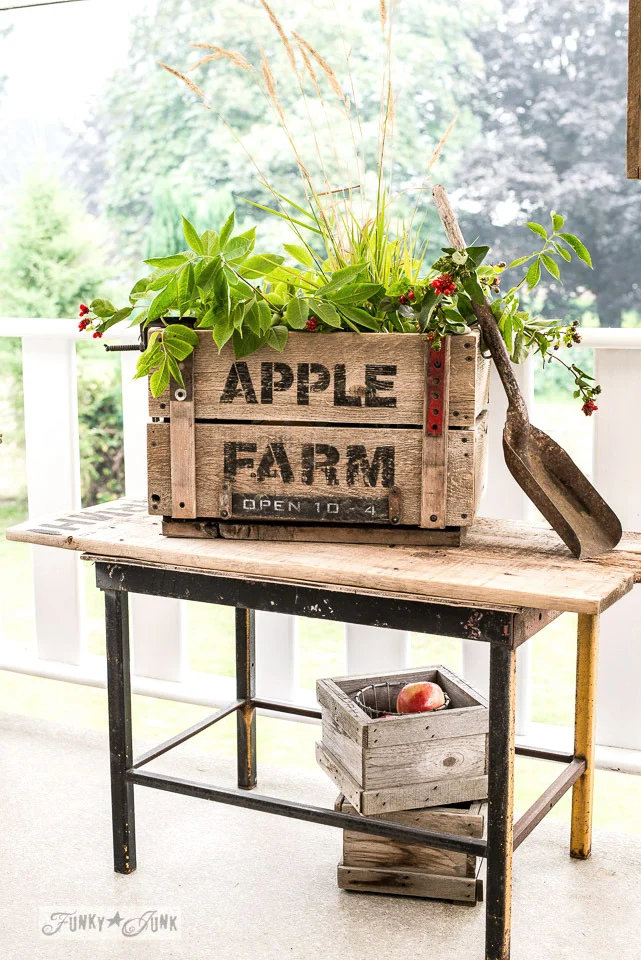
This reclaimed wood crate has two sides, Apple Farm stenciled on one and Flower Farm on the other, so one spin changes the display. Lay your stencils on wood strips first to size the crate, then cut four 12 inch side boards, four 20 inch front and back boards and four chunky corner supports, and sand everything. Build the two sides first, drilling pilot holes so the old wood doesn’t split, then screw on the front and back. Stencil a saying on each side and leave the raw wood as is. Fill it with hydrangeas, branches, apples or pumpkins.
Get the full tutorial at Funky Junk Interiors.
11. DIY Rope Wrapped Apples

Rope wrapped apples bring rustic texture to a bowl or shelf all year, and a whole bowlful takes about an hour. Start with plastic, foam or paper mache apples and pull out the stem. Secure the end of thin two-ply cotton rope at the bottom and wrap upward in a tight spiral, adding tiny dots of hot glue as you go so the rope stays put when people pick them up. Low temperature glue is kinder to foam and plastic. Wrap over the top, then glue the stem back in at the hole.
Get the full tutorial at Creative Jewish Mom.
12. Stained Glass Apple Window

This stained glass apple window craft uses clear contact paper, tissue paper squares and a construction paper apple frame, and it’s mess free because there’s no glue. Peel a sheet of contact paper and lay it sticky side up, then press on a red apple frame, a stem and a leaf. Kids fill the inside of the apple one tissue square at a time, overlapping red, yellow and green pieces. Seal it with a second sheet of contact paper, trim the edges and hang it in a window. A free apple template keeps the frames even.
Get the full tutorial at Kinder Craze.
13. 3D Paper Apple Craft
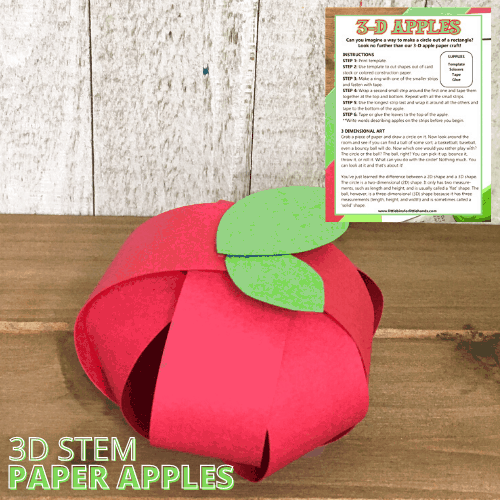
A 3D paper apple is a great answer to the riddle of how to make a circle out of a rectangle. Print the free template and cut the strips and leaves from red, green or yellow cardstock. Tape one short strip into a ring, wrap a second strip around it and tape it at the top and bottom, and repeat with all the short strips. Wrap the longest strip around everything last and tape it underneath, then add the leaves on top. Older kids can write apple describing words on the strips before they build.
Get the full tutorial at Little Bins for Little Hands.
14. Homemade Apple Coasters
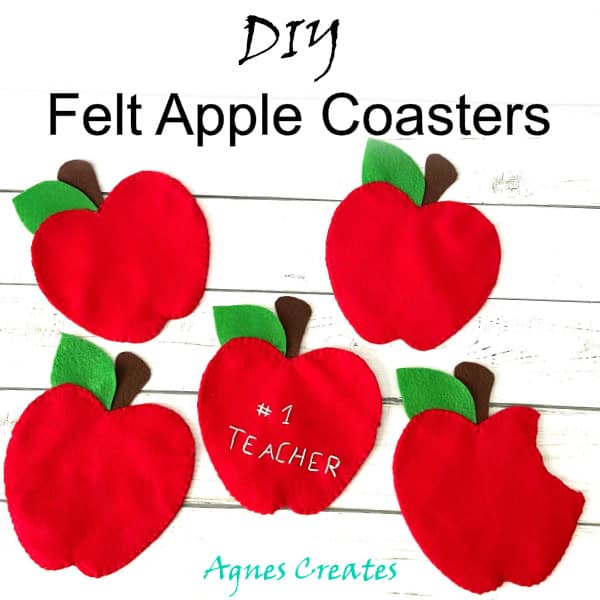
These felt apple coasters are stitched together with embroidery thread, so they are a gentle first sewing project. Print the free apple template and cut two red or green felt apple shapes for each coaster, plus a brown stem and a green leaf. Pin the stem and leaf between the two apple layers, then blanket stitch around the edge with matching embroidery floss. Knot the thread on the last stitch and push the needle between the layers to hide the tail. Try the version with a bite taken out, or embroider a short message on top.
Get the full tutorial at Agnes Creates.
15. DIY Apple Cupcake Toppers

Red and pink pom poms on wooden skewers make apple cupcake toppers in less than an hour. Cut small leaf shapes from two shades of green felt, then pinch the base of each leaf with a tiny dab of hot glue so it curls a little. Hot glue pom poms in big, medium and small sizes to the tops of the skewers and glue a leaf onto each one. Push one or two into each frosted cupcake. A pink apple or two mixed in keeps the set from looking too matchy for a fall party or apple picking day.
Get the full tutorial at Delineate Your Dwelling.
16. Apple Mason Jar

This apple mason jar uses spray paint and a stencil to leave a clear apple window in the glass. Wipe the jar with rubbing alcohol, then stick an apple shape cut from vinyl on a cutting machine, or from contact paper by hand, to the front and burnish out every bubble. Spray light coats of gold metallic or mirror effect paint, waiting a minute between coats, for about seven coats. Peel off the apple once it’s dry, fill the jar with red candies and tie a ribbon around the rim for a teacher.
Get the full tutorial at Infarrantly Creative.
17. 3D Printable Apple Basket Craft
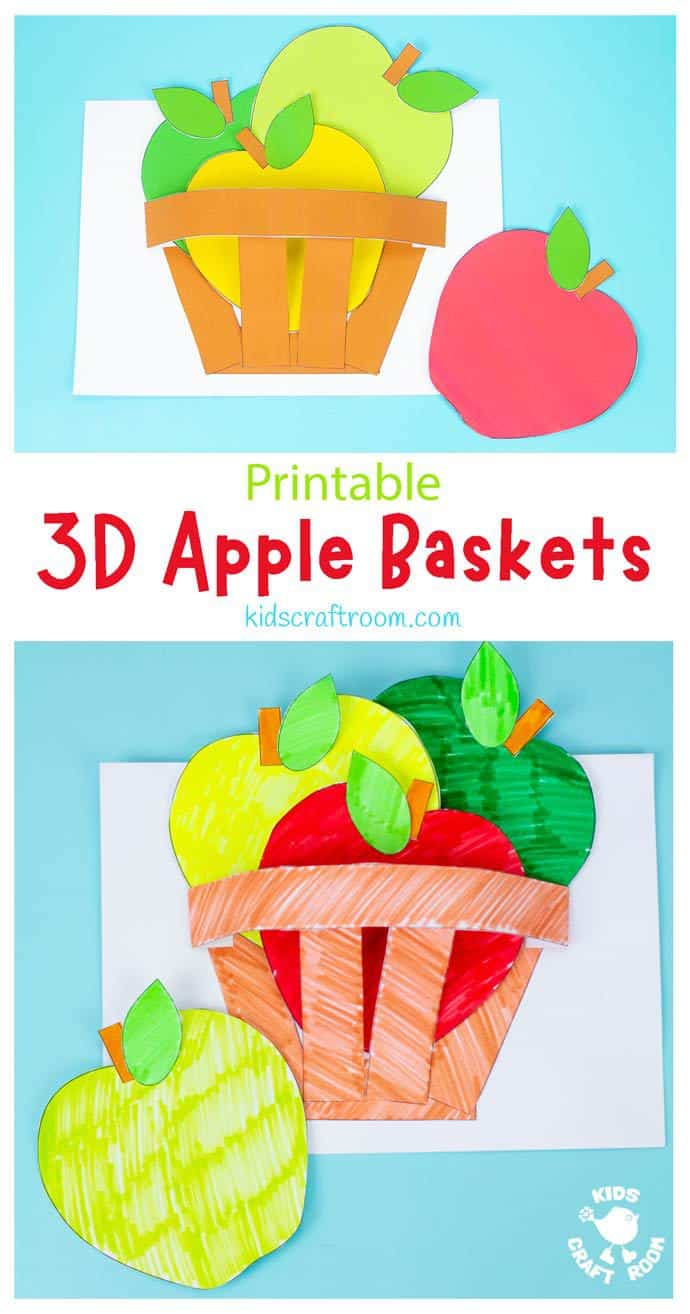
This printable apple basket craft has a 3D basket that stands off the page, so kids can actually drop their apples in and pull them out again. Print the template in color, or in black and white to color in or trace onto colored paper. Cut out the pieces, glue three short basket pieces to the backing sheet, fanning the outer ones slightly, then fold the tabs of the long basket piece and glue it into an arch across the front. Glue stalks and leaves onto the apples and fill the basket. The pieces are big enough for little hands.
Get the full tutorial at Kids Craft Room.
18. Paper Cup Apples

Red, yellow and green paper cups become little apple gift boxes in this clever back to school wrap. Trim the rolled lip off the top of each cup, then mark eight even points around the rim and snip a 2 inch slit straight down from each one. Fill the cup with treats, erasers or a small gift, then fold the tabs over one another all the way around so they cascade closed. Knot a 5 inch loop of jute for the stem, tuck the knot into the top and seal it with a circle of tape, then fold a strip of green washi tape over the loop for a leaf.
Get the full tutorial at Willowday.
19. Make Apple Candles
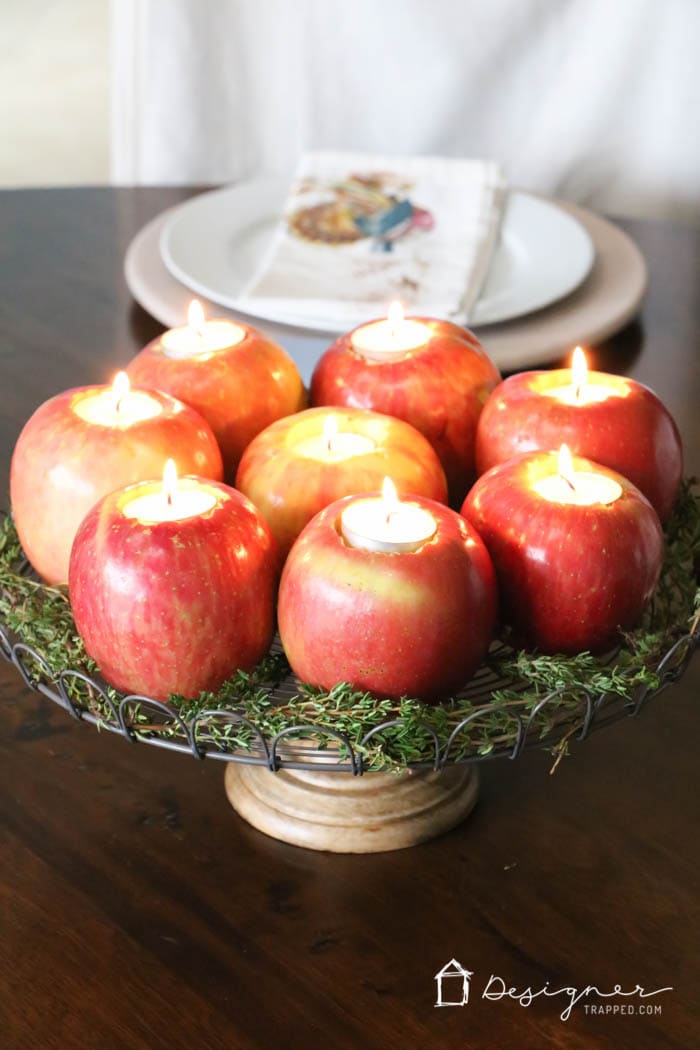
Apple candles take about ten minutes and around $10 for a whole centerpiece. Pick apples with flat bottoms so they sit upright; red and green varieties look especially pretty. Use a drill with a 1 1/2 inch paddle bit to make a shallow hole in the top of each apple, only about 1/4 inch deep, just enough to hold a tea light. Drop in the tea lights, set the apples on a cake stand or crate and tuck fresh herbs like thyme around and between them. It works for Thanksgiving and Christmas tables alike.
Get the full tutorial at Kaleidoscope Living.
20. Apple Wall Hanging

Seven metal jar lids from baby food, peanut butter or pasta sauce become the apples on this apple wall hanging. Paint the lids red, two coats for a rich color, then bend green pipe cleaners into a leaf and stem for each one and tape them to the back. Tie twine to both ends of a stick about 1 to 1 1/2 feet long for the hanger, then tie on strings of different lengths at even spacing and tape a lid to the end of each. Real or silk leaves and ribbon or yarn can stand in for the pipe cleaners and twine.
Get the full tutorial at Moms and Crafters.
21. Stamped Apple Wrapping Paper
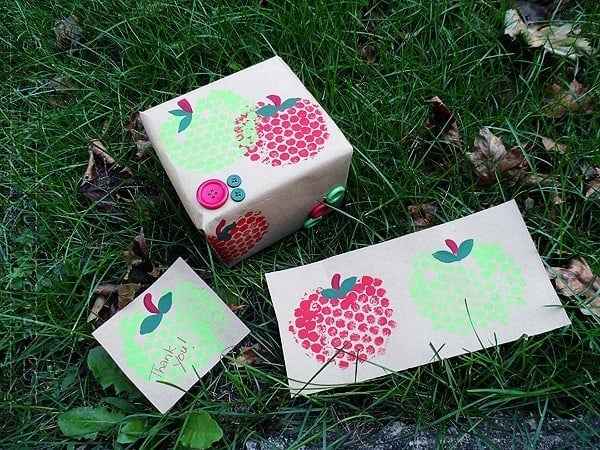
Bubble wrap makes an apple stamp that prints a fun dotted texture. Cut bubble wrap into roughly 6 inch squares, then paint a simple apple shape on the bubble side, keeping the paint light so it stays on the bubbles and out of the gaps. Flip it paint side down onto brown kraft paper, press gently and peel it back to reveal the print. Use a fresh piece of bubble wrap for each color. Stamp gift wrap, thank you cards or a banner, or switch to fabric paint for an apron, a T-shirt or a canvas bag.
Get the full tutorial at Crafts by Amanda.
22. DIY Gilded Apples
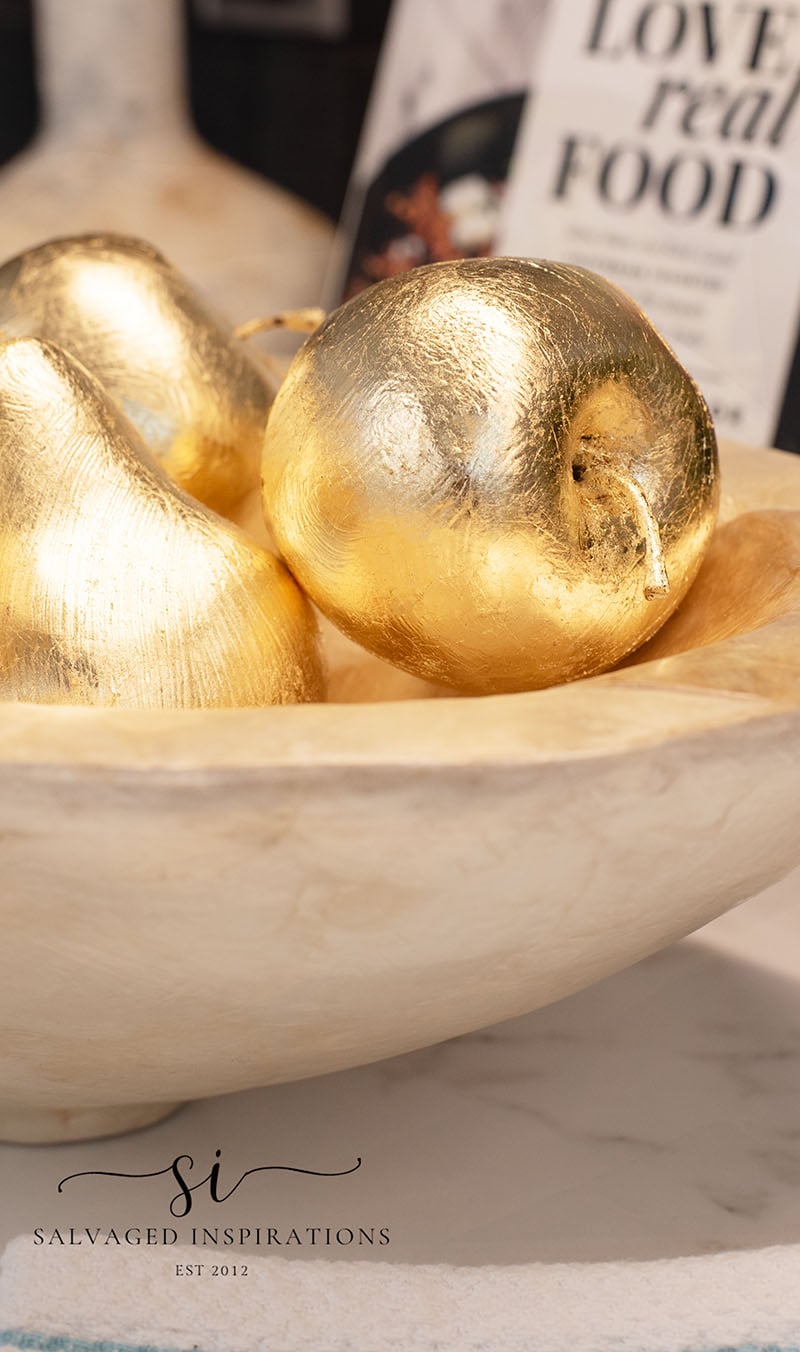
Thrifted plastic fruit turns into gilded apples with a gold leaf kit and a little patience. Clean each piece with a degreasing cleaner, rinse and let it dry, then scuff sand with a 220 grit sponge so the adhesive has something to grip. Brush on a thin, even coat of gilding glue and wait about 15 minutes, until it turns clear and very tacky. Lay on the gold leaf sheets gently, away from fans and open windows, wearing gloves. Tears and wrinkles can be patched. Each apple used about two and a half sheets.
Get the full tutorial at Salvaged Inspirations.
23. Apple Pencil Toppers

Felt apple pencil toppers are a quick back to school craft, and one sheet of felt makes quite a few. Cut an apple shape from red or green felt, plus a small rectangle, a stem and a leaf. Glue the stem and leaf together and attach them to the back of the apple. Add googly eyes to the front, and a drawn smile if you like. Glue each end of the felt rectangle to the back of the apple, leaving a gap in the middle so a pencil slides through. School glue works for kids; hot glue is faster.
Get the full tutorial at Made To Be A Momma.
24. DIY Recycled Apple Bunting
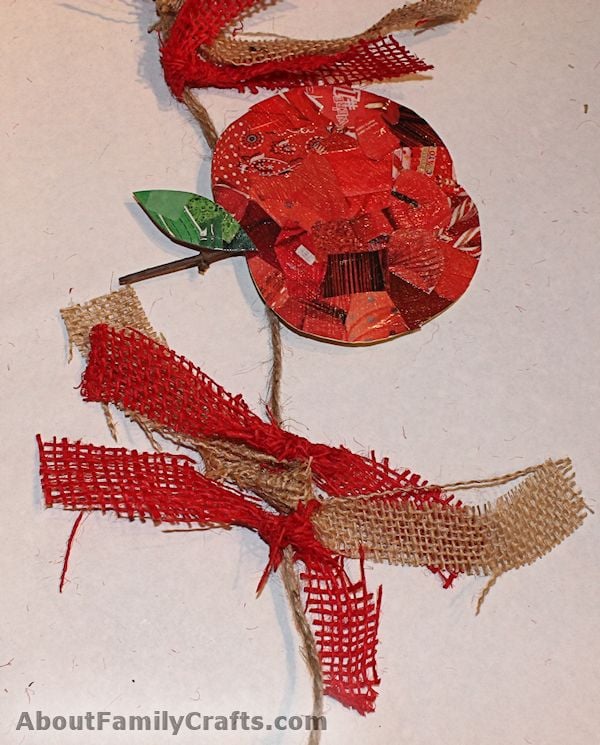
The apples on this recycled bunting are cut from margarine tub lids and covered in red catalog scraps. Trim the lids into apple shapes by cutting off the rim and snipping a small dip at the bottom and a larger one at the top; cardboard works too. Tear or cut every red bit you can find in old catalogs and magazines, then decoupage the pieces on with Mod Podge, half an apple at a time, letting them overlap the edge. Decoupage green scraps onto cardboard for leaves, trim everything when dry and string the apples together.
Get the full tutorial at About Family Crafts.
25. 10-Minute Apple Pie Soap

Melt and pour apple pie soap is ready in about ten minutes and smells like dessert. Cube about 1 pound of shea butter soap base, which makes four 4 ounce bars, and melt it in a microwave safe measuring cup in 20 to 30 second bursts, stirring each time. Stir in apple fragrance oil to taste, a tablespoon of vanilla extract, a little cinnamon and soap colorant if you want it. Pour into a soap mold and leave it alone for about 30 minutes. Wrap each bar in a printed kraft paper label.
Get the full tutorial at Happiness is Homemade.
26. Big Apple Bean Bags

Big apple bean bags are a sewing project kids can help with and a toy for tossing games afterward. Trace a large lid twice on red felt or fabric and cut out two apple circles, plus a stem and a leaf. Sew around the edge by hand or machine with a sturdy stitch, catching the stem and leaf between the layers and leaving a gap. Funnel in plastic pellets, working inside a clear bag to catch spills, then sew the gap closed, pushing the pellets aside so the needle doesn’t hit them. Pumpkins work the same way.
Get the full tutorial at Make It Your Own.
27. Yarn-Wrapped Pinecone Apple Tree Craft

A pinecone wrapped in green yarn and dotted with red pom poms turns into a little apple tree. Wrap the yarn around the pinecone many times, then cut the end and tuck it in, adding a dab of glue if it wants to unwind. Glue red pom poms onto the tree for apples, sizing them to fit the pinecone. For a trunk, glue the pinecone on top of a wooden spool. Set out a mix of pinecones, yarn colors and pom pom sizes and let kids design their own. It’s great fine motor practice for preschool through first grade.
Get the full tutorial at Buggy and Buddy.
28. Pool Noodle Apple Stamping Craft
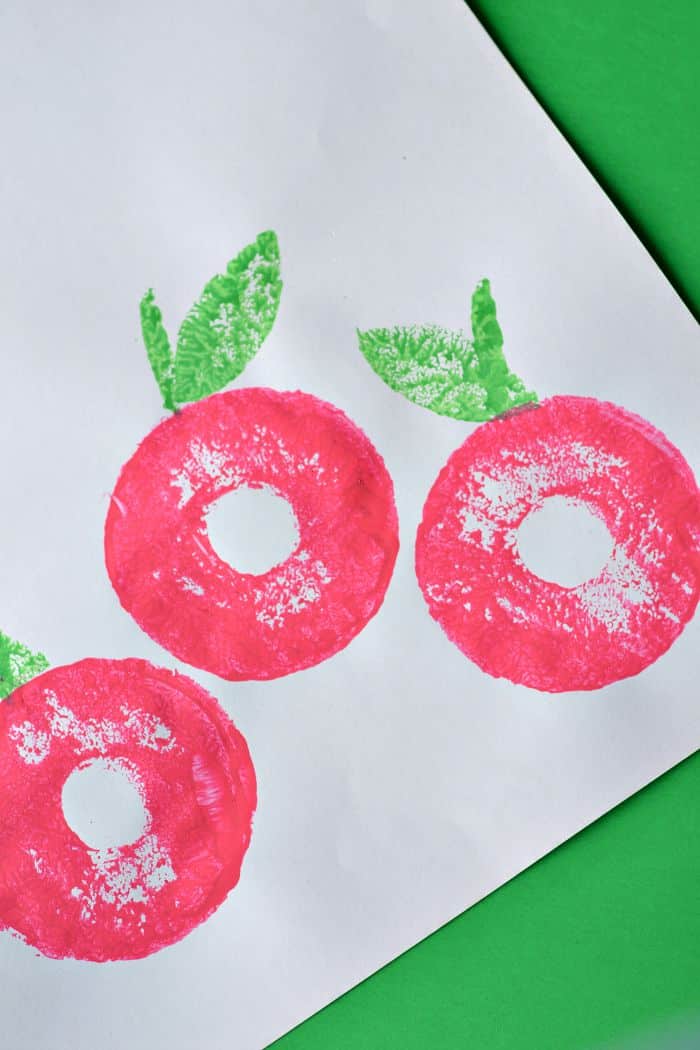
A cheap pool noodle makes the stamps for this apple painting craft, and setup takes just a few minutes. Slice a few rings off the noodle for the apples, then cut one piece into a leaf shape and a thin sliver for the stem. Dip the rings in red or green tempera paint, blot them on scrap paper and stamp onto cardstock, then stamp the stems and leaves above each apple. Expect squishy, happy messes from little ones. Swap to orange paint and the same rings make pumpkins for October.
Get the full tutorial at Glue Sticks and Gumdrops.
29. Crochet Apple Cosy

A crochet apple cosy protects a lunchbox apple from bruises and uses only 12 to 15 grams of yarn with a 4 mm hook. Chain 6 and join into a ring, then work increasing rounds of single crochet until the flat base is about 1 1/2 inches across, or 2 inches for larger apples. Switch to half double crochet rounds, using a real apple as a guide, and turn the cosy inside out once it starts to curve. Finish with single and slip stitches, then thread a ribbon or a chain drawstring with little crochet leaves.
Get the full tutorial at Coffee & Vanilla.
30. DIY Glitter Apple Earrings
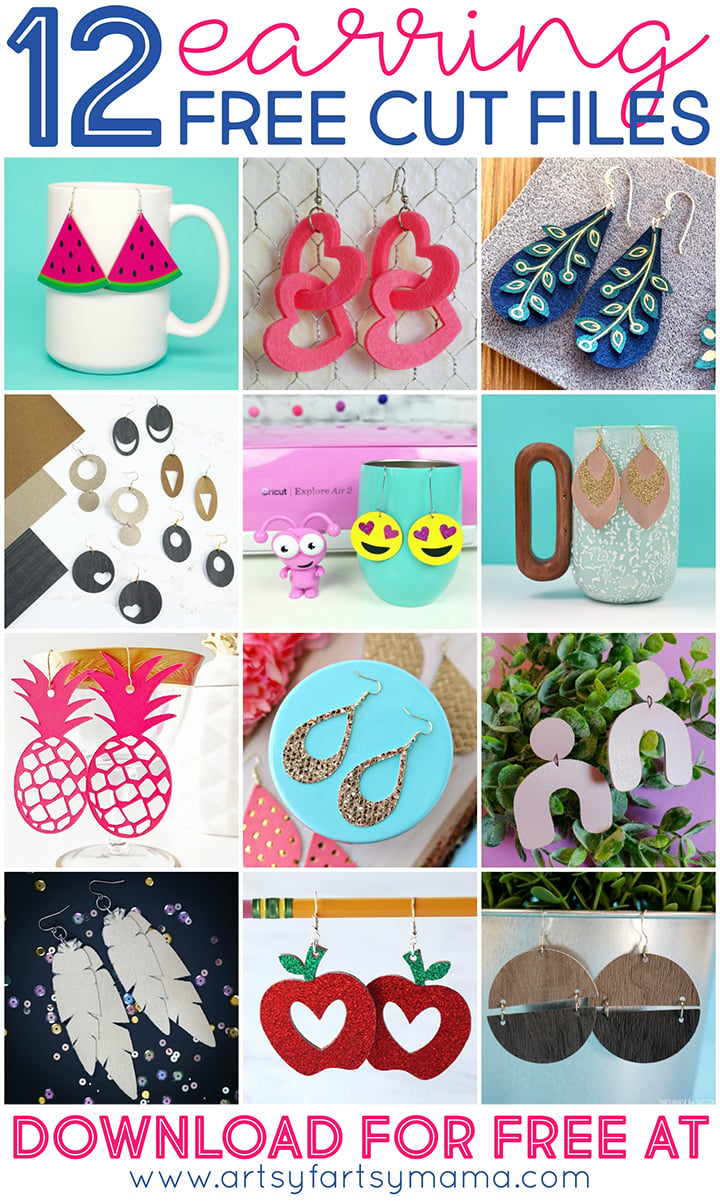
These glitter apple earrings come from a free cut file for Cricut or other cutting machines and finish about 2 inches high. Cut a sturdy base from 2 mm chipboard or basswood with the knife blade on a StrongGrip mat, taping the edges so nothing shifts; it takes about 10 or 11 passes. Cut red and green glitter cardstock for the apple and leaves, layer them on the base and add earring hooks. Duplicate and mirror the design in the software for a matching pair. A sharp blade matters most if you try leather.
Get the full tutorial at Artsy-Fartsy Mama.
31. Easy No-Sew Felt Fruit Coasters

These no-sew felt coasters include a sliced apple, plus a lemon and a watermelon to round out the set, and everything is held together with hot glue. For the apple, make a template, then cut an outer apple from red felt, a smaller inner shape from white, a green leaf, a brown stem and four black teardrop seeds. Glue the white layer to the center of the red, then add the seeds, stem and leaf. Stiff craft felt keeps the coasters from going floppy, and tailor’s chalk keeps the traced lines invisible. Watch the DIY JOY video for every cut.
Get the full tutorial at DIY JOY.






