I’m so glad that I know this now…this is so beneficial! That being said, in the past, I sure could have used this great tip! I can’t believe how many articles of clothing I’ve gotten rid of when I could have kept them and done this to them, continuing to wear them (sad face)!
If your favorite pair of jeans have become too small in the waist, don’t despair and definitely don’t get rid of them. Instead, here’s an amazing idea for altering the waistband to fit again even without advanced sewing skills. How exciting is this?
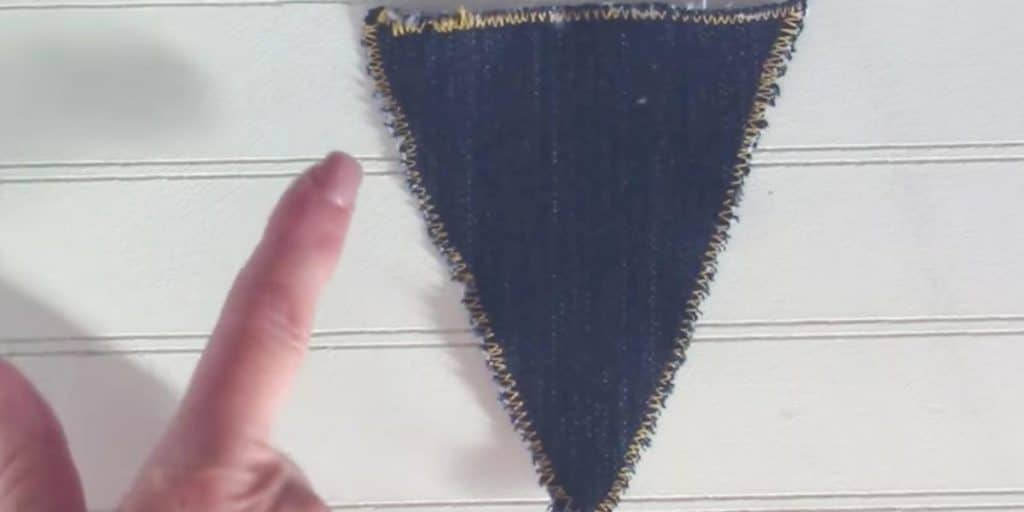
Keep in mind, if your denim patch doesn’t match exactly, try to stick with the slightly darker than lighter. It’ll be somewhat hidden by the center belt loop, so slightly darker will draw less attention to it.
Here’s how to do this:
- Remove the center back belt loop with a seam ripper. Use a tape measure to determine the circumference of the waistband on your jeans. Write that number down and save it for later.
- Use a sharp pair of scissors to cut directly down the center back of your jeans to the back yolk. You can cut down farther if you need more room in the hips as well.
- Now measure around your waist or hips where the waistband of your jeans sits. Subtract the circumference of the waistband from the circumference of your waist/hip measurement to determine the width of the denim piece you’ll need to insert into your jeans. Then add 1 inch to that number for a seam allowance. For example, if your waist circumference is 30 inches and your jeans waistband is 28 inches: 30-28=2+1=3. Your denim insertion piece will need to be 3 inches wide.
- To determine the length of the denim insertion piece, measure the raw edge of the cut you made in the center back and add 1 inch.
- Sew across the top of the denim piece.
- Fold 1/2 inch of the top of the denim piece toward the wrong side of the denim and press.
- Topstitch the top edge of the fold.
- Place the denim piece under the cut in the back of the jeans and mark the opening onto the insertion piece with a washable marker or tailor’s chalk.
- Cut 1/2 inch away from the marks you made.
- Finish the raw edges of the insertion piece using the wide zigzag stitch that you used on the top edge.
- Pin the denim insertion piece into the opening.
- Change the thread in your machine to match your jeans and use the same wide zigzag stitch to sew the denim piece into the opening. Go slow and make sure you are catching the raw edge of the jeans. Remove the pins as you sew.
- Change your machine to a narrow zigzag stitch, but keep it on a short stitch length. Use this stitch to reattach the belt loop to the center back of your jeans.
Make sure to watch this gal with eHow do this in her step by step tutorial so you can start altering some jeans!


