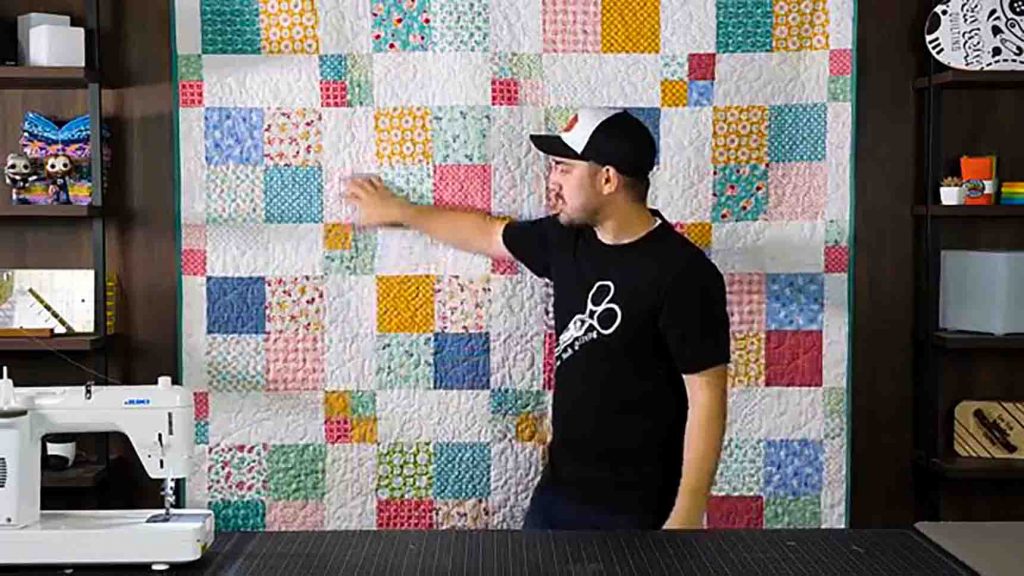
Are you curious as to how to make the disappearing 9-patch quilt? This tutorial from Sew Yeah on Youtube is perfect for beginners! I used to get intimated with complicated quilt patterns, including the disappearing 9-patch, but this quilt tutorial is the best I’ve seen. I was able to make my first disappearing 9-patch quilt thanks to this incredible tutorial. Learn the step by step instructions by watching the video below.
Materials:
- main fabric – 6 1/2″ yards of strip roll (or 3 7/8 yards of fabric)
- background fabric – 6 1/2″ yards of strip roll (or 3 7/8 yards of fabric)
- backing – 5 1/4 yards
- binding – 5/8 yard
- (click here for the free pattern)
Directions:
Step 1
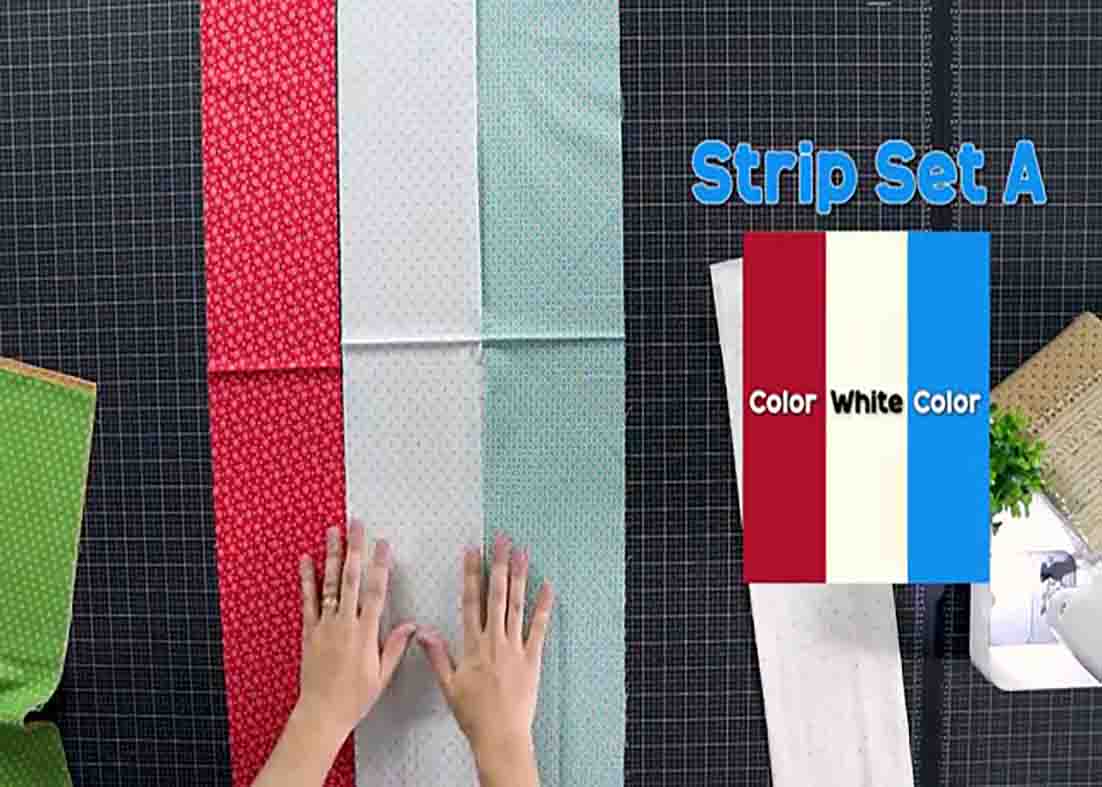
Separate your strip roll into lights and darks. After this, make two different strip sets with three strips to make one unit. Now, you have strip set A and strip set B. You will need one of these for every two of the other kind of strip sets. Once you have your sets, sew each down their entire length, right sides together, then iron them to the dark side. Once you have your units sewn, subcut them to 6 1/2″ x width of sewn strips.
[social_warfare]
Step 2
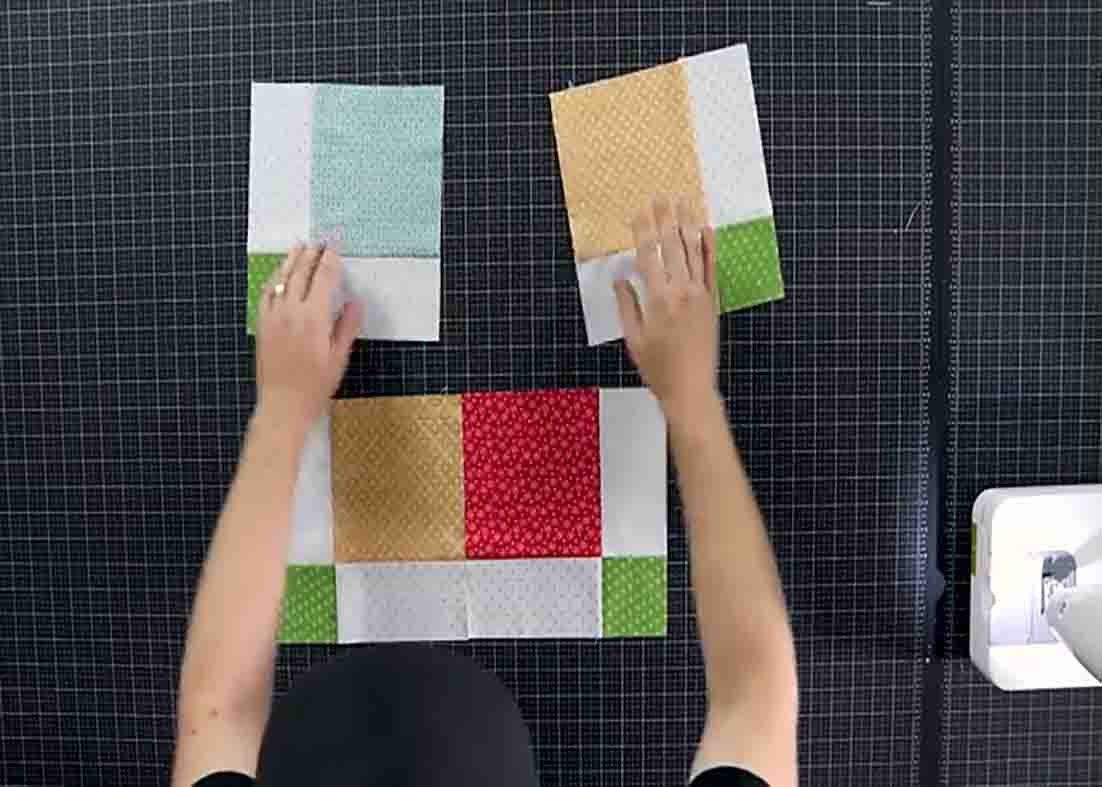
Now, start mixed matching. Take three strips, making sure the little squares have different colors, then sew them together. Press them afterward. Now, you have your nine-patch, it’s time to make it disappear. Grab your ruler and cut them directly in half on both sides. Once cut, rotate them, placing the big squares in the center. Sew them together, then press. Repeat these until you have enough blocks to make the quilt top.
Disappearing 9-Patch Quilt Tutorial


