
This cute fall pumpkin coaster by Stacey Lee Creative is the perfect pair for your pumpkin spice latte or hot chocolate mug at home! It’s very easy to make – you can finish several pieces in a day. Watch the video below for full instructions.
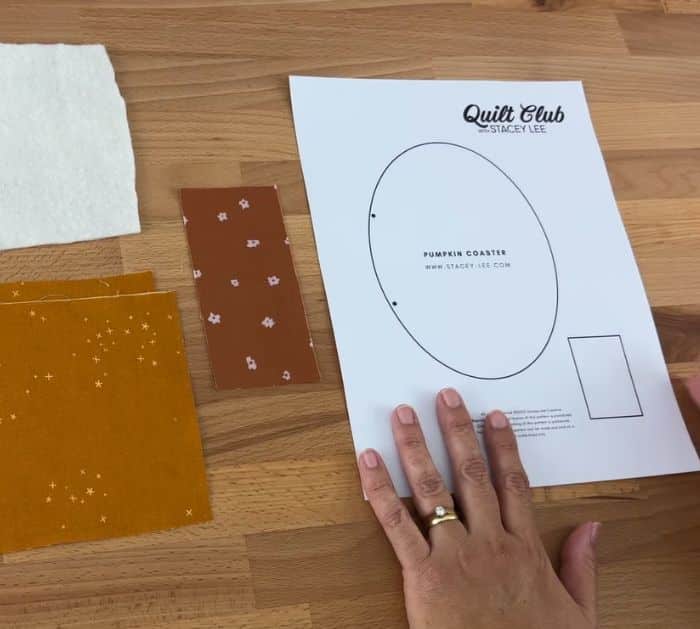
Materials
- 2 pieces of 7 1/2″ x 6″ orange rectangles
- 1 piece of 7 1/2″ x 6″ batting
- 1 piece of 5″ x 2 1/2″ brown rectangle for the stem
- thread
- pattern (you can download it here: link)
[social_warfare buttons=”facebook,pinterest,twitter,whatsapp”]
Instructions
Step 1:
First, you need to cut the oval and the rectangle from the pattern. You can also make your own pattern just like the one below.
Step 2:
Get the brown rectangle and fold it in half, right sides together. Place the stalk in the middle and pin it in place. Cut around it and take the template paper off. Place them on top of each other, right sides together.
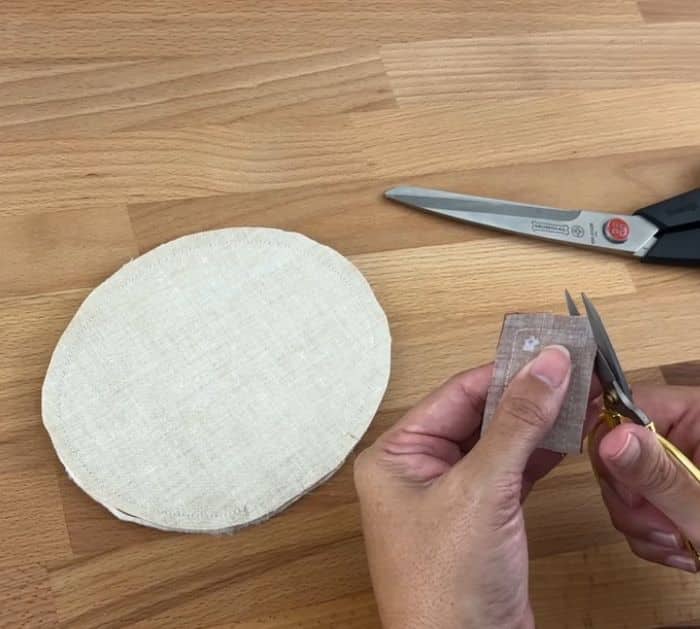
Step 3:
Place the two pieces of orange fabric right sides together and put the oval template on top. Pin it in place and cut around the template. Before you take the template off, mark on the fabric where the two dots are. Remove the pins and template.
Step 4:
Cut the batting the same shape as the oval.
Step 5:
Take your fabric pumpkins (right sides together) and place the batting on top. Pin them together. On the fabric side, make the markings again. Set the stitch length at 2.5. Sew with a quarter of an inch seam allowance starting on the second marking. Backstitch, go all the way around, then come up to the second marking and backstitch again.
Step 6:
Take your stalk and sew around the three sides, leaving an opening. Trim the corners just be careful not to cut the stitches.
Step 7:
Trim the excess from the edges of the pumpkin to remove the bulk. Open the pumpkin in between the two fabrics, pop your fingers in, grab the bottom of the pumpkin, and pull it through. Push out all the edges. Flip the stalk too.
Step 8:
With the batting on top, tuck the opening in with a quarter-of-an-inch seam allowance. Give it a press. Press the stalk too.
Step 9:
Find the opening of the pumpkin and insert the stalk. Pin it in place.
Step 10:
Mark the center of the bottom of the stalk. Draw the curves echoing the shape of the pumpkin. Sew right around the edges of the pumpkin with a 1/8″ seam allowance to close the opening. After that, sew on the curved lines.
Cute Fall Pumpkin Coaster


