Country style feels best when it’s handmade, a little imperfect and full of things you put together yourself. These 27 country crafts are projects to make, not pieces to buy and style. Weave a tobacco basket from coffee stained reed, turn yard sale hardcovers into burlap and lace book stacks, sew bandana pillows, coil a jute rope tray and hang a pallet peg board by the back door. There are signs to hand letter, a shopping list pad for the fridge, a sweet spring basket wreath and a thrifted candle holder made from an old cake pan. Six DIY JOY video tutorials join the list, including a chicken wire suncatcher and bandana wall art. Most of these use scrap wood, twine, thrift finds and craft paint. Browse more on the country crafts hub.
Table of Contents
- 1. DIY Tobacco Basket
- 2. DIY Chicken Wire Suncatcher
- 3. Wreath Inside A Basket
- 4. Easy DIY Farmhouse Candlesticks
- 5. Pallet Sign and Planter All In One
- 6. DIY Jute Rope Tray
- 7. DIY Wood Shopping List Pad
- 8. DIY Lace & Burlap Covered Books
- 9. DIY Bandana Pillow
- 10. DIY Pallet Peg Board
- 11. DIY Chicken Wire Frame
- 12. Easy DIY Bandana Wall Art
- 13. DIY Laurel Wreath
- 14. DIY Jeans Pocket Placemats
- 15. Pebble Coaster
- 16. Mason Jar Fairy Lights With Pressed Flowers
- 17. Twine Pumpkins Made From Toilet Paper Rolls
- 18. Farmhouse Style Mason Jar Planter
- 19. DIY Twig Letters
- 20. DIY Song Lyric Sign
- 21. Hanging Paper Wisteria
- 22. DIY Cotton Boll Wreath
- 23. DIY Painted Canvas Farmhouse Sign
- 24. DIY Rustic Footstool
- 25. DIY Kitchen Towels
- 26. DIY Wood Box Centerpiece
- 27. Thrift Store Farmhouse Candle Holder
1. DIY Tobacco Basket

A DIY tobacco basket gives you that sought after farmhouse wall piece without the antique store price tag. The secret is a single coil of 1 inch flat basket reed, enough for one large and one medium basket. Soak the coil in a strong pot of instant coffee to age the pale reed, let it dry, then cut it into strips and weave them on a flat surface, holding everything with binder clips until it stays put. A long strip wrapped around the outside forms the rim, and an office stapler plus hot glue hold it all together.
Get the full tutorial at anderson + grant.
2. DIY Chicken Wire Suncatcher
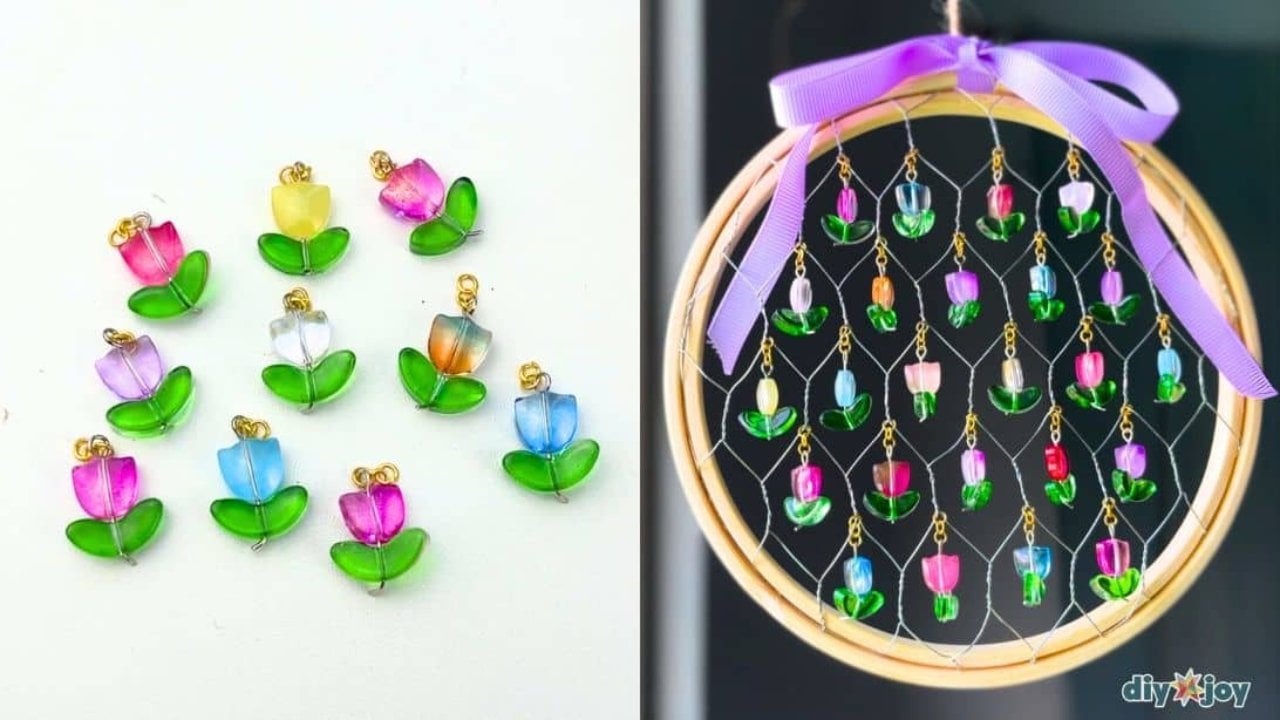
Part farmhouse decor and part wind chime, a DIY chicken wire suncatcher jingles softly whenever a breeze comes through. Use the inner ring of an embroidery hoop as a template, mark a circle on the chicken wire, add an allowance and snip it out with wire cutters (gloves help). Bend the edges and tighten the outer ring over the wire. For the charms, stack a glass tulip bead and a green leaf bead on a head pin and curl the end. Link each charm to the wire with jump rings, tie a ribbon on top and hang it in the sun.
Get the full tutorial at DIY JOY.
3. Wreath Inside A Basket

A wreath inside a basket is a fresh way to welcome spring at the front door. Start with a shallow, round bottomed bushel basket and hot glue a wire to the back so it hangs on its side. Glue layers of moss inside, building it a little higher on one side, then nestle a small bird’s nest with faux eggs into that taller corner. Tuck in pussy willow and a few bare twigs, and perch a little craft bird on the rim. A few fresh pansies will last for days with a light daily misting.
Get the full tutorial at Your Cozy Home.
4. Easy DIY Farmhouse Candlesticks

Easy DIY farmhouse candlesticks start with old spindles, and you can usually find them for a few dollars on Craigslist or at a salvage shop. Cut each spindle to the height you want. Screw a wooden base from the craft store onto the bottom, then flip a round wooden plaque upside down and screw it on top so the candlestick tapers up like the real thing. One coat of chalk paint in a warm linen white covers well. Sand the edges in a few spots so the bare wood peeks through.
Get the full tutorial at Sarah Joy.
5. Pallet Sign and Planter All In One

A pallet sign and planter all in one greets guests at a side door with flowers and a family name. Spray paint a rough pallet in a bright color, two coats on the front and edges. Trace bowls of different sizes to make a big daisy template, pencil the flowers on and fill them in with acrylic craft paint. Add your family name and the year using a chalk transfer or a cutting machine. For the planters, punch drainage holes in clean cans, spray them lime green and hang them on nails between the slats.
Get the full tutorial at Modern on Monticello.
6. DIY Jute Rope Tray
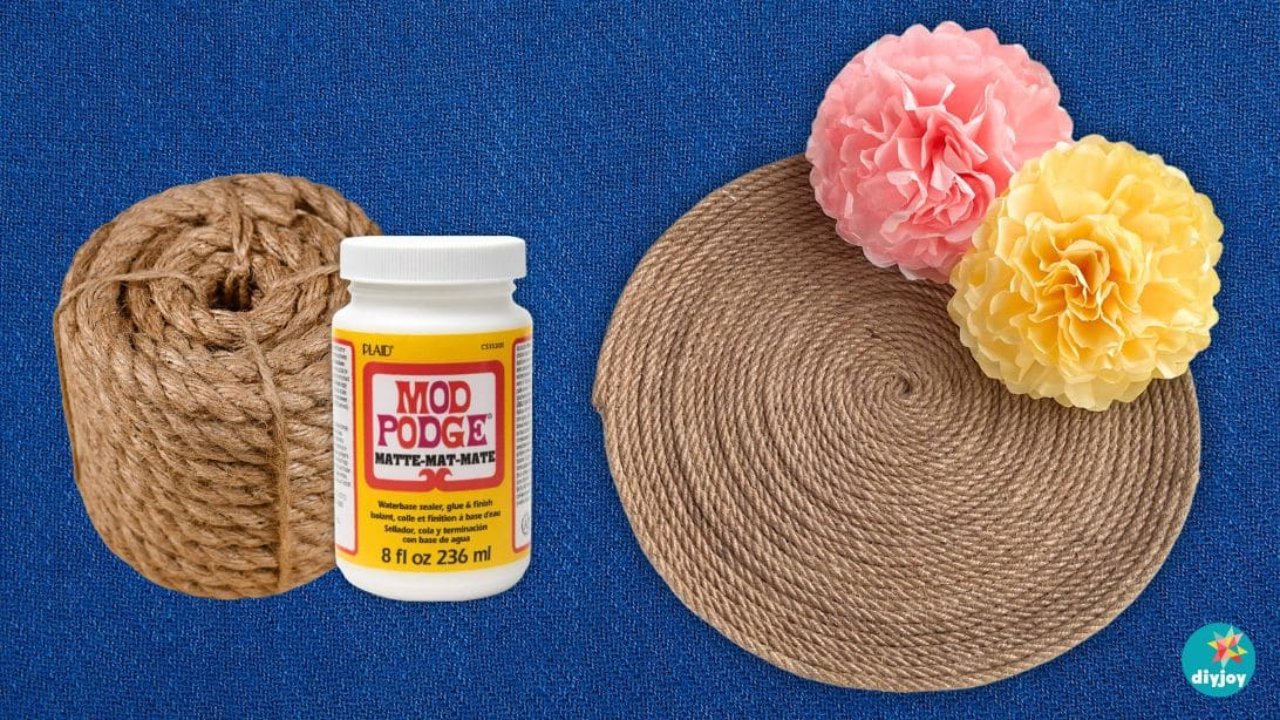
A DIY jute rope tray looks like a pricey boho find but starts with a few dollars of rope and a jar of Mod Podge. Cover an old tray or plate in cling wrap so nothing sticks, paint on plenty of glue, and spiral the rope from the middle outward, keeping the coils snug with no gaps. Turn the last few rounds up slightly for a low lip. Brush on another generous coat, press it flat and set weights on it while it dries. Pop it off the plastic once it’s firm.
Get the full tutorial at DIY JOY.
7. DIY Wood Shopping List Pad

A DIY wood shopping list pad hangs on the fridge and holds a whole roll of paper, so you can tear off the list and take it to the store. Size a piece of 1/4 inch birch plywood to fit a wide receipt roll. Cut two strips of galvanized steel plate, file the edges and screw them across the board with washers underneath so the paper slides through. Screw eye hooks near the top, thread a bent piece of galvanized wire through them and the roll, and epoxy strong magnets on the back.
Get the full tutorial at The Merrythought.
8. DIY Lace & Burlap Covered Books

DIY lace and burlap covered books turn yard sale hardcovers into pretty stacks for the coffee table or mantel. Choose newer books you won’t miss, never special old ones. Paint each cover, inside edges included, in a soft gray chalk paint. Hot glue a large book page across a little over half of the front and trim the excess, then glue a strip of burlap trimmed with lace over the top. Leave a couple of books simply painted and cover one entirely in pages, so the stack has some variety when you style it.
Get the full tutorial at Sarah Joy.
9. DIY Bandana Pillow

DIY bandana pillows are a country classic you rarely see in stores, and each one costs just a few dollars. Lay two bandanas right sides together, mark a quarter inch seam and press along the lines. Sew three sides and part of the fourth, leaving about 8 inches open, or glue the seams and clip them if you’d rather skip the machine. Turn it right side out, poke out the corners, stuff it with fiberfill or an 18 inch insert and close the gap with a blind stitch or fabric glue.
Get the full tutorial at DIY JOY.
10. DIY Pallet Peg Board

A DIY pallet peg board is a country store classic made with three supplies: pallet wood, hard cut masonry nails and a drill. Those square, old fashioned nails give it the rustic look, and big home improvement stores usually carry them. Choose a thick pallet board, since thin ones split. Decide how long you want it, mark evenly spaced spots for the nails, pre drill a little at each mark and drive the nails in. Hang a basket, a tote, keys or a dish towel from the pegs.
Get the full tutorial at Live Laugh Rowe.
11. DIY Chicken Wire Frame

A chicken wire frame is the kind of DIY farmhouse decor that looks expensive and costs almost nothing. Build a simple frame from weathered pallet boards, then stretch a piece of chicken wire across the back and fasten it tight. Hang a small boxwood wreath from the wire and you’ve got a rustic wall piece for an entry or above a buffet. It doubles as a memo board, since notes and photos clip right onto the wire. Using scrap wood you already have keeps the total around $13.
Get the full tutorial at DIY JOY.
12. Easy DIY Bandana Wall Art
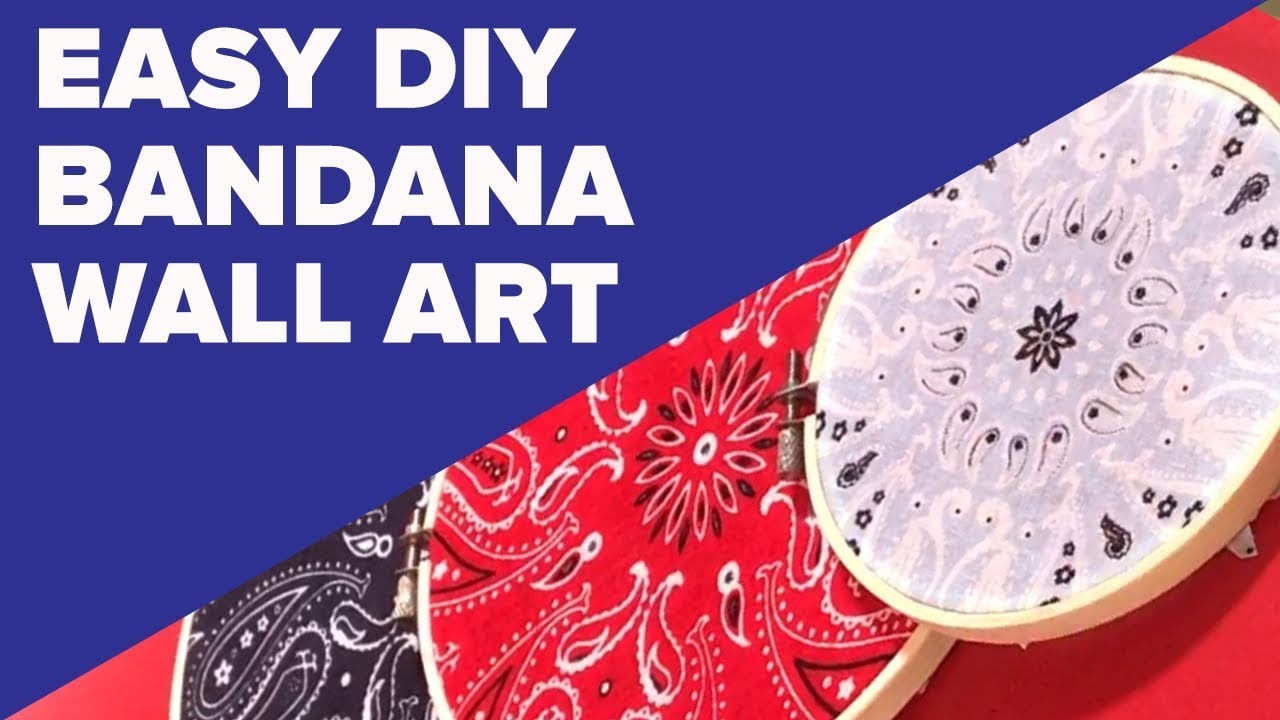
Easy DIY bandana wall art might be the quickest country craft on this list. Pick a few bandanas in classic red, navy and white paisley, then stretch each one tight inside a wooden embroidery hoop, the same way you’d hold fabric for stitching. Tuck or trim the extra fabric at the back so the hoop sits flat against the wall. Hang a cluster of different sizes together over a bench, a bed or a reading nook. Dollar store bandanas keep it about as budget friendly as a gallery wall can get.
Get the full tutorial at DIY JOY.
13. DIY Laurel Wreath

A DIY laurel wreath frames a wooden initial beautifully and works in every season. Pull apart a wire floral wreath form by bending back its metal tabs, then snip one of the rings in half to make two curved arms. Bend a faux leafy branch along each half circle and attach it every few inches with floral wire. Join the bottom ends with more wire and wrap them in brown floral tape. Twist two small hanging loops near the top and hang it with a distressed letter in the center.
Get the full tutorial at Craftberry Bush.
14. DIY Jeans Pocket Placemats
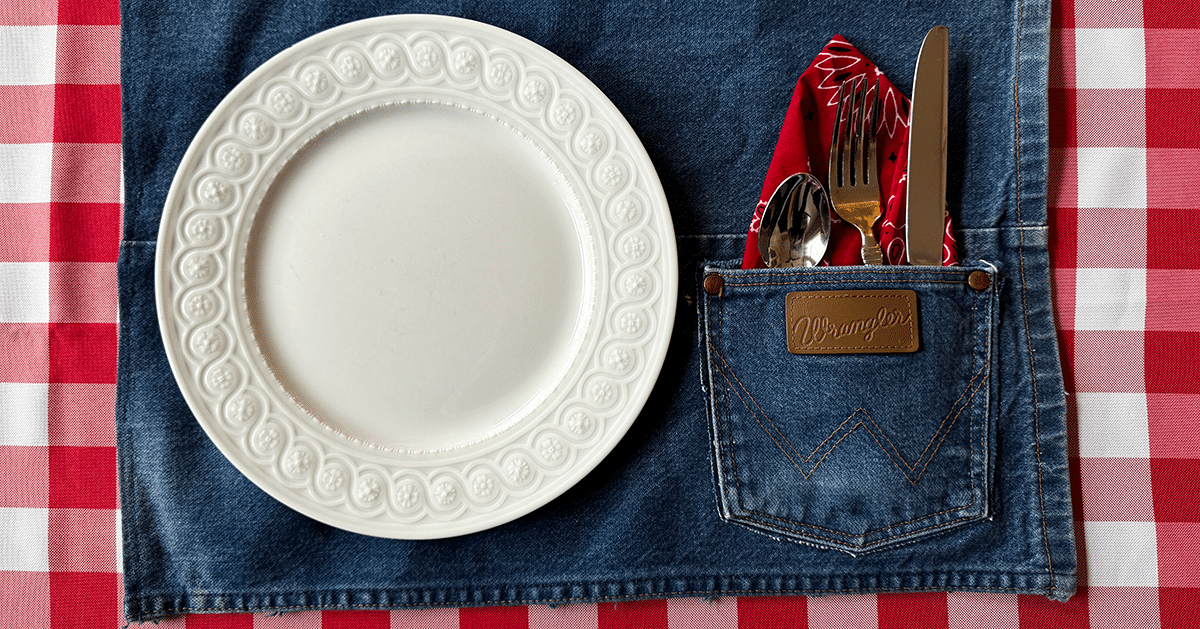
Jeans pocket placemats give a casual table real country charm, and they don’t need a single stitch. Non stretch denim from large jeans works best, and each pair makes two mats. Cut up the outside seam of a leg, cut it off around 22 inches, flatten it and trim to 14 by 19 inches. Fold every edge under a quarter inch, iron it, glue the hems with fabric glue and clip them until dry. Cut out a back pocket with a slim border and glue it near a lower corner to hold the silverware.
Get the full tutorial at DIY JOY.
15. Pebble Coaster

A pebble coaster, or really a trivet, brings a bit of the beach to the kitchen table. Collect flat, smooth stones that sit level, since bumpy ones will make a teapot wobble. Cut a circle of thick felt, then hot glue the pebbles from the outer edge inward, mixing gray and white for a speckled look. Felt alone can sag under the weight, so gluing the felt onto a stiff plastic trivet first makes it much sturdier. The same idea scales up into a placemat or even a bath mat.
Get the full tutorial at Tarz Meselesi.
16. Mason Jar Fairy Lights With Pressed Flowers
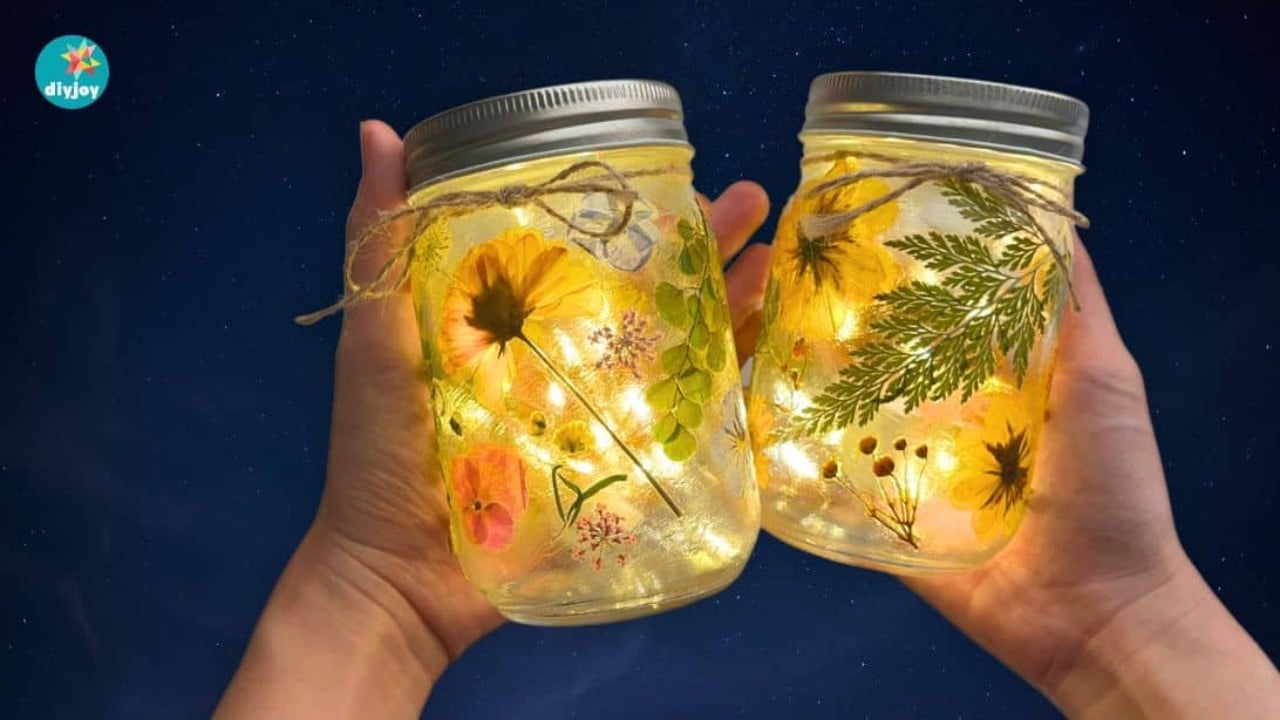
Turn a plain mason jar into a soft night light with a handful of pressed flowers. Wash and dry the glass, then play with the layout before any glue comes out. Thin blooms, ferns and leaves work best, since light passes through them. Brush Mod Podge onto one small area, set a flower down, press gently and brush a little more over it. Keep going section by section, then add a second sealing coat once it dries. Tuck a string of fairy lights inside, put the lid on and finish with a jute twine bow.
Get the full tutorial at DIY JOY.
17. Twine Pumpkins Made From Toilet Paper Rolls
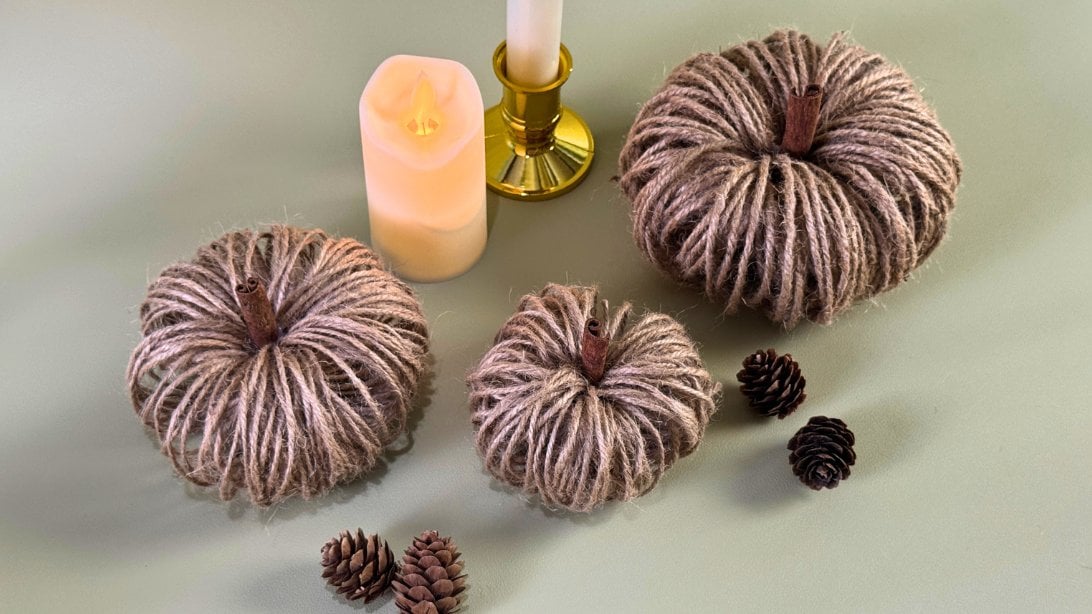
Twine pumpkins made from toilet paper rolls are about as cheap as rustic fall decor gets. Tape a length of twine lengthwise along a cardboard tube, leaving tails at both ends, then wrap more twine snugly around the middle until it’s nice and thick. Slide the tube out while holding the bundle, tie the long tails tight around the center and fan out the loops into a round pumpkin. A dab of hot glue sets a cinnamon stick on top as the stem, and it adds a lovely fall scent.
Get the full tutorial at DIY JOY.
18. Farmhouse Style Mason Jar Planter

A farmhouse style mason jar planter suits any Fixer Upper fan’s dining table. Paint three 16 ounce mason jars with white chalk paint, giving them a couple of coats for solid coverage. Paint an unfinished wood box with metallic silver craft paint, then dab a little gray over it with a paper towel to fake the look of weathered galvanized metal. Keep layering silver and gray until you like it. Drop the jars in and fill them with succulents, greenery, faux stems or real flowers in water.
Get the full tutorial at The Craft Patch.
19. DIY Twig Letters

DIY twig letters bring a little of the woods inside, and the only thing you’ll buy is a plain wooden letter from the craft store. Gather a bundle of thin twigs on your next walk. Cut them to size and lay them loosely across the letter first, overlapping a few so no paint shows through. Once you like the coverage, hot glue each twig in place. It goes quickly and looks great propped on a fall mantel. Mini versions make sweet place cards for the Thanksgiving table, too!
Get the full tutorial at The Happy Housie.
20. DIY Song Lyric Sign

A DIY song lyric sign takes patience, but the result looks like a page from an old book. Paint a pre cut piece of edge glued pine with three coats of off white chalk paint, sand it smooth and frame it with trim stained a driftwood gray. Print the lyrics in a font you love, tape the words along penciled guidelines and trace each letter hard with a pen to leave an indent in the wood. Fill every indented letter with a fine tip permanent marker, erase the guidelines and sand lightly to distress.
Get the full tutorial at House by Hoff.
21. Hanging Paper Wisteria

Hanging paper wisteria brings soft color to a bedroom, a porch or a party backdrop. Use 65 pound cardstock in purples, creams and whites so the blooms hold their shape for years. Cut the petal strips by hand or with a cutting machine, curl them with a rolling tool and wrap them down a length of 22 gauge wire with hot glue. Small pearl beads add a little shimmer. Hang several strands at different lengths for a full, cascading look, and follow along with the video for each step.
Get the full tutorial at Catching Colorflies.
22. DIY Cotton Boll Wreath

A DIY cotton boll wreath gives you the full, fluffy look of the pricey store versions for around $20. Start with a 14 to 16 inch grapevine wreath, and check the thrift store, since old wreaths are easy to strip. Cut six or seven cotton stems into smaller sprigs of three or four bolls. Hot glue a three boll sprig on a diagonal, tuck its stem under a vine, then add a four boll sprig just below it. Keep alternating all the way around, fill any bare spots and tie on twine to hang.
Get the full tutorial at Sense & Serendipity.
23. DIY Painted Canvas Farmhouse Sign

A DIY painted canvas farmhouse sign gives you the Magnolia look without the $125 price tag. Start with a 10×20 canvas from the craft store and paint it gray. Cut the verse from vinyl with a cutting machine and burnish it down hard, since vinyl doesn’t love canvas. Paint over the stencil in gray again to seal the edges, then paint the whole canvas antique white. Peel the vinyl and the gray letters pop out crisp and clean. Hang it above a hook rack and a magnolia wreath for an easy entry nook.
Get the full tutorial at unOriginal Mom.
24. DIY Rustic Footstool

A DIY rustic footstool makeover uses jute twine to give a plain thrift store stool a woven top. Sand the legs back to bare wood or paint them, and take the stool apart if the top board needs to be fully wrapped. Staple one end of 6mm jute twine underneath, wrap it around the board in one direction and staple the other end. Then weave across the other way, pulling a loop through at a time so you weave two strands at once, and staple the ends once the pattern looks right.
Get the full tutorial at anderson + grant.
25. DIY Kitchen Towels

DIY kitchen towels with bold black graphics look like boutique buys for a fraction of the price. Cut your design from black heat transfer vinyl with a cutting machine, mirroring any words so they read correctly once pressed. Place it on a grain sack style towel, cover it with a clean white cloth and press with a hot iron, keeping it moving so the fabric doesn’t scorch. Peel the clear backing and press again if anything lifts. Make a set of three with utensils, a kitchen definition and EAT.
Get the full tutorial at My Life From Home.
26. DIY Wood Box Centerpiece

A DIY wood box centerpiece is long and narrow enough to sit on a farmhouse table without crowding the plates. Cut three 1×6 boards to 22 1/2 inches and two to 7 inches, drill pocket holes and screw the short sides to the long ones, then drop in the bottom and screw it in place. Stain it dark walnut, brush white chalk paint over the stain and run a scraper along the edges so the paint chips away. Add a pair of drawer pulls as handles and fill it with mason jars of baby’s breath.
Get the full tutorial at Love Grows Wild.
27. Thrift Store Farmhouse Candle Holder

A thrift store farmhouse candle holder starts with two cheap finds: a wooden candlestick and an old cake pan. Spray the candlestick with satin white paint in a few light coats, turning it upside down for the last one to reach the crevices. Glue the top of the candlestick to the center of the upturned pan with clear E6000, using a ruler to line it up, and let it cure fully. Flip it, set a pillar candle on top and fill around it with clipped boxwood sprigs. Sand the edges for extra age.
Get the full tutorial at Our Southern Home.