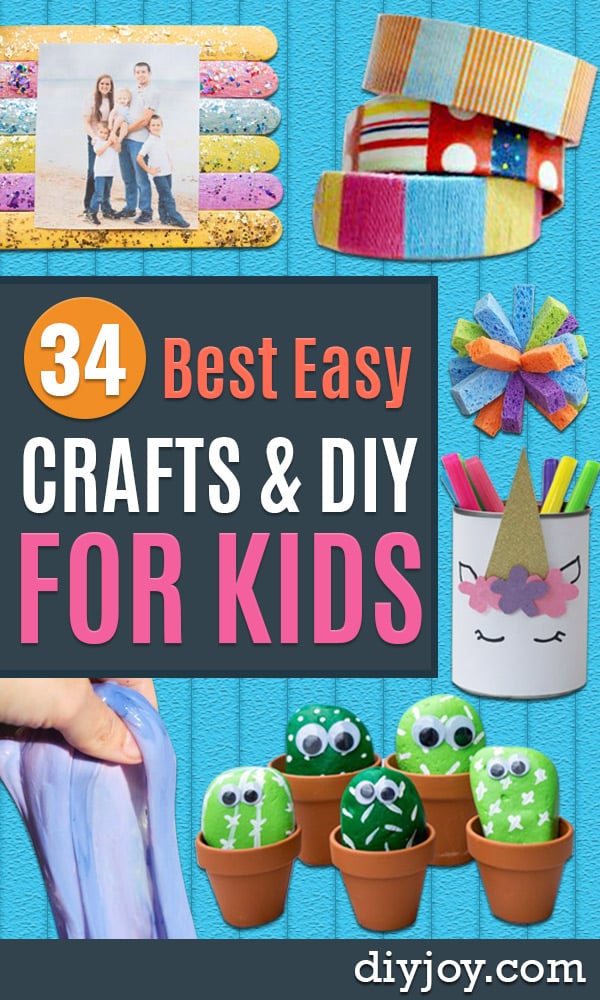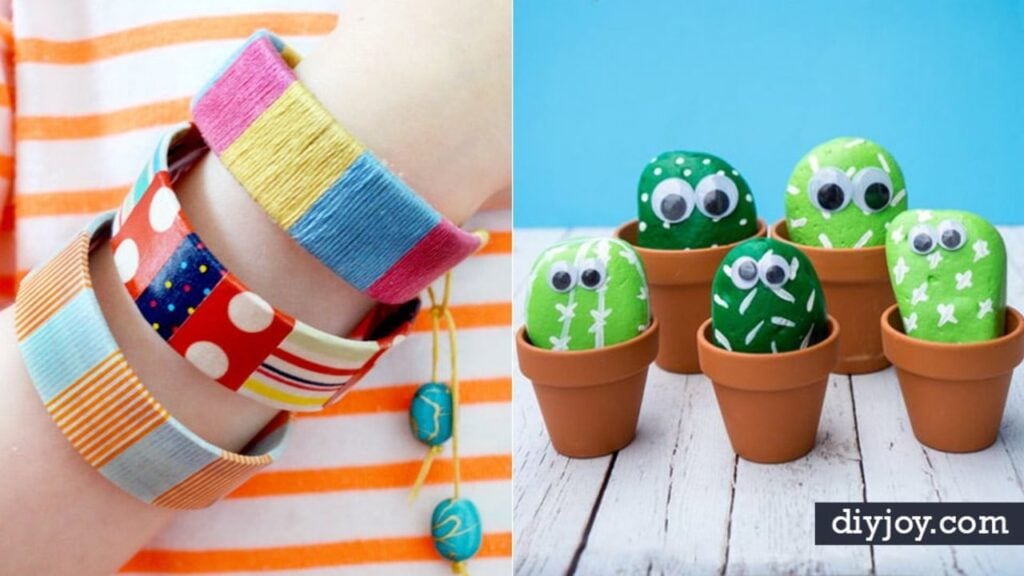
A pretty picture on Pinterest does not necessarily a good project make. That is the whole reason this list exists. After trying a pile of so-called easy crafts for kids that turned out to be neither easy nor kid-friendly, I went looking for the ones that actually work with real children in a real kitchen, and these 37 are what survived. There is slime that changes color in the sun, playdough that smells like fruit punch, pet rocks with googly eyes, and a shark made out of a pine cone. Some take ten minutes and a paper towel roll. Some earn a whole rainy afternoon. All of them come with a full step by step tutorial, so what you see really is what you will get, whether you need something for a bored six year old or a homemade gift for Grandma.
Easy Kids Crafts
1. Create Treasure Jewel Magnets
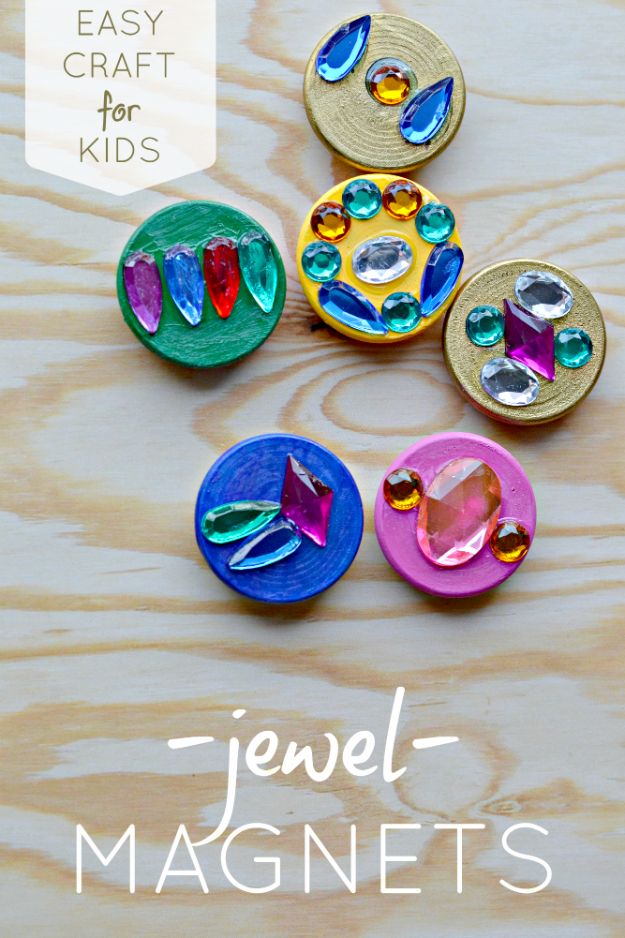
Wooden circles get painted in jewel tones, loaded up with craft gems, and finished with a magnet hot glued to the back. Gold paint is worth using here because the sheen makes cheap wooden discs look like real treasure. The maker uses Jewel-It glue, which dries clear, so a kid who squeezes out far too much of it still ends up with a good-looking magnet. Skip the magnets entirely and you have a pile of pirate coins and princess jewels for pretend play instead, which is honestly the better afternoon.
Get the full tutorial at The Life of Jennifer Dawn.
2. Egg Carton Flower Prints
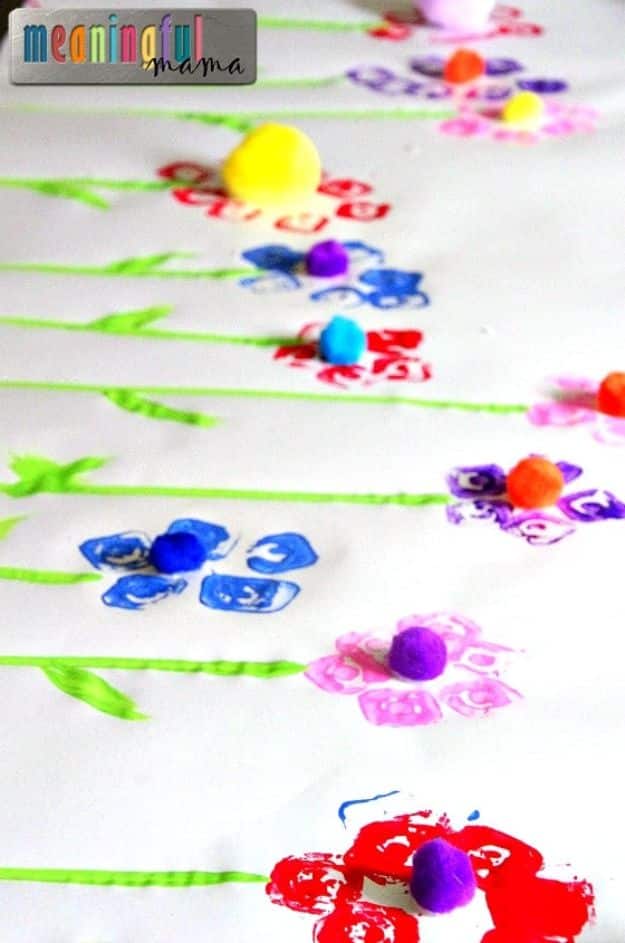
Cut an egg carton into individual cups, one cup per paint color, and you have the simplest stamp in the world. Kids dip the bottom of a cup, press it in a circle, and a flower appears. A foam brush adds stems and leaves afterward, then pom poms get glued into the centers for a bit of dimension. The maker rolls this out on a long strip of craft paper so several kids can build one giant painted garden at once, which makes it a good preschool or classroom craft.
Get the full tutorial at Meaningful Mama.
3. Birds Nest Craft
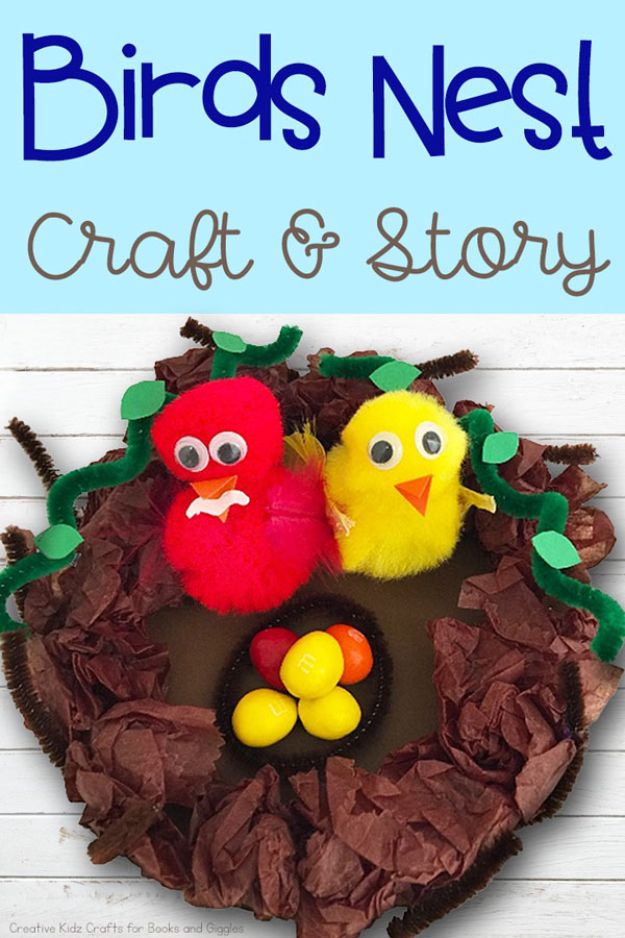
Brown tissue paper, scrunched and layered, becomes a nest convincing enough that kids will want to put something in it. The tutorial ties the craft to The Best Nest by P.D. Eastman, so it doubles as a book activity, which is a sneaky way to get a story read twice. The maker fills hers with M and Ms or jelly beans standing in for eggs, and adds a little pom pom bird to sit on them. Older kids can build one alone, and preschoolers need help only with the gluing.
Get the full tutorial at Books and Giggles.
4. Pet Cactus Rocks
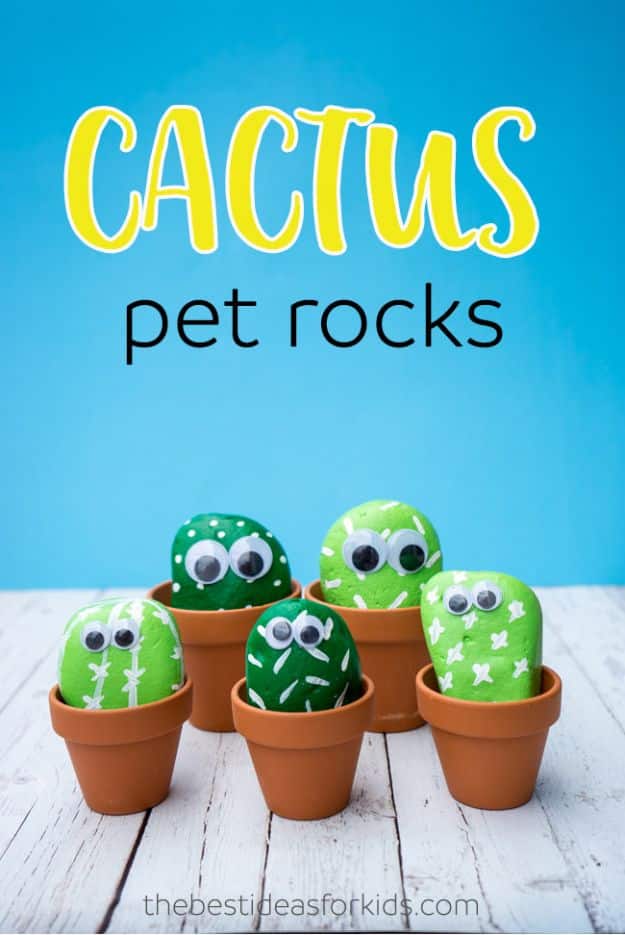
Choose rocks with one flat side so the googly eyes sit properly, paint them in two coats of green, then add white dots, hash marks and little stars on top. The rock that already has a natural dent for a mouth is the one everybody fights over. Use outdoor acrylic if the pots are going to live on a porch, and glue dots rather than a hot glue gun if the kids are doing the assembly themselves. A whole rock family lines up on a windowsill by the end of the afternoon.
Get the full tutorial at The Best Ideas for Kids.
5. Ocean Glitter Bottles
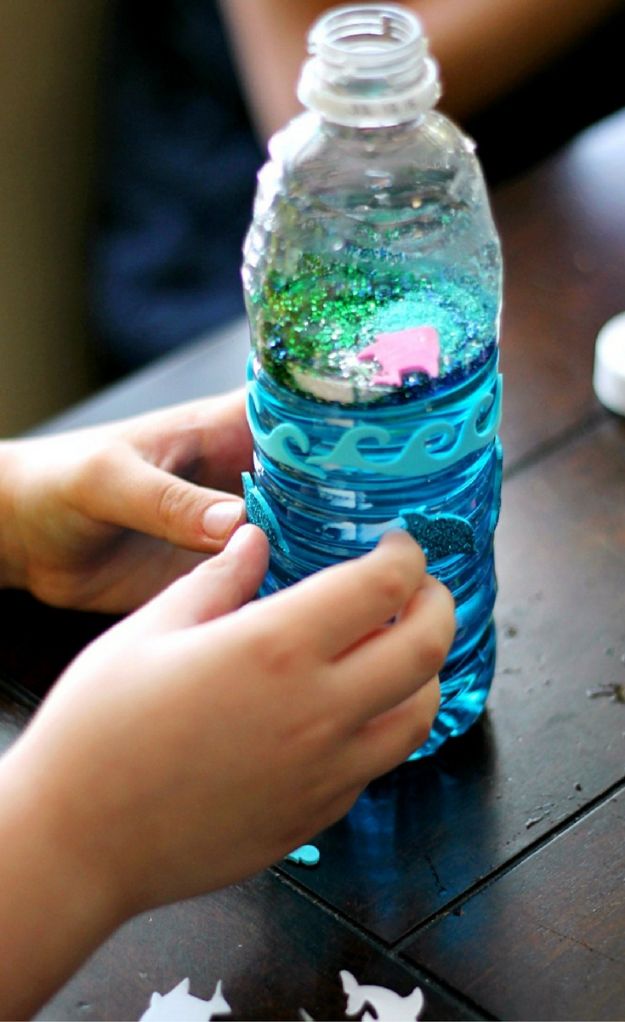
Fill an empty water bottle halfway, add a drop of blue food coloring and let each kid pour in whatever glitter colors they want. Pour a little vegetable oil in on top and the whole thing turns into a lava lamp instead of a snow globe, which is worth doing on at least one bottle so they can see the difference. Foam wave and fish stickers go around the outside. The one step nobody should skip is gluing the lid on, because a bottle of blue glitter water will otherwise end up on a carpet.
Get the full tutorial at Life With The Crust Cut Off.
6. DIY Fruit Fans
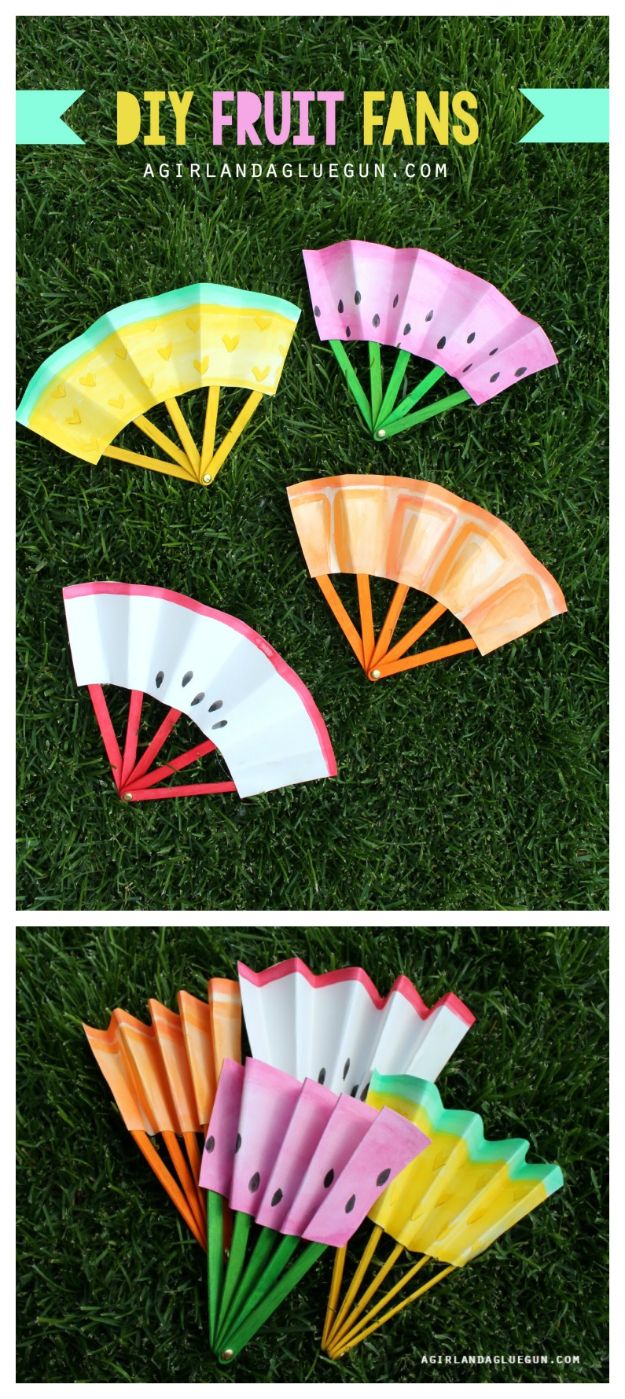
Five colored popsicle sticks, a hole drilled through one end of each, and a brad to pin them together gives you a fan that actually opens and closes. Watercolor paper painted as watermelon, pineapple and orange slices gets cut into the fan shape and glued across the spread sticks, then folded stick by stick so it collapses shut. Watercolor paper is thicker than regular paper, so the fan will not fold down completely flat, which is a fair trade for a fan that survives a whole summer.
Get the full tutorial at A Girl and a Glue Gun.
7. Snazzy Jazzy Button Bracelets
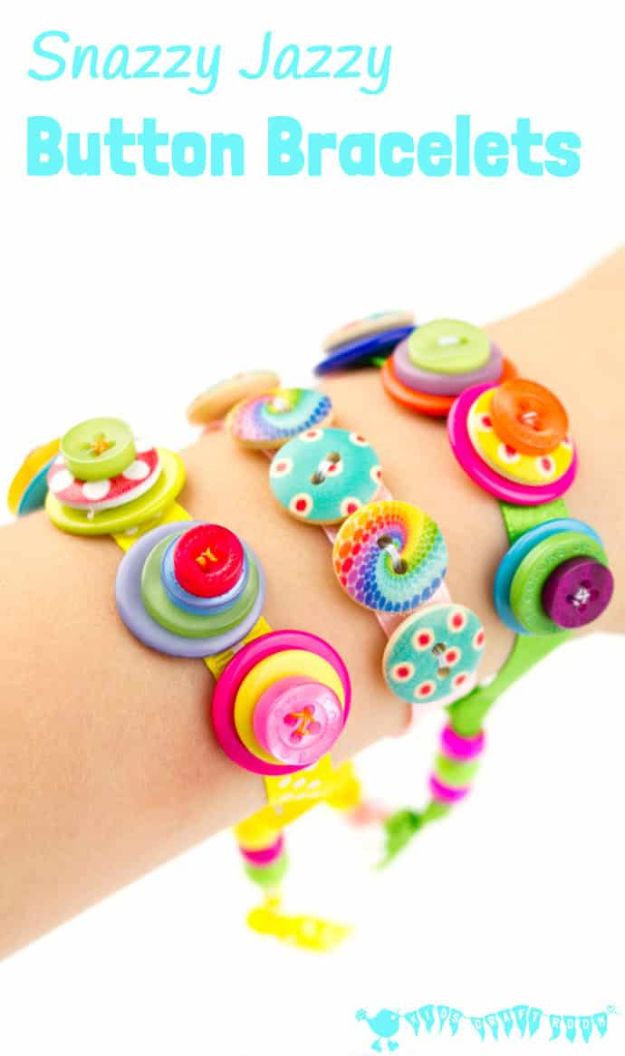
The jar of odd buttons left over from every sewing project in the house finally has a job. Buttons get sewn onto a length of ribbon, singly or in stacks with the largest at the bottom, and both ribbon ends thread through a few pony beads and knot, so the beads slide to tighten it on any wrist. It is one of the better first sewing projects for kids, because a button has built-in holes and no sharp edges, and it scales with age: one button in the middle for a beginner, a whole row of stacks for somebody older. Keep the buttons away from under fives.
Get the full tutorial at Kids Craft Room.
8. Printable Dragon Marionette
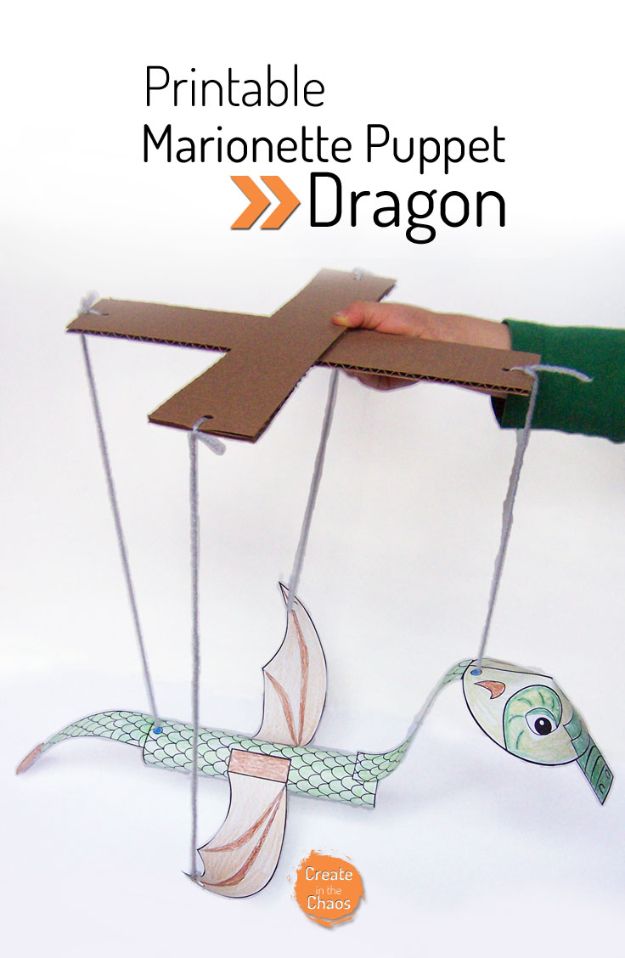
A printable dragon, two strips of cardboard and four lengths of yarn add up to a puppet that genuinely walks when you tilt your wrist. Color and cut the pieces, glue the head, wings and tail onto the body, then punch a hole at the base of the head, the base of the tail and each wing. The short cardboard strip, eleven inches, takes the head and tail strings and the twelve inch one takes the wings. The payoff is the moment a kid realizes the strings are doing what their hand tells them to. Print two so nobody has to share.
Get the full tutorial at Create in the Chaos.
9. Adorable Polymer Clay Best Friends Necklaces
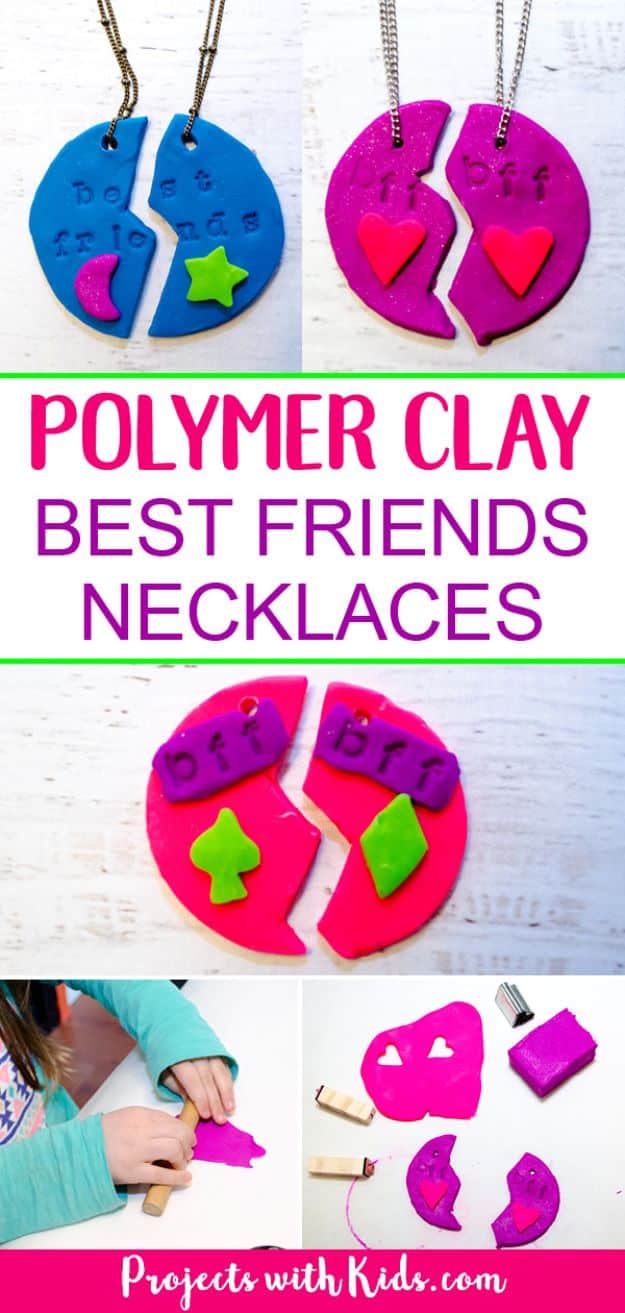
A circle of polymer clay, cut in half with a wiggle down the middle, gives two friends one matching pendant each. Mini cookie cutters press a shape into each half, small rubber letter stamps press bff into the clay, and a chopstick pokes the hole for the cord before baking. The maker traces the base circle around a drink lid, which is the sort of tip that saves buying a single extra tool. Sculpey and Fimo both work, and the design possibilities are effectively endless once kids figure out the cutters.
Get the full tutorial at Projects with Kids.
10. Easy Painting Idea With Salt and Glue
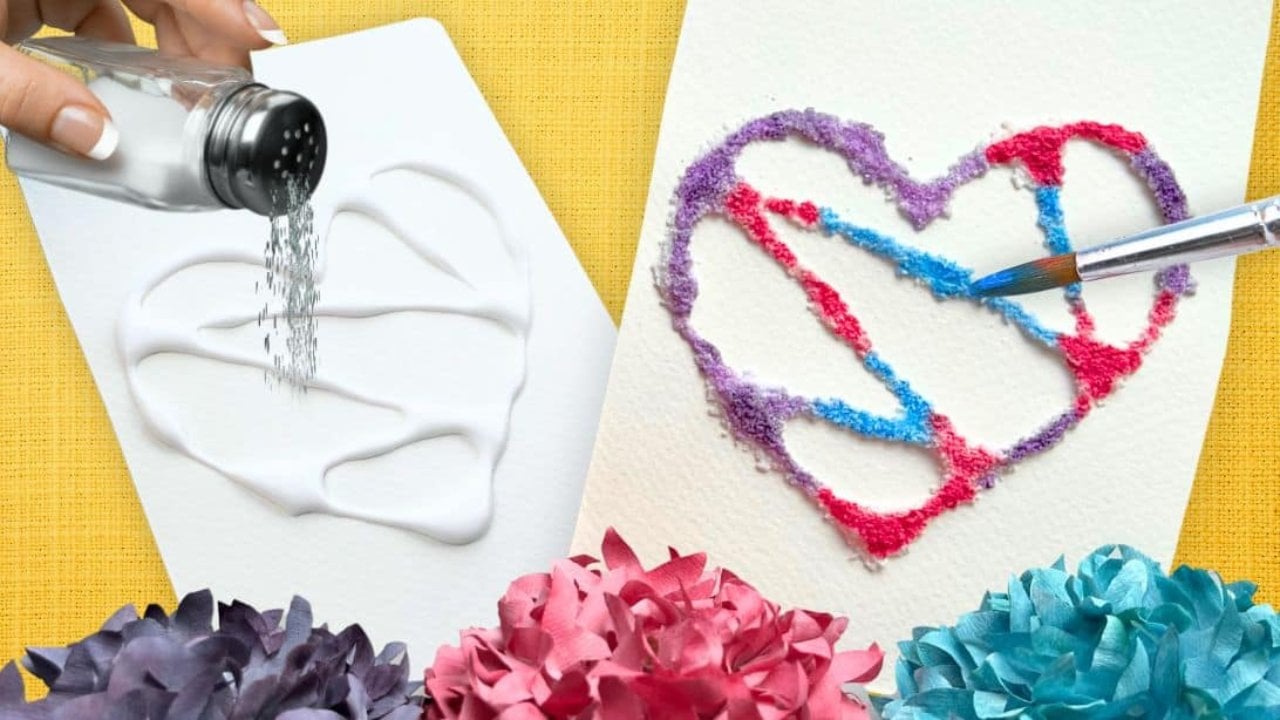
Squeeze glue onto paper in a design, sprinkle salt over the wet lines, tip the loose salt off and you have a raised, crystalline outline sitting on the page. Then touch diluted paint to the salt with a brush and watch the color travel along every line by itself. That travelling is the part kids will make you repeat all afternoon. There are no art skills involved and no expensive supplies, which is why it works for a four year old and an adult who claims they cannot paint.
Get the full tutorial at DIY Joy.
11. Color Changing Slime
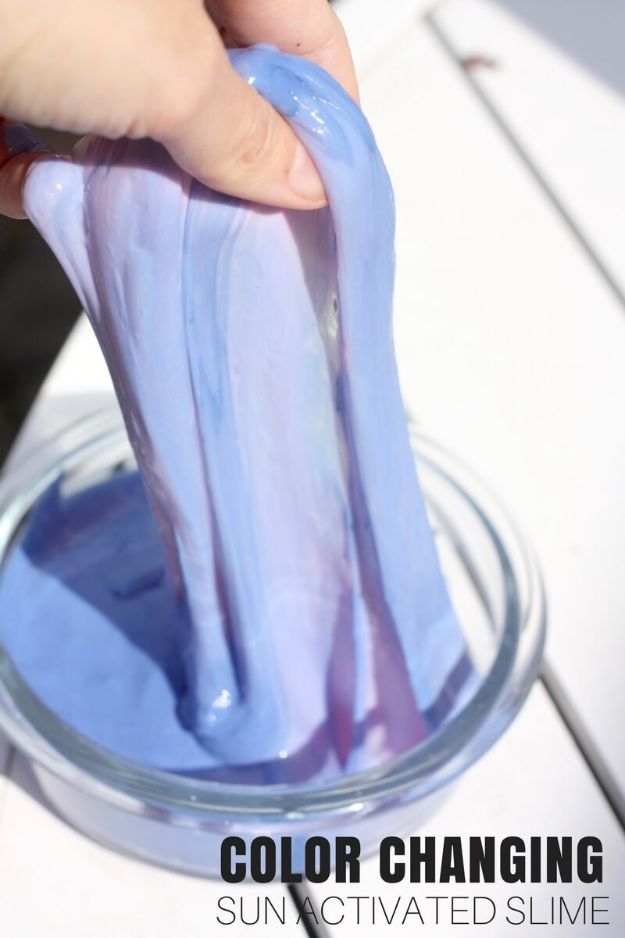
This is a plain saline solution slime with one extra ingredient: photochromic pigment powder, which flips the slime from pink to purple the second it meets ultraviolet light. That means it changes outdoors on a bright day and changes back indoors, so the sun is doing the trick rather than warm hands. A little powder goes a long way, so one jar covers batch after batch. It is a genuine chemistry lesson hiding inside the most requested activity in the house.
Get the full tutorial at Little Bins for Little Hands.
12. Crystal Geodes
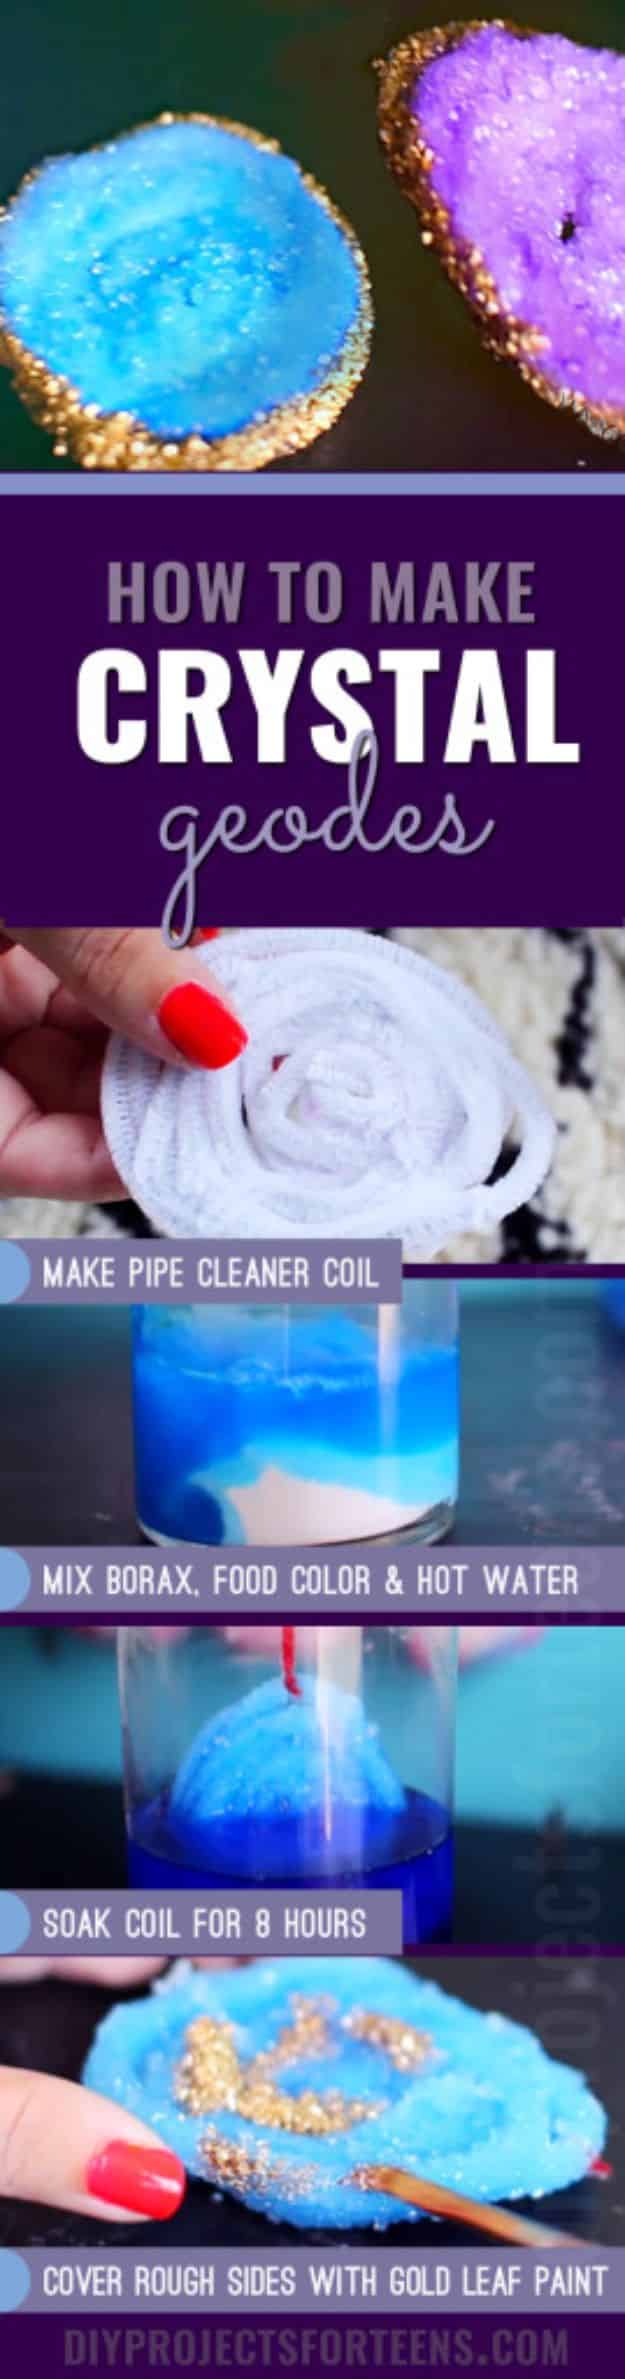
Borax, hot water, food coloring and a coiled pipe cleaner grow a crystal cluster you can watch build up on the coil, and the waiting is genuinely half the fun. Dry brush the rough outer edge with gold paint afterward and the finished piece looks like something from a museum gift shop rather than a laundry aisle. Make several colors at once, because one is never enough and the solution is already mixed. This one comes from our friends at DIY Projects for Teens, and it works just as well for a patient nine year old.
Get the full tutorial at DIY Projects for Teens.
13. Rock Painting Circles and Kawaii Faces
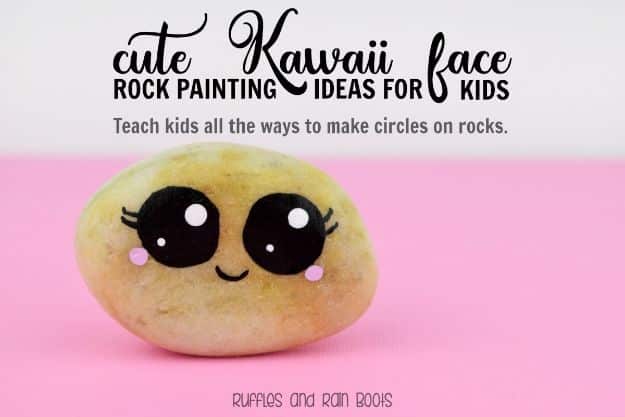
The whole lesson here is circles, and the tools are cleverer than the craft looks: foam daubers for big dots, dotting tools for small ones, and a plastic straw snipped down one side so it prints a perfect half circle for a smile. Acrylic in black, pink and white is the entire palette. Kawaii faces are forgiving because the features are tiny and the eyes are huge, so a wobbly line still reads as cute. Finished rocks end up in gardens, on desks and in pockets.
Get the full tutorial at Ruffles and Rain Boots.
14. Paper Plate Polar Bear Twirler
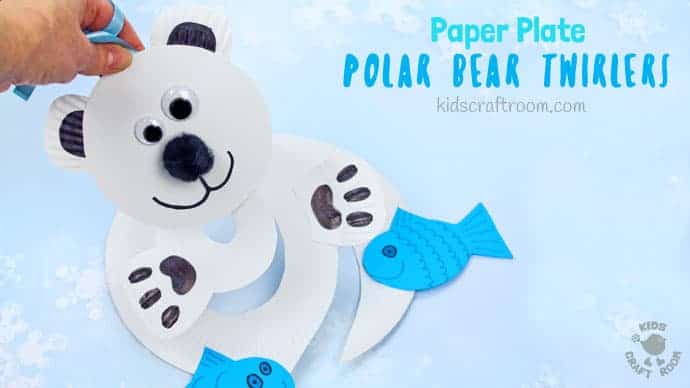
Cut a spiral into one paper plate from the outside in, then cut the middle out of a second plate for the bear’s head and use its rim for the ears and paws. Wiggle eyes, a black pom pom nose and a drawn on smile finish the face, blue paper fish get glued along the spiral, and a ribbon taped to the back of the head is what you hold. Blow on it and the whole thing spins. Hang a few from the ceiling and a snow day room suddenly has weather in it. About thirty minutes.
Get the full tutorial at Kids Craft Room.
15. Kool Aid Playdough
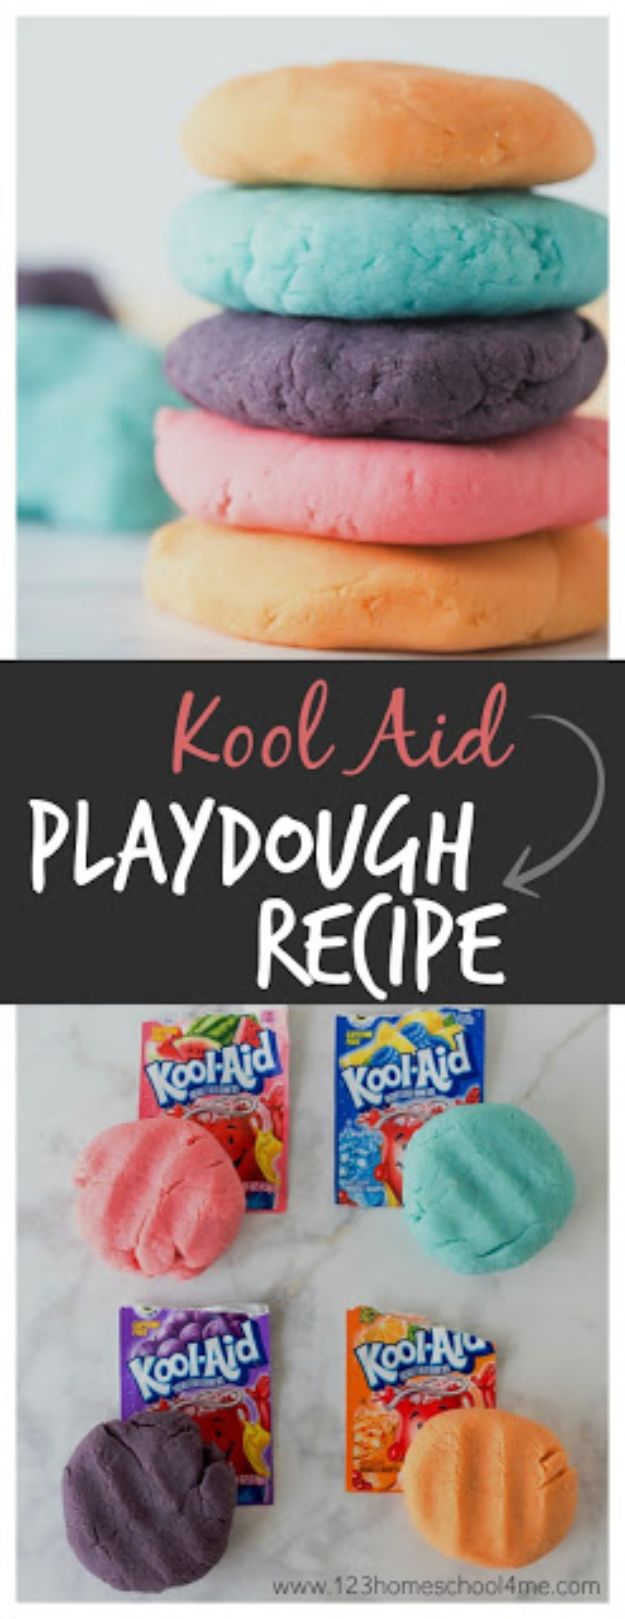
One cup of flour, a quarter cup of salt, two tablespoons of cream of tartar, a tablespoon of oil, a cup of water and one packet of Kool-Aid, cooked over medium heat until it balls up in the pan. The drink packet supplies the color and the smell in one cheap move, so grape dough is purple and smells like grape. It is a small batch on purpose, because each color needs its own pan, and a variety pack gets you the full rainbow. Kept airtight, the maker reckons it lasts more or less forever.
Get the full tutorial at 123 Homeschool 4 Me.
16. Crystal Seashells
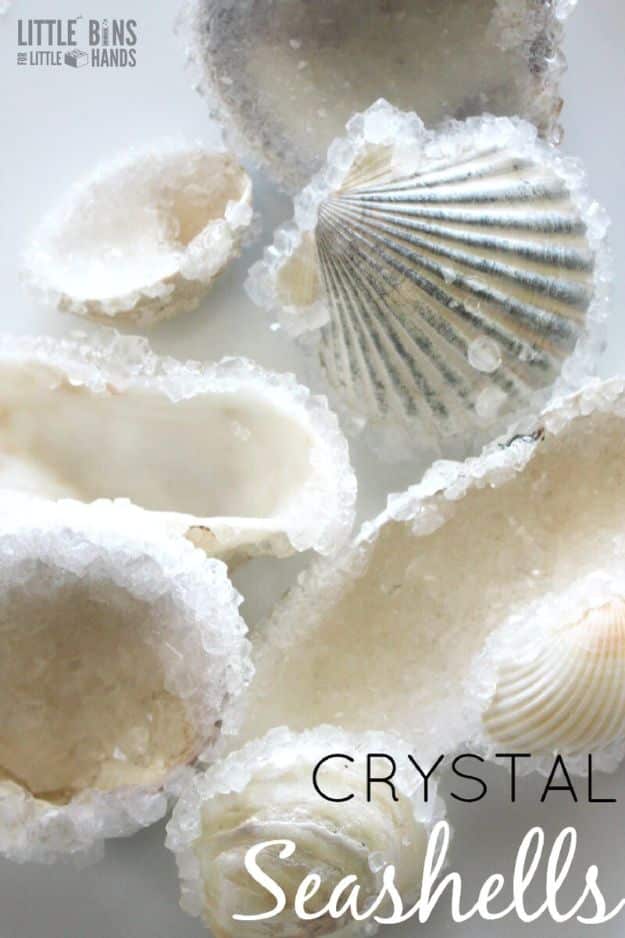
Two ingredients, water and powdered borax from the laundry aisle, plus a handful of shells and a flat container. Set the shells so they are not touching each other, pour the solution over, and leave it alone for twenty four hours. Every scalloped ridge comes back furred in white crystal. Beach souvenirs that have been rattling in a drawer since last summer finally earn their keep. It is a set-it-and-forget-it experiment, which makes it a good one for the kid who wants to do science but has no patience for stirring.
Get the full tutorial at Little Bins for Little Hands.
17. Recycled Soda Bottle Ladybug
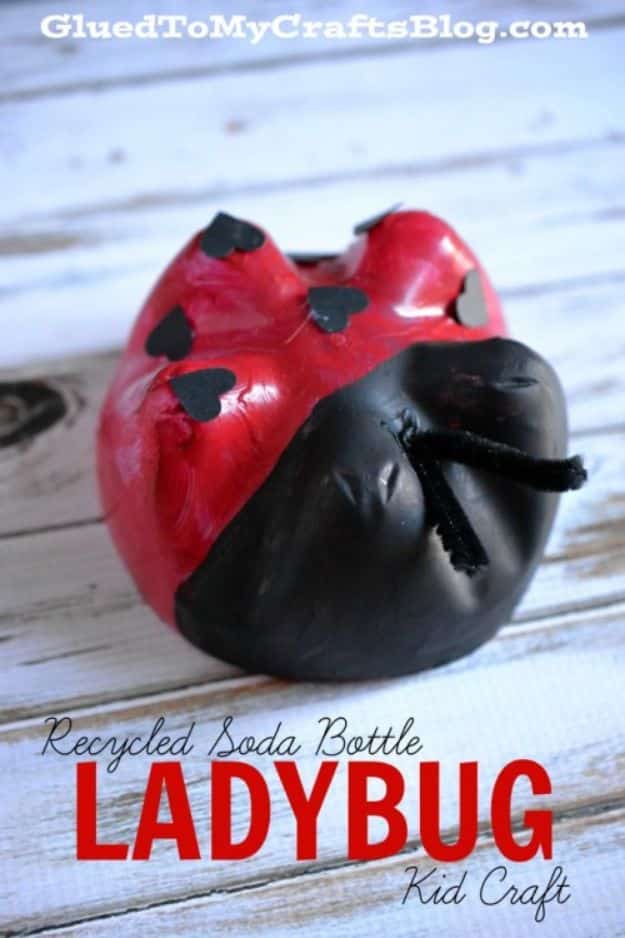
The bottom three inches of a two liter bottle already curves like a shell, so painting it red and blacking out a quarter of it for a head does most of the work. Spots get punched out of black cardstock with a small heart punch, which is a neater trick than painting dots freehand, and a bent pipe cleaner becomes antennae. Expect to need a second coat of red over clear plastic. Free materials, a fast result, and a bug cute enough that it stays on a shelf.
Get the full tutorial at Glued To My Crafts.
18. Snack Butterflies
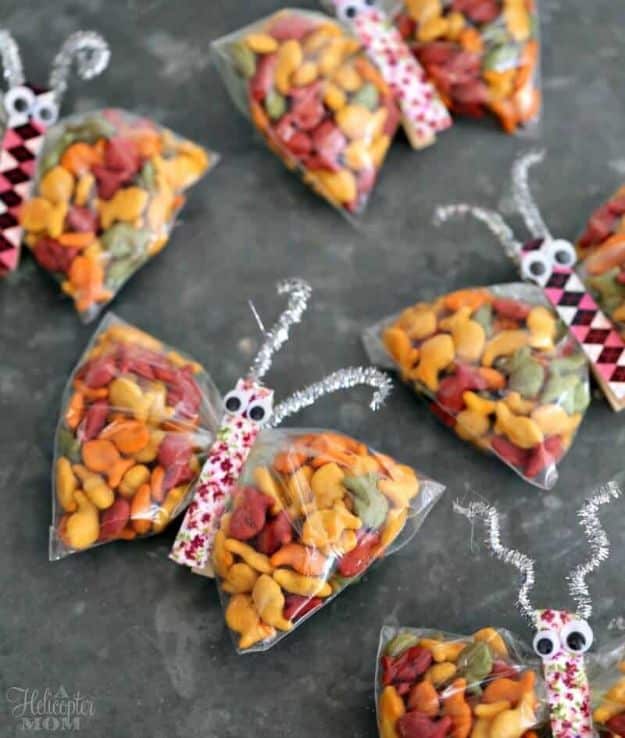
A sandwich bag of Goldfish crackers, a clothespin clipped across the middle to split the crackers into two wings, a pipe cleaner bent into antennae and a pair of googly eyes. That is the whole craft, and it is also the snack, which is the sort of efficiency that wins a long afternoon in a car park waiting on a sibling’s lesson. Kids build their own, which handles the restless stretch before snack time. They work as lunchbox surprises and class party favors too.
Get the full tutorial at A Helicopter Mom.
19. Homemade Unicorn Playdough
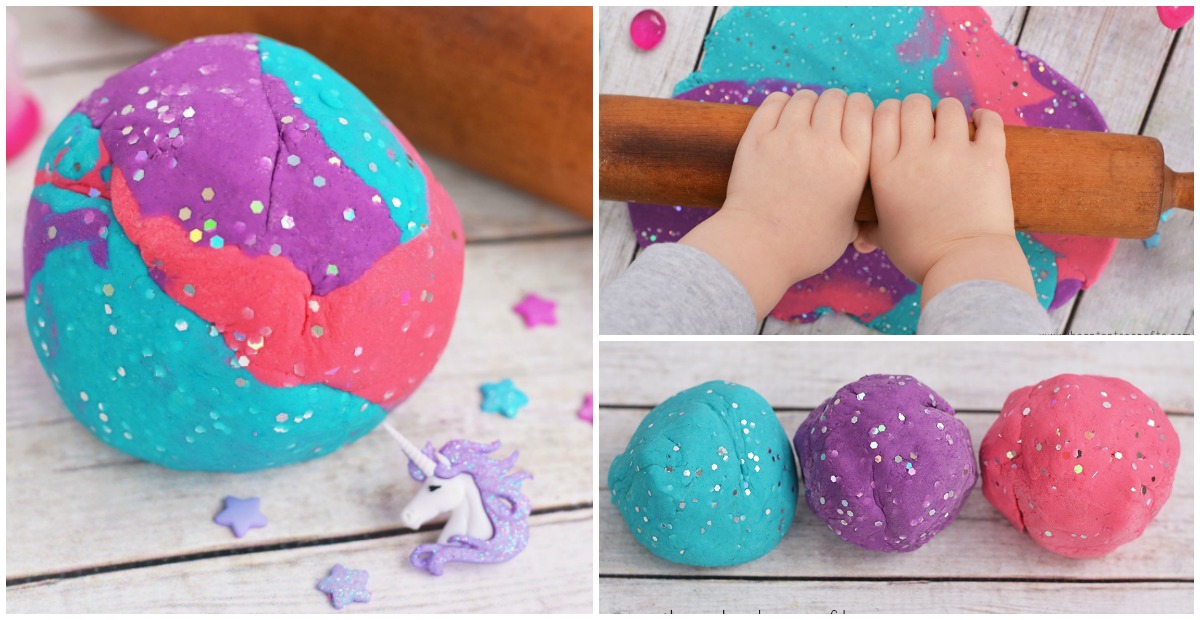
No cooking on this one: two cups of flour, a cup of salt, three tablespoons of cream of tartar, two tablespoons of oil and two cups of hot water, mixed in one bowl and split into three. Blue, pink and purple neon food coloring plus glitter go in once the dough has cooled enough to knead. The maker’s kids ended up rolling all three colors together with a rolling pin, which gives you the proper marbled unicorn effect. Airtight container or a zip bag, and it stays silky for months.
Get the full tutorial at I Heart Arts n Crafts.
20. Make A Lemon Volcano
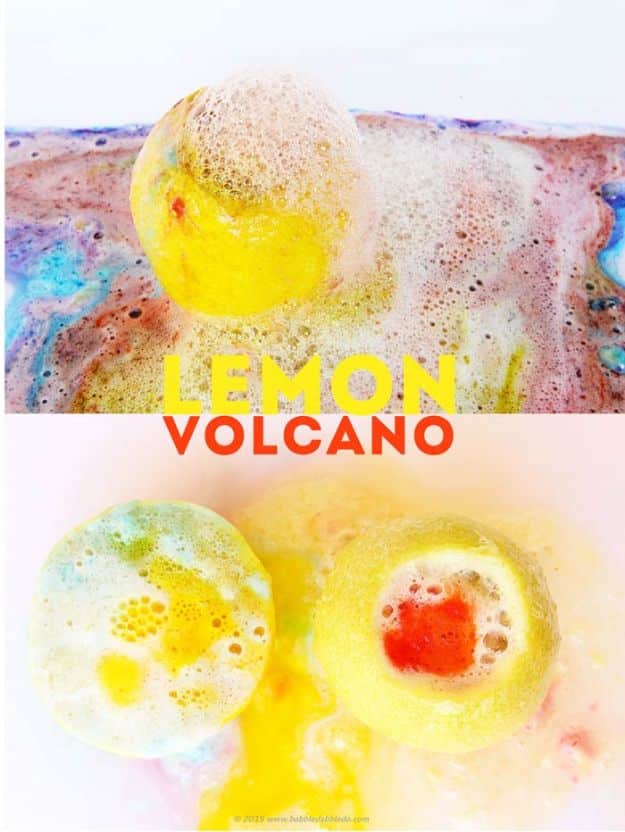
Slice the bottom flat, core the middle, mash the inside with a craft stick to free the juice, then add food coloring, a squeeze of dish soap and a spoon of baking soda. The citric acid is already in the fruit, so the eruption is the lemon reacting with itself. The dish soap is what turns a fizz into froth. Plan on two lemons per volcano, one to core and one to juice for refills, because there will be refills. It smells like a lemonade stand, which no other volcano can claim.
Get the full tutorial at Babble Dabble Do.
21. Bouncy Balls
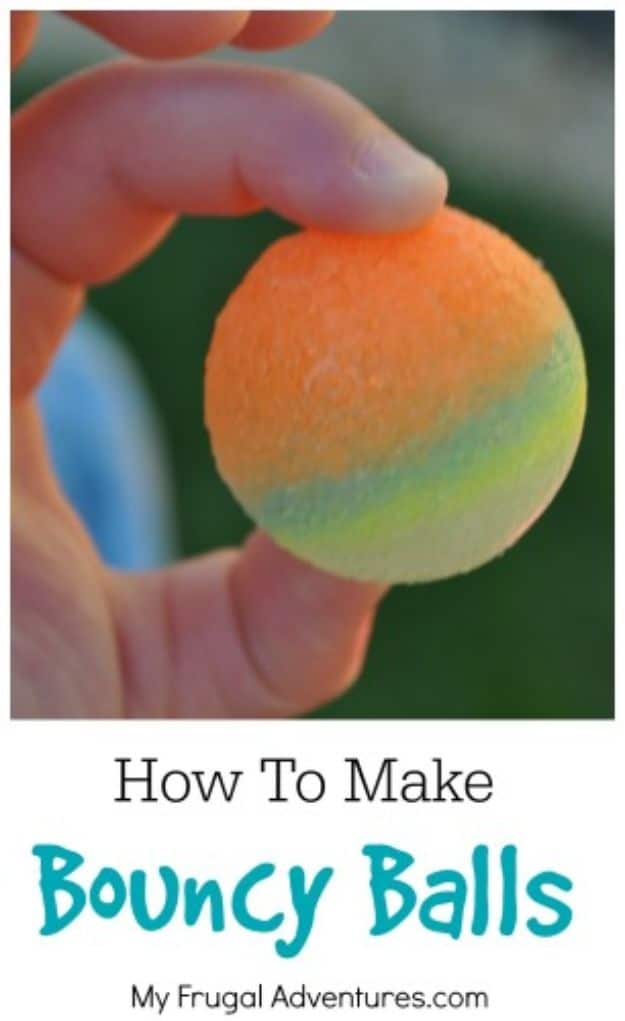
Borax, cornstarch, warm water and Elmer’s glue, mixed and rolled between your palms until a loose puddle turns into a solid springy ball. Worth knowing before you start: the maker tried the widely copied version three separate times and got balls that bounced about six inches, more silly putty than superball, so follow her working ratios rather than the first recipe you find. Keep the borax well away from little mouths. Fresh balls bounce best, and rolling them properly smooth makes a real difference.
Get the full tutorial at My Frugal Adventures.
22. Paper Roll Batman and Robin
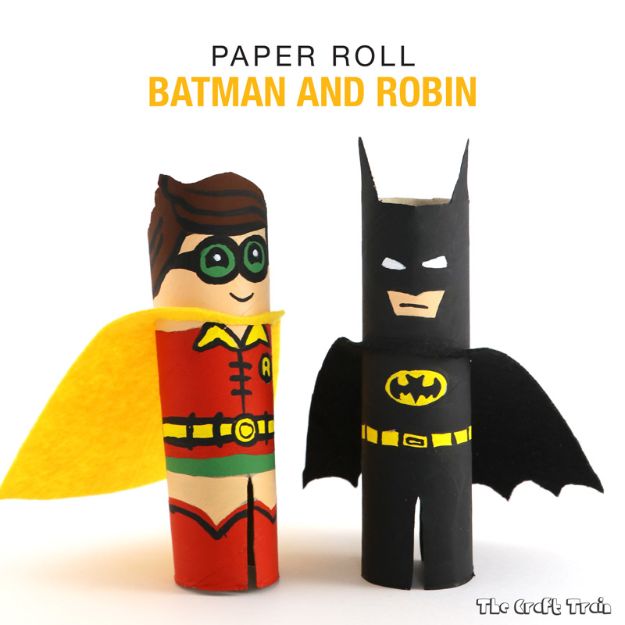
Two paper towel rolls, flattened so the ears and the fringe can be cut through both layers at once, then painted up as the Lego Batman versions of the characters. Felt capes in black and yellow finish them, and Batman’s gets little semicircles snipped along the bottom edge. The flatten-and-cut trick is the part worth stealing, because it gives a symmetrical head in one snip. Once the first two are standing on a windowsill, every remaining roll in the house is spoken for.
Get the full tutorial at The Craft Train.
23. Easy 3 Step DIY Paper Bowls Kids Craft
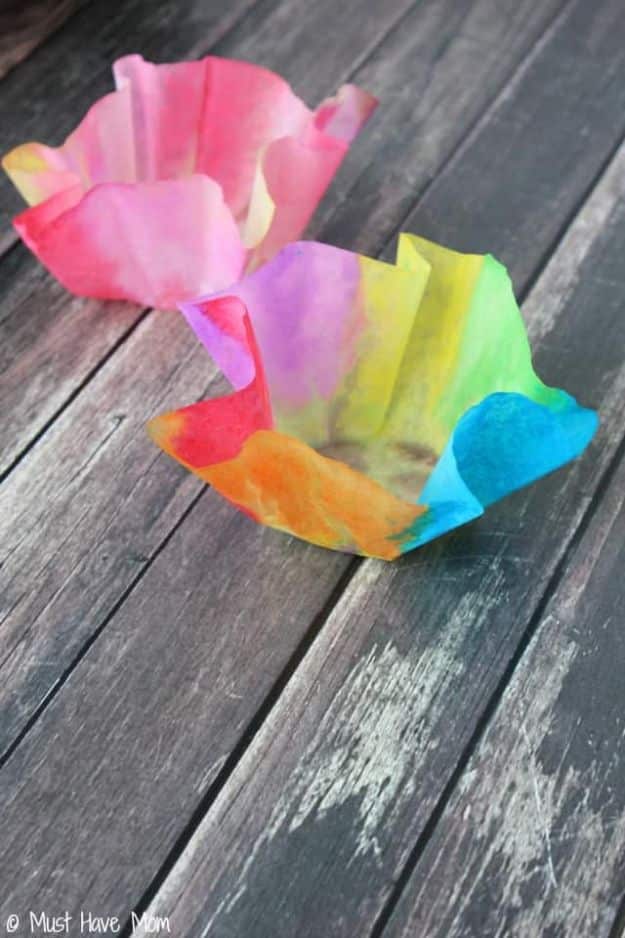
Paint a coffee filter with watercolors, drape it over an upturned cup, spray it with spray starch and let it dry stiff. That is all three steps, and the result is a little translucent bowl for trinkets and hair clips. Cut the edge of the filter a bit irregular before you paint and the finished bowl looks handmade instead of machine-cut. Kids as young as two can do this with a hand on the cup. Watercolor on coffee filter paper bleeds beautifully, so a mess is genuinely the point.
Get the full tutorial at Must Have Mom.
24. Sponge Water Bombs
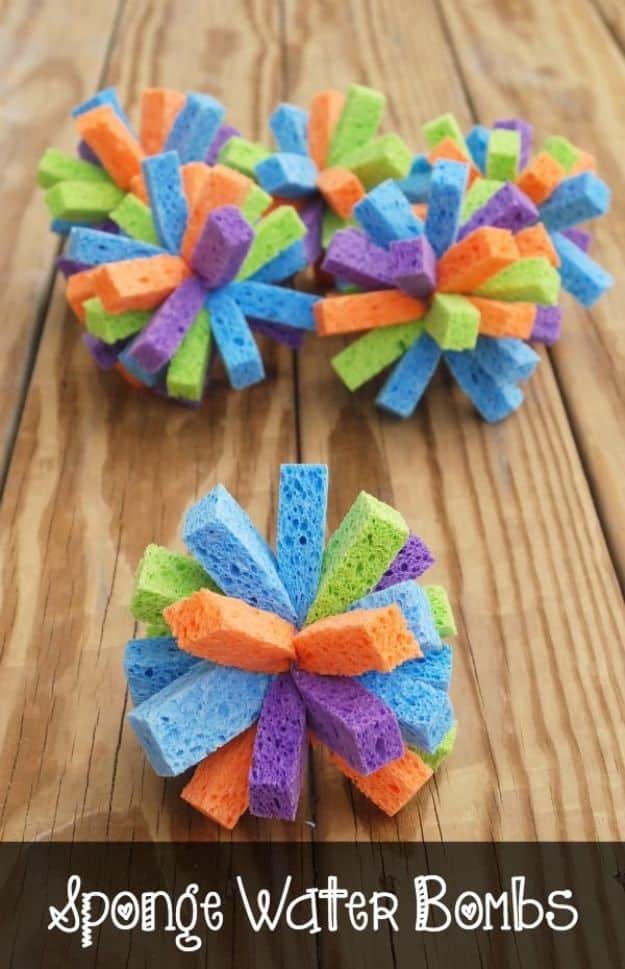
Slice sponges into fourths, stack a dozen pieces together and cinch the middle with a rubber band, and each one blooms into a throwable pom pom that holds a startling amount of water. The maker tried zip ties first and rejected them because the cut end leaves a sharp shard, which is exactly the kind of thing you want to know before handing one to a seven year old. Her math: about $8 for six of them, using five packs of Target sponges. They last summers and leave no balloon shrapnel in the grass.
Get the full tutorial at Endlessly Inspired.
25. Pine Cone Shark Craft
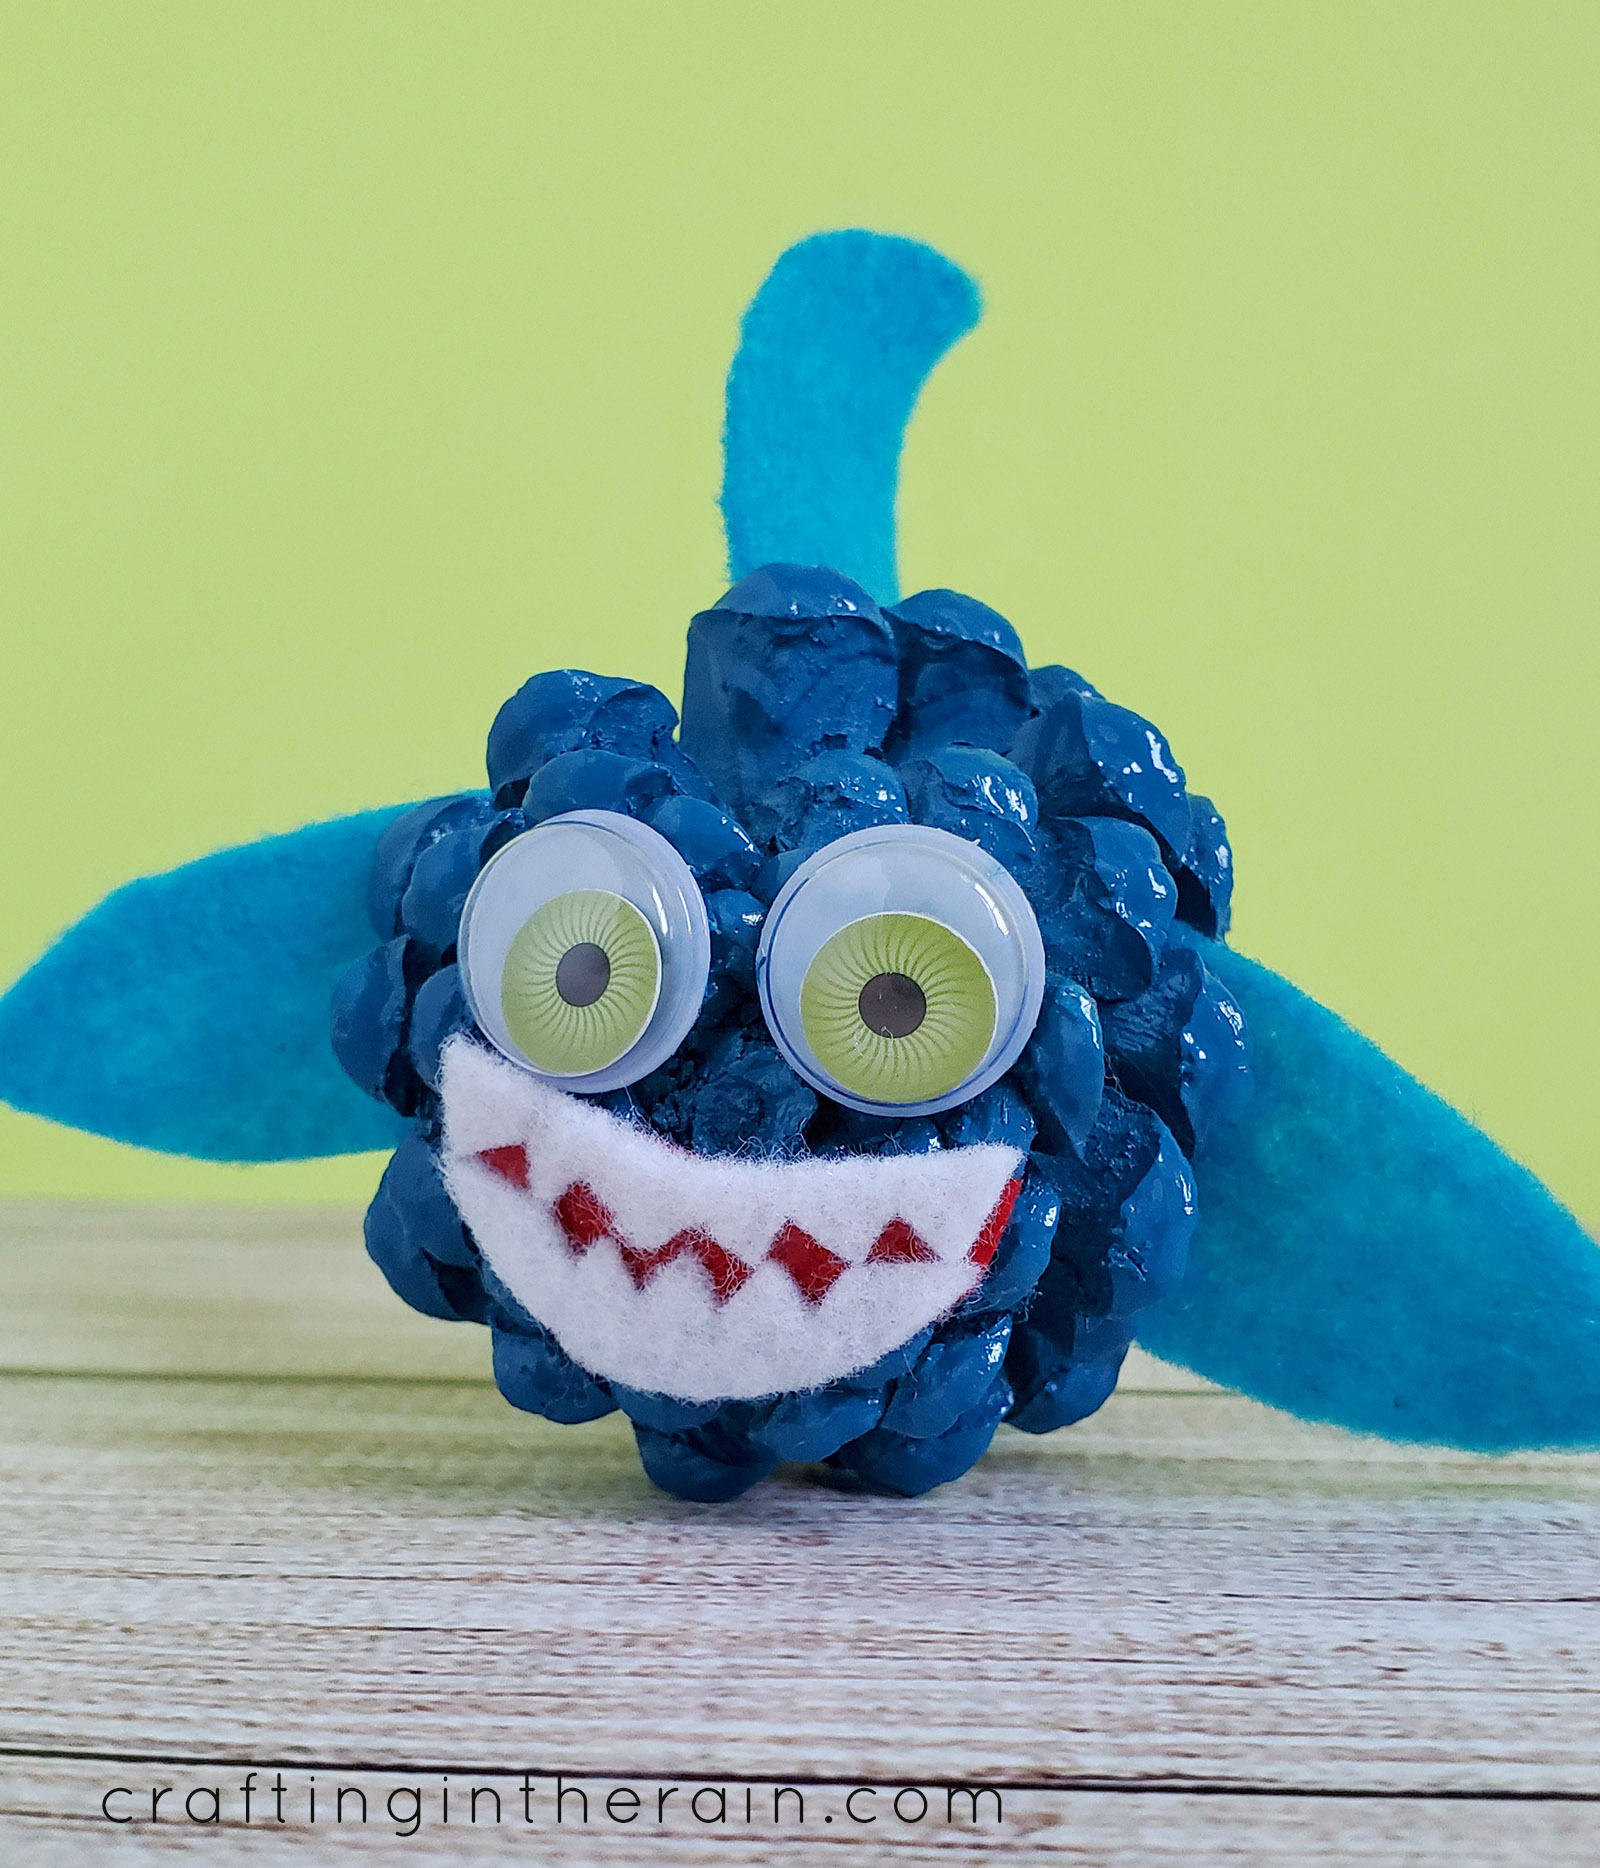
Prime a pine cone, spray it blue, then glue on felt fins and a red mouth full of white felt teeth. The maker’s tip is a good one: cut the white teeth oversized, glue them onto the red mouth first, then trim the whole mouth to size, which saves cutting twenty tiny triangles. Spray paint settles into the scales without dripping, though craft paint and a brush is fine if kids are doing it. Big googly eyes make it goofy, small ones make it genuinely beady and menacing.
Get the full tutorial at Crafting in the Rain.
26. DIY Hungry Caterpillar Clothespin Magnets
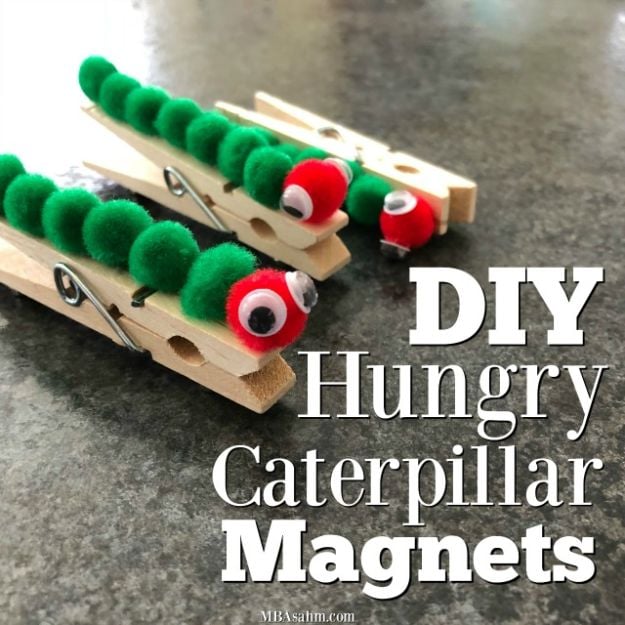
Green pom poms glued in a row along a clothespin, a red pom pom head, googly eyes and a strong mini magnet on the back. It is about as easy as a craft gets, which is the appeal: the maker’s four year old did the whole thing himself apart from the hot glue on the magnets. The clothespin still clips, so the caterpillar holds chip bags and photos as well as drawings. Strong mini magnets are worth hunting down, because weak ones will not hold a picture to the fridge.
Get the full tutorial at MBA sahm.
27. Homemade Soap For Kids
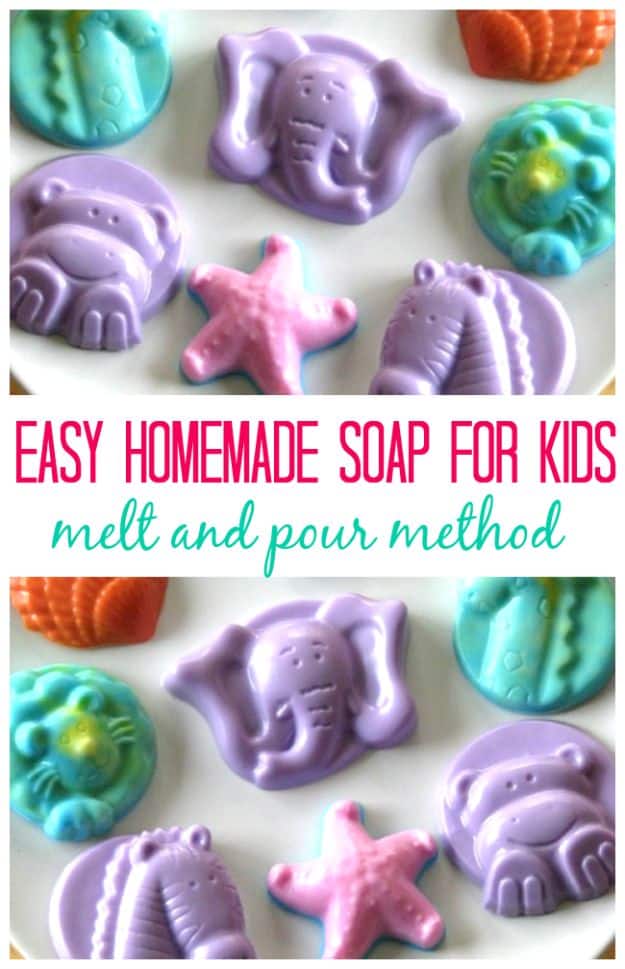
Melt and pour glycerin is the version of soapmaking that does not involve lye, a double boiler or any real risk. Blocks go into a glass measuring cup, thirty seconds in the microwave at a time with a stir in between, and three blocks take about forty five seconds. Color and scent get stirred in, then it pours into silicone molds and sits for an hour before popping out. A five year old can do the pouring. Drop a small toy in the mold first and handwashing stops being an argument.
Get the full tutorial at Gluesticks Blog.
28. DIY Unicorn Pencil Holder
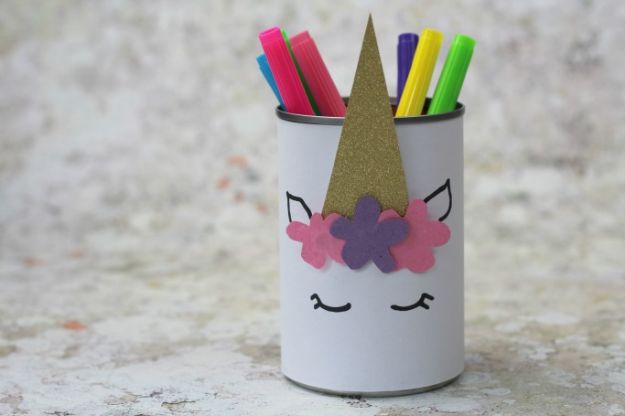
A clean tin can wrapped in white paper, a gold or glitter card horn, felt flowers and two closed eyes drawn on in black pen. Glue dots hold everything, so nothing has to be hot or wet. Draw the face on the paper before taping it around the can, or you will fight the curve the whole time. Tin can edges are sharp, so that part is a grown-up job. It takes minutes, it holds the entire pencil population of a kid’s desk, and it is a very good back to school craft.
Get the full tutorial at Crafts on Sea.
29. Salt Dough Recipe Ornaments & Necklaces
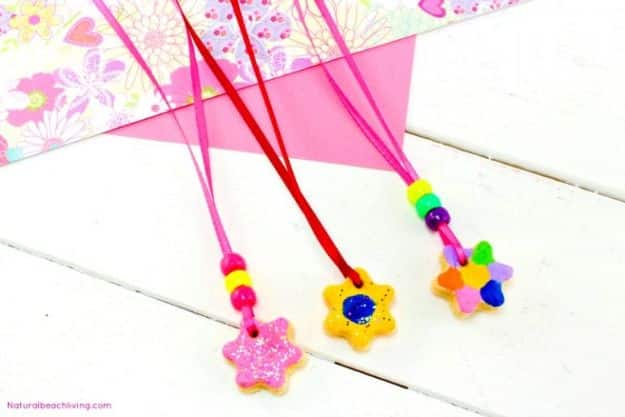
One cup of flour, half a cup of iodized salt and half a cup of water make a dough that rolls to a quarter inch, cuts with any cookie cutter, and bakes hard in an hour to an hour and a half. Poke the ribbon hole with the end of a paintbrush before it goes in the oven, because drilling a baked one is not happening. The tutorial cuts flowers and strings them as necklaces for Mother’s Day, and the same dough handles ornaments, handprints and gift tags. Let it cool completely before painting.
Get the full tutorial at Natural Beach Living.
30. Pipe Cleaner Bubble Wands
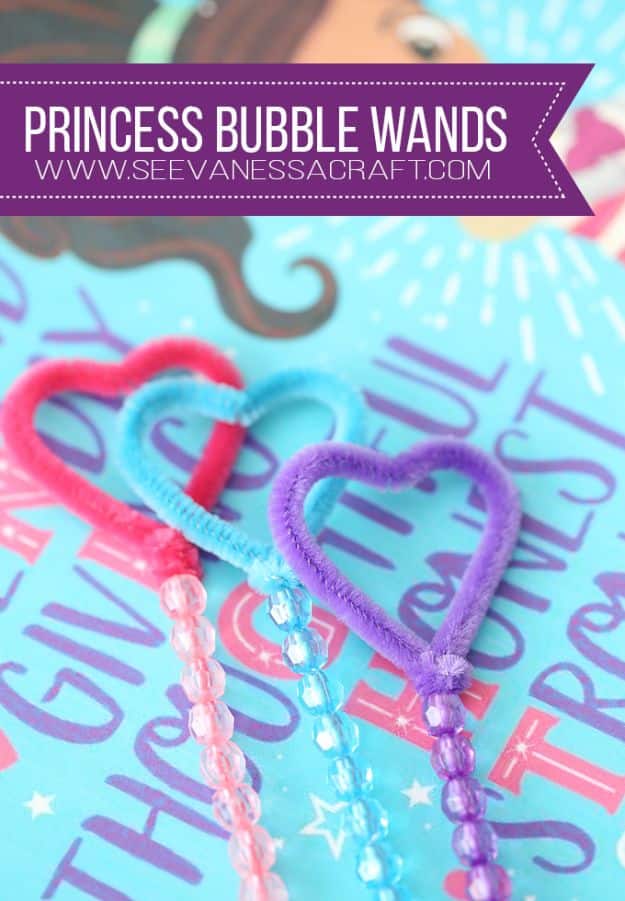
Wrap the top of a pipe cleaner around a small heart cookie cutter, slide the cutter out, thread beads down the handle and you have a bubble wand in under a minute. The shape does not change the bubble, which is a free physics lesson nobody asked for and every kid enjoys. Beads give small hands something to grip. Most preschoolers can make these alone, though beads and mouths being what they are, stay in the room. Wand making fills half an hour and bubble chasing fills the hour after.
Get the full tutorial at See Vanessa Craft.
31. Sharpie Tie Dyed Shirts
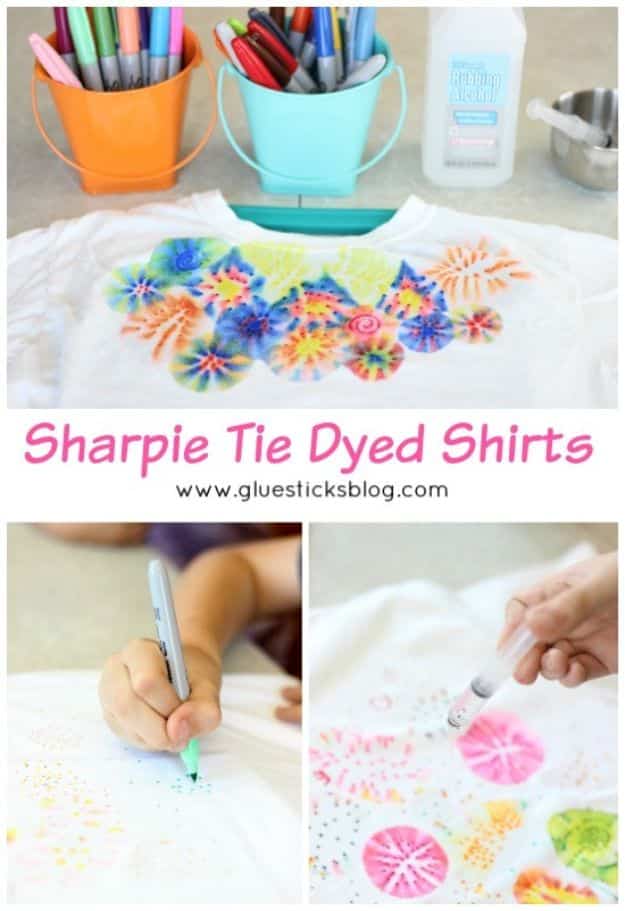
Sharpie dots drawn in a circle on a prewashed 100 percent cotton shirt, then rubbing alcohol dripped into the center with an eye dropper, and the ink blooms outward like slow fireworks. More alcohol means more spread, so this is a project you can steer as it happens. No buckets, no gloves, no dye zone in the back yard. The one step nobody should skip is heat setting with an iron afterward, or the design walks out in the first wash. Wash the shirt first without fabric softener.
Get the full tutorial at Gluesticks Blog.
32. Poured Paint Pots
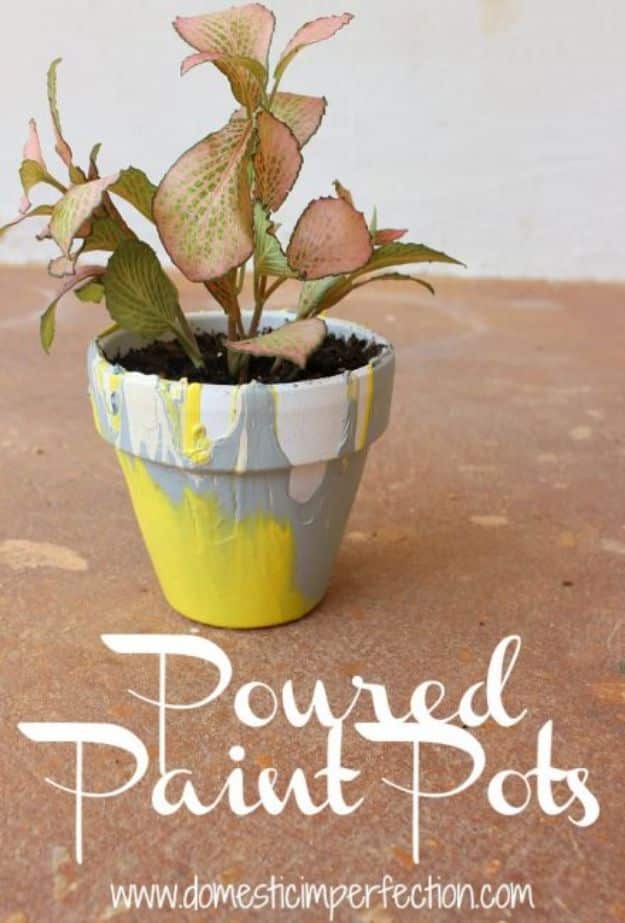
Cover the drainage hole, turn a cheap terracotta pot upside down on a raised cup, and pour paint straight onto the base so it runs down the sides in slow stripes. Gravity does the design. The maker recommends covering the hole with a cut circle of paper plate rather than tape, because it peels off cleanly, and warns that old sample paint goes chunky, so squeeze-bottle craft acrylic pours better. They take a while to dry fully. Group them and they look chaotic, split them up and they are lovely.
Get the full tutorial at Wildfire Interiors.
33. Homemade Floam
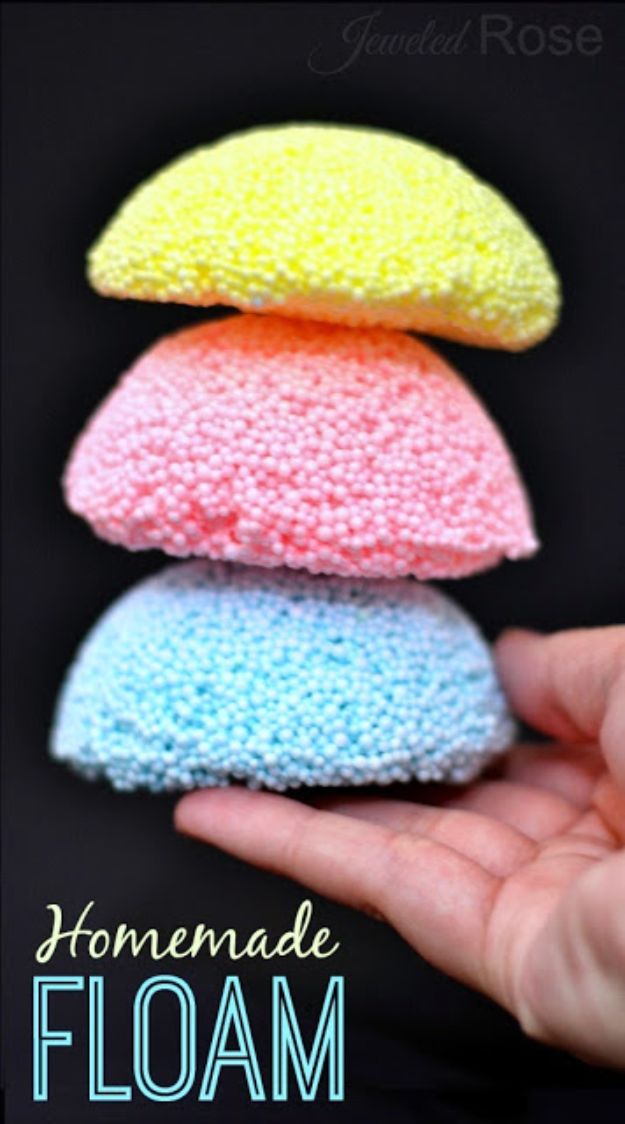
Eight ounces of school glue, food coloring, then liquid starch added slowly until the slime pulls away from the bowl, and finally a handful of polystyrene foam beads kneaded through. The beads are what make it crunch, and they also make it hold a shape, so this one builds and sculpts in a way plain slime never does. Add the starch in small amounts, because too much all at once gives you a stiff brick. More beads means more crunch. Beads cost almost nothing in bulk.
Get the full tutorial at Growing a Jeweled Rose.
34. Crab Corner Bookmarks
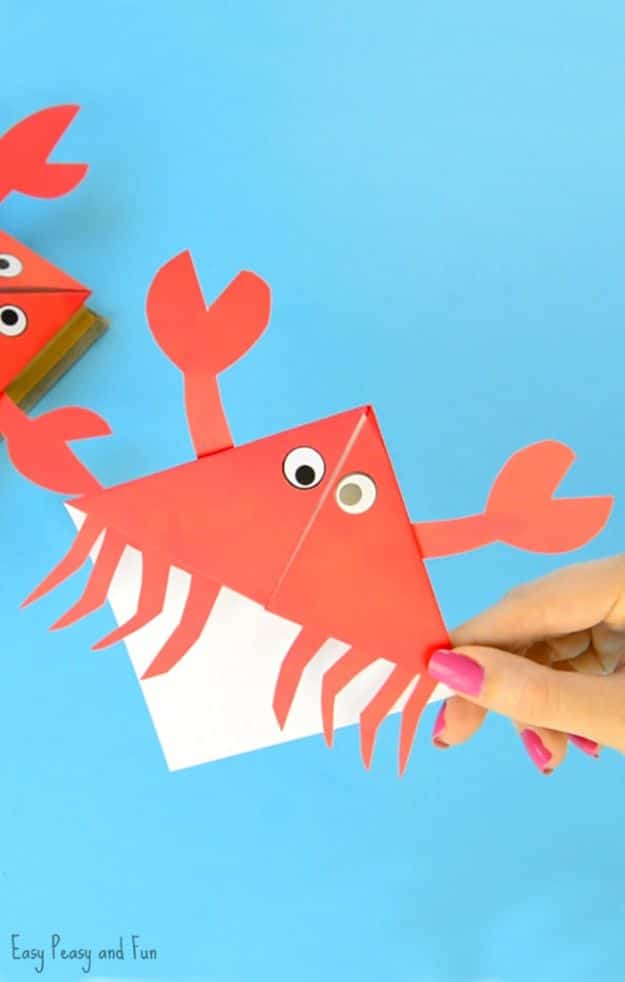
An origami corner bookmark is a folded paper pocket that bites onto the corner of a page, and the crab version is the one kids reach for first. The folding is basic enough for kindergarten hands, and the claws and legs are cut from a second sheet and glued on afterward, which is the part small children enjoy most. Googly eyes finish it, or draw the face on if you have none. Preschoolers will need help and a little patience. One sitting produces a whole reef of them, which is handy when a class needs thirty.
Get the full tutorial at Easy Peasy and Fun.
35. Leaf Clay Dish
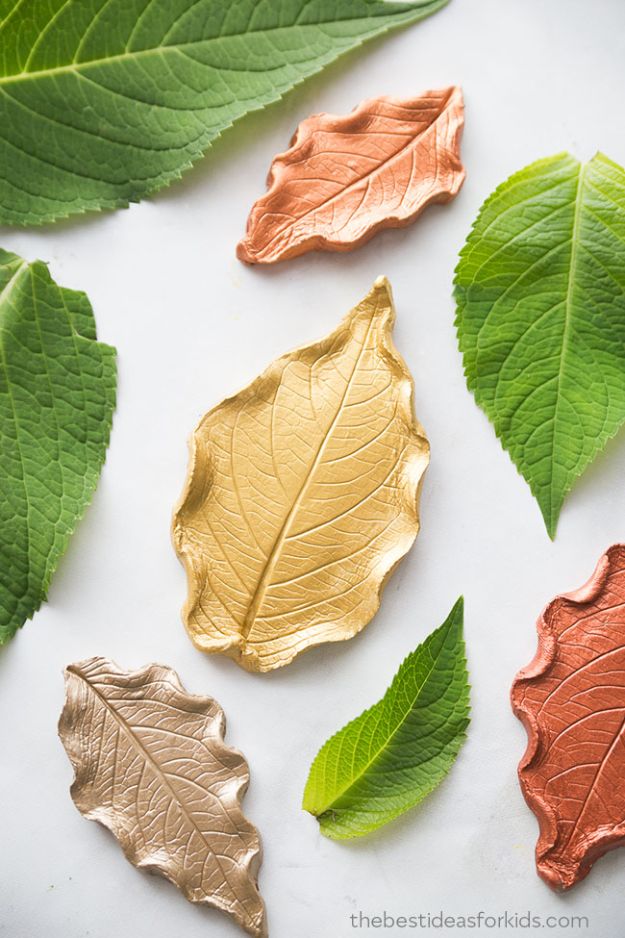
Roll out air dry clay, press a leaf into it hard enough to print every vein, cut around the shape, then curve the edges up over a bowl so it dries as a dish. Leaf choice matters more than anything: hydrangea leaves fold up beautifully and a maple leaf will not, which the maker found out the hard way. Rose gold, gold and bronze acrylic over the veins gives a grown-up finish, and a coat of gloss Mod Podge seals it. Older kids can manage this one start to finish.
Get the full tutorial at The Best Ideas for Kids.
36. Paper Poppy
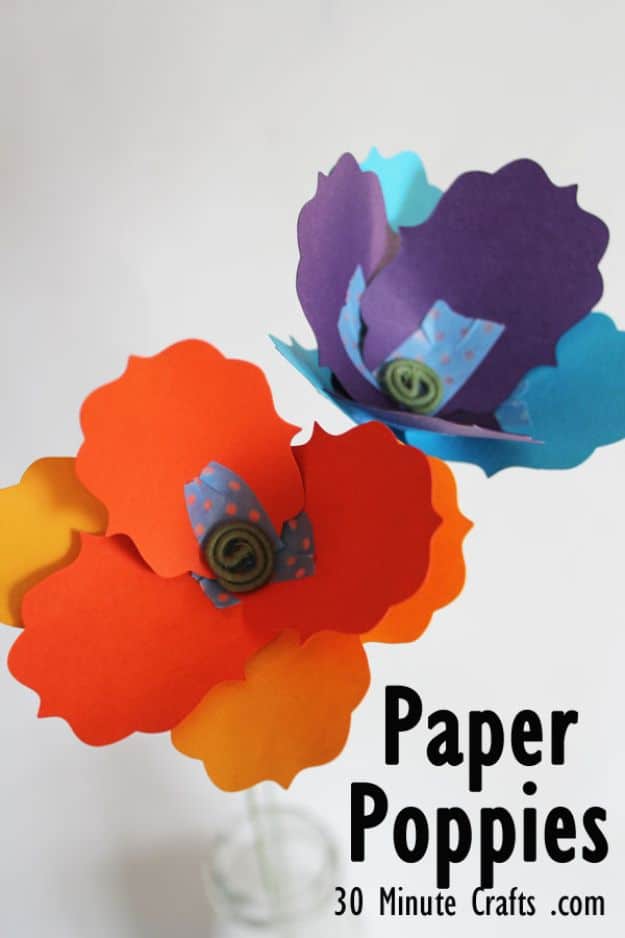
Six die-cut petals from cardstock, a small notch cut in the bottom of each and closed with a strip of washi tape so the petal cups, then a thumbtack hole a quarter inch from the edge and green floral wire threaded through the lot. A coil twisted into the top of the wire with pliers holds everything in place and doubles as the flower’s center. It takes a few minutes per flower once the shapes are cut. A bouquet of these never wilts and costs less than a single stem from the grocery store.
Get the full tutorial at 30 Minute Crafts.
37. Marbled Clay Butterfly Wand
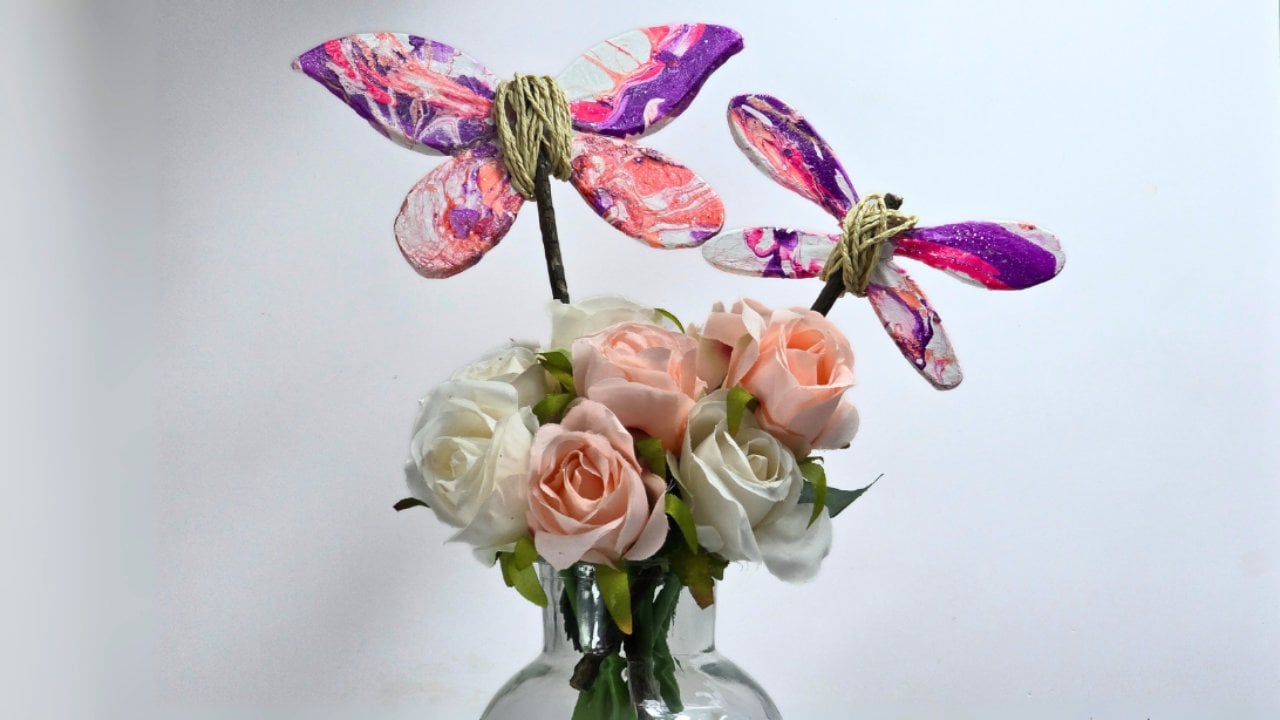
Butterfly and dragonfly wings cut from air dry clay, held on a toothpick and dipped straight into a swirled puddle of mixed nail polish, come out marbled in a pattern no two pieces will ever repeat. Leftover polish and leftover clay are the whole supply list, which is why this one tends to start with a drawer clear-out. Push the finished wands into a potted plant and a plain planter suddenly has something going on. They are light, they need no maintenance, and they make good little handmade gifts.
Get the full tutorial at DIY Joy.