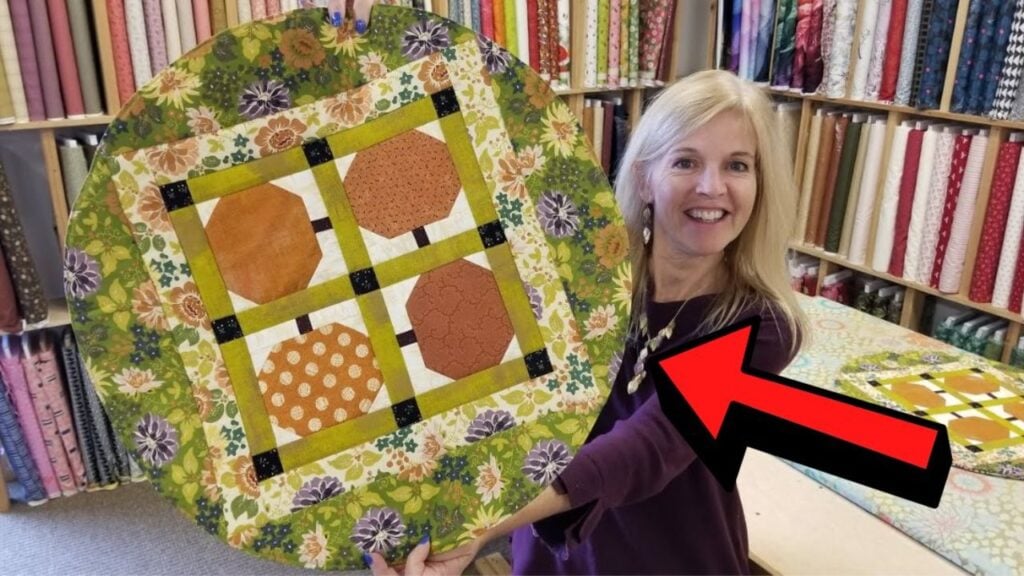
Learn how to make this beautiful table topper that fits any table by Jordan Fabrics on YouTube. This gorgeous quilting project is super easy to do even beginners can follow. Try this out now and keep yourself busy this weekend. Enjoy quilting!
Materials:
- 39 pieces of 5” charm squares
- 24″ square batting or fleece
- ¼ yard of fabric, for the inner border
- 3/8 yard of fabric, for the outer border
- Needle and thread
- Scissors
- Rotary cutter and cutting mat
- Ruler
- Marking pen or pencil
- Fabric pins and clips
- Sewing machine
- Pattern (click here to download the free pattern)
Directions:
Step 1
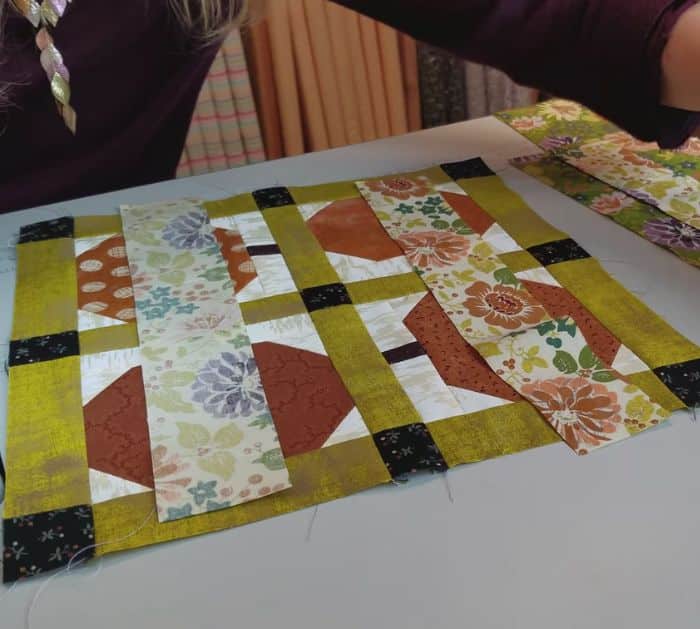
Select 4 orange charm squares for the pumpkins and cut each piece to 4¼ x 5 inches, then select 2 light charm squares for the corners of the pumpkin and cut them to 16 pieces at 1½ inches square. Fold the small squares in half diagonally, then press them well, open the folded square, and place them on the corners of an orange pumpkin rectangle. Stitch them along the fold, then trim off the outer stitched seams of each corner leaving only ¼ inch seam, open the corners, and steam press. Repeat this to the rest of the pumpkin blocks. Now, choose 2 light squares, then cut them into 8 pieces at 1¼” x 2½ inches, select 1 dark square for the pumpkin stems, and cut them into 4 at 1 x 1¼ inches. Place a stem piece in between 2 background rectangles, then sew them together, and press the seams flat. Stitch each stem to the pumpkin blocks.
[social_warfare]
Step 2
Choose 4 green charm squares for the sashing, then cut them into 12 pieces at 1½ x 5 inches, select 1 dark charm square for the cornerstones, and cut them into 9 pieces at 1½ inches square. Layout the pumpkins, sashing, and cornerstones, then stitch them all together and press the seams nicely toward the sashing. For your inner border, cut 2 pieces at 2 inches by the width of your fabric, then from each strip cut a piece at 2 x 12½, and one at 2 x 15½ inches for a total of 2 of each size. Stitch this onto your patchwork starting at the sides followed by the top and bottom. Now for the outer border, cut 2 pieces at 4½ by the width of your fabric, then from each strip cut one piece at 4½ x 15½ inches, and one at 4½ x 23½ inches. Stitch this onto your patchwork starting at the sides followed by the top and bottom, then steam press the whole piece flatly.
Step 3
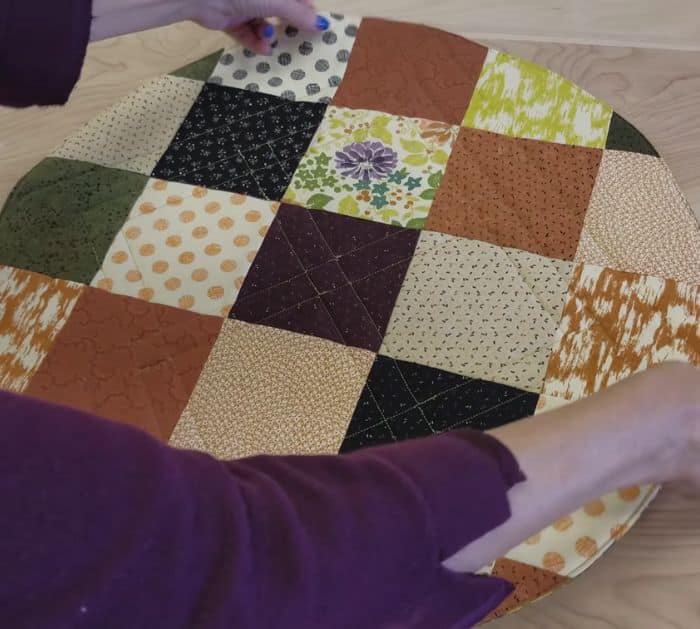
Fold the patchwork into quarters, then from the center fold, measure and mark 11 inches about every half inch, and connect the marks to create a quarter circle. Cut along those markings or lines, then open the fabric, and you should end up with a 22 inches circle. Get 25 charm squares, then stitch them together into 5 x 5 block patchwork, and press them very flat. Lay this on top of the batting with its right side up, then place the round patchwork on top with its right side facing down, and trim off the excess backing and batting following the shape of the round patchwork on top. Pin them together, then sew them around the edges leaving only about 4 inches of opening, and turn it right side out. Tuck the seams of the gap nicely, then stitch the opening closed, and hand press the edges flat. Topstitch the quilt as desired, then steam press, and you’re done!
*All image credit belongs to Jordan Fabrics via YouTube. Follow and subscribe to her channel for more!
Beginner-Friendly Quilted Round Table Topper Tutorial


