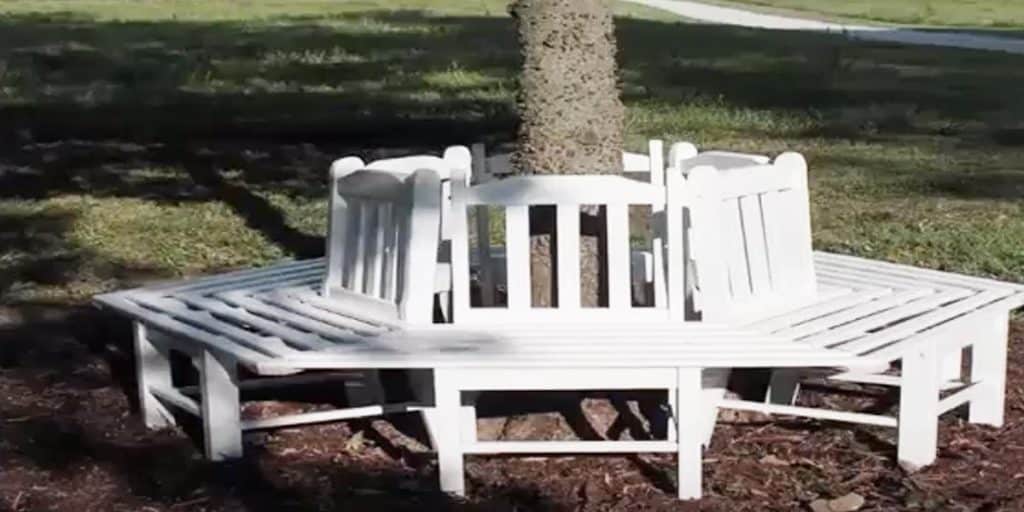
I have been admiring those tree benches for a long time. I’ve always wanted one but knew it was a little out of our price range. They can cost anywhere from $250-$3,000!
I was so psyched when I ran across this tutorial! How clever is this? I went on the hunt for some old chairs at the thrift store and found them! I ended up paying $50 for all six of them!
After removing the cushions and hardware, the first order of business was to clean the chairs with TSP. TSP is an all purpose heavy duty cleaner you use before painting. It gets rid of all the oils so that the paint will adhere better.
After the chairs were cleaned, I painted the chairs. When they dried, I pulled my genius husband in to help. I wasn’t for sure what angles to cut the wood so he gave me a crash course in geometry. He said that since we were making something circular, the angles would have to equal 360 degrees. Then I told him I had six chairs So he asked how many times six would go into 360. The wood needs to be cut in sixty degree angles.
Now this is where the magic began… he measured, I cut. After we would get a row done, then he would nail it down.
Next, we made braces that would connect the chairs to each other. We didn’t put them on just yet. First I needed to paint everything. Keep in mind that we did all of this in one weekend.
I had to find an established tree that didn’t have roots coming out of the ground, in close proximity to the house and was thin enough to be encompassed by the bench. I found a tree!
So, I raked around the tree and tried to level up the ground. I placed the chairs around the tree. Since the ground was uneven, I had to cram mulch under some of the chair legs so that it would be level enough to attach to the other chairs. Then, we got the braces and screwed all of the chairs together until it was one unit. Lastly, we put mulch underneath all of it.
Materials I used for this project:
- 6- Old kitchen chairs
- 12- 1x8s
- Oil-based paint
I know I just basically told you how to build this, but watch Princess Home’s step by step tutorial, just to make sure you’ve got a good handle on how to do this awesome DIY project!


