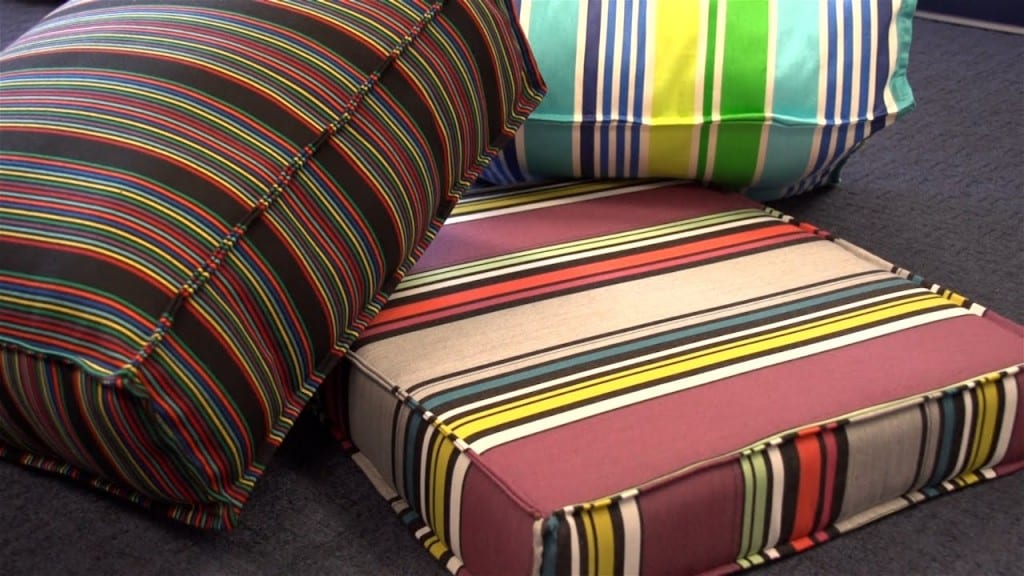
Need some new outdoor cushion covers but can’t find what you want for the price? DIY cushion covers are awesome because they cost a fraction of what it would to buy them, you get higher quality fabric, and can choose the colors and patterns of your choice. I never see patterns I absolutely love in stores, anyway, so I knew this was the next DIY project for me. Follow the super clear, detailed video tutorial and then reference our step by step photos to get the perfect outdoor seating- DYI style so you can really enjoy spring and summer in your backyard or on your porch. For outdoor patio seating, these cushion for your chairs will be enjoyed all summer long, even all year. Start sewing now so you can enjoy yours! Watch the video below for complete instructions.
Easy DIY Outdoor Cushion Covers
What you need for this sewing project:
1. Materials Needed
- Decorative Fabric
- Pillow Protector
- Polyester Thread
- Polyfill
- Center Fold Cushion Wrap Film
2. Tools Needed
- Sewing Machine
- Ruler
- Scissors
- Fabric Marking Pen or Pencil
- Hot Knife
Step 1
Mark the fabric to size with a soapstone pencil and a straight edge ruler.
Step 2
When marking along the width of the fabric the location of the stripes must be taken in to consideration for the second plate panel. Here is where the first plate started and that’s also the location where we want the second plate to start so the repeat is the same between top plate and bottom plate. If you’ve done it correctly the end point of the second plate should fall on the same strip as the end of the first plate we made.
Step 3
Next we need to mark for the boxing in both width and length.TO calculate the width of the boxing we need to add 1 3/4 inch to the desired finished width of boxing that you want. This extra amount will account for the mattress style seams.
Step 4
We are cutting the fabric using a hot knife. this seals the edge of the synthetic fabric preventing the unraveling of the fabric. Do this on top of a metal ruler to prevent damage to the table top below the hot knife.
Our 2 plates and 4 boxing strips are now cut to size and ready for sewing. We have now covered patterning for a cushion filled with fiberfill.
Next will be the pattern for a French Mattress.The measurements
Now that our patterns are done, lets now proceed to the second part of the tutorial. for fiberfill. If you’re not gonna use fiberfill please skip this part.
Patterning Insert Fabric (Fiberfill only)
Since this cushion will be filled with a polyester Fiberfill we want to make a pillow insert which will house the fiberfill. To make this we will use spun bonded pillow protector fabric which is in expensive, breathable, water repellent and soft.
Step 1.
Fold the spun bonded fabric in half then fold it over one more time to a width slightly larger than the width of the boxing. Then trace around a plate and a boxing strip. We will get two plates and 4 boxing strips all at once when we cut it out. This plates and boxing strips for the pillow insert do not need to be extremely accurate in size since they just use to house the fiberfill.
Step 2.
We now have all the plates and boxing strips cut for our cushion in both the decorative fabric and spun bonded cushion pillow protector. lay the fabric panels out in an organized fashion to reduce the chance of mistakes.
Sewing Boxing and Plate
Step 1
Start with the boxing and lay the corresponding boxing strip onto the oppposite leg so outside surfaces are facing each other. then sew the two strips together along the short end with a straight stitch about 3/8 inside the raw edges of the fabric. Be sure to do some reverse stitching at the beginning and the end of your stitch to lock the stitch in place.
Step 2
Take the assembly over to where the panels are laid out and grab the corresponding boxing strip and repeat the process. Always go back to the panels as they lay on the table and check to be sure strips are running the correct direction and also they will line up with the plates along the 2 sides that is, as it is impossible for them to line up along the other two sides.
Step 3.
Once all 4 boxing strips are sewn together,its time to join them together to form a complete chain. Be sure the outside surfaces are facing each other and sew along the end that completes the chain.
step 4.
Now take the boxing assembly over and line it up with one of the plates so the strips are all even. FLip the boxing over so outside surfaces are facing each other and the edges are even.
step 5
We will start sewing near the center position on the side. We will use a straight stitch. set at about 6mm in length and sew about 3/8 from the edge of the fabric. Be sure to line up the strips and the edge carefully as you sew.
Step 6
Once you get to the corners, bury your needle to the thickest part of the shaft and lift the presser foot. Rotate the the fabric on the corner and then lower the foot and continue to sew down the leg. Because the sides does not have stripes that match the plate, we can’t use them line up the boxing to the plate.
Ensure the opposite corner will line up with the plate’s corner.
Step 7
Continue sewing around all sides until you reach your starting stitch and do some reversing there.
Attaching Final Plate
Step 1
Now that the boxing is joined in one plate, we simply need to sew the assembly to the last plate. To do this, line up the plates so that the stripes match on the two sides. Be sure the outside surfaces are facing each other. It is easier to sew the assembly with the boxing on the top and the plate on the bottom.
Step 2
Start sewing 2-3” away from the corner to leave room for the insertion of the cushion or foam. Sew around securing the boxing to the last plate.
Step 3
Check to make sure the stripes match up. When you reached the last side, go around the corner and stop sewing about 3” away from the corner. This leaves an opening for the insertion of the foam or insert in a later step. Do some reverse stich to lock the stitch in place and keep it from coming apart when the insert or foam is pushed inside the cover.
Step 4
Turn the cover inside out.
Sewing Mattress Style Seam
Step 1
Sew the mattress style stitch along all sides and even in the corners of the cushion cover. To do this, fold the fabric out flat along each seam and try to position the seam at the extreme center edge of the folded assembly.
Step 2
Position the assembly so the stitch starts about ½” away from the sides’ corner and about 3/8” away from the folded edge.
Step 3
To keep the first seam centered correctly, sew a few inches then bury the needle and make adjustments to the assembly and repeat.
Step 4
When you reach the next corner, stop about a ½” away and do some reversing. To move on to the next edge, we will not even cut the threads but we will simply remove the needle from the fabric, lift the flute, reposition the assembly and sew on to the next corner.
Step 5
Once the plate and boxing are sewn and now we can move on to the opposite side. When sewing this, do not finish or sew the side that is left open for the insertion of the foam or pillow insert. It will be sewn shut in a later step. And now we are ready to insert the cushion.
Assembling Cushion Insert (Fiberfill only)
Step 1
Build a pillow insert from the spun bonded fabric. The construction of the pillow insert is done the same way you build the cover you will not be sewing the mattress style seam in this.
Step 2
When sewing, don’t forget to keep a side open just as you did in the cover to leave a room to insert the fiber fill. Turn this cover right side out.
Step 3
Fill the pillow insert with fiber fill until it’s plump. We recommend a stuffing of about 2lbs for a cushion measuring 20” x 20” x 5”. The amount of fiber fill used is completely up to you.
Step 4
When the pillow insert is stuffed to your satisfaction, we can now close the opening with the single stitch ensuring a reverse stitch is made at the end and beginning.
Adding Filling and Closing Cushion
Step 1
Use silk film and cover the cushion on all sides. This is done so that it will be easier to insert the cushion into the cover later on.
Step 2
Using a vacuum, compress the pillow insert until it’s reduced into half its former size.
Step 3
Insert the cushion with the vacuum still on. Once done, you can turn off the vacuum and watch the pillow slowly expand. You can leave the silk film inside to render your cushion water resistant.
Step 4
To sew the opening, create a folded hem to simulate the rest of the sides of the cushion. Fold the fabric in along with the edges of the fabric and start sewing about ½” from the corner and 3/8” from the folded edge. With the fiber fill stuffing closing, sewing up the opening is not too difficult.
And your cool pillow is done!

Love this DIY idea? Save it and share on Pinterest