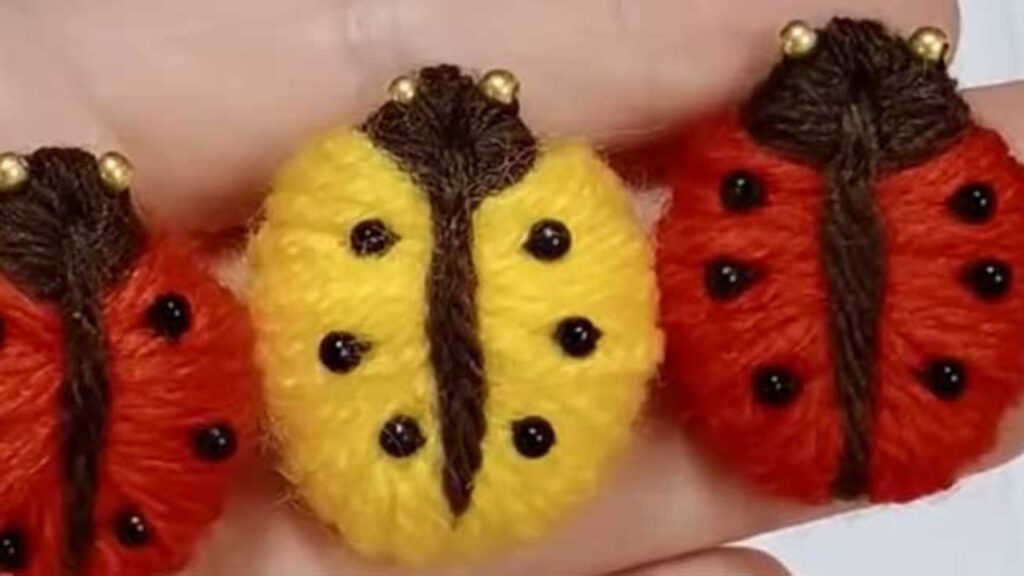
These are the cutest additions to my crocheting projects. These yarn ladybugs by Crafts & Ribbon Art are so adorable and incredibly easy to make. I recently made a cardigan and attached these cute ladybugs to it. Everyone has complimented the cardigan when I go out. After watching the video tutorial down below, you will want to add ladybugs to all your designs. These are also perfect to use as party favors for children’s birthday parties or just as decorations.
Materials Needed For This DIY:
- Yarn – Red and Black
- Fork
- Scissors
- Yarn Needle
- Beads – Black and Gold
Directions:
Step One
Use your fork to wrap the red yarn around. Once the yarn has been wrapped around multiple times, cut off the end leaving a reasonable-sized tail of string.
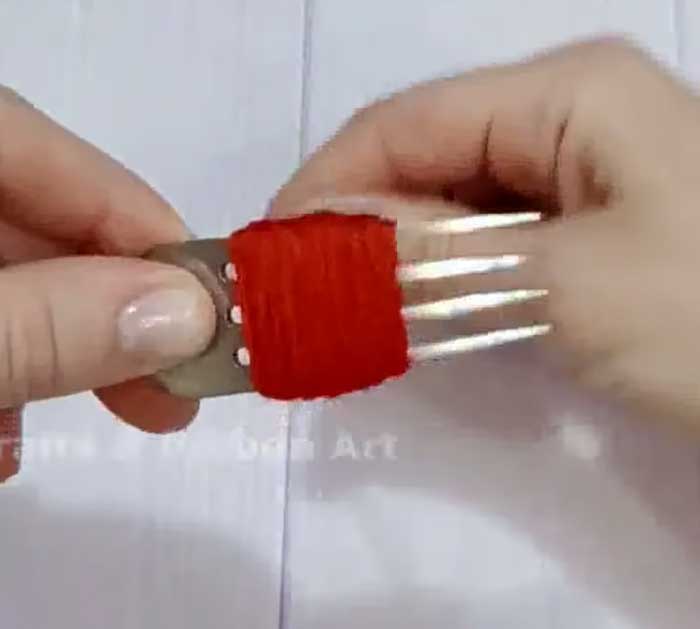
Image by. Crafts & Ribbon Art via YouTube video.
Step Two
Using the black yarn, wrap the yarn around the middle two pieces of the fork. Wrap the tail of the yarn around the middle of the ladybug once and then remove it from the fork.
Step Three
Continue wrapping the black yarn around the body of the ladybug to create a thicker body.
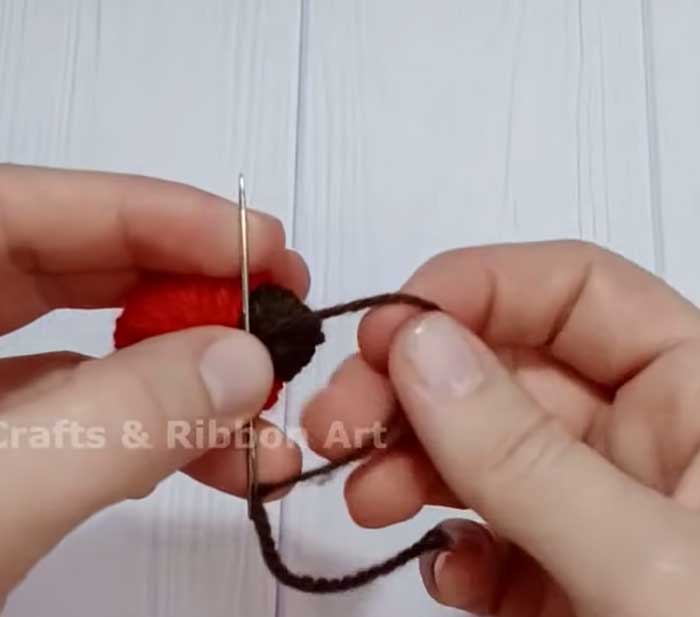
Image by. Crafts & Ribbon Art via YouTube video.
Step Four
Create antennas by stringing beads into the top of the head of the ladybug. Use your yarn needle to weave the beads into the yarn. Repeat the threading through the body of the ladybug using black beads to create spots on the top of the by.
Step Five
Finally, tie off the yarn on the bottom of the ladybug’s body to finish the project. These are perfect to attach to any knitting or crocheting project for a fun addition to your designs.
Yarn Ladybug’s Made With a Fork


