Are you looking for your next quilt project? Try making this water mill quilt block from Carol Thelen on Youtube. This quilt is perfect for all beginners out there, but even if you’re a seasoned quilter, you’ll enjoy doing this quilt. It also has a free pattern! What are you waiting for; try doing this quilt today. Watch the video tutorial below to learn the step by step instructions.
Materials:
- for each fabric: 4 – 1/2″ x WOF strip
- (click here for the free pattern)
Directions:
Step 1
To start, cut all the fabric pieces needed. For patch A, cut 3 7/8″ x 3 7/8″ squares. If you’re using patches, you’ll need four patches each of the light and the dark. For patch B, cut 4 1/2″ x 1 1/2″ rectangles; you’ll need 8 of these in the dark fabric. For patch C, cut 3 1/2″ x 1 1/2″ rectangle; you’ll need 4 of these in the dark fabric. For patch D, cut 4 1/2″ x 3 1/2″ square; you’ll need 4 of these in the light fabric. For patch E, cut 4 1/2″ x 4 1/2″ square; you’ll need 1 of this in the dark fabric.
[social_warfare]
Step 2
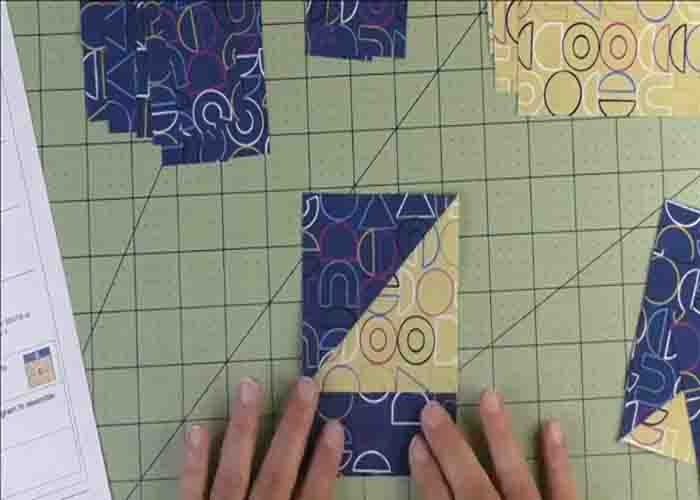
Now, on the back side of the fabric (for patch A), draw a diagonal line, put the fabric together, right sides together, then stitch on either side of the line. Cut it directly on the line afterward, then press open. Next, sew patch C at the bottom of the half-square triangle, making sure you watch the placement of the light and the dark fabric. Make four of these pieces, then sew patch B at the side, beside the light fabric, on each four pieces. Moving on, take patch Ds and the remaining patch Bs, and stitch them on the same edge.
Step 3
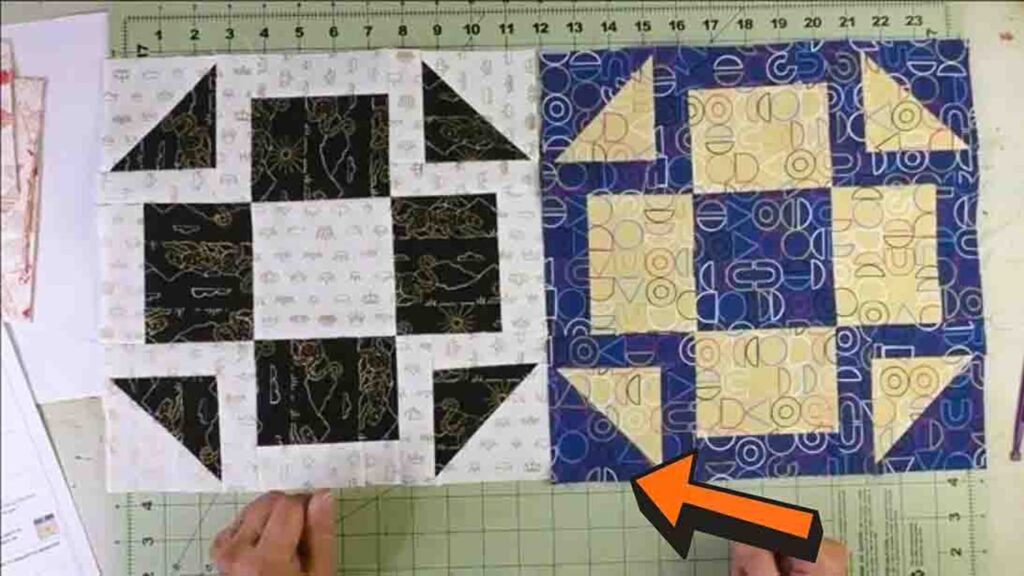
Now, start laying the block. Lay the center patch E first, then the sewn patches A, C, and B on each corner, then the sewn patches B and D in between the spaces. (See picture below.) Sew the units together into rows, then sew those rows together to finish the block. Press it open afterward.
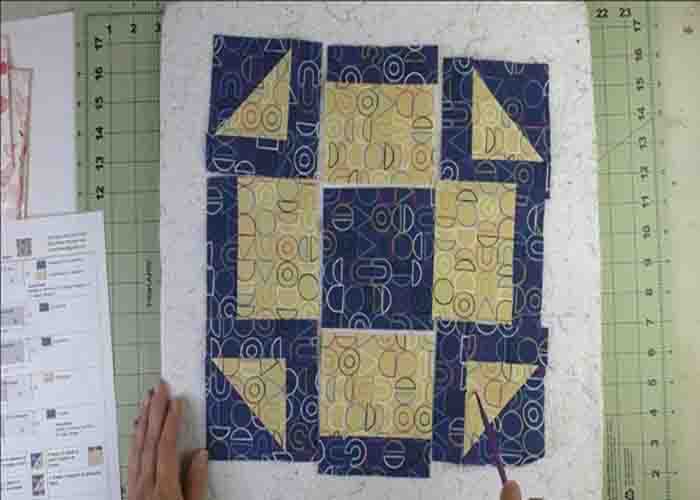
Water Mill Quilt Block with Free Pattern


