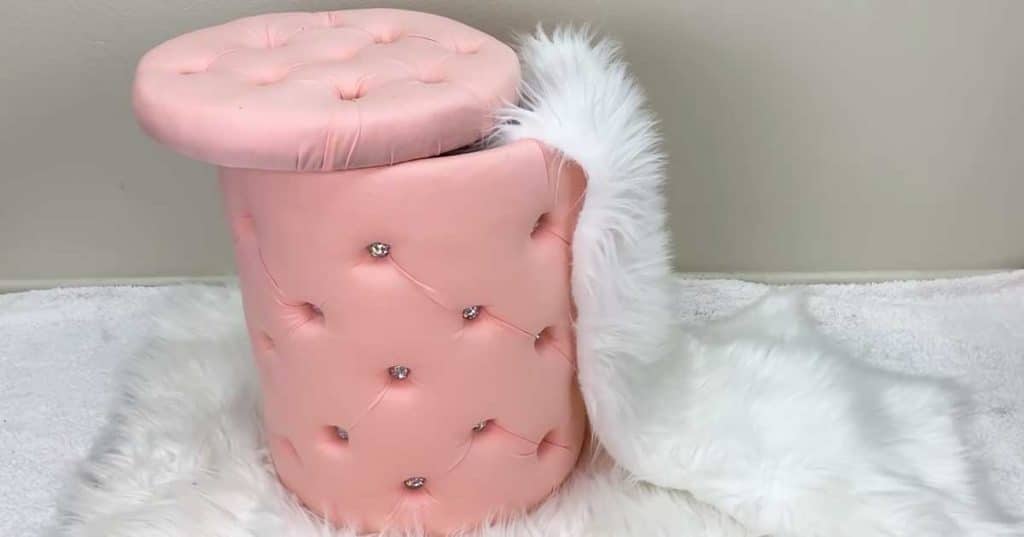
I’m always on the lookout for new storage solutions like this easy ottoman DIY. This amazing DIY YouTube video by Destined Creativity will walk you through step-by-step how to create a fun piece of furniture that doubles as storage. I use my ottoman for storing blankets in the living room
Materials Needed For This DIY:
- 1/2 inch foam
- Scissors
- Hot Glue
- Batting
- Fabric
- Staple Gun
- Large Bucket
Check out Destined Creativity’s YouTube video down below for measurements and a detailed supplies list.
Directions:
Step One
Wrap the bucket in 1/2 inch foam and attach it using hot glue. Also, pro-tip, you can get an empty pickle bucket from firehouse subs for $1.
Step Two
Cut small holes into the foam. Measure every few inches with the ruler and mark the spot you will cut using a marker.
Step Three
Add on the batting with glue or a spray adhesive. Cut the holes through your batting as well.
Step Four
Wrap the bucket in fabric, staple through the fabric, and the holes in the foam into the bucket. When you get to the end of the fabric, simply glue the rest of the fabric down. This works best if you use a stretchy fabric.

Image by. Destined Creativity via YouTube video.
Step Five
Using your scissors, bend the staples over on the inside of the bucket, so the ends aren’t sticking out. This will keep things from getting snagged inside the bucket.
Step Six
On the top of the bucket, just staple down the extra fabric, or hot glue it down. Glue the bottom of the fabric to the bucket as well.
Step Seven
Using a poster board, create a backing for the bucket. Glue this to the inside of the bucket.
Step Eight
You can use a piece of cardboard, or wood in the size of the top of your bucket to make the lid. Repeat the process you did to cover the bucket when covering the lid.
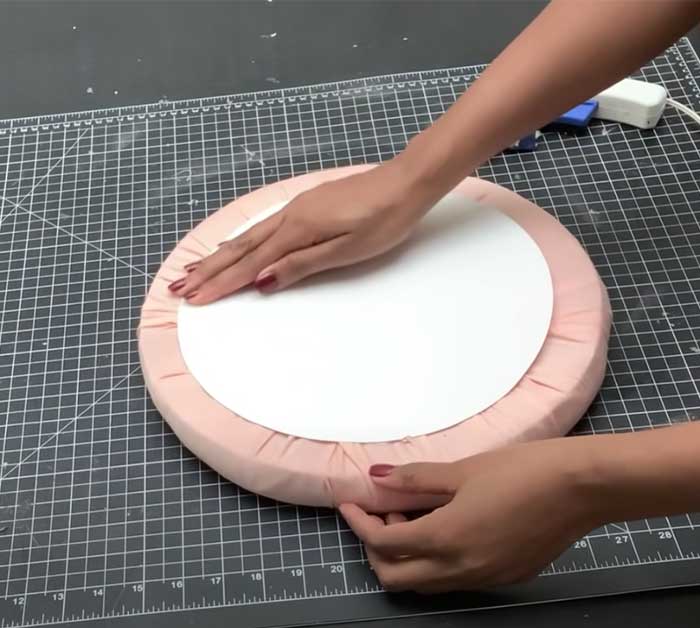
Image by. Destined Creativity via YouTube video.
[social_warfare]
Step Nine
Cut down all the extra fabric. Finally, use gems or buttons and glue them into the holes you made in the foam on both the lid and the bucket.
Turn A Bucket Into A Stylish Ottoman