Nine patches are definitely a good block to start with if you’re a beginner in quilting, but if you want to spice things up, why not inject some flying geese into your nine-patch pattern? This quilt block from fabric406 on YouTube is the answer. You should definitely try making this quilt block if you want a more complex design yet still beginner-friendly. Watch the video tutorial below to learn the step by step instructions.
Fabric Requirements:
- click here for the free pattern
light/white:
- 1 – 4 1/2″ square
- 4 – 2 1/2″ x 4 1/2″ rectangles
- 12 – 2 1/2″ squares
medium/green:
- 4 – 2 1/2″ x 4 1/2″ rectangles
medium/blue:
- 4 – 2 1/2″ x 4 1/2″ rectangles
- 12 – 2 1/2″ squares
Directions:
Step 1
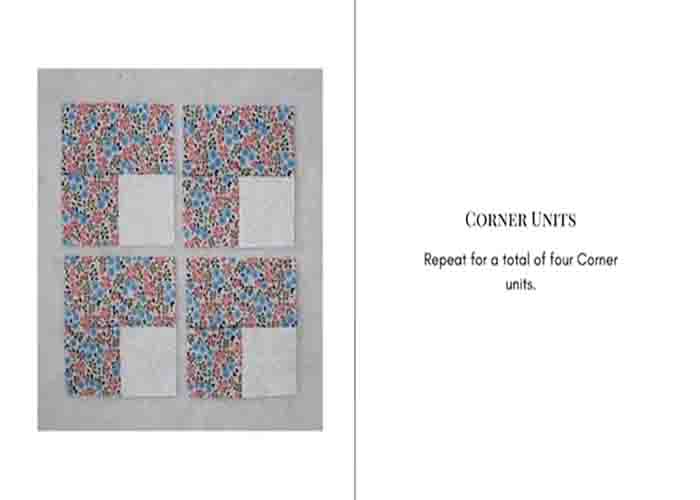
To start, cut all the fabric requirements, label them, and set them aside into groups. Now, make the corner units. Sew a white 2 1/2″ square and a blue 2 1/2″ square together, then press the seam away from the white. Next, sew a blue 2 1/2″ x 4 1/2″ rectangle to the previous unit, then press the seam toward the blue rectangle. Repeat these steps to make a total of four corner units. Moving on to the flying geese units, using a white 2 1/2″ x 4 1/2″ rectangle and two blue 2 1/2″ squares, make a flying geese patch. Make a total of four white/blue flying geese patches, then repeat using green 2 1/2″ x 4 1/2″ rectangles and white 2 1/2″ squares for a total of four white/green flying geese patches.
[social_warfare]
Step 2
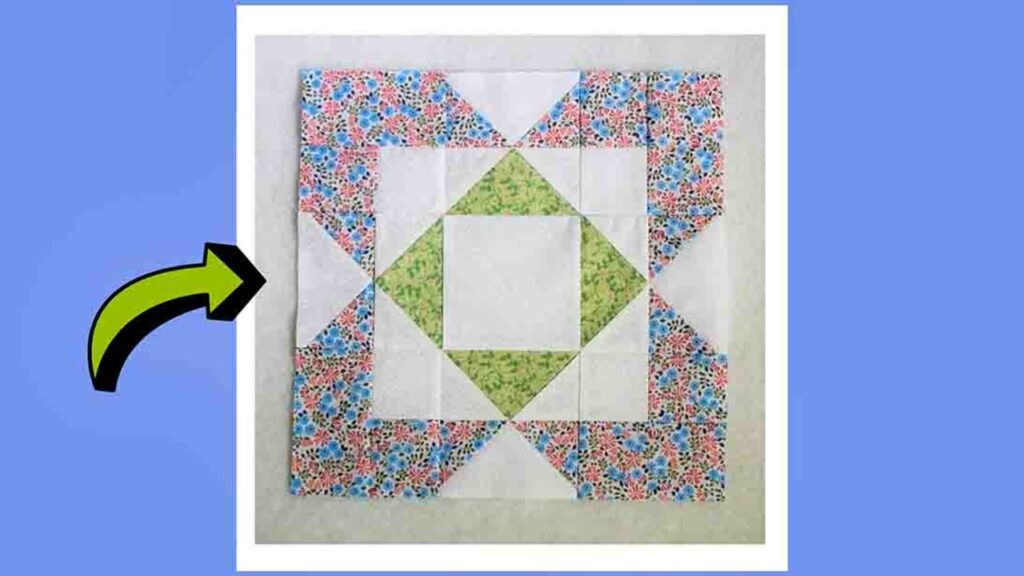
Next, match a white/blue flying geese patch with a white/green flying geese patch. Line and stitch these together and press the seam toward the white/green flying geese. Repeat these steps to make a total of four flying geese units. Once done, it’s time to assemble the block. Lay the corner units first, then the flying geese units, as shown in the image below. From here, the block goes like a nine-patch block. Sew them into three rows, then sew these rows together to complete the block. Press the seams away from the flying geese units once sewn.

The Traditional Four Squares Quilt Block Tutorial


