I’ve tried my hand at a few paintings, and while I am not a professional artist, I have created some pretty impressive pieces. The truth is, there is no single right way to make art. Every creation is unique, and what truly matters is your intention, your subject, and your goal, rather than technical skill. Everyone starts as a beginner, and the path to becoming a skilled artist comes from practicing repeatedly until painting becomes a natural and effortless process.
RELATED: Easy DIY Eco Bag Heart Wreath
![]()
Why You Should Try This
You should try this textured painting project because it is easy, beginner-friendly, and fun. It makes a unique gift idea that you can easily personalize for friends or family. You can even use the same paper mache technique on a smaller canvas to create keychains, perfect for gifting or selling. This project is a creative way to explore painting hacks, make one-of-a-kind art, and share your creations with others.
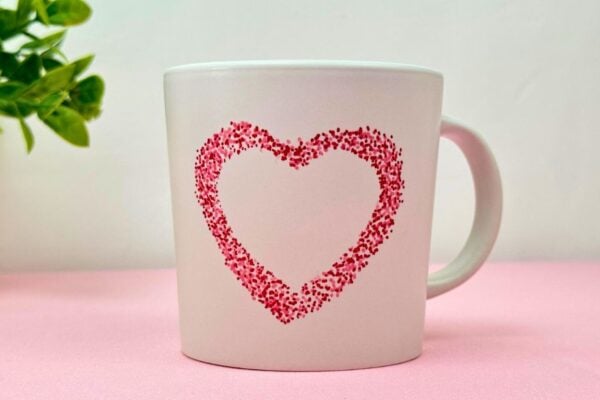
Painting can be full of surprises, especially when you explore creative hacks and techniques beyond the usual brushes and canvases. From using plastic, tissue paper rolls, or even cotton swabs and Q-tips, the possibilities are endless. Today, I am excited to share a simple and beginner-friendly method for creating a beautiful textured painting using a paper mache technique. This approach is easy to follow, fun to try, and guarantees a stunning result even on your very first attempt.
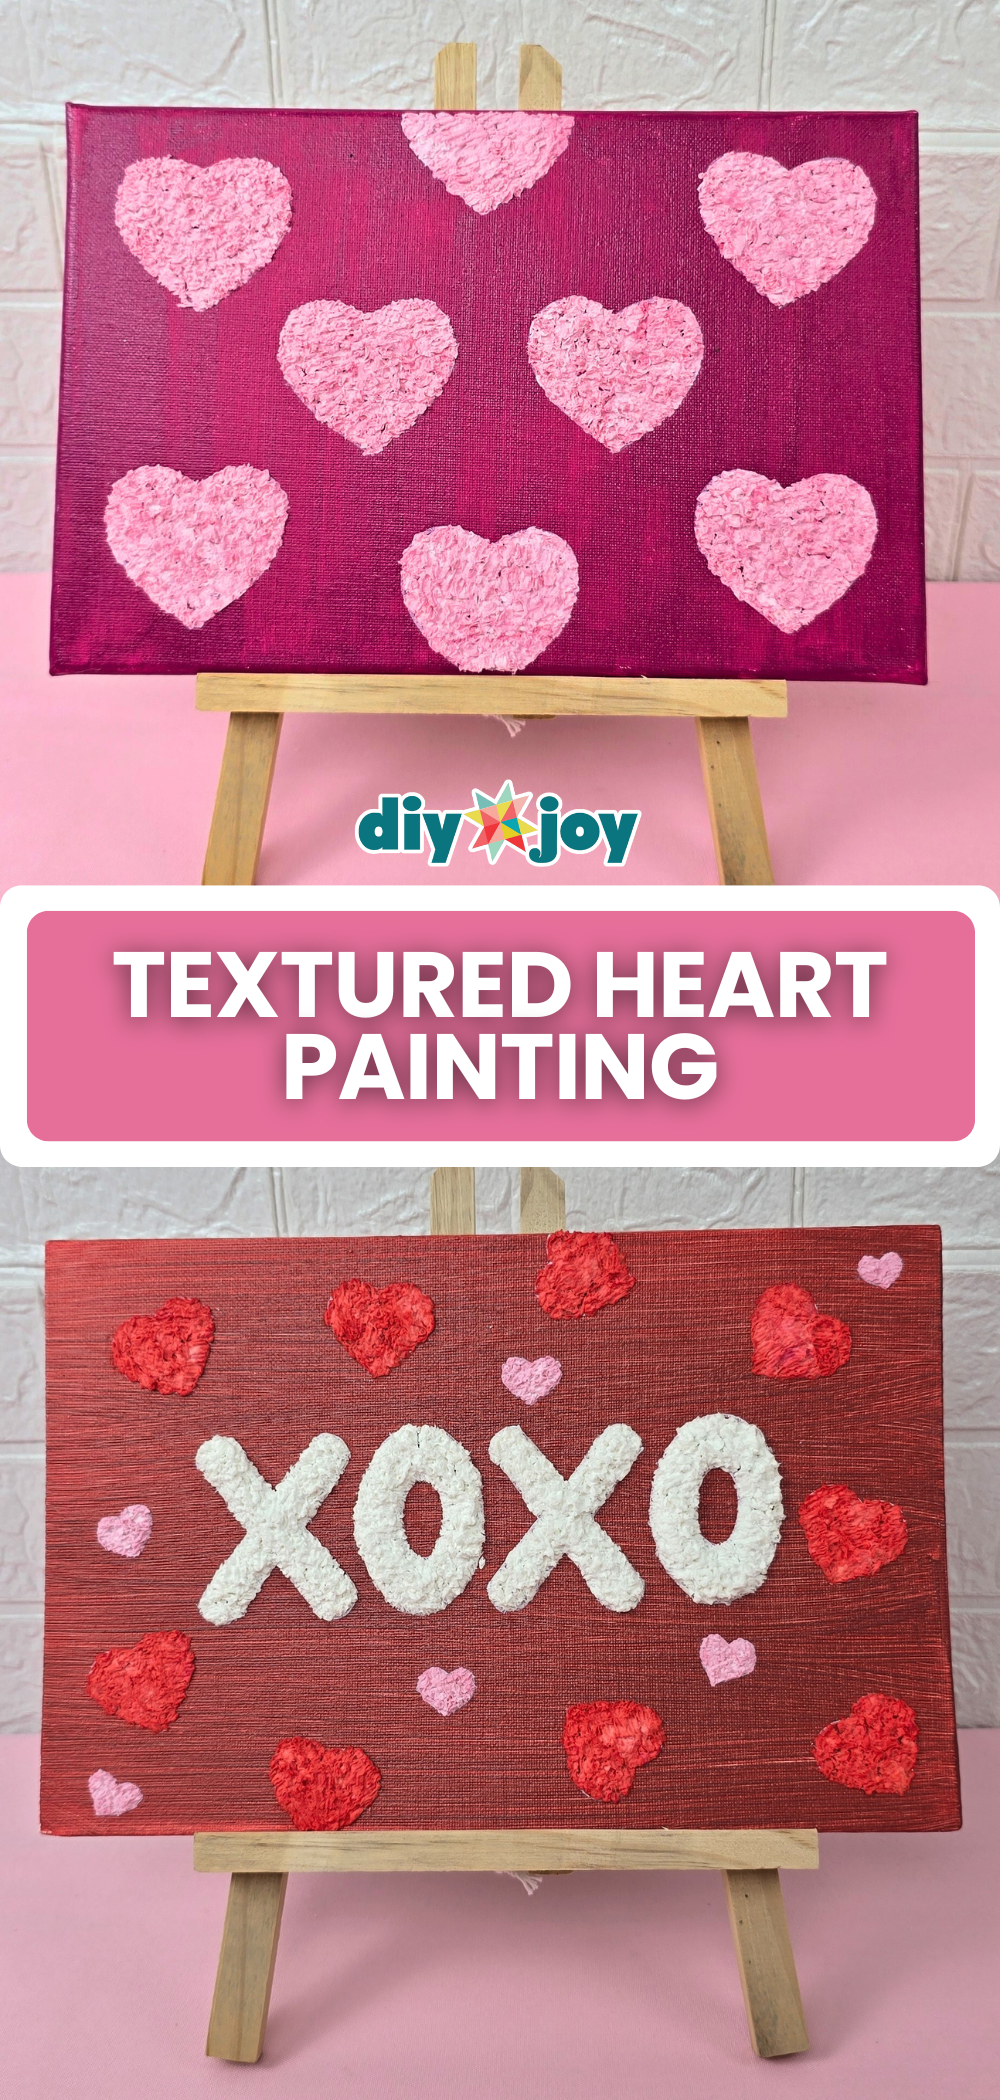
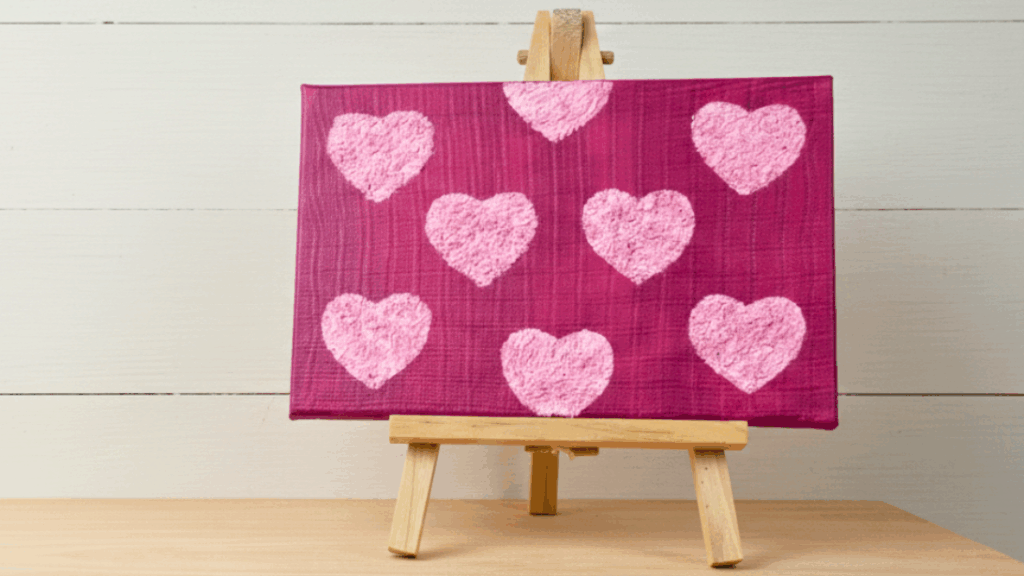
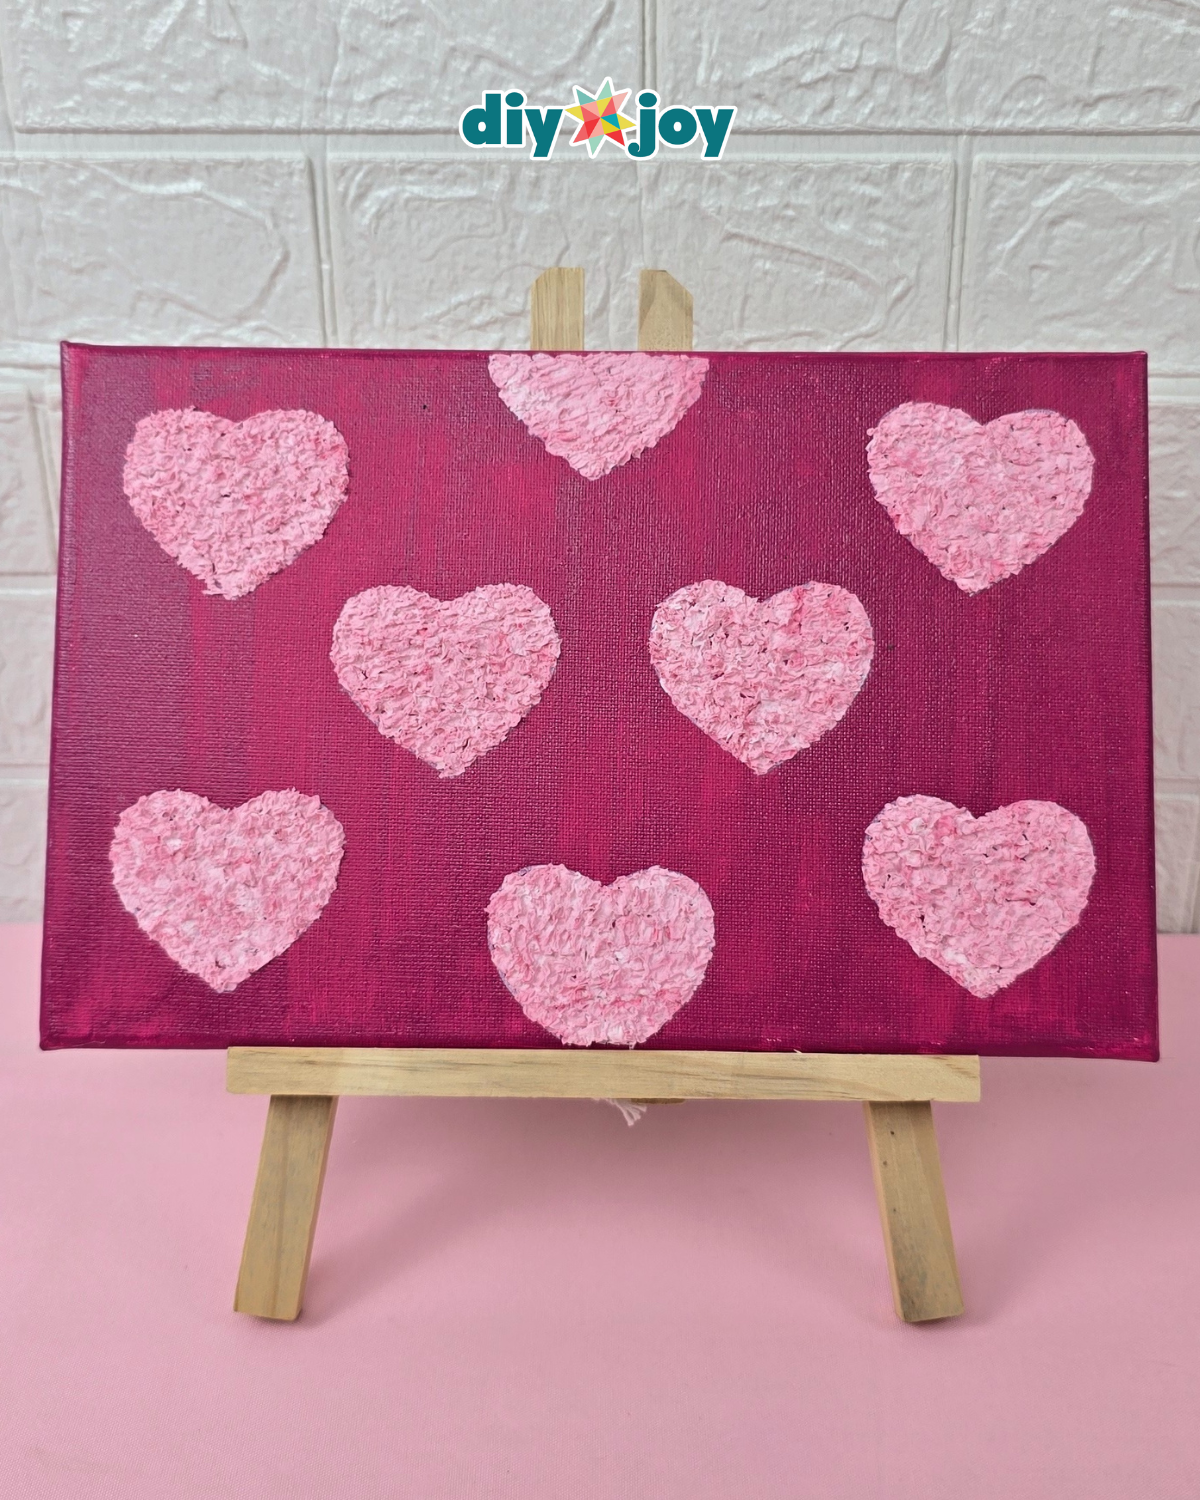
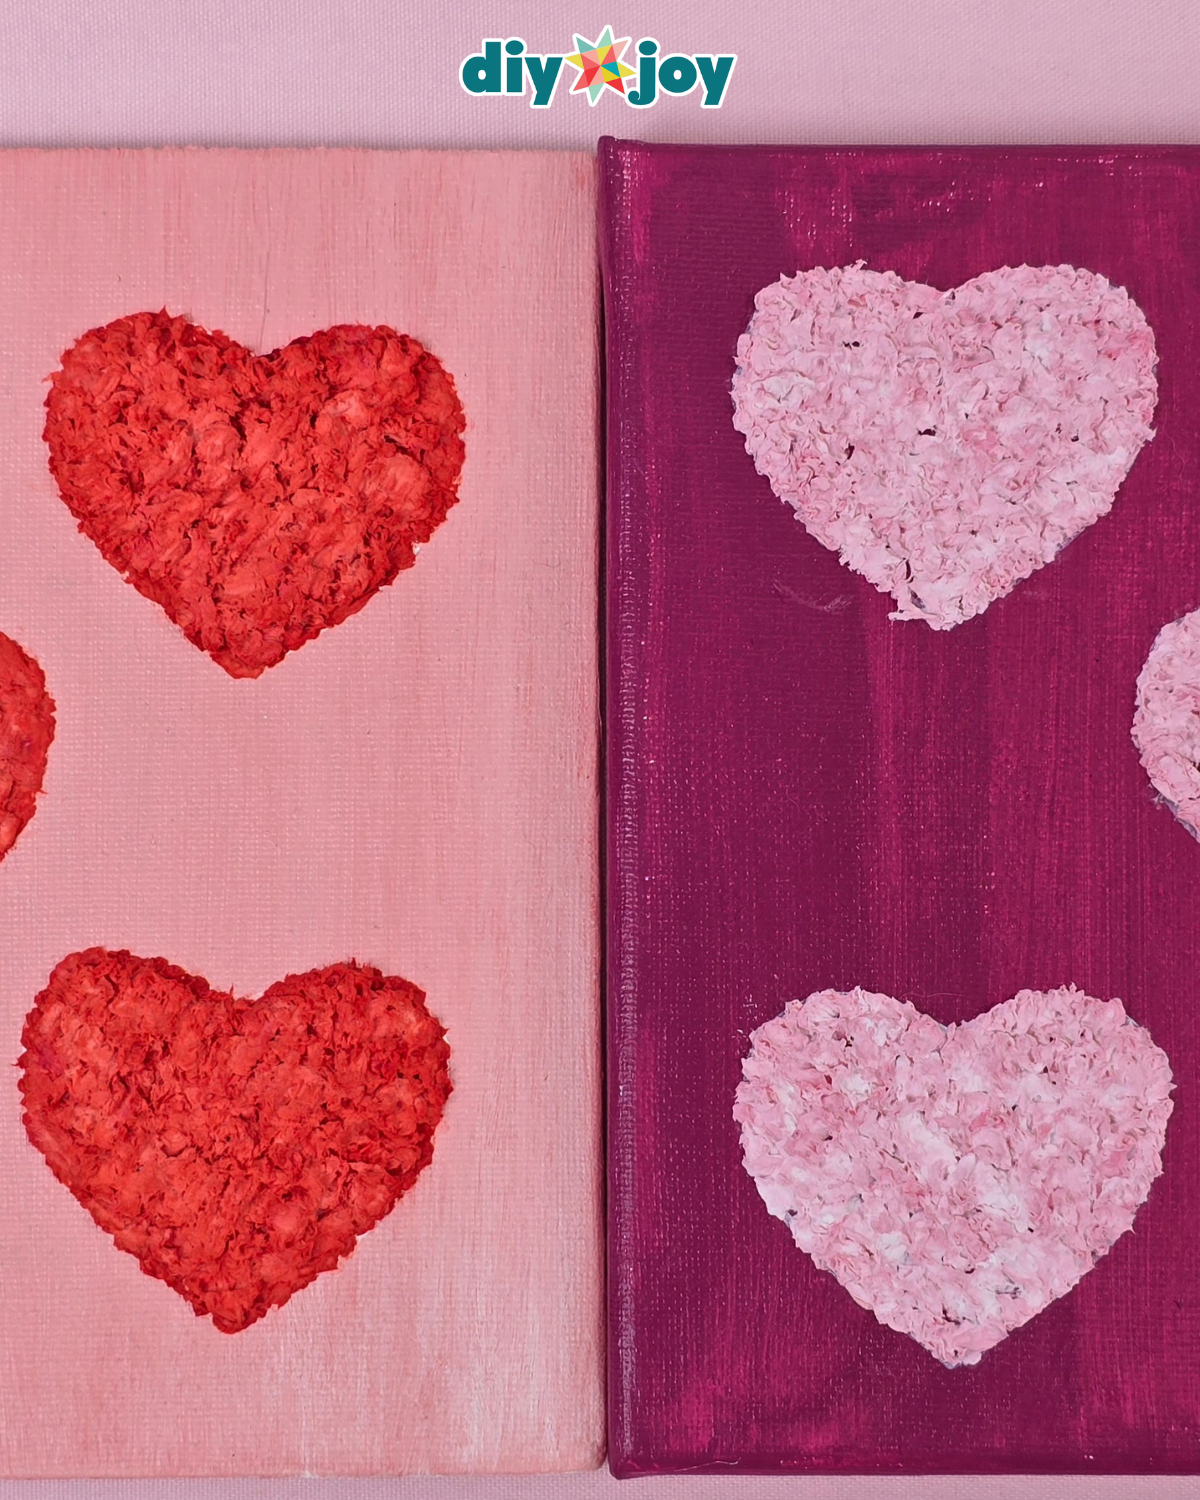
How to Make Textured Heart Canvas Art Painting
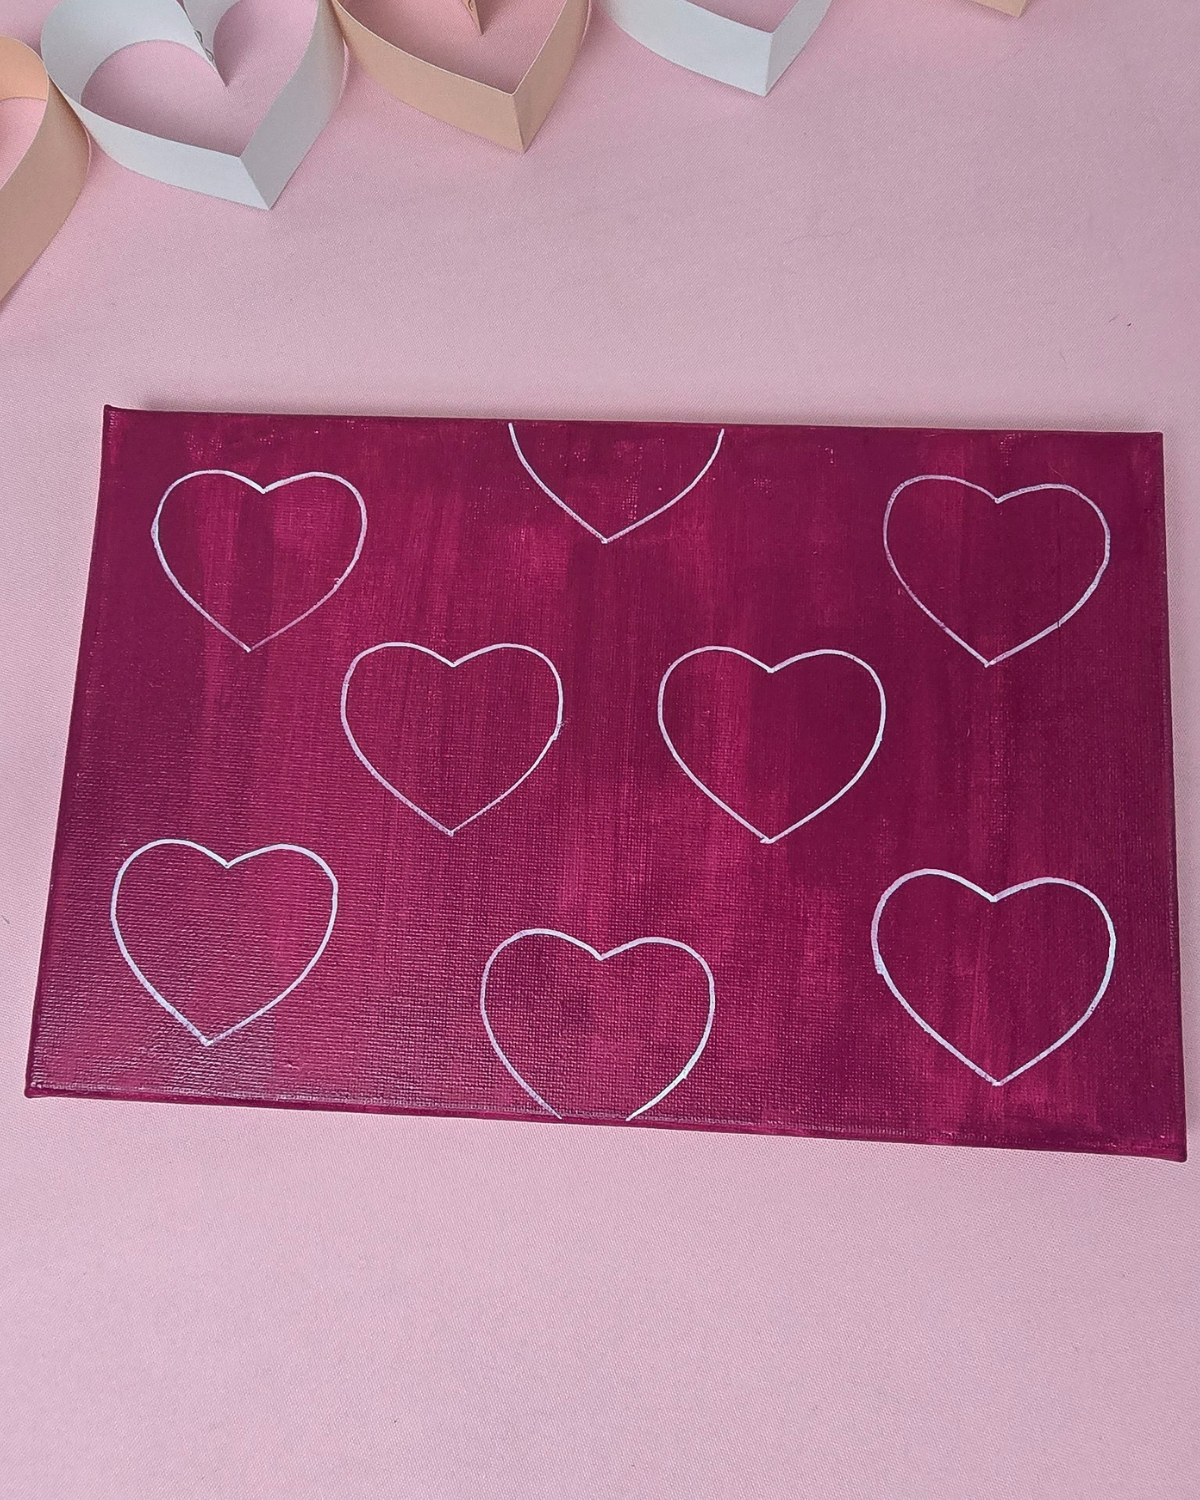
Step 1: Paint Your Canvas

Paint the canvas in your chosen color and allow it to dry completely. Once dry, lightly draw a heart, other shapes, or letters wherever you want them to appear on the canvas.Step 2: Make the Paper Mache Mixture
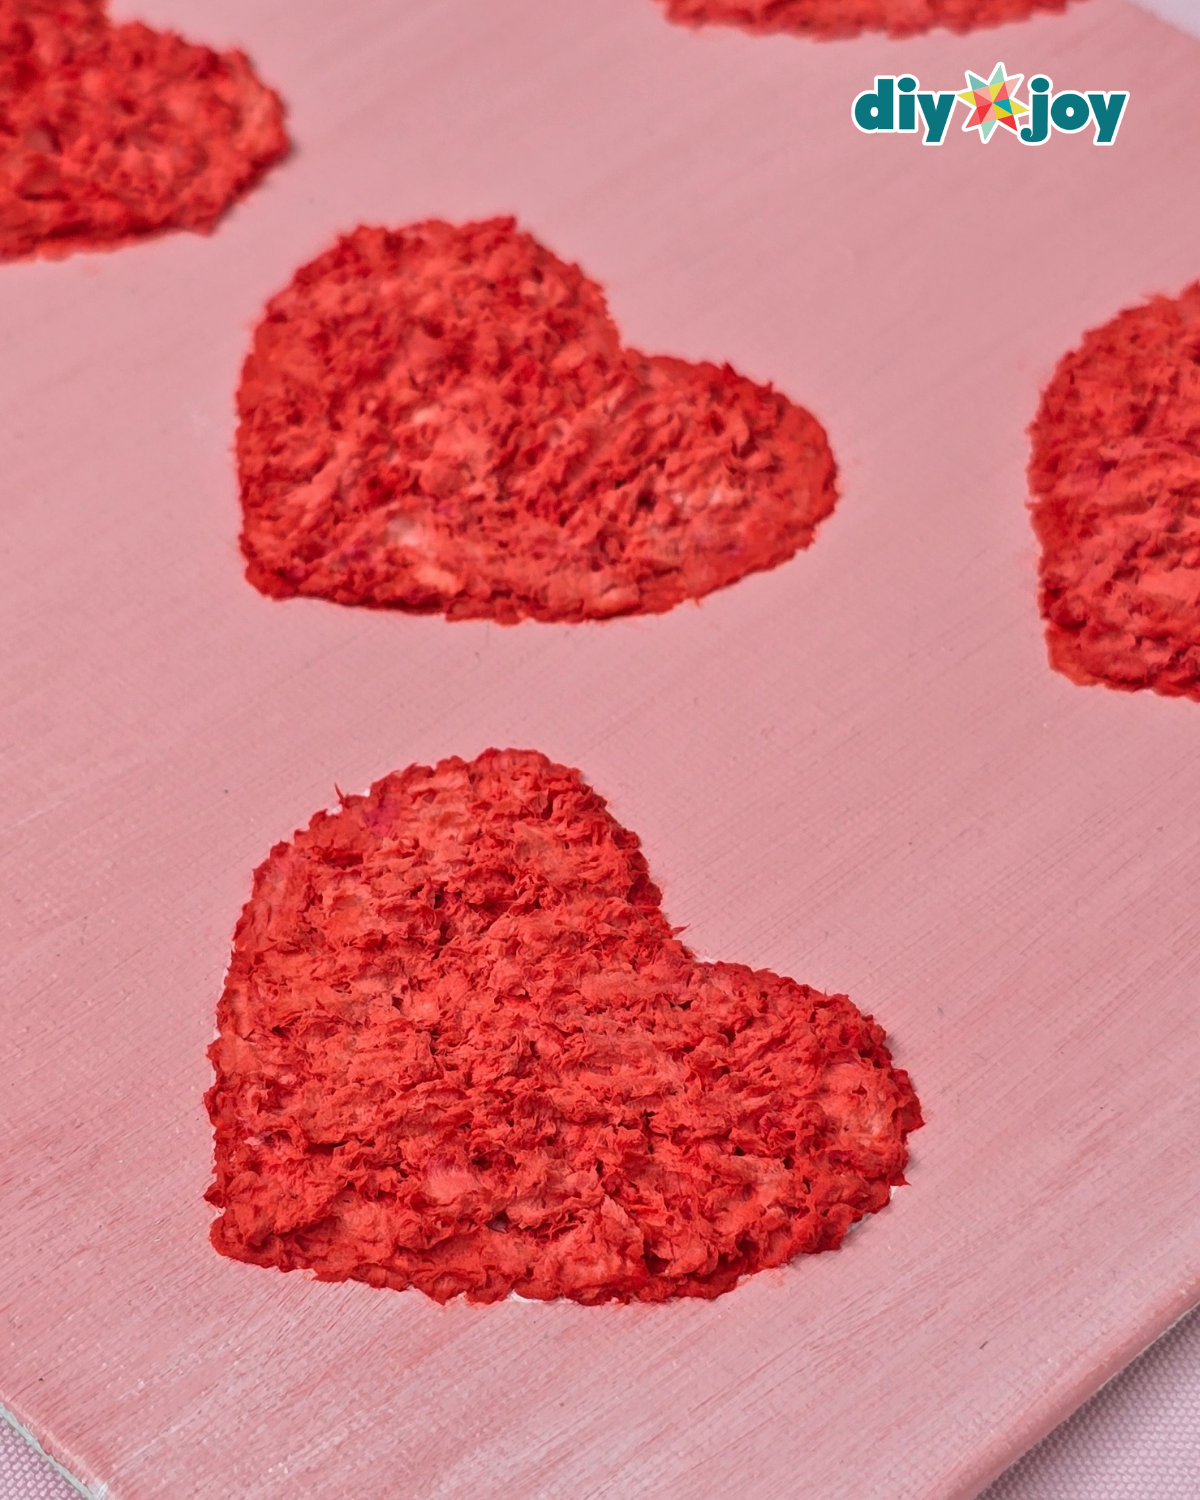
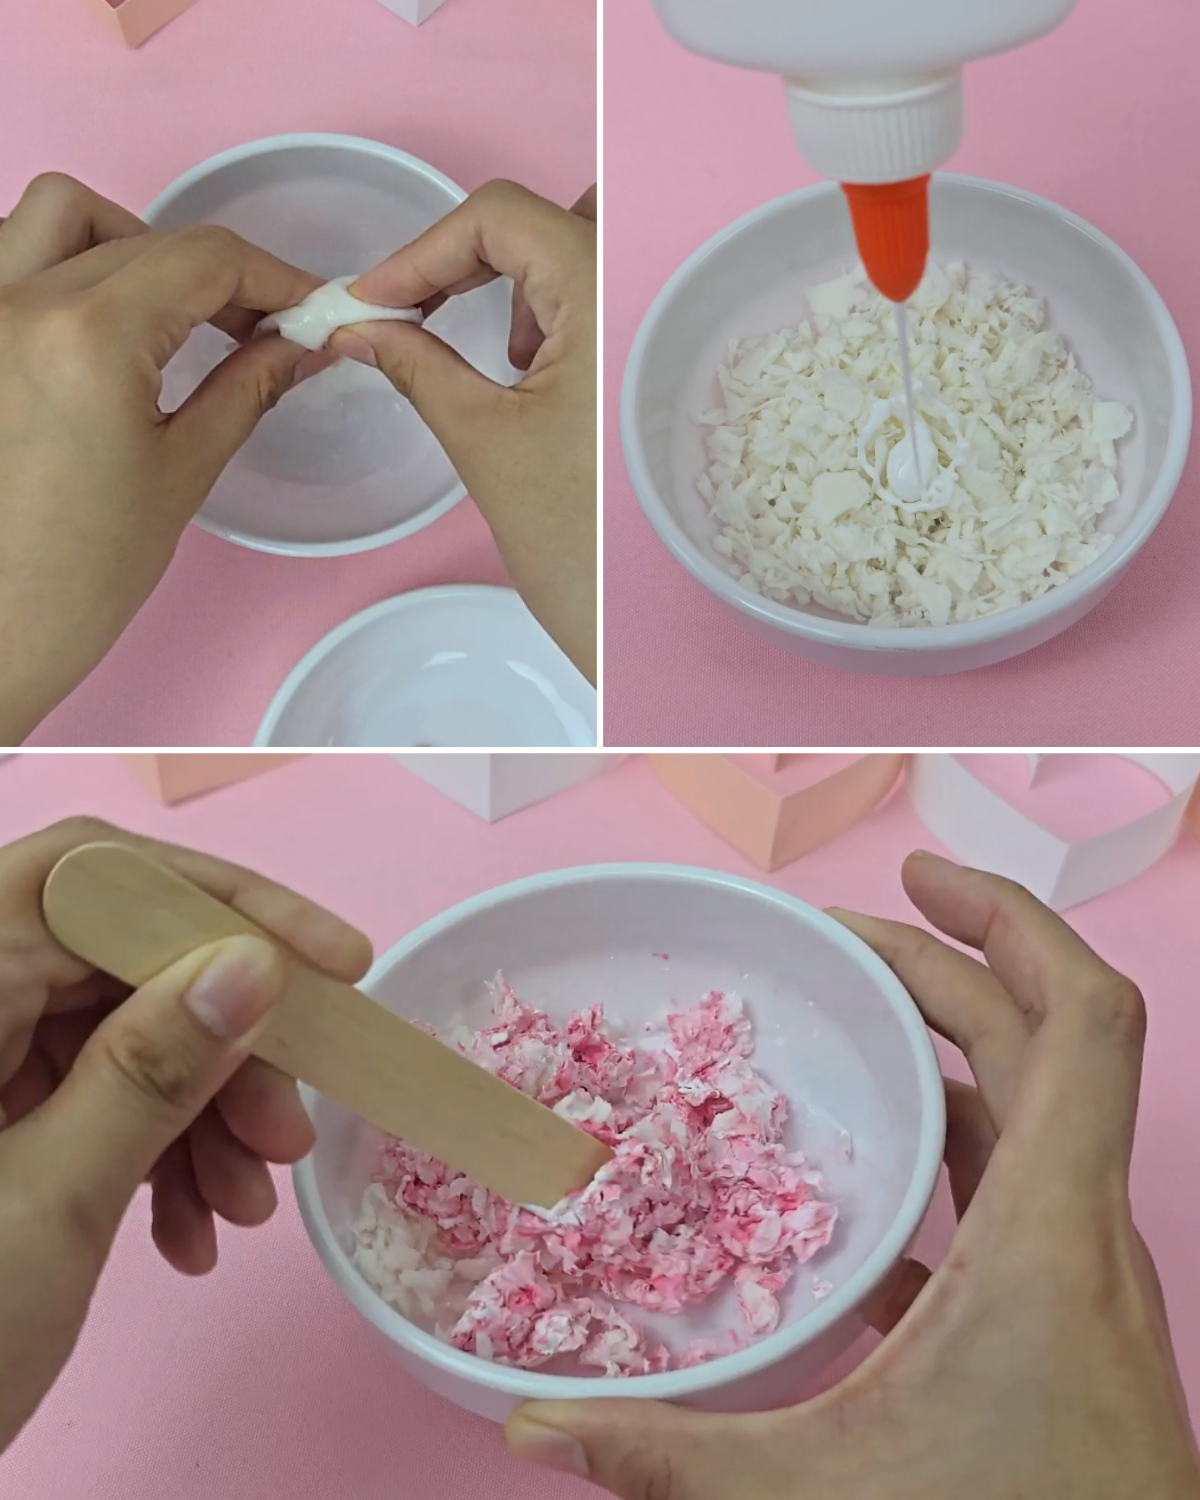
Tear the tissue paper into small pieces and place them in a bowl. Add enough water to fully soak the tissue, then squeeze out the excess water and transfer the tissue to a dry bowl. Tear the tissue into even smaller pieces, add glue and your chosen paint color, and mix well until everything is fully combined.Step 3: Apply the Paper Mache Mixture to the Heart
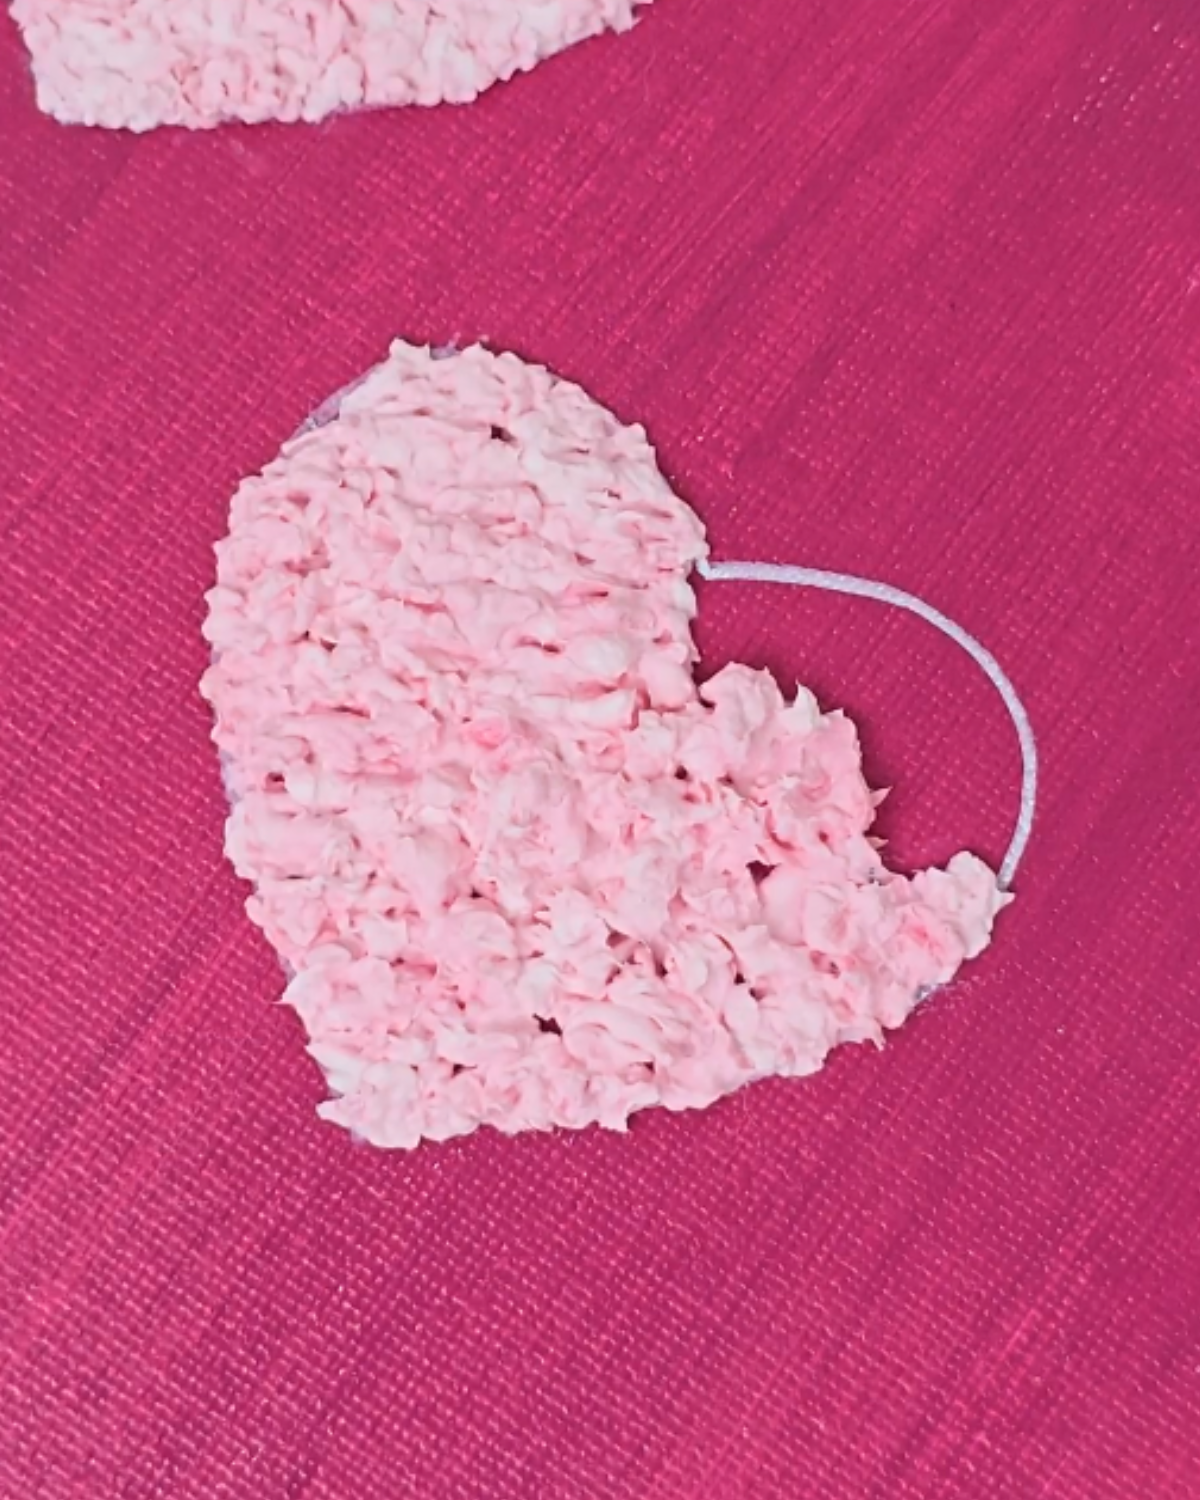
Fill the entire heart shape with the tissue paper and glue mixture, spreading it evenly to cover all areas and hide any lines. Add extra layers if you want a more textured, embossed look, but avoid overloading it, as this will increase drying time. Set it aside to dry completely.
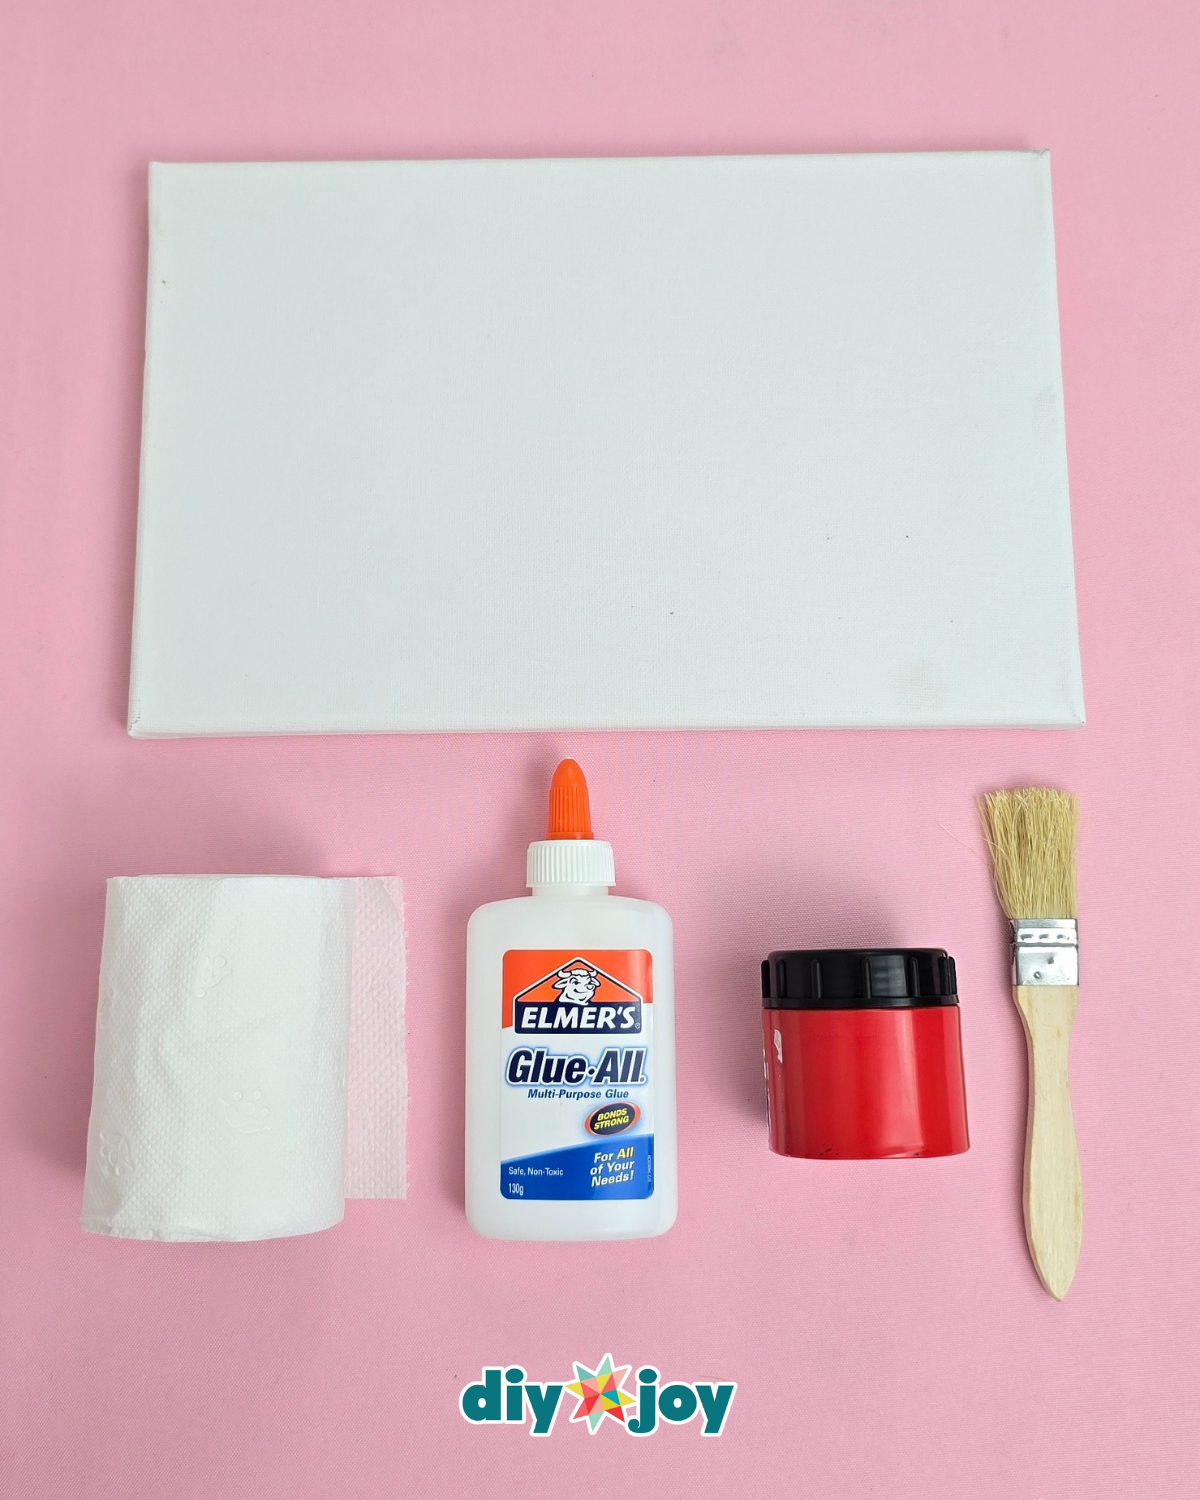
Materials
- Canvas
- Acrylic Paint
- Heart Template
- Marker
- Tissue Roll
- Water
- Glue
![]()
Pro Tips
Control the Tissue Texture
The smaller and more uniform you tear the tissue pieces, the smoother your final texture will be.
Experiment with Shapes
While hearts are classic, try mixing letters or small shapes for a fun personalized look—this works especially well for gifts or wall art.
Must-Try Crafts!

Painting & Art
Paper Flowers
Paper Flowers

Tips and Hacks

*If you love this craft, then visit our official website, follow our Facebook page, and subscribe to our YouTube channel for more!
Textured Heart Canvas Art Painting