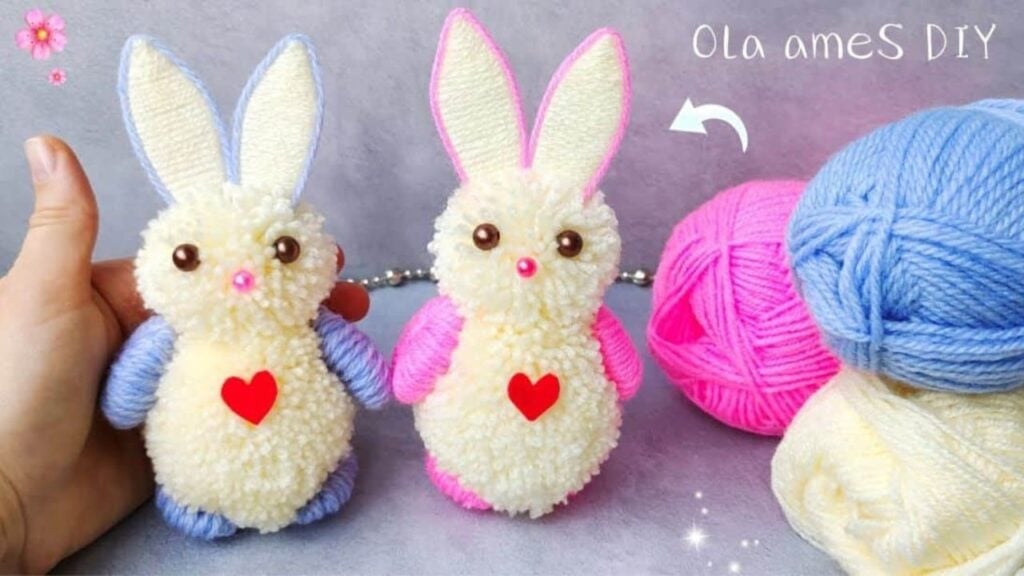
Spring means it’s time to bring out bunny decor pieces or make them if you don’t have any! Here’s a super easy cute woolen bunny by Ola ameS DIY on Youtube. I am so in love with this small project that I made it several times in different colors. Read on or watch the video below for full instructions.
Materials:
- 2 yarns in different colors
- scissors
- hot glue
- fork
- cardboard
- beads for eyes and nose
[social_warfare buttons=”facebook,pinterest,twitter,whatsapp”]
Instructions:
Step 1:
Get one of the yarns and cut a small thread. Place it in the middle of your index and middle fingers. Using the same yarn, wrap it around your three fingers (index, middle, and ring) 120 times.
Step 2:
Once done, take the small thread and tie it around the middle to make the pom pom. Remove it and cut the loops. Make 2 more of this pom pom.
Step 3:
Trim one of the pom poms to make it as round as you can. After that, glue the other two together before trimming.
Step 4:
Glue the small pompom on top of the oval one.

Step 5:
Get a fork and the other yarn. Cut a small thread and insert it in the middle of the fork tines. Next, roll the yarn 60 times on the fork tines, then tightly tie it in the middle using the small thread to form it into an oval. Remove from the fork. Make 3 more for a total of 4.
Step 6:
Glue the oval yarn on the sides of the body for the hands and the other two for the feet.
Step 7:
Cut two bunny ears on the cardboard. Add glue on the tip of one ear and stick the end of the yarn. Wrap the yarn around the ear, then secure the end with glue. Glue the other yarn color around the edges. Repeat for the other ear, then glue them together.

Step 8:
Glue the ears on the head of the bunny.
Step 9:
Loop the yarn to your index finger 20 times and tie it in the middle with a small thread. Cut the loops and trim them to form them into a circle. Glue at the back of the bunny for the tail.
Step 10:
Glue the beads for the eyes and nose.
Super Easy Cute Woolen Bunny


