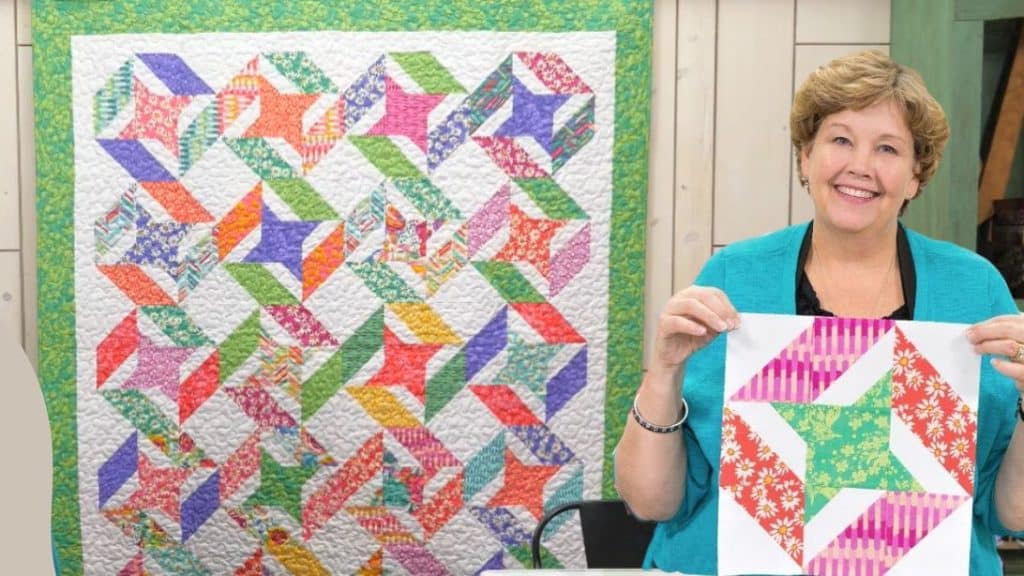
Isn’t this easy sidekick quilt pattern beautiful? You might be familiar with this block by Missouri Star as it is a twist on the friendship star pattern. At first, it may look complex, but trust me, it is simple to make. With this step-by-step instructions tutorial by Jenny Doan, you can easily follow the steps without difficulties. The first steps are just the same as how you make the friendship star.
RELATED: Jelly Roll Friendship Braid Table Runner Tutorial
For this design, you will be using 5-inch squares of precut fabric or charms. This pattern does not require any sashing, as you can see in the finished quilt. It is the perfect project to make with your sidekick, friend, or sewing partner if you already have a bunch of charm packs with you! Grab them now and start making this easy and fun project. I bet you’ll enjoy making this one!
Easy Sidekick Quilt Materials
- 3 packs of 5″ print squares
- 2 packs of 5″ background squares
- 1/2 yard of inner border
- 1 yard of outer border
- 3/4 yard of binding
- 3 3/4 yards of backing
[social_warfare buttons=”facebook,pinterest,twitter,whatsapp”]
How to Make Sidekick Quilt Block
Step 1:
Pull 3 sets of matching 5″ print squares with 2 pieces each.
Step 2:
Get one set, cut a 4 1/2″ square from one square and cut the other into four pieces of 2 1/2″ squares.
Step 3:
Get four pieces of 5″ background squares and draw a diagonal line from corner to corner. Place each on top of the squares from the 2 sets, right sides together. Sew them on either side of the line with a 1/4″ seam allowance.
Step 4:
Cut directly on the lines, and press them open towards the dark sides. Trim them into 4 1/2″ squares.
Step 5:
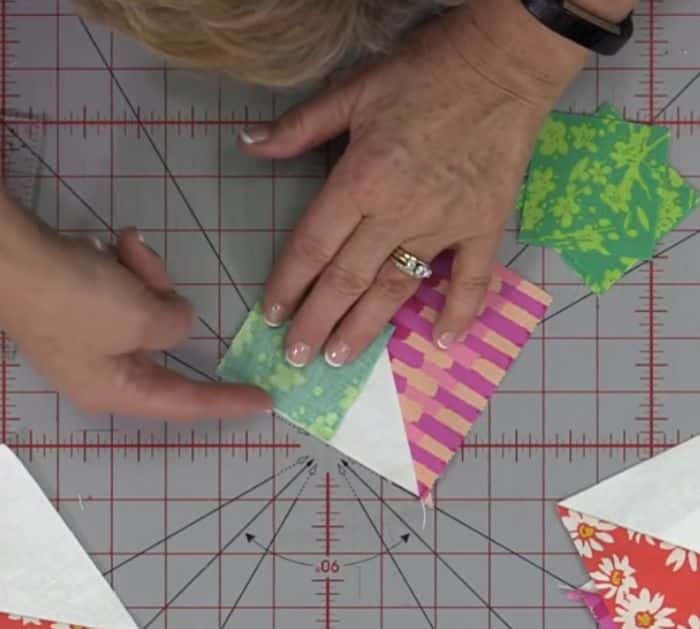
Get the four pieces of 2 1/2″ squares and press them in half diagonally to make a crease. Take one and place on one of the half-square triangles on the corner of the white part. Make sure it lines up, then sew straight across the line. Do this for four blocks with 2 matching sets.

Step 6:
Cut the corners 1/4″ away from the sewn line and press them open.
Step 7:
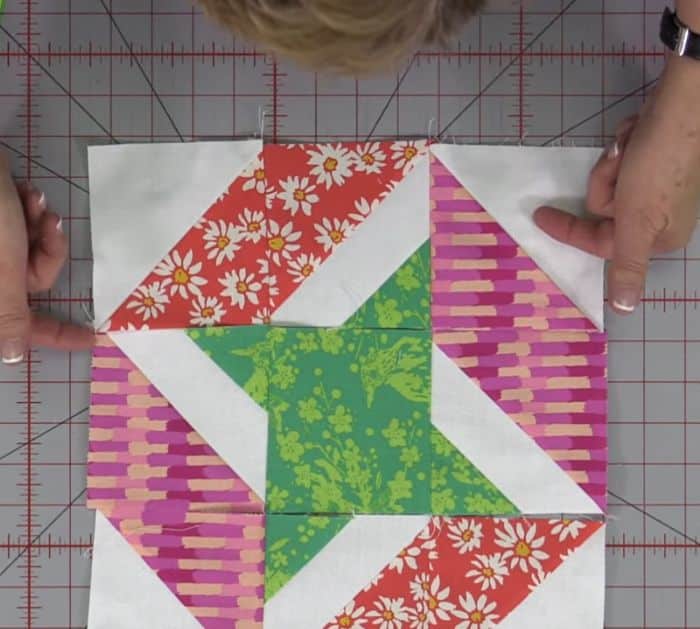
Get your 4 1/2″ square from the first set – it will be your center piece. Next, add the 3-striped blocks on the sides, with the matching fabrics together, then fill the corners with the half-square triangles. Make sure they are matching. Look at the photo below for reference.

Step 8:
Sew them in rows first, then press them flat. The seams on the first and last row should be pressed in the same direction and the middle should be on the opposite direction. Once done, sew the rows together to make the block and press flat. You need 5 rows with 4 blocks for each one.


