The best quick DIY gifts usually start with something you already have, like a spare Christmas sock that turns a wine bottle into a Santa wine bottle gift (yes, really, a sock). Every idea here is a super easy homemade gift you can finish in an evening or less, with simple supplies like Sharpies, jars, felt, air-dry clay and hot glue. There’s a rainbow dot Sharpie mug with their initial on it, a coffee body scrub you stir together in a jam jar and a snow globe gift card holder that makes a plain gift card feel like an actual present. Need last minute gifts for the coworker you forgot or the host of tonight’s party? Pom pom barrettes, glitter keychains and gold oyster dishes take less time than a trip to the mall, and I can pretty much guarantee nobody else shows up with the same thing. Perfect for Christmas, birthdays, teachers, coworkers, hostesses, neighbors and anyone you forgot until the last minute.
Last Minute DIY Gift Ideas
Easy DIY Nail Polish Paintings
Learn how to make quick works of art, no artistic skills required. All you need is nail polish, water and a blank canvas. Check out the video to learn how to make some for yourself.
1. Leather Envelope Clutch

Leather, a printable template and two brass screw studs are all this clutch asks for. Trace the template on the back of the leather, cut it out, punch holes at the corners, then iron in a printed cotton lining with fusible applique paper. Fold it up like an envelope and screw the stud closed. No sewing machine comes out of the closet at all. The small size holds business cards or earrings and the large one fits a phone, so you can make a matching pair for your best friend and her mom.
Get the full tutorial at Alice and Lois.
2. Succulent Gifts With a Printable Tag

Here’s a quick DIY gift where the hardest part is picking out the plants at the garden store (there are so many cute ones). Skip the repotting entirely. Wrap each nursery pot in a square of burlap, tie it with twine, then print a little tag that says Thank you for helping me grow, mat it on scrapbook paper and hot glue it to a wooden skewer. It’s a sweet thank you for a teacher, a mentor or a mom, and succulents are hard to kill, which is a real kindness to the recipient.
Get the full tutorial at Ribbons and Glue.
3. Crochet Chevron Zipper Pouch

If you can single crochet, you can make this pouch in an evening. The free pattern uses worsted weight yarn in two colors and a G hook, switching shades every eight rows to build the chevron. Fold it, sew it into a tube, then hand stitch in a 4 to 5 inch zipper (no machine needed) and finish with a tiny yarn tassel on a jump ring. It’s sized for cash, cards, a lip balm and a nail polish, so it suits the friend who hates hauling a giant purse.
Get the full tutorial at Whistle and Ivy.
4. Pom Pom Barrettes

Three supplies and three steps, which might make this the fastest gift on the whole list. Cut a strip of felt to cover the top of a plain barrette, hot glue pom poms onto the felt, then glue the felt to the barrette. That’s it. Mix big and tiny pom poms or go rainbow, and you can match a team’s colors for cheerleaders, scouts or a whole dance class. Little girls go nuts for these, and you can make a dozen in the time it takes to wrap one store bought present.
Get the full tutorial at My Very Educated Mother.
5. Watercolor Saying in a Frame

You don’t need to be a painter for this one, I promise. Stamp a saying on a 4 by 6 inch piece of watercolor paper with a VersaMark pad, pour on white embossing powder and melt it with a heat gun. Then wet the paper and dab on watery ink in a couple of shades. The embossed letters resist the color, so the words pop out white and crisp. Pop it in a 4 by 6 frame and you have a framed print for a coworker, a grad or a friend who needs a pep talk.
Get the full tutorial at The Crafty Blog Stalker.
6. Ombre Tissue Paper Vase

A tall dollar store vase plus tissue paper in three shades makes a vase that looks way pricier than it was (the tutorial puts the cost at about $2). Cut stacks of little leaf shapes with a die cutter or plain scissors, then Mod Podge them to the glass with the darkest color at the bottom, the middle tone next and the lightest up top. Trim any overhang with a craft knife and seal it with one more coat. Fill it with grocery store tulips and it’s a hostess gift ready to go.
Get the full tutorial at Mod Podge Rocks.
7. Lavender Herbal Eye Pillow

This is the gift for every tired person you know, and the tutorial clocks it at about 30 minutes. Sew two 9.5 by 4.5 inch pieces of cotton, silk or satin together with a quarter inch seam, leaving 2 inches open. Turn it, fill it with 2/3 cup of rice or flaxseed and 1/3 cup of dried lavender (a funnel helps), then stitch the gap shut. It can chill in the freezer or warm up gently, and it’s an easy one to batch for a whole stack of teacher or nurse gifts.
Get the full tutorial at Traditional Cooking School.
8. Abstract Plexiglass Fruit Bowl

This one is for your friend with a bold, slightly funky style. A rectangle of plexiglass gets draped over a metal bowl and softened with a heat gun so the corners droop and fold into a wavy, freeform shape. Wear leather gloves and a mask and work outside or with every window open. No two come out alike, and a few deliberate bubbles give it a seeded glass look. Fill it with green apples or lemons and it’s a centerpiece and a gift in one.
Get the full tutorial at Not Just a Housewife.
9. Painted Twig Houses

Free supplies, basically, since the twigs come from your own yard. Cut straight twigs into two matching house fronts with slanted roof pieces, hot glue them together, then join them with side pieces and a ridge on top. Don’t stress over perfect angles (a little wonky adds charm). A coat of paint in white or a soft blush turns sticks into something you’d find in a boutique. Make a little village of three for the friend who loves Scandinavian decor or a cozy winter mantel.
Get the full tutorial at Life Is a Party.
10. Wood Strip Serving Tray

Got a pile of wood scraps? This tray turns them into a gift that looks custom built. Strips of the same thickness but different widths and wood tones get cut at an angle and glued to thin plywood, with little scrap feet underneath and two drawer pulls for handles. The gaps between strips get filled with quick setting epoxy, then everything gets sanded smooth. Not a single nail or screw goes in. It suits the dad, the host or the friend who keeps a bar cart.
Get the full tutorial at My Altered State.
11. Gold Oyster Shell Dish

Save the shells from your next oyster night, because they’re about to become Christmas presents. Boil them for around 20 minutes, scrape and scrub them clean with steel wool, then paint the insides with two coats of gold Liquid Leaf. The tutorial says the whole thing takes about 25 minutes. They hold rings by the sink, or with a food safe sealant they can serve as tiny salt cellars. Make a set for the beach lover or your favorite foodie.
Get the full tutorial at Just Something I Whipped Up.
12. Dotted Heart Sharpie Mug
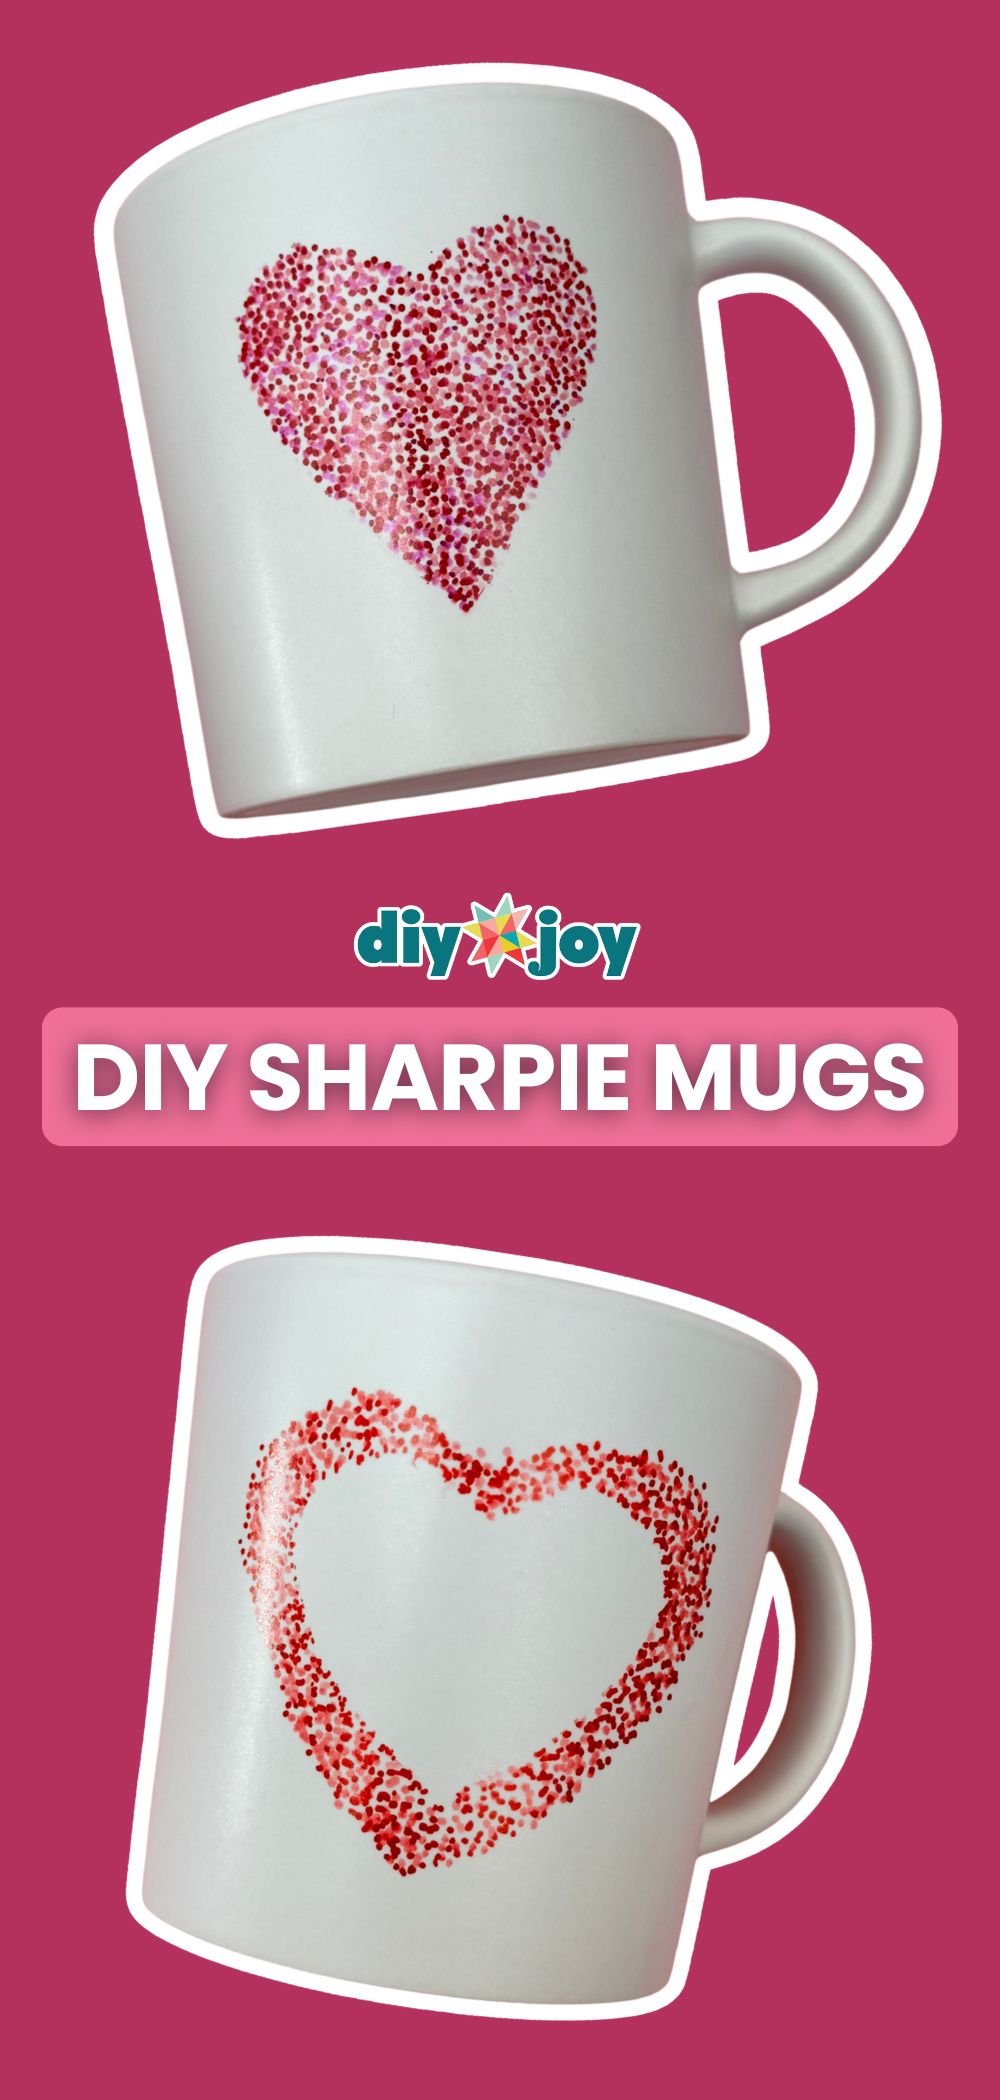
A plain white mug, a paper heart and a red and pink Sharpie. Stick the paper heart in the middle with a removable glue pen, dot all around it (let a few dots wander onto the paper for a crisp edge), then peel the heart off and there’s your negative space heart. It’s the kind of quick DIY gift kids can help with too. For one that survives the dishwasher, use an oil based paint marker, let it sit 24 hours, then bake it starting in a cold oven.
Get the full tutorial at DIY JOY.
13. Personalized Letter Sharpie Mug
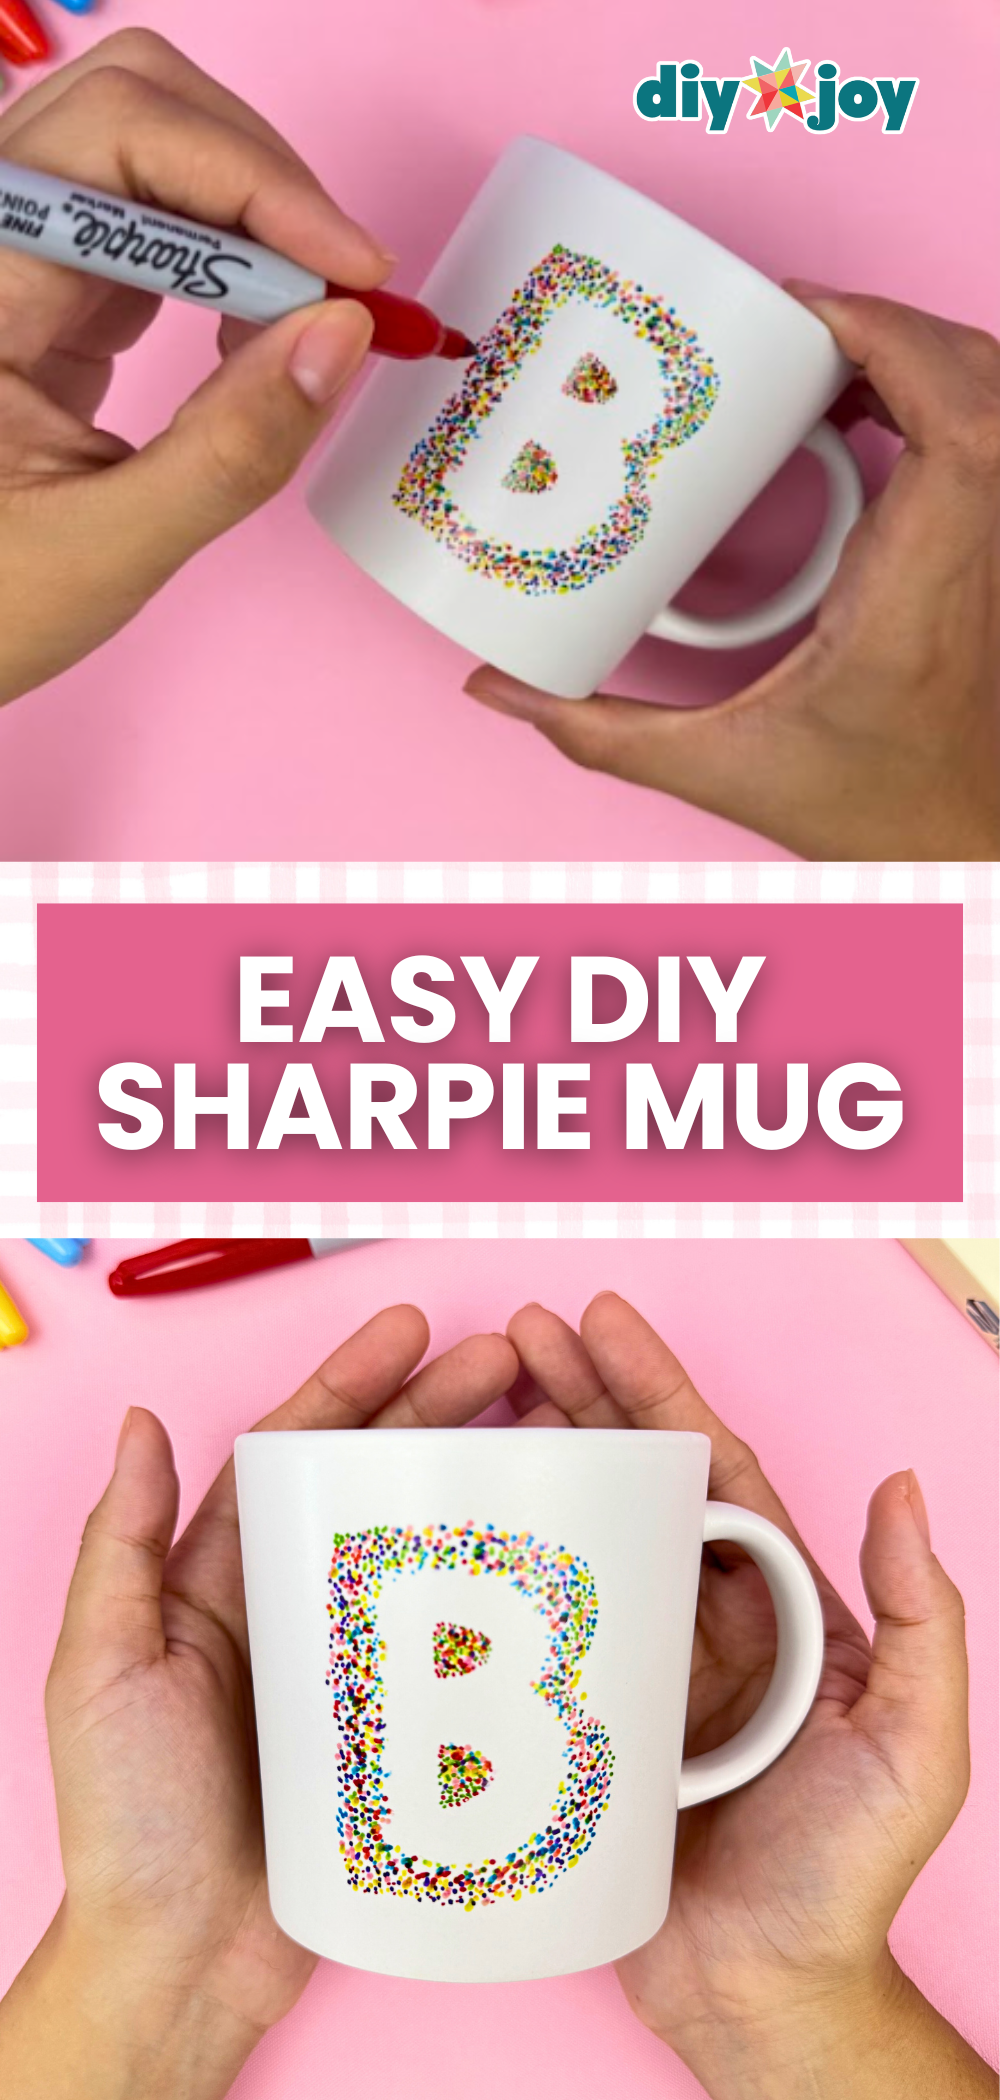
Their initial, a rainbow of Sharpies and a white mug, and you’ve got a gift with their name on it, sort of. Write the letter on paper, cut it out and coat the back with a Zig glue pen, waiting until the glue turns from white to clear. Stick it to the mug, cover the space around it in tiny colorful dots, then peel the letter away. Practice your letter on paper first. Fill it with candy and it’s an easy last minute gift for a coworker.
Get the full tutorial at DIY JOY.
14. Coffee Body Scrub

Your caffeine loving friend deserves a scrub that smells like her favorite thing. Layer fine sugar and coffee grounds in a jar, scoop in coconut oil, pour in a little castile soap and a splash of vanilla extract, then mix it all together. That’s the whole recipe. No vanilla? Coffee extract works, and extra sugar makes it rougher for heels and elbows. A clean jam jar with the label soaked off is a perfectly good container, and a bit of twine around the lid makes it look boutique.
Get the full tutorial at DIY JOY.
15. Blueberry Sugar Scrub
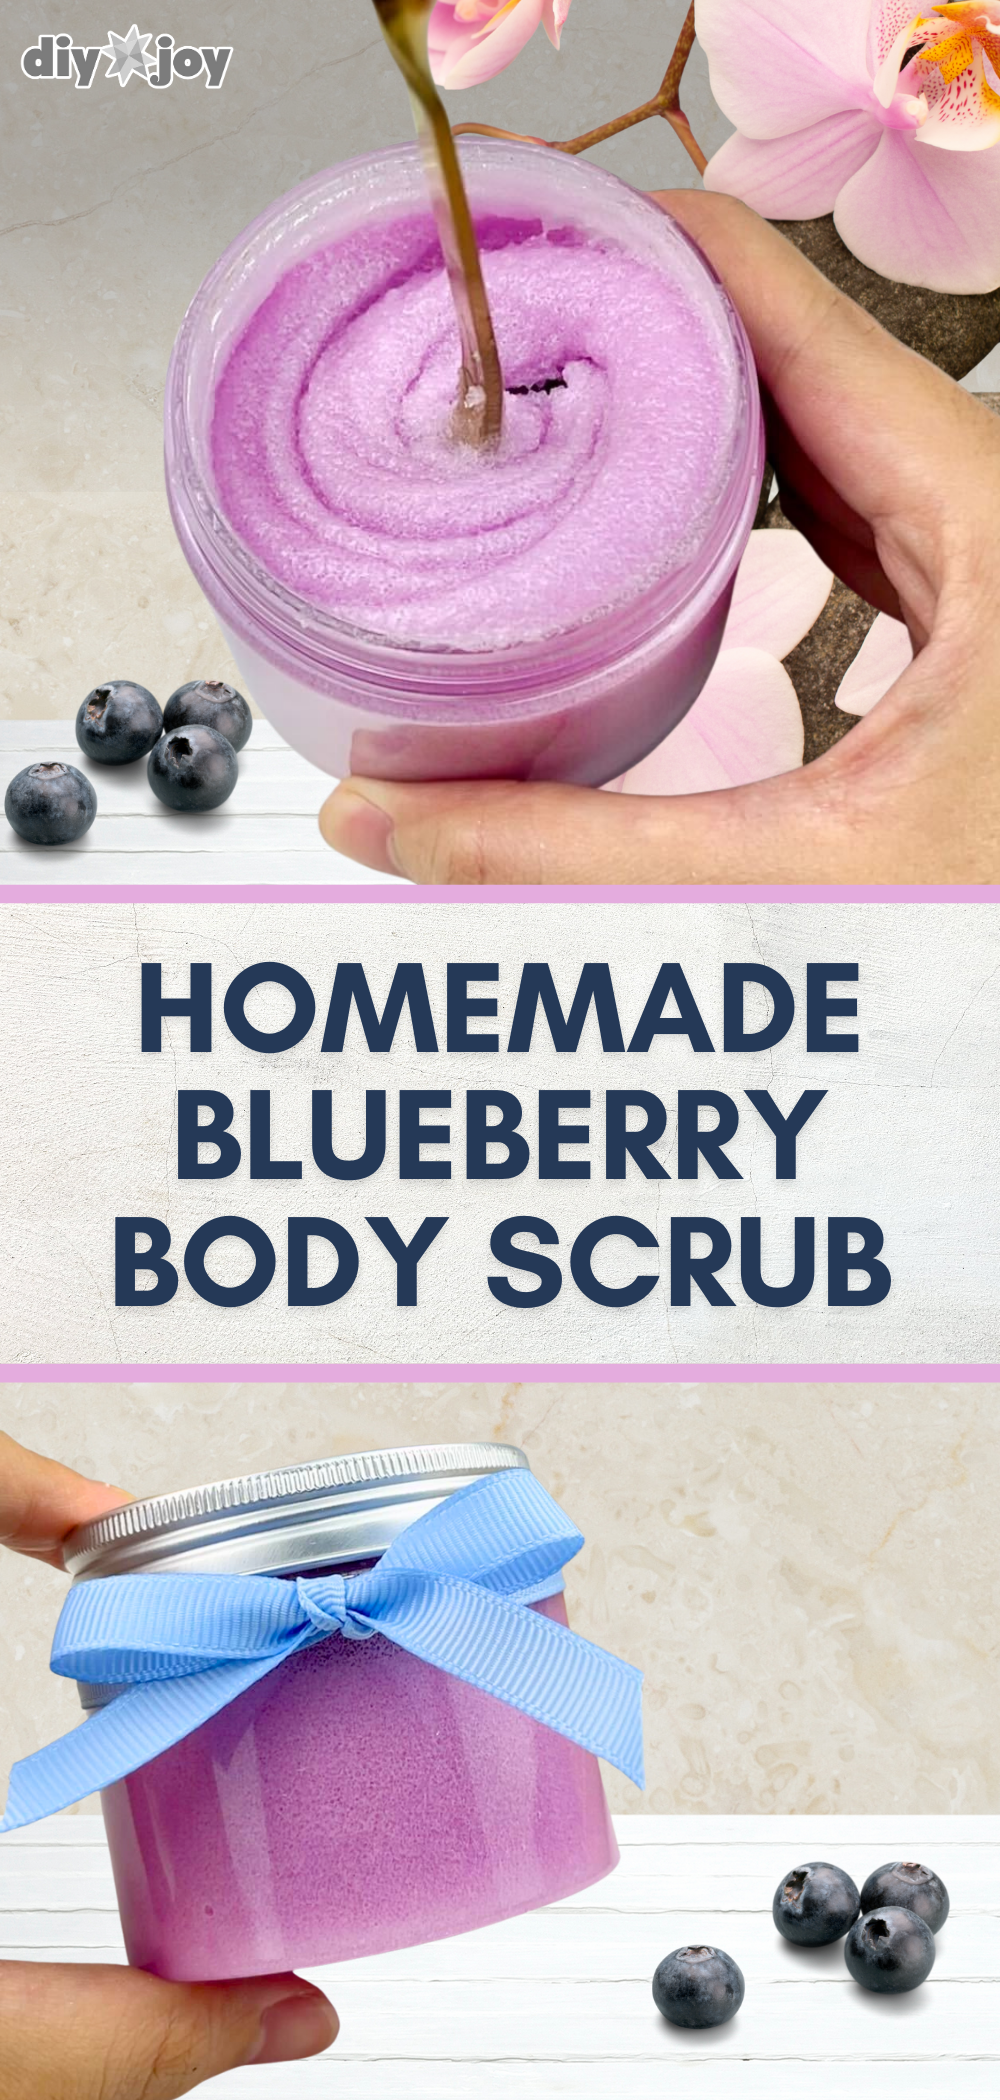
Pretty in purple and done in about ten minutes. Start with 1/2 cup of fine sugar, stir in about 1/4 teaspoon of violet or blue mica powder for color (optional, but so cute), then add 1/4 cup of coconut oil, 10 drops of blueberry oil and a tablespoon of castile soap. The recipe uses a carrier oil, which is gentle on skin, but you can swap in your favorite scent. Tie a blue ribbon around the jar and it’s a sweet birthday or spa night gift.
Get the full tutorial at DIY JOY.
16. Citrus Print Tea Towel
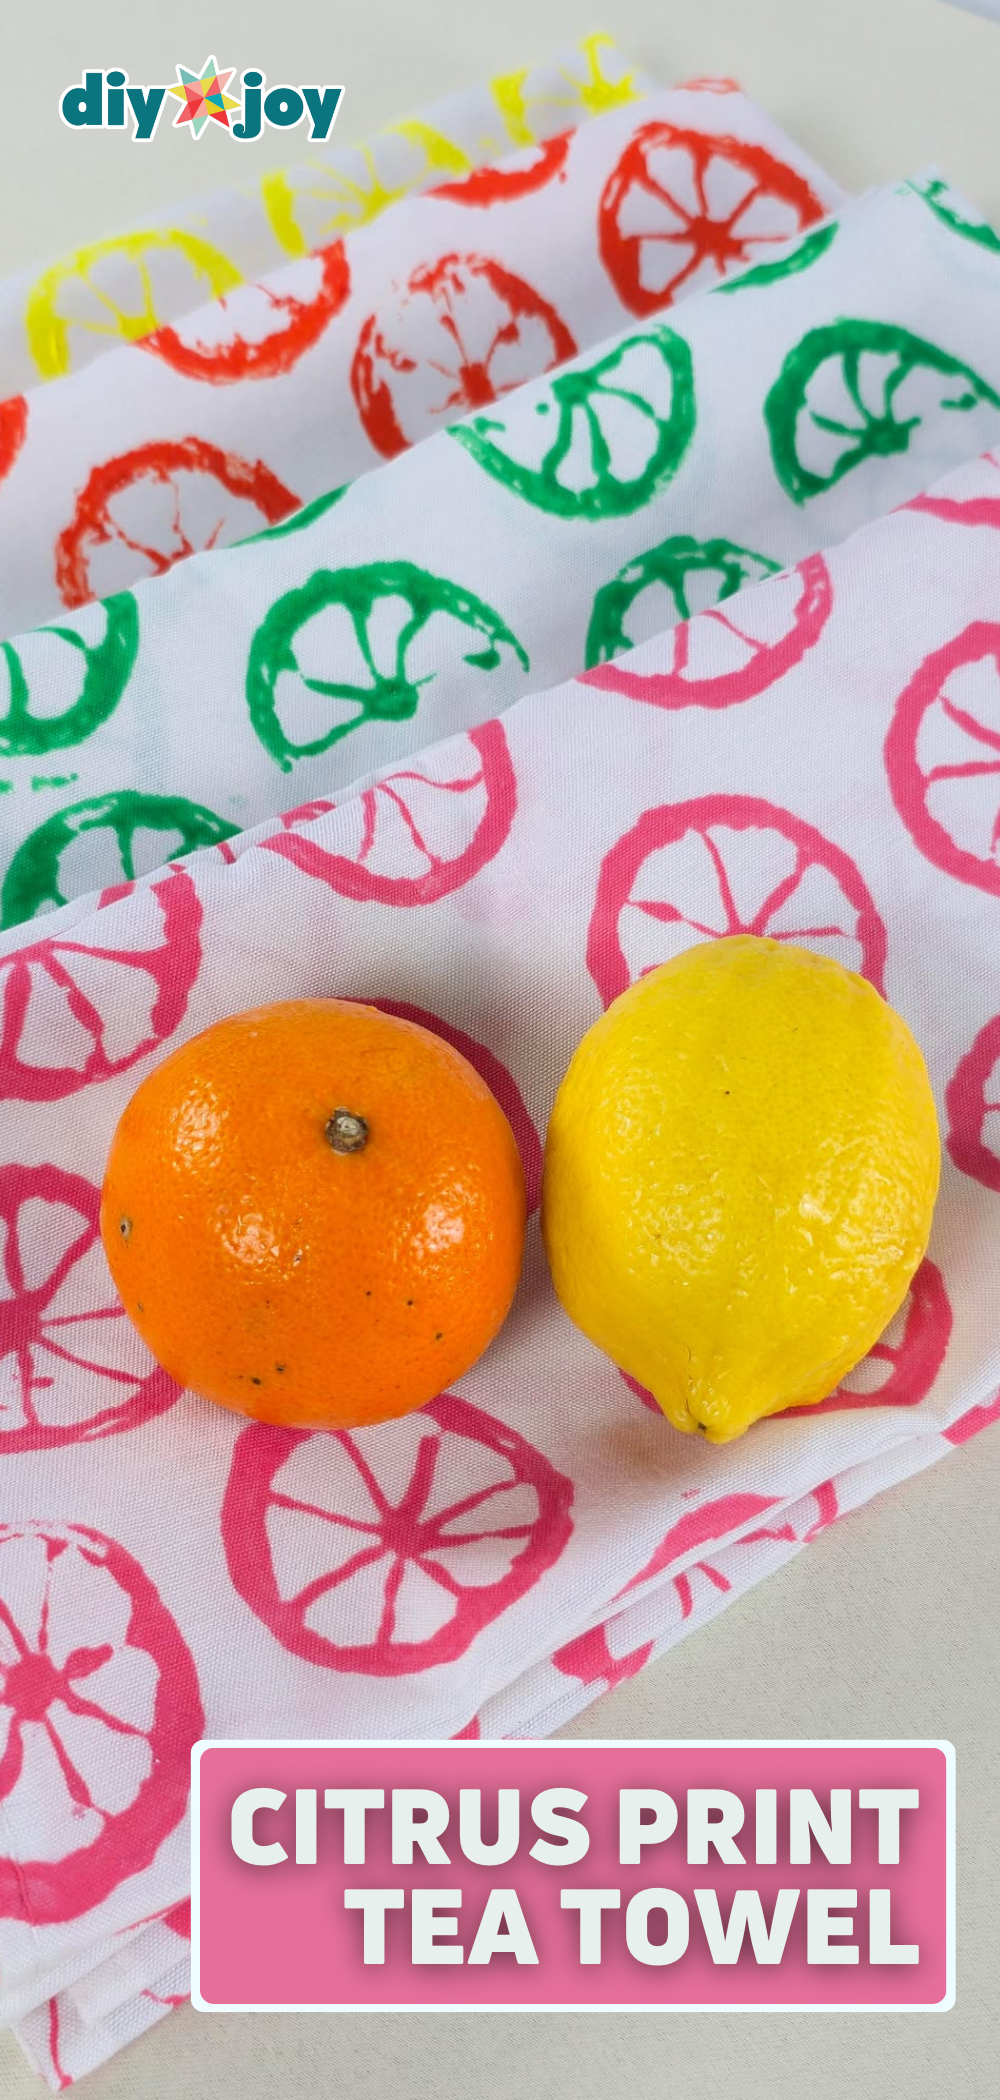
Lemons and oranges make the stamps here, which is just about the most fun use of fruit I can think of. Cut a citrus in half, scoop out the pulp but keep the membrane walls, pat it dry, then dip it in paint mixed half and half with textile medium. Stamp rows onto a plain cotton tea towel, then switch colors or cut wedges for smaller prints. Let it dry completely. Roll up two with a wooden spoon and you have a hostess gift with zero shopping stress.
Get the full tutorial at DIY JOY.
17. Photo Resin Coaster
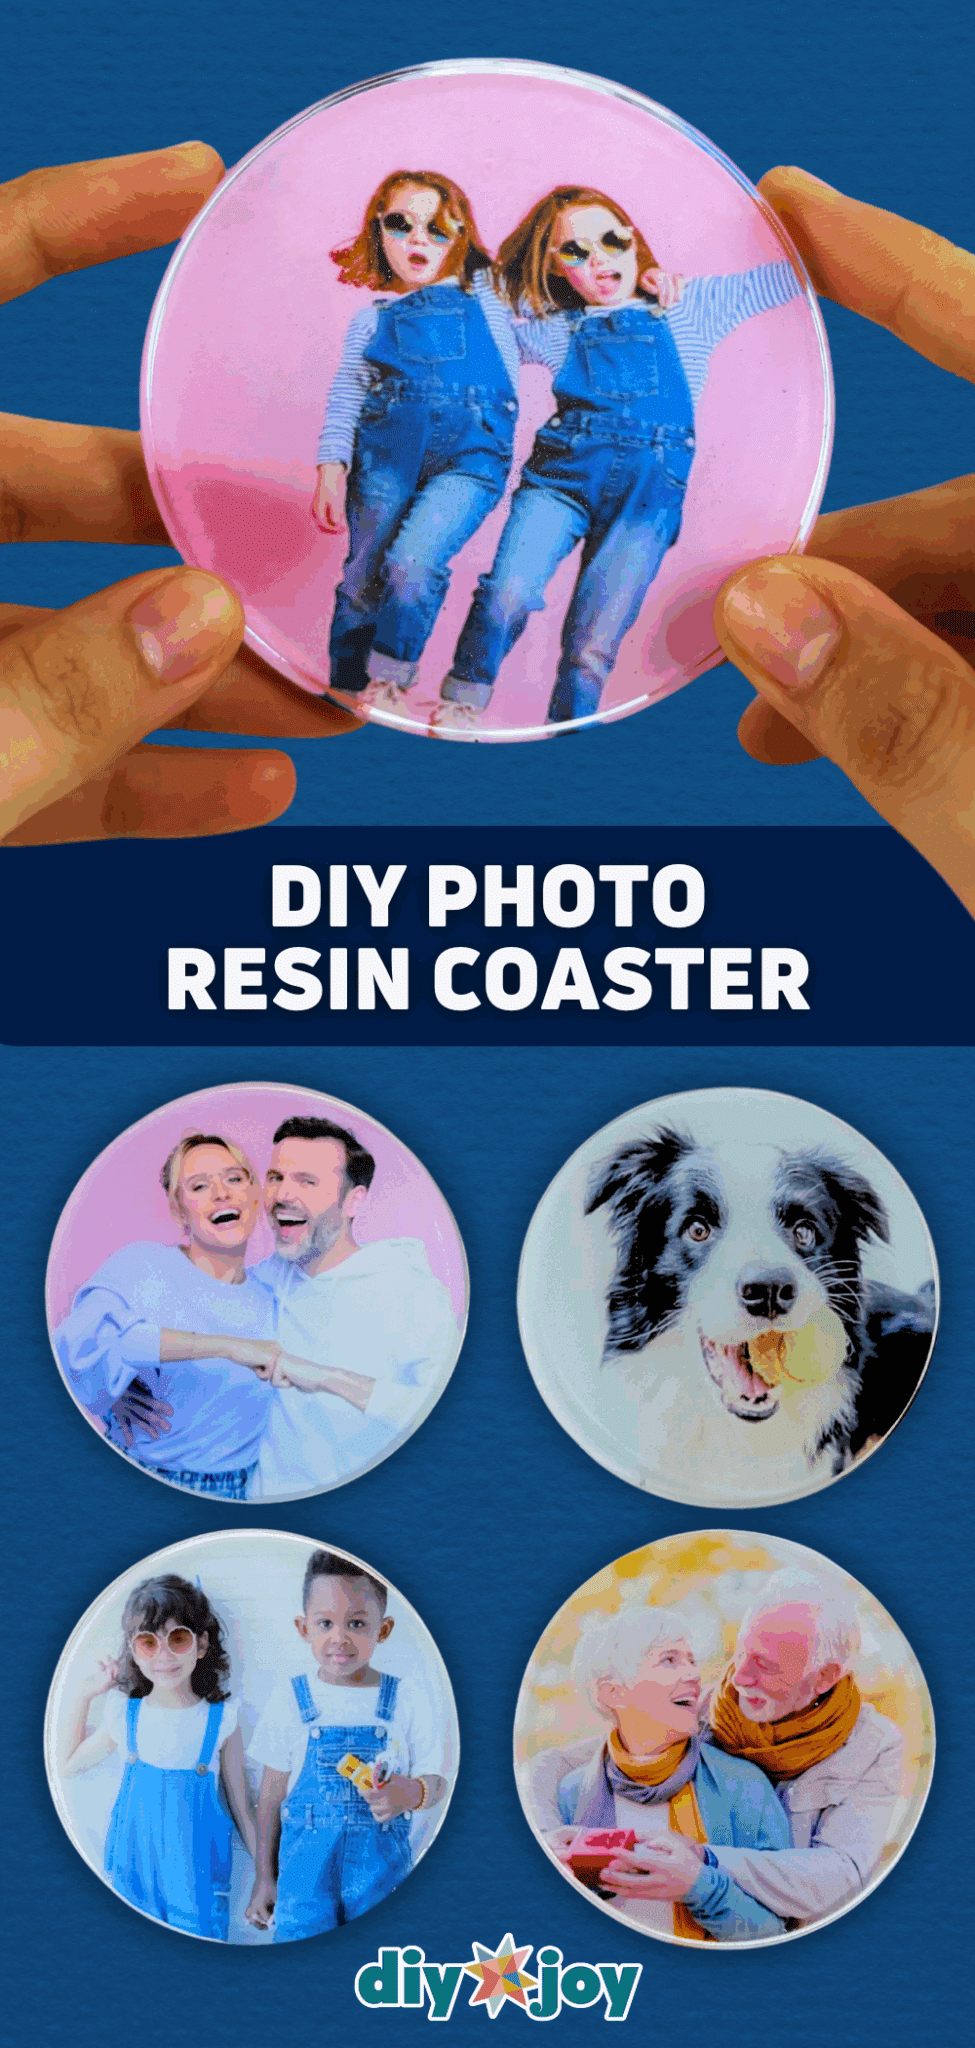
Put their dog, their kids or their favorite photo of the two of you inside a crystal clear coaster. Mix epoxy resin and hardener at a 3 to 1 ratio (about 36 grams to 12) and stir slowly for 5 to 10 minutes to keep bubbles out. Pour a thin layer into a round silicone mold, trace and cut the photo to fit, lay it in, then fill the mold. Even if you’ve never touched resin, this is a beginner friendly start. Grandparents will keep these forever.
Get the full tutorial at DIY JOY.
18. Pressed Flower Resin Coaster
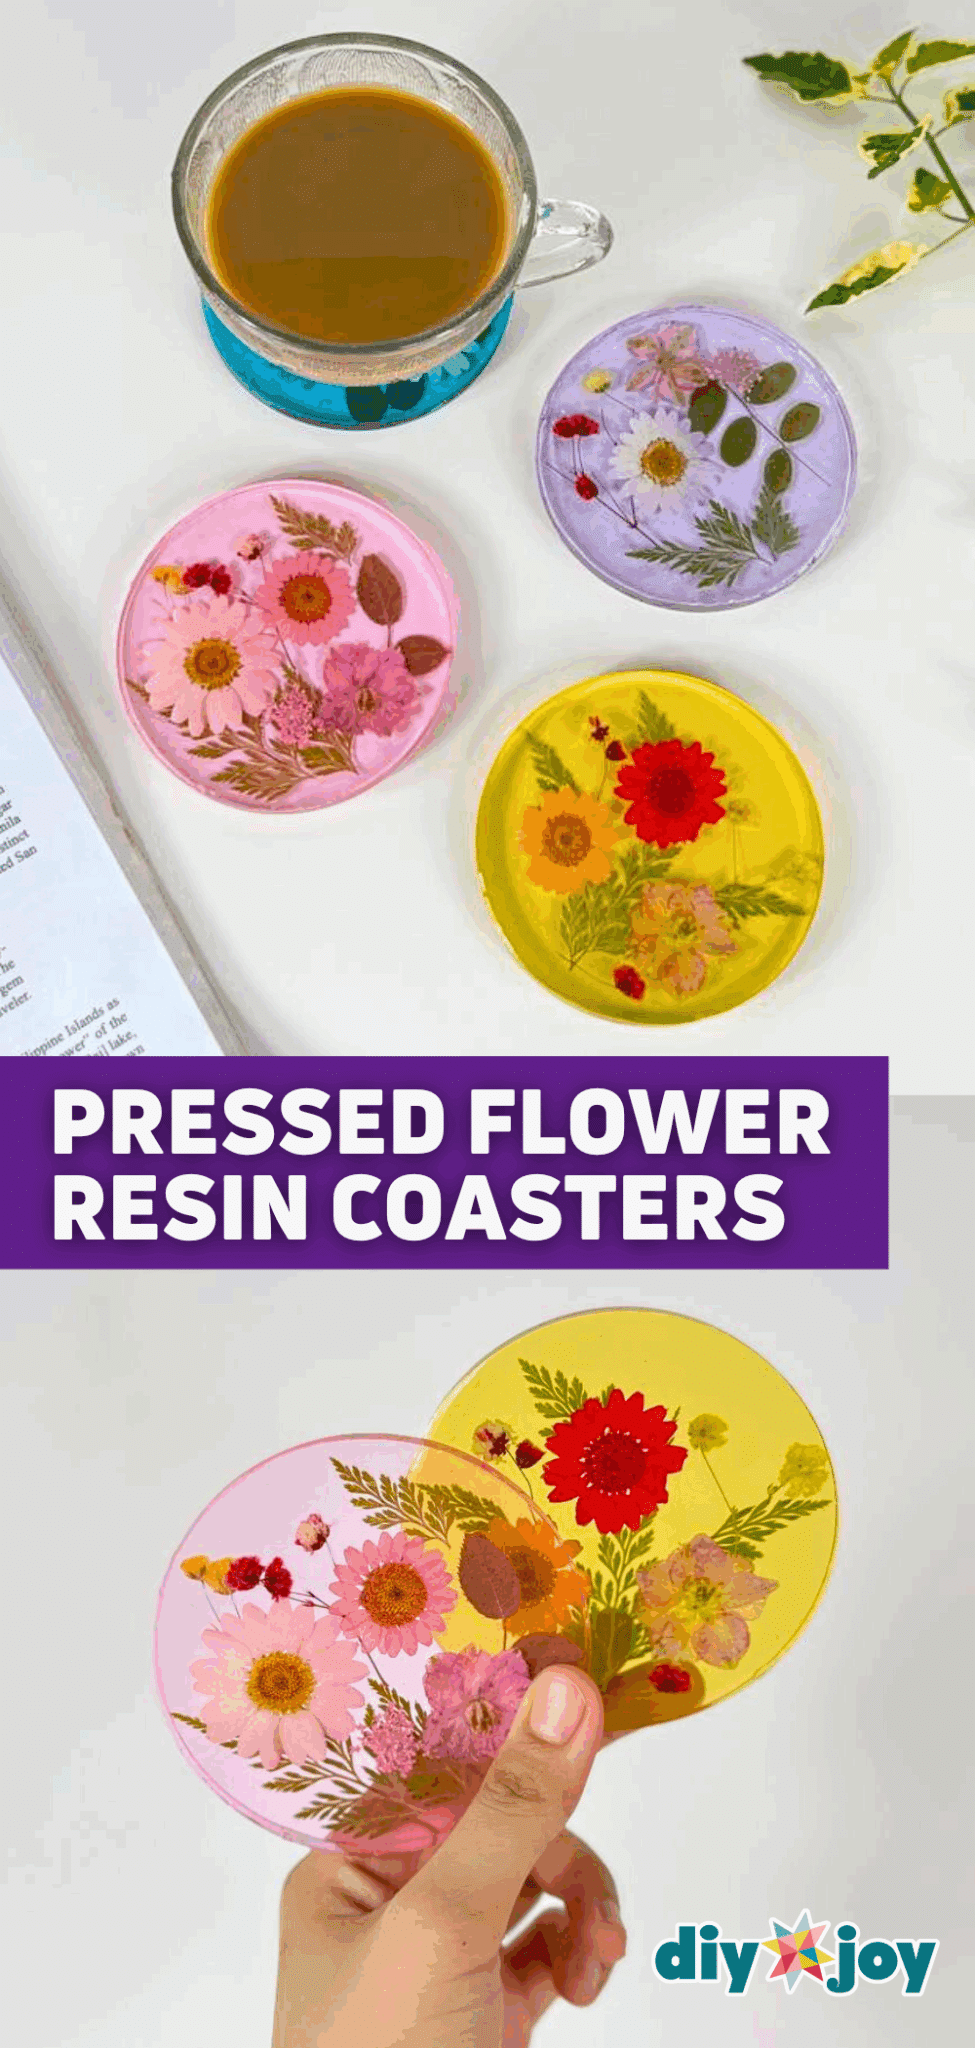
Real flowers sealed in tinted resin, and they look like stained glass when the light hits them. Mix about 36 grams of epoxy resin with 12 grams of hardener, stir slowly, then add 2 to 3 drops of pigment. Pour half into a clean mold, arrange pressed flowers with tweezers, wait a couple of minutes and pour the rest on top. A quick pass with a lighter pops bubbles. Let them cure overnight. A set of four in pink, purple and yellow is a gorgeous gift for the gardener in your life.
Get the full tutorial at DIY JOY.
19. No-Sew Felt Fruit Coasters

No sewing, no resin, no waiting for anything to dry, just felt and a hot glue gun. Cut circles and little shapes, then stack them into fruit: a lemon with five yellow segments, a watermelon with a pink center and ten black seeds, and an apple with seeds, a leaf and a stem. Use stiff craft felt so they don’t flop, and trace with tailor’s chalk. Kids can help with these (supervise the scissors). They make bright party favors or a cheerful summer hostess gift.
Get the full tutorial at DIY JOY.
20. Air-Dry Clay Jewelry Tray
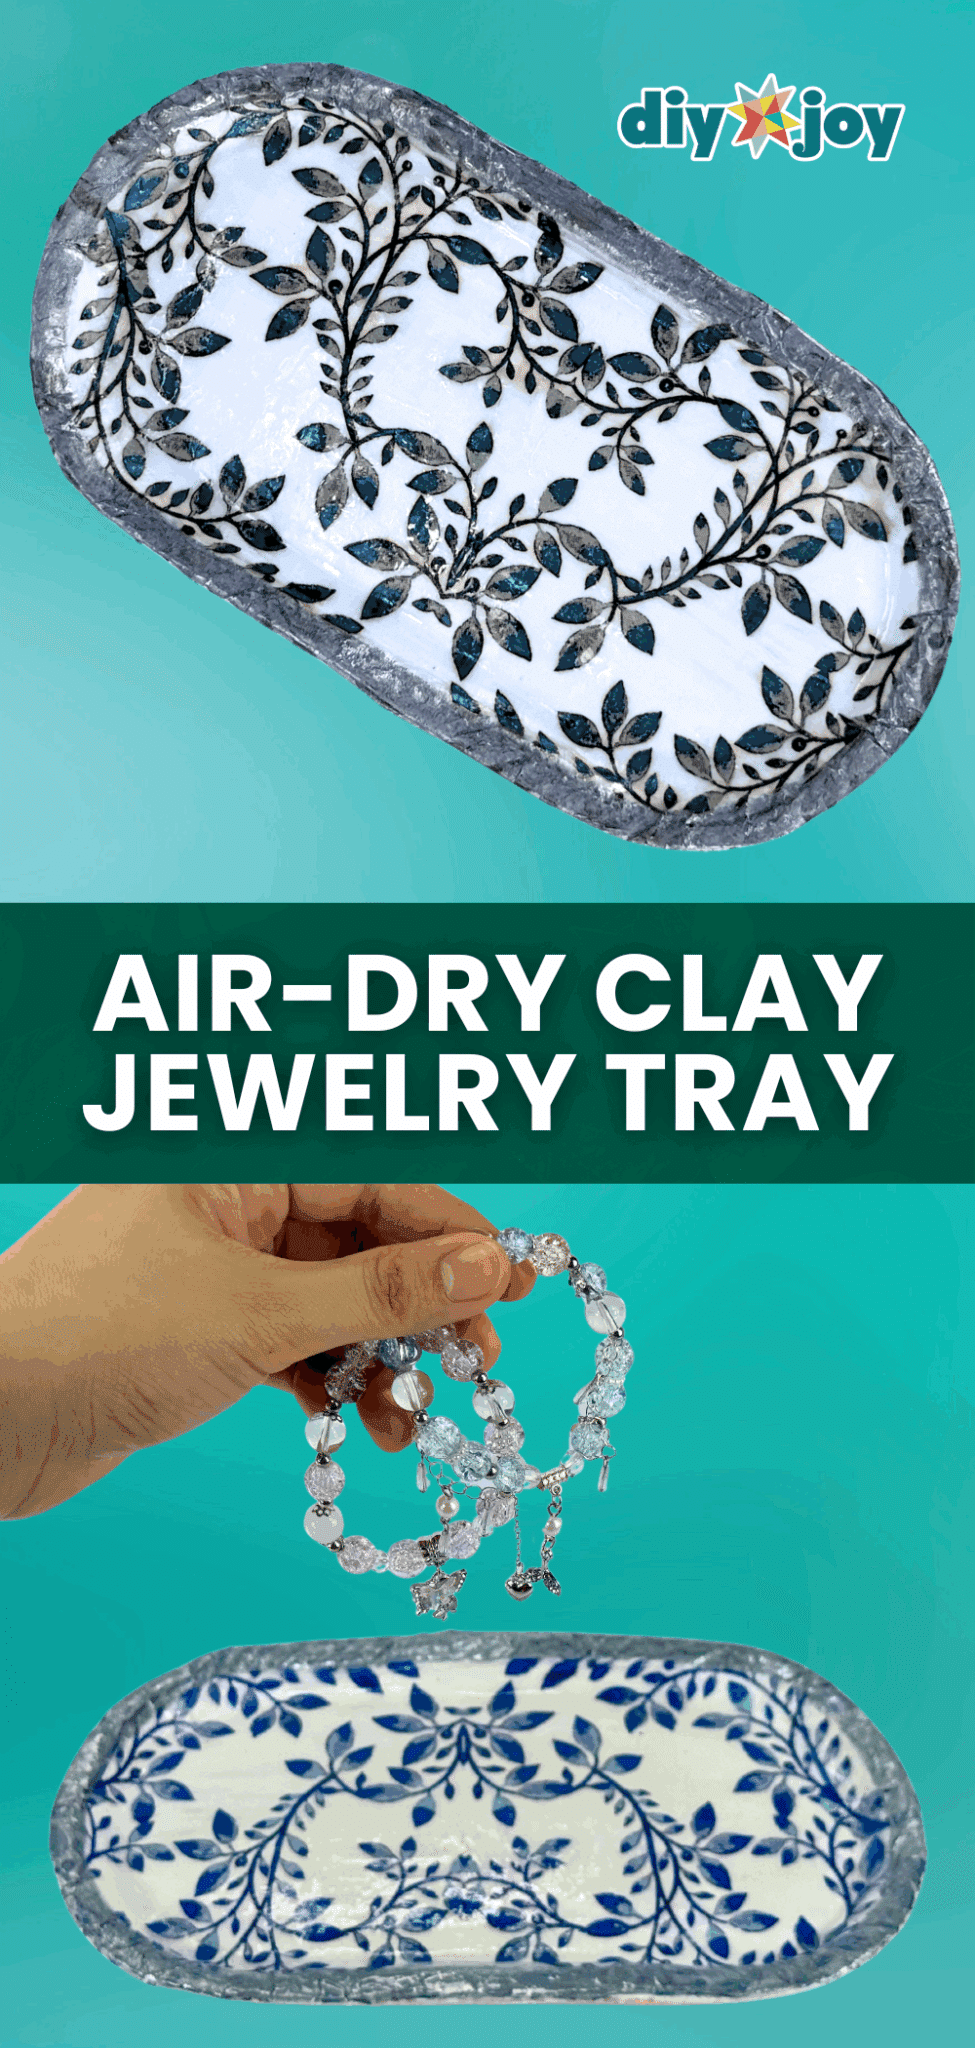
Grab a tray you already own and use it as the mold. Roll air-dry clay flat, dust the tray with baby powder so nothing sticks, press the clay in and smooth it with a damp sponge. Once it’s dry, pop it out, prime it and Mod Podge a printed napkin on top, which is where all that pretty pattern comes from. Finish with UV resin for a glossy coat. It holds bracelets, rings and earrings, and it’s a lovely gift for a sister, bridesmaid or best friend.
Get the full tutorial at DIY JOY.
21. Flower Clay Ring Holder
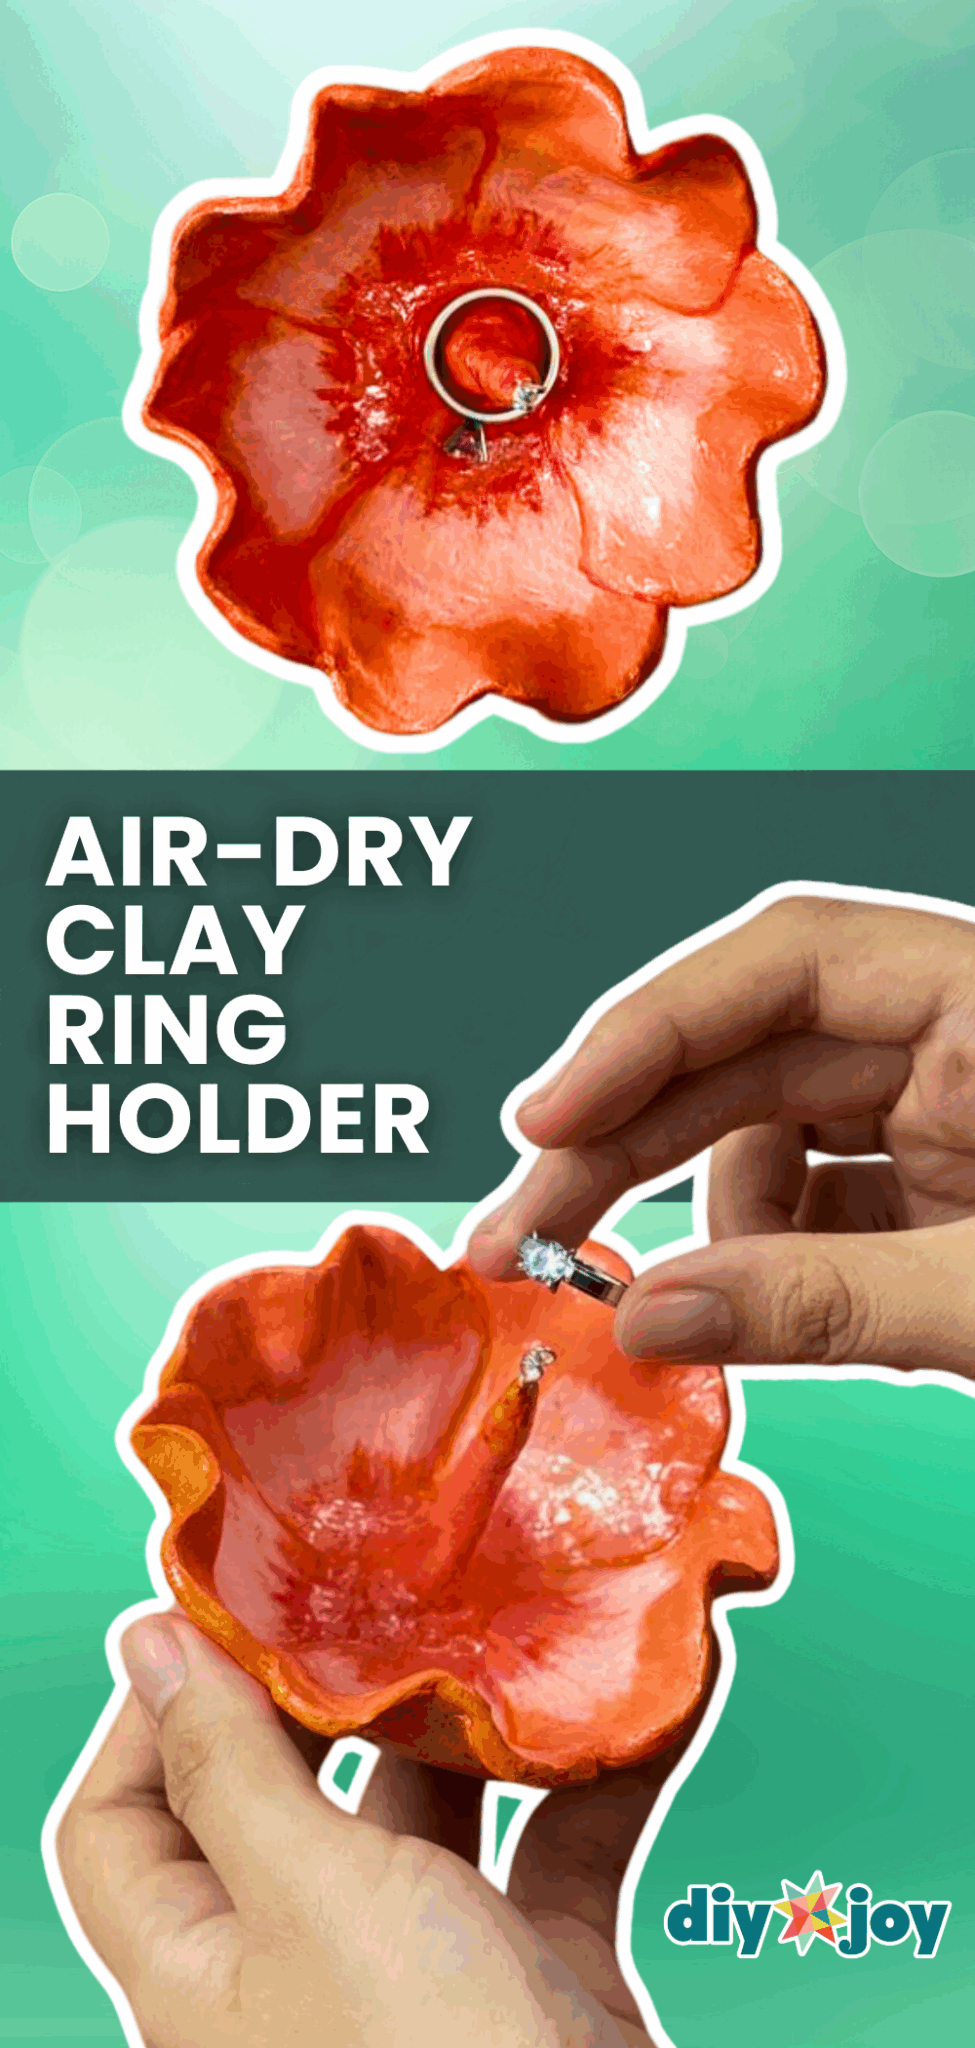
No kiln and no oven, just air-dry clay, a flower template and a bowl to hold the shape. Roll the clay, cut the flower, slit between the petals and overlap them, then let it set in a bowl on a towel so it cups. A little rolled clay stamen in the center holds rings. Prime it, paint it a bold orange or any color they love, and finish with UV resin. It sits right by the sink so rings don’t go down the drain, which is a gift and a favor.
Get the full tutorial at DIY JOY.
22. Woven Yarn Mug Cozy
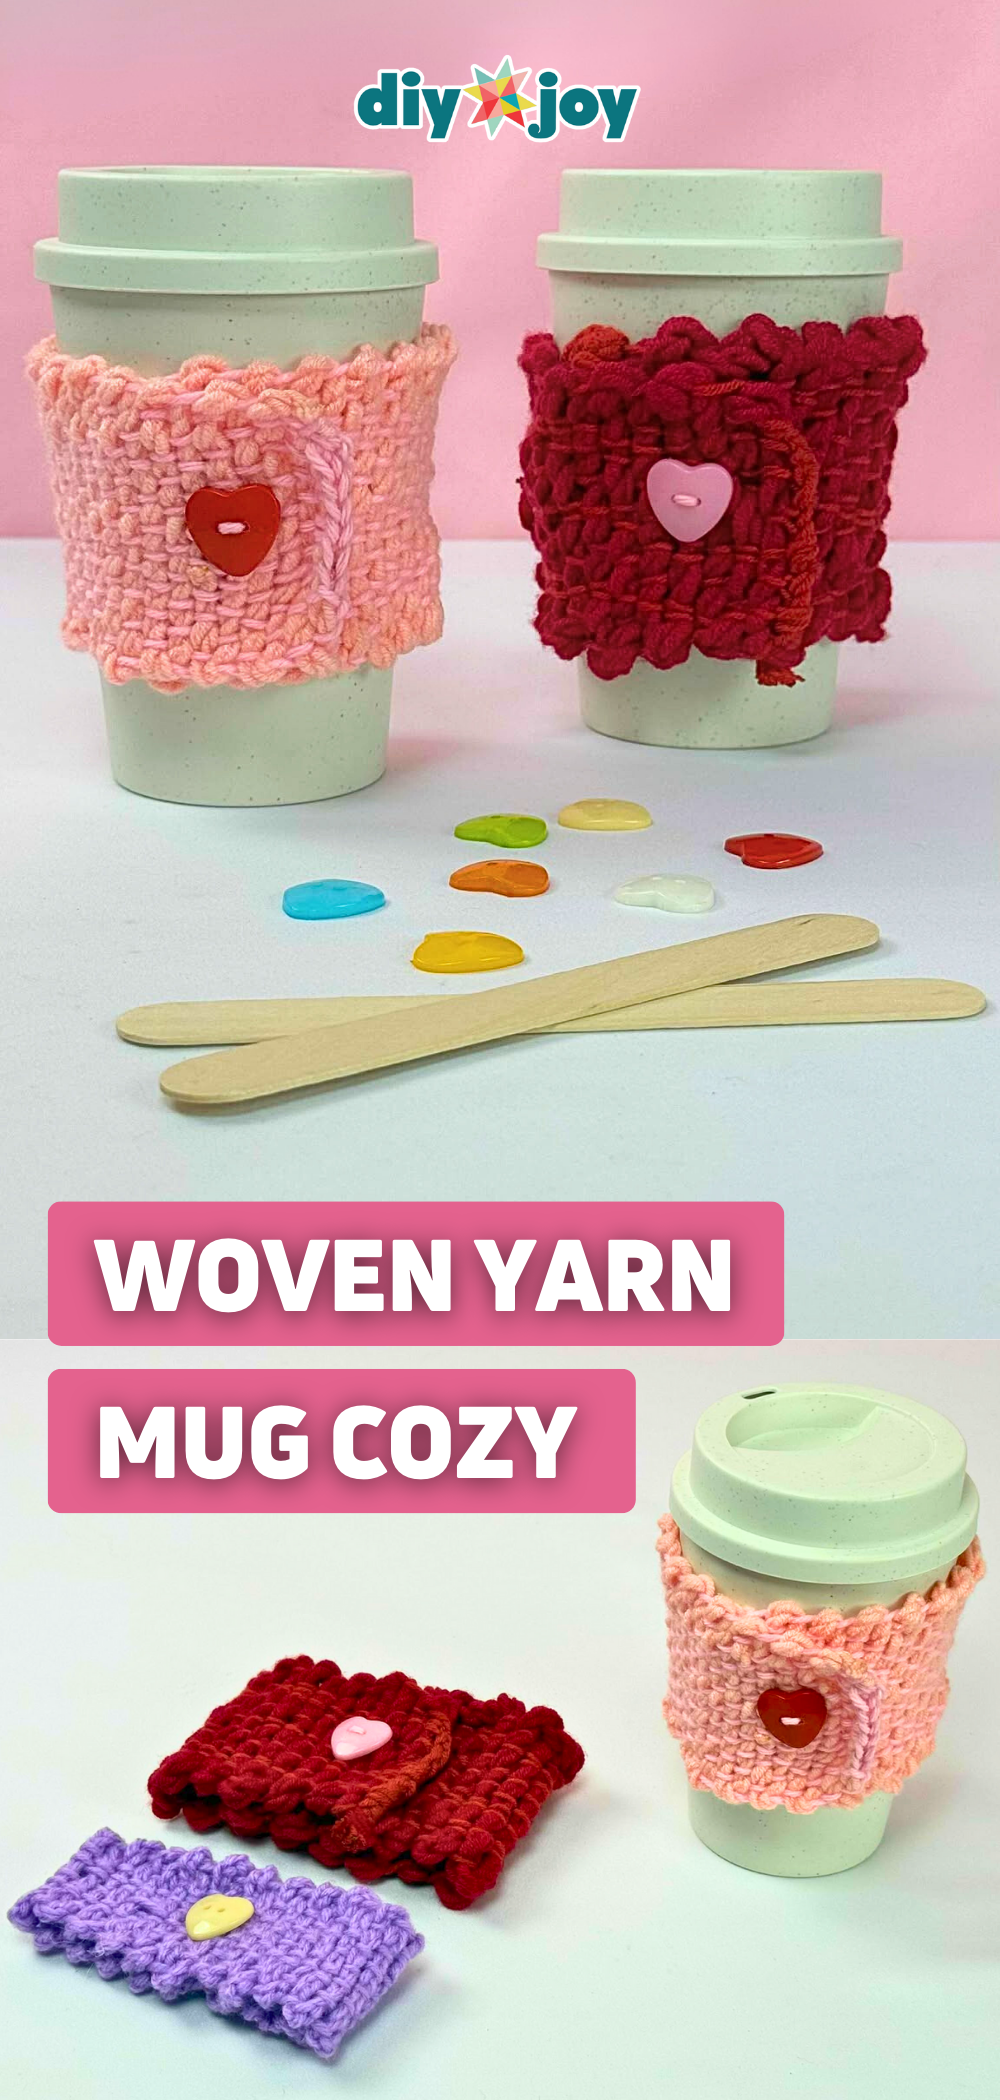
You weave this one on a piece of cardboard, so no loom required. Cut cardboard to the size of the cup, notch the ends, string the yarn up and down, then weave across with a popsicle stick needle. Twisting the yarn first gives it that chunky, textured look. A touch of crochet finishes the edges, and a heart button closes it. It’s beginner friendly and relaxing, and a cozy plus a bag of coffee is a perfect stocking stuffer or teacher gift.
Get the full tutorial at DIY JOY.
23. Fabric Coffee Cozies

Use a cardboard sleeve from your last coffee run as the pattern. Trace it onto outer and lining fabric with a quarter inch seam allowance, cut insulating fleece without it, then sew, turn and sandwich the layers. An elastic hair tie glued into the gap makes the loop, and a button closes it. Each one needs only about a quarter yard of fabric, so scraps work great. Make a stack for hostess gifts, stocking stuffers and teachers, and tuck one around a gift card.
Get the full tutorial at DIY JOY.
24. Jute Rope Tray

A Dollar Tree tray, a roll of jute and Mod Podge add up to a boho tray that looks straight out of a home decor shop. Cover the tray in cling wrap, brush on Mod Podge, then coil the rope in a spiral from the center, pressing it flat and adding glue as you go. Glue down the end and cover the whole thing in one more generous coat. Keep the sides low so it holds its shape. Set candles or a little jar of flowers on top and it’s a housewarming gift.
Get the full tutorial at DIY JOY.
25. Funny Holiday Wine Labels

Store bought wine is a perfectly fine gift, but a label that says Naughty, Nice, I Can Explain is a much better one. Soak the bottle in vinegar and soapy water for 30 minutes to slide the front label off, clean the glue with rubbing alcohol, then wrap on one of the free printable holiday labels (the back label stays, so they still know what’s inside). A mini Santa hat cut down from a full size one finishes the look. Perfect for coworkers and the office party.
Get the full tutorial at DIY JOY.
26. Santa Wine Bottle Gift

Yes, this Santa used to be a sock. Cut a Christmas sock so the long section becomes the hat, hot glue the open edges from the inside and turn it back out. Cut a beard from faux fur (snip from the back so you don’t chop the fluff), glue it around the neck of the bottle, pull the hat down over the top and glue on a pom pom nose. It takes minutes and most of it is craft drawer stuff, so it’s an easy last minute gift for any host.
Get the full tutorial at DIY JOY.
27. Cutout Photo Bookmarks
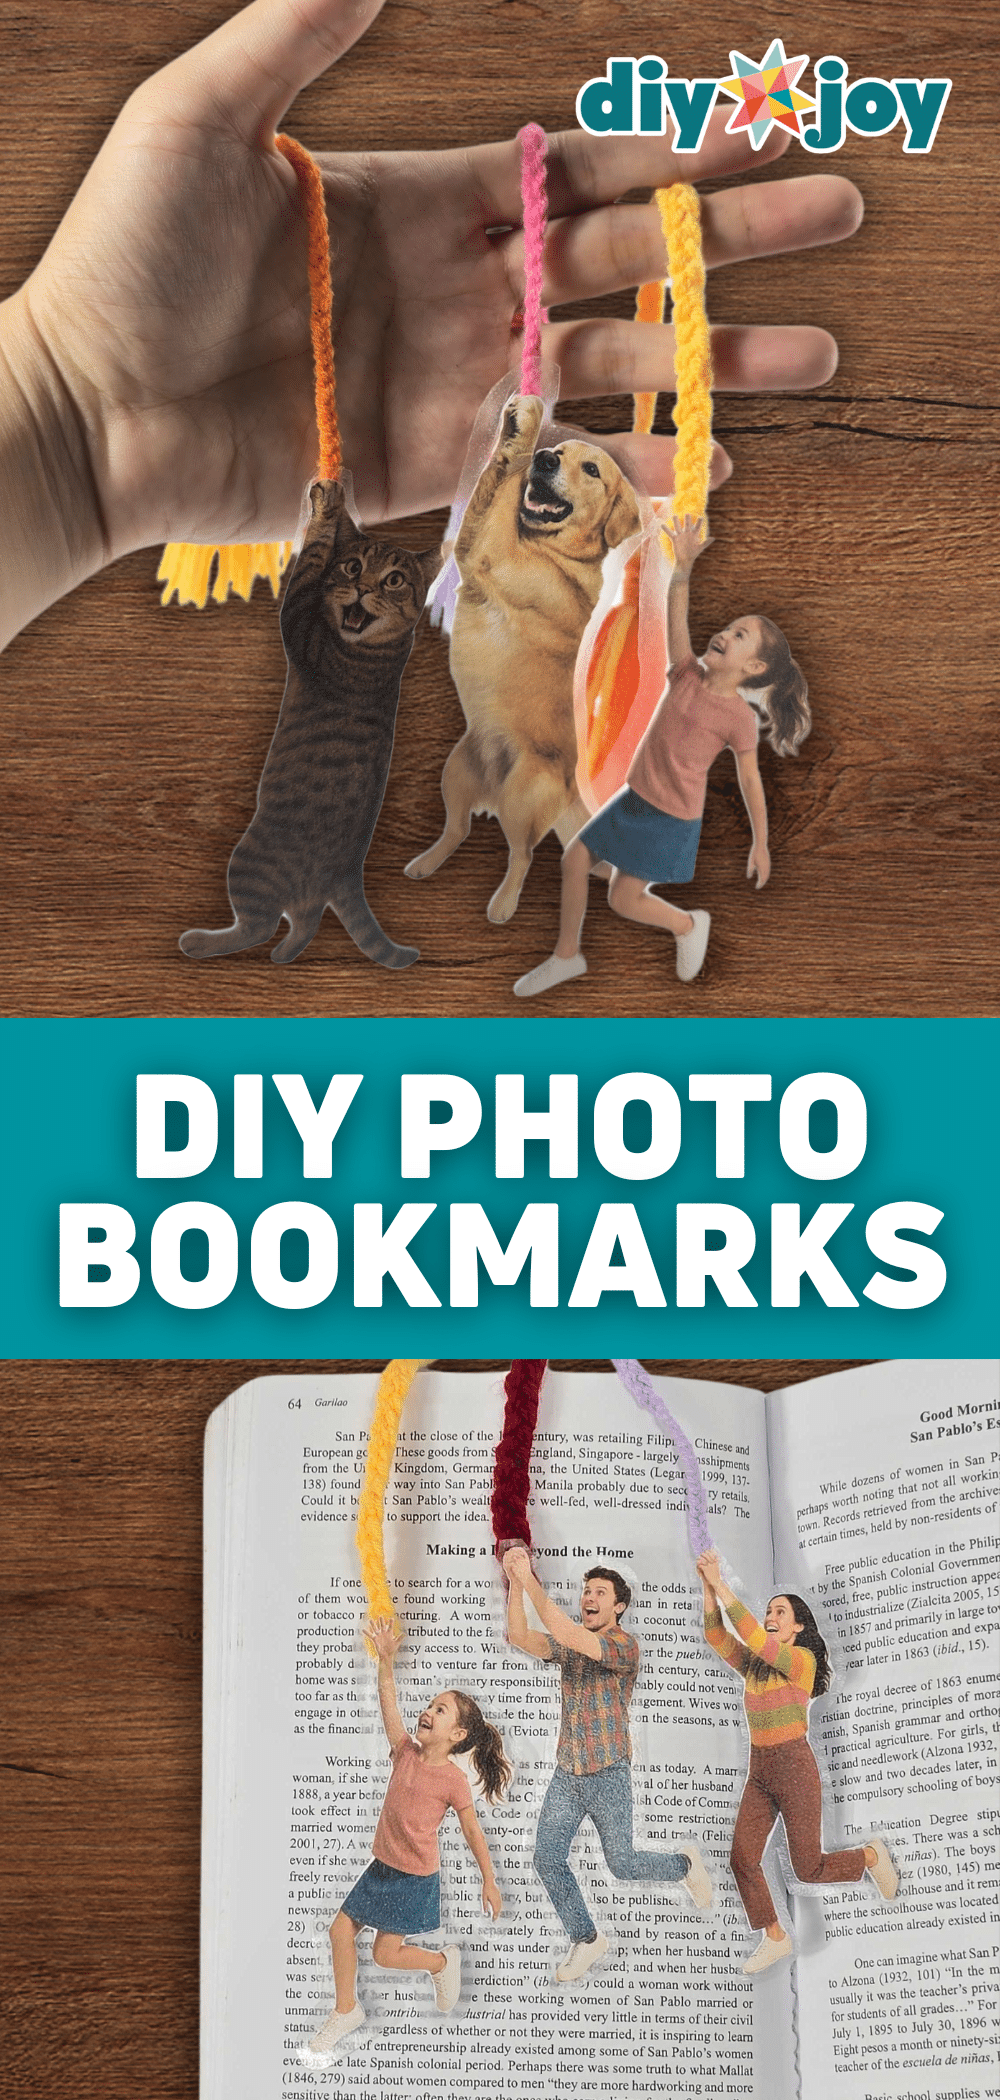
Cut a photo of a person or pet right along its outline so they look like they’re dangling off the page, which never stops being funny. Glue the cutout to cardstock (leave the hands loose), tuck a tassel’s top loop in between the layers at the hands, then seal both sides with contact paper and trim, leaving about an eighth of an inch. Kids can help. It’s a cheap, quick gift for a reader, a grandma, Mother’s Day or a birthday.
Get the full tutorial at DIY JOY.
28. Mini Hot Glue Photo Frame Magnets

These look like antique gold frames and they’re made from a glue stick. Print tiny photos (about 0.85 by 1 inch), squeeze a puddle of crystal clear hot glue over each one and press a chilled wax seal stamp into it. Wait 10 to 15 seconds, lift the stamp, trim the extra glue, paint the frame gold and stick a magnet on the back. Chilling the stamp on ice keeps the glue from sticking. A set of six is a sweet gift for a partner, mom or best friend.
Get the full tutorial at DIY JOY.
29. Pressed Flower Mason Jar Lights
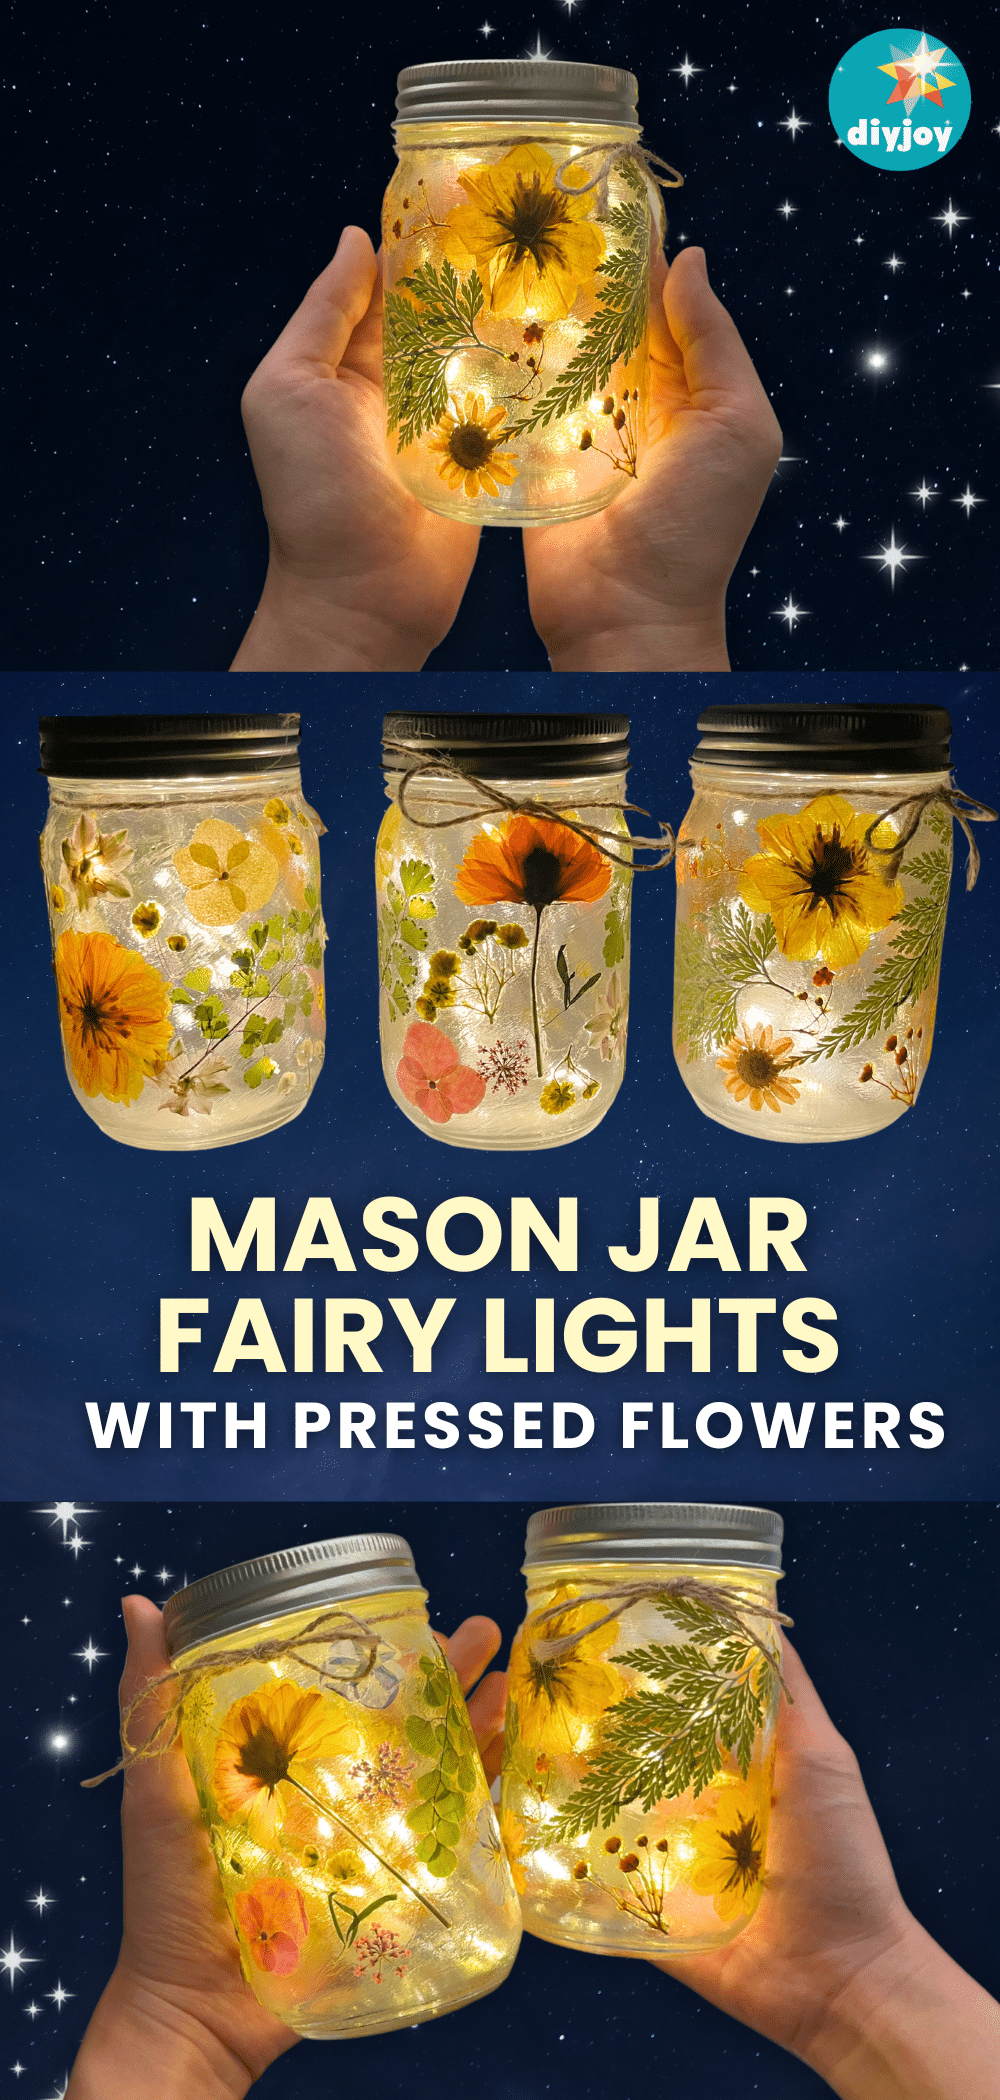
A mason jar, pressed flowers, Mod Podge and a string of fairy lights become a night light that glows like a little garden. Brush a thin layer of Mod Podge on the glass, press each flower down and brush more over the top, working in small sections so it doesn’t dry on you. A second coat seals it all. Once it’s dry, coil the fairy lights inside and close the lid. Fair warning, these are hard to stop making. It’s a dreamy gift for a teen or a flower lover.
Get the full tutorial at DIY JOY.
30. Fairy Jar Lamp
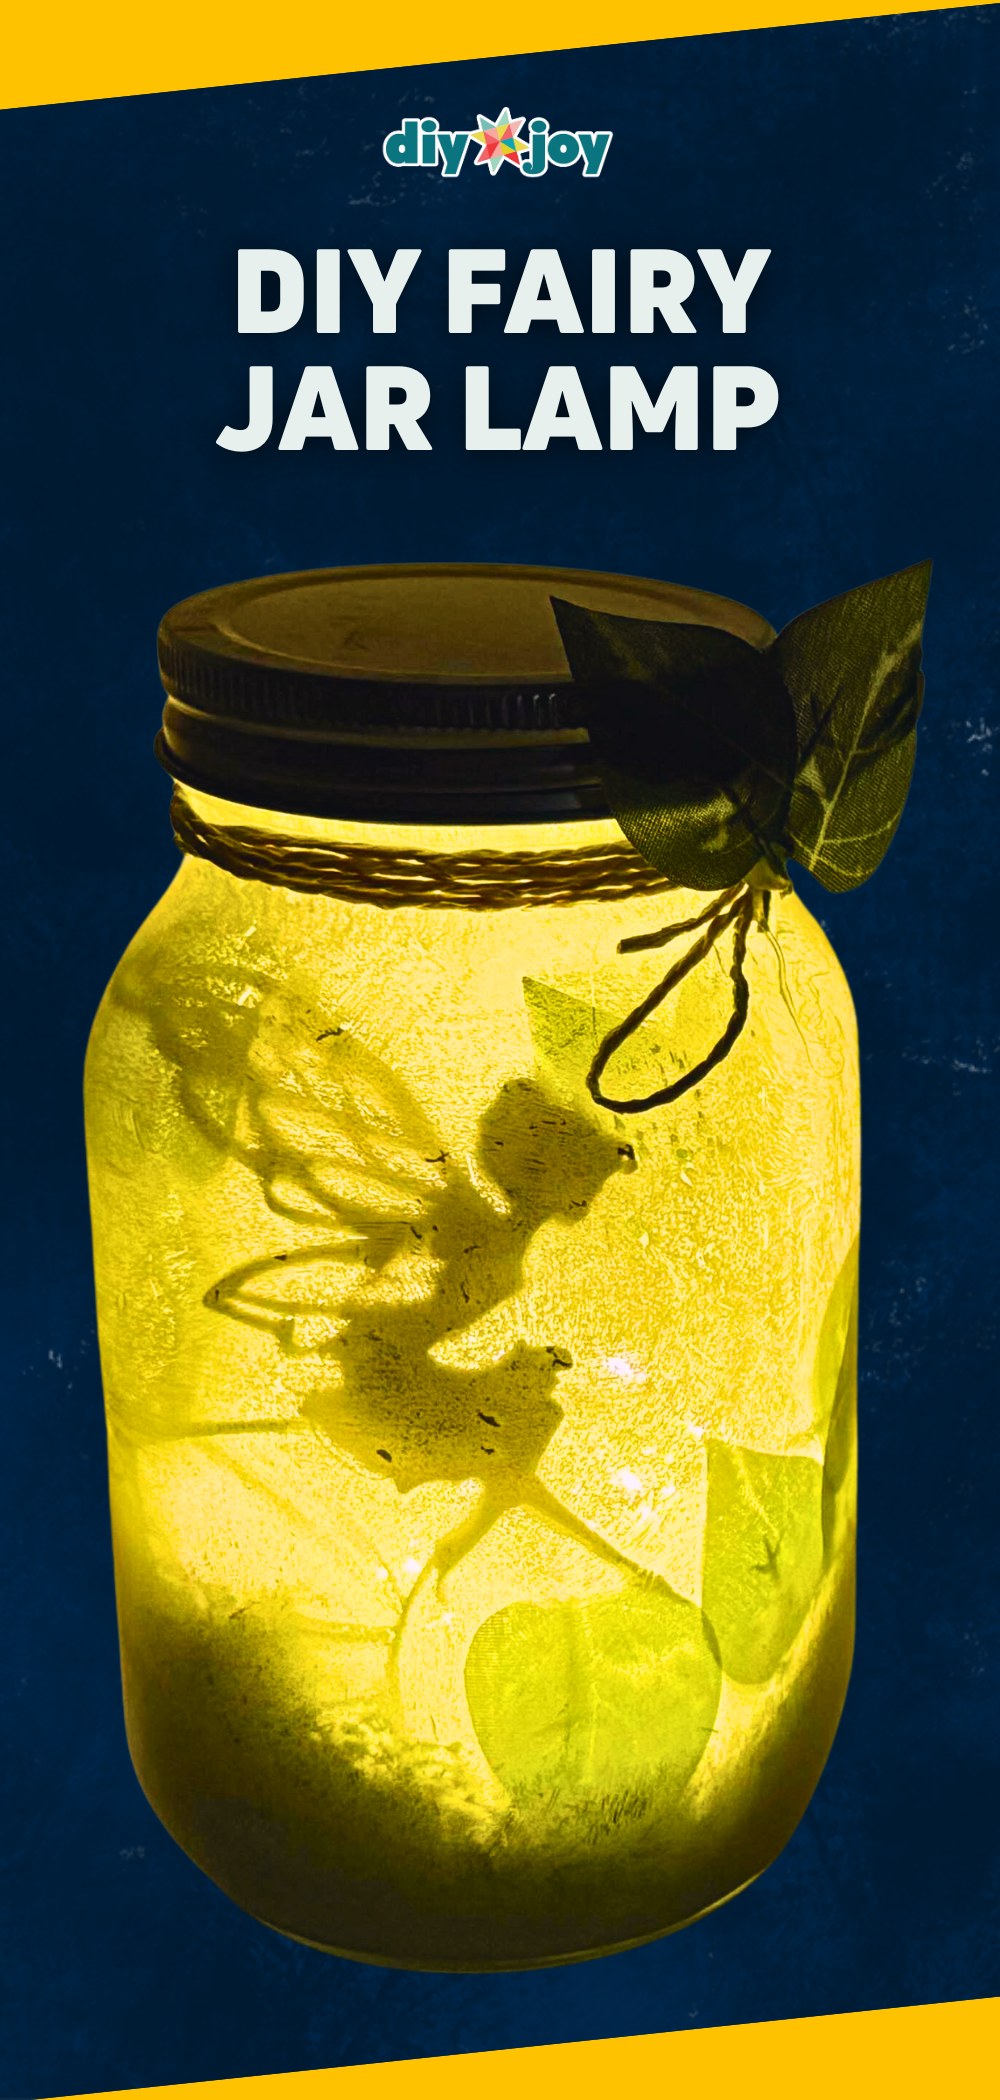
Every kid who still believes in fairies needs one of these on the nightstand. Print a fairy silhouette, cut it out, then paint the inside of a jar with white acrylic or primer, thin enough for light to glow through. Add faux moss (crumpled tissue works too), glue the fairy facing out and tuck in a few leaves for extra shadows. Fairy lights go inside for the glow, and twine and leaves dress up the lid. Swap in a mushroom or tree silhouette for a nature lover.
Get the full tutorial at DIY JOY.
31. Santa Chocolate Jar
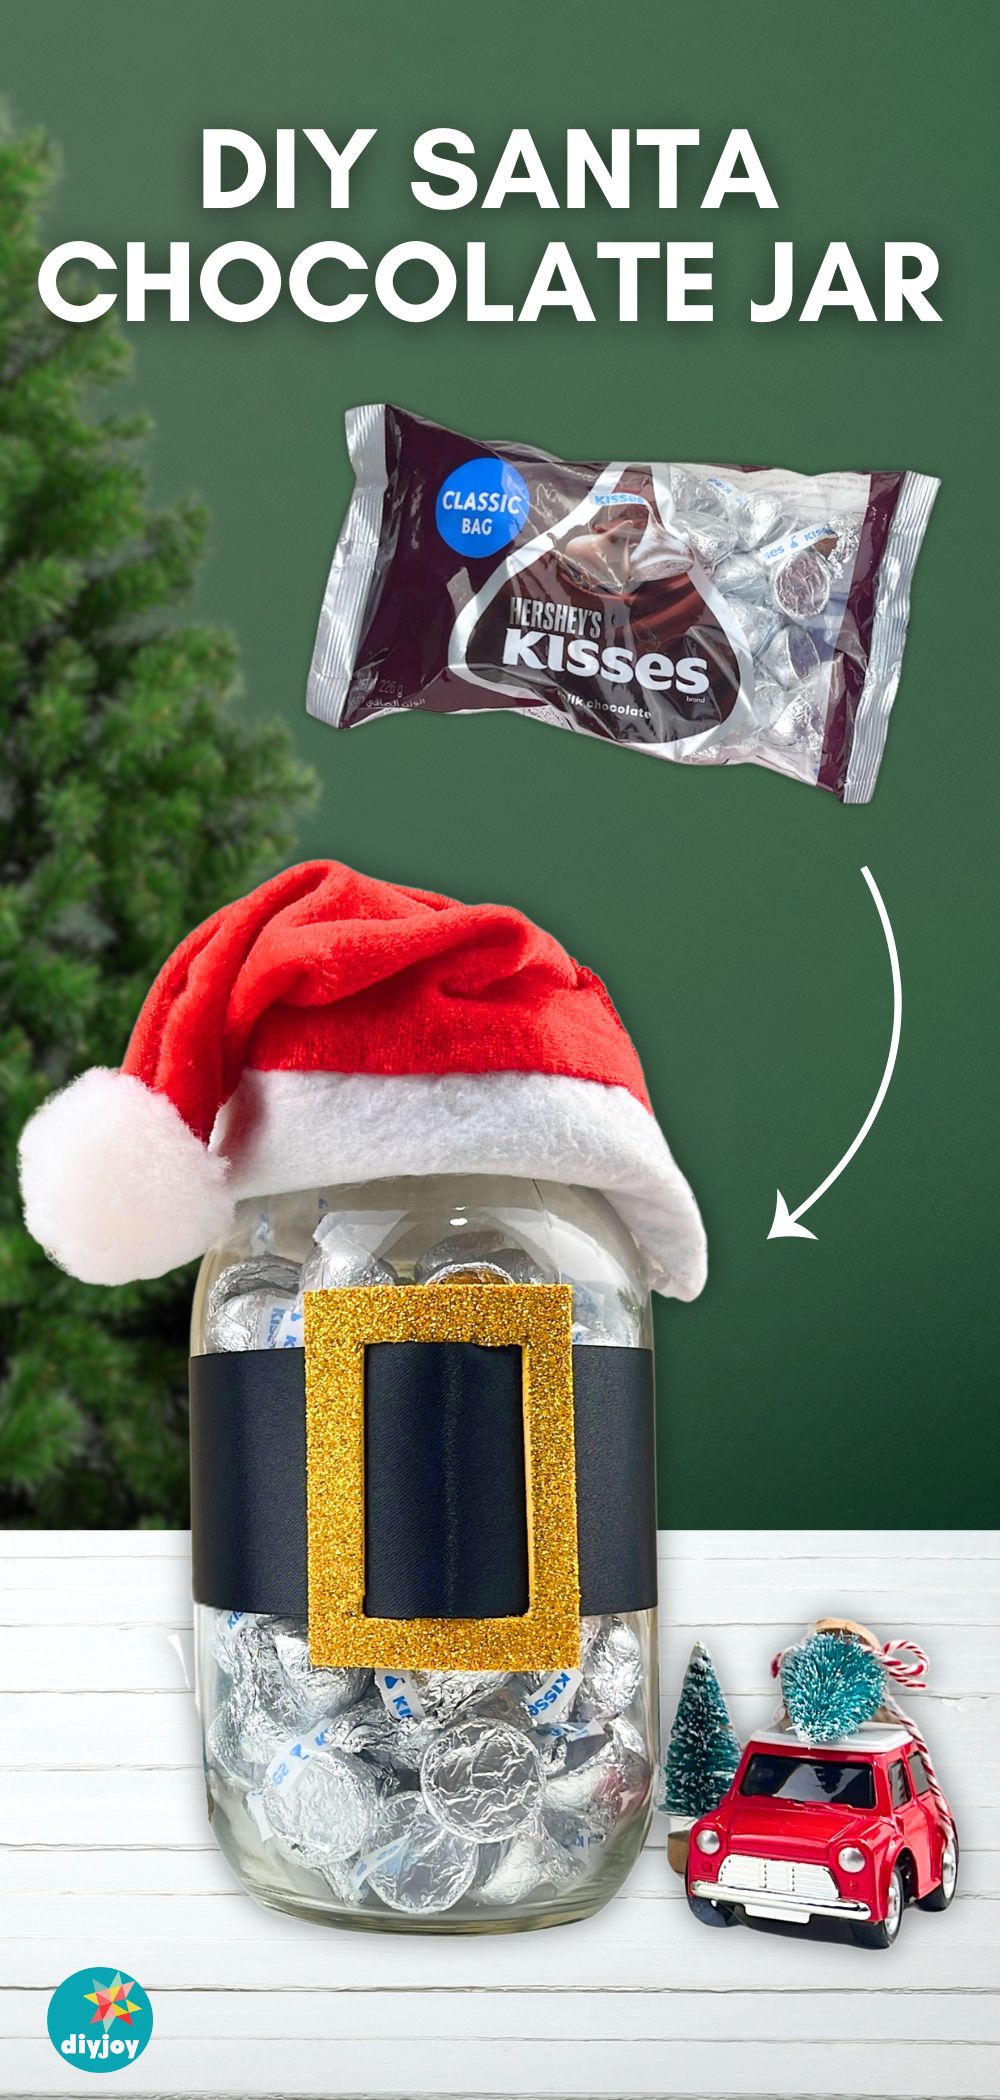
Fill a mason jar with Hershey’s Kisses and dress it like Santa. A strip of black ribbon is the belt and a buckle cut from gold glitter EVA foam holds it in place. Trim a Santa hat down to fit the lid, hot glue the edge and put the pom pom back on top. If you can’t find EVA foam, felt with glitter or a cut piece of an old black belt works. It’s the perfect gift for teachers, coworkers or the neighbor with a sweet tooth.
Get the full tutorial at DIY JOY.
32. Snow Globe Gift Card Holder

A gift card in an envelope is a little sad. A gift card standing inside a snow globe with a tiny red car hauling a Christmas tree is a whole moment. Glue a mini bottle brush tree onto a toy car, glitter a plastic lid and glue it all inside a mason jar lid. Drop in mini Styrofoam balls for snow (no water at all), slide in a cardboard gift card and close it up with a red velvet bow. It’s the best way to give cash or cards.
Get the full tutorial at DIY JOY.
33. Ferrero Rocher Jewelry Box

Eat the chocolates first, obviously, then turn the box into a jewelry organizer. Lift the label off the lid with wide tape, Mod Podge pressed flowers inside the lid, and run gold washi tape around the little compartments. Those cups are perfectly sized for rings, studs and small earrings, and the clear lid shows everything off. If you’re out of Mod Podge, equal parts white glue and water works. It’s a sweet upcycled gift for a teen or the friend who loses earring backs.
Get the full tutorial at DIY JOY.
34. Glitter Hot Glue Keychain

Draw a shape on parchment paper, trace it with hot glue and dump glitter on top. Blow off the extra, repeat until it’s covered, then poke a hole and add a chain. It’s that fast. Cherries are adorable, but a heart, a lemon, a strawberry or someone’s initial works the same way. Work over a tray so you catch the glitter instead of finding it in your coffee for a week. A stack of these is a fun gift for tweens, stocking stuffers or a whole friend group.
Get the full tutorial at DIY JOY.
35. Decoupage Clay Jewelry Dish
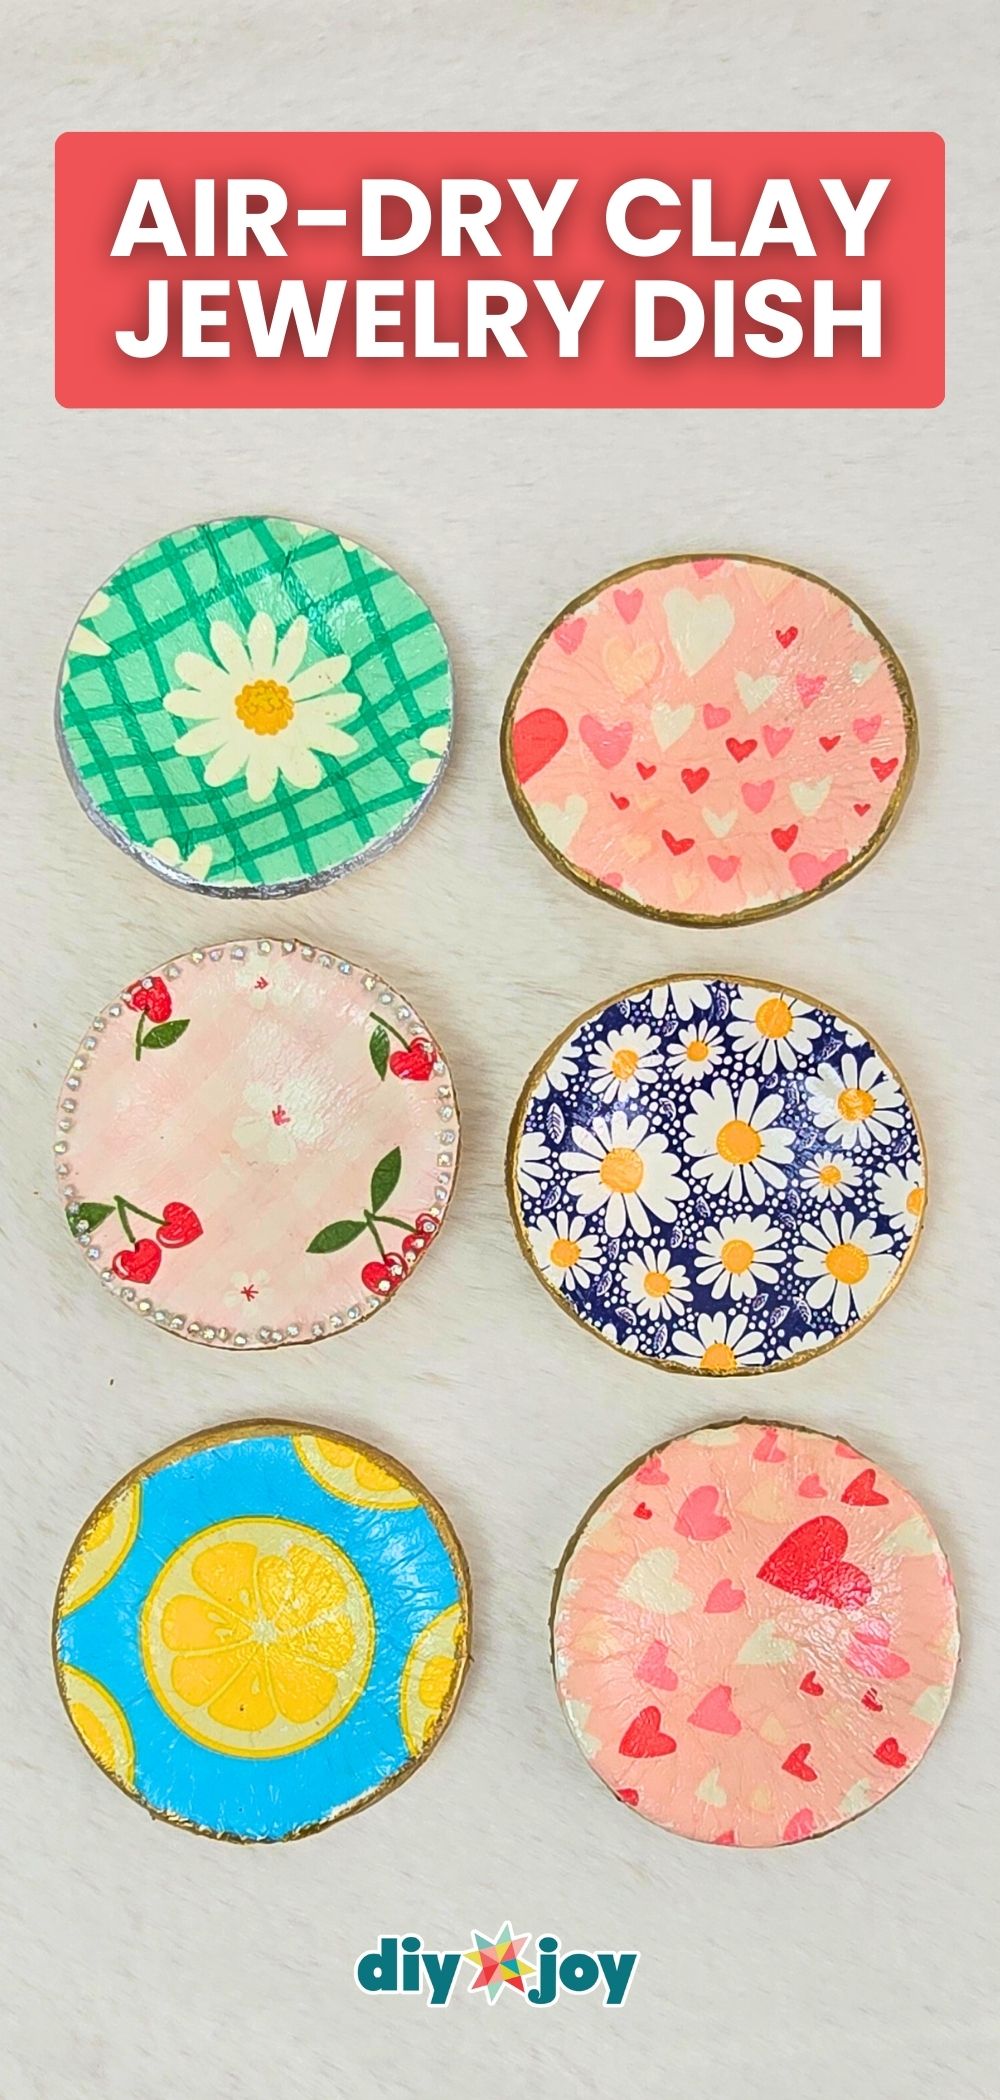
Paper napkins have the cutest prints, and this is how you put them to work. Roll air-dry clay flat, lay a napkin layer on top and cut a circle with a cookie cutter or a jar lid. Brush on Mod Podge, press it into a muffin pan so it dries overnight in a shallow bowl shape, then paint the rim gold and seal it with gloss varnish. Daisies, hearts or lemons, pick a print that fits their style. Make a few for teachers or coworkers.
Get the full tutorial at DIY JOY.
36. Rose Macrame Bracelet

Two cords, some tape and one evening, and you have a rose pattern bracelet. Cut two cords about 4.9 feet each, fold them in half, tie and tape the ends down, then repeat a square knot, alternating colors to build the little roses. Braid and knot the tails to finish. No hooks or special tools needed. If you made friendship bracelets as a kid, this will feel familiar fast. Make matching ones for a best friend, a daughter or a whole sleepover crew.
Get the full tutorial at DIY JOY.
37. Napkin Paper Candle
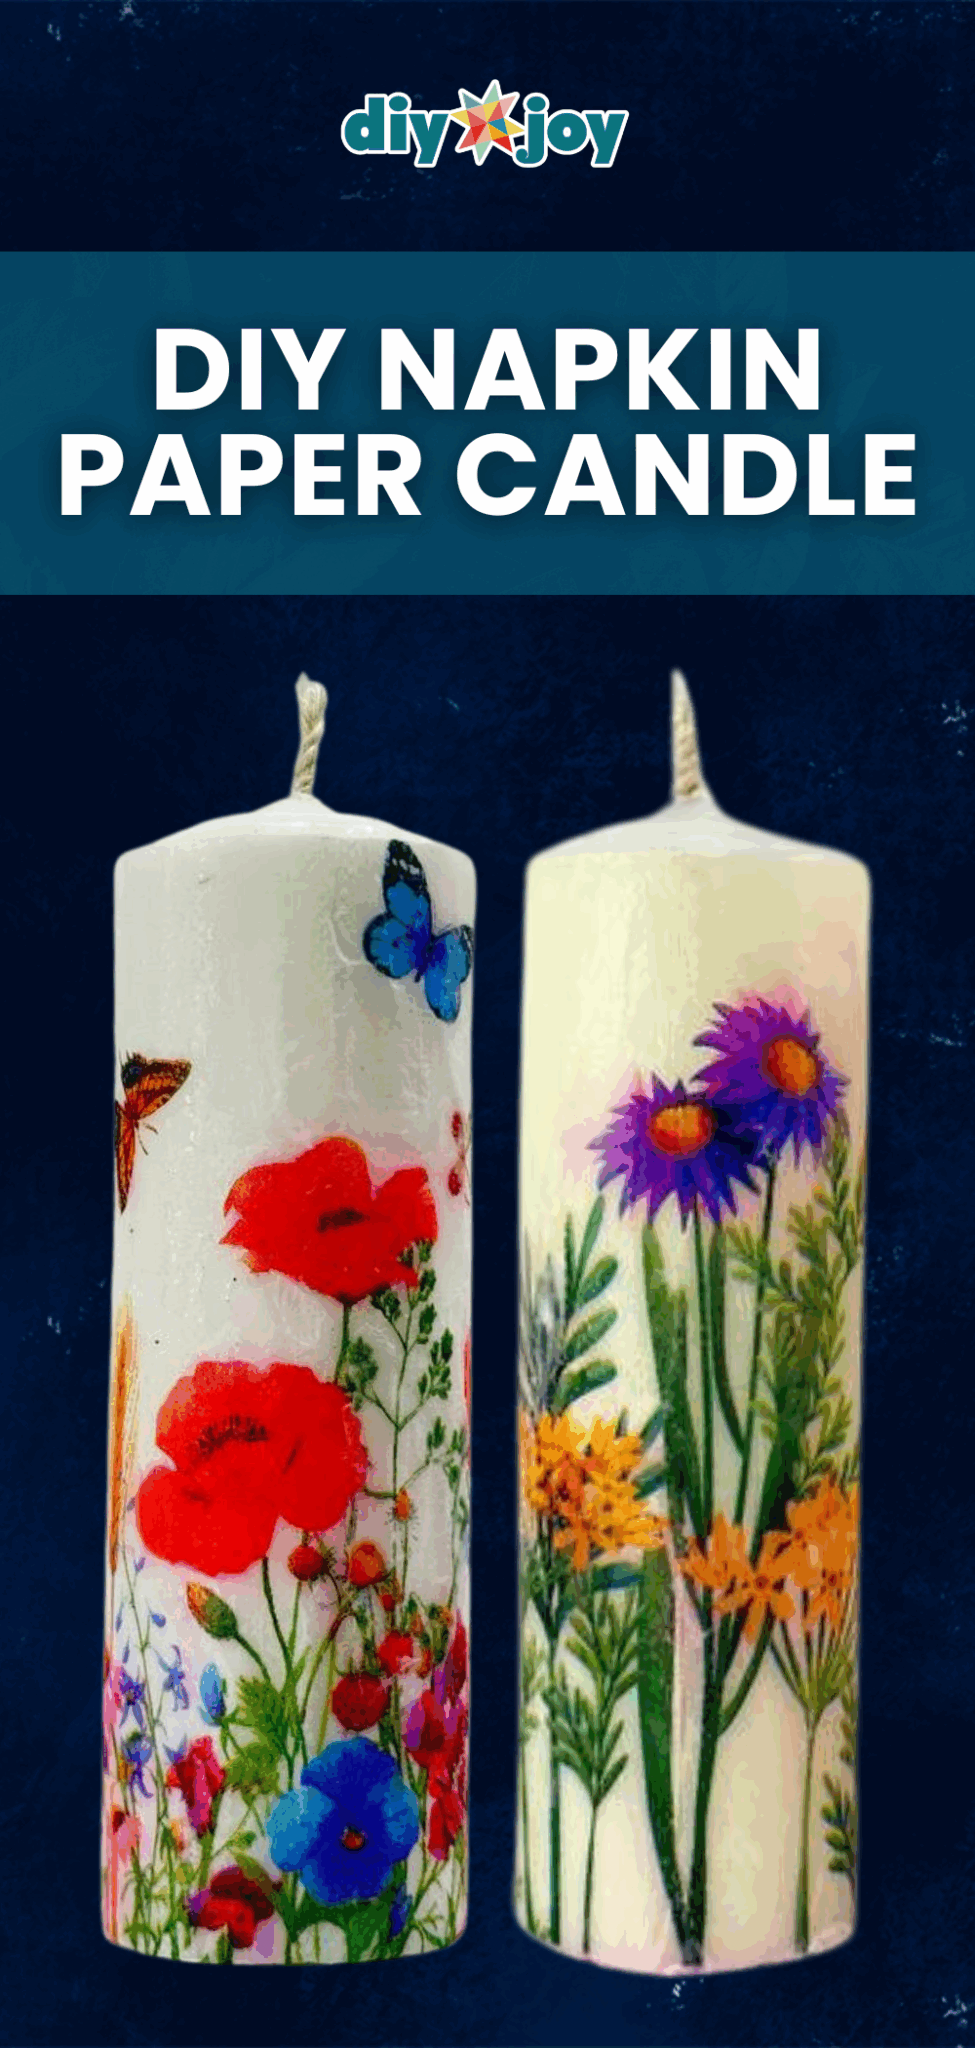
All you need is a candle, a printed napkin, wax paper and your iron. Peel the napkin down to its printed layer, wrap it around a clean pillar candle, cover it with wax paper and iron gently until the candle wax melts into the napkin and holds it in place. Then peel off the wax paper and touch up the edges. Wildflowers and butterflies look amazing, but any napkin print works, including holiday ones. It’s a pretty, cheap gift for a coworker or teacher.
Get the full tutorial at DIY JOY.