This crafty idea has been my favorite thing to make all year. It requires only a few supplies and the results are always gorgeous. Imperfection makes them even more charming. This is a cool handmade gift idea and a project we love to make for “girls night out” aka crafting party. See what you think of the step by step video and be sure to check out the instructions below.

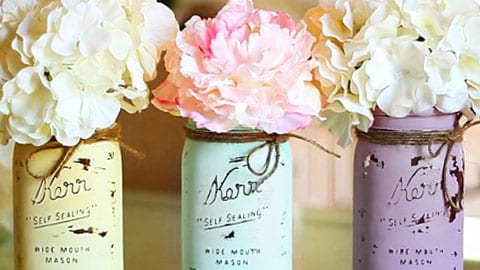
Easy DIY Chalk Painted Mason Jars
What You Need:
- 3 mason jars
- Flowers
- Chalk paint (ultra-matte)
- Paint brush/waxing brush
- Finishing wax/acrylic sealer
- Twine
- Paper towels
- Rubbing alcohol
- Sanding block (120-150 grit)
Here’s How:
Step 1
Clean the entire outside surface of the mason jars using paper towels dabbed in rubbing alcohol. This is done to ensure that the chalk paint will adhere better.

Step 2
Begin the painting process by taking your brush and swirl it a little on the chalk paint bottle. Start with the rim of the jar first then flipping it upside down and continuing painting with the rim facing your work surface. Typically, it would take 1-2 coats to achieve an opaque-matte finish.

Step 3
Continue painting the other jars using different colors. Once they are all dried, you can apply the second coating. Let them dry overnight before you start the destressing/sealing process.

Step 4
To begin destressing/sealing process, start sanding from the top of the jar and the bottom. Work by swirling motion all over the surface of the jar. Once done, wipe off the chalk dust or residue using paper towels.

Step 5
Now it’s time to seal your mason jars. Take your waxing brush and apply a good amount of finishing wax onto the surface of the jars in a horizontal motion. Go around the surface by putting your other hand inside the jar to make it quicker and easier.

Step 6
Let them dry and buff with a soft cloth before moving to the next step.

Step 7
Cut a long piece of twine and wrap it around the mason jars creating a ribbon or bow. Repeat the process for all jars and now you can put the flowers inside your mason jars to create that lovely home decor.

And your DIY Chalk Painted Mason Jars are done!


