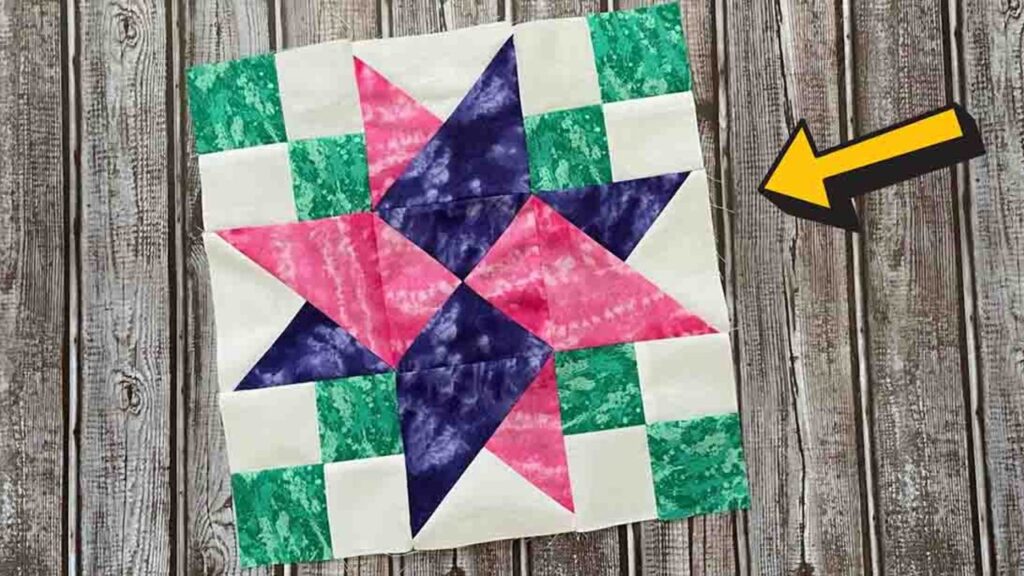
If you just started to learn how to quilt and are looking for a project, I recommend this Isabella star quilt from Cut and Create on YouTube. This quilt block pattern may look complex, but it’s beginner-friendly, and I’m sure you’ll enjoy making this. It’s pretty, easy, and fun to make! Try this today and see for yourself. Watch the video below to learn the step by step instructions.
Materials:
fabric A:
- 3 – 5″ x 5″ squares
- 1 – 6 1/2″ x 6 1/2″ square
fabric B:
- 3 – 5″ x 5″ squares
- 1 – 6 1/2″ x 7 1/2″ square
fabric C:
- 1 – 6 1/2″ x 6 1/2″ square
- 1 – 2 1/2″ x 20″ strip
fabric D:
- 1 – 2 1/2″ x 20″ strip
Directions:
Step 1
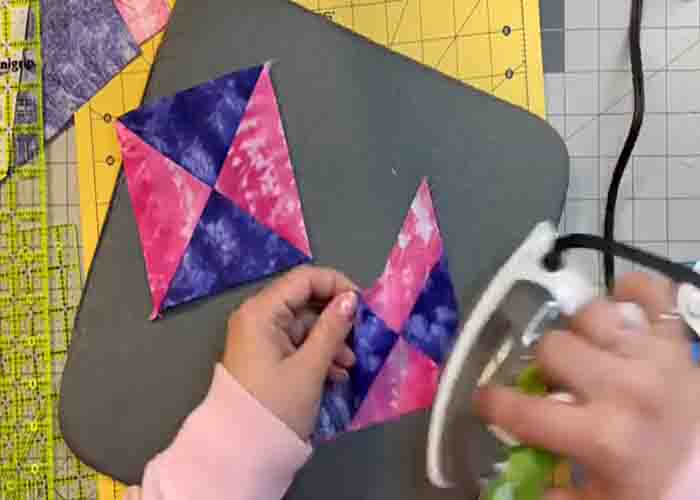
Grab one fabric A and B, line them up, and draw a line from corner to corner. Sew on either side of that line, then cut directly on the center. Press them open and square them up. Next, line up these two half-square triangles on opposite colors, draw a line on the opposite corner to corner, and then sew on either side of that line. Cut directly on the center, then press open. Once done, square the hourglass units to 4 1/2″.
[social_warfare]
Step 2
Now, grab one colored 6 1/2″ x 6 1/2″ square and one white 6 1/2″ x 6 1/2″ square. Line them up, right sides together, then draw a line from corner to corner. Sew on either side of that line, then cut directly on the center. Press open afterward. Now, lay the two half-square triangles, grab the corresponding solid-colored squares, and line them up, right sides together. Draw a line from corner to corner, (making sure it’s opposite the seam of the block below) sew on either side of that line, then cut directly on the center. Press open afterward and square them up to 4 1/2″.
Step 3
Now, sew the two strips together, press open, then cut 2 1/2″ pieces. With these, make two sets of four-patch. Once done, start laying out the pieces (refer to the image below for the placements) to form the block. Sew them by rows, then sew those rows together to complete the quilt block.

Isabella Star Quilt Block Tutorial


