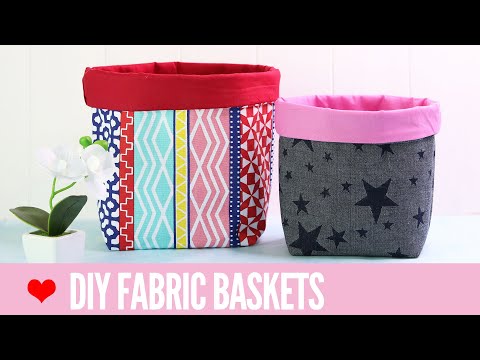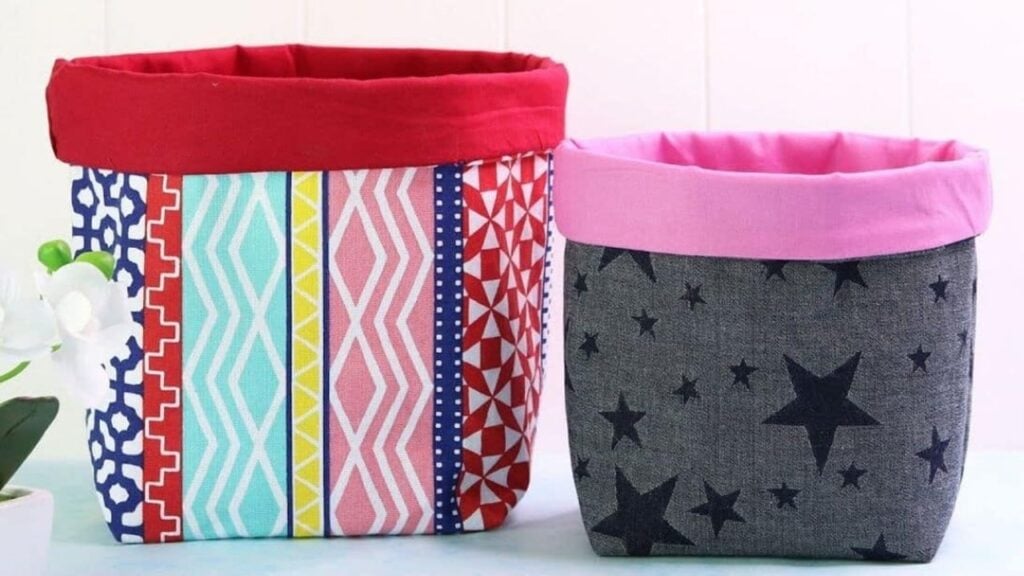
Here’s how to keep yourself busy for the weekend. Try and sew these adorable and multipurpose fabric bags in different sizes through this video tutorial by Treasurie on YouTube. It’s a dun and beginner-friendly sewing project that doesn’t require that much material.
Materials:
- Main or outer fabric, use something medium weight like cotton decorator fabrics
- Lining fabric, quilting cotton
- Heavy fusible interfacing fabric, for L and XL baskets you need extra heavy interfacing to keep its shape
- Scissors
- Marking pen
- Ruler
- Pins
- Sewing machine
- Needle and matching thread
- Iron
Directions:
Step 1
Cut 2 pieces of the same sizes from each fabric, then stack them together evenly, and cut square boxes from the bottom corners of the fabric. For XS (11*11 inches) fabric, cut the corners into 2.5*2.5 inches squares. For S (13*13 inches) fabric, cut the corners into 3*3 inches squares. For M (15*15 inches) fabric, cut the corners into 3.5*3.5 inches squares. For L (17*17 inches) fabric, cut 4*4 inches squares. For XL fabric, cut the corners into 5*5 inches squares. Press the 2 pieces of interfacing fabric on the wrong side of the main fabric, then lay the 2 main fabrics fused with interfacing together with their right sides facing. Sew both sides as well as the shorter bottom of the main fabrics together with a ½” seam allowance. Press the seams open, then pinch the center of the front and back of the boxed corners, and pull them apart.
[social_warfare]
Step 2
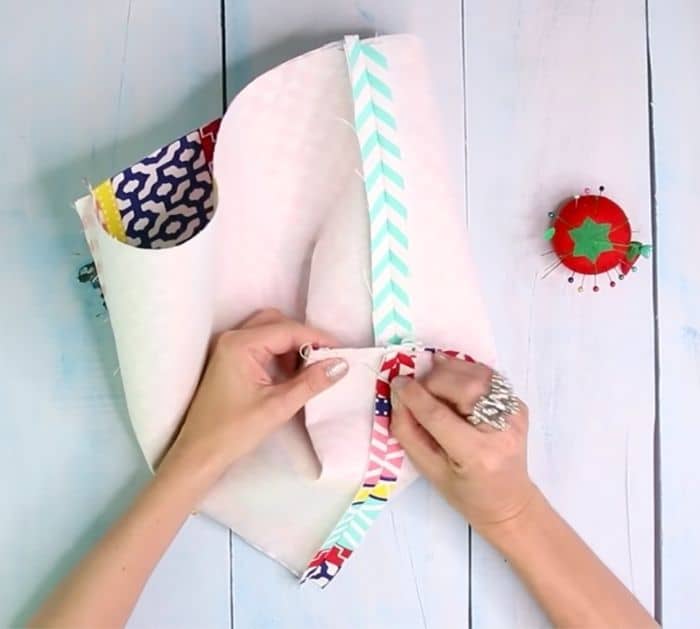
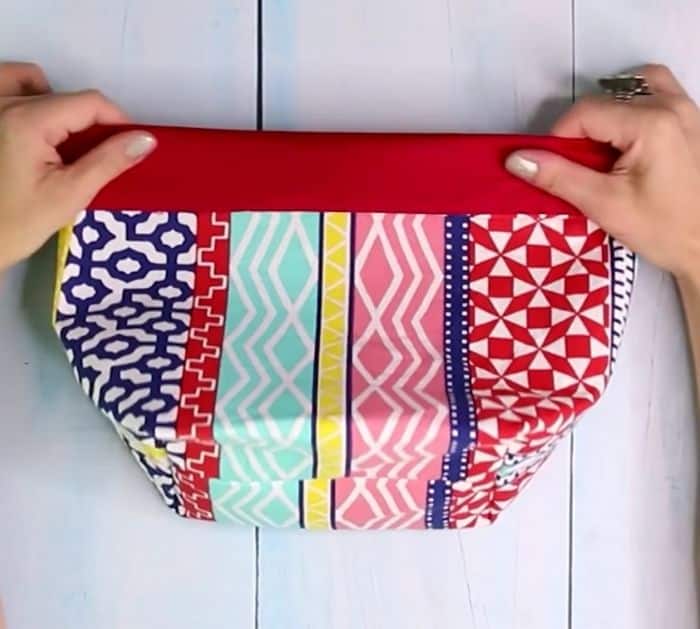
Match the pressed seams together, then pin them in place. Sew them together with a ½” seam allowance, then repeat on the other side. Sew the lining fabrics together in the same way as the main fabric except for this time, leaving a gap on the side for turning. Grab the main fabric and turn it right side out but leave the lining fabric to remain with its wrong side out. Put the main fabric piece inside the lining fabric piece so that their right sides are facing together. Match the seams on the side and pin them together in place. Sew the top of the baskets together with a ½” seam allowance, then pull the main fabric out through the gap on the side of the lining fabric, and stitch the gap close either by hand or by using a machine. Push and tuck the lining fabric inside the main fabric nicely, then give it a good press, and fold down the cuff to about 2 to 3 inches.
*All these images are credited to Treasurie via YouTube. Give her channel a visit and subscribe for more!
How To Sew Fabric Baskets